- Home
- Forums
- Technical Articles/muscle cars
- American Muscle Cars
- Engine: Repairs , Modifications , Trouble Shooting
You are using an out of date browser. It may not display this or other websites correctly.
You should upgrade or use an alternative browser.
You should upgrade or use an alternative browser.
LT1 and a T56 in a 55 Chevy
- Thread starter 2Loose
- Start date
New projects are almost always exciting and interesting and you have the skills and experience to make that an exceptional car, I just hope you sit down and plan out what you intend to do and have detailed ideas and a matched budget, I hope that , your getting a damn good price, on that project car, and not paying top dollar!
going into that project, as it might turn into a potentially , nearly bottomless money pit unless it is in better shape that it appears to be.
yeah, been theres done that with a buddy, and while it eventually looked better and ran decent, it took him over 15 years and if his wife ever realized what he spent on the car, he will turn up missing with a picture on a milk carton, hes repeatedly told me it cost significantly more than his house did by the time he had a 871 super charger on a stroked hemi, lenco and 9" ford 4 link rear with a custom tube frame and front tilt fiberglass front end
http://www.acautos.com/40-41-willys-coupe/
http://www.fasttimesrods.com/product-galleries/1940-1941-willys-gassers/
http://scottrodscustom.com/40-41willysgasser.html
Last edited:
2Loose
reliable source of info
Sounds like a friend of mine and his 55 ford pickup. "Sure, let's do that too...."
it got well into the six figure category by the time it was all done....
But it's won a trophy at the Grand National Roadster Show,
quite a few years ago....
now he's afraid to drive it, it mostly sits in his garage....
But I think I'm done once this '55 Sport Coupe is done....
Couple of old HD's maybe still left in me, but that's about all...
Loves302Chevy
"One test is worth a thousand expert opinions."
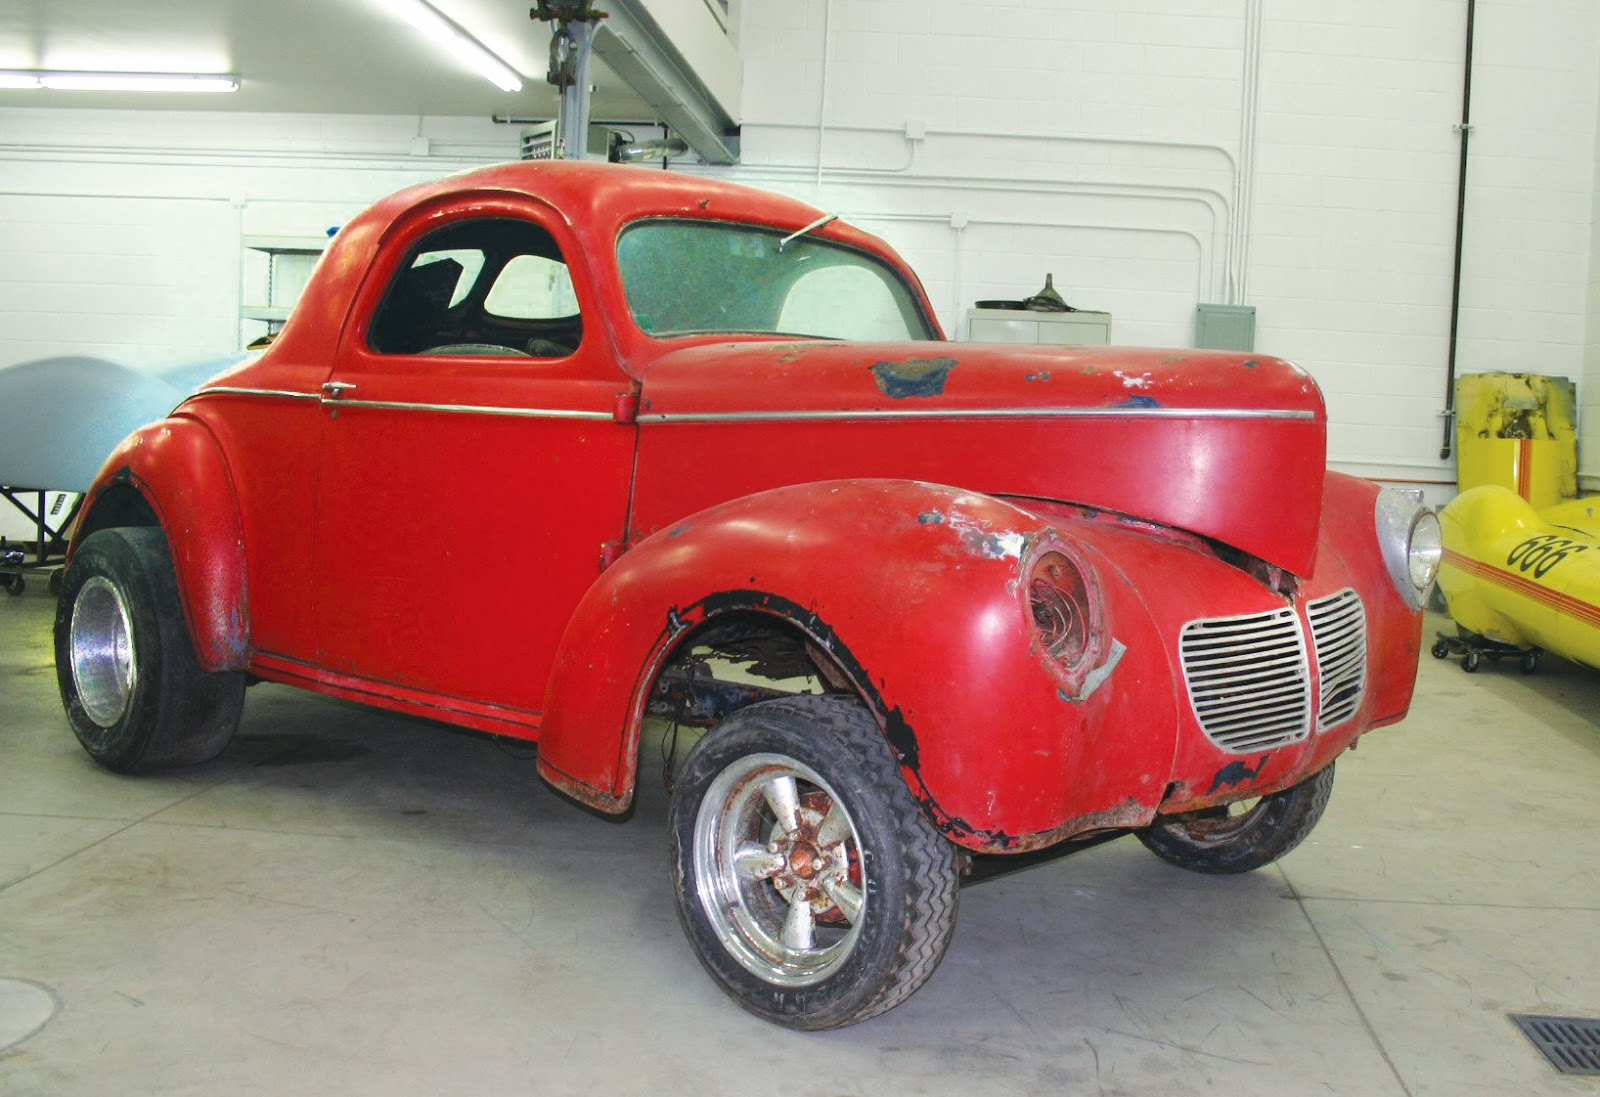
Me too. But that will never happen. Those cars are so BAD ASS.I've always wanted to do a Willys gasser style....
2Loose
reliable source of info
...... plan out what you intend to do and have detailed ideas and a matched budget....
....get a damn good price, on that project car, and not paying top dollar!....
.....by the time he had a 871 super charger on a stroked hemi, lenco and 9" ford 4 link rear with a custom tube frame and front tilt fiberglass front end.....
And then there's illnesses and injuries that pop up in the middle of a project....
And if you're married with kids, family stuff pops up that takes away money and time from the project....
And if you put it all off until the kids are grown up, married and moved off somewhere with kids of their own,
something will happen that they need your help, further delaying the project....
Then if there are other old custom/classic cars already "completed" in your garage, invariably they
will need a new transmission/motor/cooling system/rear end/something replaced, taking time/money away from the current project. As the rule is (at least for me and my buddies), keep the "finished" rigs running first, then tackle the new project !!!
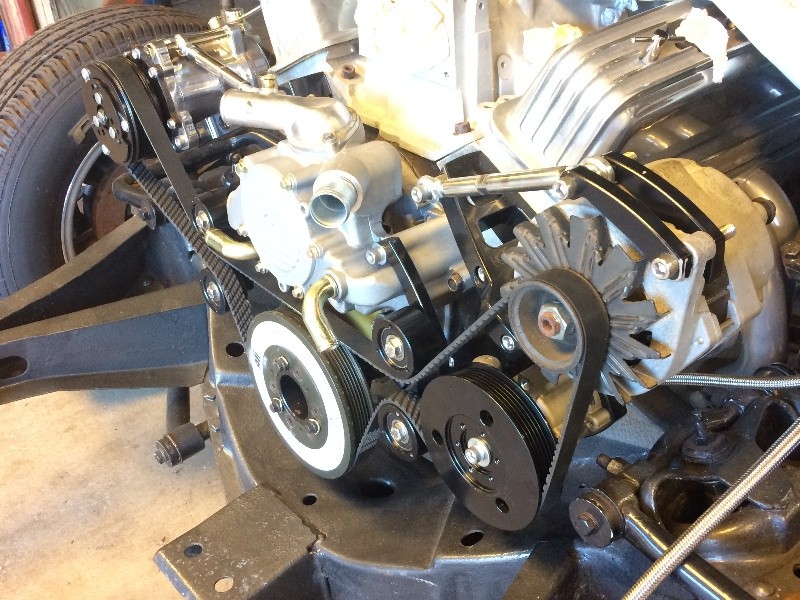
With my '58 pro street truck ("finished" in '98), my '55 4x4 truck ("finished" in 2000), and my '55 gasser ("finished" in 2009) all being enjoyed daily by me and my wife, they are like my children, always needing attention, the '58 has been eating v-belts (a new hi output alternator seems to put occasional heavy loads on the pulley, and the belt screeches...) and mildly overheating when under a load and in the middle of the day (pulling uphill with a load at noon, hey, I work that truck!), finally decided that the 18 year old BBC water pump was not doing it's job, so am in the middle of a replacement, with is involving cleaning/repainting various front end components I've pulled out (fan, fan shroud, alternator, PS pump, pulleys), and checking out the radiator while I'm in there. So the '55 Sport Coupe project gets delayed a bit longer......
Plus I grow a special kind of tasty banana for sale at the local market, so always gotta tend to those chores...
That's just life here on Willy's Farm....
Willy

Last edited:
Loves302Chevy
"One test is worth a thousand expert opinions."
Both of those problems could be from that belt slipping. I don't know what you have for pulleys, but check the v-grooves.the '58 has been eating v-belts (a new hi output alternator seems to put occasional heavy loads on the pulley, and the belt screeches...) and mildly overheating when under a load and in the middle of the day (pulling uphill with a load at noon, hey, I work that truck!
If they are worn and look more like a U instead of a V, then the pulleys are worn and need to be replaced.
If you have unused grooves, maybe you can add a second belt.
2Loose
reliable source of info
Health issues and a couple of bad injuries have kept me away from this project for awhile.
As my broken left arm heals and gets stronger, and feeling better, I'm starting to get back onto the '55 HT project...
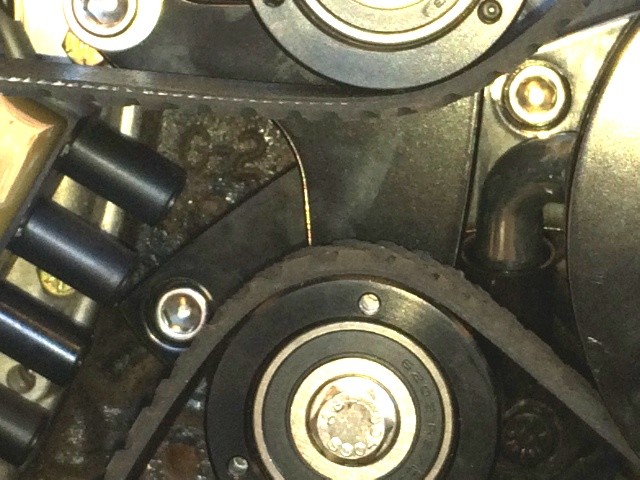
Lookin' at why the power steering pump is out of alignment, with this March Performance setup I bought...
The pump sits about 1/8" too far forward....
It sits just below the alternator, and closer to the motor in this pic...
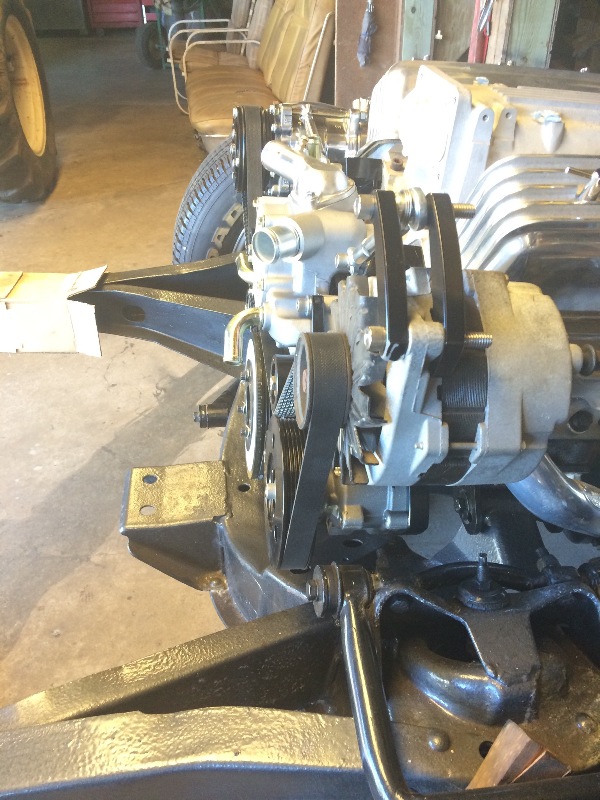
These spacers, 0.316" thick, came with the March Performance LT1
setup, but they are obviously too thick for this particular setup with
these particular heads and block. Everything else seems to fit just fine
now that I have the dampner problems sorted out....
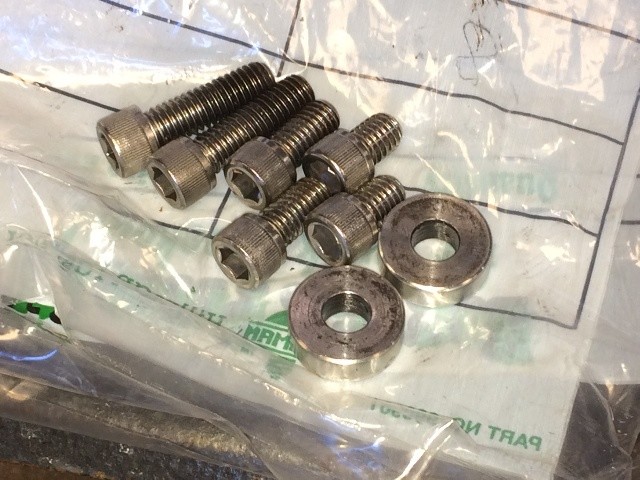
I had a variety of allen head bolt length available to get
a good fit with the proper spacers....
Picked up a dozen ss flat washers, these are 0.050" thick....
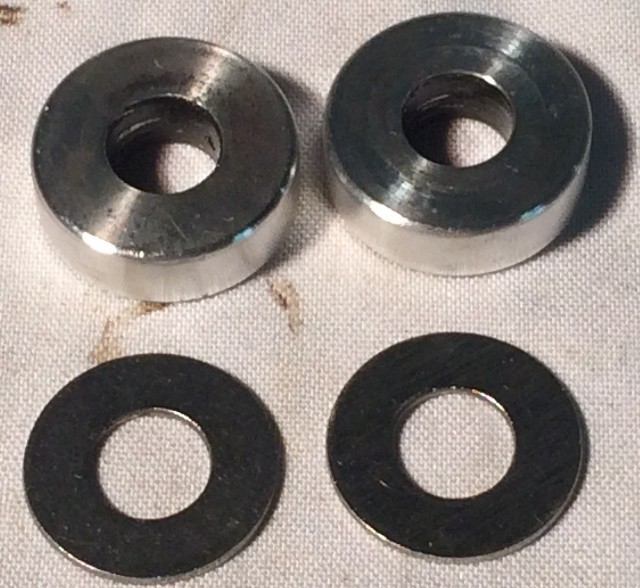
Behind the idler rollers and bracket, is the bracket for the PS pump,
that's where the spacers have to go to align the pump....
I started with two washers, 0.100" spacing, wasn't quite right,
added another washer to each location, 0.150" now....
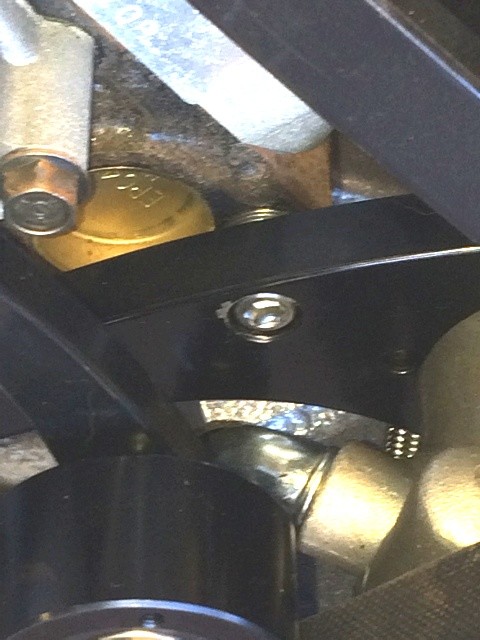
It looks good, don't think I can get it much closer....
These LT1 motors from the mid 90's were a bit of an odd duck, with the ignition (Optispark) mounted directly behind the water pump, and both driven directly off of the cam....
If I have time, I might machine those thick spacers March supplied down to 0.150" and use those instead of the stacked flat washers....
Aloha,
Willy
As my broken left arm heals and gets stronger, and feeling better, I'm starting to get back onto the '55 HT project...
Lookin' at why the power steering pump is out of alignment, with this March Performance setup I bought...
The pump sits about 1/8" too far forward....
It sits just below the alternator, and closer to the motor in this pic...
These spacers, 0.316" thick, came with the March Performance LT1
setup, but they are obviously too thick for this particular setup with
these particular heads and block. Everything else seems to fit just fine
now that I have the dampner problems sorted out....
I had a variety of allen head bolt length available to get
a good fit with the proper spacers....
Picked up a dozen ss flat washers, these are 0.050" thick....
Behind the idler rollers and bracket, is the bracket for the PS pump,
that's where the spacers have to go to align the pump....
I started with two washers, 0.100" spacing, wasn't quite right,
added another washer to each location, 0.150" now....
It looks good, don't think I can get it much closer....
These LT1 motors from the mid 90's were a bit of an odd duck, with the ignition (Optispark) mounted directly behind the water pump, and both driven directly off of the cam....
If I have time, I might machine those thick spacers March supplied down to 0.150" and use those instead of the stacked flat washers....
Aloha,
Willy
")
2Loose
reliable source of info
Well, hand and arm injuries during the last 2 years continue to slow me down considerably !!
Have tried to keep my personal web page up dated when I could....
More pix, etc. here (Link)
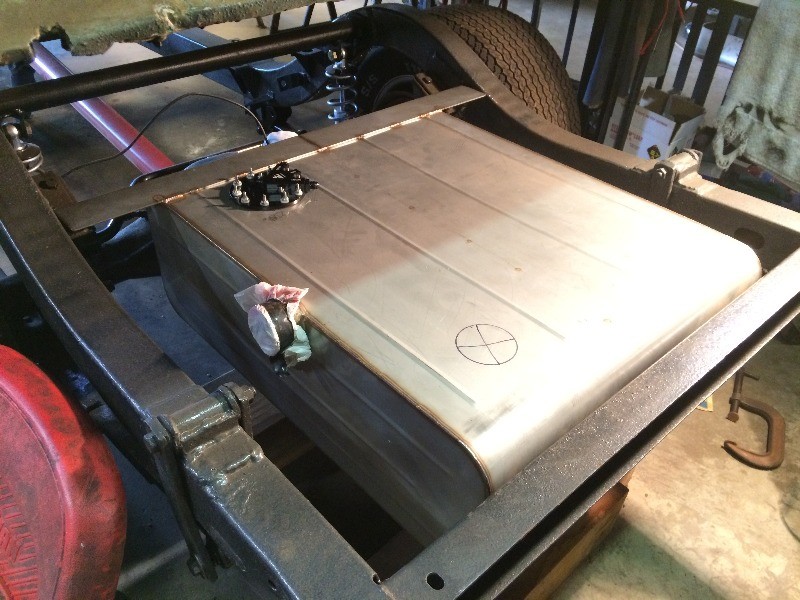
Time to hang the fuel tank and install the fuel system....
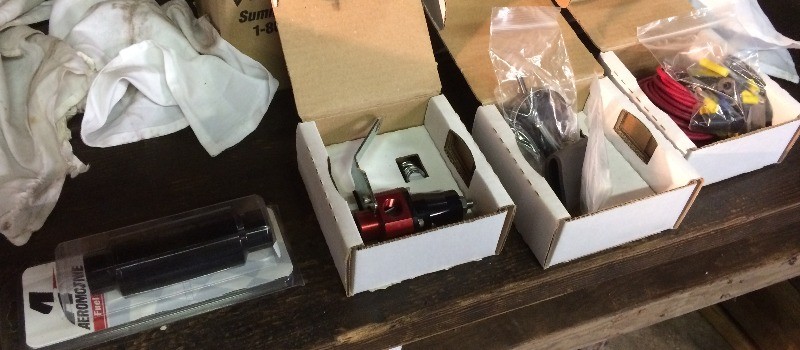
Dug out the fuel tank, pump and other parts I've had
in storage for some time now....
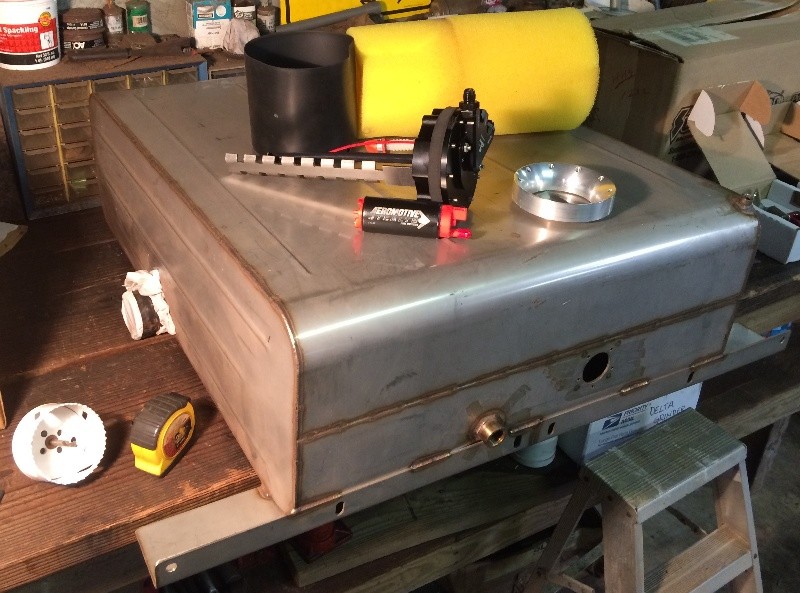
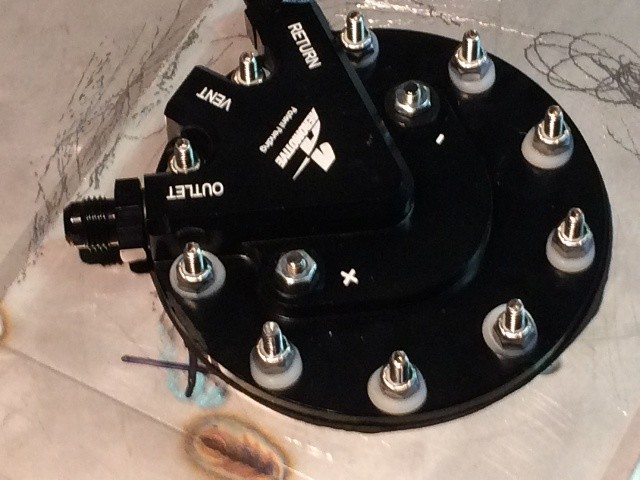
Using all Aeromotive parts for an intank efi style fuel pump system...
Glad to be back at it again....
Aloha to all...
Willy
Have tried to keep my personal web page up dated when I could....
More pix, etc. here (Link)
Time to hang the fuel tank and install the fuel system....
Dug out the fuel tank, pump and other parts I've had
in storage for some time now....
Using all Aeromotive parts for an intank efi style fuel pump system...
Glad to be back at it again....
Aloha to all...
Willy
2Loose
reliable source of info
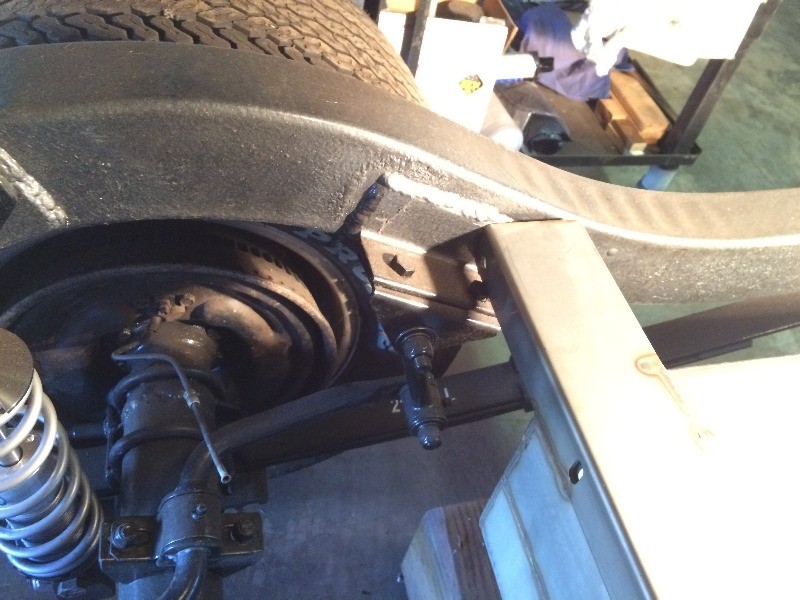
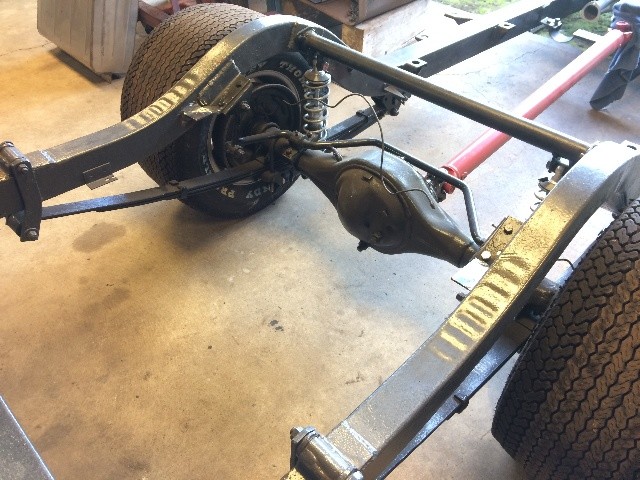
Finally figured out how it was supposed to fit....
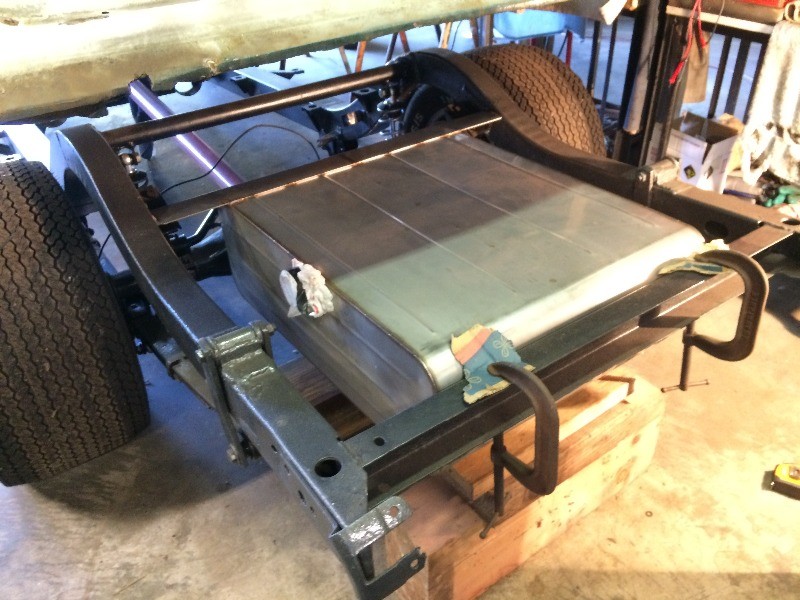
The front mount will fit in nicely with my sway bar frame mounts....
Some slight modification required here....
Another view....
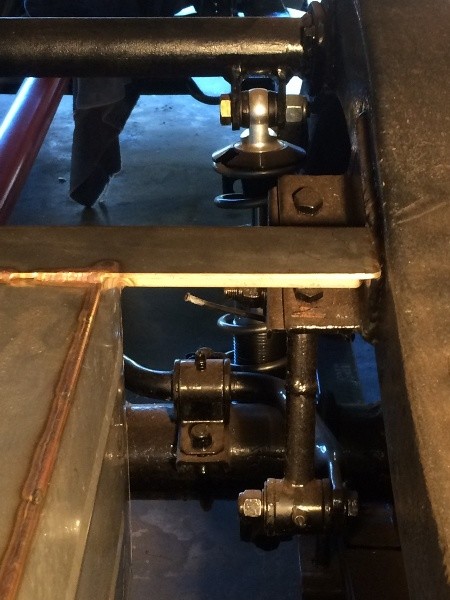
This will be easy....
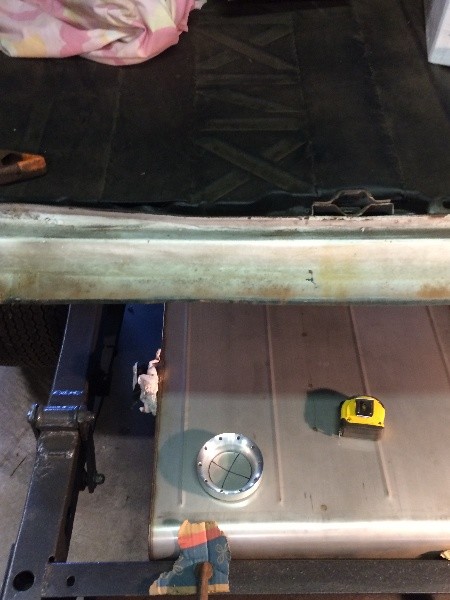
Gotta cut a 3-1/4" hole for the Aeromotive fuel pump and fuel well....

And will cut and fab a removable piece of the trunk floor over the fuel pump....
More Later....
Willy
The front mount will fit in nicely with my sway bar frame mounts....
Some slight modification required here....
Another view....
This will be easy....
Gotta cut a 3-1/4" hole for the Aeromotive fuel pump and fuel well....
And will cut and fab a removable piece of the trunk floor over the fuel pump....
More Later....
Willy
2Loose
reliable source of info
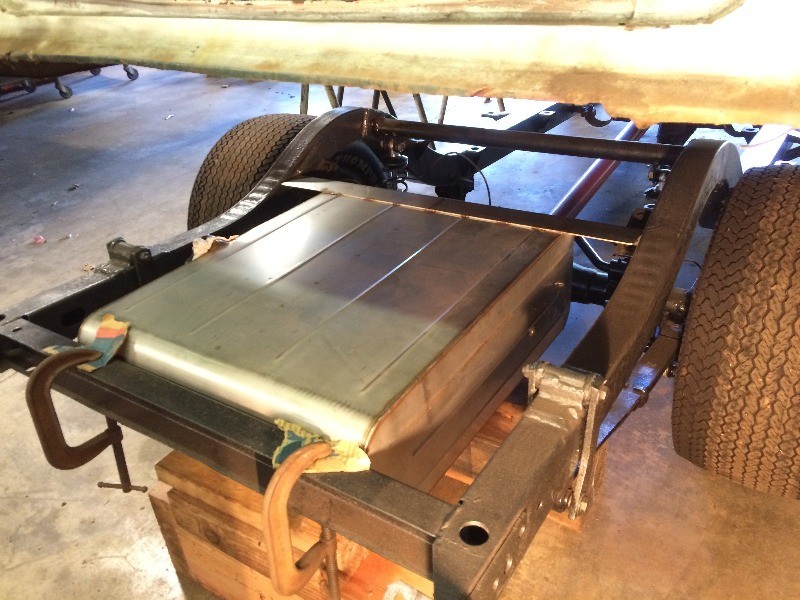
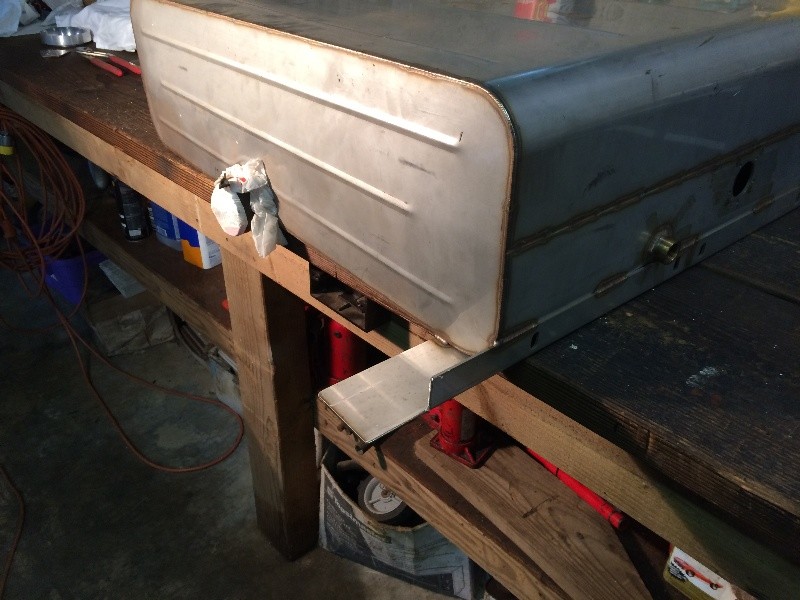
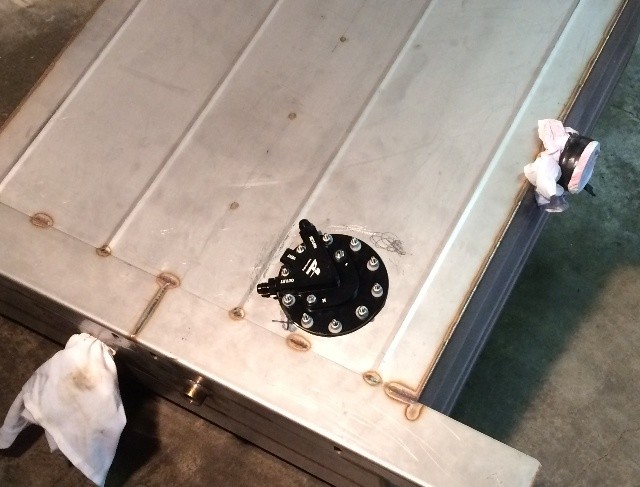
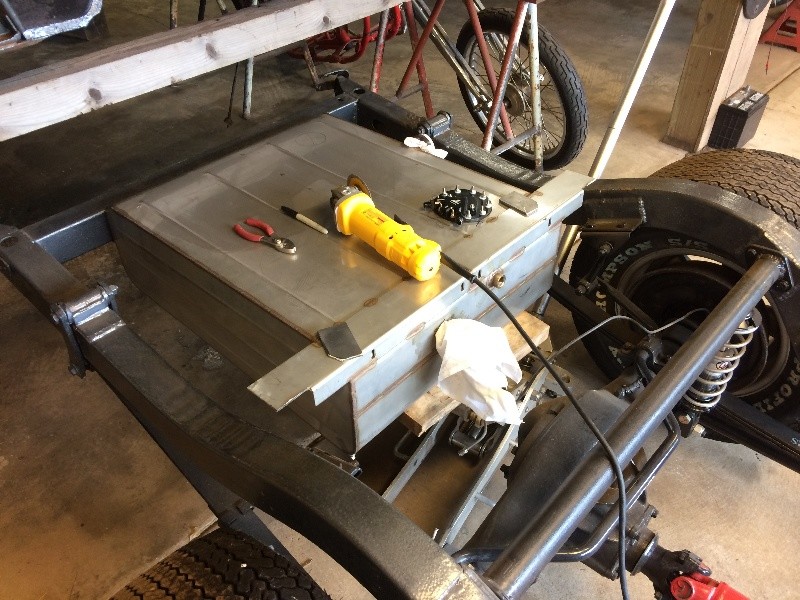
Got some more work done on the fuel tank....
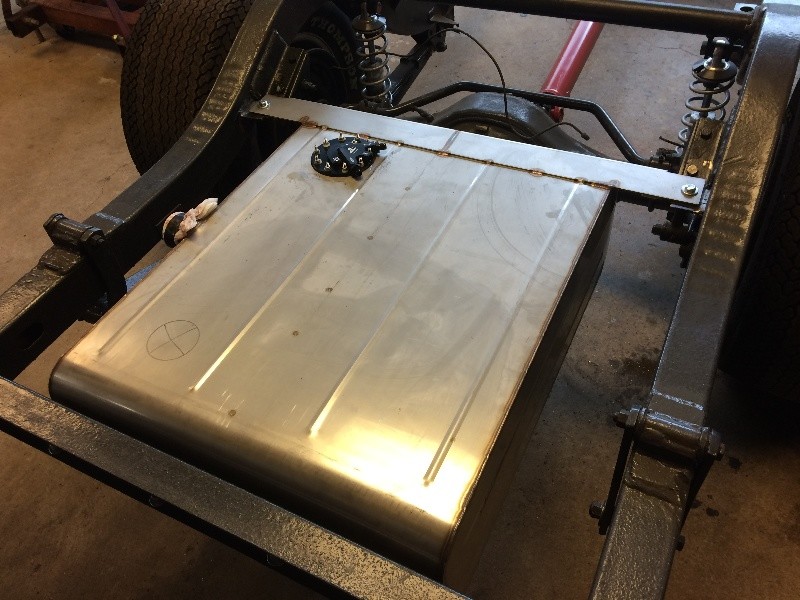
I trimmed the front support angle to get a better fit on the sway bar frame supports....
If I mount the fuel pump in the front of the tank, left side of the trunk floor is the easiest to cut an access hole for future removal and maintenance....
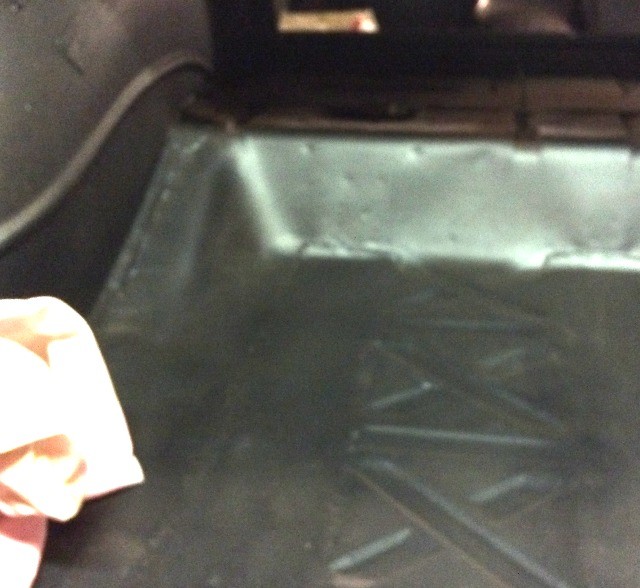
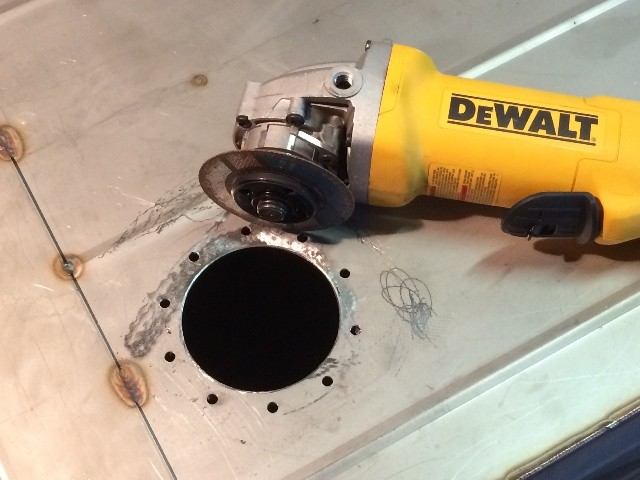
So I went ahead and cut the required 3-1/4" hole in the front left part of the tank....
Cleaned up and smoothed the rough edges of the new hole....
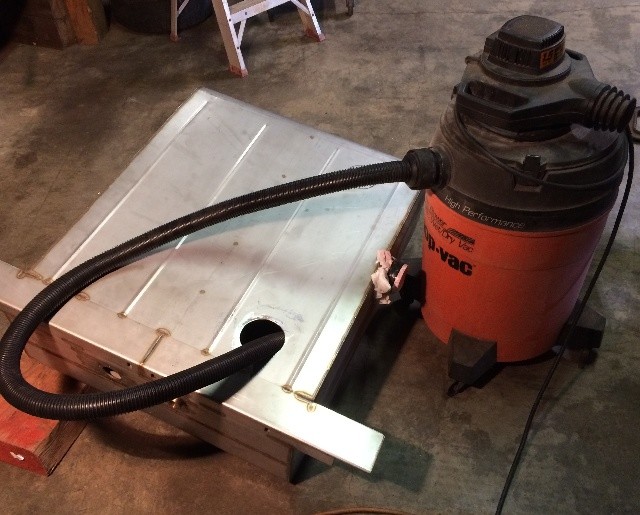
I propped the tank up so that corner was lowest to keep the mess mostly located right under the hole, and it vacuumed out nicely....
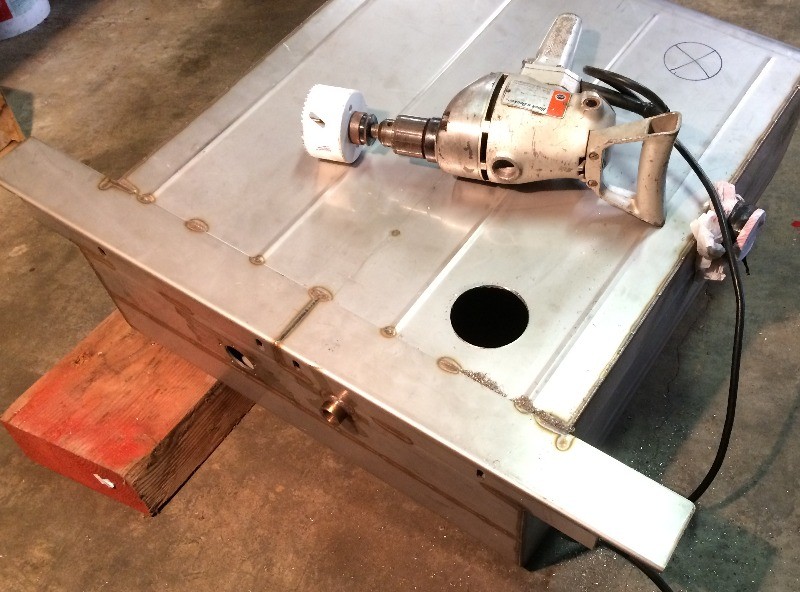
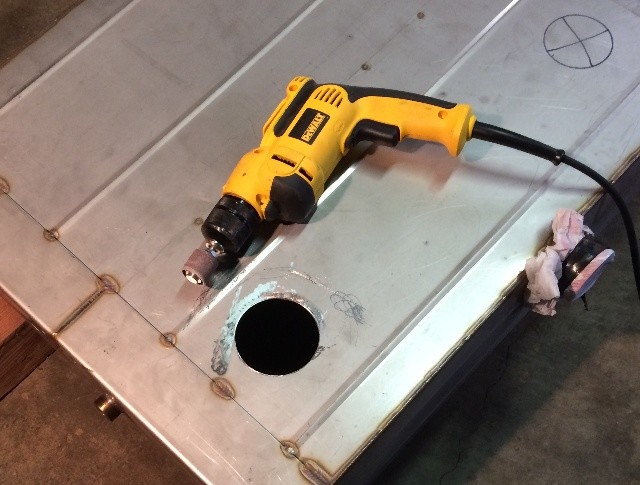
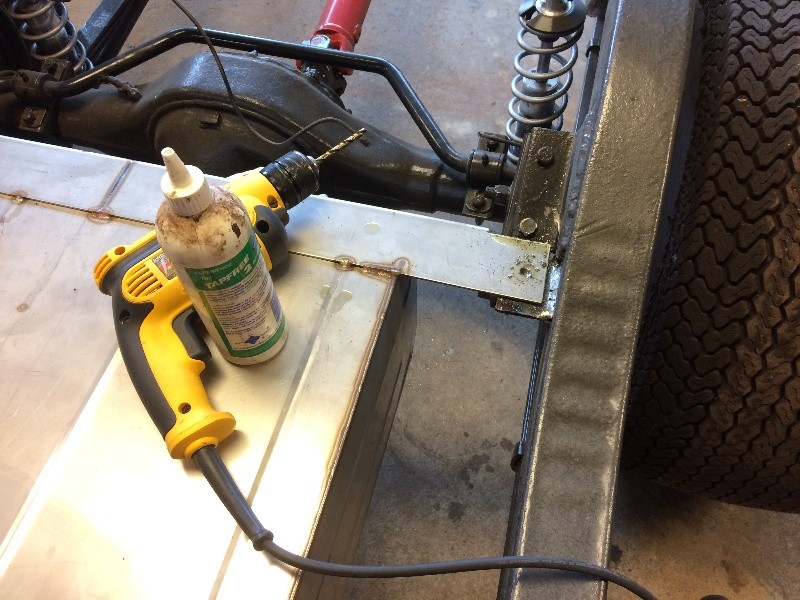
Aeromotive supplied a jig to drill the holes for the new fuel pump....

The idea was to drill two holes opposite each other, then keep it located with these two screws while drilling the rest of the holes...
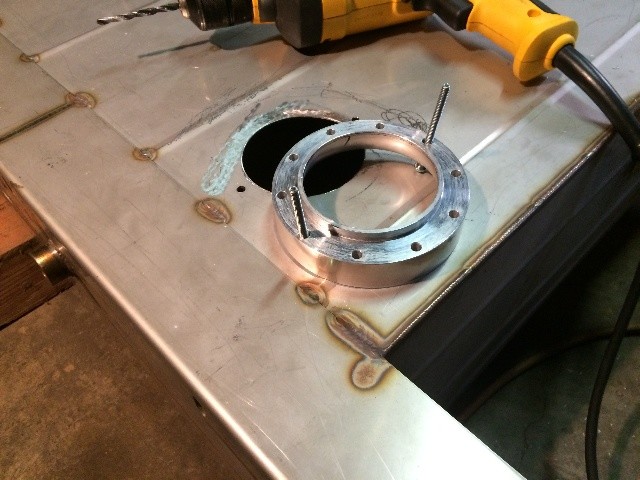
However, my drill bit went 'south' on the second hole, so I'm going to have to resharpen this bit after each hole, or go buy a couple more bits....
Probably will end up doing both....
More Later...
Aloha,
Willy
I trimmed the front support angle to get a better fit on the sway bar frame supports....
If I mount the fuel pump in the front of the tank, left side of the trunk floor is the easiest to cut an access hole for future removal and maintenance....
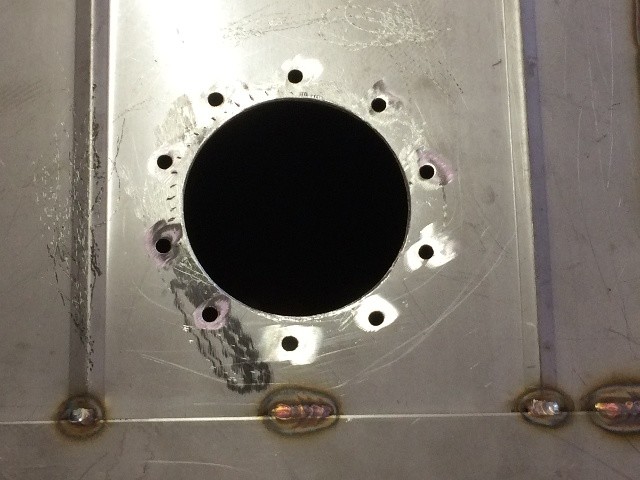
So I went ahead and cut the required 3-1/4" hole in the front left part of the tank....
Cleaned up and smoothed the rough edges of the new hole....
I propped the tank up so that corner was lowest to keep the mess mostly located right under the hole, and it vacuumed out nicely....
Aeromotive supplied a jig to drill the holes for the new fuel pump....
The idea was to drill two holes opposite each other, then keep it located with these two screws while drilling the rest of the holes...
However, my drill bit went 'south' on the second hole, so I'm going to have to resharpen this bit after each hole, or go buy a couple more bits....
Probably will end up doing both....
More Later...
Aloha,
Willy
2Loose
reliable source of info
Cleaned up the drilled holes for the fuel pump, inside and out....
Used the shop vac to suck out all the debris....
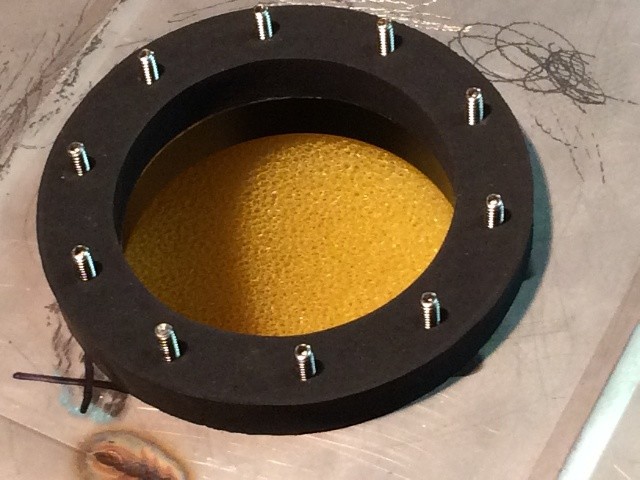
Put the inside ring with the screws in place,,,,
had to file some of the holes to get a good fit....
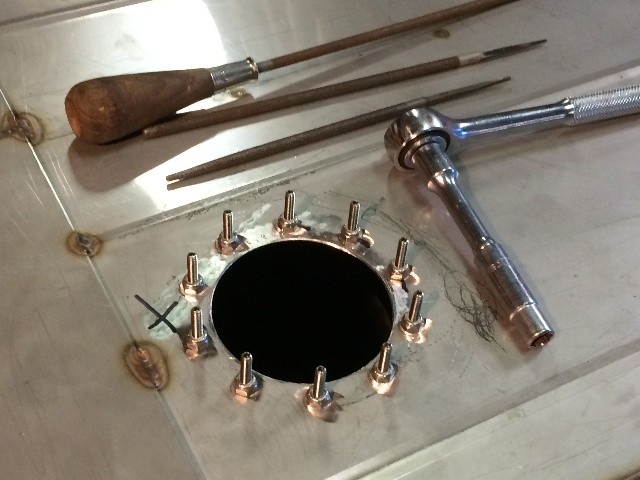
The nuts are removed after the inside ring is pulled into position...
It is a tight enough fit that it stayed in place....
The front of the tank is 9-1/2" deep (28 gallon tank)...
so the foam is cut to 10-1/2"....
The tank tapers to 9" deep in the rear....
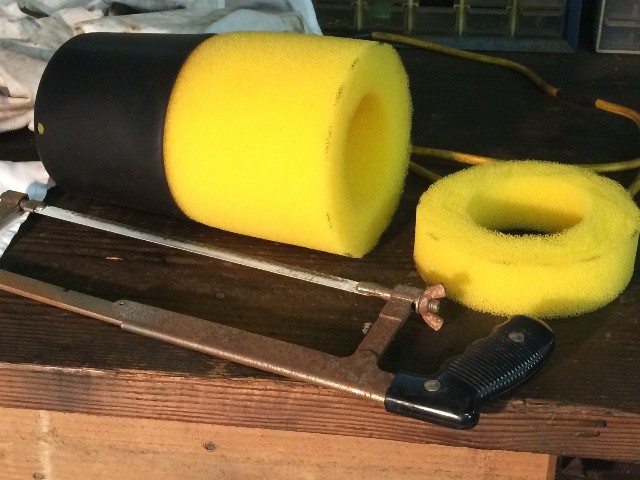
And stuffed down in the tank and massaged back into shape and into position
Then the foam gasket is put on top....
The pump assembly is also assembled to match the 9-1/2" depth...
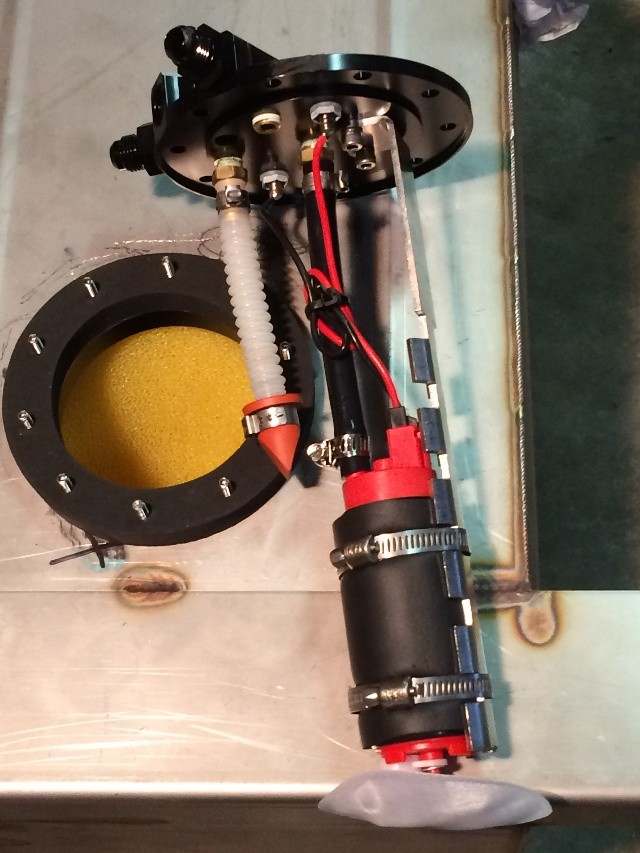
Had to readjust the foam fuel well a couple of times to get it right....
I think it's good to go....
Now to work up some front mounting brackets....
Aloha,
Willy
Used the shop vac to suck out all the debris....
Put the inside ring with the screws in place,,,,
had to file some of the holes to get a good fit....
The nuts are removed after the inside ring is pulled into position...
It is a tight enough fit that it stayed in place....
The front of the tank is 9-1/2" deep (28 gallon tank)...
so the foam is cut to 10-1/2"....
The tank tapers to 9" deep in the rear....
And stuffed down in the tank and massaged back into shape and into position
Then the foam gasket is put on top....
The pump assembly is also assembled to match the 9-1/2" depth...
Had to readjust the foam fuel well a couple of times to get it right....
I think it's good to go....
Now to work up some front mounting brackets....
Aloha,
Willy
2Loose
reliable source of info
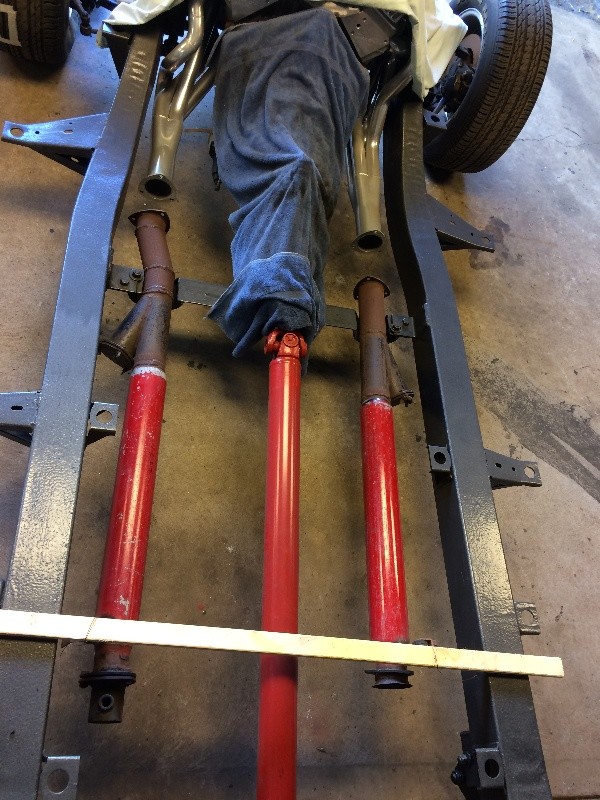
Rolled the chassis out from under the body,
easier to work on the fuel system....
Loosened up the bolts in back, jacked up the front to cut some more
metal off the front brackets on the tank for a better fit....
While it was up, got in there and ground off paint, cleaned up weld areas....
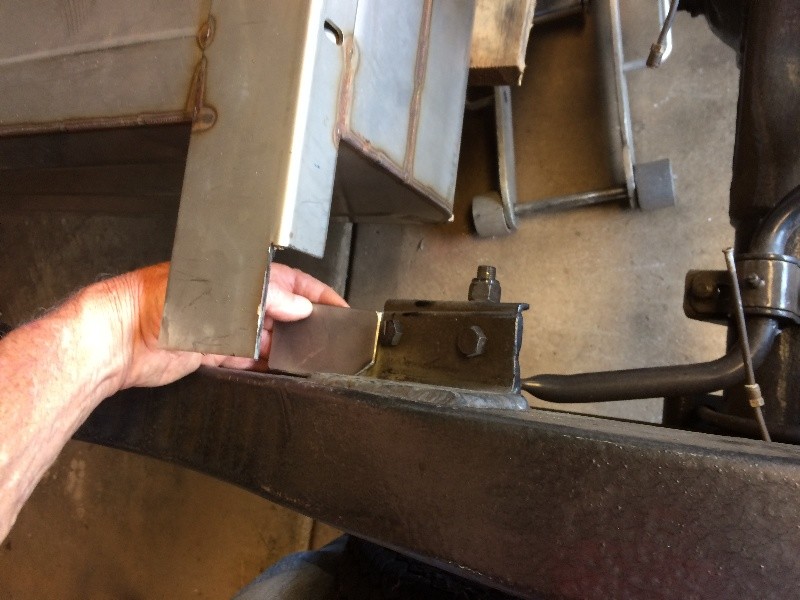
AND fitted a piece of 3/16 to weld on as a bracket on each side..
Both sides welded on, tacked on while
clamped to the fuel tank to keep then located...
Man, this SS was the toughest stuff to drill I've ever run across....
Using Ace's best bits, I went through 8- 1/4" bits, and 4- 3/8" bits
and that was with a drilling lube and running slow speed, and resharpening
bits with a "Drill Doctor"....
Using cad plated 3/8" bolts, 3/4" long, with flat washers, cad plated, both sides,
a lock washer and a regular nut.
Will pull it out to paint the recent welds,
and I want to coat the welds on this SS tank....
easier to work on the fuel system....
Loosened up the bolts in back, jacked up the front to cut some more
metal off the front brackets on the tank for a better fit....
While it was up, got in there and ground off paint, cleaned up weld areas....
AND fitted a piece of 3/16 to weld on as a bracket on each side..
Both sides welded on, tacked on while
clamped to the fuel tank to keep then located...
Man, this SS was the toughest stuff to drill I've ever run across....
Using Ace's best bits, I went through 8- 1/4" bits, and 4- 3/8" bits
and that was with a drilling lube and running slow speed, and resharpening
bits with a "Drill Doctor"....
Using cad plated 3/8" bolts, 3/4" long, with flat washers, cad plated, both sides,
a lock washer and a regular nut.
Will pull it out to paint the recent welds,
and I want to coat the welds on this SS tank....
2Loose
reliable source of info
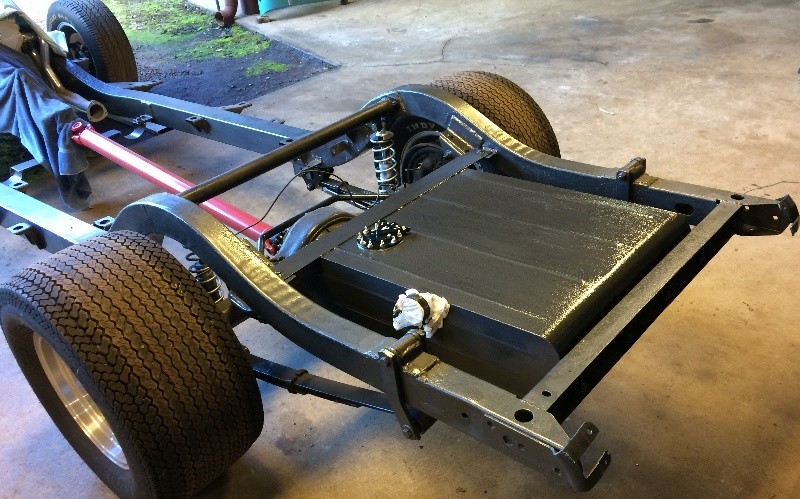
Since I painted the frame with Rustoleum
Black Hammer Tone, decided to do the tank
with the same....
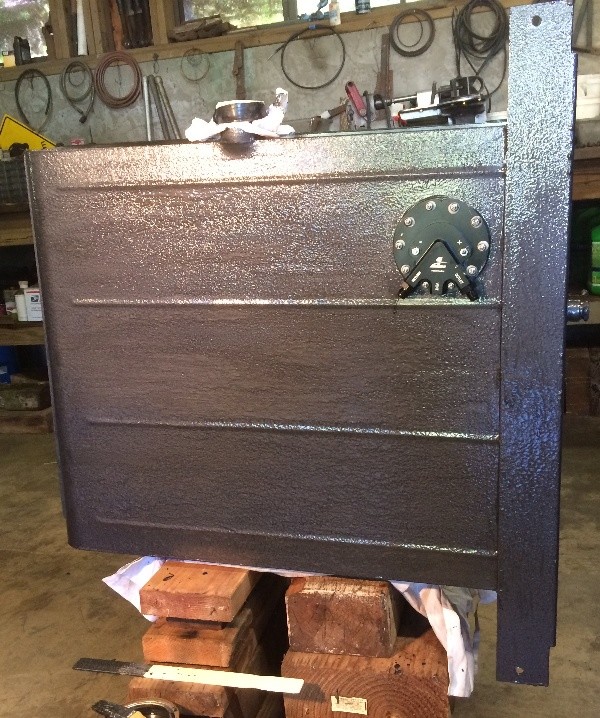
It took two coats plus a little bit here and there, but it looks good to go....
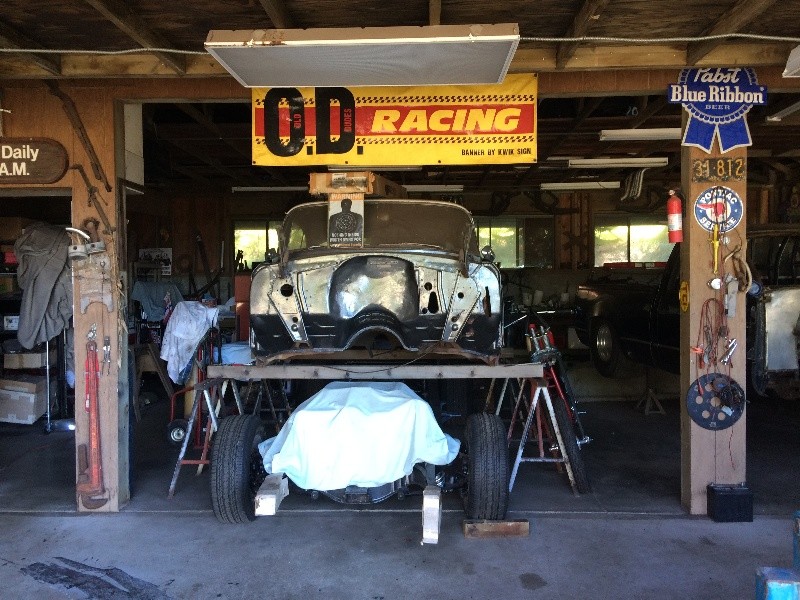
Just for grins, my shop space,
It's the OD Racing Team....
(Old Dudes....)
Three of us share this shop space, it used to be a flower packing shed, they shipped all over the world from here, but the owner passed away, and nobody was interested in taking over the flower bizz, so us car guys turned it into a custom fab shop....
More Later
Willy
Black Hammer Tone, decided to do the tank
with the same....
It took two coats plus a little bit here and there, but it looks good to go....
Just for grins, my shop space,
It's the OD Racing Team....
(Old Dudes....)
Three of us share this shop space, it used to be a flower packing shed, they shipped all over the world from here, but the owner passed away, and nobody was interested in taking over the flower bizz, so us car guys turned it into a custom fab shop....
More Later
Willy
2Loose
reliable source of info
I was over to Orange County, CA for the annual "Cruisin' For A Cure" car show and cruise at the Orange County Fairgrounds (Prostate Cancer fund raiser and you can also get med checked for prostate problems) and saw the Williams Classic Chassis Works display. Later went and visited their shop, got talked into this larger tank, as the plan is to ship this car to the mainland and use it for long cruises, since that motor dyno'ed at over 500 hp, I suspect it will be a somewhat thirsty beast....
Just might be really glad I have a tank that big....
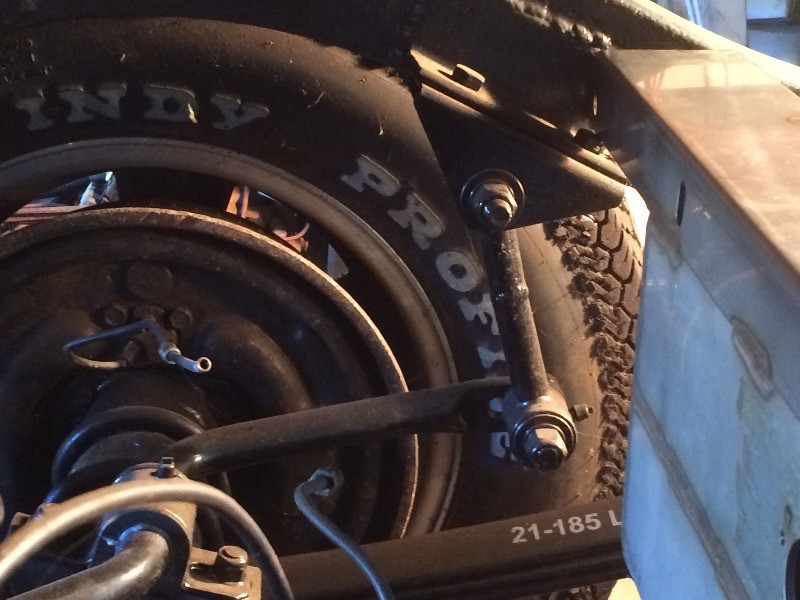
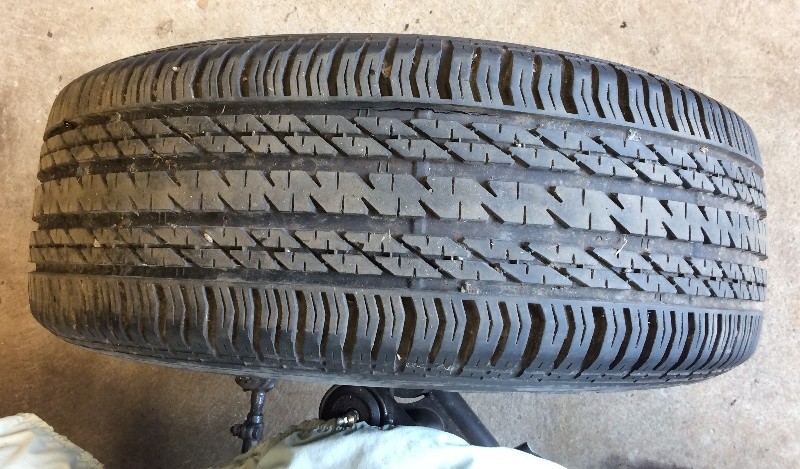
Looking at the tires, and not happy....
They've been in storage for, what, 5 years or more??
The front left tire....
Do you see anything??
Here, I marked it with tape...
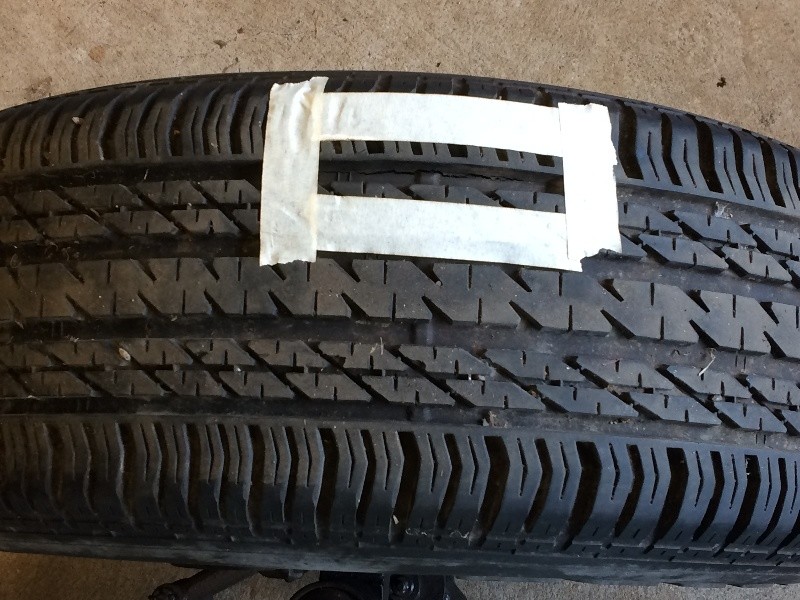
A close up....
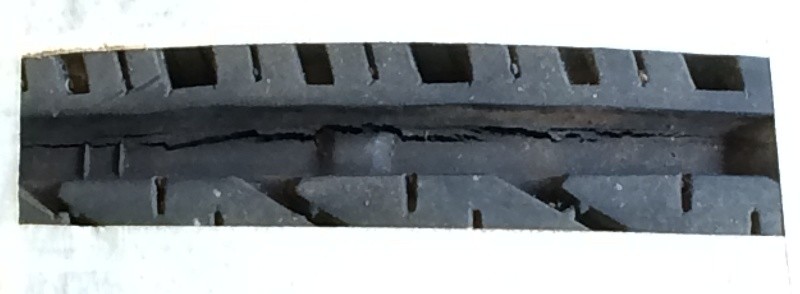
I sure don't want to drive around on a tire like this....
Had some glaspaks from some past project,
stuck 'em in there to see how they looked...
More Later....
Just might be really glad I have a tank that big....
Looking at the tires, and not happy....
They've been in storage for, what, 5 years or more??
The front left tire....
Do you see anything??
Here, I marked it with tape...
A close up....
I sure don't want to drive around on a tire like this....
Had some glaspaks from some past project,
stuck 'em in there to see how they looked...
More Later....
yes its amazing how often I've seen guys never notice or neglect tires, they may have been brand new when you bought them,
but if they sat un-used for 6-7 years they may be in crappy condition, even un-used.
http://garage.grumpysperformance.com/index.php?threads/how-to-prevent-tire-dry-rot.8480/#post-29756
http://garage.grumpysperformance.co...-refers-too-and-related-info.1946/#post-43927
http://garage.grumpysperformance.co...a-car-transport-trailer.845/page-2#post-66803
http://garage.grumpysperformance.com/index.php?threads/wheel-studs-and-replacement.4414/#post-11609
2Loose
reliable source of info
I've been traveling over the holidays, it sure is nice to get back home and back out in the shop....
I need to figure out my fuel system for this '55 Chevy Sport Coupe project...
I'm not familiar with these early 90's LT-1 efi systems,
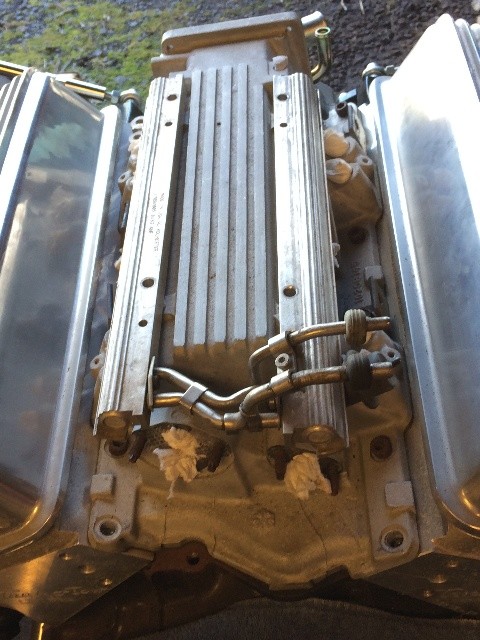
Here's what I have to start with....
The motor is built up, 396 ci, ported heads, the plenum has been
port matched to the heads, and the throttle body end
of the plenum has been bored out to match a larger throttle body....
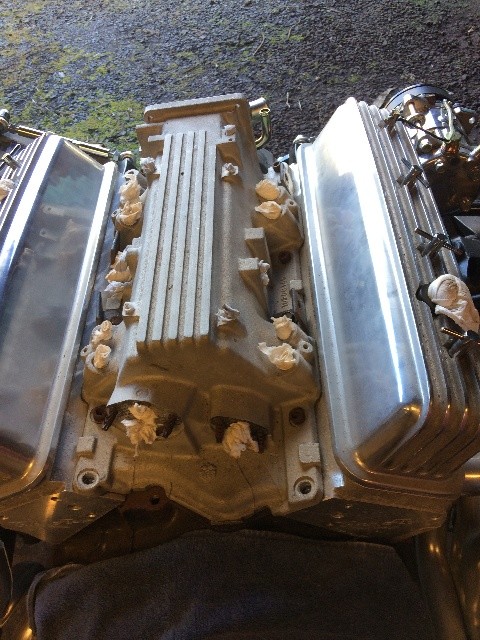
Some stock fuel rails, a 10 micron filter, a pressure regulator....
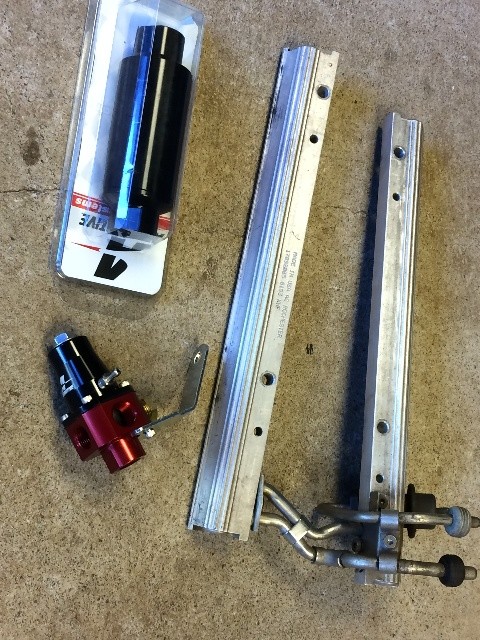
There's also a box of high flow injectors that are supposed to work with this motor....
The fuel fails match up to the plenum, don't see a problem there....
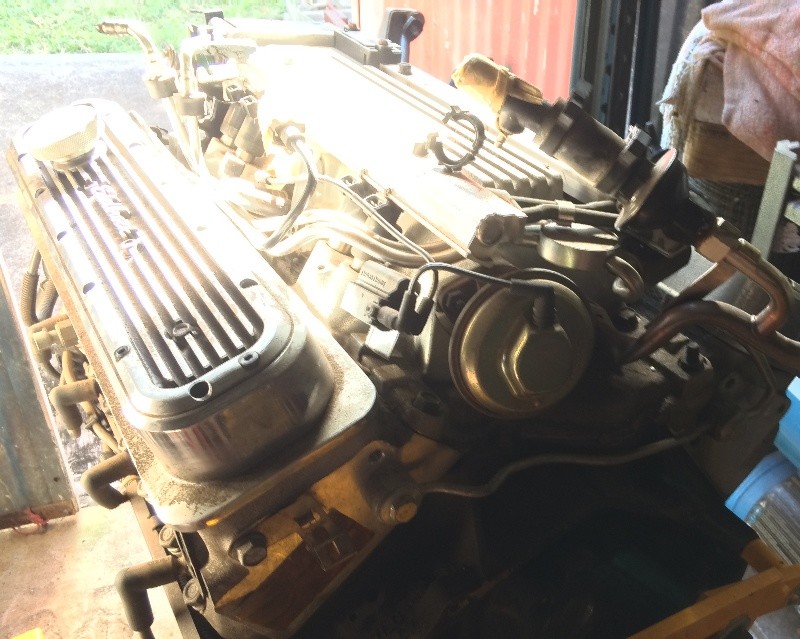
Here's a complete stock '93 LT-1 Camaro Z28 motor I can pull parts off of if needed....
But I'd rather leave it complete if I can....
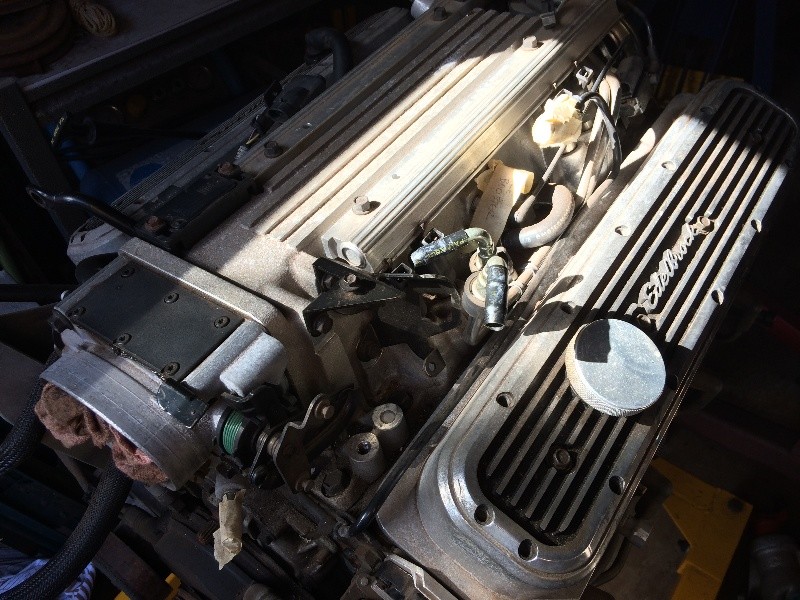
Another view....

View #3....
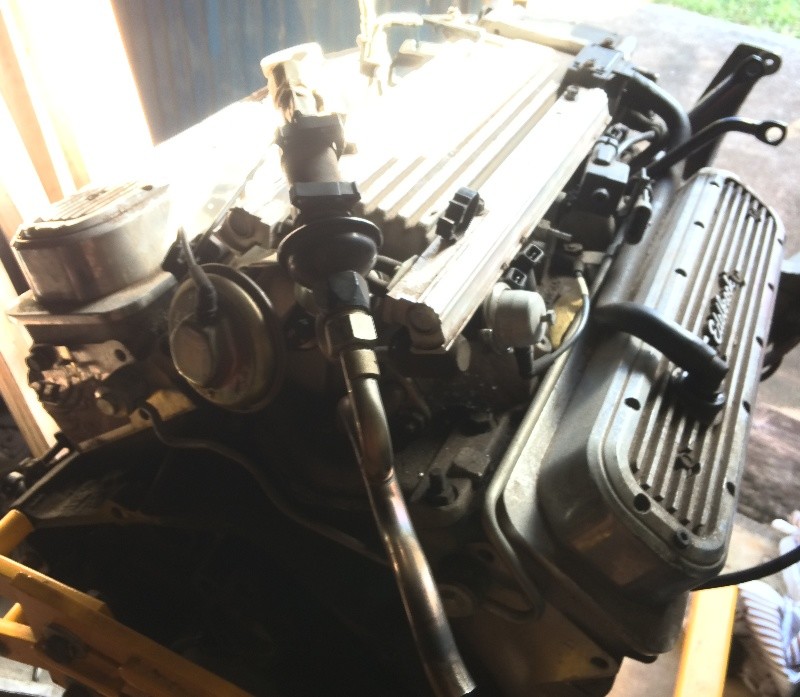
One more....
I need to find instructions on how these systems worked,
and figure out what I need to do with mine....
In the meantime, I'll plumb in the fuel lines....
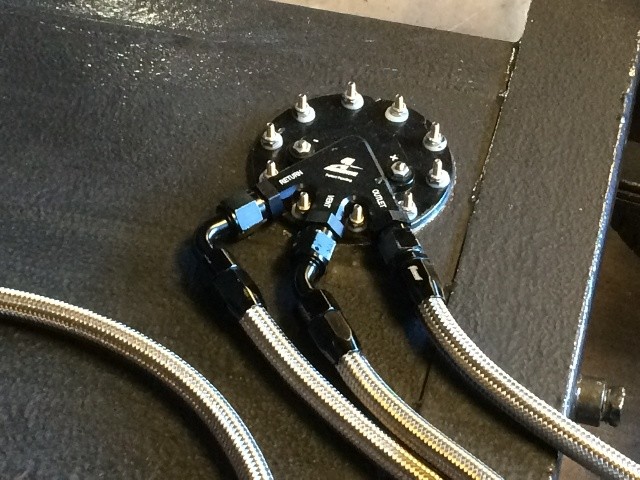
The Aeromotive fuel pump I mounted in the tank came with AN-6 fittings...
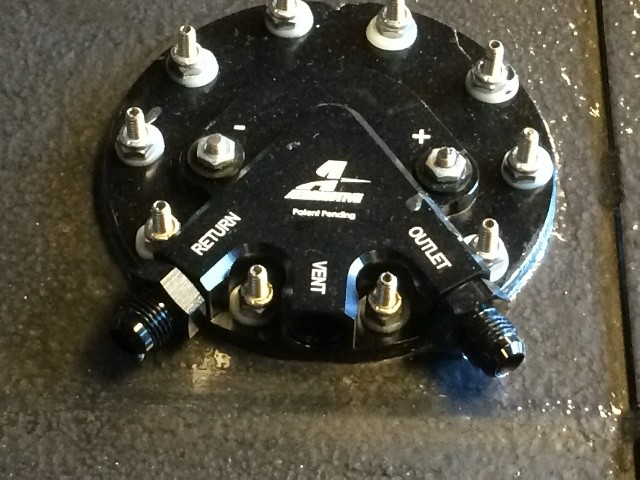
Changed 'em out for AN-8 fittings and put on the hose ends
I want to use to see how well they fit...
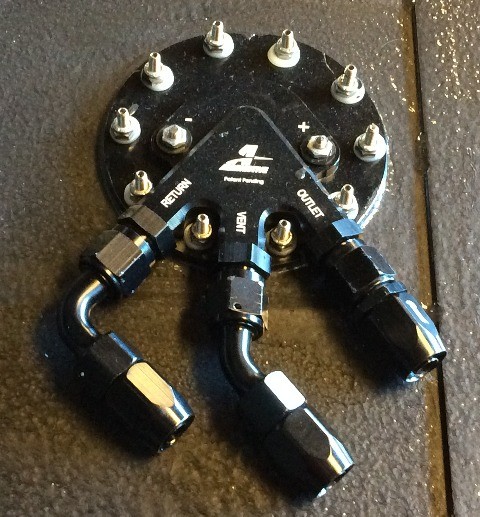
That ridge just under the hose ends was a very tight fit...
But I got them on....
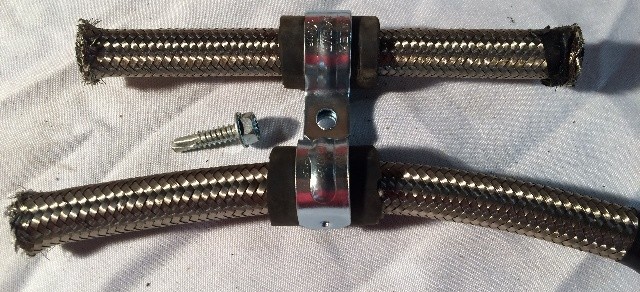
Time for some hose....
I think this will work quite nicely....
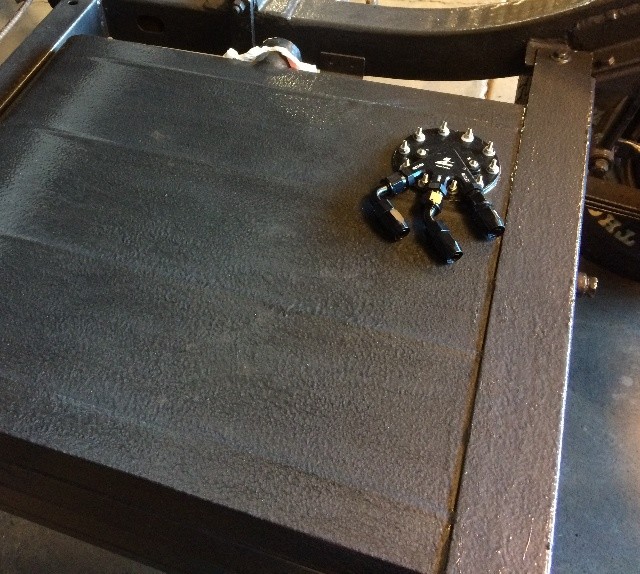
Had some clamps and some old rubber hose around, so check out the fit...
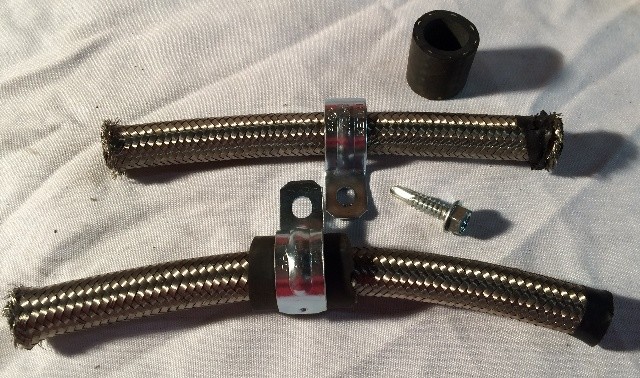
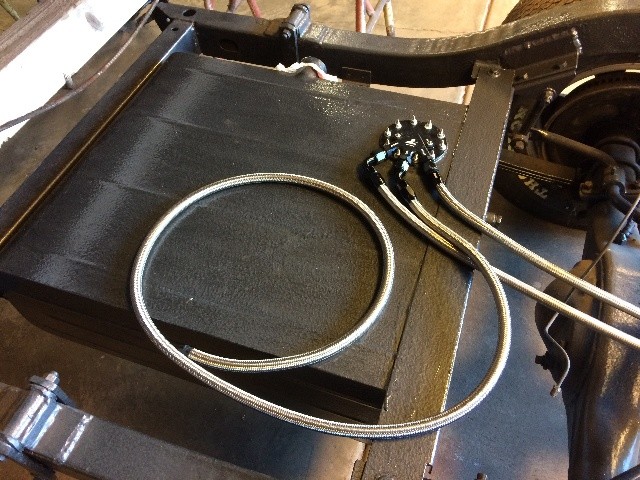
Yeah, this will work....
Hung the hoses (a feed hose and a return) on the inside
of the right frame rail with clamps about every foot...
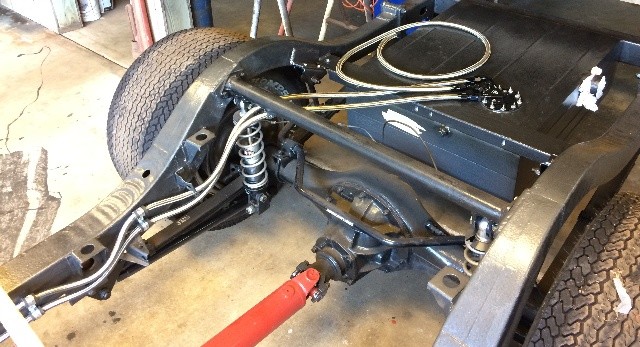
Had to route them around the body mount brackets,
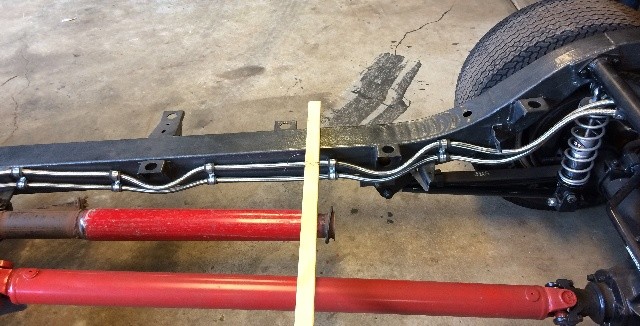
Will put some protective hose on the fuel lines anywhere
they might rub on a metal bracket...
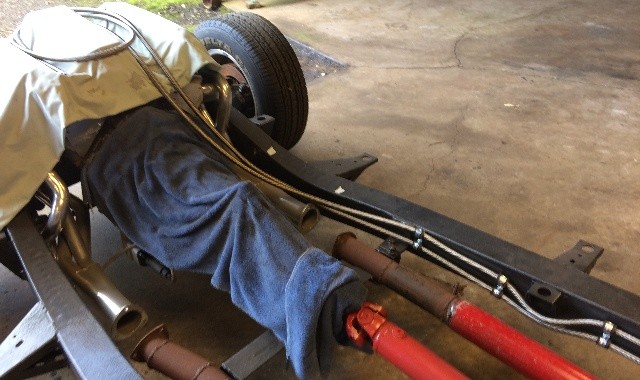
I need to pull off the right side header to drill and mount the last two
sets of mounting clamps...
Installing AN-8 fittings and plugs in the pressure regulator...
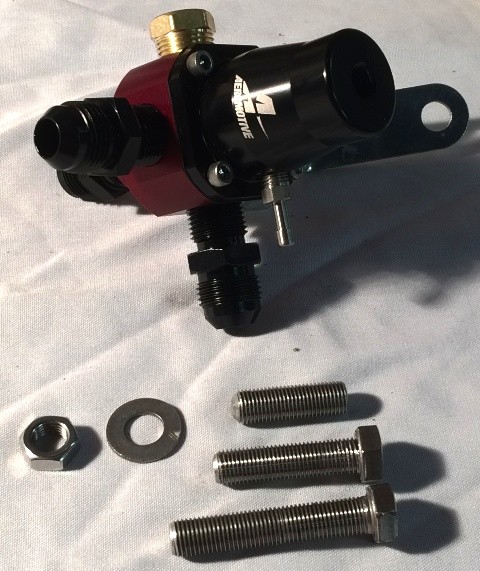
I had to change out the spring in this regulator,
it came with a low pressure spring for a carb setup,
and I needed the high pressure spring for the efi setup,
but that spring was much shorter then the carb spring,
and that short adjusting bolt was too short to use with
the high pressure spring, so I got two more bolts, the one
in the middle looked the best, so will use it....
More Later....
I need to figure out my fuel system for this '55 Chevy Sport Coupe project...
I'm not familiar with these early 90's LT-1 efi systems,
Here's what I have to start with....
The motor is built up, 396 ci, ported heads, the plenum has been
port matched to the heads, and the throttle body end
of the plenum has been bored out to match a larger throttle body....
Some stock fuel rails, a 10 micron filter, a pressure regulator....
There's also a box of high flow injectors that are supposed to work with this motor....
The fuel fails match up to the plenum, don't see a problem there....
Here's a complete stock '93 LT-1 Camaro Z28 motor I can pull parts off of if needed....
But I'd rather leave it complete if I can....
Another view....
View #3....
One more....
I need to find instructions on how these systems worked,
and figure out what I need to do with mine....
In the meantime, I'll plumb in the fuel lines....
The Aeromotive fuel pump I mounted in the tank came with AN-6 fittings...
Changed 'em out for AN-8 fittings and put on the hose ends
I want to use to see how well they fit...
That ridge just under the hose ends was a very tight fit...
But I got them on....
Time for some hose....
I think this will work quite nicely....
Had some clamps and some old rubber hose around, so check out the fit...
Yeah, this will work....
Hung the hoses (a feed hose and a return) on the inside
of the right frame rail with clamps about every foot...
Had to route them around the body mount brackets,
Will put some protective hose on the fuel lines anywhere
they might rub on a metal bracket...
I need to pull off the right side header to drill and mount the last two
sets of mounting clamps...
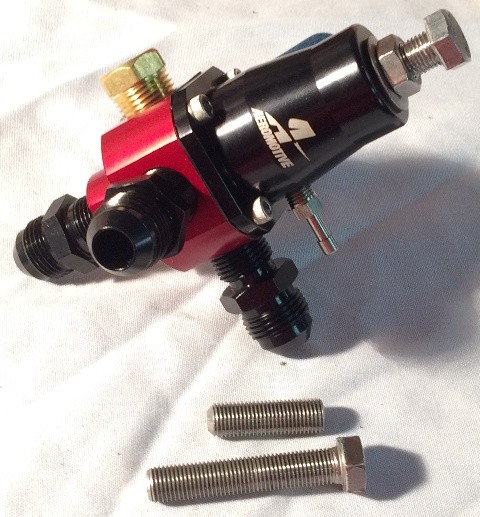
Installing AN-8 fittings and plugs in the pressure regulator...
I had to change out the spring in this regulator,
it came with a low pressure spring for a carb setup,
and I needed the high pressure spring for the efi setup,
but that spring was much shorter then the carb spring,
and that short adjusting bolt was too short to use with
the high pressure spring, so I got two more bolts, the one
in the middle looked the best, so will use it....
More Later....
Last edited by a moderator: