TBucket Engine Project (Dart SHP)

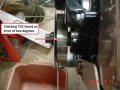
you do realize that type of aluminum beer keg ,
gas tank repair, minor intake manifold cracks,
minor porting screw-ups on aluminum intakes,
like sealing pin holes and thermostat corrosion repairs ARE

generally done like this
VIDEO BELOW

http://garage.grumpysperformance.com/index.php?threads/aluminum-repair-without-the-tig-welder.376/

https://www.harborfreight.com/8-piece-low-temperature-aluminum-welding-rods-44810.html

WATCH VIDEO
http://durafix.com/demo/256.html

http://durafix.com/index.html#order

BTW it should be obvious, it would be smart to fill the empty beer keg fuel tank with a complete flush of argon or CO2 before using a torch near any fuel tank,
BTW
if you don,t have a welding tank with shield gas handy your local super market generally can sell you 5-6 lbs of DRY ICE, if you pour all the fuel out and flush the tank with water and a few drops of dawn dis soap then rinse, then drop in 5-6 lbs of crushed dry ice and cover the exits with duct tape then wait 20 minutes the tank will be filled with a low pressure cloud of co2 gas making an explosion impossiable
1104.jpg

and you could very easily do it faster, cheaper and better yourself
 
Last edited:
Dent the cracked area in a little so that when you grind it smooth, there is still some metal thickness underneath.
 
.
The owner of Osborn radiator called me back and said to bring it back and he would weld it
again for free. With three overlapping passes on the weld this time it's much wider than the
first weld. It's off to the Elite Polishing to get the keg redone. Also taking my two piece valve
covers and the Summit aluminum water pump pulley.

Got to get ready for the cruising season that's not too far off.

FP03_Patch2ndAttempt_00232.jpg
 
E85 is Moonshine Mike.
Gasoline added so you can not drink it.

Did a search here.
No Transbrake data exist here for the TH400, TH350, Powerglide, .
4L80E.
Something I can work on.
Debatable who makes the best for a TH400 For Drag Racing.
 
.
Got around to installing the new Fluidampr balancer. I did like Love302 suggested with the
silicone sealer, that should fix a small leak I had with the old balancer.

FP03_BalancerInstallSealer_00211.jpg

I bought a set of water pump pulley shims that come in 0.60, 0.90 and .120 inch, but I didn't
need them. Alignment was perfect.

https://www.summitracing.com/parts/sum-310121

Summit Water Pump Pulley
https://www.summitracing.com/parts/sum-g3960

FP03_SummitWP_Spacers_310121_ml.jpg

FP03_BalancerPulleyAlignmnet_00212.jpg

I also needed to check TDC with the new balancer and adjustable pointer. Since the last balancer
was 8 inch and new one is 6-1/4 inch I had to buy an new pointer.

I emailed ARP to find out what they recommended for torque when using Loctite Red 262 with
their bolt. See their email response at the end of this post, but they suggested the same torque of
80 ft-lbs as they did with their lubricant. I thought it might be different since they always
recommend you use their "ARP Fastener Assembly Lubricant #100-9909". No need to purchase
a tube, normally they will send a small package with their products.

FP03_ARP_BalancerBolt_00235.jpg

\----------------------------------------------------------------------\

ARP Email Response

Hi Rick,

Thanks for the inquiry,

You can use the red Loctite on the threads and apply lube under the head of the bolt, the
torque would be 80 ft. lbs.


Thanks,
Sam Benson
Technical Support and Customer Service Supervisor
ARP, (Automotive Racing Products)
samb@arpfasteners.com
800.826.3045 toll free
805.339.2200 office
.
 

Attachments

  • FP03_BalancerTDC_Check_00226.jpg
    FP03_BalancerTDC_Check_00226.jpg
    81.3 KB · Views: 35
Ok, I'm baffled ??? I want to install the distributor in the correct position. I'm trying to find
the compression stroke by putting my finger on the spark plug hole while I turn the crankshaft.
I've done this several times and it always wants to push my finder off the hole. NO pushit as
you remove your finger. I've tried the following with NO difference, not even slightest indication
of compression.

- Checked every time the crank was turned, not just when the balancer degrees showed TDC approaching.
- Added oil to the cylinder
- Pulled the valve cover and watched the valves. After the intake closed, then watch the balancer degrees.

I could go by the intake valve closing, then set the balancer at 10° BTDC. Install the distributor pointing
at cylinder #1.

But I want to know why I'm not getting indication of compression..... comments ???
 
How fast are you turning the crankshaft? It will not hold compression forever.

This does work: I could go by the intake valve closing, then set the balancer at 10° BTDC.
Install the distributor pointing at cylinder #1.
 
I turn the crank while holding my finger on the spark plug hole. How fast, well ...... how fast can
one turn the crank with a breaker bar.

It's always worked before.

Have you done the very same thing ????

FP04TurnCrank_00236.jpg
 
One more thing I've done is to removed the valve cover. The covers you see in the photos
are the old covers that are not as tall as the 2 pieces covers I have always had installed. But
that made NO difference. I thought maybe they wore restricting the valves from completely
closing.
 
Turn the engine over by hand with a breaker bar at 160 rpms.
If you can not then use a starter bump switch to engage the starter motor.
 
loosen the rockers on both valves on the cylinder your trying to find compression on at least one full turn, out,
on the adjuster rocker nut and try again,
if the piston is moving up the bore its compressing trapped gases if the valves seal,
its very unlikely your crank broke ,
but its not all that hard to have the valves slightly out of adjustment so they don,t seat and seal.

http://garage.grumpysperformance.com/index.php?threads/leakdown-compression-test.881/#post-56489
 
Last edited:
loosen the rockers on both valves on the cylinder your trying to find compression on at least one full turn, out,
on the adjuster rocker nut and try again,

I did this, checked the pushrods and they have plenty of clearance. I can feel them both with plenty
of slop. There was NO change, still no compression !!!

So to make sure I knew what to expect, I move to cylinder #3. There is no doubt in my mind now,
there is NO compression on cylinder #1 !!!

I wanted to compare the valve retainer heights from the intake to exhaust on cylinder #1 .... I get 0.060
inches lower on the intake valve. To make sure I had a valid comparison, I moved over to the cylinder #3
intake took the same measurement across to cylinder #1 intake. Guess what I got the same clearance
within 0.002 inches.

My guess is the intake valve is bent, which keeps it from closing completely. But when did it happen, it's
been since May 2016 that the motor has seen anything over 5000 RPM. Since then I have been on another
6 hour drive to the Lake of the Ozarks in September. When I parked it at the end of the 2016 summer in
October, I had not noticed any changes in the engine behavior.

Grumpy needs to get away from the kids and wife and move to Oklahoma, then this would be a fun problem
to solve, just hope it doesn't cost too much !

FP01_Cyl1ValveHeightDifference.jpg

FP01_Cyl1-3_IntakeCompare.jpg

.
 
obviously its time too pull the head and inspect closely

You would agree then that 0.060 inches difference is considerably too much???

I thought about one possible cause, that would be the valve keepers NOT completely seated.
But no that can't be the problem if you look at the photo.

Anything else I can check before getting serious about pulling the heads???

If so then I better pull both heads, when I'm this close. Also I will be checking for signs of DETONATION,
since this would be a good time to verify what I believe I've been to be hearing.

FP02_Cyl#1_KeeperCompare.jpg

.
 
WITH PRACTICE you can pull the heads and intake in well under 30-40 minutes,
..WITH PRACTICE even far less time with air tools

you might want to pull a spark plug and use a flex micro cam to inspect inside the cylinder
http://www.getlizardcam.com/index.jsp

http://www.getlizardcam.com/index.jsp#product_selection

http://garage.grumpysperformance.com/index.php?threads/leakdown-compression-test.881/#post-56489

https://www.walmart.com/ip/6LED-Wat...0812&wl11=online&wl12=623029814&wl13=&veh=sem

this is also a good inspection tool
http://www.thetoolwarehouse.net/p-6283- ... pv618.aspx
PV618.jpg

GOOGLE PV-618 and PV-636

High resolution lens provides a clear image of objects as close as 3/4 inch and over one foot away while providing a wide 40 degree field of view.
Powerful lamp illuminates dark crevices on-demand with the push of a button conveniently located on the handle.
Ergonomically designed handle is comfortable to hold and allows one-handed focusing and light activation.
Rugged and water resistant, ProVision is made of high impact ABS and flexible cable sheathing. (Note: Shaft is water resistant, not the handle.)
PV-618 and PV-636 models have .23” diameter, flexible, non-obedient cable. Durable carrying case included.
Accessories available to optimize ProVision for specialized applications.
Made in the USA
Specifications:

Cable Length: 18" (457.2mm)
Cable Diameter: .23"
Handle Length: 6" (152.4mm)
Handle Width: 1.43" (36.2mm)Overall Length: 24" (609.6mm)
Weight of Scope w/ Carrying Case: 1 lb. 5.7 oz (615 g)
Field of View: 40°
Optimal Viewing Distance: Min. .8" (20mm); Max. is dependent upon ambient lighting conditions.
Lamp Volts: 2.7 volts (Halogen)
Power Source: 2 AA batteries (not included)
Pressure Necessary to Operate Lamp: 2.9 avg. p/psi; 3.2 max. p/psi


heres a cheaper version that works with a lap top computer

51GhC8fSwCL.jpg

GCA 5.5mm Diameter USB Waterproof 6 Led Endoscope Borescope Inspection Wire Camera (5m)
Price: $18.50 & FREE Shipping on orders over $49. Details


    • Waterproof wire endoscope
    • Diameter:5.5mm head, 5 meters long flexible tube
    • High resolution 1.3MP with 1/12" VGA CMO
    • 6 LED lighting adjustable, can be inspected the hard-to-see areas.
    • Waterproof : IP67, 60°Viewable Angle. Can take photo & video and save in your computer

prod_1588185312.jpg

31fRAa9PwjL.jpg


71747jntrcL._SX522_.jpg

valvetraintray.jpg


valvetraintray1.jpg
 
Last edited:
Back
Top