You are using an out of date browser. It may not display this or other websites correctly.
You should upgrade or use an alternative browser.
You should upgrade or use an alternative browser.
TBucket 200-4R Transmission Project
- Thread starter Indycars
- Start date
Loves302Chevy
"One test is worth a thousand expert opinions."
JohnHancock
Well-Known Member
I think if I was Dorian I would have worn out 2 sets of kneecaps kicking my own ass! Good for you! Did you replace your 2004r with a Muncie? Did I read that right?
I think if I was Dorian I would have worn out 2 sets of kneecaps kicking my own ass! Good for you! Did you replace your 2004r with a Muncie? Did I read that right?
Ooooh, and that was only the trans
The 200-4r was in the Chevelle. Once I installed it I never looked back. The Chevelle is now sold. When I bought the corvette, I wanted the experience of a V8 with manual... Now I think I need manual + OD
JohnHancock
Well-Known Member
Lol. Lots of 5 and 6 speeds out there. With your dedication I know you can make one work.
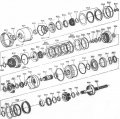
Best to start off with the ATSG drawing to keep everyone orientated.

After removing all the clutch plates, next to come out is the piston (622). Notice all the burned on friction
material. Below you will see that it's all cleaned up. The steels need to move freely along the spline.

You are looking (photo below) at the side that faces the front of the trans, opposite side from photo above. The lips point forward also.

Also had some metal transfer from the steel plates. This would explain the extreme difficulty in removing the
Forward Clutch from the case.

Cleaned up the friction material and metal transfer in 5 places.


After removing all the clutch plates, next to come out is the piston (622). Notice all the burned on friction
material. Below you will see that it's all cleaned up. The steels need to move freely along the spline.

You are looking (photo below) at the side that faces the front of the trans, opposite side from photo above. The lips point forward also.

Also had some metal transfer from the steel plates. This would explain the extreme difficulty in removing the
Forward Clutch from the case.

Cleaned up the friction material and metal transfer in 5 places.

I posted yesterday on this but obviously the post got deleted some how.
Id be surprised if the component that ran through that center where the clip and seal were damaged did not also show at least minor damage, that bent seal and retainer obviously were deformed with a good deal of forces at some point.. or was that the result of a tool used to remove that component?

Id be surprised if the component that ran through that center where the clip and seal were damaged did not also show at least minor damage, that bent seal and retainer obviously were deformed with a good deal of forces at some point.. or was that the result of a tool used to remove that component?
Id be surprised if the component that ran through that center where the clip and seal were damaged did not also show at least minor damage, that bent seal and retainer obviously were deformed with a good deal of forces at some point.. or was that the result of a tool used to remove that component?
After removing the piston, I pulled the seal out so the photo would show which way the lip was
pointing. Sorry, false alarm!
The seal on the outside perimeter has already been removed and therefore is not visible in the
photo.
I'm way past the point below where I'm removing everything from the trans case. I just have
not felt like posting nice annotated photos lately.
Right behind the Input Drum (Also Called "Sun Gear Shell (640) ) ...... is the Low Reverse Clutch.


Ok, so that's all there is to dissembling the transmission. Next is the inspection of any components that
were NOT already obviously bad as they came out.

not felt like posting nice annotated photos lately.
Right behind the Input Drum (Also Called "Sun Gear Shell (640) ) ...... is the Low Reverse Clutch.


Ok, so that's all there is to dissembling the transmission. Next is the inspection of any components that
were NOT already obviously bad as they came out.

threads related to cleaning parts and prep.
http://garage.grumpysperformance.co...an-aluminum-intake-manifold.14410/#post-74196
http://garage.grumpysperformance.com/index.php?threads/block-prep.125/
http://garage.grumpysperformance.com/index.php?threads/parts-prep-cleaning.6255/#post-76350
http://garage.grumpysperformance.co...cking-blocks-heads-for-cracks.3363/#post-8862
http://garage.grumpysperformance.co...nt-moore-tools-related-info.12148/#post-74995
http://garage.grumpysperformance.co...n-buying-used-engine-blocks.14305/#post-73107
http://garage.grumpysperformance.com/index.php?threads/precision-measuring-tools.1390/#post-68861
http://garage.grumpysperformance.com/index.php?threads/finding-a-machine-shop.321/#post-59253
http://garage.grumpysperformance.co...engine-stand-mods-accesories.3724/#post-26986
Strictly Attitude
solid fixture here in the forum
Rick what are your plans for the converter? New one?
Strictly Attitude
solid fixture here in the forum
Rick it is all the material that was pumped through it would be my concern. No idea on how to flush it out.


