You are using an out of date browser. It may not display this or other websites correctly.
You should upgrade or use an alternative browser.
You should upgrade or use an alternative browser.
Hi from Germany
- Thread starter 55C150
- Start date
T-Test
solid fixture here in the forum
I can't finish the installation, my 11mm drill is gone. I will finish it in the next days.
Told you about loaning them out or forgetting to cut their legs off!
wisesurfer84
Member
Great progress!
55C150
Well-Known Member
Smal progress.
A short foreword.
In the last two years I was thinking about a 17" Schroeder Racing steering wheel to install it in my 55. The 230$ + shipping + import tax etc. was one of a few points why it was not happened until today. So last November I had the money to give it to myself as a christmas present. I looked at the website of Schroeder Racing and was a little shocked. They closed the business a few month before. No way to get the steering wheel.
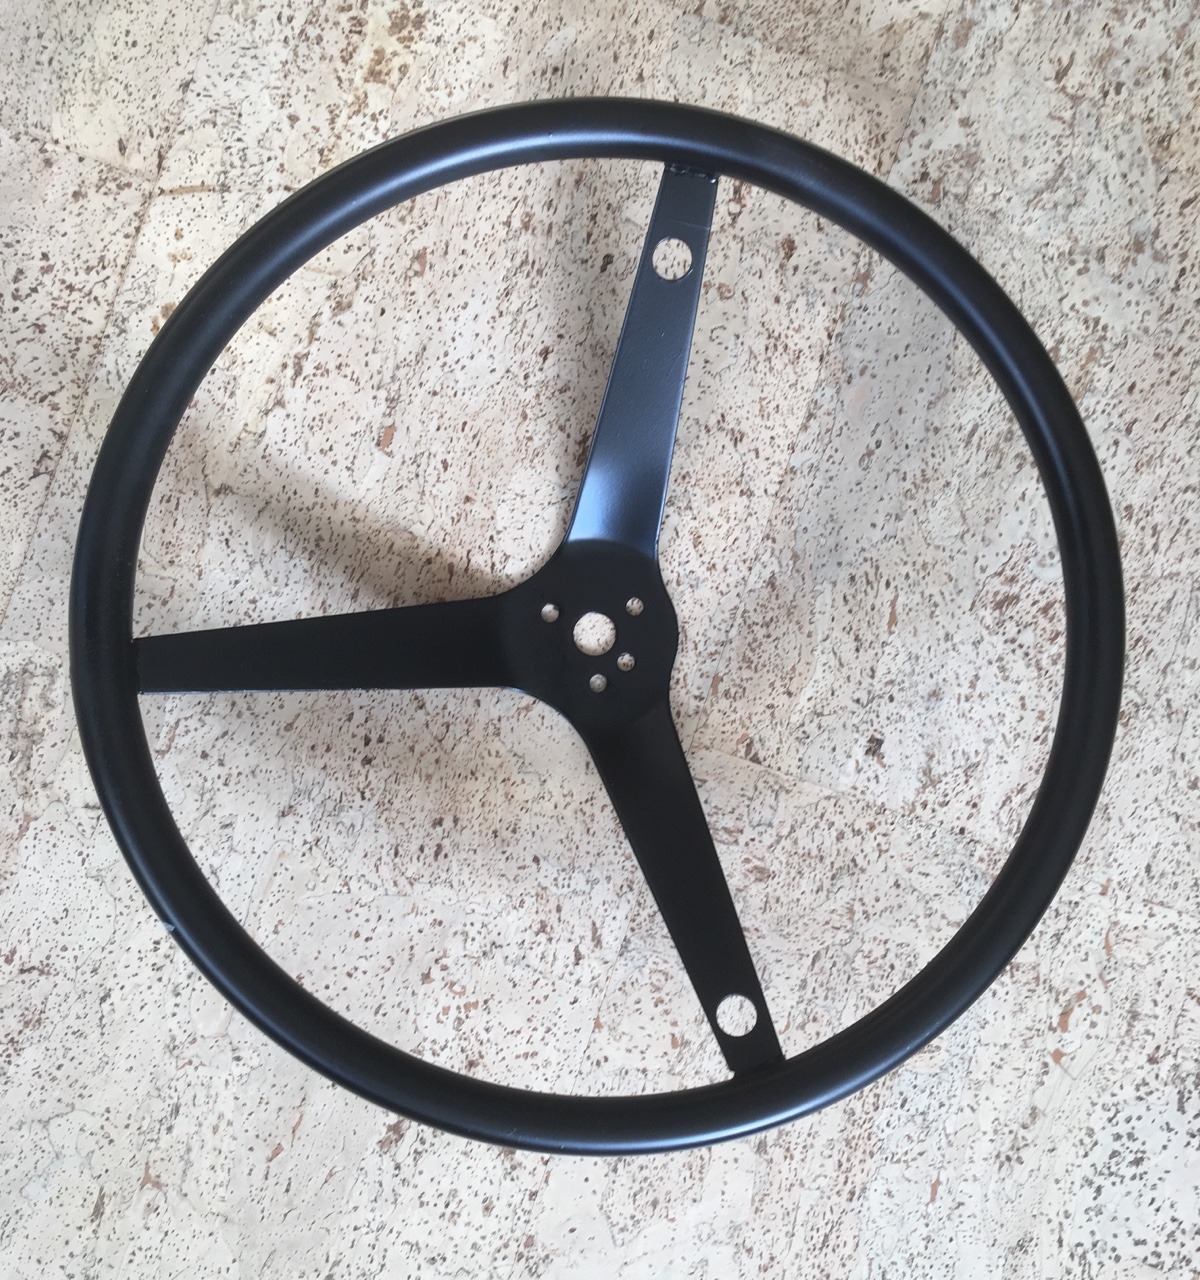
So I looked at Ebay and other sites with no result. I found some 15" and 15.5" steering wheels, but they are too small for my non power steering. A few weeks later I found a 16" from a racing series, it was bare metal. The price was 38$ + 24$ shipping, great price for me. I bought it.
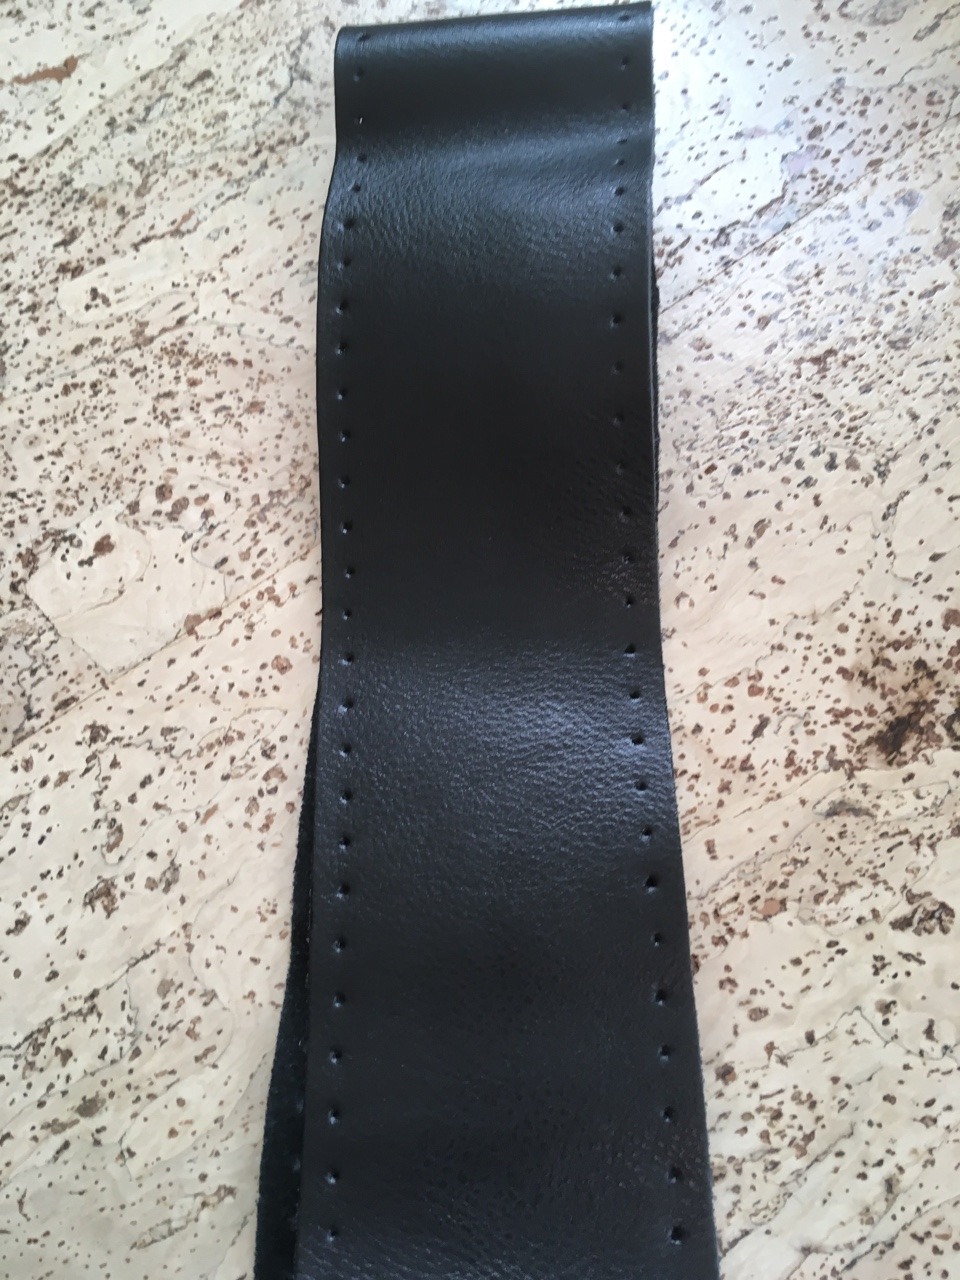
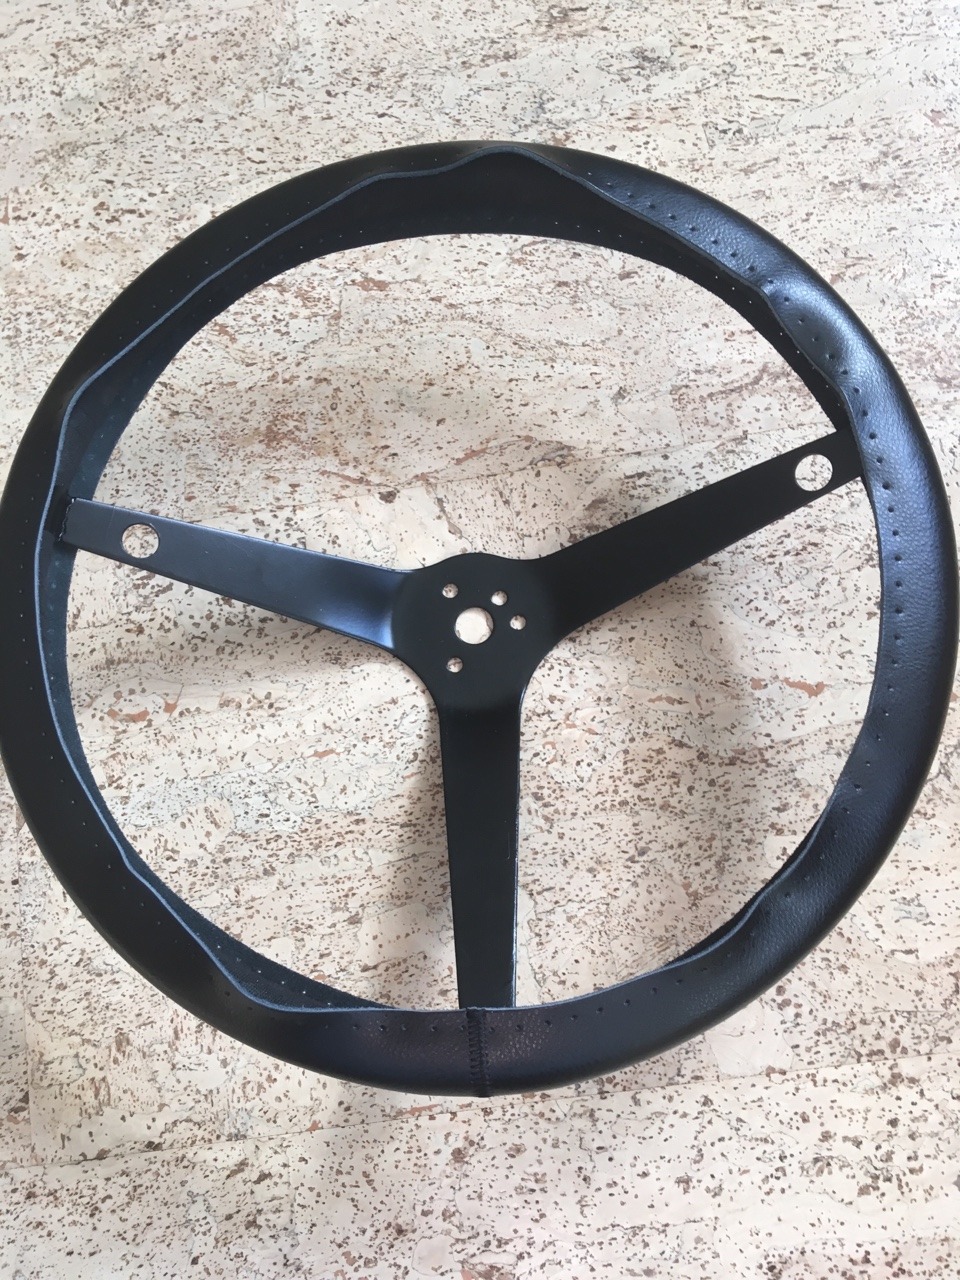
When it arrived it looked good and was solid. The paint was faded away on some spots, but that was no problem. In Germany it is not alowed to have a bare metal steering wheel in a street car. So I searched for a solution to get it wrapped. I found something interesting and cheap to try it out. It is a DIY leather steering wheel cover.
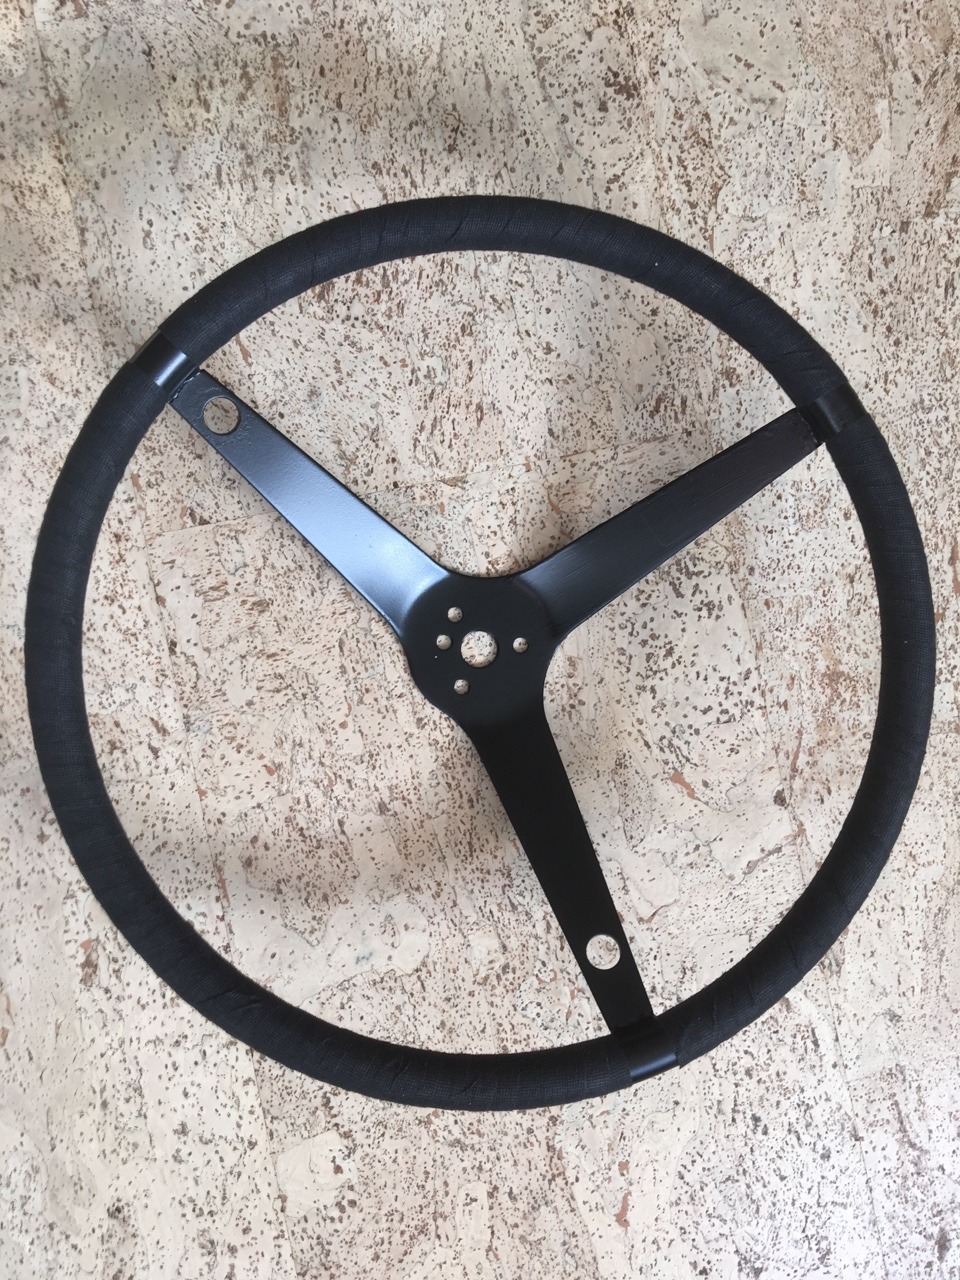
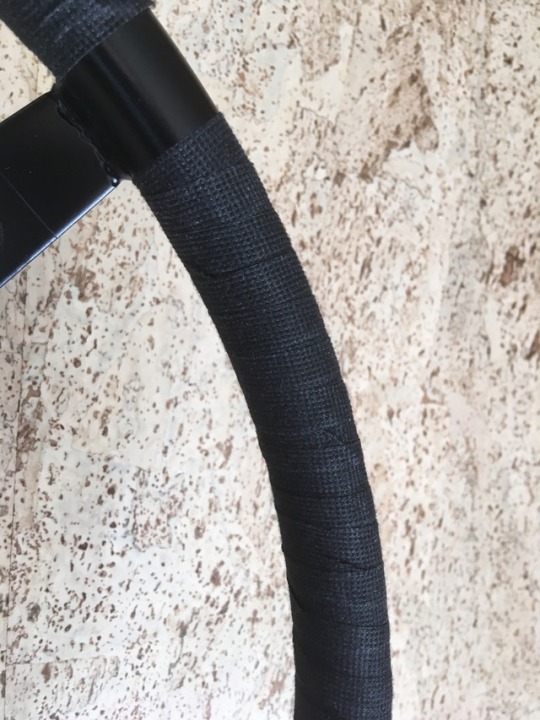
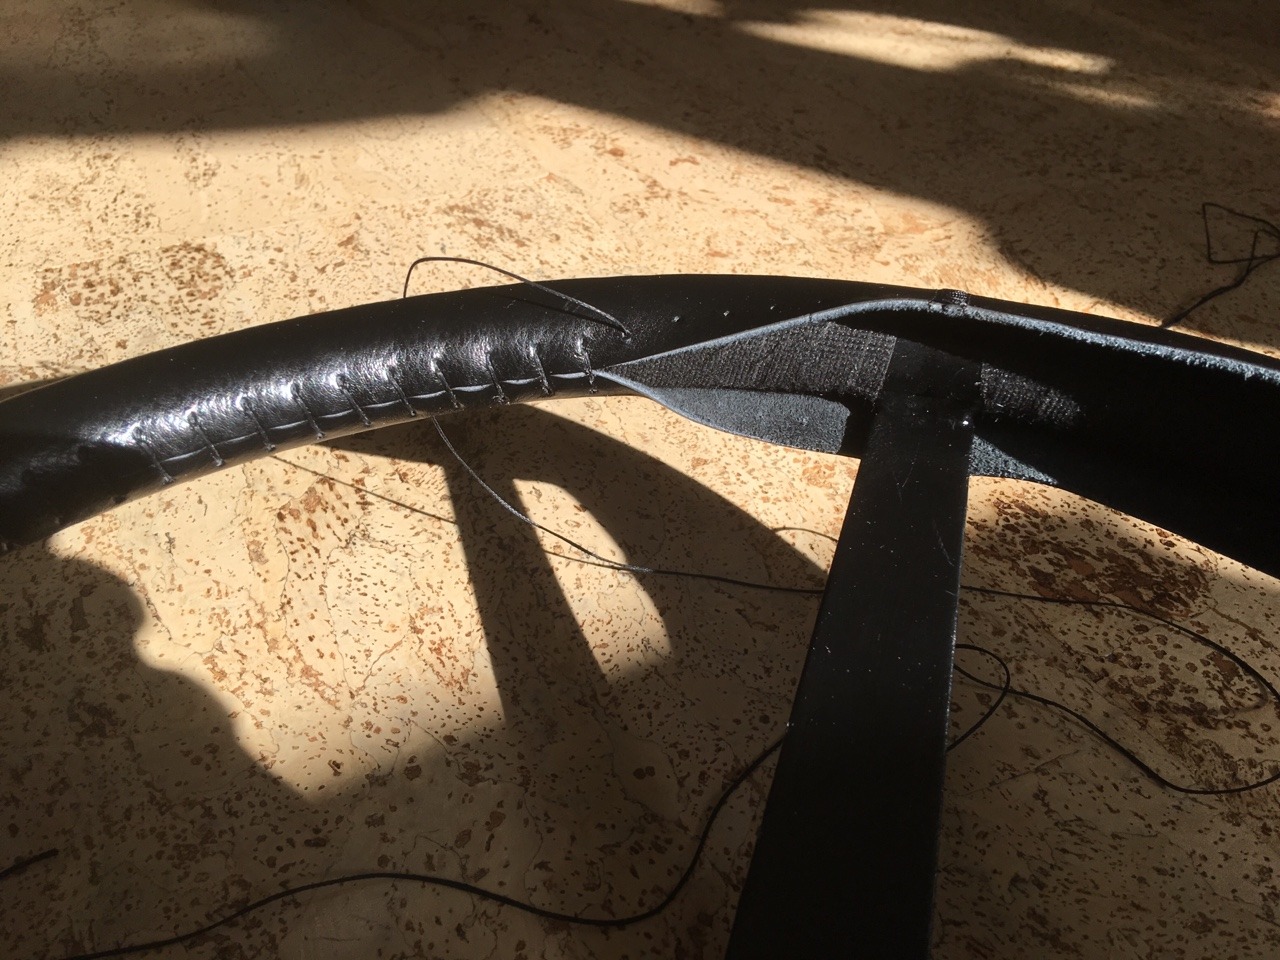
So I started with the small project. I removed some rust and painted it flat black. After that I wrapped a fabric tape around it, to get a little bigger diameter and my thought was that the leather would not slip around so easy.
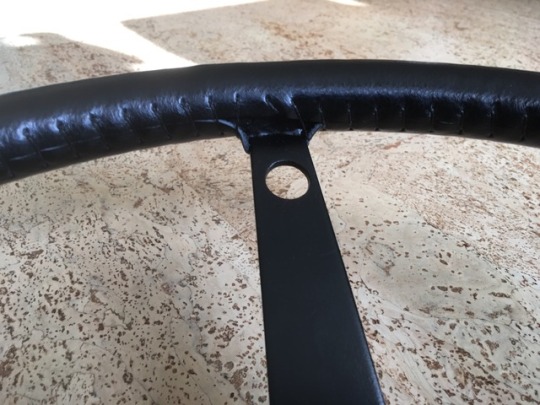
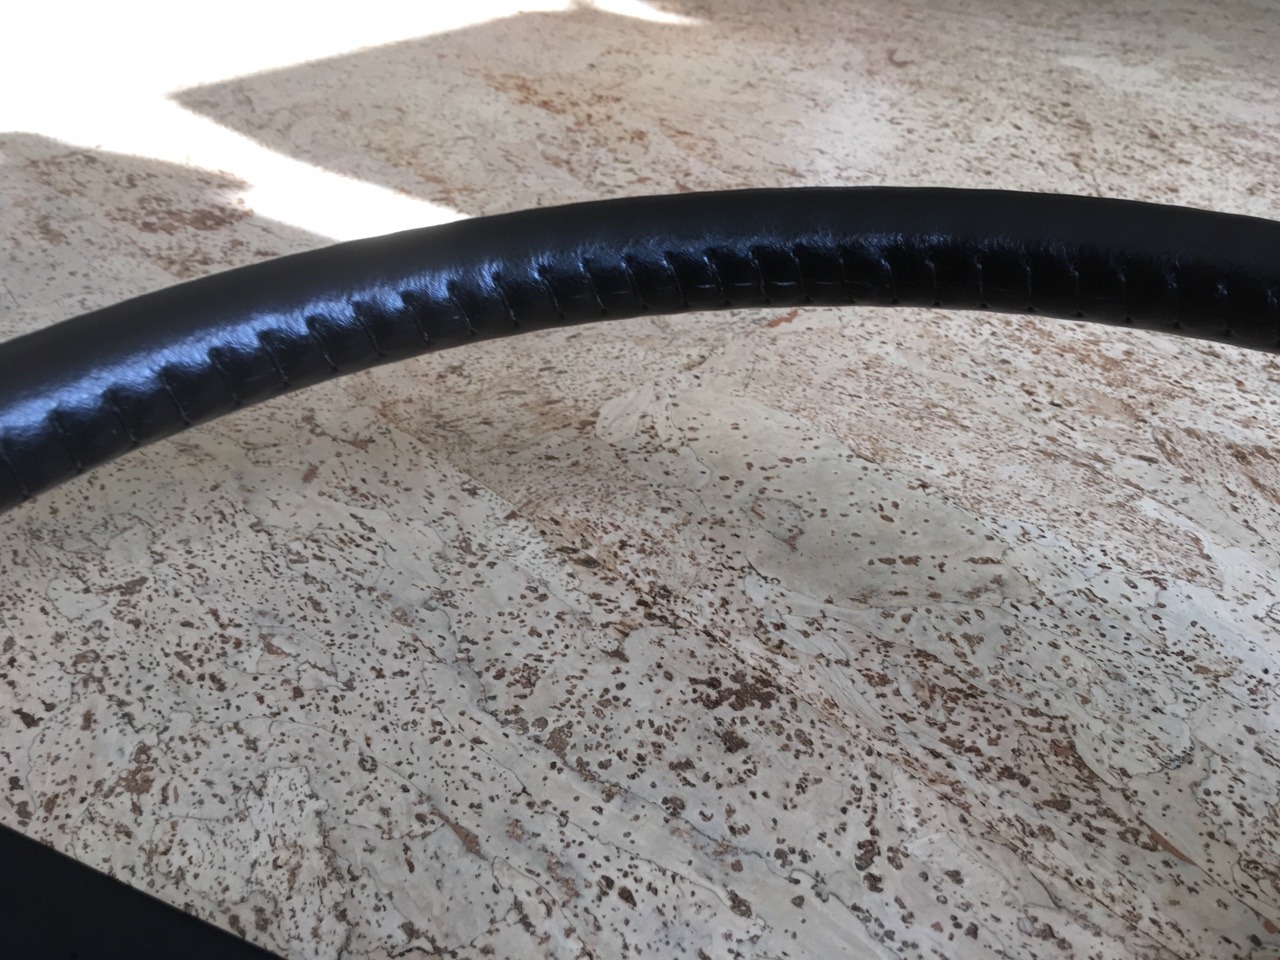
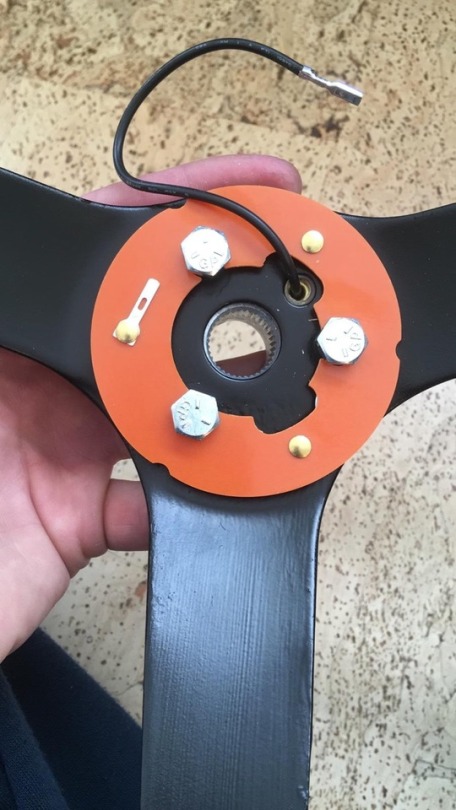
Know I wrapped the leather cover around, 1.5 hours later I had a good looking steering wheel. I cost me around 90$ total.
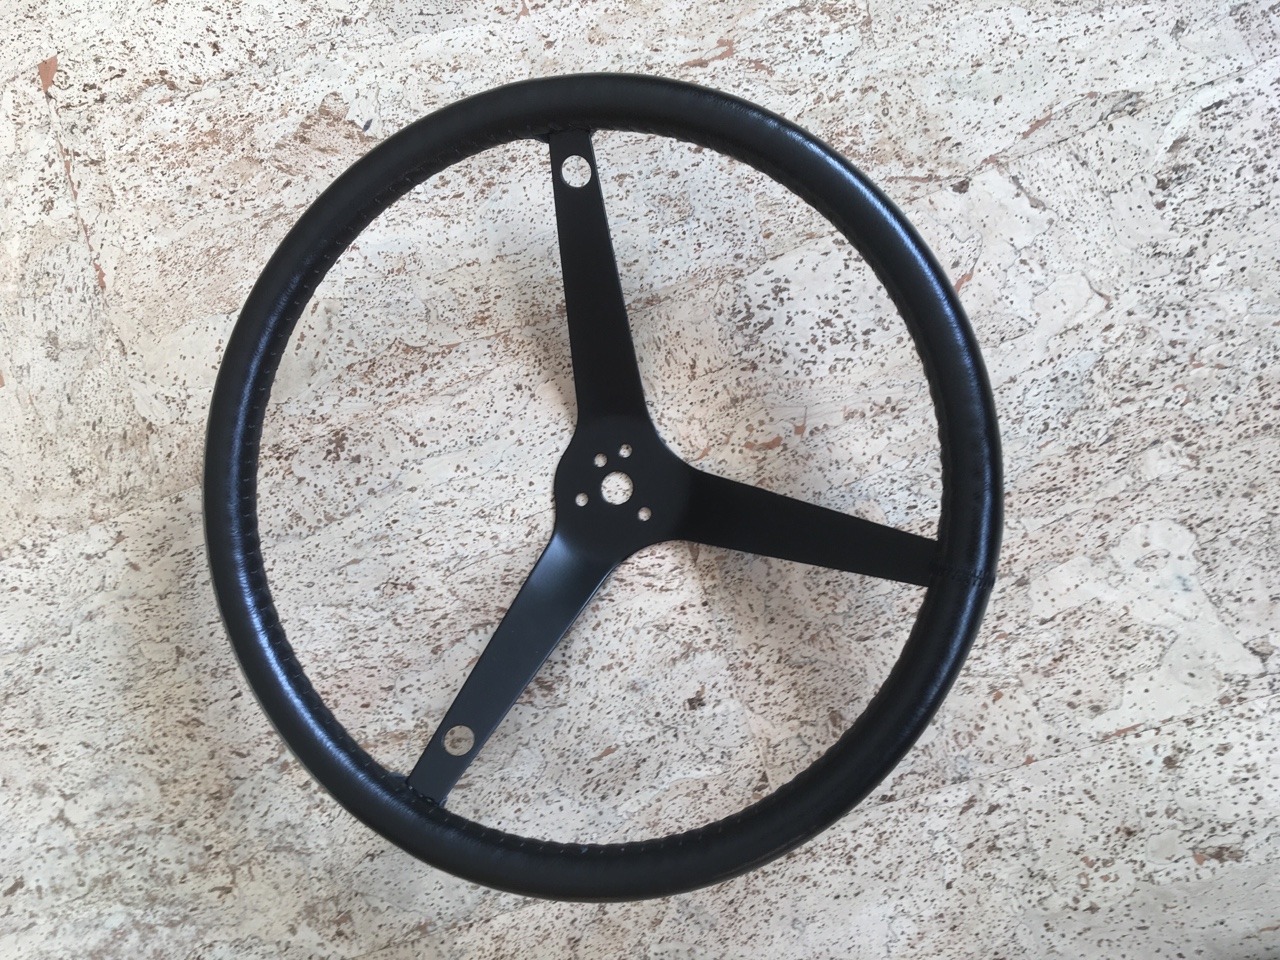
I ordered a new Grant adaptor

A short foreword.
In the last two years I was thinking about a 17" Schroeder Racing steering wheel to install it in my 55. The 230$ + shipping + import tax etc. was one of a few points why it was not happened until today. So last November I had the money to give it to myself as a christmas present. I looked at the website of Schroeder Racing and was a little shocked. They closed the business a few month before. No way to get the steering wheel.
So I looked at Ebay and other sites with no result. I found some 15" and 15.5" steering wheels, but they are too small for my non power steering. A few weeks later I found a 16" from a racing series, it was bare metal. The price was 38$ + 24$ shipping, great price for me. I bought it.
When it arrived it looked good and was solid. The paint was faded away on some spots, but that was no problem. In Germany it is not alowed to have a bare metal steering wheel in a street car. So I searched for a solution to get it wrapped. I found something interesting and cheap to try it out. It is a DIY leather steering wheel cover.
So I started with the small project. I removed some rust and painted it flat black. After that I wrapped a fabric tape around it, to get a little bigger diameter and my thought was that the leather would not slip around so easy.
Know I wrapped the leather cover around, 1.5 hours later I had a good looking steering wheel. I cost me around 90$ total.
I ordered a new Grant adaptor
I love the photo quality and number of photos showing the step by step process,
and the finished product produced is very nice!
(matches the application and intended use really well!)
Its the attention to detail and custom work that makes the car rather unique! congrats!
and the finished product produced is very nice!
(matches the application and intended use really well!)
Its the attention to detail and custom work that makes the car rather unique! congrats!
Maniacmechanic1
solid fixture here in the forum
LOOKS GREAT !Smal progress.
A short foreword.
In the last two years I was thinking about a 17" Schroeder Racing steering wheel to install it in my 55. The 230$ + shipping + import tax etc. was one of a few points why it was not happened until today. So last November I had the money to give it to myself as a christmas present. I looked at the website of Schroeder Racing and was a little shocked. They closed the business a few month before. No way to get the steering wheel.
So I looked at Ebay and other sites with no result. I found some 15" and 15.5" steering wheels, but they are too small for my non power steering. A few weeks later I found a 16" from a racing series, it was bare metal. The price was 38$ + 24$ shipping, great price for me. I bought it.
When it arrived it looked good and was solid. The paint was faded away on some spots, but that was no problem. In Germany it is not alowed to have a bare metal steering wheel in a street car. So I searched for a solution to get it wrapped. I found something interesting and cheap to try it out. It is a DIY leather steering wheel cover.
So I started with the small project. I removed some rust and painted it flat black. After that I wrapped a fabric tape around it, to get a little bigger diameter and my thought was that the leather would not slip around so easy.
Know I wrapped the leather cover around, 1.5 hours later I had a good looking steering wheel. I cost me around 90$ total.
I ordered a new Grant adaptor
55C150
Well-Known Member
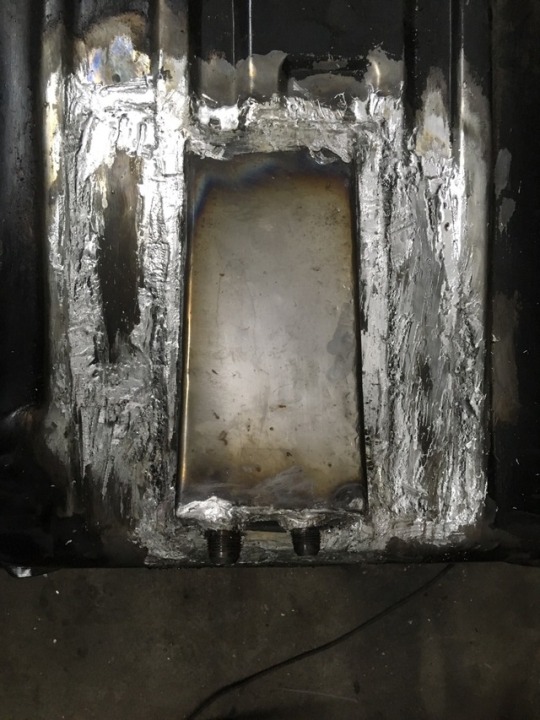
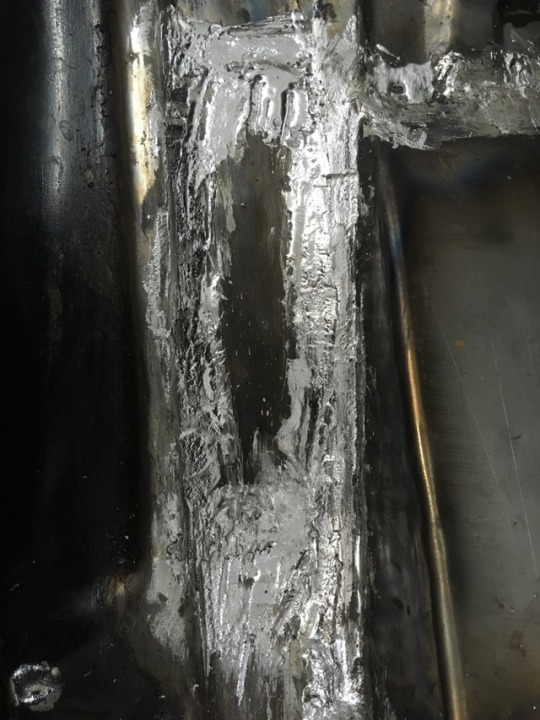
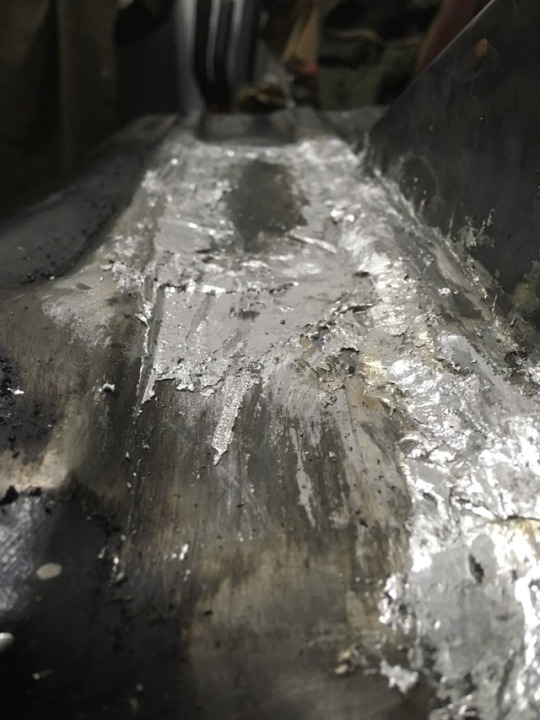
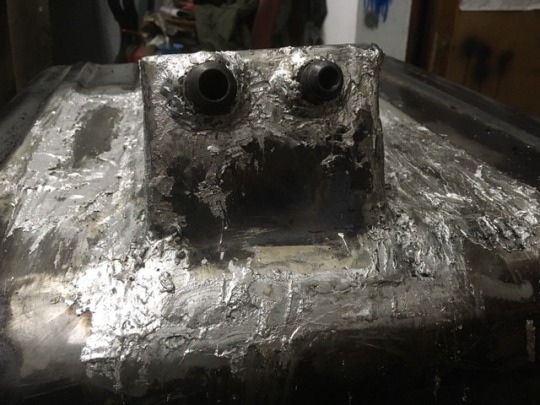
I tried to build my own fuel tank sump. I formed a flat piece of metal to an triangle. It worked ok, but when I started to weld it on the tank the whole hole massaker starts. The fuel tank was thin on many places where I had to weld. So one hole after another showed up. After patching the first three it looked terrible. So I cutted two big pieces out to fill it with two new pieces instead of six or more. What a waste of time when I tried to patch the small holes.
These are the areas where the straps holding the tank.
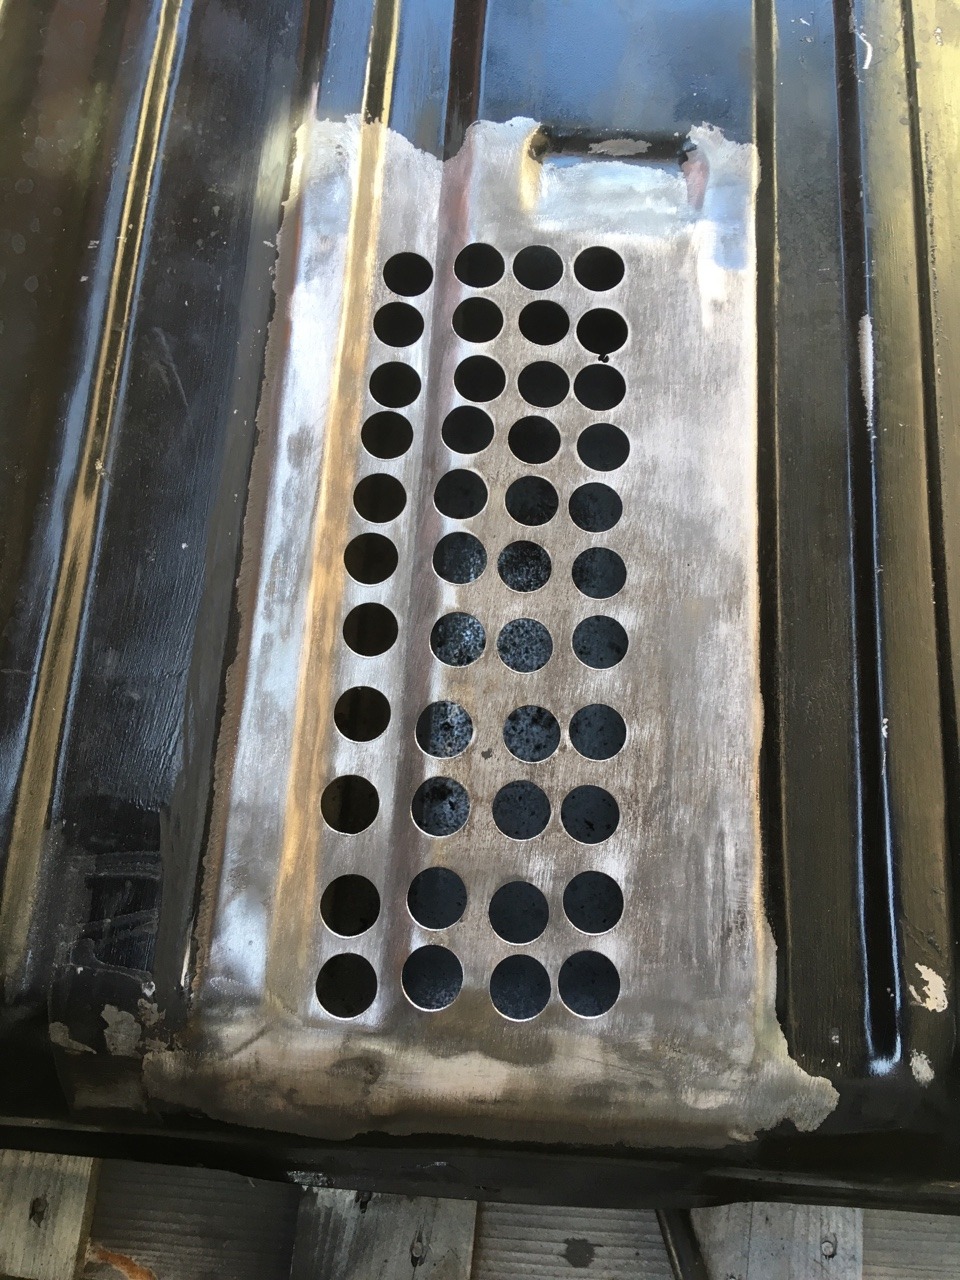
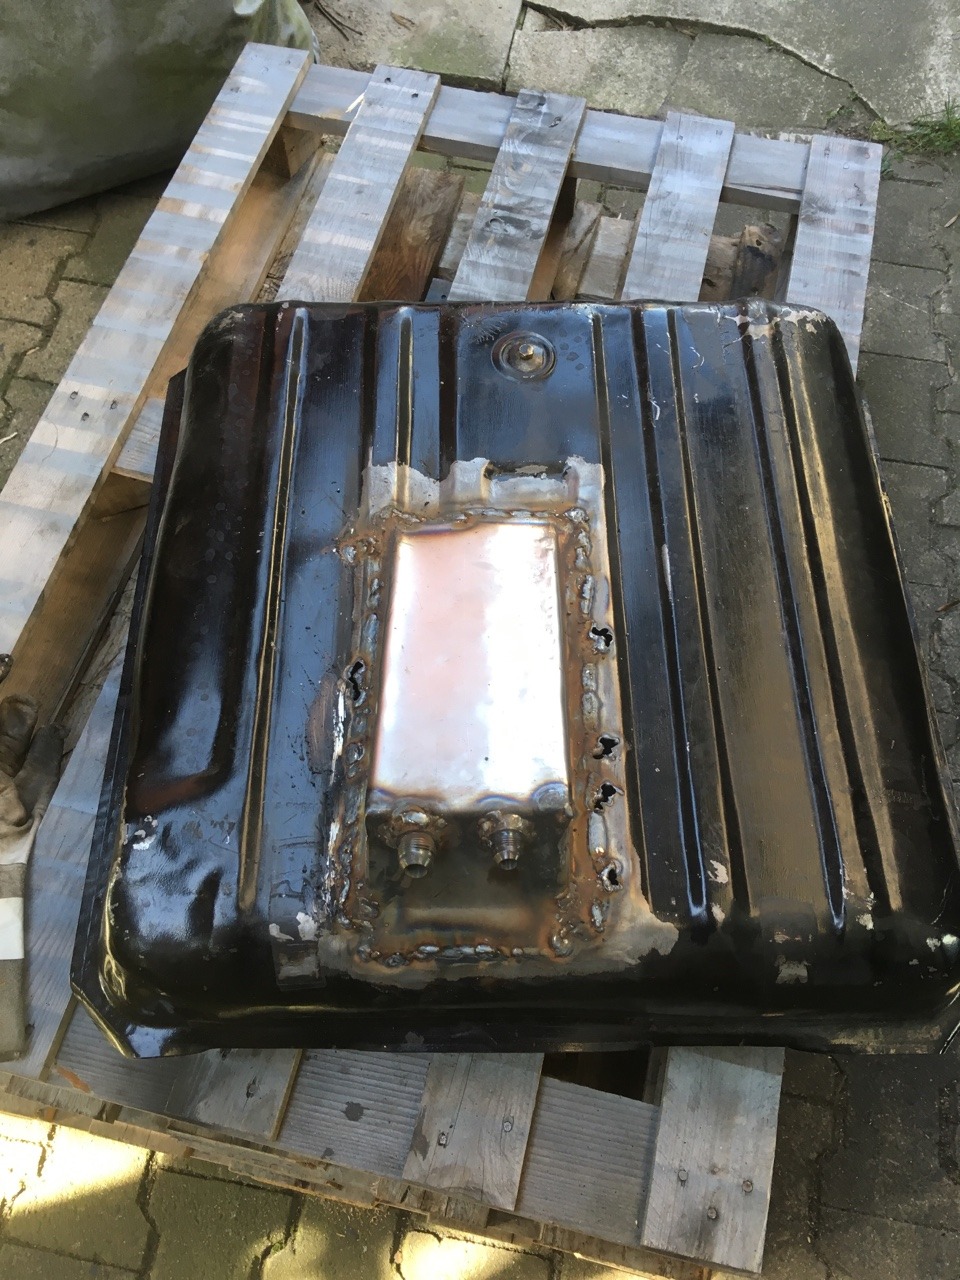

Wish me luck to get it done tomorrow with this two holes filled.
These are the areas where the straps holding the tank.
Wish me luck to get it done tomorrow with this two holes filled.
Maniacmechanic1
solid fixture here in the forum
Set the gas tank on a wood picnic table. Fill with water from a garden hose & let it sit. Watch for leaks.
Often have 1 or several.
Often have 1 or several.
55C150
Well-Known Member
Set the gas tank on a wood picnic table. Fill with water from a garden hose & let it sit. Watch for leaks.
Often have 1 or several.
That was the plan after I finished this project.
wow! what type of welder and fill rod, amps was used?
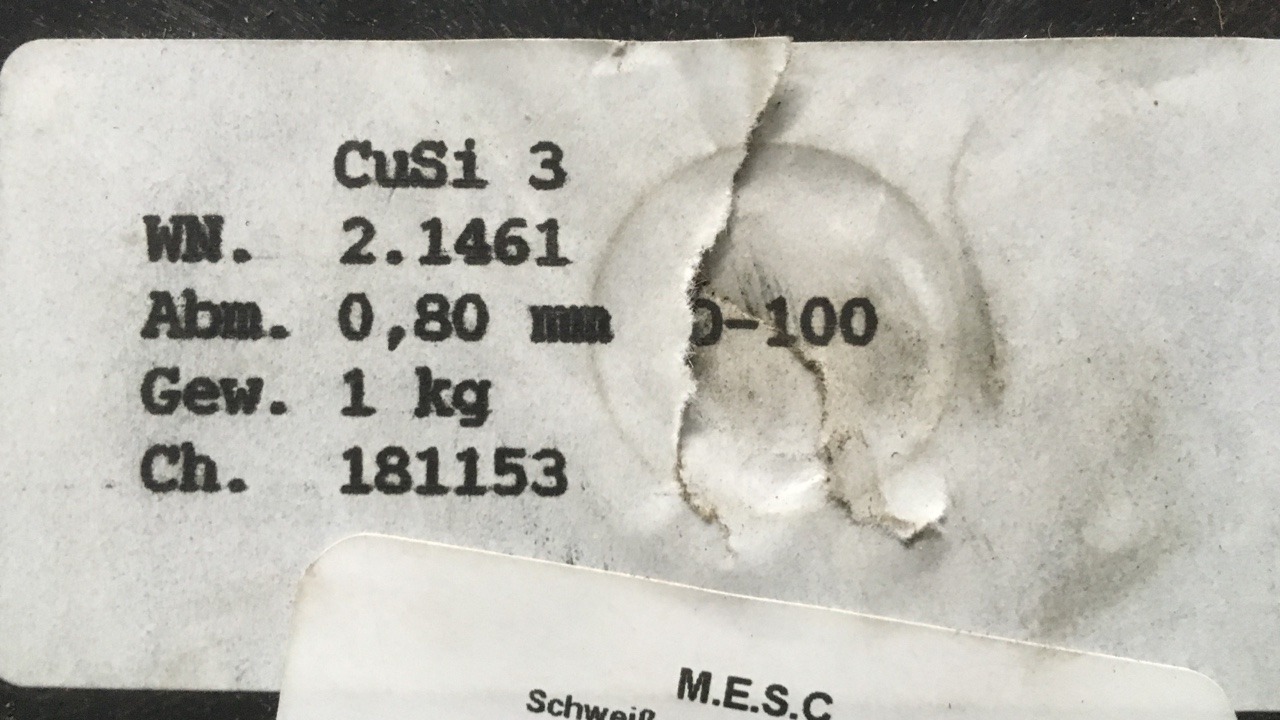
It is an 20+ year old welder from Merkle, a german Company. Max Amp are 170. I can only set the thickness of the used material and the welder set the ampere automatically. Don't know the exact Amp when I'm welding. The Gas Jet is two years old. Sometimes the welder works great and sometimes this happens. Fill rod is .8 Milimeter.
welding thin sheet steel, especially, if its coated or galvanized can be a huge P.I.T.A.
and AS I'M SURE EVERYONE REALIZES,
fuel tanks do require special precautions,
any fuel fumes near welding are a potential danger.
I.ve generally found washing them out with dish washing detergent and water ,
several times,and then, filling and flushing the interior thoroughly on them with the TIG welder Co2 shield gas ,
and sealing with duct tape is required,
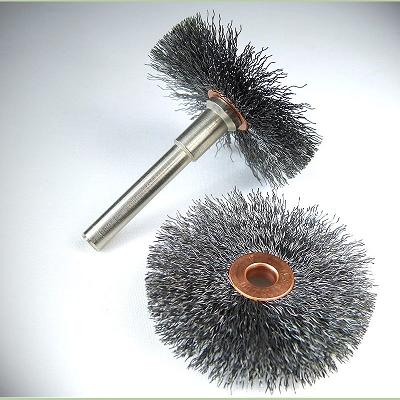
careful surface cleaning of the area to be mig welded with a drill and rotary brush, to prep the weld surface , down to bare steel over the entire area to be welded, generally helps
as a pro welder you most likely have far more experience and skill than I have,
but dozens of people if not hundreds will read through this thread over time,
so I may as well post useful info here.
and
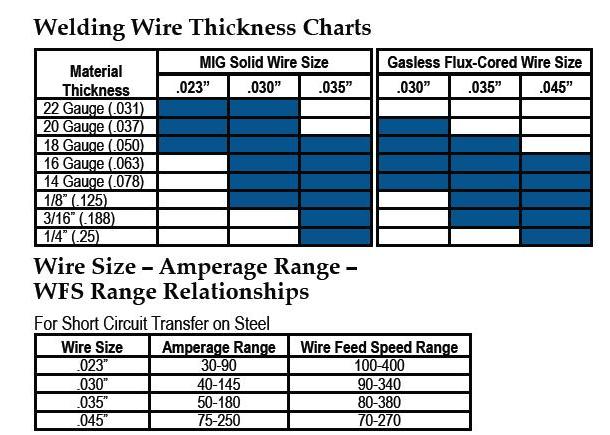
a thin MIG wire .024 vs .030 or .035 generally works to your advantage
https://www.mscdirect.com/product/details/36172229
read the link
http://garage.grumpysperformance.com/index.php?threads/installing-a-fuel-cell.733/
http://garage.grumpysperformance.com/index.php?threads/shield-gas-selection-for-welding.1108/
Ive seen good work done with both miller and lincold 110 volt 120 and 140 amp welders so top quality equipment , like my 252 mig are not required.
and AS I'M SURE EVERYONE REALIZES,
fuel tanks do require special precautions,
any fuel fumes near welding are a potential danger.
I.ve generally found washing them out with dish washing detergent and water ,
several times,and then, filling and flushing the interior thoroughly on them with the TIG welder Co2 shield gas ,
and sealing with duct tape is required,
careful surface cleaning of the area to be mig welded with a drill and rotary brush, to prep the weld surface , down to bare steel over the entire area to be welded, generally helps
as a pro welder you most likely have far more experience and skill than I have,
but dozens of people if not hundreds will read through this thread over time,
so I may as well post useful info here.
and
a thin MIG wire .024 vs .030 or .035 generally works to your advantage
https://www.mscdirect.com/product/details/36172229
read the link
http://garage.grumpysperformance.com/index.php?threads/installing-a-fuel-cell.733/
http://garage.grumpysperformance.com/index.php?threads/shield-gas-selection-for-welding.1108/
Ive seen good work done with both miller and lincold 110 volt 120 and 140 amp welders so top quality equipment , like my 252 mig are not required.
Last edited:
next time your filling a few pin hole leaks you may want to consider use of epoxy, lead certainly works but it takes considerable experience to get the job done and looking good.
years ago I did considerable solder body work, but the metal must be carefully prepped and you need the correct tools and both the correct solder, torches and body butter (flux)
read this thread
http://garage.grumpysperformance.co...ol-lead-tin-auto-body-filler.8350/#post-33690
Maniacmechanic1
solid fixture here in the forum
The Original Slow normal dry time J-B Weld Epoxy is Fuel resistent.Is JB Weld fuel resistant? I bought a body lead kit with all needed tools