I found this posted else ware but figured some guys here could use the info also
When you upgrade to a 200R4 OD transmission to get the benefits of the 0.67 overdrive, it is rare that the automatic shifting sequence occurs at the proper speed. Most likely you have lower rear end gears and a cam so you want the shifts to occur at a higher RPM but the donor tranny is likely set up for a grocery getter and results in 1-2, 2-3 shifts way too slow for your setup. Thus you are stuck with manual shifting which is fun but there are times you want to set it in drive and run it automatically.
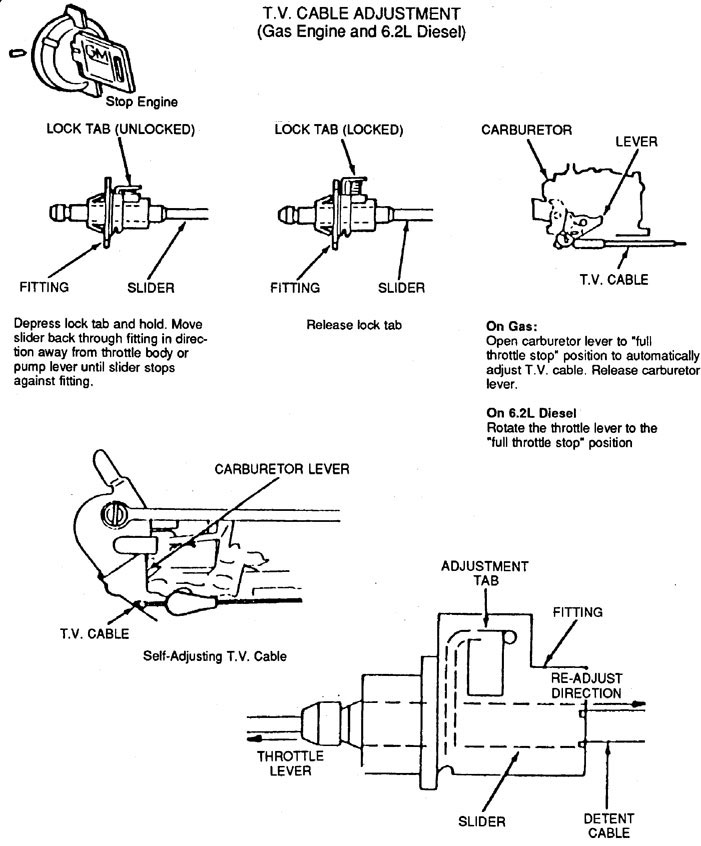
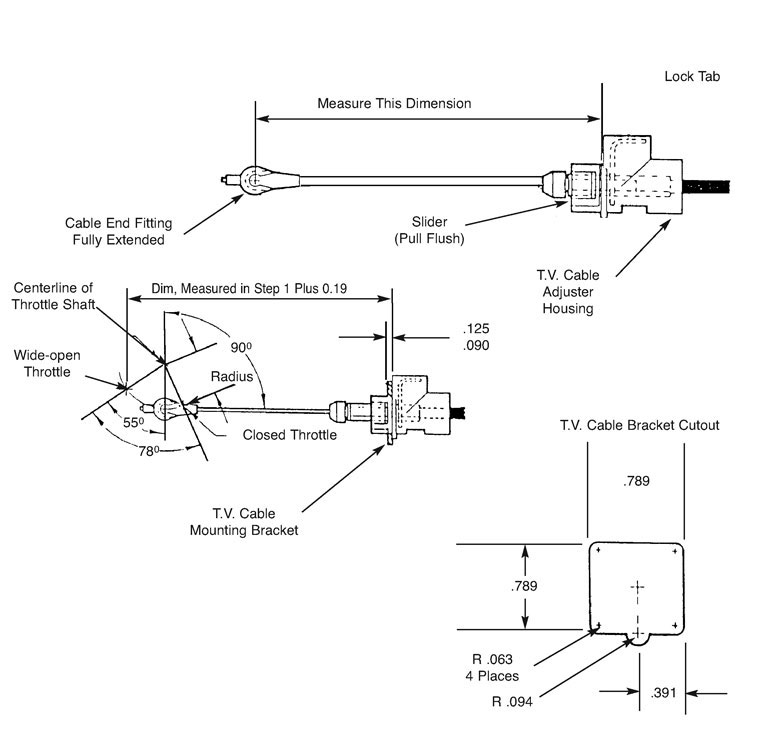
A lot of people suggest changing the shift points by adjusting the throttle cable. DON'T DO THAT! That cable needs to be set properly and left alone. It is the governor that sets the shift timing and you have to modify it.
We did ours on our '59 El Camino running a 307 w/ corvette cam & 283 PowerPack heads. We put 3.54 gears in the rear so our auto shifts were occurring @ ~1000rpm lugging the engine badly.
We bought a couple spare governors from PATC Automotive who specializes in 200R4 trannys.
http://www.transmissioncenter.net/200-4r.htm
I am giving them a plug because their authentic GM parts governors are less than $10! We bought two to play with.
It is a hassle to do this modification because you need to take the pan off to get at the governor. There are YouTube videos on doing that step so look it up if you don't know where the governor is. It is an easy swap. Here is a good video
http://video.search.yahoo.com/video/pla ... 11a6g44gh&
http://video.search.yahoo.com/video/pla ... 11a6g44gh&
http://video.search.yahoo.com/video/pla ... 11a6g44gh&
Photo 1 shows the modified governor on the left and the stock one on the right. We took a huge amount of weight off the modified one (power hacksaw and files) but we took the design from a picture of a governor from a Grand National Buick. Plus we still have two more to play with if we screwed this one up. We cut half the skirt off the small weight and ground the top of the large one even with the top of the small one, about 1/8".
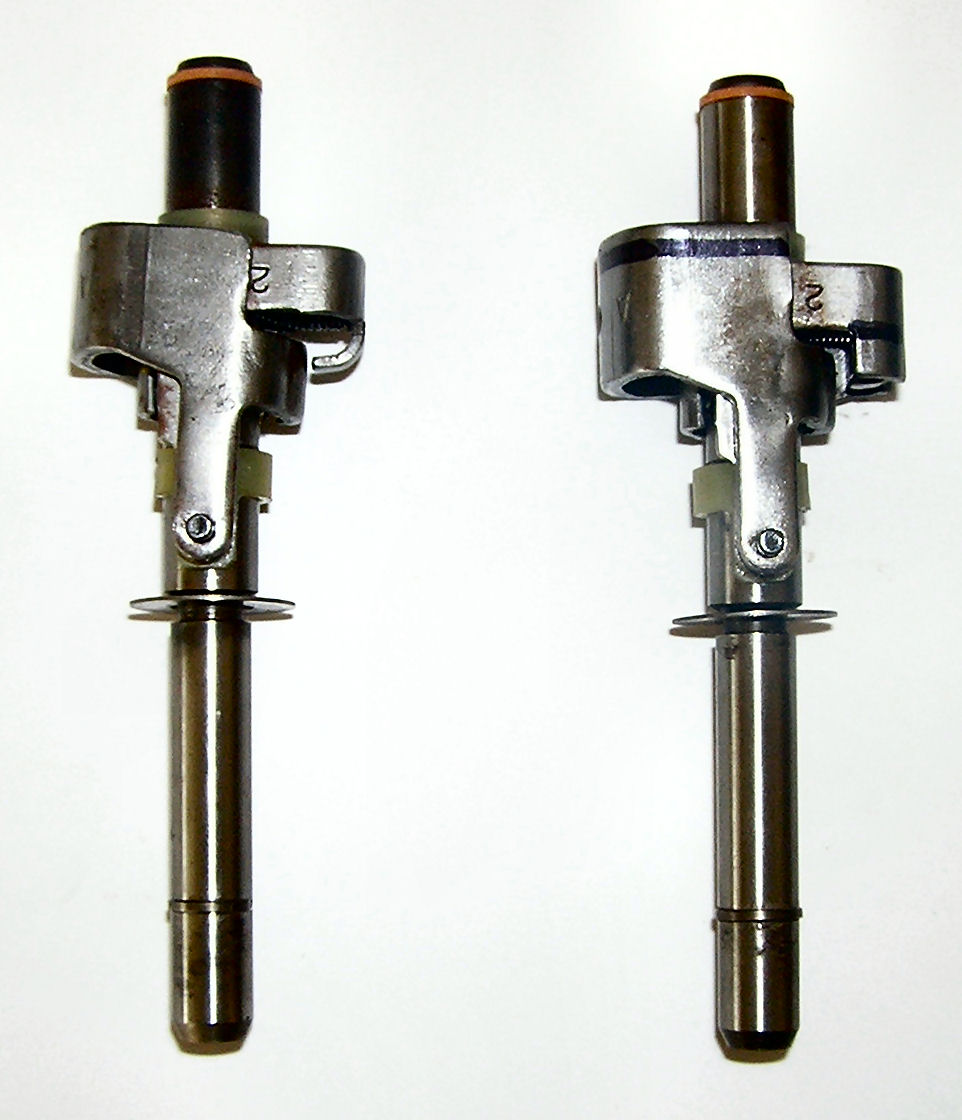
Photo 2 shows an end view of the small weight. These things come apart very easily knocking out the pin at the base of the weights. Watch where the two ball bearings go! When putting them back together, 'glue' the bearings in their holes w/ Vaseline.
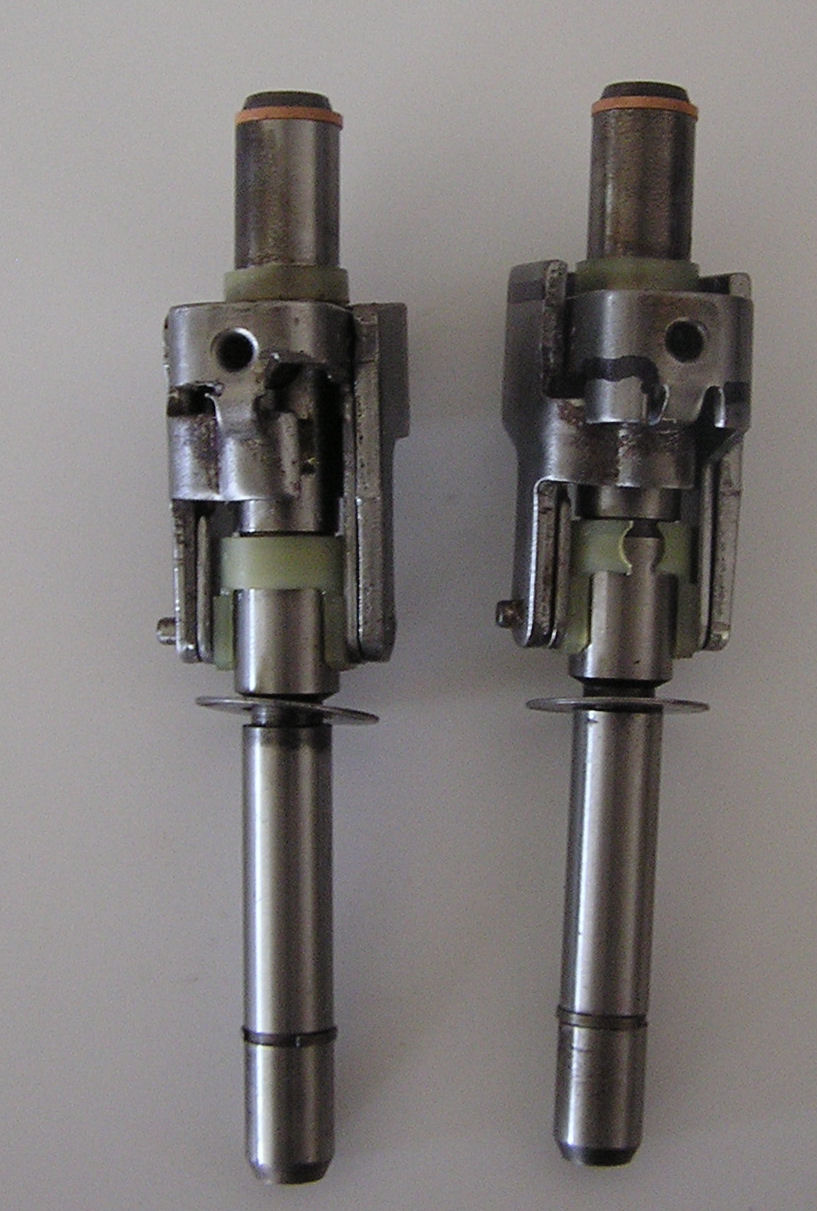
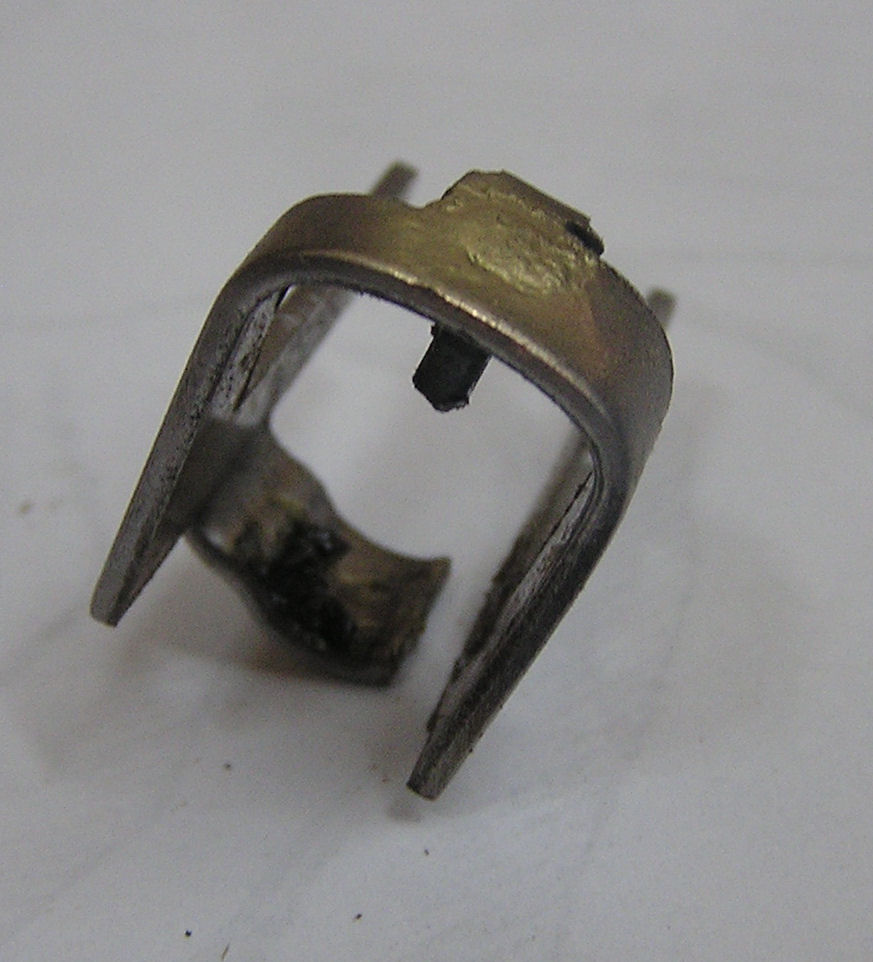
Photo 3 shows a couple more modifications we made. First we took out the spring in the big weight leaving the spring in the small one. We took our cue on this again from the Grand National Buick version. Second, we brazed a short nail in the spring hole in the small weight. Word is that that spring has a tendency to hop out on hard shifts so this is a common hi performance mod.

Photo 4 shows another view of the nail.
There are other sites on the web showing how to calibrate the speedometer by changing our the big plastic barrel gear on the shaft of the govern with the speedo gear that is removed by taking off the speedo cable at the back of the tranny. Do that while you are doing this. I think PATC sells the cheapest gears too. They have a ratio calculator on their site so if you know your tire diameter and rear end ratio, you get the perfect speedo ratio.
Oh, we ended with perfect shift points for the street; ~2000rpm @ 1-2 and 3000rpm @ 2-3. We havent tried it yet but I assume at WOT the shiftw will rise accordingly to higher in the power band.
When you upgrade to a 200R4 OD transmission to get the benefits of the 0.67 overdrive, it is rare that the automatic shifting sequence occurs at the proper speed. Most likely you have lower rear end gears and a cam so you want the shifts to occur at a higher RPM but the donor tranny is likely set up for a grocery getter and results in 1-2, 2-3 shifts way too slow for your setup. Thus you are stuck with manual shifting which is fun but there are times you want to set it in drive and run it automatically.
A lot of people suggest changing the shift points by adjusting the throttle cable. DON'T DO THAT! That cable needs to be set properly and left alone. It is the governor that sets the shift timing and you have to modify it.
We did ours on our '59 El Camino running a 307 w/ corvette cam & 283 PowerPack heads. We put 3.54 gears in the rear so our auto shifts were occurring @ ~1000rpm lugging the engine badly.
We bought a couple spare governors from PATC Automotive who specializes in 200R4 trannys.
http://www.transmissioncenter.net/200-4r.htm
I am giving them a plug because their authentic GM parts governors are less than $10! We bought two to play with.
It is a hassle to do this modification because you need to take the pan off to get at the governor. There are YouTube videos on doing that step so look it up if you don't know where the governor is. It is an easy swap. Here is a good video
http://video.search.yahoo.com/video/pla ... 11a6g44gh&
http://video.search.yahoo.com/video/pla ... 11a6g44gh&
http://video.search.yahoo.com/video/pla ... 11a6g44gh&
Photo 1 shows the modified governor on the left and the stock one on the right. We took a huge amount of weight off the modified one (power hacksaw and files) but we took the design from a picture of a governor from a Grand National Buick. Plus we still have two more to play with if we screwed this one up. We cut half the skirt off the small weight and ground the top of the large one even with the top of the small one, about 1/8".
Photo 2 shows an end view of the small weight. These things come apart very easily knocking out the pin at the base of the weights. Watch where the two ball bearings go! When putting them back together, 'glue' the bearings in their holes w/ Vaseline.
Photo 3 shows a couple more modifications we made. First we took out the spring in the big weight leaving the spring in the small one. We took our cue on this again from the Grand National Buick version. Second, we brazed a short nail in the spring hole in the small weight. Word is that that spring has a tendency to hop out on hard shifts so this is a common hi performance mod.
Photo 4 shows another view of the nail.
There are other sites on the web showing how to calibrate the speedometer by changing our the big plastic barrel gear on the shaft of the govern with the speedo gear that is removed by taking off the speedo cable at the back of the tranny. Do that while you are doing this. I think PATC sells the cheapest gears too. They have a ratio calculator on their site so if you know your tire diameter and rear end ratio, you get the perfect speedo ratio.
Oh, we ended with perfect shift points for the street; ~2000rpm @ 1-2 and 3000rpm @ 2-3. We havent tried it yet but I assume at WOT the shiftw will rise accordingly to higher in the power band.