400ci small block fuellie heads which cams should be used

Right cranks back form grinding Wednesday.
Out to be balanced Thursday.back on Friday.
Youngsters can work over the weekend
 
Right update

Rolling road in place !
Crankshaft ground.
Tomorrow balancing.
Brackets for fuellies without mounting holes
Being made with our waterjet !
Can't wait !
 
clear pictures of the project as its progressing, would be great
 
Hello,

i'm one of the students working on the 400Ci SBC ,

When we dissasembled the heads with the old springs there were rings underneath the springs. ( ring shown in picture).
IMG-20180608-WA0000.jpeg

Do we have to use those rings for our new springs also?

https://www.summitracing.com/int/parts/cca-982-kit
Number of Springs Per Valve: Single

Valve Spring Style: Conical

Valve Stem Diameter (in): 0.344 in.

Valve Stem Diameter (mm): 8.73mm

Retainers Included: Yes

Retainer Material: Steel

Locks Included: Yes

Lock Style: 7 degree

Lock Groove Quantity: 1-groove

Lock Material: Steel

Outside Diameter of Outer Spring (in): 1.454 in.

Coil Bind Height (in): 1.040 in.

Damper Spring Included: No

Spring Rate (lbs/in): 362 lbs./in.

Inside Diameter of Outer Spring (in): 1.070 in.

Inside Diameter of Inner Spring (in): 0.886 in.

Valve Springs Coated: No

Valve Stem Seals Included: Yes

Valve Guide Diameter (in): 0.502 in.
 
Some pics
More to Come later
index.php

index.php

index.php
 

Attachments

  • 20180608_141550-1280x720.jpg
    20180608_141550-1280x720.jpg
    115.7 KB · Views: 25
  • 20180608_141557-1280x720.jpg
    20180608_141557-1280x720.jpg
    121.5 KB · Views: 28
  • 20180608_141547-1280x720.jpg
    20180608_141547-1280x720.jpg
    110.4 KB · Views: 25
Last edited by a moderator:
yes you need to as stated, many times on this and other websites, check all your valve train clearances carefully, the cam spec. card that came with your cam should indicate the ideal matching spring load rates and clearances required.
drawsdf.jpg


those heads (keep in mind that price is for a single (1) cylinder head)
https://www.summitracing.com/parts/tfs-30410001/overview/

OBVIOUSLY YOULL WANT THE CORRECT VALVE SPRINGS
the most valuable and useful tool you have is the ability to stop, look, think, question,
and ask detailed questions any time your not 110% sure that you know everything,

you need to too do things correctly and verify the results.
http://garage.grumpysperformance.co...steam-holes-posted-by-dennyw.2991/#post-57455

http://www.competitionproducts.com/1500-1585-OD-Valve-Springs/products/2631/1/0

https://www.summitracing.com/search/part-type/valve-springs

https://www.iskycams.com/cart/valve-springs-c-99.html

http://www.cranecams.com/userfiles/file/334-343.pdf

https://www.racingsprings.com/Valve-Spring/Store/13

http://www.lunatipower.com/Category.aspx?id=23

http://www.pspring.com/products/engine-valve-springs/

http://www.competitionproducts.com/Valve-Springs/departments/49/

http://psisprings.com/products/

http://www.compcams.com/Products/CC-'Valve Springs By Usage'-0.aspx

http://www.racingsprings.com/Beehive-Valve-Springs

https://www.supertechperformance.com/valve-springs-p109

http://www.cvproducts.com/index.php/psi-springs/

you might also want to keep in mind theres a great deal more to setting up a valve train than slapping some springs and retainers and keepers on the valve
s.
read thru the links and sub links as theres a great deal of useful info, that youll want to know.
btw just a bit more info, there are valve spring retainers, valve spring seats, shims, valve retainer keepers etc. that can be used that have different sizes or depths that allow you to change the installed height, or relation of the spring to the valve stem , it compressed height, or the valve springs location in relationship to the stems locking groove
keep in mind shims under the valve springs can be used to raise the spring or shorten the valves installed height, valve locks and retainers can be purchased with non-O.E.M dimensions to adjust the valves installed height or spring load rates
you use either or both depending on the application
a .050 PLUS valve lock moves the retainer .050 higher on the valve stem with no other changes, a plus .050 retainer would move the retainer .050 higher with stock valve locks or an additional .050 if matched to .050 plus locks
if you used a plus .o50 retainer with a set of minus .o50 valve locks the retainer would remain at the stock height on the valve stem
cca-4929.jpg


0607em_17_z+engine_assembly+shims.jpg


viewtopic.php?f=52&t=181
http://www.jegs.com/p/Crane/746983/10002/-1

http://www.jegs.com/p/Moroso/764349/10002/-1

http://www.jegs.com/p/Manley/940089/10002/-1

http://www.jegs.com/p/Comp+Cams/757964/10002/-1
2709946016.jpg

660-42379-16.jpg

valvespringseats.png

valsp1.jpg

valsp2.jpg

valsp3.jpg

valsp4.jpg


youll have to correctly measure the clearance on your heads with the valve springs and cam specs you selected too use to know if you have the correct valve spring installed height and clearances, failure to accurately check frequently results in very expensive repairs and to what new guys frequently blame on the cam when it was a installers ignorance that was the true cause.

https://www.summitracing.com/parts/pro-66902/overview/

https://www.summitracing.com/parts/sum-900032/overview/

https://www.summitracing.com/parts/rsc-pac-t902/overview/

pic16vc.jpg

pic19vc.jpg


springmicv.jpg

vsmt7a.jpg

pic18vc.jpg

pic20vc.jpg


vspr1.jpg

valve springs must be installed at a specific semi compressed and listed installed height,
to provide the listed load rates and clearances,
example

crane110921.jpg

the cam you select will generally come with a suggested listed valve spring load rate and installed height,
(NOTICE THE SUGGESTED INSTALLED HEIGHT WITH THIS CAM IS 1.800"
and the loads are listed)

you must maintain minimum coil bind and retainer to valve seal clearance and proper push-rod and rocker geometry
the distance between the lower edge of the valve spring retainer and the cylinder head is adjustable to achieve the desired valve spring height through the use of valve spring seat cups and shims placed under the valve spring which can be purchased to lock into a stock height, or plus or minus about .050, and valve locks that cam move the retainer (stock or aftermarket) an additional .050 either tighter or longer allowing the valve spring to expand taller, shims can be placed under the valve seat hardened cups that are almost always mandatory on aluminum head but may be optional on iron heads,(O.E.M. cast iron and lower valve spring load rates)

ValveSpringDetail.gif


clear.jpg


valvespringinstalled.gif


springshima.jpg

prctool.png


retain6.jpg


bbcspring2.gif

installedheight.gif


edvalvs.jpg

valvespringseats.png

Installedsp.jpg

valvespringseatsx.png

max lift is installed height minus .060 minus coil bind
drawsdf.jpg

related info you really need to read
http://garage.grumpysperformance.co...ring-installation-questions.12833/#post-66460

http://garage.grumpysperformance.co...-loads-and-installed-height.10709/#post-46658

http://garage.grumpysperformance.co...ve-spring-iinstalled-height.12791/#post-66038

http://garage.grumpysperformance.co...train-clearances-and-problems.528/#post-57678

http://garage.grumpysperformance.com/index.php?threads/valve-springs.9613/#post-50556

http://garage.grumpysperformance.com/index.php?threads/valve-train-clearances-and-problems.528/

push rod to short
WIDE SWEEP ON VALVE TIP FROM ROCKER ADDS ADDITIONAL,
SIDE LOAD WEAR
long.jpg

push rod to long
correct.jpg

lash_caps.jpg

at times lash caps or longer push rods will be needed to change the valve train geometry to gain rocker clearance or get the proper geometry

push rod length correct
AS CLOSE TO CENTER AS POSIABLE BUT BEING CENTERED IS LESS IMPORTANT THAN MINIMAL SWEEP ON THE VALVE TIP< INDICATING MINIMAL SIDE LOADING

http://garage.grumpysperformance.co...-pushrods-and-check-info-you-might-need.5931/
http://www.summitracing.com/search/...d-length-checkers?autoview=SKU&ibanner=SREPD5
Proform Pushrod Length Checkers 66789 SBC 3/8" rocker studs

Proform Pushrod Length Checkers 66790 SBC 7/16" rocker studs

Proform Pushrod Length Checkers 66806 BBC 7/16" rocker studs
a few simple tools will tell you if clearances are ok

12cal.jpg


Feeler-Gauge.jpg


READ THESE LINKS CAREFULLY

http://garage.grumpysperformance.co...e-springs-and-setting-up-the-valve-train.181/

http://garage.grumpysperformance.com/index.php?threads/rocker-push-rod-wear-issues.9815/

http://garage.grumpysperformance.co...steam-holes-posted-by-dennyw.2991/#post-57455

http://garage.grumpysperformance.com/index.php?threads/checking-piston-to-valve-clearances.399/

http://garage.grumpysperformance.com/index.php?threads/valve-train-clearances-and-problems.528/

http://garage.grumpysperformance.com/index.php?threads/two-loose-valve-locks.9687/#post-47884
 
Last edited:
:thumbsup:Daan, those heads almost certainly came with exhaust valve rotators from the factory.
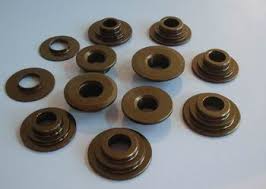
For performance use rotators are not used - only retainers like the ones on the intake valves.
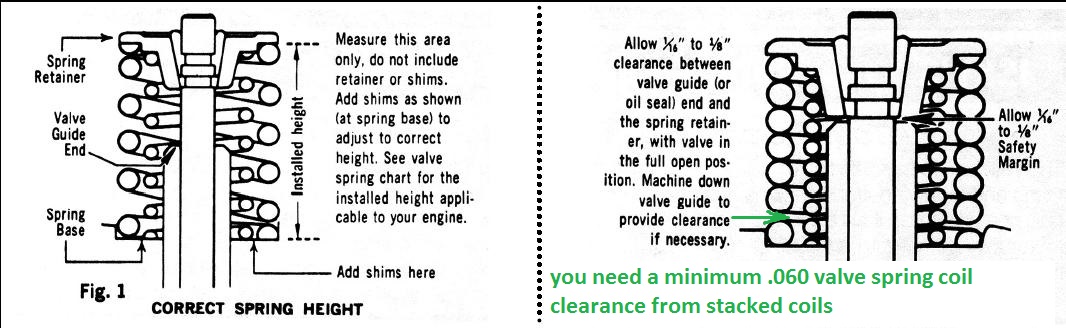
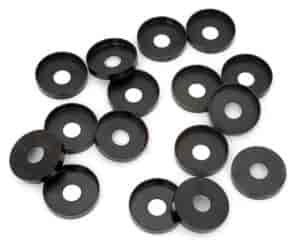
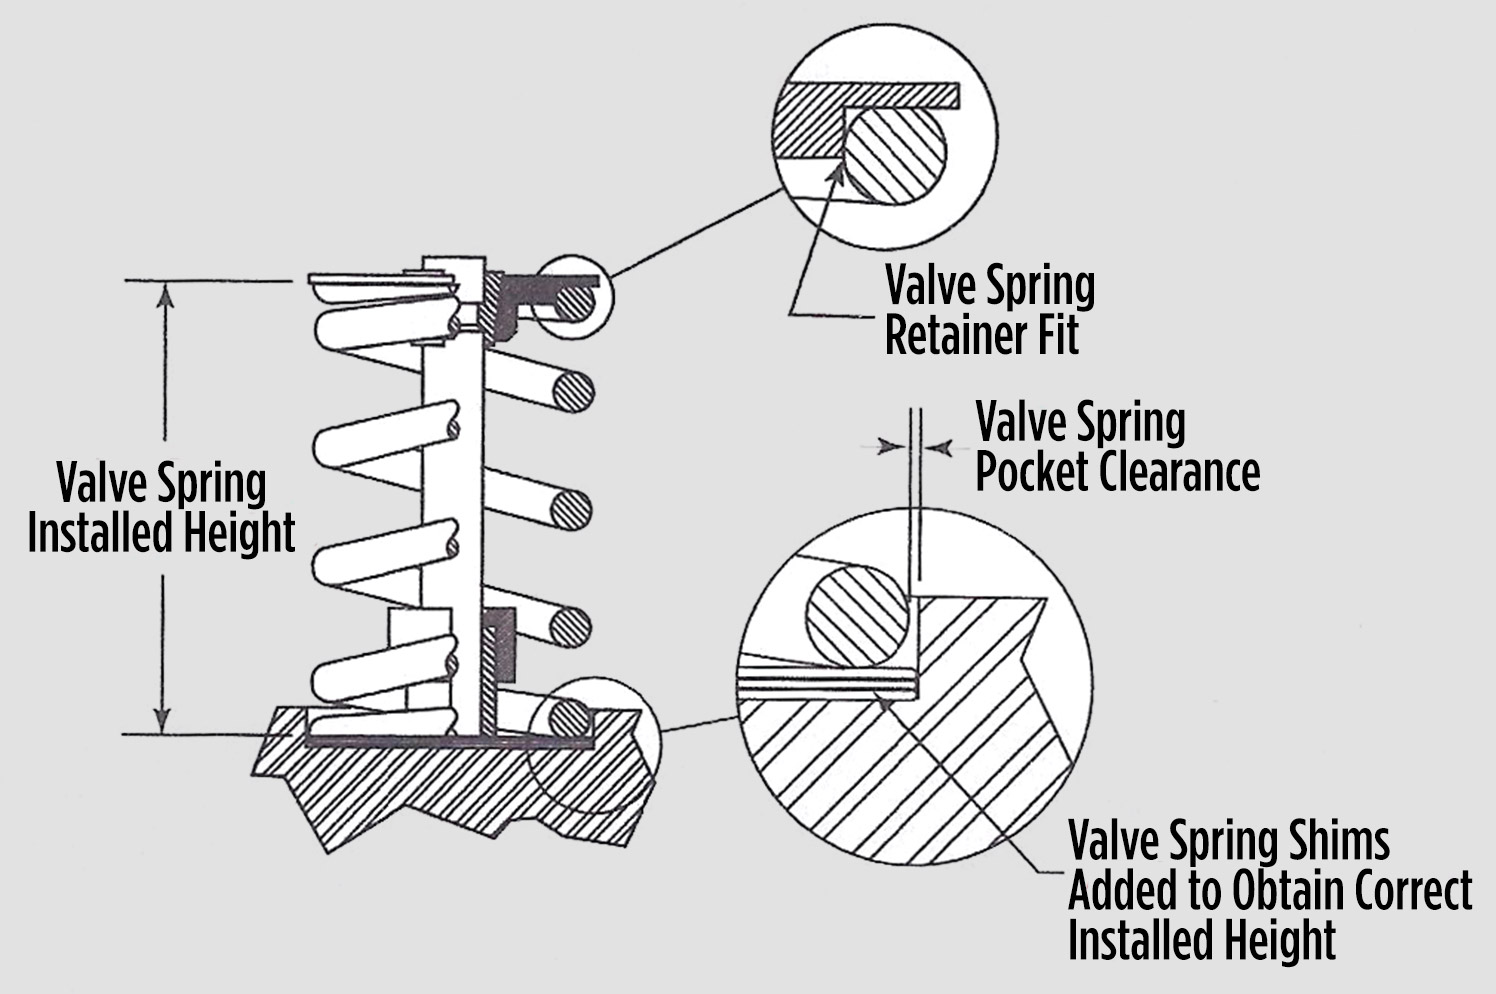
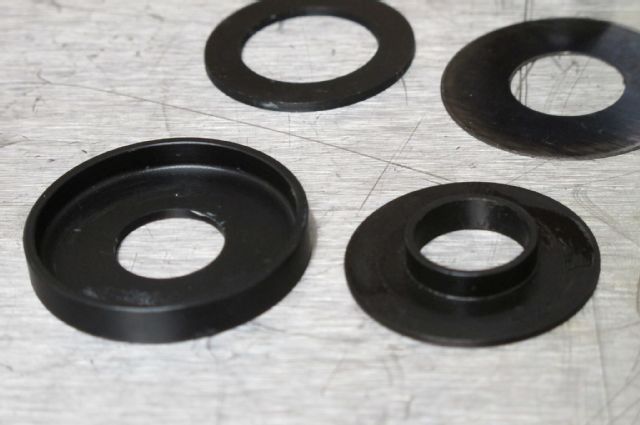
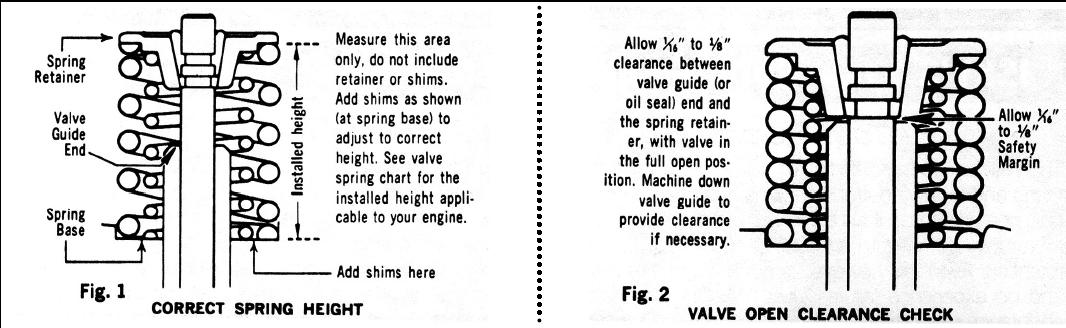
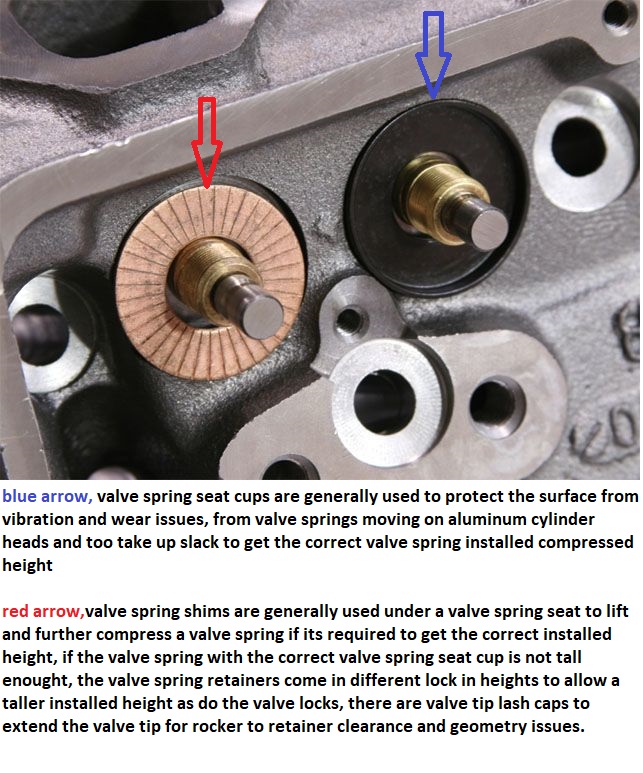
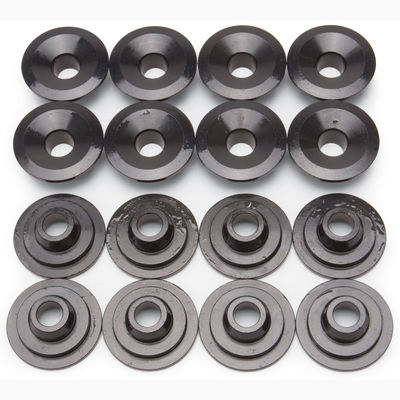
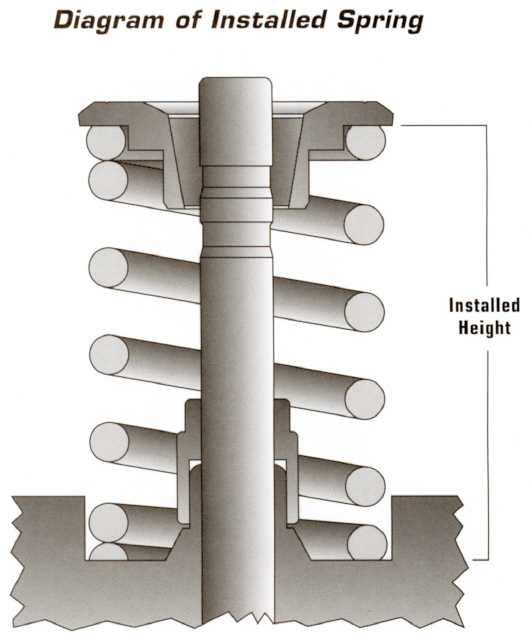
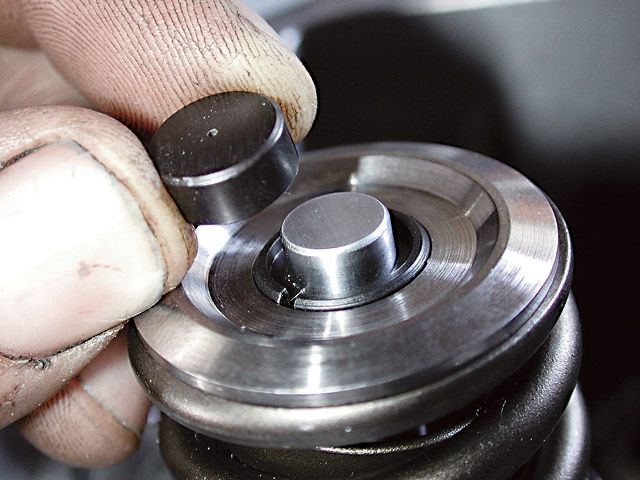
That shim makes up the difference in the thickness between the two in order to get the proper spring installed height.
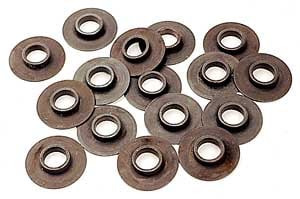
You might find that the exhaust spring seats are machined deeper in those heads to compensate for the difference in thickness if rotators were in fact used.


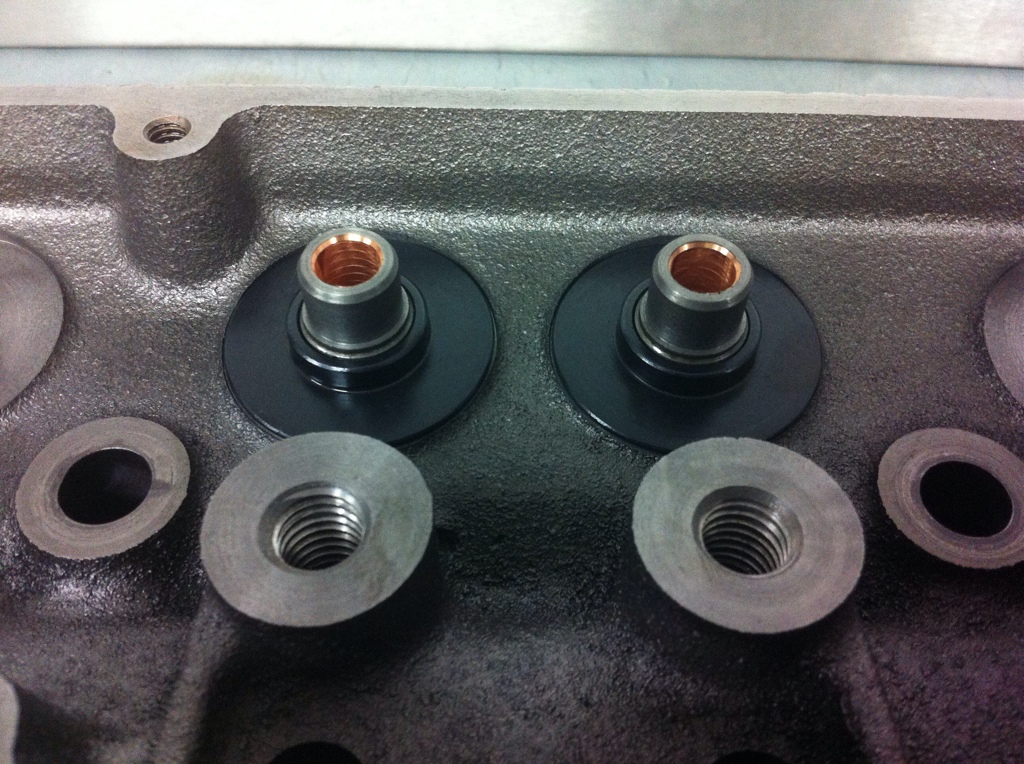
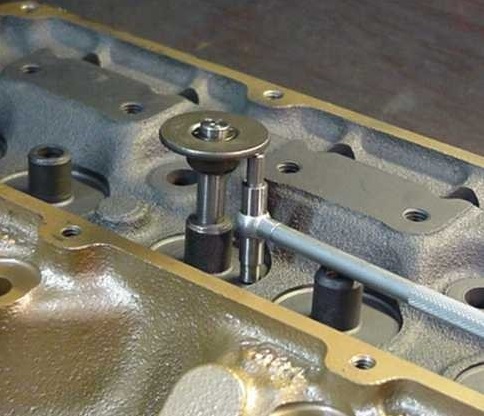
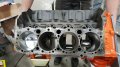
I see that you did not use the spring shields. Good for you. Back in the day, all that was used for valve seals was a combination of an o-ring that went in that extra lower groove in the valve stem (the groove under where the locks grab) and those metal shields for oil control. We have much better valve seals now. I see your valve guides have already been machined for them.:thumbsup: To use those metal shields today is a complete waste. It's just unnecessary added weight to the valvetrain that can serve no other purpose but to lower your rpm potential.

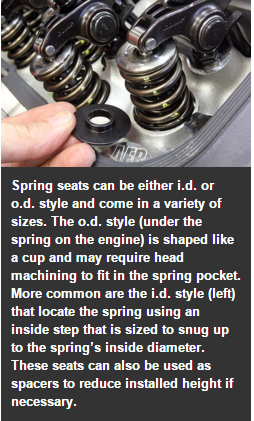
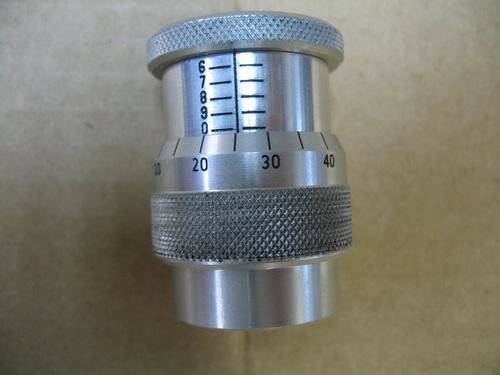
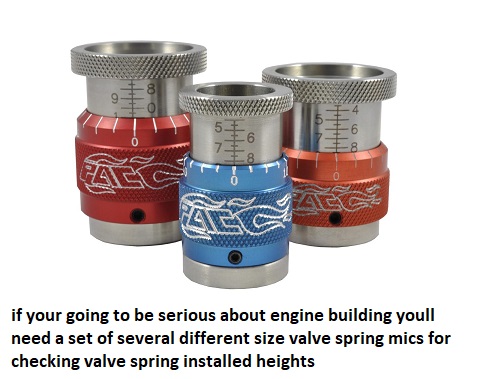
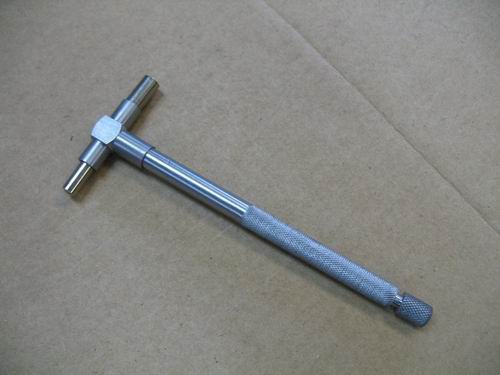
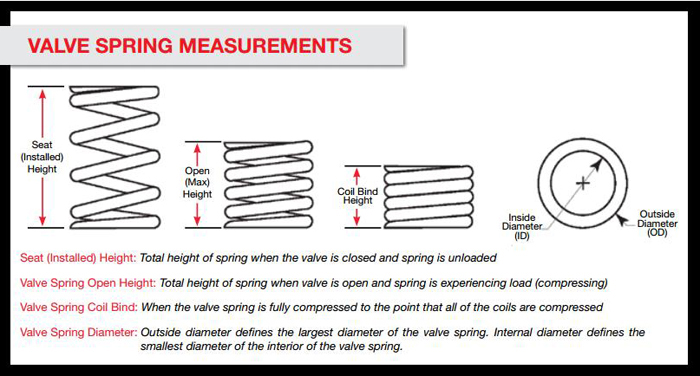
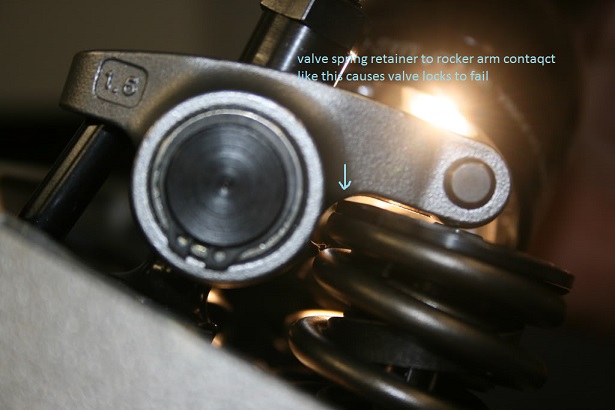
Ultimately whether you use shims, cups, or locators, plus or minus retainers, or plus or minus locks, you need to find the best combination to get the correct spring installed height without having coil bind occur, or the bottom of the retainer contacting the top of the valve seal at full lift. There must also be clearance between the rocker arm and spring retainer and clearance between the rocker arm slot and its stud through the entire lift cycle.

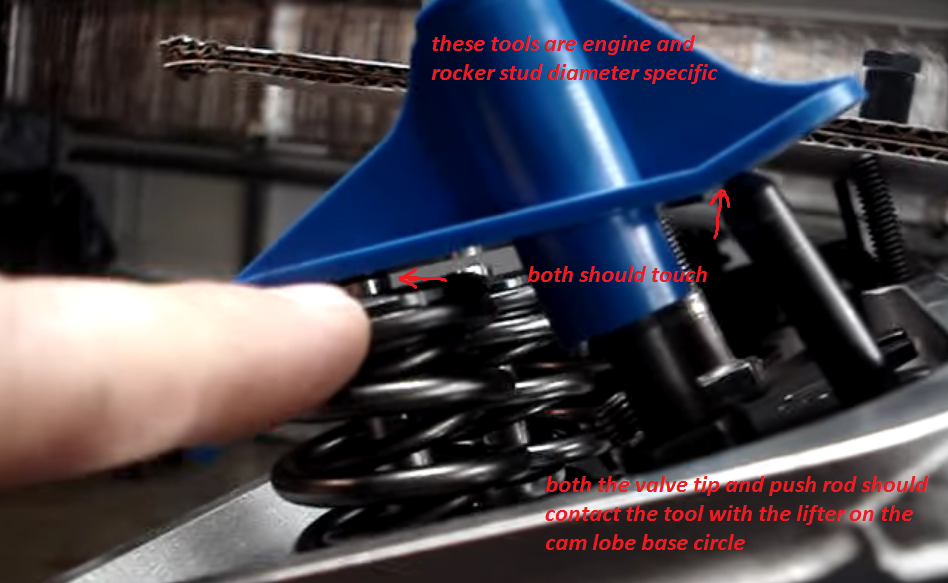
After you get all of that correct, then you have to determine the correct pushrod length to achieve proper valvetrain geometry.

Read through Grumpy's links for more detailed explanations.
 
Last edited:
I like to use the Term application specific.

High Performance engines tend to have much higher oil consumption rates.
Some burn 1 quart of oil every 100 miles and no smoke from the exhaust is ever witnessed.
Some burn 1 quart every 500 miles.
Some use just 1/2 quart every 3000-4000 miles driven.

Exhaust valve rotators were never a good idea in Chevy Engines.
Since Day 1 guys were turning them to 6000-8000 rpms.

Exhaust valve rotators were used in nearly every Oldsmobile V8 engine.
They actually worked OK & seldom failed.
1965 Olds 425 did not use rotators on the valves. It was a factory high rpm engine.

Pontiac used spring shields on all engines except the 1969-1970 RAIV 400.

I have noticed always when an engine has its valvetrain setup for High RPM Race even with the very best Viton or Teflon Valvestem seals it uses consumes more oil than the factory layout did.

So You have a street engine for long life and low oil consumption.
Then a Race engine put on the street.
That race engine is meant to make Max Power.
Oil consumption is going to be higher than a stock layout street engine.
 
Any engine turned up to 6K or more should have at least Billet Steel Chrome Moly Valvespring retainers & Matching Billet Valve stem Locks.
7 degree or 10 degree Billet valve stem Locks.
7 degree Super Locks are for only Radius race groove Valves.
 
Old blocks out!
Crank is back tomorrow
index.php

index.php

index.php

index.php


index.php
 

Attachments

  • 20180611_170031-1280x720.jpg
    20180611_170031-1280x720.jpg
    96.9 KB · Views: 34
  • 20180611_170043-1280x720.jpg
    20180611_170043-1280x720.jpg
    109.6 KB · Views: 35
  • 20180611_155300-1280x720.jpg
    20180611_155300-1280x720.jpg
    122.3 KB · Views: 34
  • 20180611_154415-1280x720.jpg
    20180611_154415-1280x720.jpg
    105 KB · Views: 35
  • 20180611_170833-1280x720.jpg
    20180611_170833-1280x720.jpg
    108.5 KB · Views: 34
Last edited by a moderator:
Timing camshaft
But puzzled on the non solid rockers.
Checking whether valves hit pistons or not.
Bring out the play dough!
 
Pics
index.php

index.php
 

Attachments

  • 20180612_165746-1920x1080.jpg
    20180612_165746-1920x1080.jpg
    126.1 KB · Views: 27
  • 20180612_165748-1920x1080.jpg
    20180612_165748-1920x1080.jpg
    127.2 KB · Views: 27
Last edited by a moderator:
Self made timing disc
index.php
 

Attachments

  • 20180612_164016-1280x720.jpg
    20180612_164016-1280x720.jpg
    137.1 KB · Views: 26
Last edited by a moderator:
Back
Top