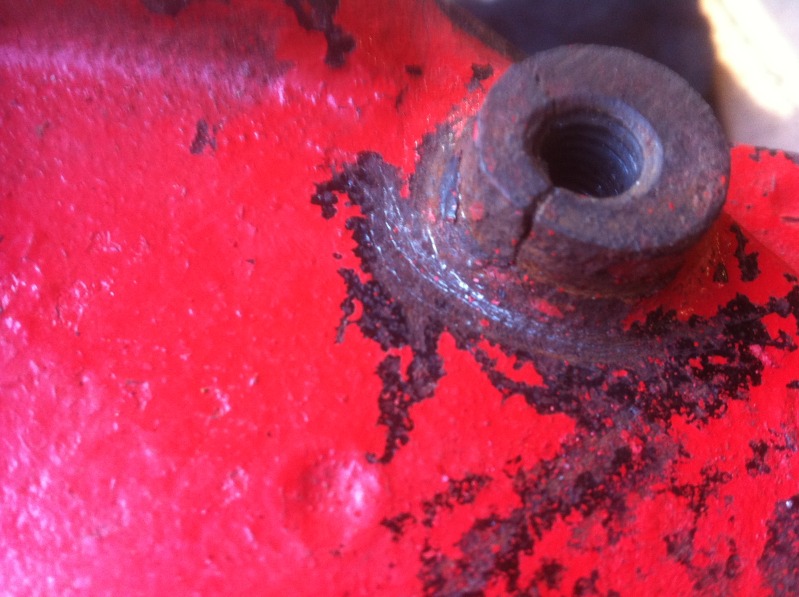
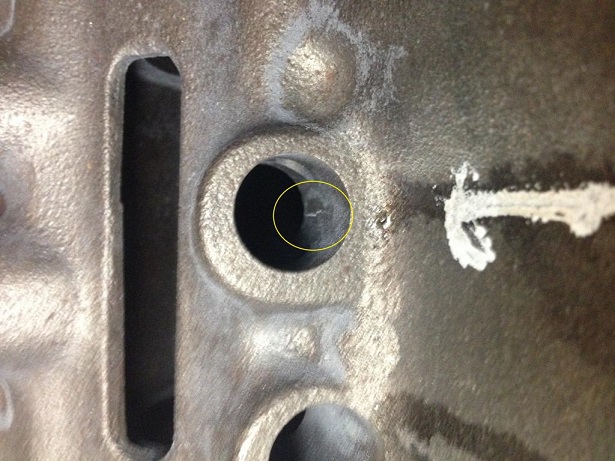
I found these pictures posted on a different forum and the owner of the block with a question asking if the big block ,block he got a deal on, but having the cracked accessory bolt thread hole in that block, he was wondering if the block was trash or salvageable?
now if for some reason like to maintain a true numbers matched combo you need to repair a block in some cases in non-stressed areas thats usually done with brazing , if its a common 350 or 396 block the cost of repair might be 1/2-3/4 of what a used block can be purchased for so youll have a decision to make

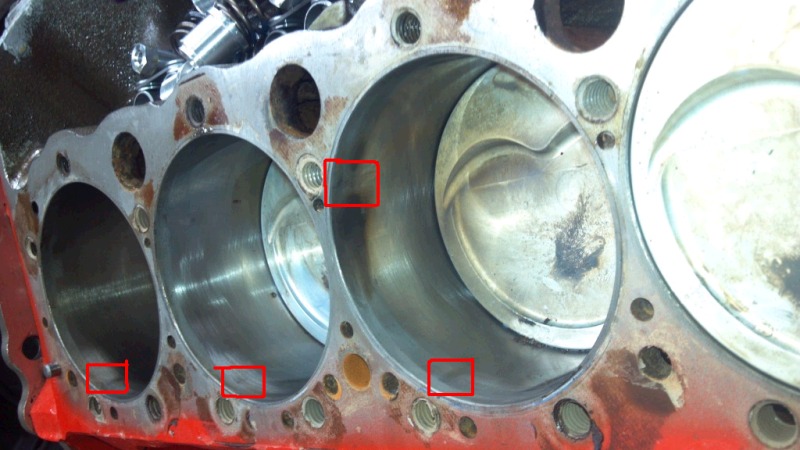
clean any block you buy and look for obvious cracks and if you have doubts get the machine shop to mag or dye test the block or heads
lifter bores
and lifter gallery
,piston bore walls,
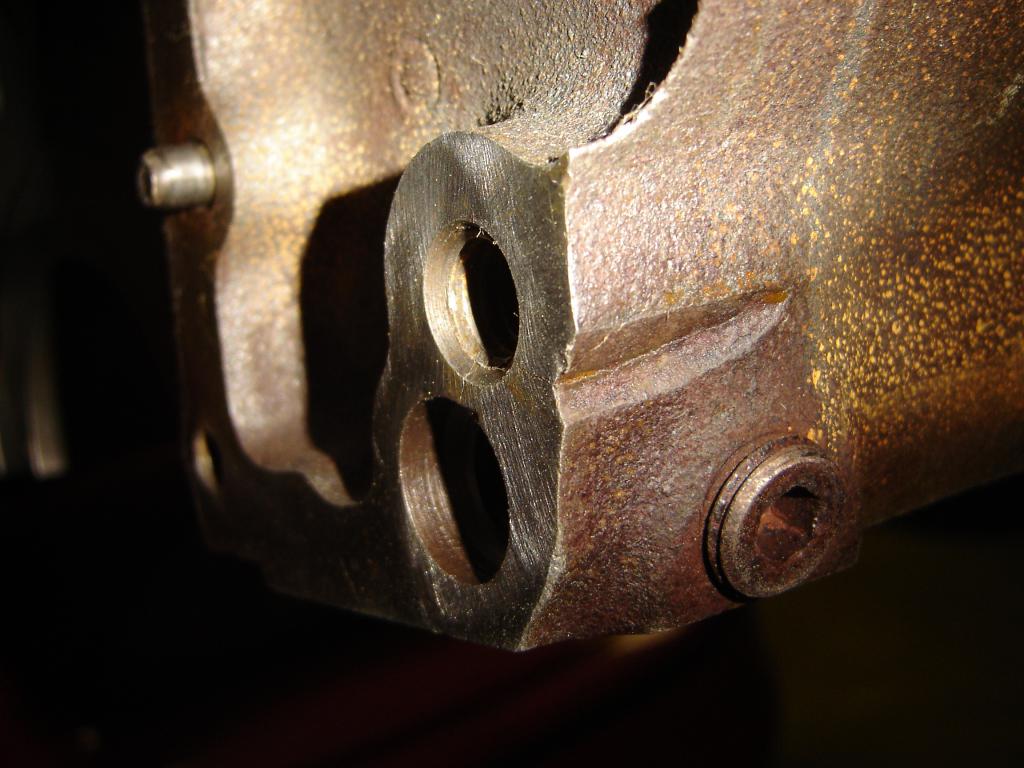
block main cap web support areas
heads between the valves in valve seat area
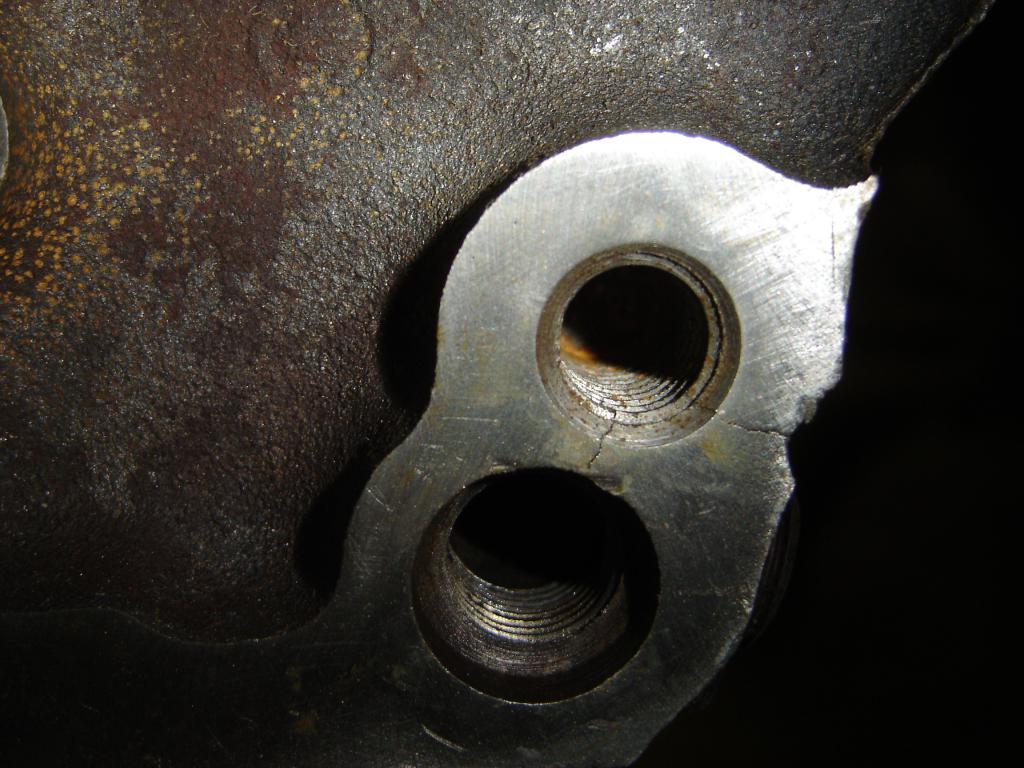
look for stripped head and manifold and oil pan mounting bolt threads,
in threaded holes and cracks in block radiating from the holes

ASK LOTS TO QUESTIONS & SHOP CAREFULLY,
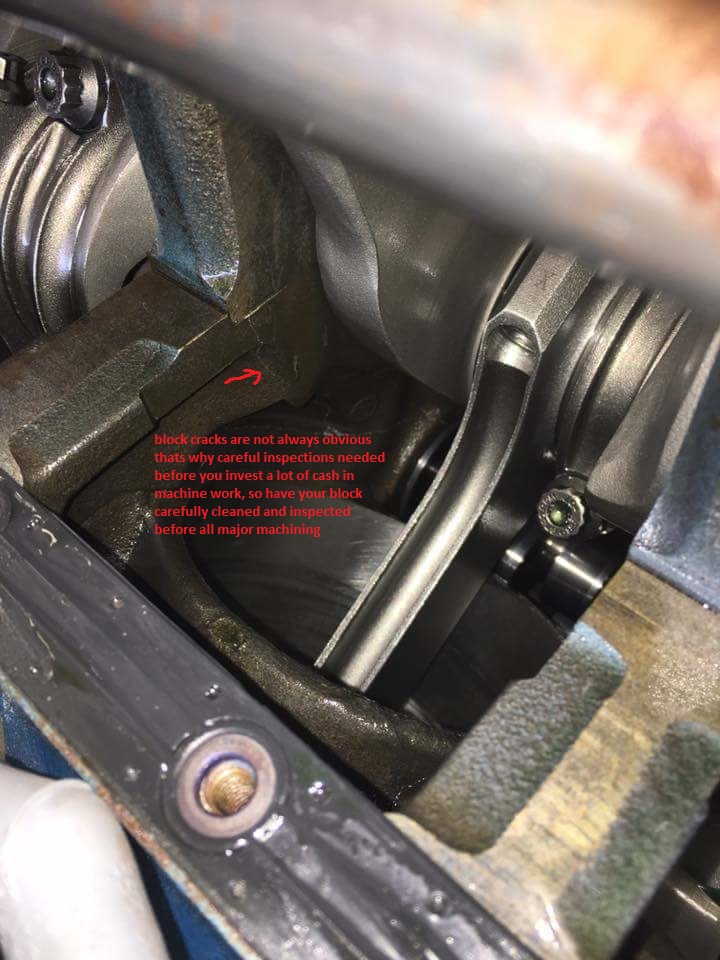
well the answer here depends on what the block looks like after its carefully cleaned AND INSPECTED and the local machine shop tests the block for what might be not so obvious damage,you should have the block heat and chemically cleaned before inspection, the truth here is that cast iron can be welded or brazed and that does not appear to be a critical location, but thats why MAGNAFLUX and SONIC TESTING are advised BEFORE investing a lot of time and machine work expense in a used block!
I know many guys prefer to BRAZE a crack in cast iron to stabilize the cast iron in non-stressed areas like that appears to be, as its far faster, simpler and cheaper than an actual weld, and in a non-stressed area should be all thats required.
check with a local machine shop,if you find a cylinder head, intake manifold or other component with a crack, in many non-critical stress areas, drilling the ends of the crack , a bit of grinding and BRAZING the crack, followed by a bit of surface machining can make a good functional leak free repair.
Ive seen several heads with cracks successfully repaired in that way in non-stressed areas like cracks in accessory bolt holes etc.
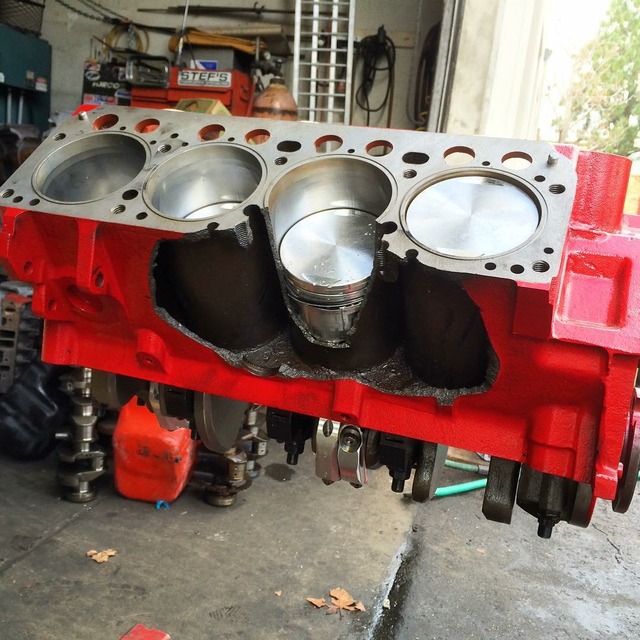
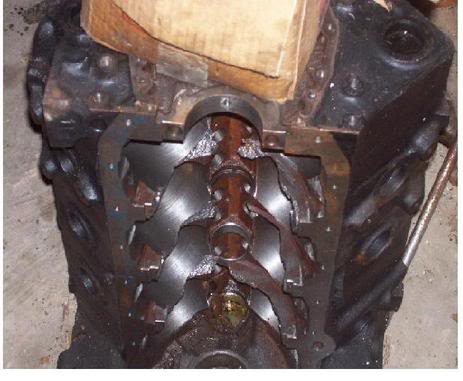
the block pictured above is from a FORD, but it gives you some idea of what the block internal coolant passages and cylinder walls look like
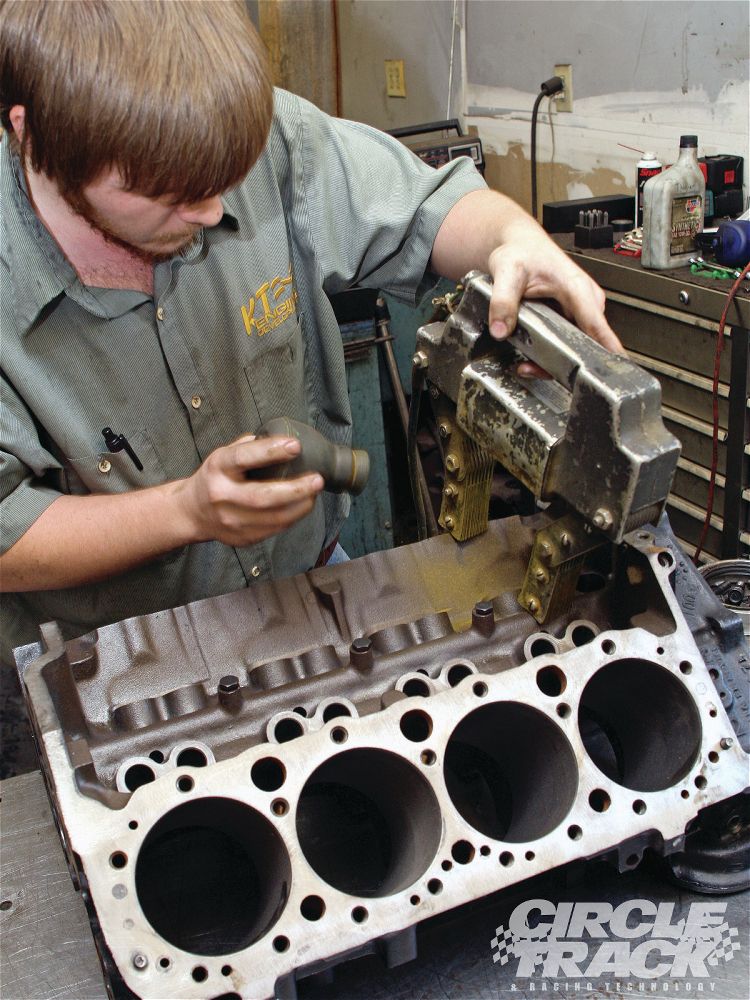
before you dump a $1000 dollars or more into machine work on any block have the bore walls thickness checked and the block MAG TESTED for FLAWS & CRACKS , failure to spend the time and money required to do so can cost you a great deal of wasted time and money!
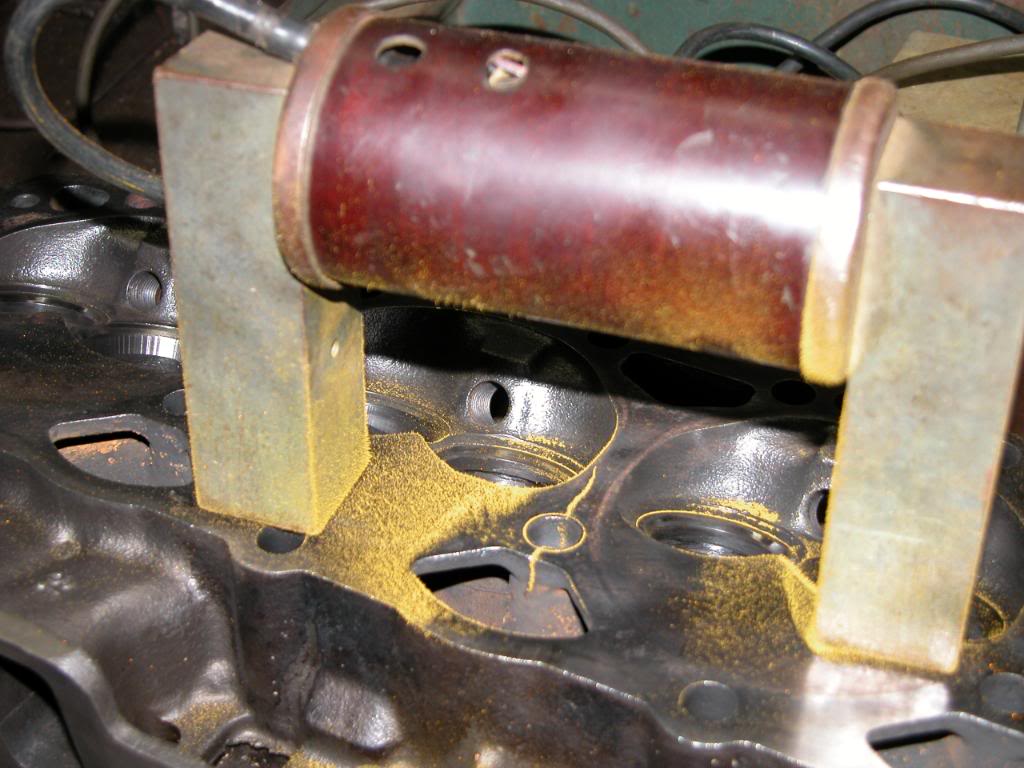
mag check for cracks in the block
READ THE LINKS
http://www.ehow.com/list_6947342_ways-c ... racks.html
http://www.enginebuildermag.com/Article ... ology.aspx
http://www.enginebuildermag.com/article ... ction.aspx
http://www.weldguru.com/braze-cast-iron.html
http://www.sarusilver.com/brass-bronze- ... lloys.html
viewtopic.php?f=50&t=10363
related info
http://www.lincolnelectric.com/en-us/su ... etail.aspx
http://www.locknstitch.com/CastIronWelding.htm
http://www.ehow.com/how_6851947_repair- ... azing.html
viewtopic.php?f=51&t=976
http://www.aluminumrepair.com/hts528.asp
viewtopic.php?f=51&t=125&p=10122&hilit=+sonic+testing#p10122
viewtopic.php?f=51&t=3169&p=8500&hilit=+sonic+testing#p8500
now if for some reason like to maintain a true numbers matched combo you need to repair a block in some cases in non-stressed areas thats usually done with brazing , if its a common 350 or 396 block the cost of repair might be 1/2-3/4 of what a used block can be purchased for so youll have a decision to make
clean any block you buy and look for obvious cracks and if you have doubts get the machine shop to mag or dye test the block or heads
lifter bores
and lifter gallery
,piston bore walls,
block main cap web support areas
heads between the valves in valve seat area
look for stripped head and manifold and oil pan mounting bolt threads,
in threaded holes and cracks in block radiating from the holes
ASK LOTS TO QUESTIONS & SHOP CAREFULLY,
well the answer here depends on what the block looks like after its carefully cleaned AND INSPECTED and the local machine shop tests the block for what might be not so obvious damage,you should have the block heat and chemically cleaned before inspection, the truth here is that cast iron can be welded or brazed and that does not appear to be a critical location, but thats why MAGNAFLUX and SONIC TESTING are advised BEFORE investing a lot of time and machine work expense in a used block!
I know many guys prefer to BRAZE a crack in cast iron to stabilize the cast iron in non-stressed areas like that appears to be, as its far faster, simpler and cheaper than an actual weld, and in a non-stressed area should be all thats required.
check with a local machine shop,if you find a cylinder head, intake manifold or other component with a crack, in many non-critical stress areas, drilling the ends of the crack , a bit of grinding and BRAZING the crack, followed by a bit of surface machining can make a good functional leak free repair.
Ive seen several heads with cracks successfully repaired in that way in non-stressed areas like cracks in accessory bolt holes etc.
Allthrottleandsomebottle said:the main reason to use Magnuflux is the block does not need to be absolutly clean like it MUST be to get an accurate LPI and its a whole lot cheaper!
Primary Advantages of LPI:
The method has high sensitive to small surface discontinuities.
The method has few material limitations, i.e. metallic and nonmetallic, magnetic and nonmagnetic, conductive and nonconductive materials may be inspected.
Large areas and large volumes of parts/materials can be inspected rapidly and at low cost.
Parts with complex geometric shapes are routinely inspected.
Indications are produced directly on the surface of the part and constitute a visual representation of the flaw.
Aerosol spray cans make penetrant materials very portable.
Penetrant materials and associated equipment are relatively inexpensive.
Primary Disadvantages of LPI:
Only surface breaking defects can be detected.
Only materials with a relative nonporous surface can be inspected.
Precleaning is critical as contaminants can mask defects
Metal smearing from machining, grinding and grit or vapor blasting must be removed prior to LPI
The inspector must have direct access to the surface being inspected.
Surface finish and roughness can affect inspection sensitivity.
Multiple process operations must be performed and controlled.
Post cleaning of acceptable parts or materials is required.
Chemical handling and proper disposal is required
Magnetic Particle Inspection
Magnetic particle inspection is a nondestructive inspection methods used for defect detection. The method is used to inspect a variety of product forms such as castings, forgings, and weldments. The only requirement from an inspectability standpoint is that the component being inspected must be made of a ferromagnetic material such iron, nickel or cobalt, or some of their alloys. Ferromagnetic materials are materials that can be magnetized to a level that will allow the inspection to be effective. Many different industries use magnetic particle inspection for determining a component's fitness-for-use.
Some examples of industries that use magnetic particle inspection are the structural steel, automotive, petro-chemical , power generation and aerospace industries. Underwater inspection is another area where magnetic particle inspection may be used to test such things as offshore structures and underwater pipelines.
The magnetic particle inspection method along with liquid penetrant inspection is one of the oldest and most widely utilized forms of nondestructive testing currently in use today. Magnetic particle testing uses magnetic fields and small magnetic particles, such as iron filings to detect flaws in components. In theory, it is a relatively simple concept. When a bar magnetis broken in the center of its length, two complete bar magnets with magnetic poles on each end of each magnet will result. If the magnet were cracked but not broken completely in two, a north and south pole will form at each edge of the crack, just as though the break had been completed. If iron particles were then sprinkled on this cracked magnet, these particles will be attracted not only to the ends of the magnets poles but also to the edges of the crack.
In magnetic particle inspection there are primarily two types of magnetic fields used to inspect parts, longitudinal and circular. Longitudinal magnetic fields are typically created by placing the part in a strong external magnetic field generated by a conducting copper wire that has been looped or wrapped to form a coil. A coil would be used to inspect such things as a steel rod or a valve from a car engine that might have cracks or inclusions in it. A magnetizing coils is a standard feature on a dry/wet inspection unit but smaller field portable coils are also available. A wet horizontal unit is a large stationary piece of equipment that not only has head-shot and central conductor fixtures but also has a coil permanently mounted to it. The magnetic particles are held in a suspension of either water or oil and are supplied by a pump and hose on the system. These particles are of either the visible type, which means that they can be seen in normal white light, or the fluorescent type. Fluorescent particles require the use of a blacklight, which causes the particle indications to illuminate. This is much the same as causing a blacklight poster to glow in the dark.
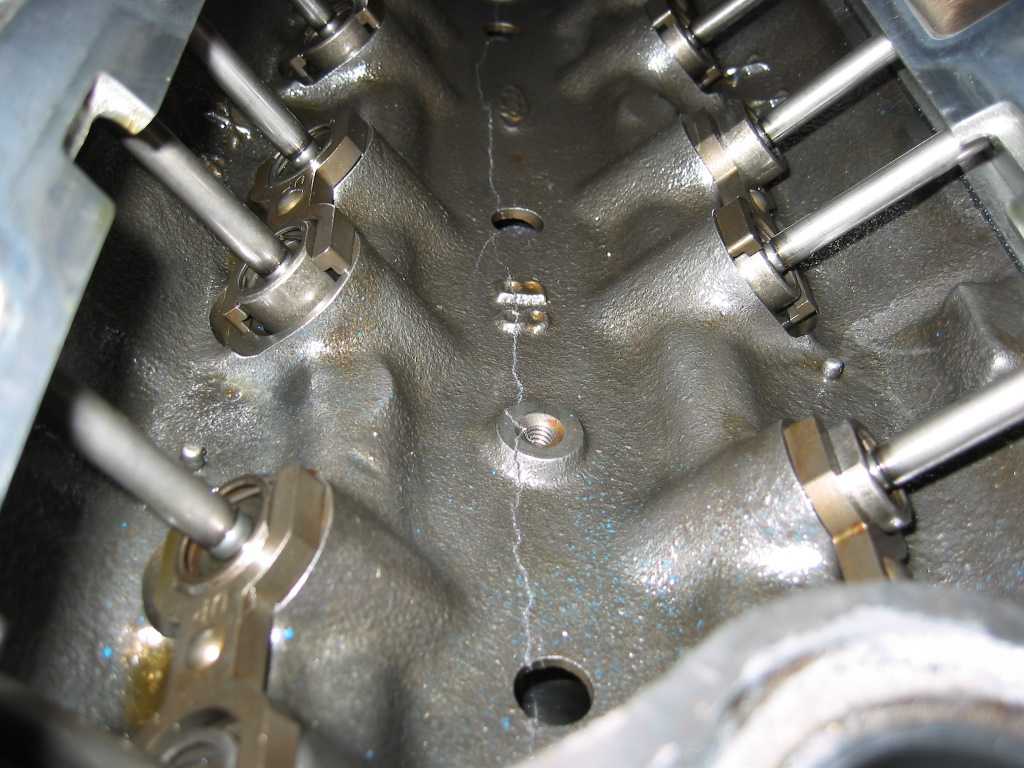
the block pictured above is from a FORD, but it gives you some idea of what the block internal coolant passages and cylinder walls look like
before you dump a $1000 dollars or more into machine work on any block have the bore walls thickness checked and the block MAG TESTED for FLAWS & CRACKS , failure to spend the time and money required to do so can cost you a great deal of wasted time and money!
mag check for cracks in the block
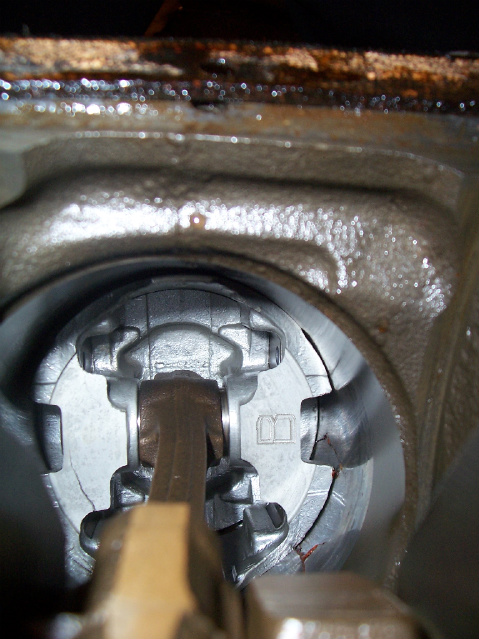
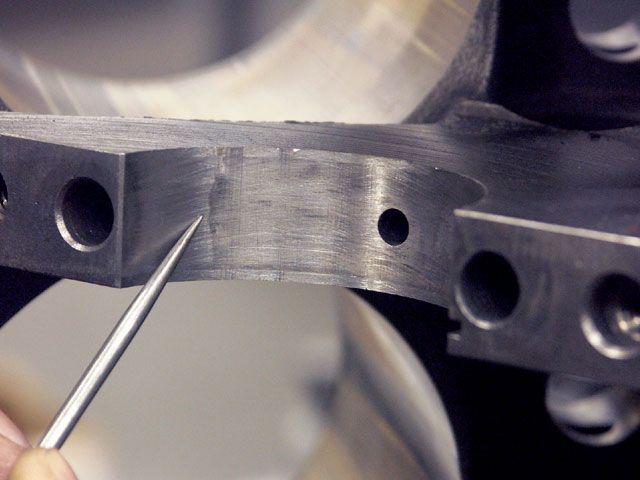
NOT A TA" said:For those who never witnessed Magnafluxing this is how its done. Electromagnet is located so the area you want to test is located between the posts. Then some "magic dust" (in my best Cheech impersonation) is puffed ofer the area to be checked and the dust jumps right to the crack. Even if the crack is very small (like the one on my head) it will show right up. The crack in this pic was easily seen by the naked eye but it made for a nice easy pic to display the process. The lightweight head in the pic had been sleeved for the bolt hole previously so thats why theres a circle of magic dust around it. The dust knows it as a crack. This head will be pinned to repair the crack. If the opportunity arises to get pics of "pinning" sometime I'll get some.
READ THE LINKS
http://www.ehow.com/list_6947342_ways-c ... racks.html
http://www.enginebuildermag.com/Article ... ology.aspx
http://www.enginebuildermag.com/article ... ction.aspx
http://www.weldguru.com/braze-cast-iron.html
http://www.sarusilver.com/brass-bronze- ... lloys.html
viewtopic.php?f=50&t=10363
related info
http://www.lincolnelectric.com/en-us/su ... etail.aspx
http://www.locknstitch.com/CastIronWelding.htm
http://www.ehow.com/how_6851947_repair- ... azing.html
viewtopic.php?f=51&t=976
http://www.aluminumrepair.com/hts528.asp
viewtopic.php?f=51&t=125&p=10122&hilit=+sonic+testing#p10122
viewtopic.php?f=51&t=3169&p=8500&hilit=+sonic+testing#p8500
Last edited by a moderator:


