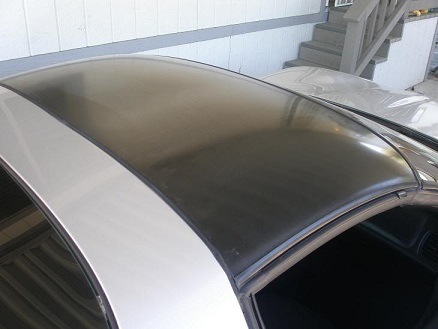
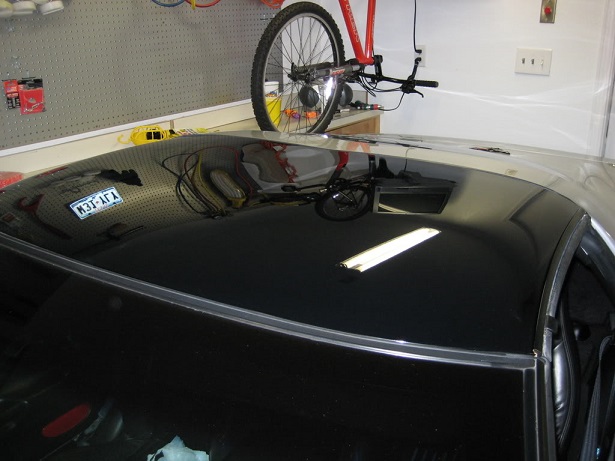
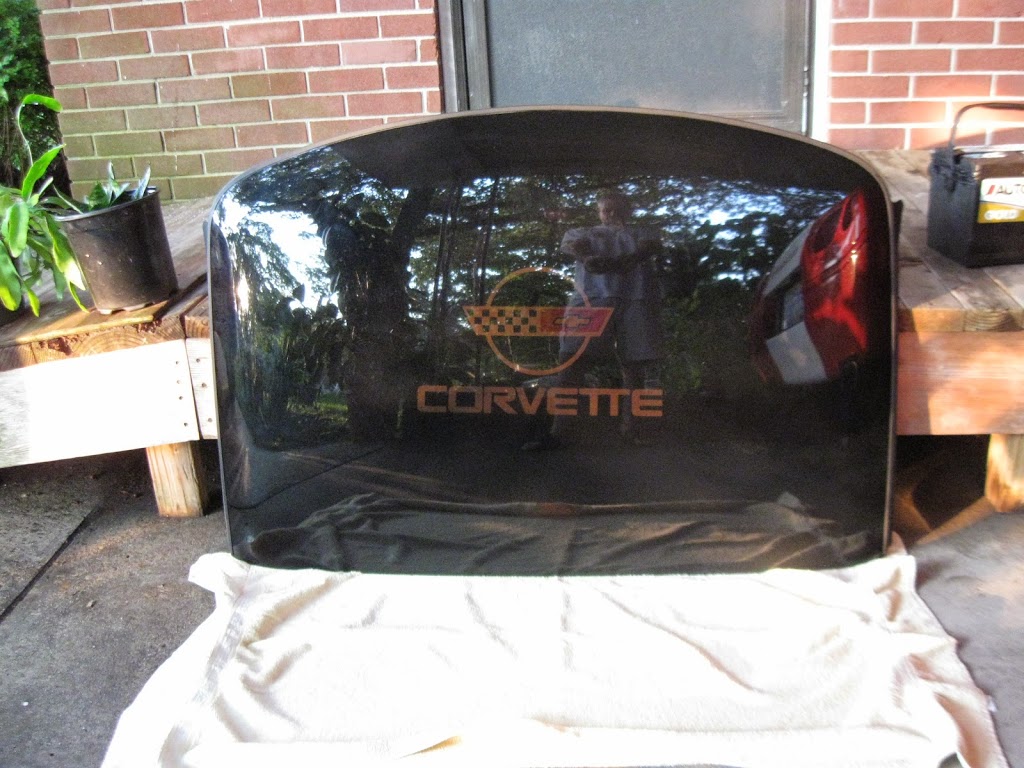
if you have a 1984-96 corvette it has a removable roof section.
most are tinted black, dark blue or gold and translucent and cloud up over time, this can usually be restored with careful surface refinishing
http://forums.corvetteforum.com/c5-tech ... ow-to.html
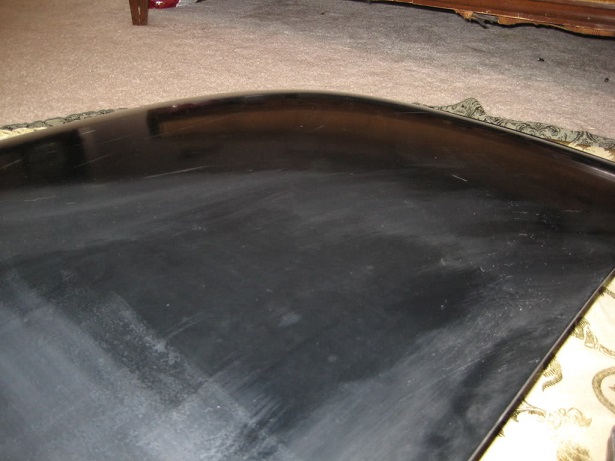
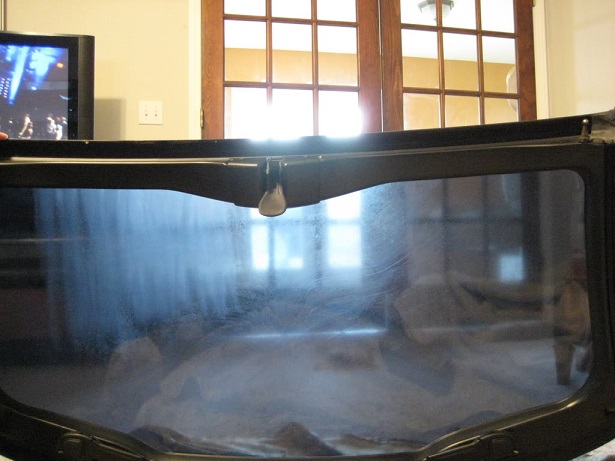
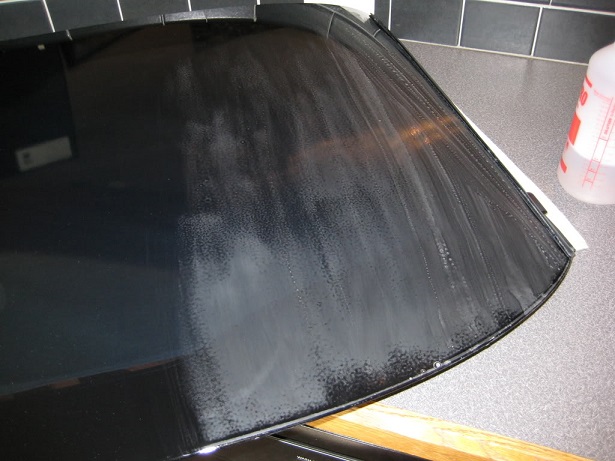
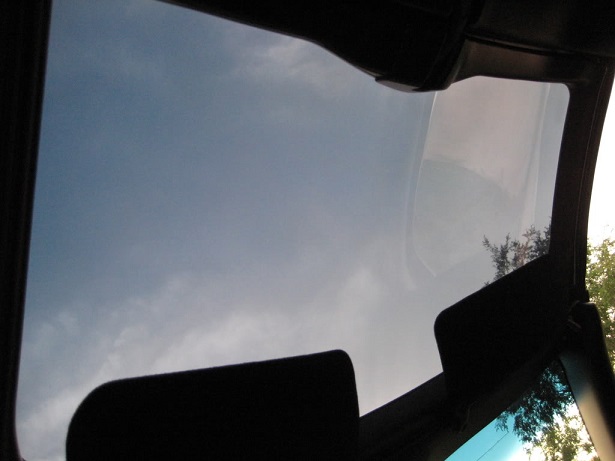
but many of these targa top roof sections tend to crack or show a spider web like micro crack surface with repeated exposure too heat or extreme cold or rapid changes like your see from sitting out in the sun for long periods, then getting hit with cool water like a sudden rain, or washing or if you drive from a heated garage out into a cold night air or rain storm,Ive rarely seen a top over 7-8 years old that has not started to degrade and since all c4 corvettes are now at least 18 years old now theres an excellent chance your original roof acrylic panel has started to degrade.
http://www.gmpartsdirect.com/catalog/frameset.cfm
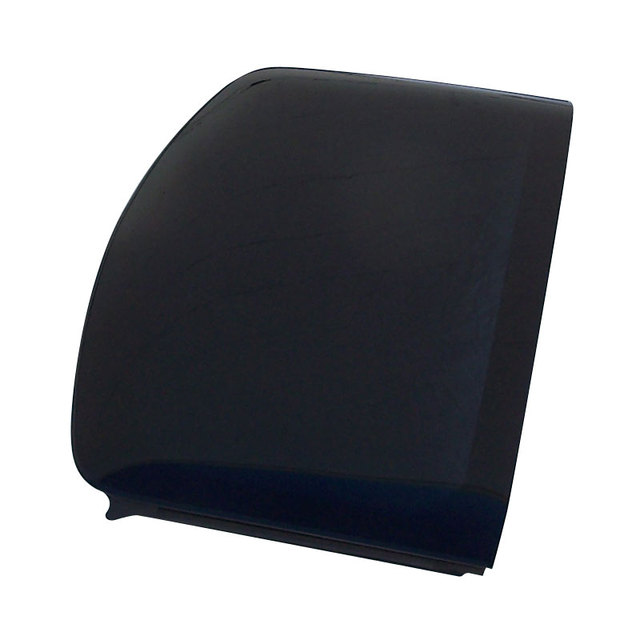
now a common failure is a split down the center as the stress seems to make that rather common, you of course have the option to get the roof professionally repaired, but sending your roof in to be rebuilt tends to cost $800-$1300, depending on whats done and replaced, you can of course use high grade epoxy to structurally repair the physical damage and have the panel painted, this obviously makes the panel opaque vs semi translucent , so it may not be the ideal option.
now if your strapped for cash the epoxy crack repair and re-paint route may be a less desirable but useful option, to keep the interior ,water leak free, obviously this will require a bit of careful surface prep and masking before repainting to match the car so it looks like its original
https://www.youtube.com/watch?v=b7dZESFmG2c
http://www.corvettettops.com/84-96.htm
http://www.astrotops.com/
http://www.vette2vette.com/
http://www.sunroofdoctor.com/
http://www.zip-corvette.com/84-96-c4/bo ... anels.html
http://blog.zip-corvette.com/corvette-p ... ls-for-c4/
https://www.youtube.com/watch?v=mIXDQSQvOvQ
http://www.ecklerscorvette.com/exterior ... -tops.html
1st design 84 - Early 86 28.5”
2nd design Late 86-88 31.5”
3rd design 89-96 32.5”
Factory correct C4 roof installation procedure
Melrose T-Top Int. has been in the Corvette business for over 30 years. In that time we have taken lead position as the most reputable GM licensed aftermarket supplier of Corvette roofs and t-tops in the industry.
That being said, I feel comfortable explaining to you what seems to be a gray area in the Corvette world regarding replacement roof installation and adjustment. Most C4 Corvette owners don’t lend much thought to their tops as being an integral part of the vehicle’s structural integrity. The C4 however was initially designed as T-bar vehicle like the C3’s, and it wasn’t until a GM exec ordered the car be converted to a targa model, the engineers realized they had a problem. With the T-bar removed handling characteristics suffered greatly due to torsional flexibility. Unfortunately for us the only viable solution to this was an inconvenient bolt in bulky style targa roof.
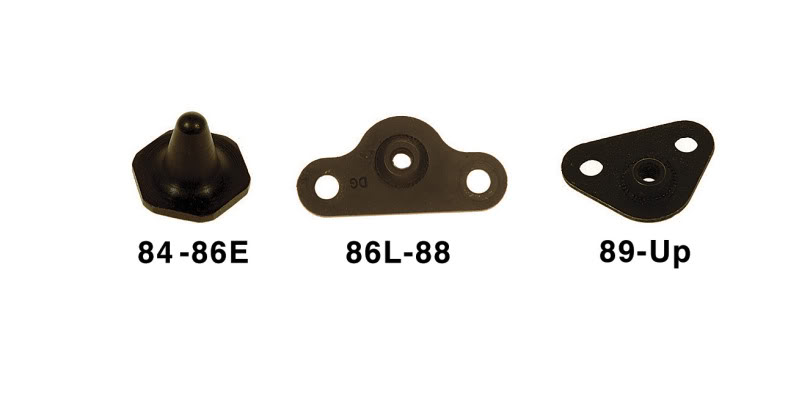
The first thing you want to do when purchasing a new roof is verify the year of the roof on your car. Even though your car may be a 1988 it could have been converted at one point. Sound unlikely? GM sold a kit for many years to convert 84-88 Corvettes to the third design 89-96 roof styles. This was due in part to the fact that only one roof design was available and it generated more income selling and installing the kits. So, how do I determine my roof year design? You can compare your front mounting hardware with chart below or measure between your front mounting bolts.
Measured from bolt to bolt O.C. across top of windshield frame.
· 1st design 84 - Early 86 28.5”
· 2nd design Late 86-88 31.5”
· 3rd design 89-96 32.5”
1984 - 1996 Roof Panel Hardware Detail
THE PANELS ARE NOT UNIVERSALLY INTERCHANGEABLE, BETWEEN ALL YEARS OF PRODUCTION
We have established the structural importance of the C4 targa style roof and it’s different designs. Now we can discuss how to properly install it, or better yet, how not to. Start by parking your vehicle on flat ground, and inflating all tires to factory specs then follow the instructions below per your specific vehicle year.
1st design 84-Early 86 front adjustments-
1. Make sure front cone / plate assembly is loose enough to move by hand.
2. Set the roof on the car and tighten rear center bolts. If bolts are being difficult to start, recheck to make sure roof is centered, and have a second person push roof towards back of car to help compress the new weatherstrip.
3. Tighten the outer two rear locator bolts.
4. Tighten front mounting bolts. You may need to move the plate assembly around while trying to line up and tighten front mounting bolts with other hand.
5. Tighten cones with thin 1 1/8” installation wrench as seen here:
6. Loosen center front mounting bolts. Retighten front bolts paying close attention to when front of the roof’s lens makes an even contact with the windshield weatherstrip. The front edge should only put approximately 1/8” of pressure on the weatherstrip for proper sealing as front bolts are tightened. Too much pressure may cause warps, cracks, or other problems. Too little pressure may result in air or water leaks. If you feel there is too much pressure being put onto the front of the lens please refer to 2nd design install instruction below to adjust front roof mounting brackets.
2nd design Late 86-96 front adjustments
1. Drop front upper windshield trim panel by removing 5 Phillips screws (1 rear view mirror screw and 4 outer)
2. Remove front upper roof mounting bracket covers via 2 Phillip screws per side
3. Remove 5/16” visor nuts and pop off spring retaining washers using a flat screwdriver
4. Visors will slide out and allow entire trim panel, mirror, and visors to hang
5. Go to roof and make sure front plate assembly on roof is loose enough to move by hand.
6. Set the roof on the car and tighten rear center bolts. If bolts are being difficult to start, recheck to make sure roof os centered, and have a second person push roof towards back of car to help compress the new weathertstrip.
7. Tighten the outer two rear locator bolts.
8. Tighten center front mounting bolts. You may need to move the plate assembly around while trying to line up and tighten front mounting bolts with other hand
9. Tighten outer front roof plate bolts
10. Loosen center front mounting bolts. Retighten front bolts paying close attention to when front of the roof’s lens makes an even contact with the windshield weatherstrip. The front edge should only put approximately 1/8” of pressure on the westherstrip for proper sealing as front bolts are tightened. Too much pressure may cause warps, cracks, or other problems. Too little pressure may result in air or water leaks.
11. If you feel there is too much pressure on the front of the lens, loosen the front mounting brackets and move upward as necessary. (Tip- mark the windshield frame where bracket is sitting before you loosen it, so you have a origin to return to if needed)
12. Once roof is adjusted reassemble trim parts in reverse order. Pay attention to rear view mirror wires so they don’t get pinched.
Note-
· There are many people installing cheap aftermarket weatherstrips on their cars these days. Sometimes you don’t have a choice, but if you do, always try to find something as close to the factory latex covered foam type weatherstripping. Avoid the rubber (gummy bear) feeling stuff. It doesn’t compress very well and causes damage in many cases to Corvette transparent roofs. If you install these on your car you must readjust your front mounting brackets.
· Shims may be added or removed behind rear brackets to adjust rear roof gap, though this is most often not needed. Drop rear trim panel to access rear mounting brackets.
First design 84-Early 86 Roof Installation
1. Make sure front cone / plate assembly is loose enough to move by hand.
2. Set the roof on the car and tighten rear center bolts. If bolts are being difficult to start, recheck to make sure roof is centered, and have a second person push roof towards back of car to help compress the new weatherstrip.
3. Tighten the outer two rear locator bolts on each side. Rear of roof is now done.
4. Tighten front mounting bolts. You may need to move the plate assembly around while trying to line up and tighten front mounting bolts with other hand.
5. Tighten cones with thin 1 1/8” installation wrench (can be purchased here)
c4wrench250.jpg
6. Loosen center front mounting bolts. Retighten front bolts paying close attention to when front of the roof’s lens makes an even contact with the windshield weatherstrip. The front edge should only put approximately 1/8” of pressure on the weatherstrip for proper sealing as front bolts are tightened. Too much pressure may cause warps, cracks, or other problems. Too little pressure may result in air or water leaks. If you feel there is too much pressure being put onto the front of the lens please refer to 2nd design install instruction below to adjust front roof mounting brackets.
Second and Third Design 86 late -96 Roof Installation
1. Drop front upper windshield trim panel by removing 5 Phillips screws (1 rear view mirror screw and 4 outer)
2. Remove front upper roof mounting bracket covers via 2 Phillip screws per side
3. Remove 5/16” visor nuts and pop off spring retaining washers using a flat screwdriver
4. Visors will slide out and allow entire trim panel, mirror, and visors to hang (like picture below)
instc4hang.png
5. Go to roof and make sure front plate assembly on roof is loose enough to move by hand.
6. Set the roof on the car and tighten rear center bolts. If bolts are being difficult to start, recheck to make sure roof os centered, and have a second person push roof towards back of car to help compress the new weathertstrip.
7. Tighten the outer two rear locator bolts on each side. Rear of roof is now done.
8.
Tighten center front mounting bolts. You may need to move the plate assembly around while trying to line up and tighten front mounting bolts with other hand
roofinst2.png
9. Tighten outer front roof plate bolts
10. Loosen center front mounting bolts. Retighten front bolts paying close attention to when front of the roof’s lens makes an even contact with the windshield weatherstrip. The front edge should only put approximately 1/8” of pressure on the westherstrip for proper sealing as front bolts are tightened. Too much pressure may cause warps, cracks, or other problems. Too little pressure may result in air or water leaks.
11.
If you feel there is too much pressure on the front of the lens, loosen the front mounting brackets and move upward as necessary. (Tip- mark the windshield frame where bracket is sitting before you loosen it, so you have a origin to return to if needed)
c4roofinstall11.png
12.
Once roof is adjusted reassemble trim parts in reverse order. Pay attention to rear view mirror wires so they don’t get pinched.
NOTES:
There are many people installing cheap aftermarket weatherstrips on their cars these days. Sometimes you don’t have a choice, but if you do, always try to find something as close to the factory latex covered foam type weatherstripping. Avoid the rubber (gummy bear) feeling stuff. It doesn’t compress very well and causes damage in many cases to Corvette transparent roofs. If you install these on your car you must readjust your front mounting brackets.
Shims may be added or removed behind rear brackets to adjust rear roof gap, though this is most often not
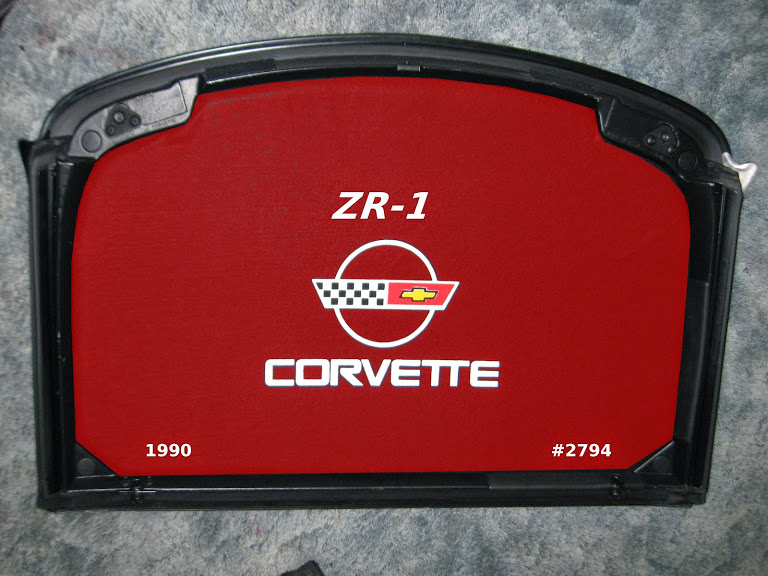
CUSTOM HEAD LINERS CAN BE USED ON BOTH TRANSLUCENT AND OPAQUE TOPS
most are tinted black, dark blue or gold and translucent and cloud up over time, this can usually be restored with careful surface refinishing
http://forums.corvetteforum.com/c5-tech ... ow-to.html
but many of these targa top roof sections tend to crack or show a spider web like micro crack surface with repeated exposure too heat or extreme cold or rapid changes like your see from sitting out in the sun for long periods, then getting hit with cool water like a sudden rain, or washing or if you drive from a heated garage out into a cold night air or rain storm,Ive rarely seen a top over 7-8 years old that has not started to degrade and since all c4 corvettes are now at least 18 years old now theres an excellent chance your original roof acrylic panel has started to degrade.
http://www.gmpartsdirect.com/catalog/frameset.cfm
now a common failure is a split down the center as the stress seems to make that rather common, you of course have the option to get the roof professionally repaired, but sending your roof in to be rebuilt tends to cost $800-$1300, depending on whats done and replaced, you can of course use high grade epoxy to structurally repair the physical damage and have the panel painted, this obviously makes the panel opaque vs semi translucent , so it may not be the ideal option.
now if your strapped for cash the epoxy crack repair and re-paint route may be a less desirable but useful option, to keep the interior ,water leak free, obviously this will require a bit of careful surface prep and masking before repainting to match the car so it looks like its original
https://www.youtube.com/watch?v=b7dZESFmG2c
http://www.corvettettops.com/84-96.htm
http://www.astrotops.com/
http://www.vette2vette.com/
http://www.sunroofdoctor.com/
http://www.zip-corvette.com/84-96-c4/bo ... anels.html
http://blog.zip-corvette.com/corvette-p ... ls-for-c4/
https://www.youtube.com/watch?v=mIXDQSQvOvQ
http://www.ecklerscorvette.com/exterior ... -tops.html
1st design 84 - Early 86 28.5”
2nd design Late 86-88 31.5”
3rd design 89-96 32.5”
Factory correct C4 roof installation procedure
Melrose T-Top Int. has been in the Corvette business for over 30 years. In that time we have taken lead position as the most reputable GM licensed aftermarket supplier of Corvette roofs and t-tops in the industry.
That being said, I feel comfortable explaining to you what seems to be a gray area in the Corvette world regarding replacement roof installation and adjustment. Most C4 Corvette owners don’t lend much thought to their tops as being an integral part of the vehicle’s structural integrity. The C4 however was initially designed as T-bar vehicle like the C3’s, and it wasn’t until a GM exec ordered the car be converted to a targa model, the engineers realized they had a problem. With the T-bar removed handling characteristics suffered greatly due to torsional flexibility. Unfortunately for us the only viable solution to this was an inconvenient bolt in bulky style targa roof.
The first thing you want to do when purchasing a new roof is verify the year of the roof on your car. Even though your car may be a 1988 it could have been converted at one point. Sound unlikely? GM sold a kit for many years to convert 84-88 Corvettes to the third design 89-96 roof styles. This was due in part to the fact that only one roof design was available and it generated more income selling and installing the kits. So, how do I determine my roof year design? You can compare your front mounting hardware with chart below or measure between your front mounting bolts.
Measured from bolt to bolt O.C. across top of windshield frame.
· 1st design 84 - Early 86 28.5”
· 2nd design Late 86-88 31.5”
· 3rd design 89-96 32.5”
1984 - 1996 Roof Panel Hardware Detail
THE PANELS ARE NOT UNIVERSALLY INTERCHANGEABLE, BETWEEN ALL YEARS OF PRODUCTION
We have established the structural importance of the C4 targa style roof and it’s different designs. Now we can discuss how to properly install it, or better yet, how not to. Start by parking your vehicle on flat ground, and inflating all tires to factory specs then follow the instructions below per your specific vehicle year.
1st design 84-Early 86 front adjustments-
1. Make sure front cone / plate assembly is loose enough to move by hand.
2. Set the roof on the car and tighten rear center bolts. If bolts are being difficult to start, recheck to make sure roof is centered, and have a second person push roof towards back of car to help compress the new weatherstrip.
3. Tighten the outer two rear locator bolts.
4. Tighten front mounting bolts. You may need to move the plate assembly around while trying to line up and tighten front mounting bolts with other hand.
5. Tighten cones with thin 1 1/8” installation wrench as seen here:
6. Loosen center front mounting bolts. Retighten front bolts paying close attention to when front of the roof’s lens makes an even contact with the windshield weatherstrip. The front edge should only put approximately 1/8” of pressure on the weatherstrip for proper sealing as front bolts are tightened. Too much pressure may cause warps, cracks, or other problems. Too little pressure may result in air or water leaks. If you feel there is too much pressure being put onto the front of the lens please refer to 2nd design install instruction below to adjust front roof mounting brackets.
2nd design Late 86-96 front adjustments
1. Drop front upper windshield trim panel by removing 5 Phillips screws (1 rear view mirror screw and 4 outer)
2. Remove front upper roof mounting bracket covers via 2 Phillip screws per side
3. Remove 5/16” visor nuts and pop off spring retaining washers using a flat screwdriver
4. Visors will slide out and allow entire trim panel, mirror, and visors to hang
5. Go to roof and make sure front plate assembly on roof is loose enough to move by hand.
6. Set the roof on the car and tighten rear center bolts. If bolts are being difficult to start, recheck to make sure roof os centered, and have a second person push roof towards back of car to help compress the new weathertstrip.
7. Tighten the outer two rear locator bolts.
8. Tighten center front mounting bolts. You may need to move the plate assembly around while trying to line up and tighten front mounting bolts with other hand
9. Tighten outer front roof plate bolts
10. Loosen center front mounting bolts. Retighten front bolts paying close attention to when front of the roof’s lens makes an even contact with the windshield weatherstrip. The front edge should only put approximately 1/8” of pressure on the westherstrip for proper sealing as front bolts are tightened. Too much pressure may cause warps, cracks, or other problems. Too little pressure may result in air or water leaks.
11. If you feel there is too much pressure on the front of the lens, loosen the front mounting brackets and move upward as necessary. (Tip- mark the windshield frame where bracket is sitting before you loosen it, so you have a origin to return to if needed)
12. Once roof is adjusted reassemble trim parts in reverse order. Pay attention to rear view mirror wires so they don’t get pinched.
Note-
· There are many people installing cheap aftermarket weatherstrips on their cars these days. Sometimes you don’t have a choice, but if you do, always try to find something as close to the factory latex covered foam type weatherstripping. Avoid the rubber (gummy bear) feeling stuff. It doesn’t compress very well and causes damage in many cases to Corvette transparent roofs. If you install these on your car you must readjust your front mounting brackets.
· Shims may be added or removed behind rear brackets to adjust rear roof gap, though this is most often not needed. Drop rear trim panel to access rear mounting brackets.
First design 84-Early 86 Roof Installation
1. Make sure front cone / plate assembly is loose enough to move by hand.
2. Set the roof on the car and tighten rear center bolts. If bolts are being difficult to start, recheck to make sure roof is centered, and have a second person push roof towards back of car to help compress the new weatherstrip.
3. Tighten the outer two rear locator bolts on each side. Rear of roof is now done.
4. Tighten front mounting bolts. You may need to move the plate assembly around while trying to line up and tighten front mounting bolts with other hand.
5. Tighten cones with thin 1 1/8” installation wrench (can be purchased here)
c4wrench250.jpg
6. Loosen center front mounting bolts. Retighten front bolts paying close attention to when front of the roof’s lens makes an even contact with the windshield weatherstrip. The front edge should only put approximately 1/8” of pressure on the weatherstrip for proper sealing as front bolts are tightened. Too much pressure may cause warps, cracks, or other problems. Too little pressure may result in air or water leaks. If you feel there is too much pressure being put onto the front of the lens please refer to 2nd design install instruction below to adjust front roof mounting brackets.
Second and Third Design 86 late -96 Roof Installation
1. Drop front upper windshield trim panel by removing 5 Phillips screws (1 rear view mirror screw and 4 outer)
2. Remove front upper roof mounting bracket covers via 2 Phillip screws per side
3. Remove 5/16” visor nuts and pop off spring retaining washers using a flat screwdriver
4. Visors will slide out and allow entire trim panel, mirror, and visors to hang (like picture below)
instc4hang.png
5. Go to roof and make sure front plate assembly on roof is loose enough to move by hand.
6. Set the roof on the car and tighten rear center bolts. If bolts are being difficult to start, recheck to make sure roof os centered, and have a second person push roof towards back of car to help compress the new weathertstrip.
7. Tighten the outer two rear locator bolts on each side. Rear of roof is now done.
8.
Tighten center front mounting bolts. You may need to move the plate assembly around while trying to line up and tighten front mounting bolts with other hand
roofinst2.png
9. Tighten outer front roof plate bolts
10. Loosen center front mounting bolts. Retighten front bolts paying close attention to when front of the roof’s lens makes an even contact with the windshield weatherstrip. The front edge should only put approximately 1/8” of pressure on the westherstrip for proper sealing as front bolts are tightened. Too much pressure may cause warps, cracks, or other problems. Too little pressure may result in air or water leaks.
11.
If you feel there is too much pressure on the front of the lens, loosen the front mounting brackets and move upward as necessary. (Tip- mark the windshield frame where bracket is sitting before you loosen it, so you have a origin to return to if needed)
c4roofinstall11.png
12.
Once roof is adjusted reassemble trim parts in reverse order. Pay attention to rear view mirror wires so they don’t get pinched.
NOTES:
There are many people installing cheap aftermarket weatherstrips on their cars these days. Sometimes you don’t have a choice, but if you do, always try to find something as close to the factory latex covered foam type weatherstripping. Avoid the rubber (gummy bear) feeling stuff. It doesn’t compress very well and causes damage in many cases to Corvette transparent roofs. If you install these on your car you must readjust your front mounting brackets.
Shims may be added or removed behind rear brackets to adjust rear roof gap, though this is most often not
CUSTOM HEAD LINERS CAN BE USED ON BOTH TRANSLUCENT AND OPAQUE TOPS