Cam Drive Details

Indycars

Administrator
Staff member
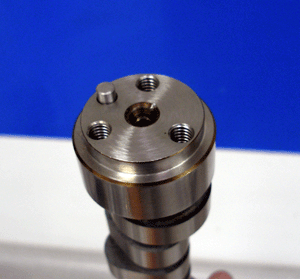
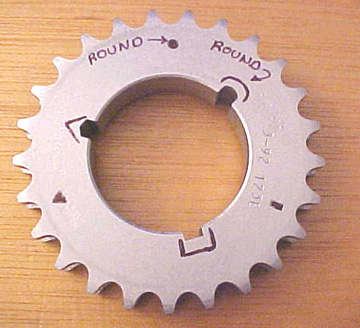
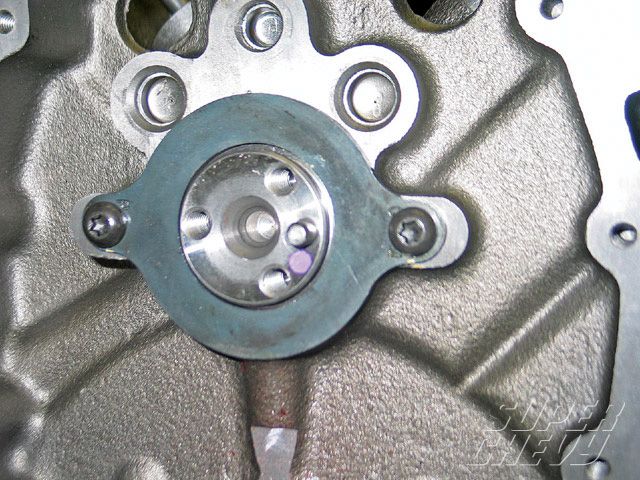
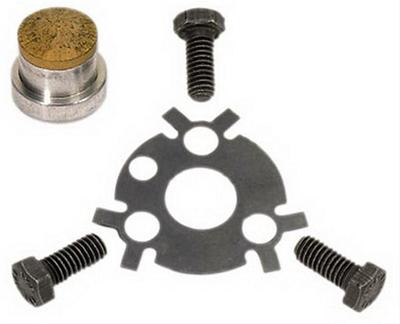
Since I'm going to be using the Dart SHP block, I have the choice of which style cam to use. One with the thrust plate (1) or the older style with a thrust button (2). The camshaft will be a hydraulic or solid roller. If I use the older style with a thrust button, then would it be necessary to use the thrust washer (3) or a torrington thrust bearing to protect the block???


figure2-r2.gif

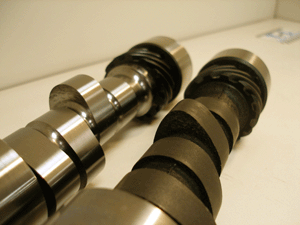
notice the more aggressive cam lobe acceleration rate on the roller cam lobes
figure5-5.gif

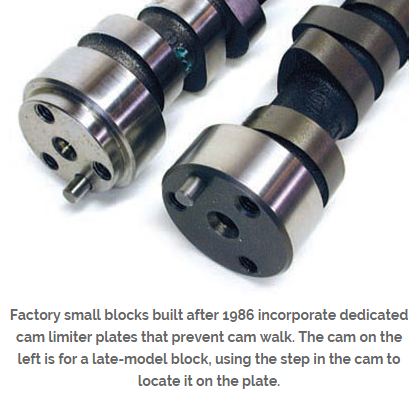
notice the stepped cam nose to fit retainer plate
 

Attachments

  • GM_CamshaftThrustPlate.jpg
    GM_CamshaftThrustPlate.jpg
    8.7 KB · Views: 485
  • ThrustWasher.jpg
    ThrustWasher.jpg
    24 KB · Views: 485
  • RollerThrustButton.jpg
    RollerThrustButton.jpg
    17.8 KB · Views: 485
both the cam shaft index systems have advantages and potential problems but the later style retention plate with matched cam, with the recessed front modified for the retention plate.
file.php

tends to be a bit less prone to problems


crankgearvb.jpg
 
grumpyvette said:
both the cam shaft index systems have advantages and potential problems but the later style retention plate with matched cam, with the recessed front modified for the retention plate.
file.php

tends to be a bit less prone to problems
Should I expect to have to adjust the camshaft endplay with this configuration???
If I need MORE endplay, does that require machining???
How about getting LESS endplay, are there shims for this???
 
Thanks for the info!

If the prices are essentially the same for both style of camshafts, then I guess there is no reason not to use the later style retention plate.
 
There is two retention / thrust plates available for GM.
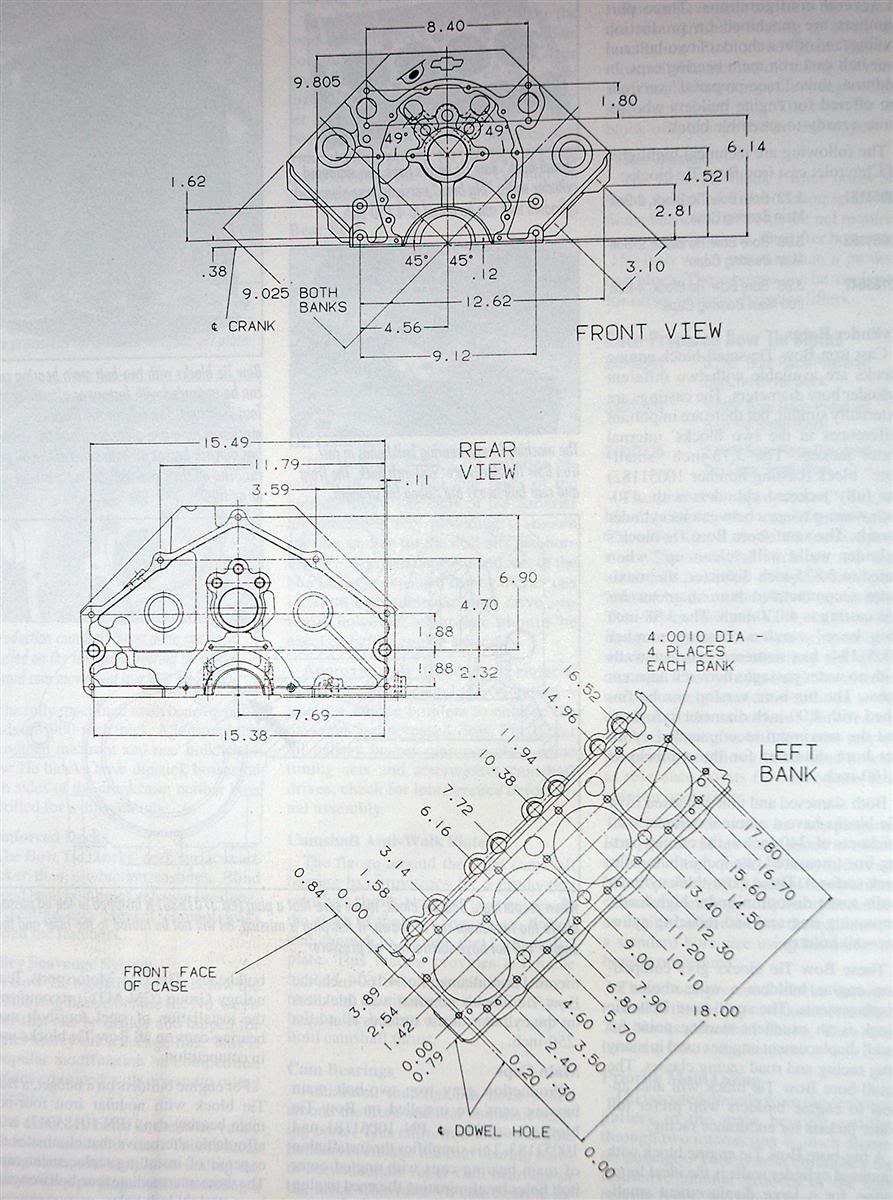
- Designed to fit ZZ3 and ZZ4 engines with 3.294 in. bolt center.
http://www.summitracing.com/parts/NAL-10168501/

- Designed to fit ZZZ and ZZ2 engines with 3.620 in. bolt center.
http://www.summitracing.com/parts/NAL-10088128/

I'm pretty sure the Dart SHP takes the plate with 3.294" bolt center, but I still have a question about the bolts for this plate. Will they have to be a button head for clearance reasons or will a standard hex head (Grade 5 or 8) work.
 

Attachments

  • ButtonHeadCapScrew.jpg
    ButtonHeadCapScrew.jpg
    7.1 KB · Views: 442
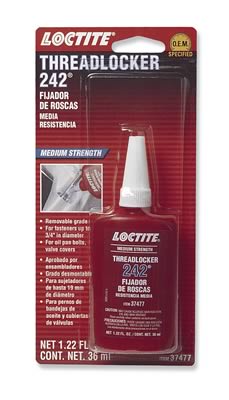
youll generally use LOC-TITE on the retainer bolts threads
use loc-tight on the bolt threads to reduce any tendency for them coming loose
266loc.JPG

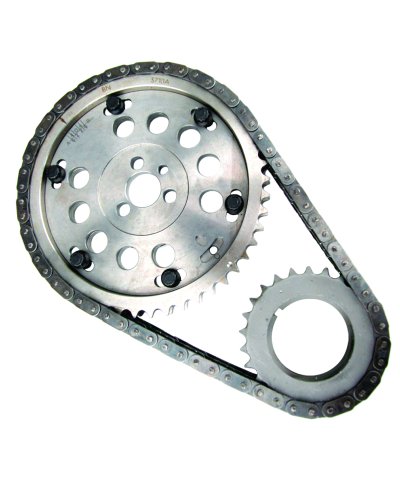
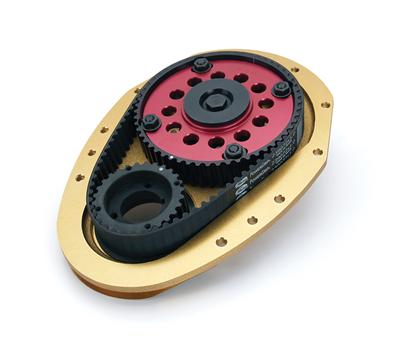
a basic timing chain set like this from cloyes works great in most SBC applications
https://www.summitracing.com/parts/CLO-9-1100/

FIRST GEN, SBC CLOYES ROLLER TIMING SET
https://www.summitracing.com/parts/clo-9-1100/overview/

MARK IV BBC CLOYES ROLLER TIMING SET 1965-90
https://www.summitracing.com/parts/clo-c-3024x/overview/

MARK VI BBC CLOYES ROLLER TIMING SET 1991-95
https://www.summitracing.com/parts/...-specific/engine-family/chevy-big-block-gen-v
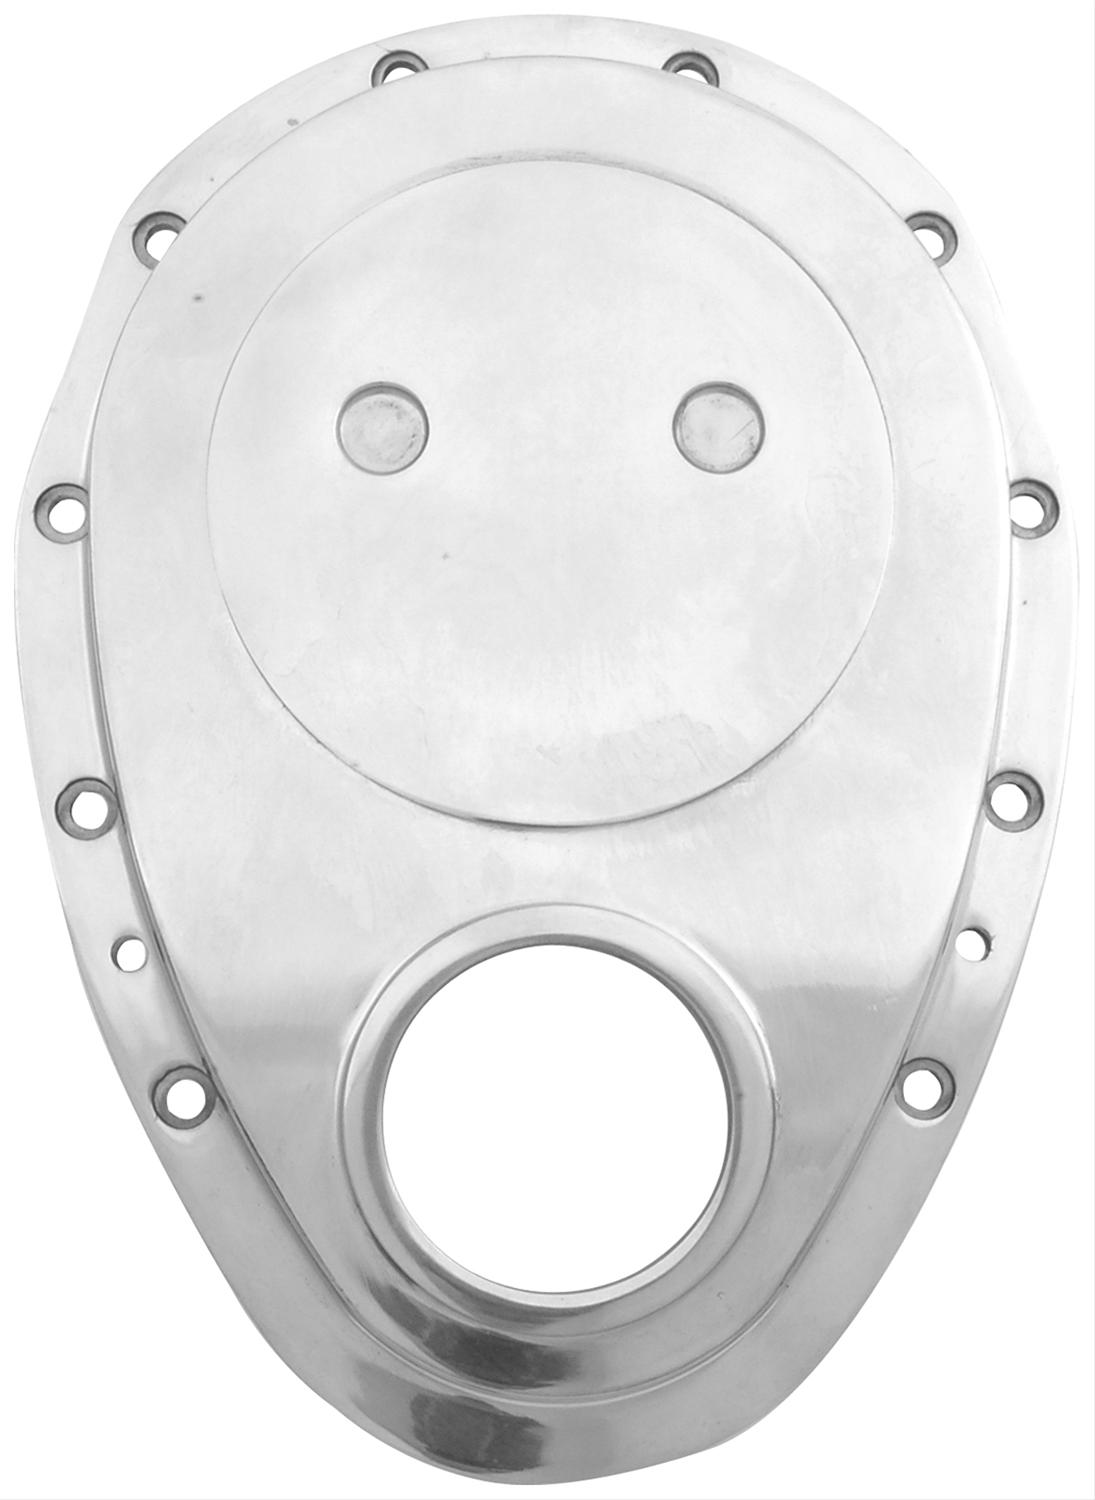
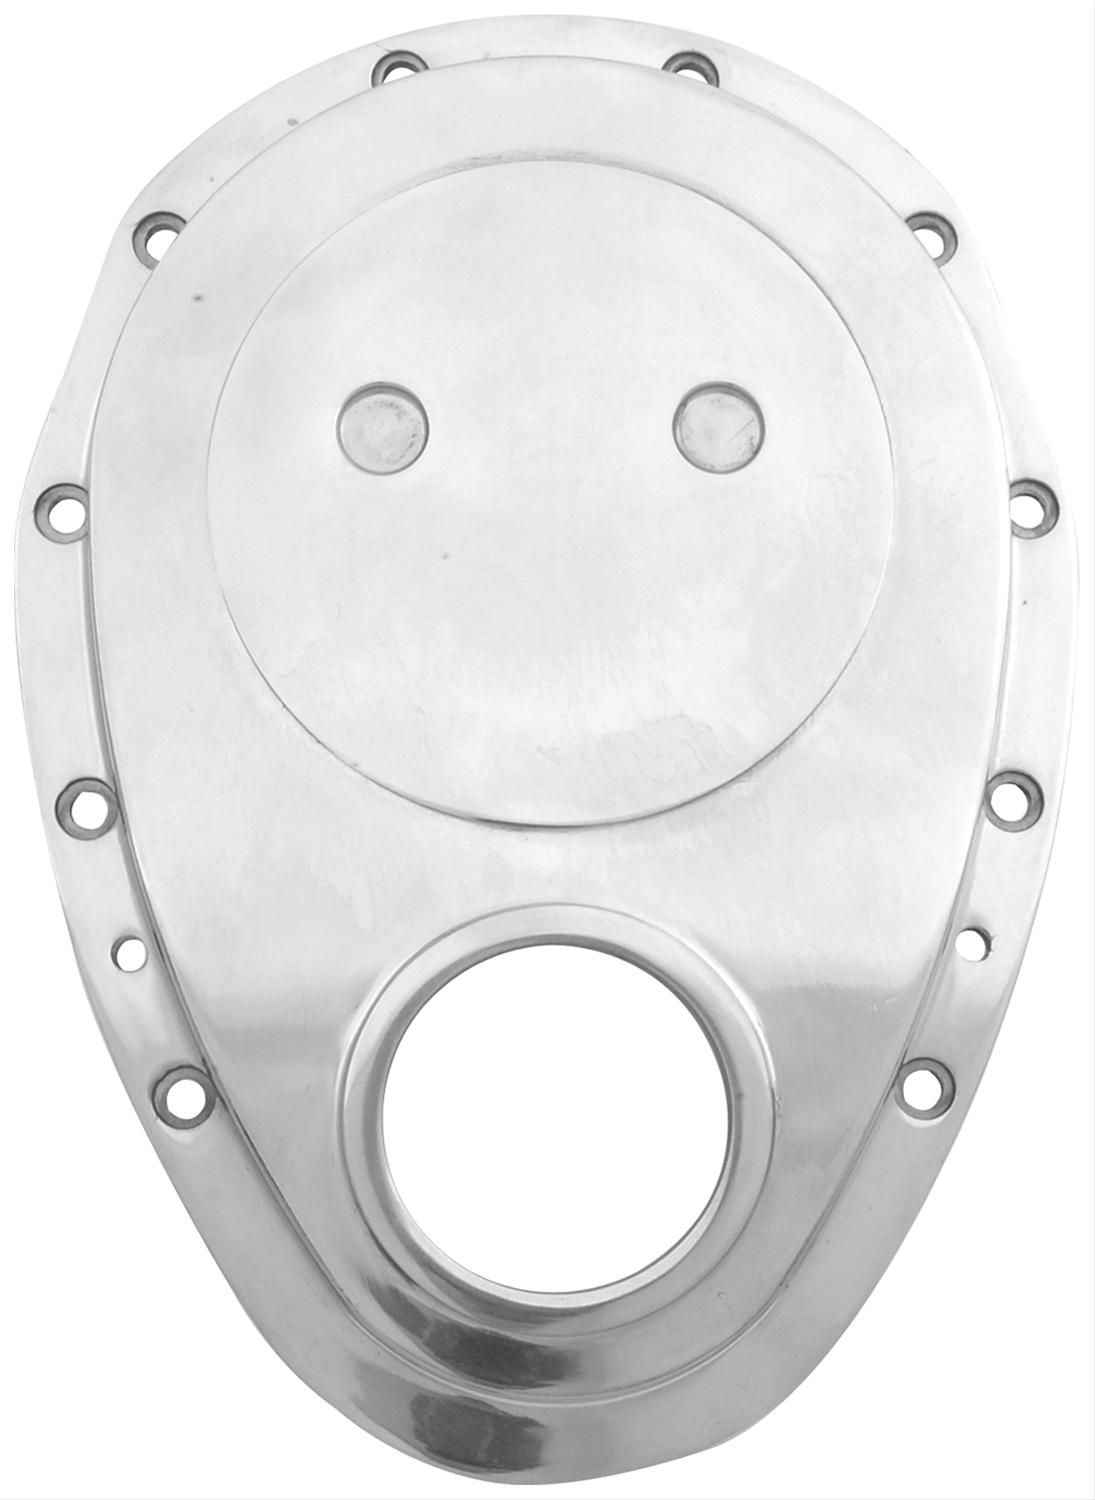
some cam timing covers are much better quality
aaf-all90008_xl.jpg

If your ever in doubt, about the correct timing chain application,
CALL THE TECH GUYS AT CLOYES:D

cloyes tech dept 1-479-646-1662 EXT 228
454build2.jpg

cambut1.jpg

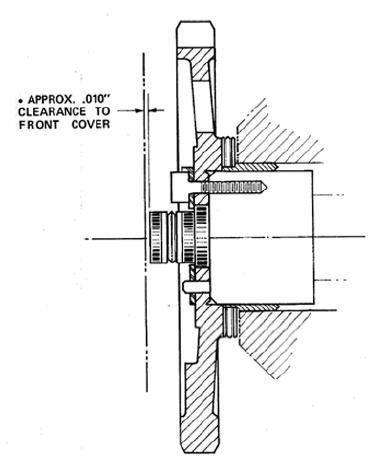
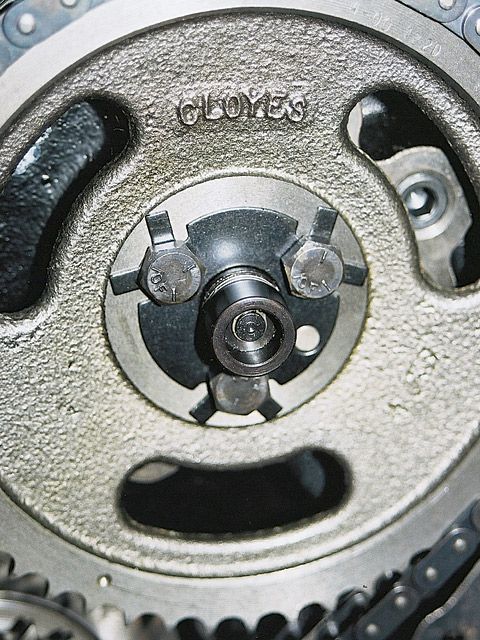
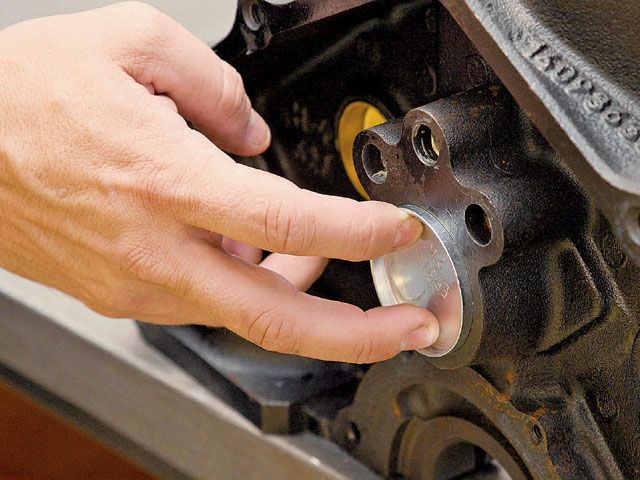
a properly installed nylon cam button with a bolt retainer plates a good idea


I generally use a NYLON cam button rather than the roller bearing versions as its far less difficult to machine to compensate for required end to timing cover clearances if the extra rooms required, Id sure use a NYLON cam button and cut the button to get the clearance , the reason, is that parts expand when heated and while its UNLIKELY I have seen the rear cam tunnel freeze plug start leaking oil as a result of no cover to cam button clearance

http://www.summitracing.com/parts/LCT-37477/

lct-37477_w.jpg


related thread
viewtopic.php?f=52&t=205&p=887&hilit=gears+chain+cams#p887

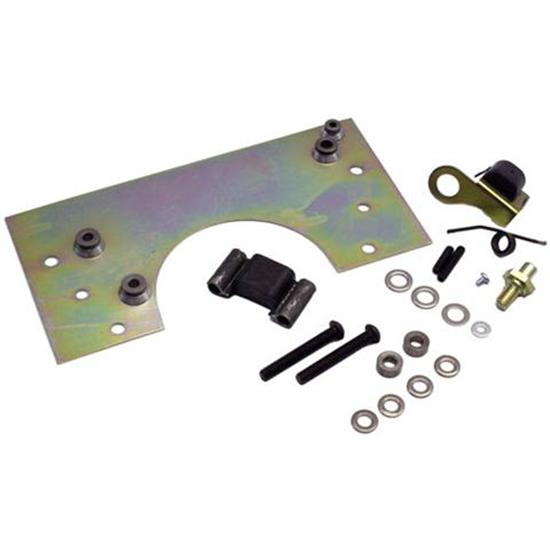
, a timing chain set designed to be used with a retainer plate,and cap screws to get the required clearance
cambutclear.jpg

small_block+retainer_plate.jpg

vincam.png

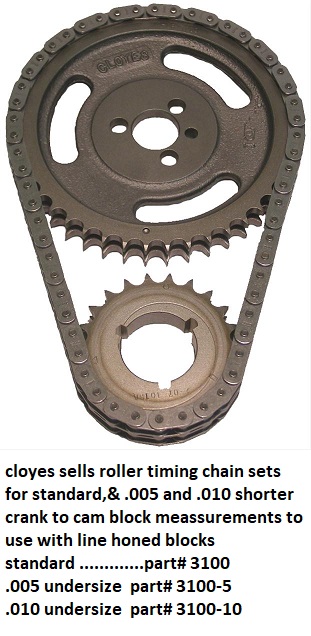
Ive occasionally been asked what you can do too reduce the slack in the timing chain if your blocks been line honed,
to straiten the main bearings and that resulted in a slightly closer crank to cam center-line distance,
that results in a slightly increased slack in the stock timing chain sets.
a negligible amount of metal is generally removed from the main bearing saddles in the block, they usually try very hard to minimize that, metal removal so standard parts still fit,during a line hone , but they do sell slightly tighter timing chain sets to correct excess slack if that's required.
SBCprintCustom2.jpg


cloyesunder.jpg


https://www.summitracing.com/parts/clo-9-3100-5
Timing Chain and Gear Set, Original True Roller, Double Roller, -0.005 in., Iron/Steel Sprockets, Chevy, Small Block, Set
for line honed blocks where the crank is .005 closer to the cam


https://www.summitracing.com/parts/clo-9-3100-10
for line honed blocks where the crank is .010 closer to the cam
Timing Chain and Gear Set, Original True Roller, Double Roller, -0.010 in., Iron/Steel Sprockets, Chevy, Small Block, Set

related info
http://garage.grumpysperformance.co...ped-nose-cam-in-early-block.14182/#post-71937

http://garage.grumpysperformance.com/index.php?threads/cam-drive-details.3809/#post-16765

http://garage.grumpysperformance.co...hanics-of-adv-ret-a-camshaft.4532/#post-12048

http://garage.grumpysperformance.co...-get-it-to-last-cam-install-info.90/#post-114

http://garage.grumpysperformance.com/index.php?threads/cam-spacer-buttons.1793/#post-4553


http://garage.grumpysperformance.com/index.php?threads/chain-vs-gear-drive-cam.781/
camaro_small_block+timing_chain.jpg

http://www.superchevy.com/technical/eng ... to_17.html

small_block+lt1_timing_chain.jpg

http://www.summitracing.com/parts/NAL-1 ... /?rtype=10
c60462.jpg

nal-12370835.jpg

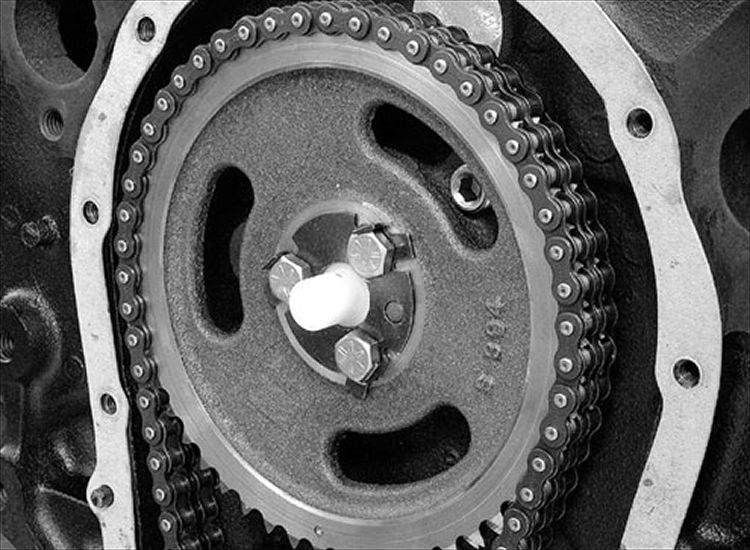
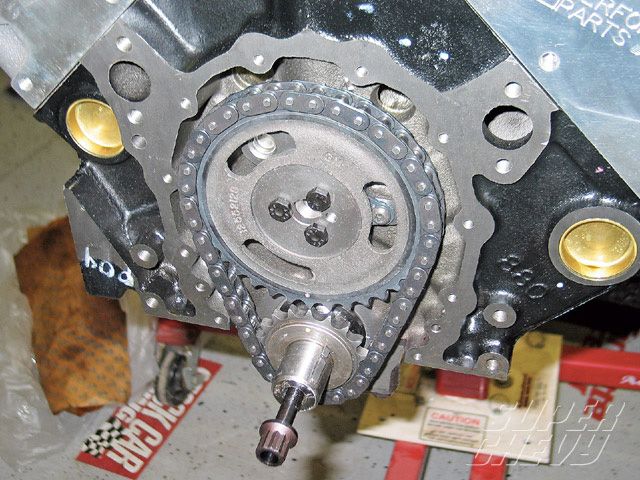
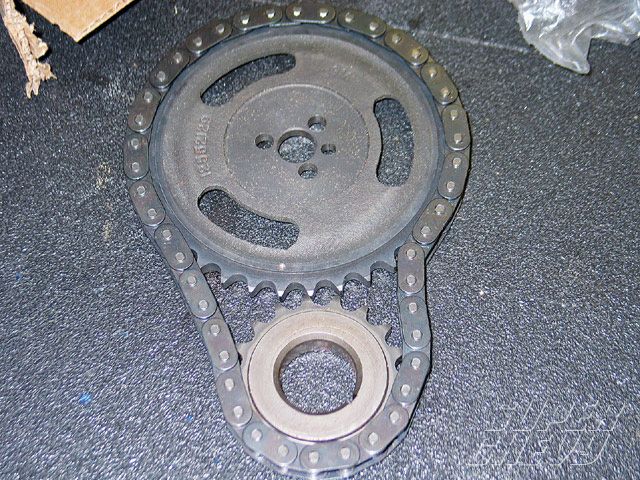
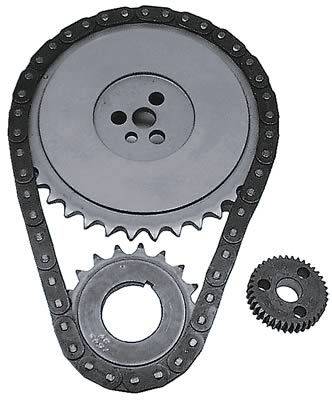
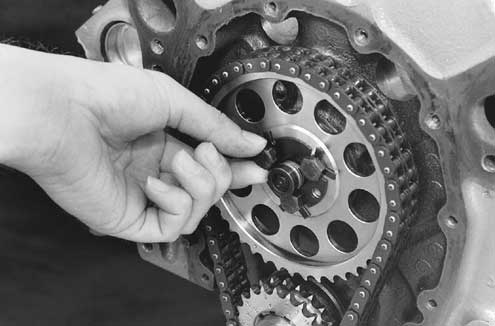
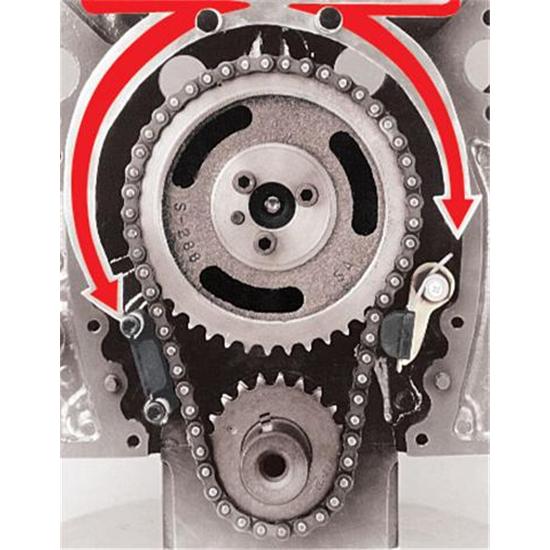
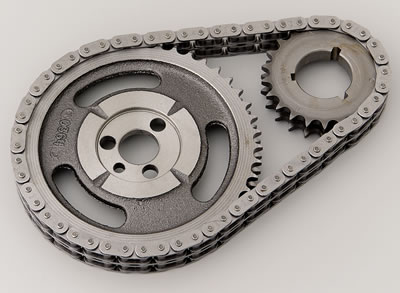
LOOK CLOSELY at the timing set chain and gears, the blocks with cams with retainer plates tend to use a single link chain design, like above, the older SBC design timing chain sets BELOW for cams that use retainer buttons tend to use the DUAL LINK CHAIN AND GEAR DESIGN TIMING SETS


figure2-r2.gif

notice the more aggressive cam lobe acceleration rate on the roller cam lobes
figure5-5.gif

notice the stepped cam nose to fit retainer plate

buttonretainer.jpg

adjustable.jpg


0106em_bbshootout_14_z.jpg

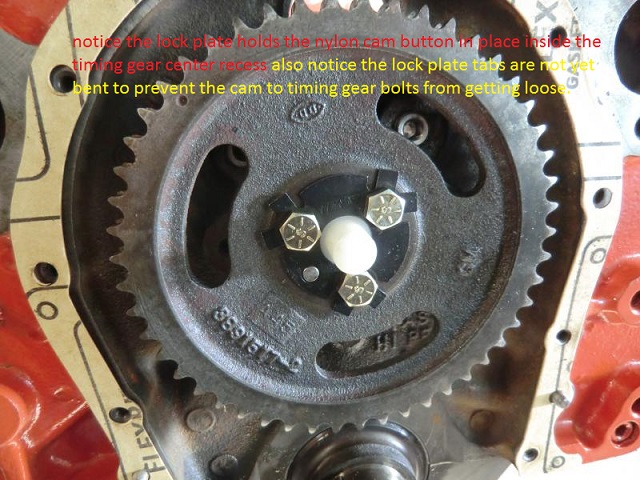
this cam buttons correctly installed but thee retainer plate tabs have not been bent up to lock the bolt heads from rotating

viewtopic.php?f=52&t=1793&p=4553&hilit=cam+nylon+button#p4553

http://www.summitracing.com/parts/CLO-9-3100/
ON CLOYES SETS the SHORTER CHAINS used ON LINE HONED BLOCKS ,GENERALLY HAVE A PART NUMBER ENDING IN EITHER -5 or _10 INDICATING A .005 or .0010 TIGHTER timing set

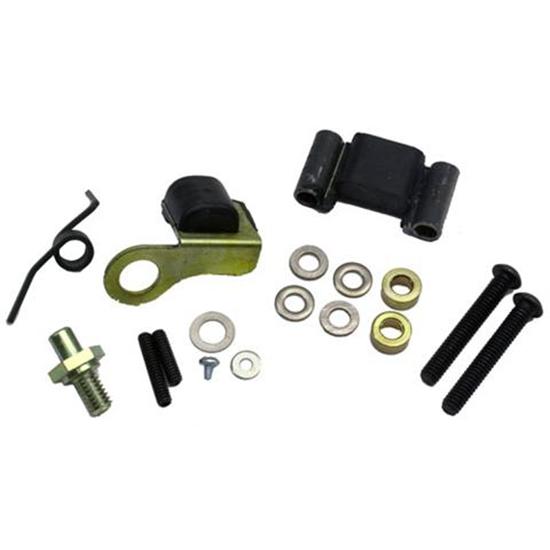
THERE ARE TIMING CHAIN TENSION-ER KITS AVAILABLE

http://www.speedwaymotors.com/S-B-Chevy ... ,3229.html
ten1.jpg

ten2.jpg

ten3.jpg

clo-9-3100-10_w.jpg
 
Last edited by a moderator:
Indycars said:
If I use the older style with a thrust button, then would it be necessary to use the thrust washer (3) or a torrington thrust bearing to protect the block???
Id also like to know the answer to this latter question.
Because, when the guy put my cam in the engine, he put a cam button in too(despite its not a roller cam) and no thrust washer.. If this can cause harm(cam button without a thrust washer/bearing) i will disssemble and take the cam button out.
 
properly installed they cause zero problems, in fact Ive used a nylon cam button even on non-roller cam applications for many decades.
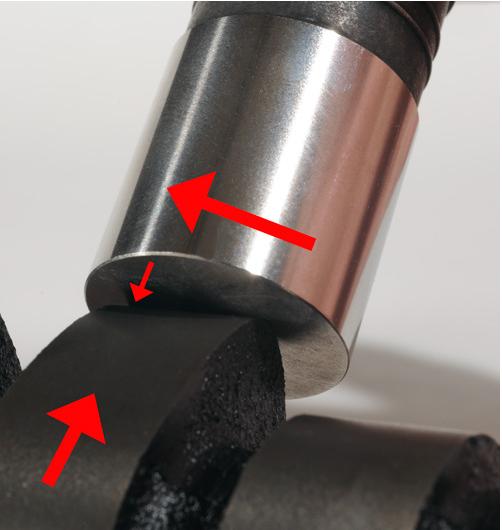
a thrust washer to protect the block surface is a good idea IF THE CAM GEAR is designed to use one AND if you have the .007-.005 clearance between the nylon cam button and the timing cover
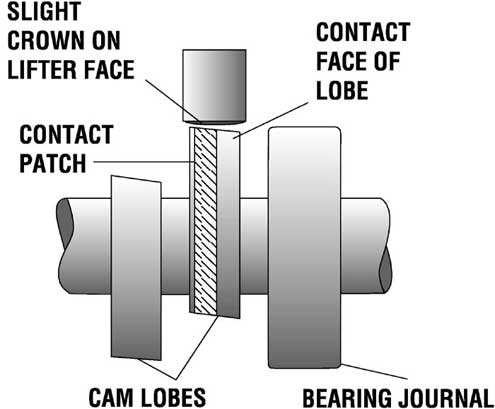
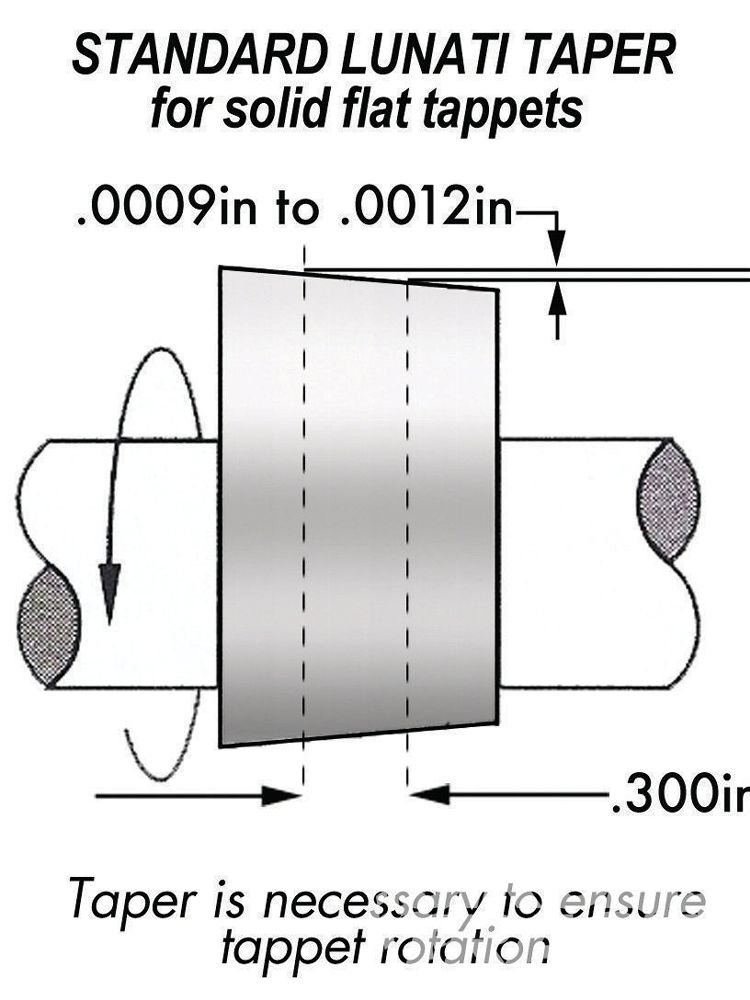
remember flat tappet cam lobes have a micro angle that tends to force the cam to the rear as it runs so theres very little chance for the cam to move forward in the block like with a roller cam, but the button does tend to eliminate and chance of that so its a good safety measure, even if its not needed most of the time.remember the rear cam journal is covered on the rear block with a freeze plug and oil pressure tends to make the cam stay a few thousands forward as theres a pressurized disc of oil flow behind the cam
rearfreezepluginstallation.jpg

READ THIS
viewtopic.php?f=52&t=3777&p=10011&hilit=nylon+button#p10011
p43452_image_large.jpg

cl1.jpg


race-engine-cams.jpg

cl2.jpg


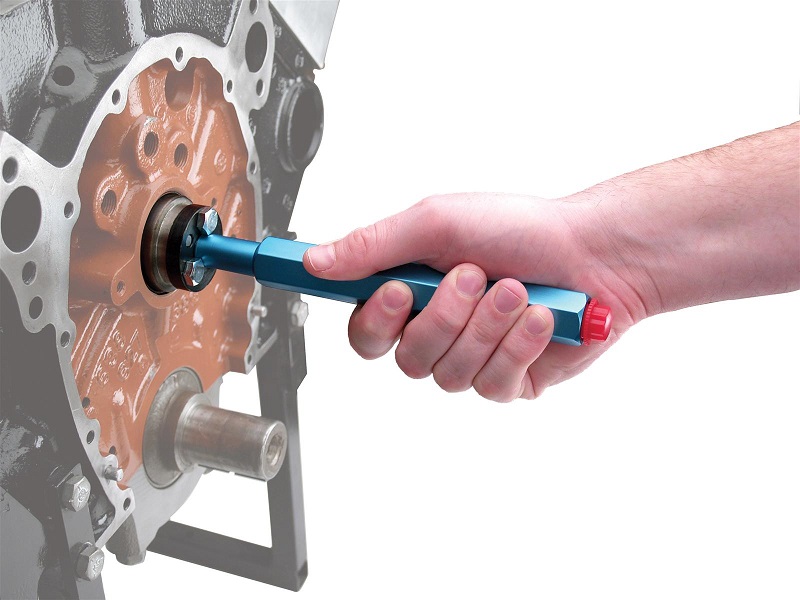
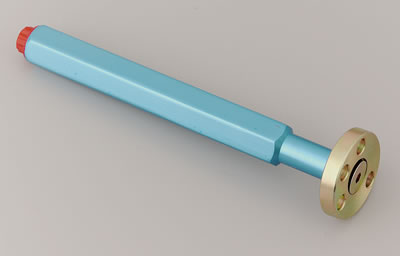
use of a camshaft install handle generally reduces the chances of damaged cam bearings
CCA-4919_xla.jpg

cca-4919_w.jpg


heres a bit of potentially useful info GOFAST POSTED
["quote=GOFAST"]

SBC Stepped Nose Cam in Early Block?
Just curious if anyone has devised a way to use the later SBC "stepped-nosed" cams in the early SBC's?

We are trying to eliminate the required use of any cam-buttons in the 100% stock-appearing builds on the roller platform?

Thanks, Gary in N.Y.

P.S. Open to any suggestions/recommendations. Have my own idea but like to hear some add'l possibilities/thoughts.
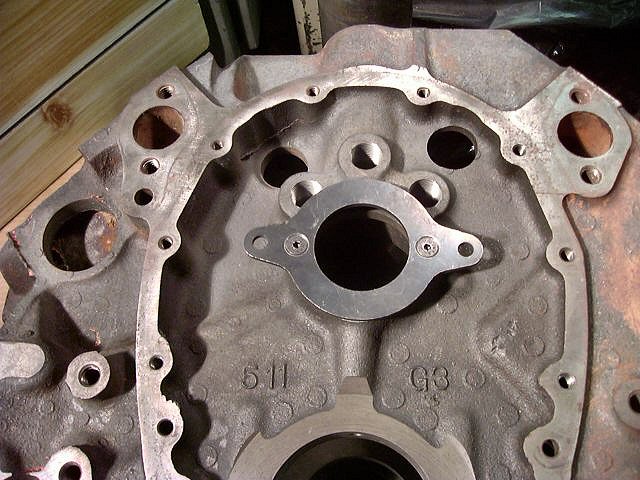
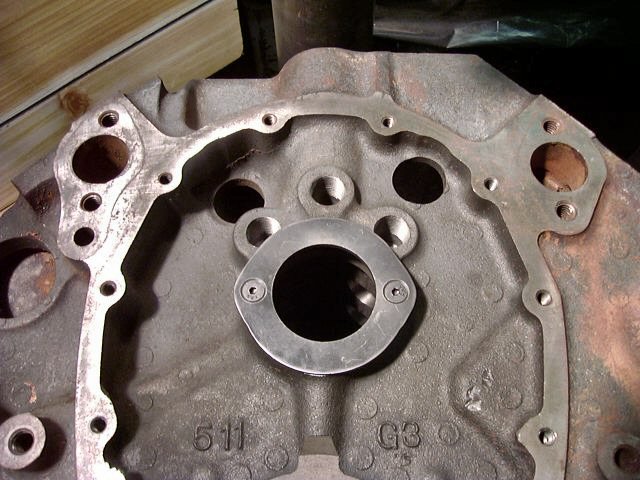
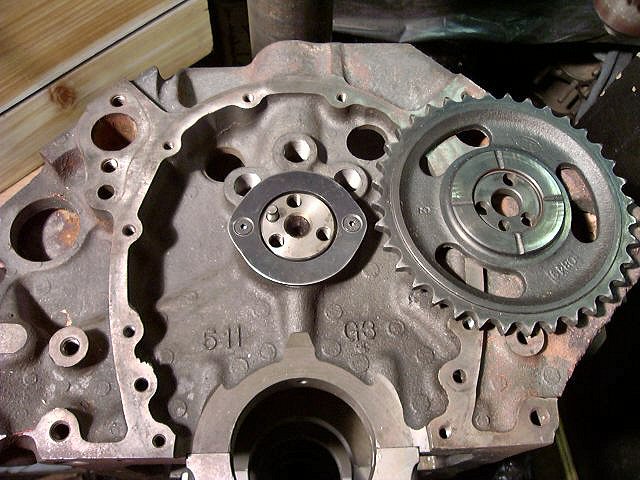
I brought this back because it turned out to be a fairly simple resolution. Wasn't sure it could be done without extensive machining, solved it easily.

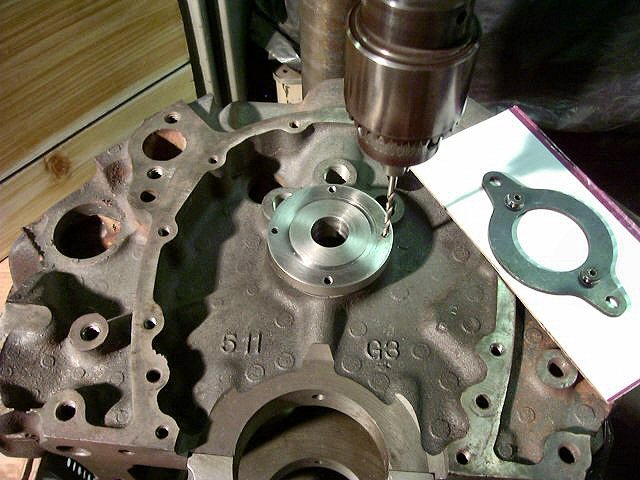
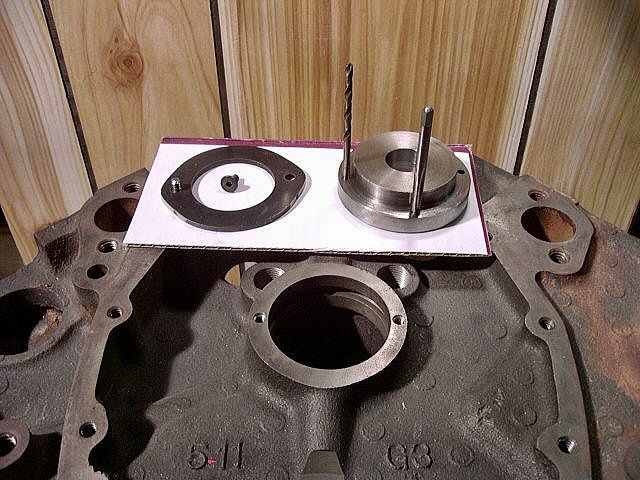
I'll put a couple shots below showing the basic's of the "fix". Takes about 30/40 minutes or so for the entire machining and can be done on a simple (decent) drill press capable of holding the block on the table.

Quote:
Originally Posted by novaderrik View Post
just use a roller cam block... the only real striking visual difference between them and an old small block once it's in the car is the size of the pad by the water pump where the id codes are stamped.
Hi nova, we do a bunch of 100% stock-appearing builds where ANY replacement block is NOT an option. Now we can set up the roller cams (mostly retro-hydraulics) with the late thrust plate. No more "playing-around" with cam buttons/end play. Much easier for us here.


Thanks, Gary in N.Y.

P.S. Anyone with any machining experience can accomplish this mod easily. With the way we designed the tool in the photo we can pick the 2 best spots on the original thrust surface to locate the 2 allen-head screws, an area that has some extra "meat" for the screw-threads.

grpl1.jpg
grpl2.jpg

don't need those ears on the sides anymore?

small taps in cast iron, any troubles there?
Hi Tom, correct on the "ears", they aren't needed with this method. Later today I'll put another shot here with the plate finished, "ears" removed!

No problem drilling/tapping for the fasteners, entire procedure went smoothly after devising the jig to set all the holes in place. The jig is used to locate/drill the new holes in the plate also, in the first photo you can see the "register" that holds the plate in place to back-drill these holes.

Like I stated above, was fairly easy when I finally got a handle on exactly how I was going to get it to come together.

The only potential issue on some blocks is the uniformity of the original cam-thrust surface face, many favor one side more that the other. In other words (looking at the block from the front) some castings are wider on one side making the other side narrower, we can position the 2 bolts anywhere on the surface. They don't need to be "clocked" so to speak!

(Add) This a huge breakthrough for us when doing the 100% stock-appearing builds on any roller platform. In the larger picture the cost is also less, no cam button/locking plate, just the cost of the OEM plate. Cost/labor of installing the plate is about a "wash" with the time spent on setting up the end-play with the button. We can layout the plate at the same time we drill/tap for the front (3) oil galley plugs, which are also done while on the drill press

(Add) Below is a shot of the finished plate installed.

Thanks, Gary in N.Y.

P.S. On a side note, we didn't find it necessary to drill (deep enough) into the oil groove behind the cam brg but it would not have made any difference when the bolts are installed. Also, I could put 2 more fasteners in the plate if I felt it necessary. Would take about an extra 10 minutes simply by "turning" the jig 90* and drilling the 2 add'l holes.

grpl3.jpg


P.S. I've already "kicked" this around with a couple local builders just for opinion's sake, all are in agreement, looks like all will be fine! I most definitely would NOT attempt this procedure by "hand", you'll most likely ruin the casting. It takes a decent lathe, the Bridgeport, and a decent rotating table to make the tooling! Also necessary is a 10-24 "bottom" tap to get every last thread possible.
ast shot, "late" cam installed, .003" (nominal) end-play.

Worked like a charm, really.

Thanks, Gary in N.Y.

P.S. Mike (Wolfplace) thanks for the support. I'll say it once more, for us here we consider this a major accomplishment. I still need to dyno test a build or two but don't anticipate any adverse effects!

grpl4.jpg

grpl5.jpg


http://www.jegs.com/i/JEGS-Performa...MIiNrGptbX1gIVzYJ-Ch0grAi6EAQYAiABEgKuRvD_BwE

http://paceperformance.com/i-648452...ines-chevrolet-performance-parts-engines.html


old school
http://www.jegs.com/p/COMP-Cams/Comp-Cams-Cam-Buttons-Wear-Plate/753163/10002/-1
[/quote]
 
Last edited by a moderator:
grumpyvette said:
properly installed they cause zero problems, in fact Ive used a nylon cam button even on non-roller cam applications for many decades.
I think he is also asking about whether the thrust washer or torrington bearing is needed with the cam button.
 

Attachments

  • ThrustWasher.jpg
    ThrustWasher.jpg
    24 KB · Views: 80
Back
Top