Radiator Cleaning
https://www.dewitts.com/collections/corvette-aluminum-radiators

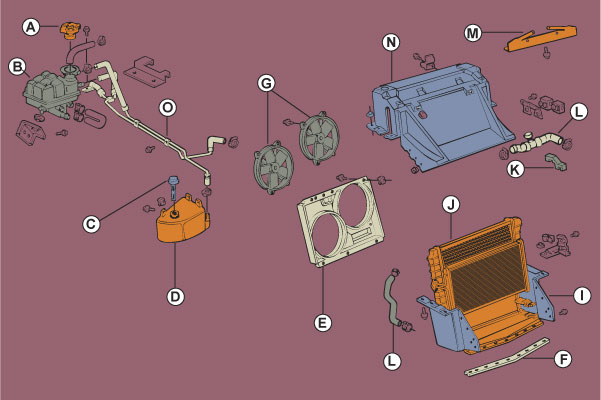
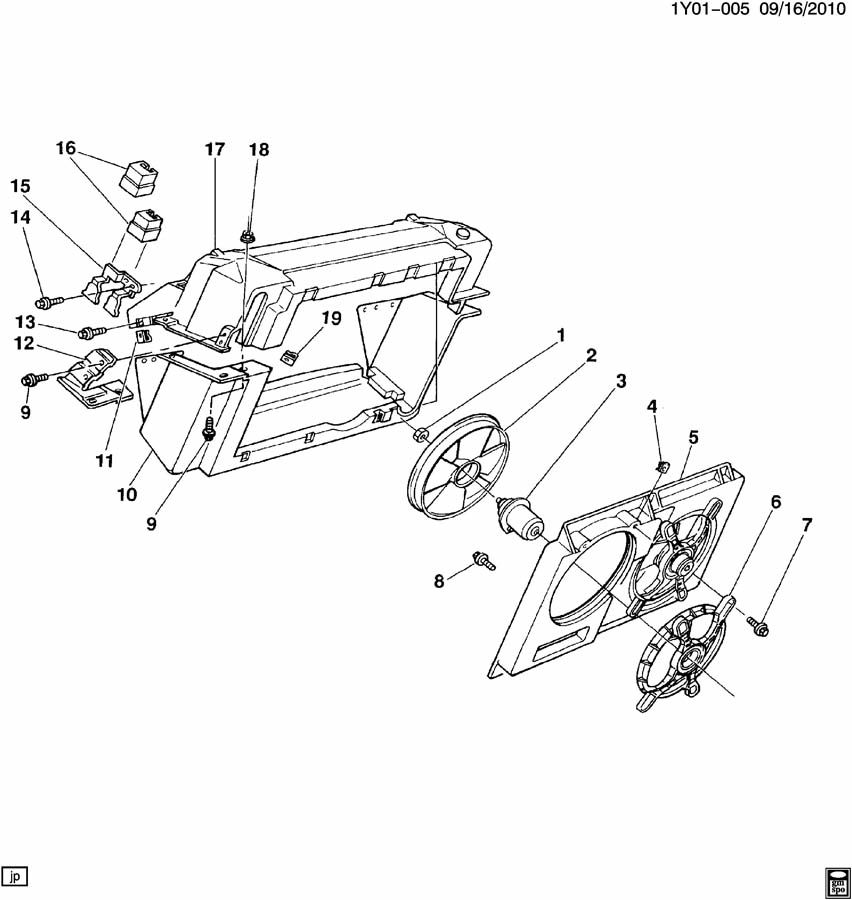
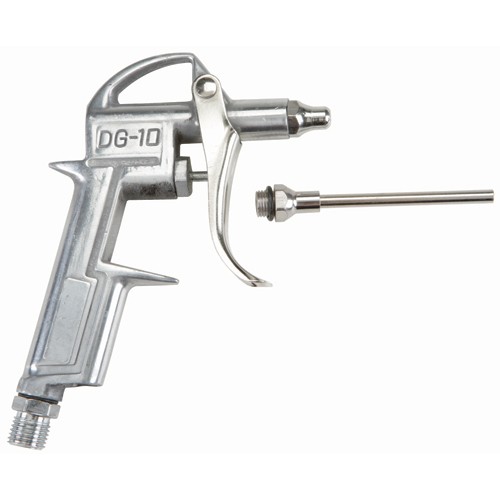
a brief inspection will show you that the cooling fan shroud and fans makes the rear surface of the radiator surface fins rather difficult to easily access, a garden hose and soapy water sprayed from the rear can loosen some crud and help flush it out, high pressure air from a long nozzle if you have access to an air compressor, can knock loose an amazing amount of trash.
http://www.harborfreight.com/air-blow-gun-with-4-in-nozzle-68258.html
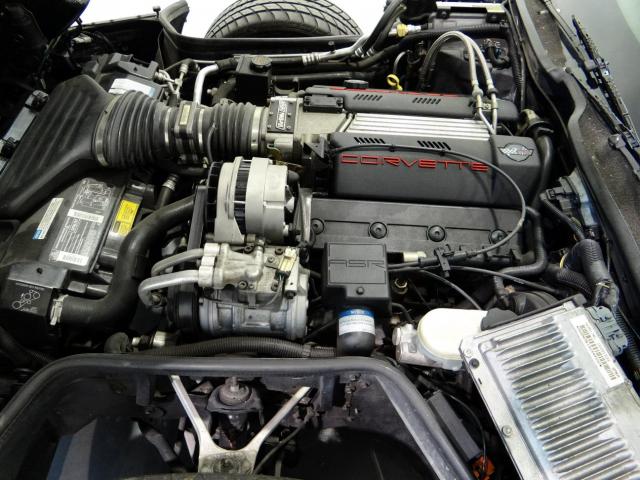
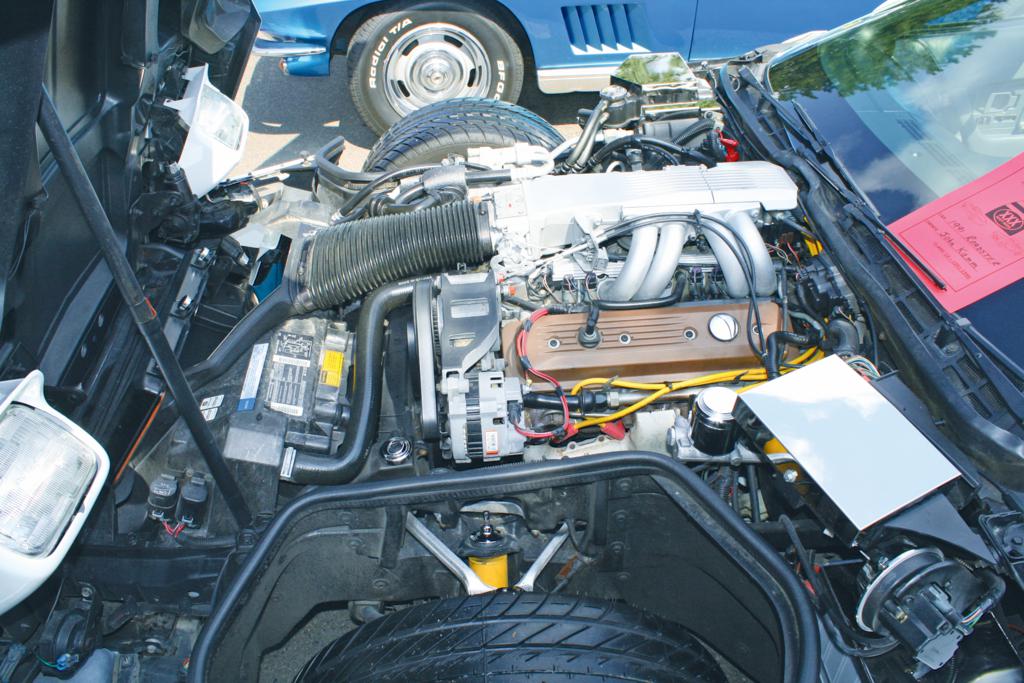
the air cleaner housing on the upper face of the air filter can be fairly easy to temporarily lift off but it offers almost no access to the radiator area
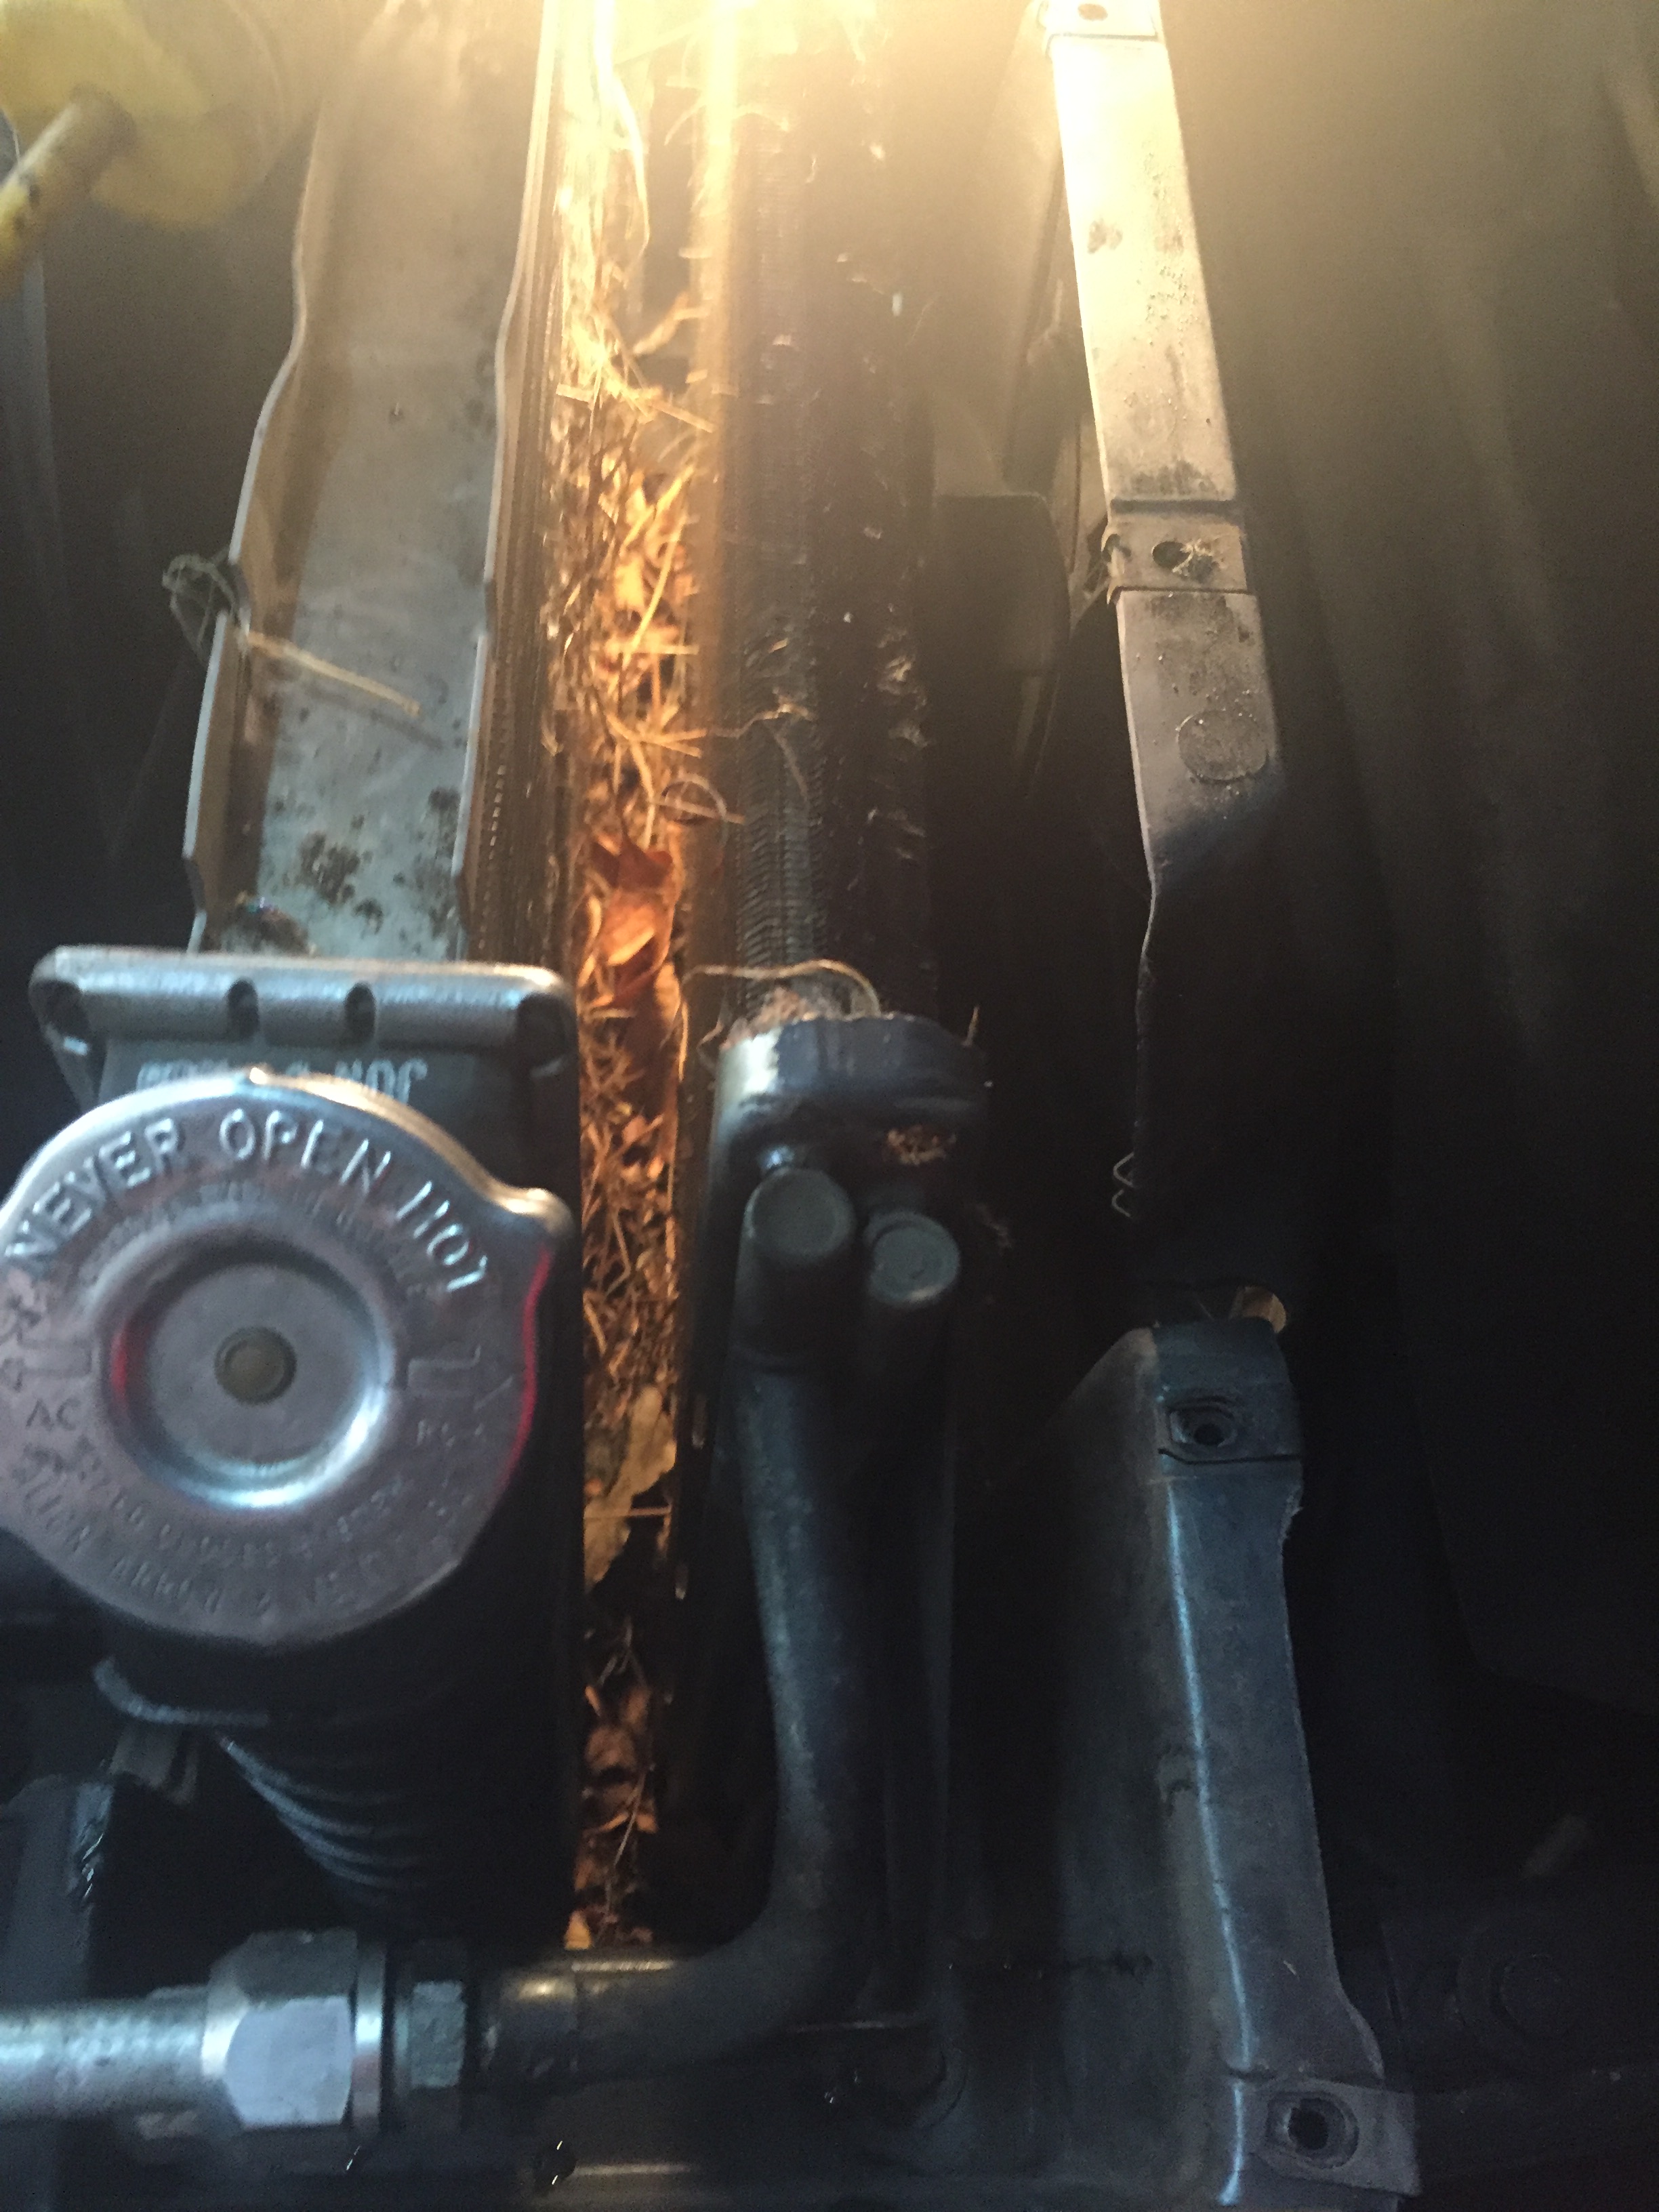
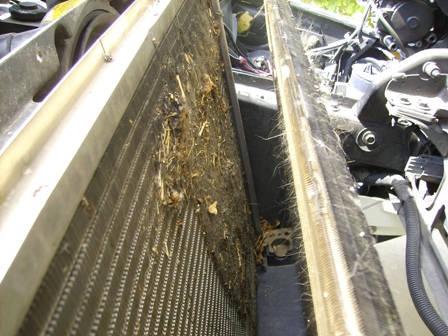
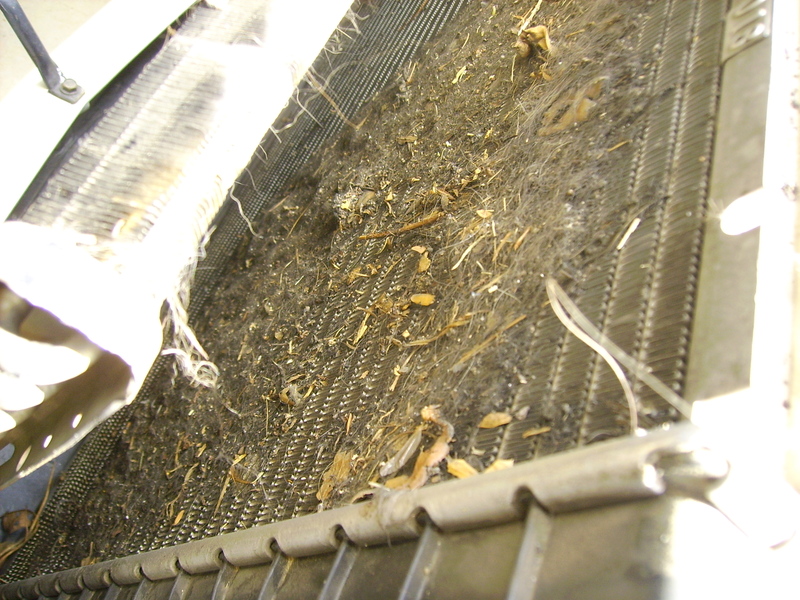
the c4 corvette does not have the most efficient cooling system design and the radiator is not extremely accessible, but at the first indication of over heating its a good idea to put the car up on a lift and do, a detailed inspection for potential damage and too remove the almost inevitable accumulation of road trash, the use of a garden hose from the rear and some dawn dish washing detergent can remove a good deal of oil road film and fine mud,, you might not realize it but even a light coating or greasy oil coated dust and dirt will reduce the air flow rates and heat transfer to the air flow as a result!
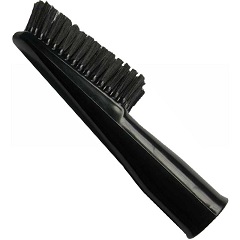
once you manually remove trash, like old news paper grass clippings and the occasional plastic bag thats reducing the corvettes cooling capacity, from the front of the radiator with brush, your fingers and a vacuum cleaner,to remove anything I can see in the radiator fins.
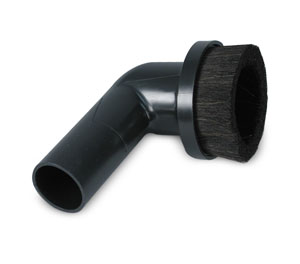
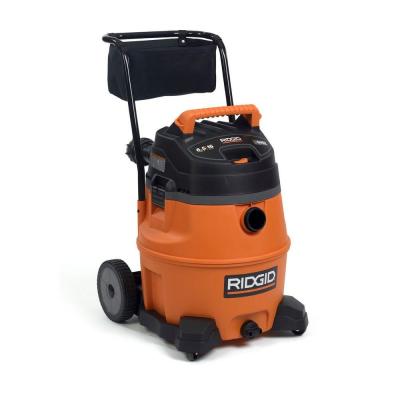
I use a shop vacuum with a brush attachment, to try to remove the particulate crud I can,t easily see.
the c4 corvette is a bottom breather in that it gets the vast majority of the air flow that gets routed through the radiator, that absorbs heat as it passes through the radiator from under the nose of the front grill.
this off the road surface source of cooling air the fans tends to generate and vehicle motion, that generates a low pressure area under the cars nose, also tends to collect, crap rather frequently and results in light weight debris like plastic shopping bags and grass clippings ,being sucked up as the car passes over them and allowing them to cover or block air flow as they tend to get stuck on or in the radiator fins.
a shop vacuum with a small brush attachment can frequently be used if the cars up on a lift to remove a great deal of debris, soaking the radiator with a mild detergent and a garden hose repeatedly followed by use of an air compressor and a long reach high pressure air jet nozzle can be very useful in loosening and removing mud and grease from the radiator fins surface, it generally takes several repeated washes of detergent laced water, a garden hose and repeated jets of high pressure air to remove the vast majority of debris.
youll be amazed at the amount of crud the repeated applications of high pressure air and soapy water loosens and dislodges
http://www.homedepot.com/p/RIDGID-16-Ga ... 5yc1vZbv79
http://shop.panasonic.com/home-and-..._cov_home-phones_pla_product&kpid=AC88RYUZV06
http://www.radiatorgenie.com/Radiator_Genie_p/rg1001.htm
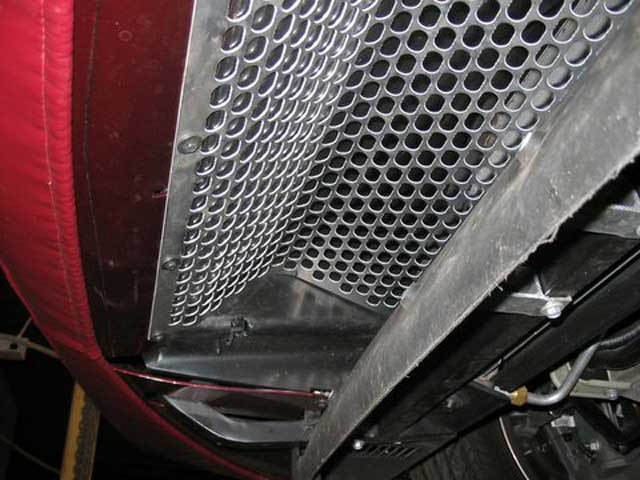
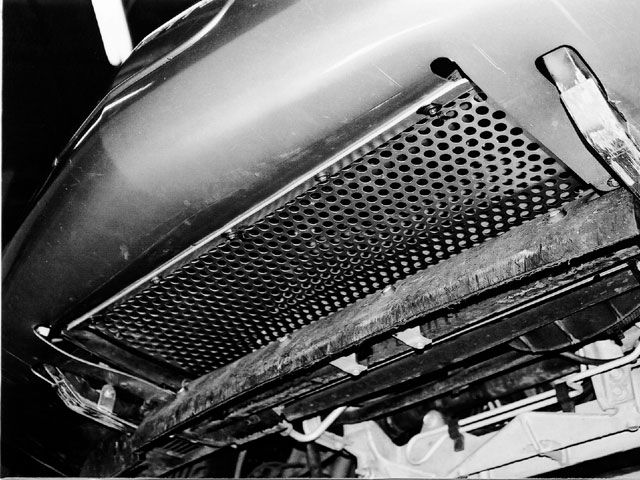
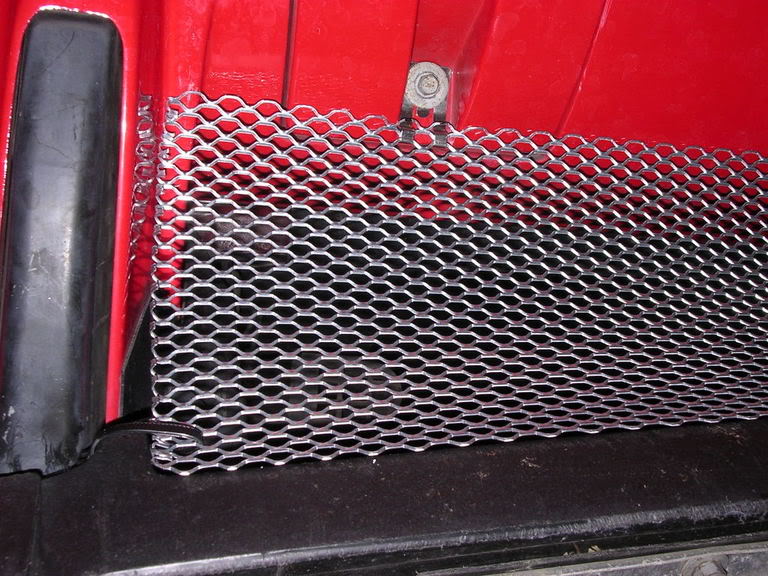
while not a factory installed component a debris screen can be fabricated and installed rather easily that will greatly reduce trash accumulating on the radiator fins or impact damage on the fins from bouncing rocks
(1) the larger the heat transfer surface area the better the system tends to operate, but a minimum of about 1.5-2 square inches of radiator fin area exposed to effective air flow per cubic inch of displacement is generally required
what I find absolutely amazing is the number of people that have ordered replacement radiators ,
without accurately measuring the original radiator, and then accurately, measuring, the space its seated been in,
and the distance available in front of the O.E.M radiator and behind that original radiator,
if you want too select and install a thicker, more efficient heat transfer core, aftermarket radiator
thats thicker has more fins and surface area and larger coolant flow tubes.
one fact often over looked is that radiator designs vary wildly, and the number of fins per inch of surface area and width of radiator coolant flow tubes can significantly increase or decrease thermal heat transfer efficiency., fin counts vary from 8 to 22 fins per inch on various radiator designs Ive seen.
thus a radiator might measure say 18" tall by 24" wide but depending on design, and fin and tube count, might actually have a radically more or less efficient heat transfer rate.
(2) oil does much of the initial heat transfer in the engine, keeping the oil cooled to no more than about 15F above the coolant temp, reduces the heat load on the radiator coolant, so adding a high capacity 7-8 quart oil pan and fan equipped, remote mounted oil cooler can dramatically reduce engine operational temps.
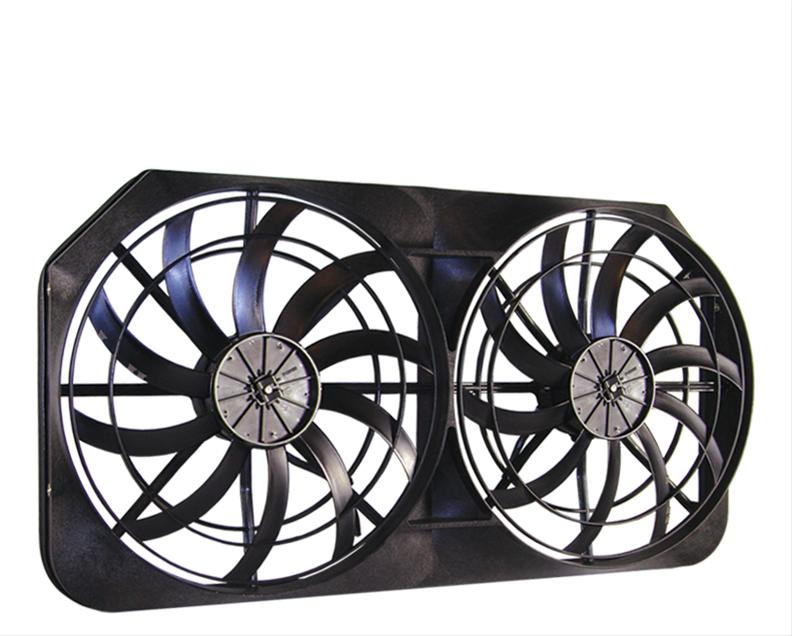
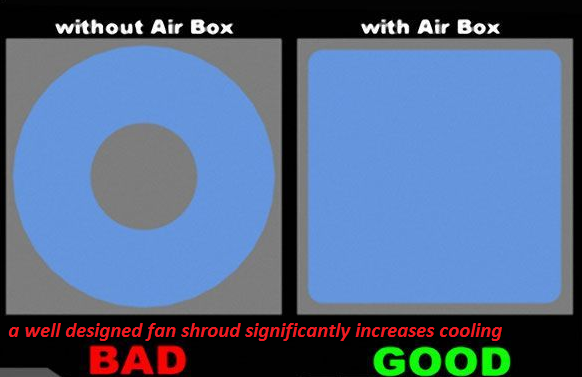
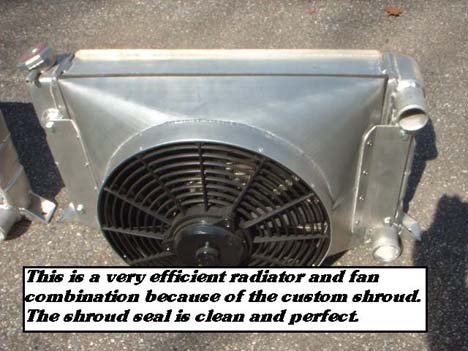
(3) air flow rates are critical so a well designed fan shroud and a fan(s) easily capable of pulling 3000 plus cubic feet per minute in air flow is very helpful
RELATED INFO
http://garage.grumpysperformance.co...per-vs-aluminum-in-radiators.4230/#post-11173
http://garage.grumpysperformance.com/index.php?threads/leaking-freeze-plugs.846/#post-1621
http://garage.grumpysperformance.com/index.php?threads/copper-head-gaskets.827/#post-1231
http://garage.grumpysperformance.com/index.php?threads/preventing-leaky-head-bolts-studs.50/#post-59
http://garage.grumpysperformance.co...-system-mods-that-help.2187/page-2#post-54400
http://garage.grumpysperformance.com/index.php?threads/sealants-and-threads.805/#post-45066
http://garage.grumpysperformance.com/index.php?threads/parts-prep-cleaning.6255/#post-41064
http://garage.grumpysperformance.co...ans-cooler-on-a-c4-corvette.10514/#post-44478
http://garage.grumpysperformance.co...flow-rates-and-heat-transfer.9880/#post-37712
http://www.mcnichols.com/gallery/product-photos/expanded/decorative-metal
http://www.mcnichols.com/gallery/product-photos/expanded/standard#
http://www.harborfreight.com/air-blow-gun-set-4-pc-68260.html
http://www.harborfreight.com/Telescoping-Blow-Gun-68261.html
http://www.sustainablesupply.com/To.../w307160.htm?gclid=CN_5x-GZtMgCFQaKaQodfEMPWA
If your replacing a damaged or missing fan shroud ,it doesn,t need to be an EXACT match,to the original O.E.M. component
but it should be an IMPROVED design over what its replacing'
in both structural strength and ideally in cosmetic appeal,
a bit of custom fabrication if done correctly,
will add rather than detract from the over all builds visual and functional presents,
ideally you want people to look at what you've done and think
"WOW! why didn,t I think of that!.... DAMN THATS IMPRESSIVE"
rather than "
what the hell was that guy thinking when he installed that crap!"
and sometimes
the difference is only in a few extra minutes grinding welds,
the type of fasteners used, the care taken in the fabrication and careful fitting,
thinking through the over all design,
or a bit of matching paint
related info
http://garage.grumpysperformance.com/index.php?threads/cooling-off-that-c4-corvette.3954/
http://garage.grumpysperformance.co...ans-cooler-on-a-c4-corvette.10514/#post-44498
http://garage.grumpysperformance.com/index.php?threads/thoughts-on-cooling.149/
if you have a transmission fluid or engine oil cooler on your car please post pictures of the install and comments as to its effectiveness at reducing the fluid temps,
once you get in some actual driving time because theres almost always a few kinks to iron out,
in any new drive train installation, and theres always adjustments and tuning required.
I know lots of guys use those type of trans fluid coolers with good results , but I must be a bit unlucky,
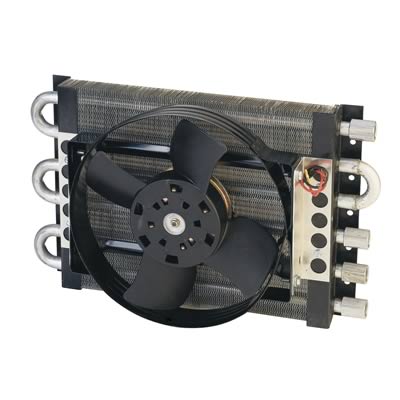
Ive tried those several times with less than in my case optimal results so I just keep using the small heat exchange type like this with the auxiliary powered fan,
which, unfortunately in my experience, are more expensive, harder to install and generally more of a P.I.T.A. to deal with, but they work,
http://www.summitracing.com/parts/der-15800
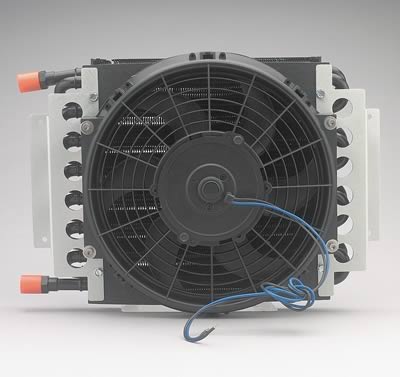
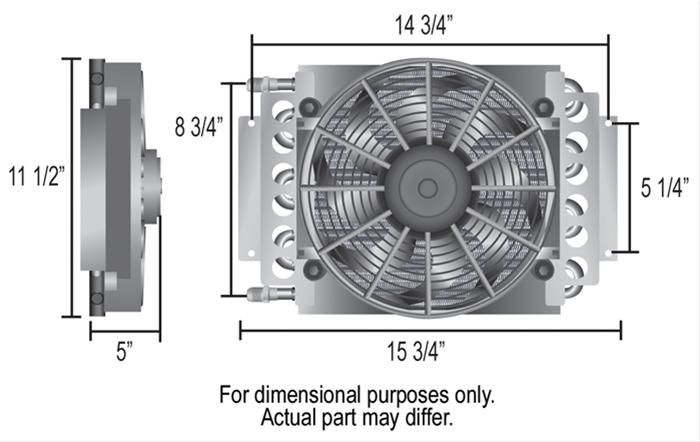
obviously the type above has efficiency advantages over the type pictured below, but the ease of installation, less packaging restrictions and lower cost, and no need to run a electrical feed to a fan all make this type , below rather interesting

http://www.summitracing.com/parts/aaf-all52100
if your going to use a valve train cooling oil flow to cool the valve springs ,
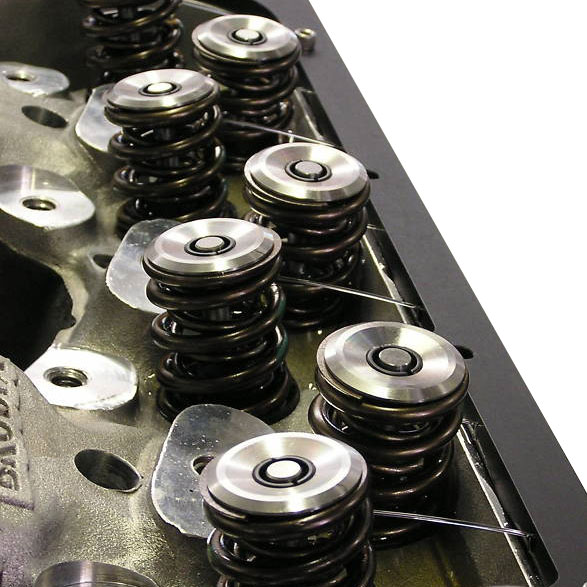
you'll need to dissipate the heat that oil flow collects as it runs over the surface of those hot valve springs and a combination of a higher capacity baffled oil pan ,
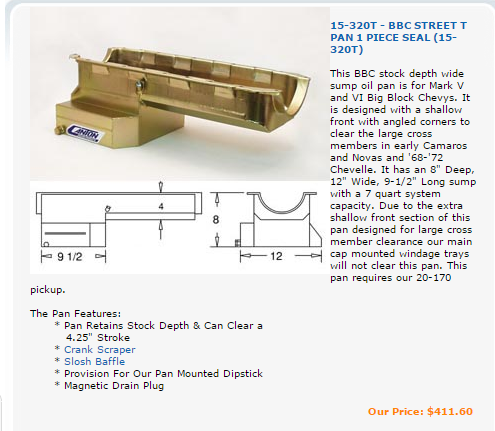
and an auxiliary oil cooler to make transferring the absorbed heat load the oil carries away from the upper engine is almost 100% mandatory if your expecting the oil to cool the valve train for very long.
Id point out that you'll almost certainly want to use an oil cooler that's as large as you have room to effectively use and having a powered fan to increase air flow and heat transfer efficiency will help, bu remember the line size between the engine cooler and back to the engine will generally slightly restrict flow so, I,d advise at least a AN#8 or 1/2" internal cross sectional, size oil or hydraulic lines designed to handle 300F temps and pressure levels with a significant safety margin above what the engine produces, and having large remote mounted oil filter(s) won,t hurt either.
Yes they make dual transmission fluid and oil coolers so you might want to consider that option if you have an automatic transmission and Id sure suggest a fluid temp gauge that accurately measures transmission fluid and a separated gauge for oil temperatures.
http://www.summitracing.com/parts/prm-12318
IM currently using this transmission fluid cooler on my 1985 corvette but have used others in the past, and a dual cooler like this certainly has some advantages , if you need both oil and transmission fluid cooling.
http://www.summitracing.com/parts/prm-13311
Adding a high quality transmission and oil cooler with low flow restriction 1/2" MINIMUM ID lines can markedly increase engine longevity and durability
most hydraulic supply shops will fabricate lines to your exact length and use the correct fittings and hose types to allow over 1000psi and 300F fluid temps, if you do a bit of reserch youll find a couple hydraulic supply shops locally
http://www.universalhoseandfittings.com/product_p/ha08-mnpt-mnpt-1.htm
a few links may help here
http://garage.grumpysperformance.com/index.php?threads/oil-filters-related-info.2080/#post-54352
http://garage.grumpysperformance.co...l-cooler-increases-durability.176/#post-48374
http://garage.grumpysperformance.com/index.php?threads/replacing-trans-fluid.10749/#post-46958
http://www.superchevy.com/how-to/15044-1991-chevrolet-corvette-oil-cooler-maintenance/
http://garage.grumpysperformance.com/index.php?threads/not-getting-oil-to-rockers.4537/
http://garage.grumpysperformance.com/index.php?threads/oil-system-mods-that-help.2187/
http://garage.grumpysperformance.com/index.php?forums/cams-heads-and-valve-trains.52/
http://garage.grumpysperformance.co...flow-rates-and-heat-transfer.9880/#post-37712
http://garage.grumpysperformance.com/index.php?threads/piston-oiler-cooling.8463/#post-29691
I'm wondering how much crap has been sucked up into the radiator, on my c4 corvette, its just seems to be a big road trash vacuum cleaner at times, SO,What's the procedure for getting in there on my C4 corvette!
Thanks
https://www.dewitts.com/collections/corvette-aluminum-radiators
a brief inspection will show you that the cooling fan shroud and fans makes the rear surface of the radiator surface fins rather difficult to easily access, a garden hose and soapy water sprayed from the rear can loosen some crud and help flush it out, high pressure air from a long nozzle if you have access to an air compressor, can knock loose an amazing amount of trash.
http://www.harborfreight.com/air-blow-gun-with-4-in-nozzle-68258.html
the air cleaner housing on the upper face of the air filter can be fairly easy to temporarily lift off but it offers almost no access to the radiator area
the c4 corvette does not have the most efficient cooling system design and the radiator is not extremely accessible, but at the first indication of over heating its a good idea to put the car up on a lift and do, a detailed inspection for potential damage and too remove the almost inevitable accumulation of road trash, the use of a garden hose from the rear and some dawn dish washing detergent can remove a good deal of oil road film and fine mud,, you might not realize it but even a light coating or greasy oil coated dust and dirt will reduce the air flow rates and heat transfer to the air flow as a result!
once you manually remove trash, like old news paper grass clippings and the occasional plastic bag thats reducing the corvettes cooling capacity, from the front of the radiator with brush, your fingers and a vacuum cleaner,to remove anything I can see in the radiator fins.
I use a shop vacuum with a brush attachment, to try to remove the particulate crud I can,t easily see.
the c4 corvette is a bottom breather in that it gets the vast majority of the air flow that gets routed through the radiator, that absorbs heat as it passes through the radiator from under the nose of the front grill.
this off the road surface source of cooling air the fans tends to generate and vehicle motion, that generates a low pressure area under the cars nose, also tends to collect, crap rather frequently and results in light weight debris like plastic shopping bags and grass clippings ,being sucked up as the car passes over them and allowing them to cover or block air flow as they tend to get stuck on or in the radiator fins.
a shop vacuum with a small brush attachment can frequently be used if the cars up on a lift to remove a great deal of debris, soaking the radiator with a mild detergent and a garden hose repeatedly followed by use of an air compressor and a long reach high pressure air jet nozzle can be very useful in loosening and removing mud and grease from the radiator fins surface, it generally takes several repeated washes of detergent laced water, a garden hose and repeated jets of high pressure air to remove the vast majority of debris.
youll be amazed at the amount of crud the repeated applications of high pressure air and soapy water loosens and dislodges
http://www.homedepot.com/p/RIDGID-16-Ga ... 5yc1vZbv79
http://shop.panasonic.com/home-and-..._cov_home-phones_pla_product&kpid=AC88RYUZV06
http://www.radiatorgenie.com/Radiator_Genie_p/rg1001.htm
while not a factory installed component a debris screen can be fabricated and installed rather easily that will greatly reduce trash accumulating on the radiator fins or impact damage on the fins from bouncing rocks
(1) the larger the heat transfer surface area the better the system tends to operate, but a minimum of about 1.5-2 square inches of radiator fin area exposed to effective air flow per cubic inch of displacement is generally required
what I find absolutely amazing is the number of people that have ordered replacement radiators ,
without accurately measuring the original radiator, and then accurately, measuring, the space its seated been in,
and the distance available in front of the O.E.M radiator and behind that original radiator,
if you want too select and install a thicker, more efficient heat transfer core, aftermarket radiator
thats thicker has more fins and surface area and larger coolant flow tubes.
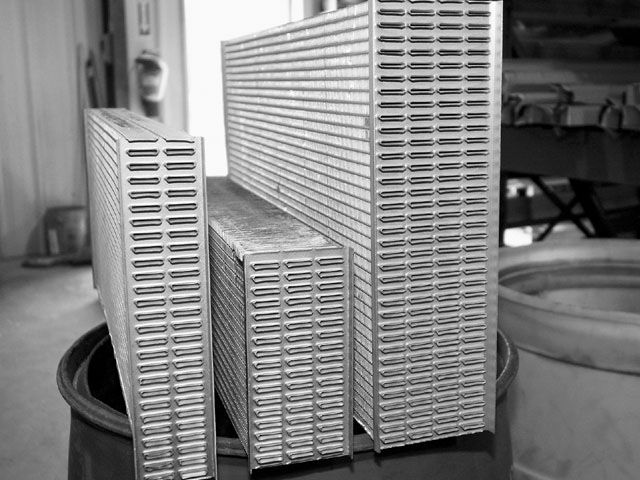
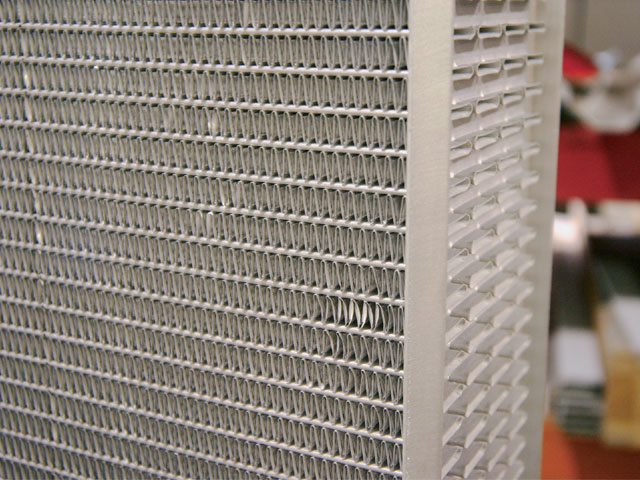
one fact often over looked is that radiator designs vary wildly, and the number of fins per inch of surface area and width of radiator coolant flow tubes can significantly increase or decrease thermal heat transfer efficiency., fin counts vary from 8 to 22 fins per inch on various radiator designs Ive seen.
thus a radiator might measure say 18" tall by 24" wide but depending on design, and fin and tube count, might actually have a radically more or less efficient heat transfer rate.
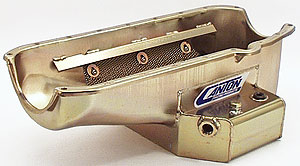
(2) oil does much of the initial heat transfer in the engine, keeping the oil cooled to no more than about 15F above the coolant temp, reduces the heat load on the radiator coolant, so adding a high capacity 7-8 quart oil pan and fan equipped, remote mounted oil cooler can dramatically reduce engine operational temps.
(3) air flow rates are critical so a well designed fan shroud and a fan(s) easily capable of pulling 3000 plus cubic feet per minute in air flow is very helpful
RELATED INFO
http://garage.grumpysperformance.co...per-vs-aluminum-in-radiators.4230/#post-11173
http://garage.grumpysperformance.com/index.php?threads/leaking-freeze-plugs.846/#post-1621
http://garage.grumpysperformance.com/index.php?threads/copper-head-gaskets.827/#post-1231
http://garage.grumpysperformance.com/index.php?threads/preventing-leaky-head-bolts-studs.50/#post-59
http://garage.grumpysperformance.co...-system-mods-that-help.2187/page-2#post-54400
http://garage.grumpysperformance.com/index.php?threads/sealants-and-threads.805/#post-45066
http://garage.grumpysperformance.com/index.php?threads/parts-prep-cleaning.6255/#post-41064
http://garage.grumpysperformance.co...ans-cooler-on-a-c4-corvette.10514/#post-44478
http://garage.grumpysperformance.co...flow-rates-and-heat-transfer.9880/#post-37712
http://www.mcnichols.com/gallery/product-photos/expanded/decorative-metal
http://www.mcnichols.com/gallery/product-photos/expanded/standard#
http://www.harborfreight.com/air-blow-gun-set-4-pc-68260.html
http://www.harborfreight.com/Telescoping-Blow-Gun-68261.html
http://www.sustainablesupply.com/To.../w307160.htm?gclid=CN_5x-GZtMgCFQaKaQodfEMPWA
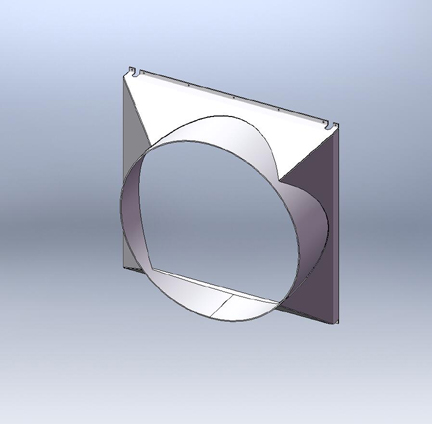
If your replacing a damaged or missing fan shroud ,it doesn,t need to be an EXACT match,to the original O.E.M. component
but it should be an IMPROVED design over what its replacing'
in both structural strength and ideally in cosmetic appeal,
a bit of custom fabrication if done correctly,
will add rather than detract from the over all builds visual and functional presents,
ideally you want people to look at what you've done and think
"WOW! why didn,t I think of that!.... DAMN THATS IMPRESSIVE"
rather than "
what the hell was that guy thinking when he installed that crap!"
and sometimes
the difference is only in a few extra minutes grinding welds,
the type of fasteners used, the care taken in the fabrication and careful fitting,
thinking through the over all design,
or a bit of matching paint
related info
http://garage.grumpysperformance.com/index.php?threads/cooling-off-that-c4-corvette.3954/
http://garage.grumpysperformance.co...ans-cooler-on-a-c4-corvette.10514/#post-44498
http://garage.grumpysperformance.com/index.php?threads/thoughts-on-cooling.149/
if you have a transmission fluid or engine oil cooler on your car please post pictures of the install and comments as to its effectiveness at reducing the fluid temps,
once you get in some actual driving time because theres almost always a few kinks to iron out,
in any new drive train installation, and theres always adjustments and tuning required.
I know lots of guys use those type of trans fluid coolers with good results , but I must be a bit unlucky,
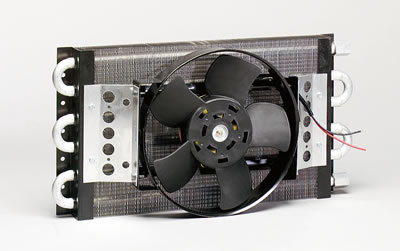
Ive tried those several times with less than in my case optimal results so I just keep using the small heat exchange type like this with the auxiliary powered fan,
which, unfortunately in my experience, are more expensive, harder to install and generally more of a P.I.T.A. to deal with, but they work,
http://www.summitracing.com/parts/der-15800
obviously the type above has efficiency advantages over the type pictured below, but the ease of installation, less packaging restrictions and lower cost, and no need to run a electrical feed to a fan all make this type , below rather interesting
http://www.summitracing.com/parts/aaf-all52100
if your going to use a valve train cooling oil flow to cool the valve springs ,
you'll need to dissipate the heat that oil flow collects as it runs over the surface of those hot valve springs and a combination of a higher capacity baffled oil pan ,
and an auxiliary oil cooler to make transferring the absorbed heat load the oil carries away from the upper engine is almost 100% mandatory if your expecting the oil to cool the valve train for very long.
Id point out that you'll almost certainly want to use an oil cooler that's as large as you have room to effectively use and having a powered fan to increase air flow and heat transfer efficiency will help, bu remember the line size between the engine cooler and back to the engine will generally slightly restrict flow so, I,d advise at least a AN#8 or 1/2" internal cross sectional, size oil or hydraulic lines designed to handle 300F temps and pressure levels with a significant safety margin above what the engine produces, and having large remote mounted oil filter(s) won,t hurt either.
Yes they make dual transmission fluid and oil coolers so you might want to consider that option if you have an automatic transmission and Id sure suggest a fluid temp gauge that accurately measures transmission fluid and a separated gauge for oil temperatures.
http://www.summitracing.com/parts/prm-12318
IM currently using this transmission fluid cooler on my 1985 corvette but have used others in the past, and a dual cooler like this certainly has some advantages , if you need both oil and transmission fluid cooling.
http://www.summitracing.com/parts/prm-13311
Adding a high quality transmission and oil cooler with low flow restriction 1/2" MINIMUM ID lines can markedly increase engine longevity and durability
most hydraulic supply shops will fabricate lines to your exact length and use the correct fittings and hose types to allow over 1000psi and 300F fluid temps, if you do a bit of reserch youll find a couple hydraulic supply shops locally
http://www.universalhoseandfittings.com/product_p/ha08-mnpt-mnpt-1.htm
a few links may help here
http://garage.grumpysperformance.com/index.php?threads/oil-filters-related-info.2080/#post-54352
http://garage.grumpysperformance.co...l-cooler-increases-durability.176/#post-48374
http://garage.grumpysperformance.com/index.php?threads/replacing-trans-fluid.10749/#post-46958
http://www.superchevy.com/how-to/15044-1991-chevrolet-corvette-oil-cooler-maintenance/
http://garage.grumpysperformance.com/index.php?threads/not-getting-oil-to-rockers.4537/
http://garage.grumpysperformance.com/index.php?threads/oil-system-mods-that-help.2187/
http://garage.grumpysperformance.com/index.php?forums/cams-heads-and-valve-trains.52/
http://garage.grumpysperformance.co...flow-rates-and-heat-transfer.9880/#post-37712
http://garage.grumpysperformance.com/index.php?threads/piston-oiler-cooling.8463/#post-29691
Last edited: