dana 60 one of the strongest rears differentials available

http://www.moserengineering.com/com.../moser-60-musclepak-muscle-pak-pack-dana.html
housingdiagram.jpg


filedanamos.jpg

QUICK OVERVIEW
MADE THE AMERICAN WAY IN THE USA!

Product will ship 3-5 business days following the completion of online order.
PRODUCT DESCRIPTION
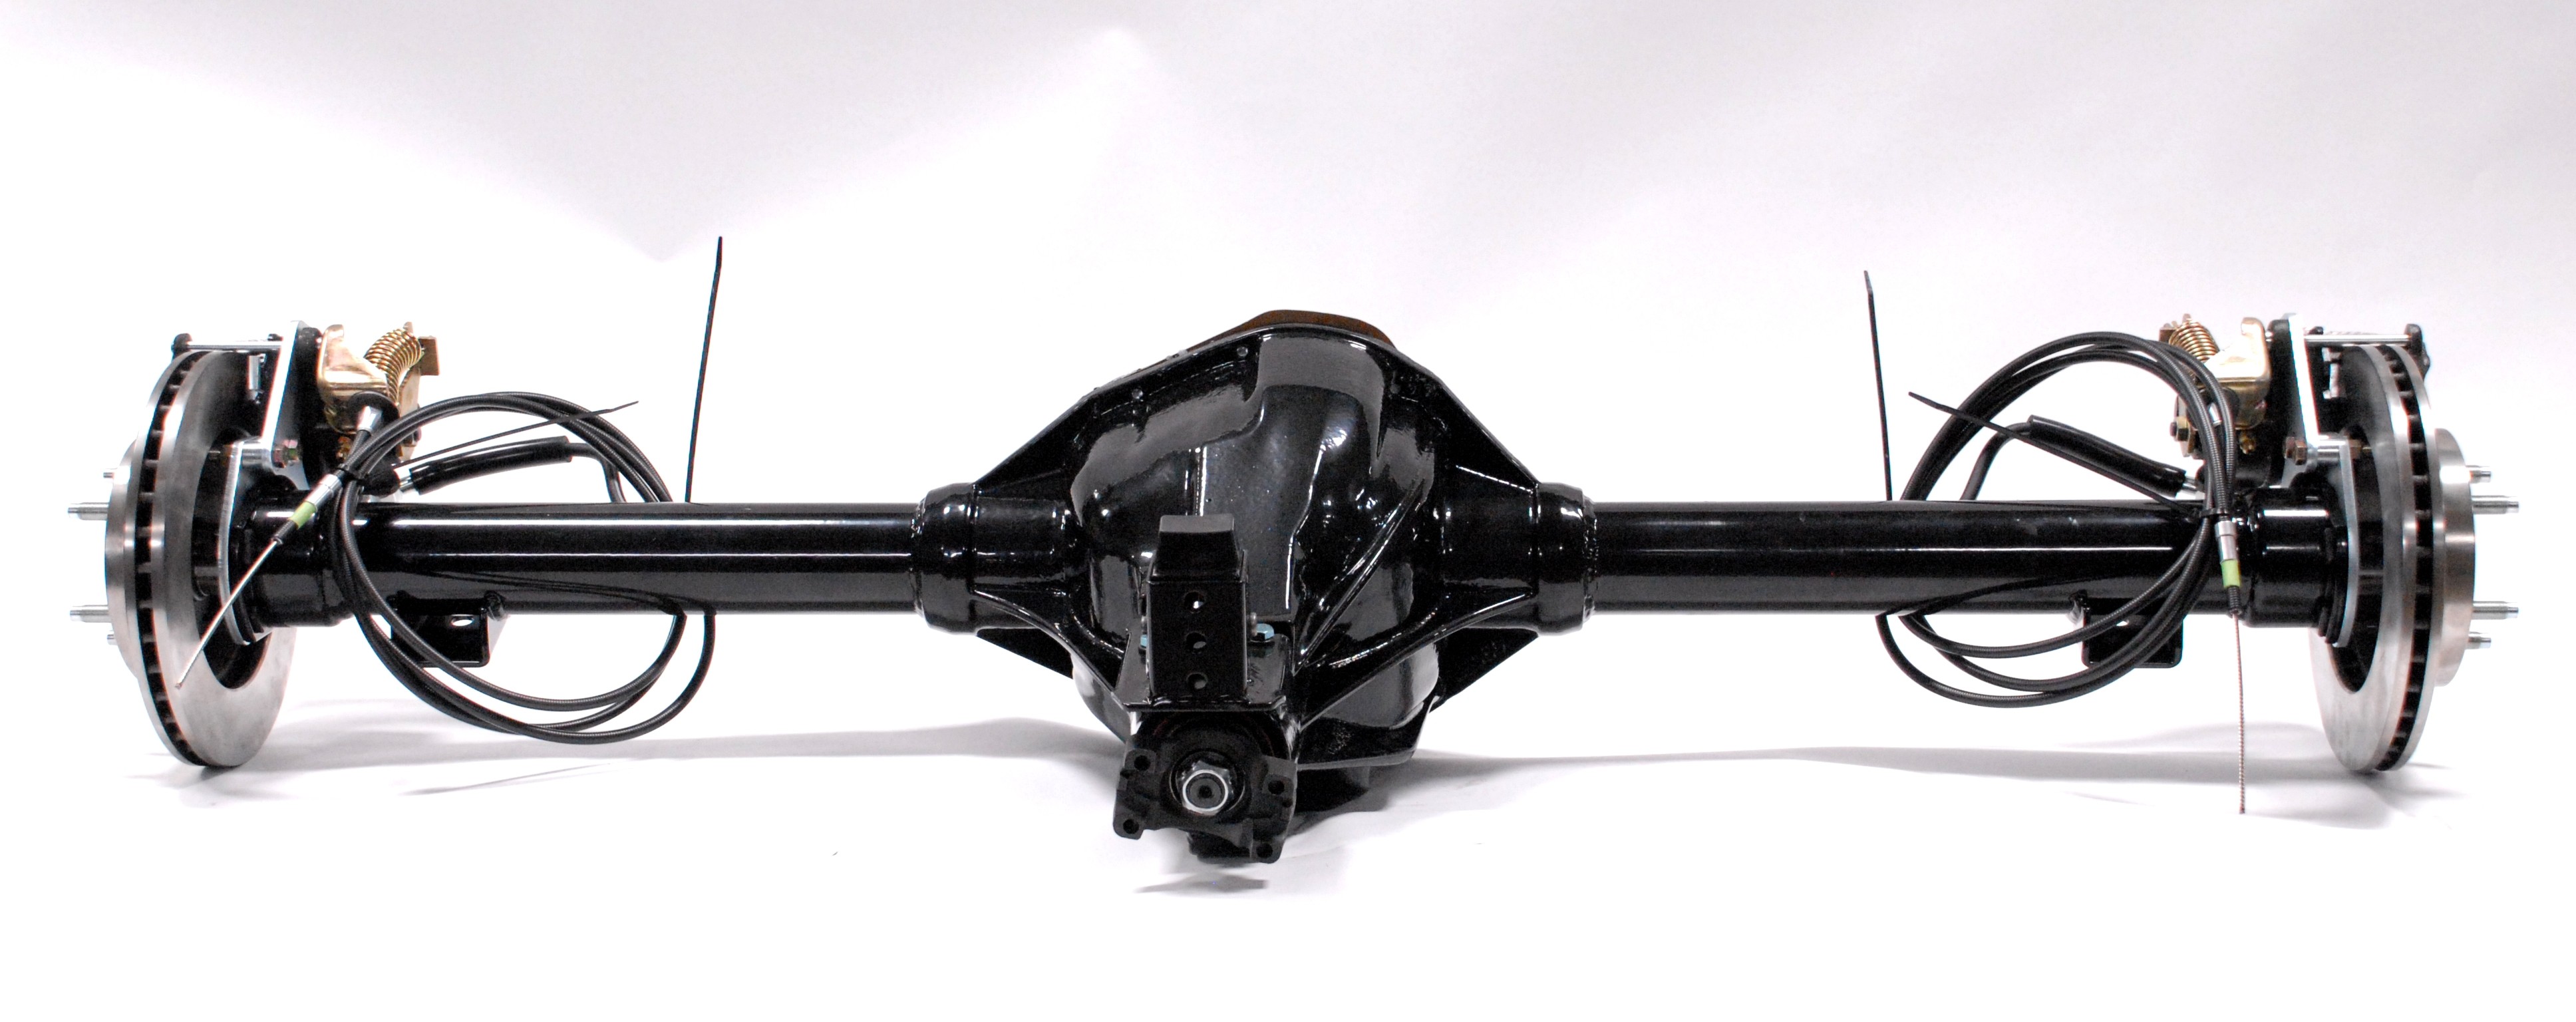
Complete Moser 60 MUSCLE PAK

THE STRONGER REAR-END REPLACEMENT!

All Moser 60 Housings are designed and manufactured in the U.S.A. using Moser Engineering owned Casting Boxes.

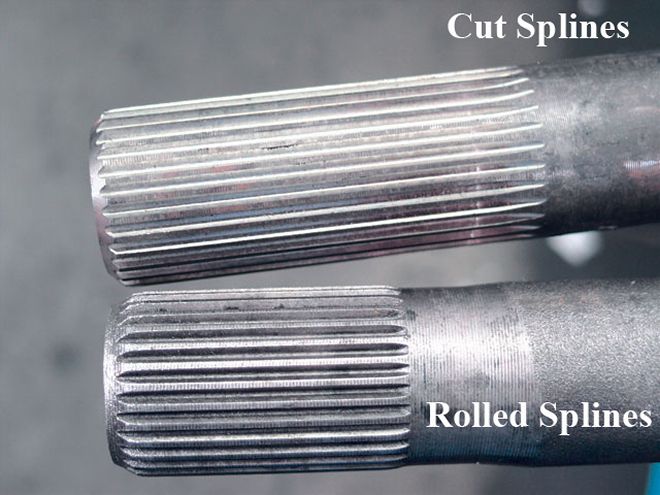
Package includes; New Moser 60 Made in the U.S.A. Housing, with OEM located mounting perches, seamless steel tubing (3" O.D., 1/4" wall), custom alloy 35 spline bolt-in axles, bearings, studs, seals, heavy duty retainer plates, new housing ends, t-bolt kit, Trac-Loc clutch posi, "1350" Series cast pinion yoke, ring & pinion, chrome rear cover, set up with Timken bearings, New 10" Drum Brakes, brake lines, flat pinion snubber, brake line clamps, and emergency brake cables.

COMPLETELY ASSEMBLED!

Many options available!

Standard Finish is no coating (bare metal), Powder Coating optional (adds 2-3 Days processing time).

Find your vehicle. Select your options. We will build it the way you want it in just 3 - 5 business days!
*YEAR/MAKE OF VEHICLE
  • A-Body MOPAR (5 X 4 1/2" Bolt Pattern)
  • 1967 Earlier B-Body MOPAR
  • 1968-70 B-Body MOPAR
  • 1970-74 E-Body MOPAR
  • 1971-74 B-Body MOPAR
  • 1955-57 Chevy (TRI-5)
  • 1962-67 Chevy II, Nova (Mono-Leaf) +$50.00
  • 1965-70 Chevy Impala +$105.00
  • 1967-69 Camaro (Mono-Leaf) +$50.00
  • 1967-69 Camaro (Multi-Leaf) +$50.00
  • 1968-76 Chevy Nova (Mono-Leaf) +$50.00
  • 1968-76 Chevy Nova (Multi-Leaf) +$50.00
  • 1970-81 Camaro (Multi-Leaf) +$50.00
  • 1982-2004 Chevy S-10 (2WD)
  • 1982-2004 Chevy S-10 (4WD)
  • 1999-2006 Chevy Silverado Pick-Up +$75.00
  • 1994-2002 Dodge 1500 P/U (2 or 4 WD) INCLUDES; ALUMINUM GIRDLE W/SPEED SENSOR +$355.00
*GEAR/RATIO
  • 3.54:1 Ratio - Pro/Street
  • 3.73:1 Ratio - Pro/Street
  • 3.90:1 Ratio - Pro/Street
  • 4.10:1 Ratio - Pro/Street
  • 4.30:1 Ratio - Pro/Street
  • 4.56:1 Ratio - Pro/Street
  • 4.88:1 Ratio - Pro/Street
  • 5.13:1 Ratio - Pro/Street
*STUD TYPE
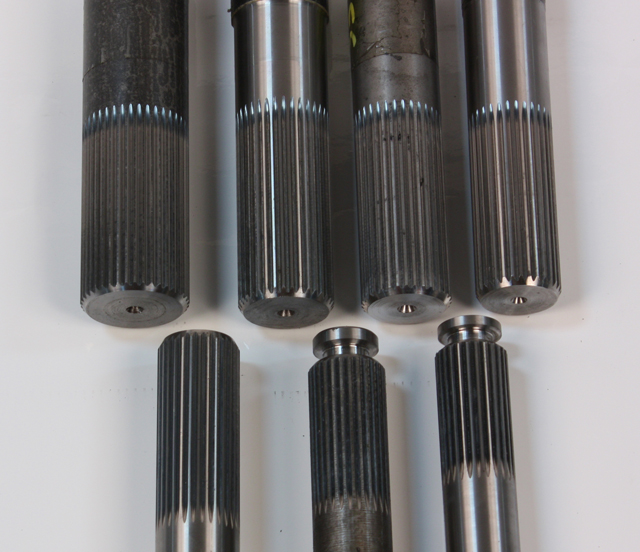
  • 1/2" x 20 -x 1 1/2" (.665" Knurl)
  • 1/2" x 20 x 3" (.685" Knurl)
  • 1/2" x 20 x 1 1/2" (.625" Knurl)
  • 1/2" x 20 x 3" (.620" Knurl)
  • 1/2" x 20 x 2" (Screw-In)
  • 1/2" x 20 x 3" (Screw-In)
  • 5/8" x 18 x 2" (Screw-In) +$65.00
  • 5/8" x 18 x 3" (Screw-In) +$65.00
  • 1/2" x 20 x 1 3/4" (.620 Knurl/Disc Brake Stud)
MISCELLANEOUS UPGRADES
  • Powder Coated Rear Cover (Black) +$20.00
  • Aluminum Girdle # 7112 +$130.00
  • Black Powder Coated Rear Cover +$20.00
  • 1350 Series Forged Pinion Yoke # PY500 +$35.00
  • Adjustable Pinion Snubber +$35.00
  • 35 Spline Truetrac (MOTUL 300 RECOMMENDED!) +$370.00
  • 35 Spline Detroit Locker +$370.00
  • 35 Spline Spool -$150.00
BRAKE UPGRADES
  • None
  • Moser Economy Disc Brake w/Parking Brake -$5.00
  • MOSER - PERFORMANCE DISC DRAG BRAKE KIT WITH HAWK "HP+" PADS +$232.50
  • Wilwood Forged Dynalite Rear Parking Brake Kit (Black Calipers) +$217.50
  • Wilwood Forged Dynalite Rear Parking Brake Kit - WITH DRILLED ROTORS +$317.50
  • Wilwood Forged Dynalite Rear Parking Brake Kit - WITH RED CALIPERS +$357.50
  • Wilwood Forged Dynalite Rear Parking Brake Kit - WITH POLISHED CALIPERS +$357.50
  • Wilwood Forged Dynalite Rear Parking Brake Kit - WITH DRILLED ROTORS & RED CALIPERS +$457.50
  • Wilwood Forged Dynalite Rear Parking Brake Kit - WITH DRILLED ROTORS & POLISHED CALIPERS +$457.50
  • Wilwood Dynapro Low-Profile Rear Parking Brake Kit for 14" & 15" Rims +$257.50
  • Wilwood Dynapro Low-Profile Rear Parking Brake Kit for 14" & 15" Rims - WITH DRILLED ROTORS +$357.50
  • Wilwood Dynapro Low-Profile Rear Parking Brake Kit for 14" & 15" Rims - WITH RED CALIPERS +$382.50
  • Wilwood Dynapro Low-Profile Rear Parking Brake Kit for 14" & 15" Rims - WITH DRILLED ROTORS & RED CALIPERS+$482.50
  • Wilwood Forged Dynalite Pro Series Rear Brake Kit +$132.50
  • Wilwood Forged Dynalite Pro Series Rear Brake Kit - WITH DRILLED ROTORS +$232.50
  • Wilwood Forged Dynalite Pro Series Rear Brake Kit - WITH RED CALIPERS +$257.50
  • Wilwood Forged Dynalite Pro Series Rear Brake Kit - WITH POLISHED CALIPERS +$257.50
  • Wilwood Forged Dynalite Pro Series Rear Brake Kit - WITH DRILLED ROTORS & RED CALIPERS +$357.50
  • Wilwood Forged Dynalite Pro Series Rear Brake Kit - WITH DRILLED ROTORS & POLISHED CALIPERS +$357.50
  • Wilwood Forged Dynalite Rear Drag Brake Kit +$57.50
  • Wilwood Forged Dynalite Rear Drag Brake Kit - WITH DRILLED ROTORS +$82.50
  • Explorer Disc Brake Kit W/internal Parking Brake +$60.00
  • Explorer Disc Brake Kit W/internal Parking Brake & Drilled Rotors +$110.00
ENTER CUSTOM WIDTH & PINION OFFSET HERE:

Maximum number of characters: 50

POWDER COATING
  • None
  • Flat Black +$250.00
  • Semi-Gloss Black +$250.00
  • Gloss Black +$250.00
  • Flat Red +$250.00
  • Semi-Gloss Red +$250.00
  • Gloss Red +$250.00
  • Flat Silver +$250.00
  • Semi-Gloss Silver +$250.00
  • Gloss Silver +$250.00
  • Flat Orange +$250.00
  • Semi-Gloss Orange +$250.00
  • Gloss Orange +$250.00
 
Last edited:
There is only one shortcoming of the Dana 60 Grumpy.

No Tall gear ratios of 2.20 - 3.42 are available. for Road Race Guys and Maxton mile guys and Bonneville Salt Flat Racers.

Ford 9" most popular there.

1957-64 Pontiac 9.3 had factory gears 2.56-6.14 available .
Some gears ratios very hard to find Mint used or NOS.
 
well thats true, but the majority of the newer transmissions (manual and automatics) have an over drive top gear ratio which allows some amazing top speeds with a 3.55:1 -3.73:1 rear gearing.
http://www.wallaceracing.com/gear-speed.php
heres a rather typical th400 with 3.55, 3.73, 4.11 rear gears
th400m.png


heres a rather typical 4l80E with 3.55, 3.73, 4.11 rear gears
th400n.png


as you can see, if you had a dana 60 with rather easily found 3.55:1 rear gears, and 25" tires,
which are fairly common on muscle cars,
a th400 would allow about 135 mph at 6500 rpm,
swapping to the 4l80e with its OD top gear allows about 45 more mph
while speeds of 180 mph may not be the top speeds available, on some tracks, Id bet most cars rarely reach those speeds as most road race courses are purposely designed to limit top speeds and maximize the need to make constant turns and have excellent brakes
now I doubt many high dollar race cars running road courses use any live axle differential, but for drag racing the extra strength is an advantage at times
 
Last edited:
well thats true, but the majority of the newer transmissions (manual and automatics) have an over drive top gear ratio which allows some amazing top speeds with a 3.55:1 -3.73:1 rear gearing
Everyone is free to use what they want to.
I still haven't found a Modern trans to match the perfect balanced gear ratio spread of Muncie M20-21-22.
 
Straub cammed 540 track results
I finally got my car to the track today. To recap the combination, it is an all steel 71 Chevelle, weighing approximately 3900 lbs with driver, P.S., G.M. C.I. hood, rally wheels.

Engine is a 540 BBC with a Straub Hyd roller, 10.7:1, AFR 305 heads, Vic Jr intake, Pro systems 1000 4150 carb,14x4" paper air filter Carter mechanical fuel pump, stock tank W/ modified stock, 1/2" pick-up. Coan 3500 stall, T400, 3.31 12 bolt, stock style rear suspension with a BMR ARB, M/T 28x9 slick. Lemons 2.125 headers, 3.5" head pipes to 3", 22" long magnaflow mufflers and 3" tail pipes.

Off the trailer with only change from street trim was changing to slicks, car ran 10.82 @ 125.06 W/ 1.650 60'. I was extremely happy with the results, went to make another pass and broke the 40+ year old G.M. ring and pinion about 60' out
frown.gif
.

Car felt great and I think it has more in it with some tuning. Now I have to decide if I should replace the gears and retain the 12 bolt or look into a 9" or S-60. I am happy with the results considering I drive the car everywhere, including hour and a half, long 75 mph trips on the interstate for weekend get aways with the wife.

Thanks to Chris Straub for the well executed cam and head combo and the helpful advise of fellow TC members

The 540 BBC linked above obviously makes rather decent horse power as hes running through the traps at 125 mph, and if hes running 10.8 times with a 3900 lb car, the engines obviously making good mid range and lower mid range
torque, now, quick calcs show about 610 rear wheel hp
a few reasonable assumptions would say that puts the expected engine torque at near 640 ft lbs at say 5000 rpm x his stated 3.31 rear gear, thats 2132 minimum ft lbs not counting shock loading, on the gear teeth and axles

http://www.wallaceracing.com/et-hp-mph.php
Ive built enough serious big block engines for myself and others and installed those engines in various G.M. muscle cars only to have very similar results, the stock street tires act like a fuse that saves the drive train ,dissipating and reducing shock loads, and allowing you to get by for months or years running a stock 10 bolt or 12 bolt differential giving you a false sense of security.
once you install decent racing slicks and start making 2000rpm-3000rpm launches the stock 10 and 12 bolt rear differentials on very limited life expectancy, and both have the very annoying habit of puking an axle or u-joint with amazing frequency.
yes you can install stronger aftermarket components, and axle retention kits but that only basically prolongs the process of throwing cash down the toilet, you'll eventually be forced to upgrade to a ford 9" or dana 60 or the aftermarket hybrid s60


http://www.markwilliams.com/bulletproof.aspx

http://www.onallcylinders.com/2014/05/22/axle-tech-upgrade-stock-gm-12-bolt-axles/
17" & 18" rim size slicks are available
http://www.titanmotorsports.com/tires.html

I got asked why I prefer the dana 60 over the 12 bolt differential, well, I shredded my first stock 12 bolt in my 1969 camaro 375 hp 396 bbc,(yes it had slicks and a 496 BBC with crower injection,)
so I spent a great deal of cash on a new 12 bolt, and summers brothers axles a a spool, and supposedly stronger bearing and gears, this was back in the early 1970s
and keep in mind all those parts cost me almost as much as I could at the time buy a used 1969 camaro for ...
I had already installed traction bars , better shocks and leaf springs,and a much stronger set of u-joints a custom drive shaft, wheel studs, and yoke.
that very expensive differential lasted about 5 months... I twisted the splines on the axles, cracked a main bearing cap, and cracked several pinion gear teeth,
that also resulted in metallic trash that ruined the ring gear
keep in mind this was not a posi but a spool, so I just gave up on the 12 bolt
now I,d point out I had 5.13 gears and a tubed rear and damn big slicks,
but I was not in my opinion launching that hard,maybe a 4000 rpm launch,
with a manual trans and the clutch had to be slipping at least marginally,
to lessen the impact shock loads on the rear differential,
as I only replaced a couple muncies, over several years.
(and if youve raced much back in the time frame the USED SALVAGE YARD muncies cost about $120-$140 EACH)
I WISH THAT WAS THE CASE NOW (BUT THAT WAS ABOUT A WEEKS PAY)
the front tires were off the ground for only maybe 30-45 feet and I doubt they got 6" or so,
it was a very nice controlled launch , I don,t remember the 60 ft times but the car ran in the high tens back when that was not too common.
(early 1970s)the 1968 corvette I eventually transferred the engine into had a good deal more suspension work and a full roll cage,
and a shortened dana 60, fully tubed rear and bigger slicks and was noticeably faster low 10,s at 135 mph
now by todays standards the cars were not impressive but back then they were at least semi competitive,
in the run what you brought style racing that we did then.
yes I.m fully aware lots of guys run 12 bolts successfully, even in heavy cars ,
but I just had no success and decided to avoid them.
I swapped too a dana 60, I bought from a salvage yard from a wrecked car, that had a bad engine fire, out of a 1970 hemi cuda, and never had a single issue
here,s a picture of me in 1970 (47 years ago) with a 1969 camaro I installed a BBC-496 with a tunnel ram into, then later CROWER FUEL INJECTION
paulscamarobw.jpg

crowerin1.jpg

Crower_Injectors.jpg


btw buy new differential gears, not used ones, those are a Risky buy,
if these gears were run with poorly set up tooth contact pattern,
you will inherit noisy gears, no matter what you do.
have an experienced shop or mechanic set up the rear gears,
if they are not correctly installed they will be ruined or at least noisy
in fact your differential can differ just enough, dimensionally,
to cause new issues to come up with previously run gears from a similar differential,
that worked ok in that differential

 
Last edited:
I clicked on todays 1st link and Read Grumpy.
Mark Williams is state of the art.
Not real popular here except for the long time old school drag racers that have been at it for 40-50 years like you have.

I noted the Strategic placed weld around the DTS Made 12-bolt housing tubes by Mark Williams welders.
It was done with a Water Cooled TIG And Nickle Filler Rod.

I am recalling my AC Stick Welding skills and using NI Nickle rod in the past.

Not sure what the group on C3 DC is or where they are going.
A few drag racers are lurking there.
We have surpassed what can be done affordable for most with IRS.
They want to run real fast and launch real hard with ZERO Failures for years.

Just one longtime readily available rear is up to the task in my opinion .
The Dana 60.

# 2 Is my own. Pontiac 9.3.
 
http://www.stangtv.com/tech-stories...ing-the-terminology-behind-streetstrip-axles/

http://www.fourwheeler.com/how-to/154-0708-weakest-to-strongest-axles/

http://www.superchevy.com/how-to/0304-9-inch-12-bolt-rearend-comparison/

http://www.onallcylinders.com/2015/02/13/ask-away-gm-10-bolt-vs-12-bolt-rear-ends/

http://garage.grumpysperformance.co...par-9-1-4-rear-differential.11490/#post-52942

http://garage.grumpysperformance.co...gthening-an-8-5-10-bolt-rear.5586/#post-16984

http://garage.grumpysperformance.com/index.php?threads/big-block-vs-10-bolt.4525/#post-12011

http://www.fourwheeler.com/features/1406-the-top-10-junkyard-axles-wrecking-yard-gold/

http://garage.grumpysperformance.co...ill-that-10-bolt-rear-hold-up.273/#post-11774

http://garage.grumpysperformance.com/index.php?threads/rear-differential-id.398/#post-5487
diffg1.jpg

diffg2.gif

diffg3.jpg

diffg4.jpg

diffg5.gif

diffg6.jpg


diffg7.jpg

diffg8.jpg

diffg9.gif

diffg10.jpg

diffg11.jpg

Dragzine_axles_05.jpg


rolled_splines.jpg

https://www.hemmings.com/magazine/mus/2006/04/Dana-60-differentials/1282217.html
You can find a passenger-type Dana 60 in one of these donor cars if equipped with 426 or 440 engines:
o 1966 Dodge Coronet and Charger, Plymouth Belvedere and Satellite
o 1967-'72 Charger, Super Bee, R/T, GTX and Road Runner
o 1970-'71 'Cuda and Challenger


yes its very unfortunate that there's no commonly, available independent rear differential,available to the performance are enthusiasts,with large disc brakes in the compatible width, that I'm aware of, in most local salvage yards , similar to the corvette rear suspension, that has the strength of the dana 60 rear differential
yes there are custom fabricated solutions, if you have a very healthy bank balance , but nothing based on a dana 60-70- or ford 9" or heavier duty independent G.M. differential

The industrial-type axles can be found in any of these truck applications:
o 1969-'88 Jeep J-20, J-2000 and J-4000 pickups
o 1967-'77 Chevrolet and GMC 3/4-ton pickups
o 1975-'87 Chevrolet and GMC 1-ton pickups and Suburbans
o 1979-'91 Chevrolet and GMC 1-ton vans with dual rear wheels
o 1955-'99 Dodge 3/4-ton pickups
o 1993-'01 Dodge 3/4-ton vans
o 1955-'93 Dodge 1-ton pickups
o 1955-'85 Ford 3/4-ton pickups
o 1980-'98 Ford E200/E250 vans with single rear wheels
o 1955-'76 Ford 1-ton trucks


These differentials came in two basic designs. The passenger-car configuration included a three-hole mounting surface on the front of the housing to mount a pinion snubber, which keeps the rear end in proper alignment with the drivetrain under heavy torque. The industrial version was used in all truck applications and does not have this mounting surface. Because most of the industrial rear end housings are built for trucks, they tend to be too wide for most passenger cars, but the Dana 60 can be narrowed by cutting the axle tubes to the proper length and installing the passenger car-style end hubs. New passenger- and industrial-style hubs can be purchased, and aftermarket axles are also available in 30- or 35-spline varieties to fit any reduced lengths. New axles may be your best option for adapting an industrial axle to fit a passenger car. Although the B-body Mopars used a five-lug bolt pattern, most industrial-style truck axles used a six-lug or an eight-lug axle, which will be difficult to redrill to a five-bolt pattern.
 
Last edited:
http://www.strangeengineering.net/dana-60-gear-installation/


http://www.mirrockcorvette.com/corvette-parts-guide-wheels.html
offsetdiagram2.jpg

Corvette wheel offset chart.jpg

http://www.dana60.com/gears.html

Dana Axle Do-It-Yourself Gear Swapping

Tools:
You need a dial indicator, a base, a press, a good impact gun, micrometer/caliper, time, patience, bearing splitter, bearing puller, pinion nut socket, brass punch(es), in. lb torque wrench, adapters for 1/4" all the way to 3/4" drive for in. lb torque wrench, ft lb torque wrench, and bearing race/seal installers.

Dependancies:

The largest dependancy, by far, is your education and research. Will your new gear set require a new carrier? If I need a new carrier, should I get a locker? Is that locker warrantied with those gears and tires? Will my new gearset require a change in speedo gear? Will my new gears put my RPMs too high on the highway?

Risks:
Screw it up badly enough, you may break other items in the housing, or the housing itself.

Not completing the installation and having to have the vehicle towed to a qualified shop to complete.

Something gets installed out-of-spec and damages the gears to the point where a shop has to repair it by installing new gears and bearings.

Almost all of these risks result in increase cost, potential vehicular damage, and potential vehicular downtime.

The Installation:
Step 1

When removing your old gears, be sure to mark the carrier bearing caps for orientation and direction. You need to install them in exactly the same way you found them, so what I usually do is take a sharp punch and make a mark on the top half of one, then a corresponding mark on the gasket surface next to it. Then I make two marks on the upper half of the other one, and another two marks respectively. This allows me to always know how to put them back. Sometimes there's a letter which has been stamped in the caps and the gasket surface that will tell you the same thing.

Step 2
You're going to have to be able to slide out and basically remove the axle shafts from the housing. On the front, this may also mean removing the tie-rods. Check your manual for all this.

Step 3
The first basic step when installing new gears is to measure the shims as you take them out of the housing. The shims on a typical Dana 44 will be in 3 places as follows:

  • Between each carrier bearing and the carrier - adjusts backlash and carrier bearing preload
  • Behind the race for the pinion head bearing - adjusts pinion depth
  • At the end of the pinion where the splines are - sets pinion bearing preload.

To remove the pinion head bearing race, take the long brass punch and punch it out from the opening for the pinion. Once it starts to seperate a little, make sure you push the shims back where you're going to be punching and get them out of the way.

Once you have them all catalogued and totalled, you can almost not mess this up. Why? Because if you get in too far, or over your head, you can put the old gears back in with the original shims and be nearly back to where you are now. That being said, this is not a great idea if you can avoid it. Putting new bearings on may throw these values off, but at least you'll be able to drive onto the wrecker to get towed to a shop. ;)

These measurements are also the best place to start for installing the new gears. Generally, people will tell you not to use the new bearings until everything is setup and ready to go. I'm going to say almost the opposite. Use the new bearings on the pinion head and on the carrier, but not for the (outer) pinion bearing. Reason being is because when you're setting pinion preload, this bearing can get crunched a little too easily, IMO.

Step 4
For starters, what I like to do is get the new parts together. Get the new bearing pressed onto the pinion head, get the new pinion head bearing race installed, get the new bearings on the carrier, etc. This provides you a nice starting point at which there is no return. This is where the bearing splitter and bearing puller come in. You need to be able to use the press to get the old bearings off, and using the splitter and puller, or a combination of both, may be the only way to do this. The pinion head bearing may not even need to be removed if you have a new bearing (recommended!) and a new pinion. The same goes for the carrier, but you'll need to get those bearings off to measure the shims as in Step 3.

Checking The Settings
Step 5

After getting the ring gear on the carrier or locker, I like to set the pinion preload to something average and run a quick pattern. By using the original shims and old bearing, you should be able to crank down on the pinion nut and you should be able to turn it by hand, but it should also have some tension. Trying to get a backlash reading with no backlash is frustrating and you won't get a good reading.

Step 6
If by some amazing stroke of good luck, your pattern is acceptable or close to acceptable, now's a good time to measure backlash. If backlash is not in spec, you have to try and get it within spec...here's where the fun begins. Backlash and pinion depth (indicated by the pattern in Step 3) feed off of one another. By changing the backlash, you're changing how the pinion gear meshes with the ring gear. It's critical to compromise these two until you have an acceptable pattern AND acceptable back lash. By changing the pinion depth, by the way, you're also changing the pinion bearing preload. It's important to keep an eye on how you're affecting the pinion bearing preload so it doesn't get too low or two high accordingly.

Settings
The end result of a good installation is having 4 distinct qualities measured to be within predetermined specifications.

Pinion Bearing Preload
On Dana 44s, for instance, the pinion bearing preload is set by using a shim pack - no crush sleeve. By cranking down on the pinion nut with at least 250 ft lbs of torque, you're basically pinching the bearing in against the housing, but you can change how far into the housing the bearing can go. More shim equals less preload. Checking pinion bearing preload is done by measuring how much effort it takes to spin the pinion gear without the carrier and axles installed. Basically, it requires turning the pinion with the in. lb torque wrench and getting a reading.

Backlash
Backlash is measured by setting up the dial indicator so that the point is on the drive side of one of the ring gear teeth. What you essentially need to measure is how much back and forth movement the ring gear has without the pinion actually moving. In other words, you should be able to rock the ring gear back and forth and measure the distance it moves before the pinion will also move. Backlash is adjusted by adjusting the shims between the carrier and the carrier bearings. Shifting the ring gear away from the pinion equals more backlash.

Gear Pattern
In order to see how well (or how badly) the pinion gear contacts the ring gear, marking compound must be used to indicate 'a pattern'. This is done by 'painting' a few teeth on the ring gear with gear marking compound and then turning the pinion so the painted area goes by the pinion. It's best to do this by placing some friction on the ring gear so that it makes a good pattern. Letting the ring gear spin freely makes for a difficult pattern to read. Reading the pattern really tells you how far 'into' the ring gear the pinion is. By adjusting the Word of advice: Summit sells gear marking compound for ~$3. Buy extra now. There must be gold or something in the paint because they only give you a tiny dab in that 1" container in the install/rebuild kit. As a novice, you'll go through this very quickly. This spec is the hardest to set mostly because there's no way to quantitatively measure the contact, you do it by eye. This is where experience comes into play.

Carrier Bearing Preload
When inserting and removing the carrier from the housing, you'll notice that it may be a tight fit. This 'tightness' is what carrier bearing preload is. Essentially, it's how hard the bearings are being forced sideways <--> into their respective races. To be honest, I don't consider myself capable of measuring this, but while I don't leave carrier floating around in the housing, I make sure it's not too tight to remove by hand, or at least with a wrench on the ring gear bolts/turning the pinion trick.

Disclaimer: This webpage is for informational purposes only. What you do with your own hands and eyes is your responsibility.

Copyright 2002 Dana60.com
 
Last edited:
Back
Top