You are using an out of date browser. It may not display this or other websites correctly.
You should upgrade or use an alternative browser.
You should upgrade or use an alternative browser.
Distance Behind X Pipe?
- Thread starter busterrm
- Start date
if you weld the two collectors directly to the x-pipe between them,
its SURE to cause fitting and assembly and alignment issues

Yes, like Grumpy said, you don’t want this to be welded solid. When I am in the construction stage there will be a V band connector in the middle of each 2 1/2 pipe between the collectors and the X pipe. Also, when you weld something that is round it is better to weld it in 1/4 or 90 degree segments. Weld one segment move 180 degrees from your starting point, weld 90 degrees, then go back to your starting point and weld that 90 the opposite direction, then go back to the starting point of your second weld and finish the joint. There will be some drawing from the welding but if you do it this way it draw evenly and easier to work with once it cools.
its SURE to cause fitting and assembly and alignment issues
Yes, like Grumpy said, you don’t want this to be welded solid. When I am in the construction stage there will be a V band connector in the middle of each 2 1/2 pipe between the collectors and the X pipe. Also, when you weld something that is round it is better to weld it in 1/4 or 90 degree segments. Weld one segment move 180 degrees from your starting point, weld 90 degrees, then go back to your starting point and weld that 90 the opposite direction, then go back to the starting point of your second weld and finish the joint. There will be some drawing from the welding but if you do it this way it draw evenly and easier to work with once it cools.
Last edited by a moderator:
busterrm
solid fixture here in the forum
Oh crap, I forgot one of the v band connections will be in the middle of the 2 1/2 pipe before the X pipe. Then another just before the mufflers.
I will weld the 2 1/2 pipe the collector let it cool in place. Then put in the V bands, let it cool, cut the pipe and weld in the X pipe. If I put it all together the welding heat will draw it all out of shape. So I will do it in stages, let it cool in between, that will allow me to do the fitting with cool parts for better fitment in each stage. I sometimes say it like it all magically fits together, and forget some of the guys reading this are not fabrication specialist like myself. So sorry! Once I am doing it, I will take pics in stages and list precautions to do a good quality job!
I will weld the 2 1/2 pipe the collector let it cool in place. Then put in the V bands, let it cool, cut the pipe and weld in the X pipe. If I put it all together the welding heat will draw it all out of shape. So I will do it in stages, let it cool in between, that will allow me to do the fitting with cool parts for better fitment in each stage. I sometimes say it like it all magically fits together, and forget some of the guys reading this are not fabrication specialist like myself. So sorry! Once I am doing it, I will take pics in stages and list precautions to do a good quality job!
Last edited:
it won,t make a difference you could see anywhere else than on a really accurate dyno graph,
but in theory its the distance too the collector block off plates at the 25" mark on your diagram,
keep in mind once the exhaust system is attached in completely changes the exhaust scavenging efficiency
and reduces the scavenging effect properly made open headers would have
but in theory its the distance too the collector block off plates at the 25" mark on your diagram,
keep in mind once the exhaust system is attached in completely changes the exhaust scavenging efficiency
and reduces the scavenging effect properly made open headers would have
Last edited:
http://garage.grumpysperformance.com/index.php?threads/header-gaskets.1046/#post-1951
http://garage.grumpysperformance.com/index.php?threads/header-bolts.559/#post-713
http://garage.grumpysperformance.com/index.php?threads/safety-wire-locking-fasteners.4306/
https://www.mcmaster.com/safety-wire-bolts/
https://www.mcmaster.com/safety-wire-bolts
http://stainlesssteelheaders.com/hardware
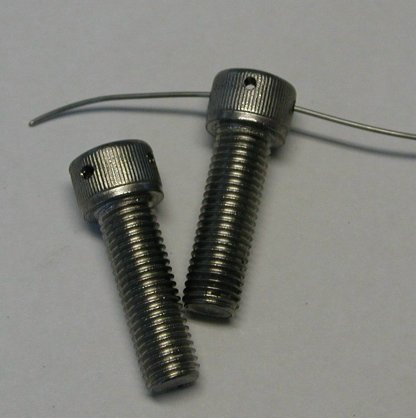
yes you can get the socket head stainless cap screws in various lengths threads ,
and at cheaper prices especially if your willing to drill the wire holes yourself

read full caption
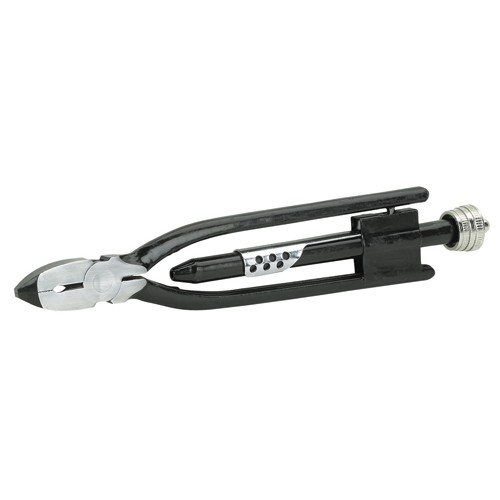
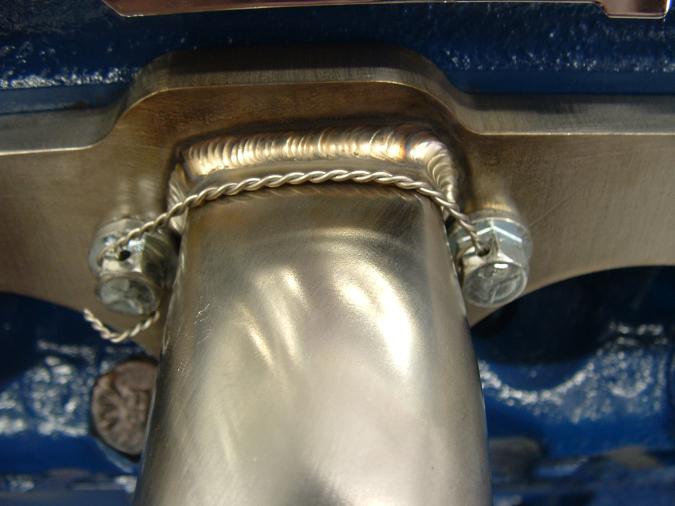
Doing The Twist Safety Wire
Safety wiring works equally well on nuts or bolts.
http://www.harborfreight.com/hand-tools ... 45341.html
http://www.harborfreight.com/0041-inch- ... -8895.html
https://www.harborfreight.com/9-inch-safety-wire-twisting-pliers-45341.html
https://www.napaonline.com/en/p/NDP...6478877959&adgroup_id=79272987338&adtype=pla&
https://www.harborfreight.com/0041-...MItcuLlNiz7gIVmIzICh2C2AtkEAQYBSABEgKm1fD_BwE
http://garage.grumpysperformance.com/index.php?threads/header-bolts.559/#post-713
http://garage.grumpysperformance.com/index.php?threads/safety-wire-locking-fasteners.4306/
https://www.mcmaster.com/safety-wire-bolts/
https://www.mcmaster.com/safety-wire-bolts
http://stainlesssteelheaders.com/hardware
yes you can get the socket head stainless cap screws in various lengths threads ,
and at cheaper prices especially if your willing to drill the wire holes yourself
read full caption
Doing The Twist Safety Wire
Safety wiring works equally well on nuts or bolts.
http://www.harborfreight.com/hand-tools ... 45341.html
http://www.harborfreight.com/0041-inch- ... -8895.html
https://www.harborfreight.com/9-inch-safety-wire-twisting-pliers-45341.html
https://www.napaonline.com/en/p/NDP...6478877959&adgroup_id=79272987338&adtype=pla&
https://www.harborfreight.com/0041-...MItcuLlNiz7gIVmIzICh2C2AtkEAQYBSABEgKm1fD_BwE
Last edited:
http://garage.grumpysperformance.com/index.php?threads/drill-bits.4714/#post-12809.
http://garage.grumpysperformance.co...afety-wire-locking-fasteners.4306/#post-11353
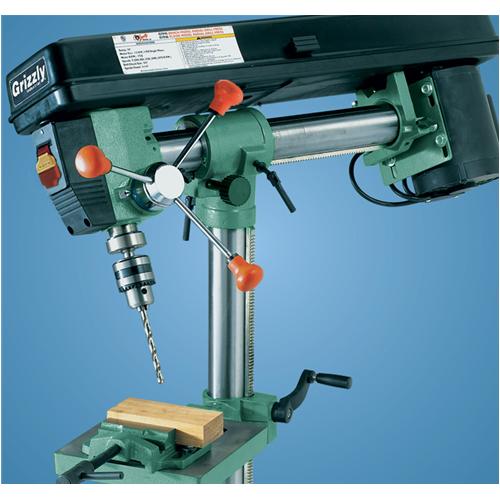
http://garage.grumpysperformance.co...hop-needs-a-decent-drill-press.970/#post-1691
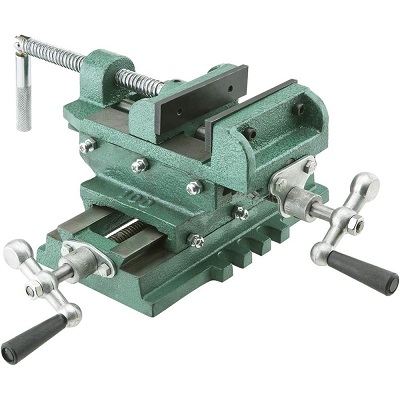
yeah it helps to own a decent drill press and mill vise
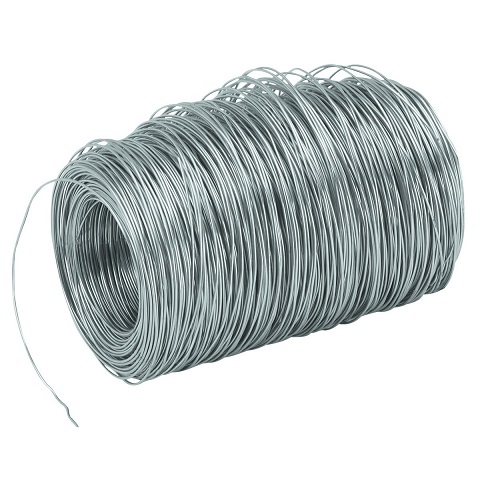
buy some size #56 cobalt drill bits to drill holes for safety wire in header bolts
your local hardware store won,t have them this cheap, buy the 12 pack, they are small and easy to break if you don,t use them correctly and drill slowly while spraying coolant oil
https://www.homedepot.com/p/Drill-America-56-M42-Cobalt-Drill-Bit-12-Piece-D-ACO56P12/305723430
Last edited:
busterrm
solid fixture here in the forum
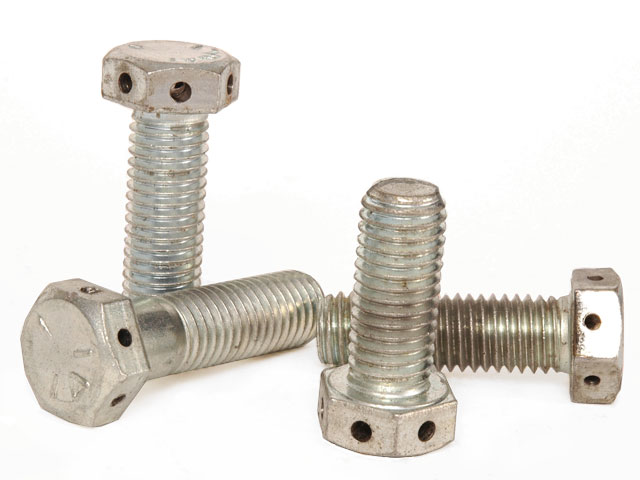
 These are the header bolts I was thinking about using when the headers and exhaust is finished.
Those bolts have a set screw that goes through the center of the bolt and spreads the very end of the bolt locking it into the threads and hopefully will prevent them from backing out and causing a header exhaust leak.
Last edited: