hey grumpyvette?
as far as synthetic in old cars. does anyone actually have any proof that synthetic oil eats seals or is it one of those wives tale things.
BTW I have on several occasions seen guys who complain about various oil leaks on valve covers and rear seals ETC.
Used, engine parts will have oil embedded deeply into the micro surfaces.
almost all replacement parts will have a wax or grease preservative coating to prevent corrosion during shipping!
IF YOU simply wipe off oil soaked surfaces with a paper towel, who then smear on the sealant of there choice and proceed to install gaskets,
YOU WILL OCCASIONALLY HAVE LEAKS!
and then they wonder or maybe be in shock when you find the seeping oil leak has returned in a few weeks time!
metal surfaces may look smooth as glass but under a microscope they look like the surface of the moon , with lots of jagged surface cracks, so you really need to wash out the micro lubricants trapped in those cracks with a thin fast evaporating grease solvent and a lint free rag , followed by a second repeat of the process and in many cases a few minutes with a heat gun to dry and evaporate the solvent in the micro cracks ,
STOP AND READ THE SEALANT PACKAGE DIRECTIONS!
you'll generally find some rather amazing , bits of info such as temperature requirements, temperature limitations, what solvents work best to remove the cement or sealant, only after reading the directions, do you then smear the gasket sealant on both mating surfaces before bonding the two gasket & metal surfaces.(and in many cases you use a brush as dirt or oil on fingers prevents a good seal!)
pontiac
http://www.boxwrench.net/specs/pont_265-455.htm
chevy sb
http://www.boxwrench.net/specs/chevy_sb.htm
chevy BB
http://www.boxwrench.net/specs/chevy_bb.htm
426hemi
http://www.boxwrench.net/specs/hemi_426.htm
383-440 mopar
http://www.boxwrench.net/specs/bchrys_B.htm
318-340-360 mopar
http://www.boxwrench.net/specs/schrys_A.htm
ford 429-460
http://www.boxwrench.net/specs/ford_429-514.htm
302-351 windsor ford
http://www.boxwrench.net/specs/ford_302_351W.htm
351 cleveland ford
http://www.boxwrench.net/specs/ford_351C.htm
352-428 ford
http://www.boxwrench.net/specs/ford_352-428.htm
Ive never heard of seals failing due to synthetic oil but I see sealants used dissolve fairly frequently, and while its true that some older formulas of gasket cements were never designed to work with some newer synthetic oils, and many (MECHANICS use the WRONG SEALANTS) and theres a very small chance that some of the synthetic oils with their better ability to seep or penetrate into small cracks that might leak, if you use them, after reading the question, , my first thought was , if you do have an oil leak,its only going to take a couple hours to put a new oil pan gasket and timing cover gasket , and rear main seal on the engine, why not just FIX THE PROBLEM!
Vortec plastic timing cover replacement
by: Cobalt327
(Click here to edit this page anonymously, or register a username to be credited for your work.)
Contents
[hide]
The Vortec engine came with a plastic timing cover with a non-replaceable front crankshaft seal. Because of this, the recommendation is to replace the cover. If the cover wasn't leaking from the front seal there seems to be little reason not reuse it.
Otherwise, it is possible to swap to a steel cover in its place
[edit]Timing covers
Below is a side-by-side shot of a plastic cover from a 1997 Vortec engine and to the right of it is a '80s non-roller steel timing cover for comparison.
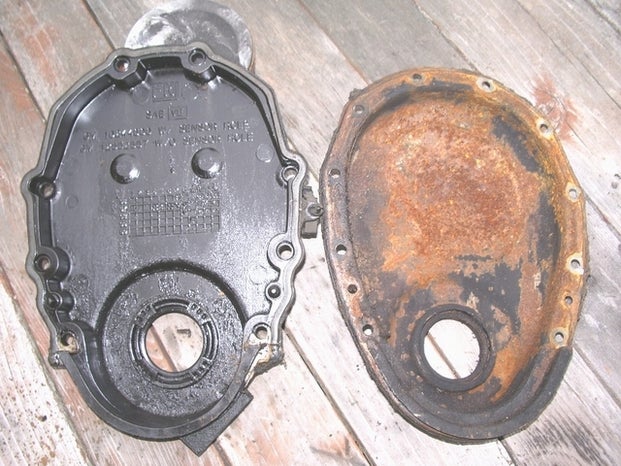
Using a '87-up steel timing cover w/the 1-piece oil pan gasket would be the best bet, although any steel or aftermarket cover may well work as well.
[edit]Timing cover differences

Some blocks do not have all the timing cover holes; holes that may be missing are circled
A block using a steel cover uses dowel pins in the block, and has the locating holes in steel cover.
The Vortec block (right) does not use block mounted dowels to locate the cover. Instead, it has holes for the plastic cover's locating pins. The locating holes in the 880 block are >15/64" and <1/4", which is about right for a press-fit 1/4" dowel pin. That said, it's not presently known if the hole size is correct for a press fit solid steel dowel like used on the earlier blocks. As a precaution, the hole should be carefully measured before driving in a solid dowel to avoid cracking the casting. Another alternative is to use a 0.250" OD hollow roll pin to avoid stressing the casting. Also the timing cover flange is thicker - 5.7L cylinder blocks with the #880 casting will accept early and late timing covers.
The 880 Vortec block shown has all the holes present and tapped. This is not always the case; some blocks (those used with the 1996-02 C/K truck and vans to 2002 with the exception of those used for marine or industrial applications) are missing two holes and will need to use a gasket as a template to drill and tap the missing holes. (These blocks with the 2 undrilled timing cover holes will also have the water pump bypass hole and its corresponding hole on the RH block deck undrilled. Drilling the hole for the water pump bypass requires the use of a water pump gasket as a template (RH water pump hole) and a pre-Vortec head gasket (the hole is drilled at an angle). Fuel pump mounting boss area is usually unmachined (as with the previous 638 or 727 castings where the fuel pump pushrod hole is undrilled even if a factory blockoff plate was used). The timing cover bolt thread size is 1/4-20 (1/4" coarse), the pilot hole can be drilled with a #7 bit.
[edit]Gaskets and seals
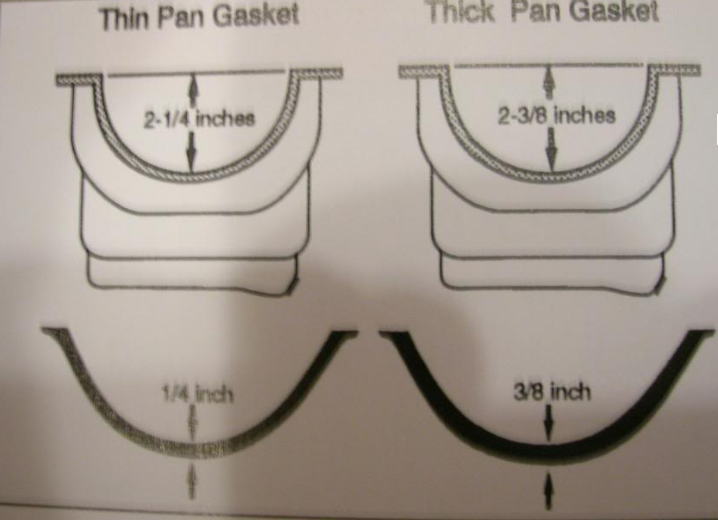
The last thing that needs checked is the type of front oil pan-to-cover seal is needed. To check what front seal is needed, put a straight edge across the front of the pan and measure down to the lowest part of where the seal rests.
The SBC damper has to be installed fully so it "sandwiches" the crank gear between the crank and the damper snout. If a damper from a 1995-back SBC is used, it will be long enough to work properly.
[edit]Vortec damper
The Vortec damper from a reluctor wheel-equipped engine is shorter by the thickness of the reluctor. So if a reluctor-equipped Vortec damper is used, a spacer made from the reluctor needs to be used if a steel timing cover is going to be used.
This is because the reluctor ring won't fit behind the steel cover. Without the spacer, the damper will go on too far and the pulleys won't line up, and the damper might even bottom out on the timing cover.
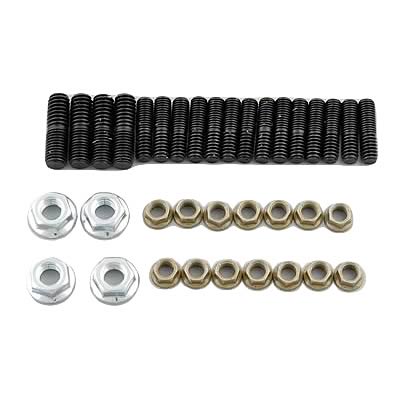
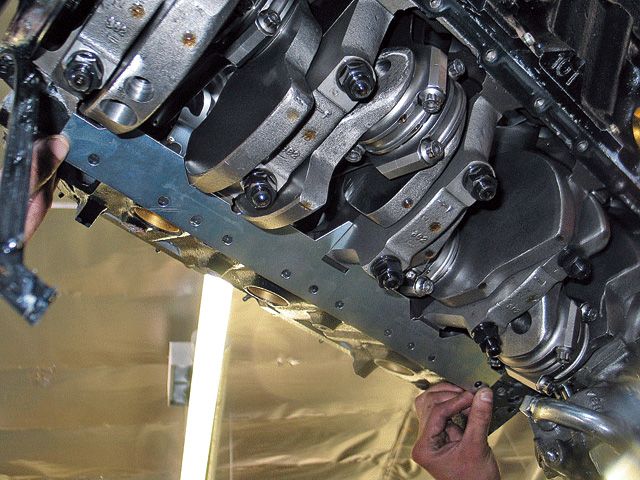
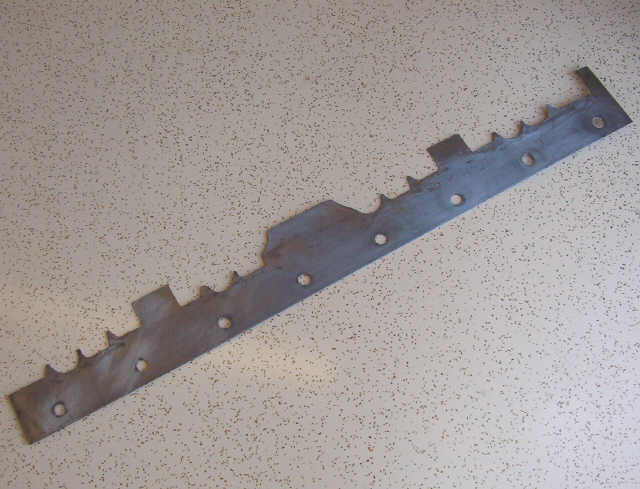
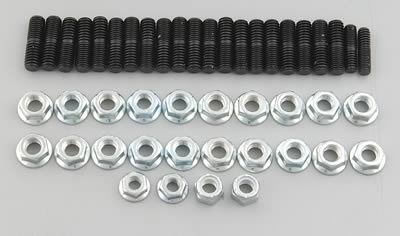
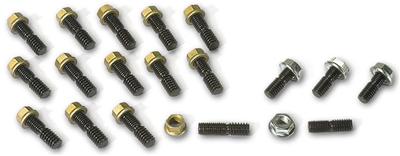
On oil pans I prefer studs, and an oil pan back plate
 DO NOT USE YELLOW 3M weather strip adhesive on an oil pan gasket as it slowly dissolves in oil over months
you might want to Use with P/N 12553058 RH and P/N 12553059 LH oil pan reinforcement plates to distribute the bolt stress on the oil pan rail for 1985 and earlier oil pans P/N 14088501 (LH) and P/N 14088502 (RH).1986 and newer
always use the manufacturers suggested installation instructions, as some applications or gasket types REQUIRE different lubes or sealants but heres a rough guide, you need to carefully clean and degrease any contact areas where sealants are to be used.
heres a rough guide to help select the correct sealants
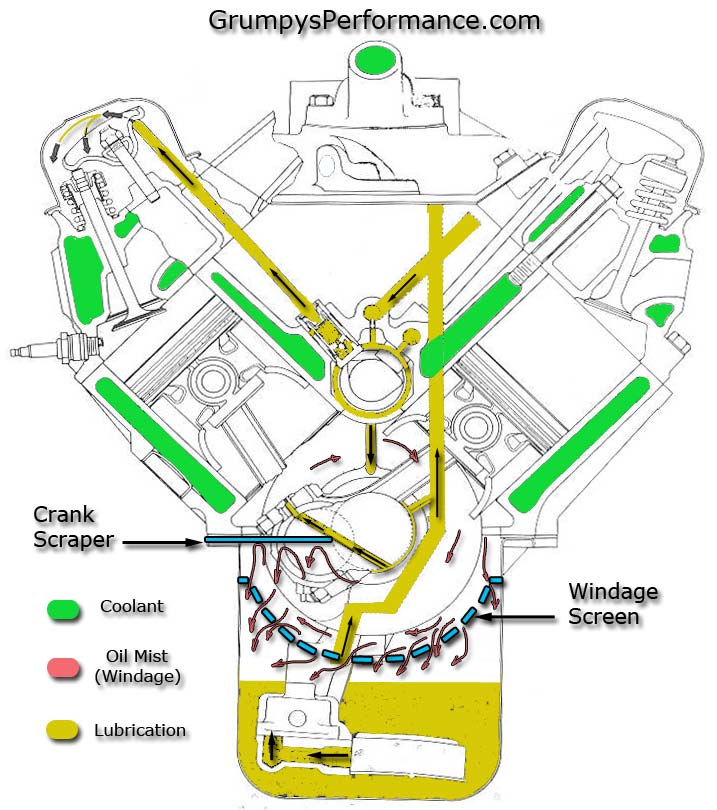
yes any component needs to be properly installed, I've seen something similar happen a few times in the past, (persistent slow oil leaks) when guys were using a crank scraper sandwiched between the oil pan gasket and the block,
when guys simply forgot to spray both of the crank scraper surfaces and the block and gasket surface with some sealant like copper coat. hot oil is DESIGNED and formulated to seep into and through small cracks , and if there's no sealant blocking that hot liquid penetrating oil, it will eventually find its way through micro cracks in the area between two metal surfaces, so you,ll want to coat both sides of the gasket and crank scraper with a thin coat of spray sealant just prior to oil pan assembly
remember theres two different gasket designs on the SBC the guy may have tried to install the wrong one
http://garage.grumpysperformance.co...etic-oil-cause-leaky-gaskets.2725/#post-13817
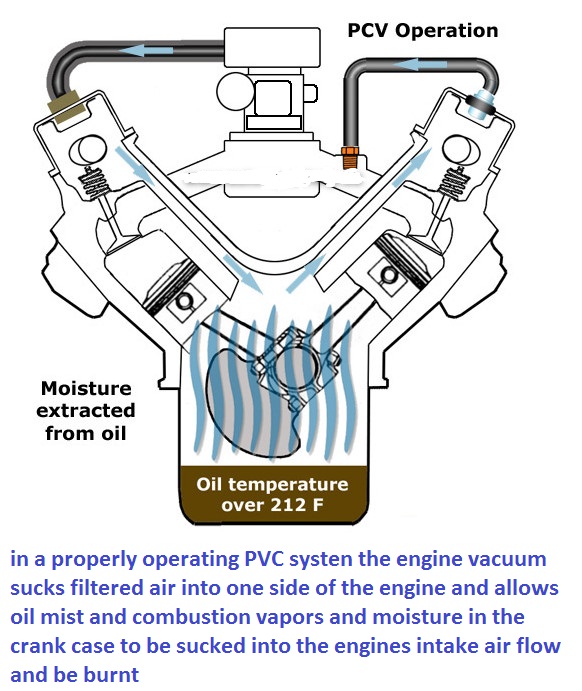
If you have oil mist or drips of oil exiting the breathers theres potentially several reasons the cause is likely to be a badly designed non baffled breather or a defective PVC valve that's not allowing air flow to be sucked IN thru the breather, , rather than crank case pressure allowing oil mist to exit the breather
(1) the engines rings are not sealing correctly resulting in higher than ideal crank case pressures.
http://garage.grumpysperformance.com/index.php?threads/maximizing-piston-to-bore-ring-seal.3897/
http://garage.grumpysperformance.co...g-and-installing-connecting-rods-pistons.247/
http://garage.grumpysperformance.com/index.php?threads/piston-to-bore-clearance.4630/
http://garage.grumpysperformance.com/index.php?threads/installing-rings-in-piston-grooves.9490/
(2) defective PVC valve
http://garage.grumpysperformance.co...lve-cover-breather-hole-in-valve-covers.2005/
http://forum.grumpysperformance.com/viewtopic.php?f=87&t=4636&p=12451#p12451
without proper venting an engines internal pressure builds , due to cylinder pressure leaking past the rings,and eventually will cause oil seals or gaskets to leak oil.
READ THE LINK
http://garage.grumpysperformance.co...stalling-the-intake-manifold-distributor.464/
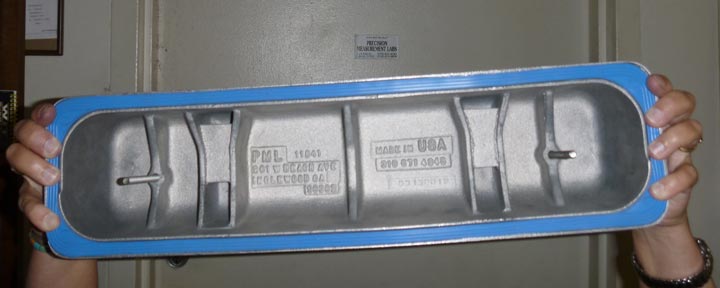
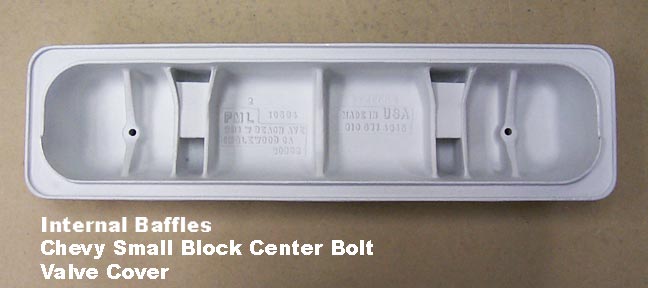
(3) improper breather design or improper location on the valve cover
http://www.jegs.com/i/JEGS-Performance-Products/555/52205/10002/-1?parentProductId=763433
check the gasket surface with a strait edge machinist ruler, degrease it with acetone and use the correct for application, good quality gasket you won,t have any issues.
READ THIS AND LOOK CAREFULLY AT PICTURES
http://garage.grumpysperformance.com/index.php?threads/on-my-3rd-rear-main-seal-bbc.11084/
http://garage.grumpysperformance.co...-the-tpi-runners-to-not-leak.5307/#post-15751
http://garage.grumpysperformance.com/index.php?threads/removing-gaskets-the-wrong-way.10464/
http://garage.grumpysperformance.com/index.php?threads/parts-prep-cleaning.6255/#post-41064
http://garage.grumpysperformance.co...hetic-oil-cause-leaky-gaskets.2725/#post-7076
http://garage.grumpysperformance.com/index.php?threads/sealants-and-threads.805/#post-45066
http://garage.grumpysperformance.com/index.php?threads/tracking-down-an-oil-leak.1430/#post-20967
http://garage.grumpysperformance.com/index.php?threads/preventing-leaky-head-bolts-studs.50/#post-59
http://garage.grumpysperformance.com/index.php?threads/locating-vacume-leaks.882/#post-45944
In a properly functioning engine the PVC valve allows engine vacuum to draw fresh outside air into the engine as it operates through the breather,
pressure in the crank case, you see as blow-bye out the breathers on valve covers is the result of cylinder combustion pressure, or to a far lower degree compression, getting past the ring to bore wall seal,the obvious best answer to reducing it is better ring seal.
now doing a ring and bearing refresh/and rebuild is just a weekend deal if your set up with the tools and have a place to work, but of course you may need a re-bore and new pistons, if the bores worn. and if thats true it will take longer and get more expensive due to the labor and machine shop costs and parts required, intermittent blow by is frequently the result of minimal ring damage due to detonation
most installed engines are slightly tilted towards the rear to help oil flow return, to the sump, in the crank case thus the forward 1/3rd of the upper inside roof of the valve covers tends to be a better place to locate breathers and PVC valves to limit oil loss, on most V 8 engines.
IVE GENERALLY HAD THE BEST RESULTS WITH ONE PIECE OILPAN GASKETS AND USING STUDS
http://www.summitracing.com/parts/mor-38360
http://www.summitracing.com/parts/mor-38350
IVE GENERALLY HAD THE BEST RESULTS WITH ONE PIECE OILPAN GASKETS AND USING STUDS
http://www.summitracing.com/parts/mor-38360
http://www.summitracing.com/parts/mor-38350
2-1/4" = thin seal
2-3/8" = thick seal
HERES A BASIC LIST (SBC)
SMALL BLOCK FELPRO
http://garage.grumpysperformance.com/index.php?threads/torque-specs-calculator-links-etc.1222/
Fel Pro #375-OS34510T
Replacement Oil Pan Gasket
PermaDryPlus
1975-85 SBC 262-400
Right-hand dipstick

Fel Pro #375-1880
H/P Oil Pan Gasket
PermaDryPlus
1975-79 SBC 262-400 (side rails cut for Strokers)
9/64" thick
Thick Front Seal
Left-hand dipstick
Fel Pro #375-1881
H/P Oil Pan Gasket
PermaDryPlus
1980-85 SBC 262-400 (side rails cut for Strokers)
9/64" thick
Thick Front Seal
Right-hand dipstick
Fel Pro #375-1882
H/P Oil Pan Gasket
PermaDryPlus
SB-Chevy & race blocks with straight side rails
9/64" thick
Thick Front Seal
Fel Pro #375-1885
H/P Oil Pan Gasket
PermaDryPlus
1957-74 SBC 262-400
9/64" thick
Thin Front Seal
Left-hand dipstick
Fel Pro #375-OS-34509T
Replacement Oil Pan Gasket
PermaDryPlus
1957-74 SBC 262-400
Thin Front Seal
Left-hand dipstick
Fel Pro #375-OS34500R
Replacement Oil Pan Gasket
Rubber-coated/steel core
1986-99 SBC 305-350
Fel Pro #375-OS34510T
Replacement Oil Pan Gasket
PermaDryPlus
1975-85 SBC 262-400
Right-hand dipstick
HERES A BASIC LIST (BBC)
Fel Pro #375-1884R
H/P Oil Pan Gasket
PermaDryPlus
1965-90 BBC 396-454
3/32" thick
Fel Pro #375-OS34407R
Replacement Oil Pan Gasket
Rubber-coated/steel core
1991-2000 BBC 454
Fel Pro #375-1893 (THREE PIECE)
H/P Oil Pan Gasket
Rubber-coated/steel core
1965-90 BBC 396-454
1991-Up BBC 454-572
Side rails cut to clear rods
Fel Pro #375-1863
Replacement Oil Pan Gasket
Rubber-coated multipiece
Donovan-Merlin blocks
BIG BLOCK MOPAR
Fel Pro #375-1834
H/P Oil Pan Gasket
Rubber-coated/steel core
1958-79 361-440 & Hemi
3/32" thick
http://www.jegs.com/webapp/wcs/stores/s ... 4_-1_10197
http://www.jegs.com/i/Milodon/697/41000/10002/-1
TWO PIECE REAR SEAL
OS34509T: Thin seal
OS34510T: Thick seal
BOTH LEFT HAND DIPSTICK
looks like you need the #OS34509T: Thin seal,if you need a thin front seal
but that only comes in left hand
so you might be forced to use
the older 4 piece design if you need a thin seal and right hand dip stick
Right-hand dipstick
375-1818
have the Felpro catalog and they show 5 SBC one piece gasket part numbers:
PN1881 1980-85 thick front seal RH dipstick; side rails trimmed for strokers
PN1880 1975-79 thick front seal LH dipstick; side rails trimmed for strokers
PN1885 1957-74 thin front seal LH dipstick
PN1882 Thick front seal straight side rails; side rails trimmed for strokers
PN1886 1986-97 thick front seal, one 1pc rear main seal GM bowtie short deck block
________
per jegs #'s FEL-PRO SMALL BLOCK CHEVY
1957-1975 1 piece 37.99 #1885
1986-1997 1 piece 39.99 #1886
MR.GASKET SMALL BLOCK CHEVY
1975-1985 1 piece 27.99 #6560
1986-1996 1 piece 27.99 #6561
http://www.jegs.com/webapp/wcs/stores/s ... 2_47050_-1
one-piece main seal blocks use this one:
OS34500R
Which type you use is dependent on your oil pan, not the block or timing cover.
BBC LISTED ALSO
http://www.jegs.com/webapp/wcs/stores/s ... 4_-1_10197
http://store.summitracing.com/egnsearch ... 5&y=8&x=43
http://garage.grumpysperformance.co...main-seal-in-a-gen-i-chevy-v8.1718/#post-4257
keep in mind on big blocks theres mark IV, mark V and MARK VI oil pan gaskets
Grumpy, what should you torque the bolts to and in what pattern?
this should help, (I generally snug the bolts up on the oil pan by feel and don,t over tighten them, and I generally use a small 1/4" drive ratchet to do so, not a tq wrench, (I think its 14-15 ft lbs or 165-170 inch lbs if you want to get technical) Im sure theres a specification, your supposed to use but Ive seldom had any problems just snugging them up by the feel with a short 1/4" drive ratchet.) I generally tighten in stages and constantly circle the pattern, I think the main problem occur when guys OVER TIGHTEN and crush the gaskets, snug but not tight works, if the gaskets being squished out noticeably between the block and pan lip, your more than likely over tightening the bolts, heres where experience comes into play, if your not sure use a inch rated tq wrench at 170 inch lbs
http://www.digitalcorvettes.com/forums/showthread.php?t=81323
http://www.small-block-chevy.com/assemblyspec.html
http://www.gmpartsdirect.com/performanc ... D=968.html
http://www.sallee-chevrolet.com/oilsystem/index.cfm
BTW oil pan rails are flimsy on some oil pans
ID check the oil pan rails are not bent/warped and if you need to use some black silicone sealant, but Ive never yet had that be necessary, most leaks are the result of EITHER the gasket not being seated correctly or over tightening the bolts bending oil pan.
you might want to Use with P/N 12553058 RH and P/N 12553059 LH oil pan reinforcement plates to distribute the bolt stress on the oil pan rail for 1985 and earlier oil pans P/N 14088501 (LH) and P/N 14088502 (RH).1986 and newer
read this thread, watch the video
http://redlinedetection.com/pages/video/
viewtopic.php?f=54&t=206&p=1154&hilit=+synthetic+gasket#p1154
viewtopic.php?f=51&t=1718&p=11956&hilit=rear+seal#p11956
viewtopic.php?f=54&t=3084&p=11971&hilit=gasket+synthetic#p11971
THE LT1 uses different recessed synthetic valve cover gaskets , than the standard first gen SBC cylinder heads
its a fact that some synthetic oils are not compatible with some of the products, used as gasket sealants,
example
the yellow weather strip adhesive many guys use as a gasket cement , on valve cover and oil pan gasket was NEVER intended to work in applications like valve cover gaskets , and oil pans or being exposed to engine heat and engine oil, and if you use it like that it WILL EVENTUALLY LEAK for example ,
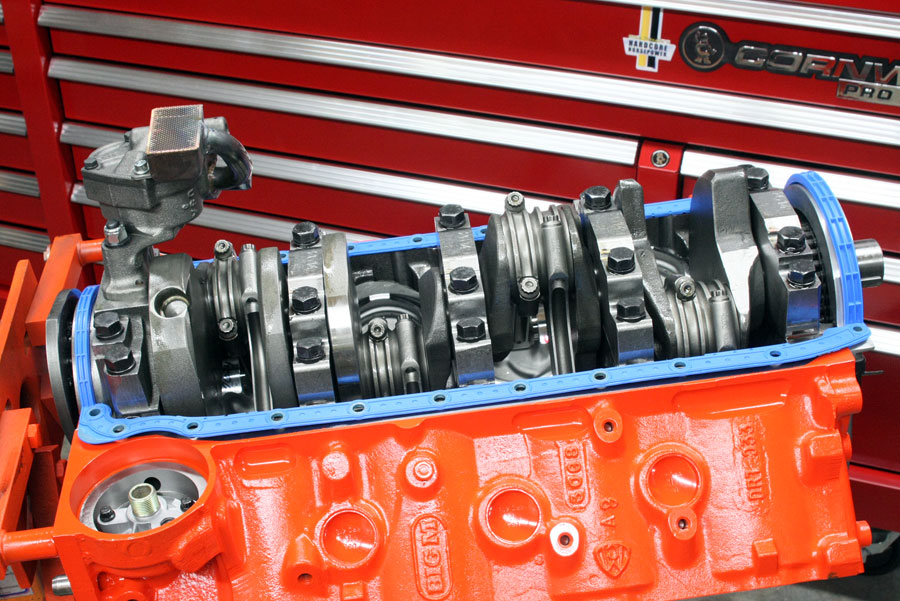
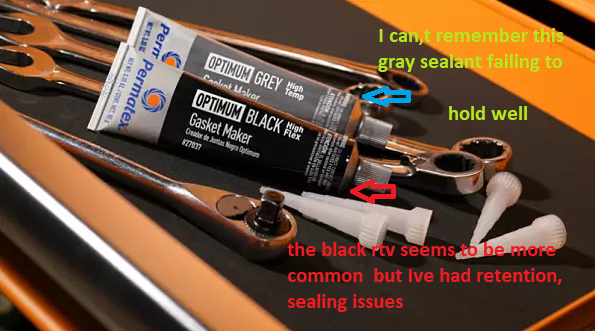
youll want to use the BLACK RTV oil proof sealant, pictured below on the upper surface of the oil pan gasket
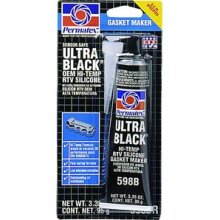
youll occasionally find uses for a high temp rated silicone sealant
like ultra-copper that has about twice the temp tolerance of the common black RTV
In my experience, the black rtv works ok,
but the high heat gray or copper gasket sealant has always worked a bit better
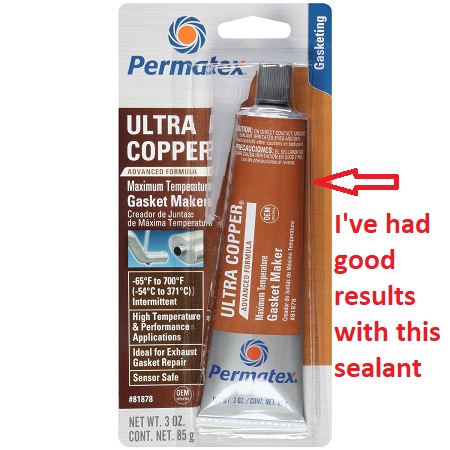
I prefer this for most of the jobs where silicone type gasket sealants get used like intake gaskets and valve cover gaskets

http://garage.grumpysperformance.com/index.php?threads/sealants-and-threads.805/#post-71928

NEVER EVER USE YELLOW WEATHER STRIP ADHEASIVE ON GASKETS THAT WILL BE USED TO PREVENT FUEL OR OIL LEAKS< AS THIS SEALANT SLOWLY DEGRADES IN CONTACT WITH FUEL OR OIL

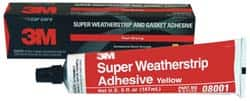
because the yellow weather strip adhesive tends to slowly loose its grip and dissolves in some hot synthetic oils over several months time.. its ok to use sparingly on the one piece oil pan gaskets because the gasket and the oil pan flange pressing it against the block rail,not the gunk does the sealing
obviously use of the correct gasket sealant in the application tends to prevent the problem, this is simply avoided by taking the time to read the labels on sealant and follow directions as to correct applications
80 350 OS34510T Felpro
'90 350 OS34500R Felpro
obviously the first step is locating the oil leak source, front seals, rear seals and oil sensors,oil filter adapters are common sources, any leak can be cured IF you know the EXACT SOURCE, and having access to a lift or sturdy jack stands so you can look carefully under the car while it idles is a big help in locating most leaks
viewtopic.php?f=62&t=1430
viewtopic.php?f=51&t=1718&p=4257&hilit=rear+seal#p4257
viewtopic.php?f=54&t=206&p=242#p242
it may be the gasket OR it may be the gasket cement, or the installation, if you use the yellow weather strip adhesive some guys use your doomed to leaks after awhile as that yellow snot slowly dissolves over time in some oils
keep in mind theres two front pan gasket thicknesses available
viewtopic.php?f=54&t=206&p=1154&hilit=+synthetic+gasket#p1154
your engine if your using the original pan used the thinner gasket
You first have to clean, and degrease the block with a good engine cleaner, spray gunk, and a local car wash with a wand you can use in the engine compartment is a good place to start, when cleaning off and engine to locate the source of oil leaks,youll want to get it completely clean and get it dry. Chalk dust ,or body talc powder or even baking flour in a squeeze plastic bottle like ketchup is occasionally found in restaurants in ,can catch the beginnings of a leak and really help you spot where it is coming from.
IF ALL ELSE FAILS,
theres kits that use UV dye and special light to locate leaks
http://www.amazon.com/Tracerline-TP8621 ... 487&sr=1-2
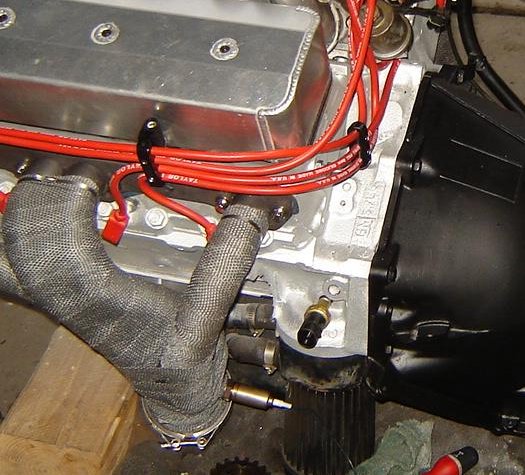
Typical leak spots are:
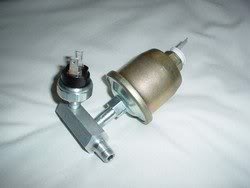
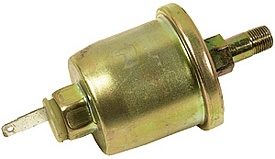
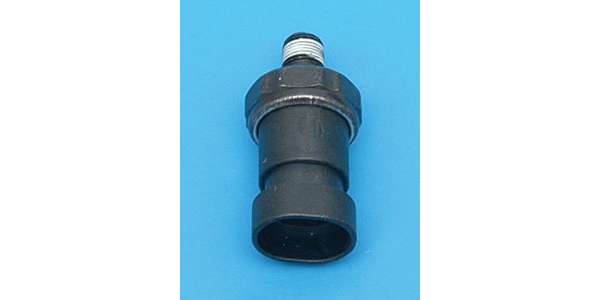
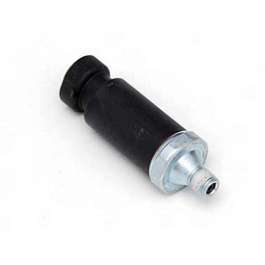
Oil pressure sender
rear main seal
front & rear intake rail seal
oil filter seal
rear cam freeze plug
valve cover breather grommet
bent pan or oil pan gasket
front cover seal
valve cover seal
front crank seal
oil filter adapters
oil filter seals
oil coolers and lines
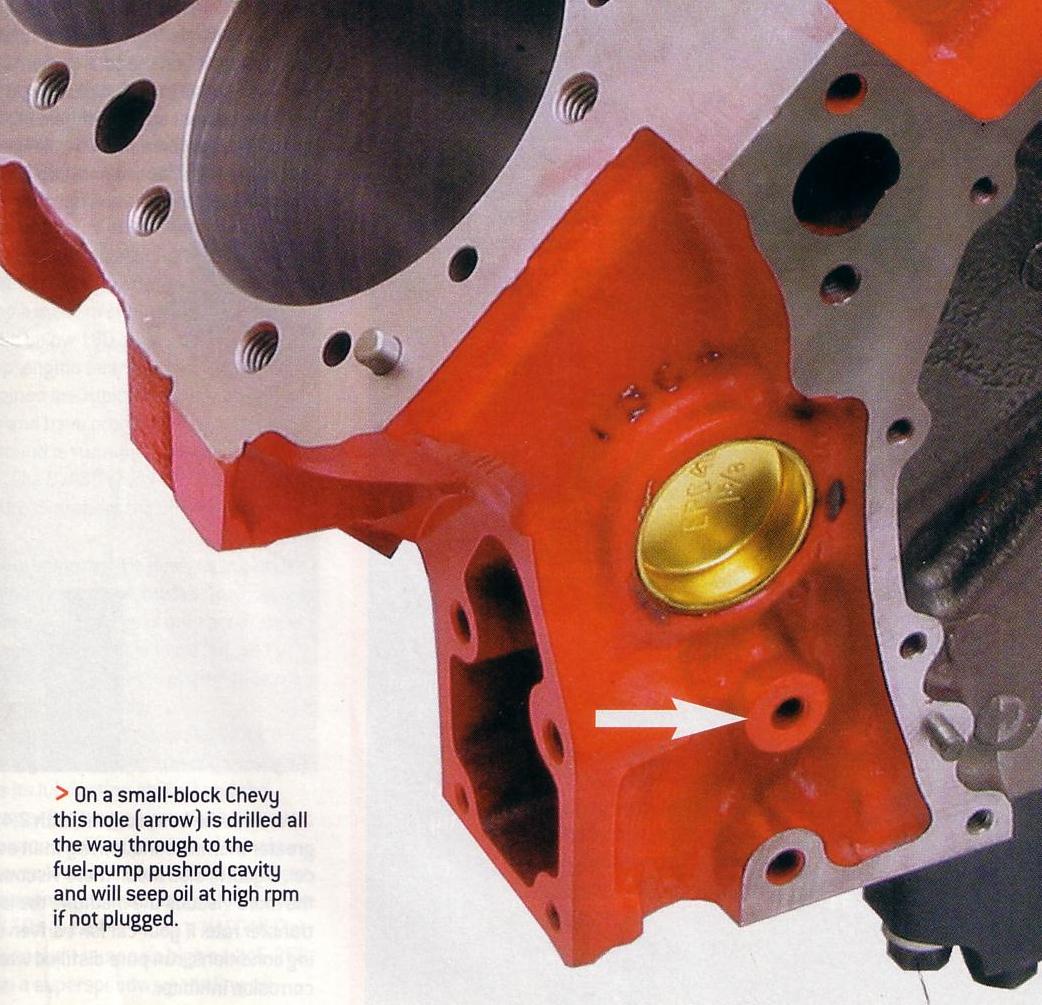
upper pass engine mount bolt hole (shown above)
fuel pump hole.
A fairly complete list but there are other less common ones .
STUDS make oil pan gasket installs easier in some cases
keep in mind theres two distinct sbc gasket thicknesses,
btw be sure its oil your seeing leak, before blaming the engine and not transmission fluid,or brake fluid, because thats obviously going too be a different source
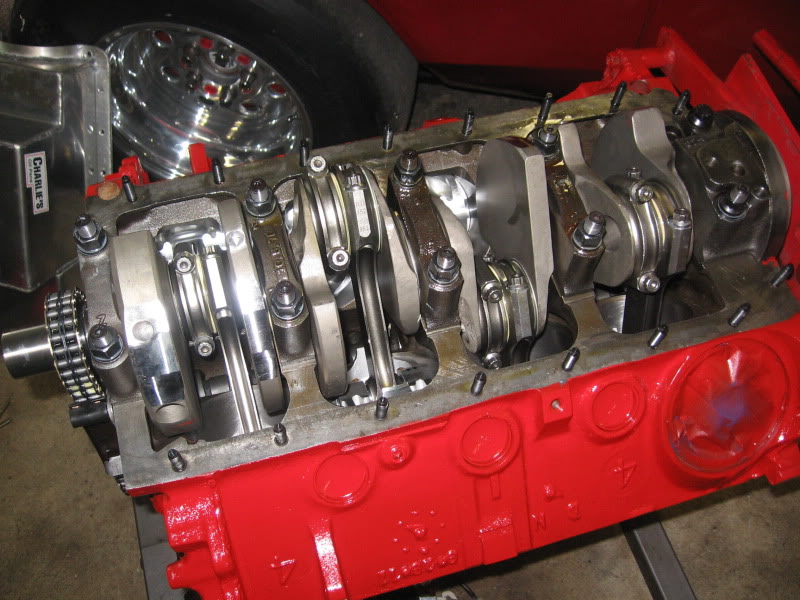
here you can see the thin line of sealant under the rear main cap, thats sometimes overlooked resulting in a slow drip near the rear main seal
most of those one piece synthetic oil pan gaskets come with instructions saying no gasket cement is needed or recommended, I generally use STUDS installed in the oil pan rail on the block and the stiffening plates listed in the linked info under the oil pan flange and Ive always used a bit of contact cement on only the upper surface of the gaskets, as it and the studs holds the gasket firmly in place while the pans aligned and installed
rear seals come in, rubber, silicon rubber,.Fluoroelastomer, and Viton they all work if properly installed but VITOR usually lasts the longest
http://www.summitracing.com/parts/FEL-BS118291/.. rubber
http://www.summitracing.com/parts/FEL-2909/... Fluoroelastomer,
http://www.summitracing.com/parts/FEL-2900/... Silicone
http://www.summitracing.com/parts/FEL-2918/..viton
I prefer to do the timing cover first but theres no reason not to install the oil pan gasket immediately after the timing cover
viewtopic.php?f=54&t=206&p=1154&hilit=+synthetic+gasket#p1154
viewtopic.php?f=51&t=1718&p=4257&hilit=rear+seal#p4257
viewtopic.php?f=54&t=2725&p=7076&hilit=gasket+synthetic#p7076
when installing an oil pan gasket its always preferable to install the front timing cover first if possible, as it makes sealing the oil pan to the block with the current one piece synthetic gaskets far easier
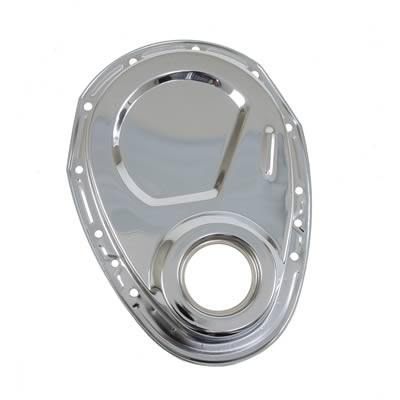
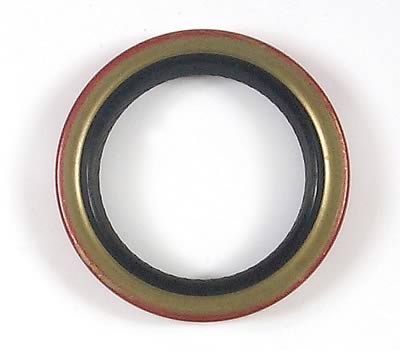
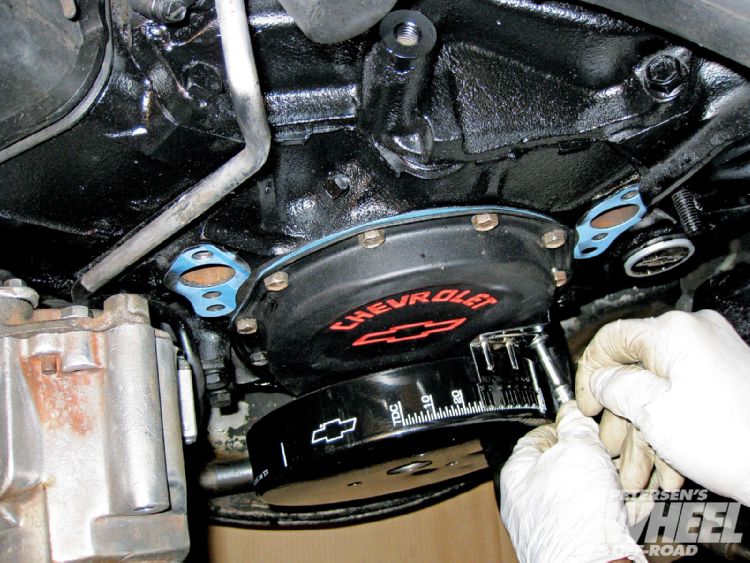
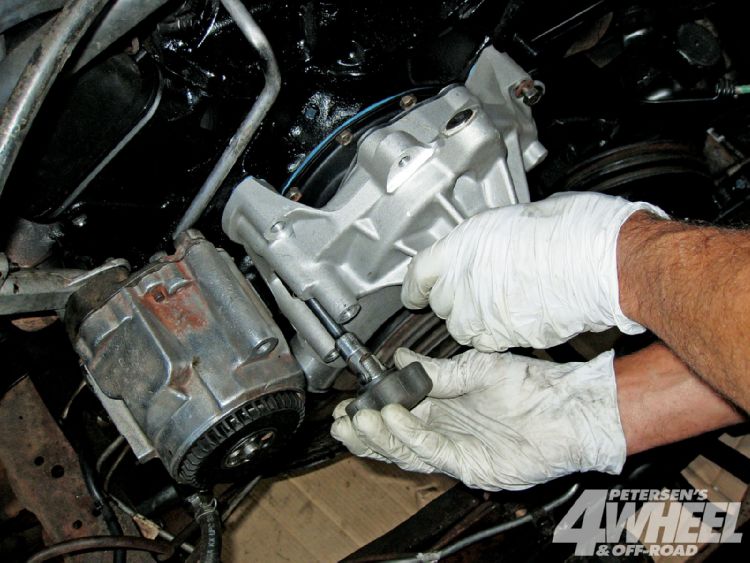
the front timing cover seal, that provides the oil seal on the damper as it slides into the cover on the crank snout is pressed in from the front, most guys tap it in with a plastic mallet,after carefully cleaning and repainting the stock cover or buying a new chrome timing chain cover as they are fairly cheap,youll want to be coating the outside edge of the seal with a liquid sealant while the timing cover is supported from the rear on a block of wood,the seals knocked out from the rear with a flat blade screw driver and a small hammer , used at an angle on the inside lip, replace it so the inner seals lip angles in towards the crank not out toward the front damper
BUT most guys simply buy a new cover since they are cheap and don,t bother cleaning the old one if it looks damaged, at $8-$10, for a new cover its hardly worth taking a chance, with the old one if its damaged
http://www.summitracing.com/parts/SUM-G3200/
as far as synthetic in old cars. does anyone actually have any proof that synthetic oil eats seals or is it one of those wives tale things.
BTW I have on several occasions seen guys who complain about various oil leaks on valve covers and rear seals ETC.
Used, engine parts will have oil embedded deeply into the micro surfaces.
almost all replacement parts will have a wax or grease preservative coating to prevent corrosion during shipping!
IF YOU simply wipe off oil soaked surfaces with a paper towel, who then smear on the sealant of there choice and proceed to install gaskets,
YOU WILL OCCASIONALLY HAVE LEAKS!
and then they wonder or maybe be in shock when you find the seeping oil leak has returned in a few weeks time!
metal surfaces may look smooth as glass but under a microscope they look like the surface of the moon , with lots of jagged surface cracks, so you really need to wash out the micro lubricants trapped in those cracks with a thin fast evaporating grease solvent and a lint free rag , followed by a second repeat of the process and in many cases a few minutes with a heat gun to dry and evaporate the solvent in the micro cracks ,
STOP AND READ THE SEALANT PACKAGE DIRECTIONS!
you'll generally find some rather amazing , bits of info such as temperature requirements, temperature limitations, what solvents work best to remove the cement or sealant, only after reading the directions, do you then smear the gasket sealant on both mating surfaces before bonding the two gasket & metal surfaces.(and in many cases you use a brush as dirt or oil on fingers prevents a good seal!)
pontiac
http://www.boxwrench.net/specs/pont_265-455.htm
chevy sb
http://www.boxwrench.net/specs/chevy_sb.htm
chevy BB
http://www.boxwrench.net/specs/chevy_bb.htm
426hemi
http://www.boxwrench.net/specs/hemi_426.htm
383-440 mopar
http://www.boxwrench.net/specs/bchrys_B.htm
318-340-360 mopar
http://www.boxwrench.net/specs/schrys_A.htm
ford 429-460
http://www.boxwrench.net/specs/ford_429-514.htm
302-351 windsor ford
http://www.boxwrench.net/specs/ford_302_351W.htm
351 cleveland ford
http://www.boxwrench.net/specs/ford_351C.htm
352-428 ford
http://www.boxwrench.net/specs/ford_352-428.htm
Ive never heard of seals failing due to synthetic oil but I see sealants used dissolve fairly frequently, and while its true that some older formulas of gasket cements were never designed to work with some newer synthetic oils, and many (MECHANICS use the WRONG SEALANTS) and theres a very small chance that some of the synthetic oils with their better ability to seep or penetrate into small cracks that might leak, if you use them, after reading the question, , my first thought was , if you do have an oil leak,its only going to take a couple hours to put a new oil pan gasket and timing cover gasket , and rear main seal on the engine, why not just FIX THE PROBLEM!
Vortec plastic timing cover replacement
by: Cobalt327
(Click here to edit this page anonymously, or register a username to be credited for your work.)
Contents
[hide]
The Vortec engine came with a plastic timing cover with a non-replaceable front crankshaft seal. Because of this, the recommendation is to replace the cover. If the cover wasn't leaking from the front seal there seems to be little reason not reuse it.
Otherwise, it is possible to swap to a steel cover in its place
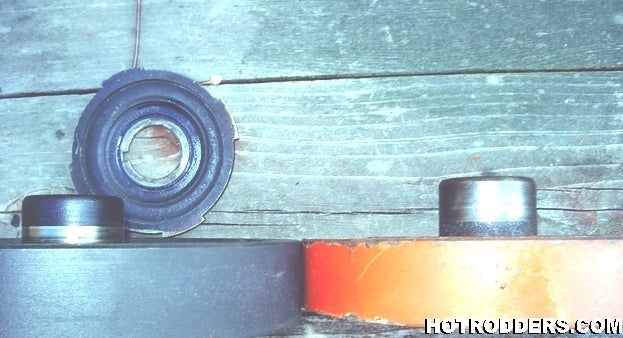
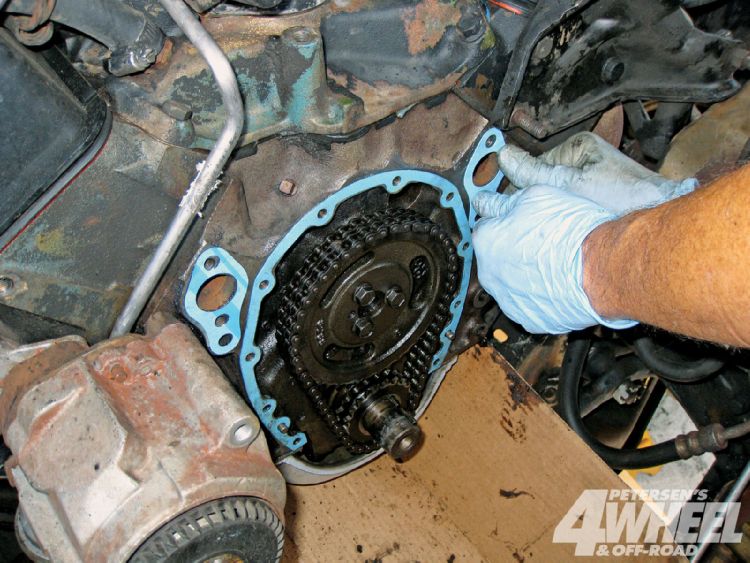
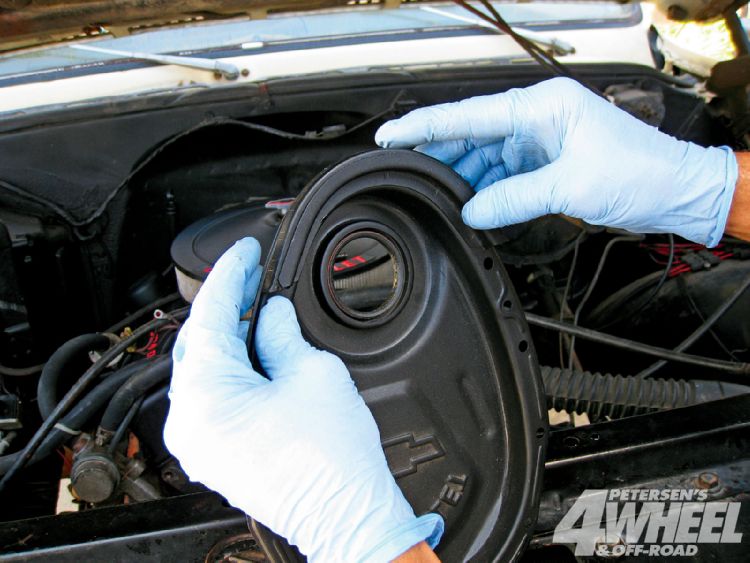
[edit]Timing covers
Below is a side-by-side shot of a plastic cover from a 1997 Vortec engine and to the right of it is a '80s non-roller steel timing cover for comparison.

Using a '87-up steel timing cover w/the 1-piece oil pan gasket would be the best bet, although any steel or aftermarket cover may well work as well.
[edit]Timing cover differences
- The plastic cover has more room around the crank gear to make room for the crank position sensor rotor
- The steel cover is deeper, from inside the front to the sealing surface
- Generally, there is more room around the inside of the steel cover, even though the photos don't show this very well due to how the covers are shaped and the angle the photo was taken
- The plastic cover has fewer bolt holes at the top
- The plastic cover has male pins or dowels to locate the cover onto the face of the block; the steel cover has holes in the same position for the dowels that are used in the older blocks
- The plastic cover's bolts are shouldered to prevent over-tightening the cover
- The p/n for plastic cover w/sensor hole is: p/n 10244600
- The number for plastic w/o sensor hole is: p/n 12562818 (old p/n 12552557). This new design cover is used on all ZZ4 crate engines, and will bolt to any small-block Chevrolet engine from 1995 through current model except LT1/LT4 (Gen 2) and LSx engines.

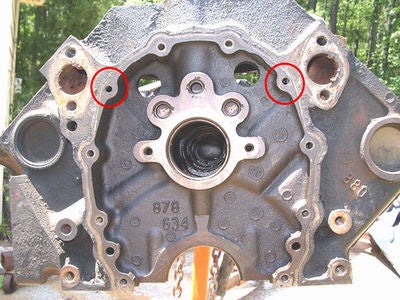
Some blocks do not have all the timing cover holes; holes that may be missing are circled
A block using a steel cover uses dowel pins in the block, and has the locating holes in steel cover.
The Vortec block (right) does not use block mounted dowels to locate the cover. Instead, it has holes for the plastic cover's locating pins. The locating holes in the 880 block are >15/64" and <1/4", which is about right for a press-fit 1/4" dowel pin. That said, it's not presently known if the hole size is correct for a press fit solid steel dowel like used on the earlier blocks. As a precaution, the hole should be carefully measured before driving in a solid dowel to avoid cracking the casting. Another alternative is to use a 0.250" OD hollow roll pin to avoid stressing the casting. Also the timing cover flange is thicker - 5.7L cylinder blocks with the #880 casting will accept early and late timing covers.
The 880 Vortec block shown has all the holes present and tapped. This is not always the case; some blocks (those used with the 1996-02 C/K truck and vans to 2002 with the exception of those used for marine or industrial applications) are missing two holes and will need to use a gasket as a template to drill and tap the missing holes. (These blocks with the 2 undrilled timing cover holes will also have the water pump bypass hole and its corresponding hole on the RH block deck undrilled. Drilling the hole for the water pump bypass requires the use of a water pump gasket as a template (RH water pump hole) and a pre-Vortec head gasket (the hole is drilled at an angle). Fuel pump mounting boss area is usually unmachined (as with the previous 638 or 727 castings where the fuel pump pushrod hole is undrilled even if a factory blockoff plate was used). The timing cover bolt thread size is 1/4-20 (1/4" coarse), the pilot hole can be drilled with a #7 bit.
[edit]Gaskets and seals
The last thing that needs checked is the type of front oil pan-to-cover seal is needed. To check what front seal is needed, put a straight edge across the front of the pan and measure down to the lowest part of where the seal rests.
- 2-1/4" = thin (early 1955-'74) seal, 3/32" thick
- 2-3/8" = thick (later 1975-'85) seal, 9/64" thick
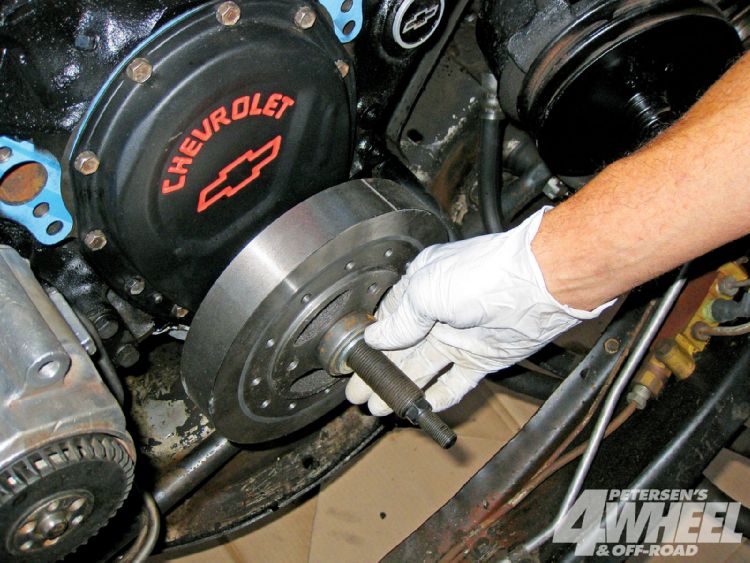
The SBC damper has to be installed fully so it "sandwiches" the crank gear between the crank and the damper snout. If a damper from a 1995-back SBC is used, it will be long enough to work properly.
[edit]Vortec damper
The Vortec damper from a reluctor wheel-equipped engine is shorter by the thickness of the reluctor. So if a reluctor-equipped Vortec damper is used, a spacer made from the reluctor needs to be used if a steel timing cover is going to be used.
This is because the reluctor ring won't fit behind the steel cover. Without the spacer, the damper will go on too far and the pulleys won't line up, and the damper might even bottom out on the timing cover.

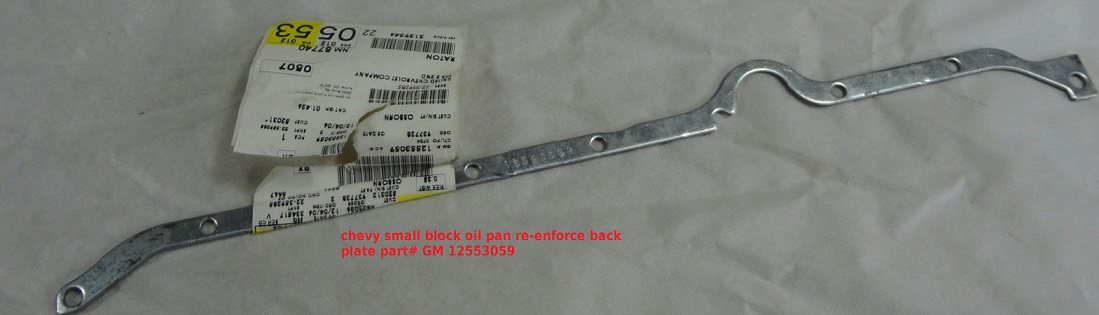
On oil pans I prefer studs, and an oil pan back plate
you might want to Use with P/N 12553058 RH and P/N 12553059 LH oil pan reinforcement plates to distribute the bolt stress on the oil pan rail for 1985 and earlier oil pans P/N 14088501 (LH) and P/N 14088502 (RH).1986 and newer
always use the manufacturers suggested installation instructions, as some applications or gasket types REQUIRE different lubes or sealants but heres a rough guide, you need to carefully clean and degrease any contact areas where sealants are to be used.
heres a rough guide to help select the correct sealants
yes any component needs to be properly installed, I've seen something similar happen a few times in the past, (persistent slow oil leaks) when guys were using a crank scraper sandwiched between the oil pan gasket and the block,
when guys simply forgot to spray both of the crank scraper surfaces and the block and gasket surface with some sealant like copper coat. hot oil is DESIGNED and formulated to seep into and through small cracks , and if there's no sealant blocking that hot liquid penetrating oil, it will eventually find its way through micro cracks in the area between two metal surfaces, so you,ll want to coat both sides of the gasket and crank scraper with a thin coat of spray sealant just prior to oil pan assembly
remember theres two different gasket designs on the SBC the guy may have tried to install the wrong one
http://garage.grumpysperformance.co...etic-oil-cause-leaky-gaskets.2725/#post-13817
If you have oil mist or drips of oil exiting the breathers theres potentially several reasons the cause is likely to be a badly designed non baffled breather or a defective PVC valve that's not allowing air flow to be sucked IN thru the breather, , rather than crank case pressure allowing oil mist to exit the breather
(1) the engines rings are not sealing correctly resulting in higher than ideal crank case pressures.
http://garage.grumpysperformance.com/index.php?threads/maximizing-piston-to-bore-ring-seal.3897/
http://garage.grumpysperformance.co...g-and-installing-connecting-rods-pistons.247/
http://garage.grumpysperformance.com/index.php?threads/piston-to-bore-clearance.4630/
http://garage.grumpysperformance.com/index.php?threads/installing-rings-in-piston-grooves.9490/
(2) defective PVC valve
http://garage.grumpysperformance.co...lve-cover-breather-hole-in-valve-covers.2005/
http://forum.grumpysperformance.com/viewtopic.php?f=87&t=4636&p=12451#p12451
without proper venting an engines internal pressure builds , due to cylinder pressure leaking past the rings,and eventually will cause oil seals or gaskets to leak oil.
READ THE LINK
http://garage.grumpysperformance.co...stalling-the-intake-manifold-distributor.464/
(3) improper breather design or improper location on the valve cover
http://www.jegs.com/i/JEGS-Performance-Products/555/52205/10002/-1?parentProductId=763433
check the gasket surface with a strait edge machinist ruler, degrease it with acetone and use the correct for application, good quality gasket you won,t have any issues.
READ THIS AND LOOK CAREFULLY AT PICTURES
http://garage.grumpysperformance.com/index.php?threads/on-my-3rd-rear-main-seal-bbc.11084/
http://garage.grumpysperformance.co...-the-tpi-runners-to-not-leak.5307/#post-15751
http://garage.grumpysperformance.com/index.php?threads/removing-gaskets-the-wrong-way.10464/
http://garage.grumpysperformance.com/index.php?threads/parts-prep-cleaning.6255/#post-41064
http://garage.grumpysperformance.co...hetic-oil-cause-leaky-gaskets.2725/#post-7076
http://garage.grumpysperformance.com/index.php?threads/sealants-and-threads.805/#post-45066
http://garage.grumpysperformance.com/index.php?threads/tracking-down-an-oil-leak.1430/#post-20967
http://garage.grumpysperformance.com/index.php?threads/preventing-leaky-head-bolts-studs.50/#post-59
http://garage.grumpysperformance.com/index.php?threads/locating-vacume-leaks.882/#post-45944
In a properly functioning engine the PVC valve allows engine vacuum to draw fresh outside air into the engine as it operates through the breather,
pressure in the crank case, you see as blow-bye out the breathers on valve covers is the result of cylinder combustion pressure, or to a far lower degree compression, getting past the ring to bore wall seal,the obvious best answer to reducing it is better ring seal.
now doing a ring and bearing refresh/and rebuild is just a weekend deal if your set up with the tools and have a place to work, but of course you may need a re-bore and new pistons, if the bores worn. and if thats true it will take longer and get more expensive due to the labor and machine shop costs and parts required, intermittent blow by is frequently the result of minimal ring damage due to detonation
most installed engines are slightly tilted towards the rear to help oil flow return, to the sump, in the crank case thus the forward 1/3rd of the upper inside roof of the valve covers tends to be a better place to locate breathers and PVC valves to limit oil loss, on most V 8 engines.
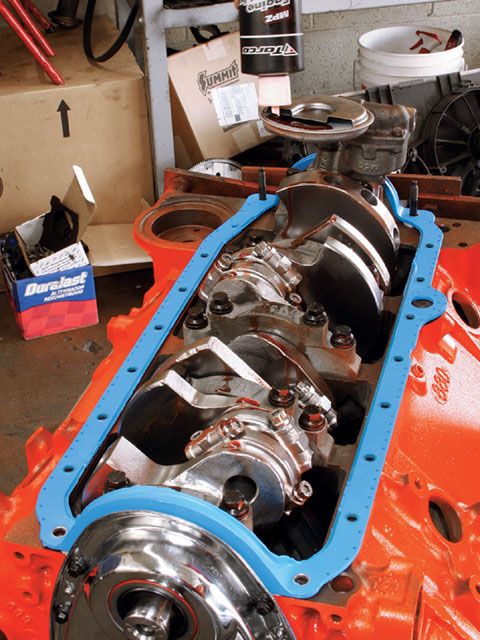
IVE GENERALLY HAD THE BEST RESULTS WITH ONE PIECE OILPAN GASKETS AND USING STUDS
http://www.summitracing.com/parts/mor-38360
http://www.summitracing.com/parts/mor-38350
IVE GENERALLY HAD THE BEST RESULTS WITH ONE PIECE OILPAN GASKETS AND USING STUDS
http://www.summitracing.com/parts/mor-38360
http://www.summitracing.com/parts/mor-38350
2-1/4" = thin seal
2-3/8" = thick seal
HERES A BASIC LIST (SBC)
SMALL BLOCK FELPRO
http://garage.grumpysperformance.com/index.php?threads/torque-specs-calculator-links-etc.1222/
Fel Pro #375-OS34510T
Replacement Oil Pan Gasket
PermaDryPlus
1975-85 SBC 262-400
Right-hand dipstick
Fel Pro #375-1880
H/P Oil Pan Gasket
PermaDryPlus
1975-79 SBC 262-400 (side rails cut for Strokers)
9/64" thick
Thick Front Seal
Left-hand dipstick
Fel Pro #375-1881
H/P Oil Pan Gasket
PermaDryPlus
1980-85 SBC 262-400 (side rails cut for Strokers)
9/64" thick
Thick Front Seal
Right-hand dipstick
Fel Pro #375-1882
H/P Oil Pan Gasket
PermaDryPlus
SB-Chevy & race blocks with straight side rails
9/64" thick
Thick Front Seal
Fel Pro #375-1885
H/P Oil Pan Gasket
PermaDryPlus
1957-74 SBC 262-400
9/64" thick
Thin Front Seal
Left-hand dipstick
Fel Pro #375-OS-34509T
Replacement Oil Pan Gasket
PermaDryPlus
1957-74 SBC 262-400
Thin Front Seal
Left-hand dipstick
Fel Pro #375-OS34500R
Replacement Oil Pan Gasket
Rubber-coated/steel core
1986-99 SBC 305-350
Fel Pro #375-OS34510T
Replacement Oil Pan Gasket
PermaDryPlus
1975-85 SBC 262-400
Right-hand dipstick
HERES A BASIC LIST (BBC)
Fel Pro #375-1884R
H/P Oil Pan Gasket
PermaDryPlus
1965-90 BBC 396-454
3/32" thick
Fel Pro #375-OS34407R
Replacement Oil Pan Gasket
Rubber-coated/steel core
1991-2000 BBC 454
Fel Pro #375-1893 (THREE PIECE)
H/P Oil Pan Gasket
Rubber-coated/steel core
1965-90 BBC 396-454
1991-Up BBC 454-572
Side rails cut to clear rods
Fel Pro #375-1863
Replacement Oil Pan Gasket
Rubber-coated multipiece
Donovan-Merlin blocks
BIG BLOCK MOPAR
Fel Pro #375-1834
H/P Oil Pan Gasket
Rubber-coated/steel core
1958-79 361-440 & Hemi
3/32" thick
http://www.jegs.com/webapp/wcs/stores/s ... 4_-1_10197
http://www.jegs.com/i/Milodon/697/41000/10002/-1
TWO PIECE REAR SEAL
OS34509T: Thin seal
OS34510T: Thick seal
BOTH LEFT HAND DIPSTICK
looks like you need the #OS34509T: Thin seal,if you need a thin front seal
but that only comes in left hand
so you might be forced to use
the older 4 piece design if you need a thin seal and right hand dip stick
Right-hand dipstick
375-1818
have the Felpro catalog and they show 5 SBC one piece gasket part numbers:
PN1881 1980-85 thick front seal RH dipstick; side rails trimmed for strokers
PN1880 1975-79 thick front seal LH dipstick; side rails trimmed for strokers
PN1885 1957-74 thin front seal LH dipstick
PN1882 Thick front seal straight side rails; side rails trimmed for strokers
PN1886 1986-97 thick front seal, one 1pc rear main seal GM bowtie short deck block
________
per jegs #'s FEL-PRO SMALL BLOCK CHEVY
1957-1975 1 piece 37.99 #1885
1986-1997 1 piece 39.99 #1886
MR.GASKET SMALL BLOCK CHEVY
1975-1985 1 piece 27.99 #6560
1986-1996 1 piece 27.99 #6561
http://www.jegs.com/webapp/wcs/stores/s ... 2_47050_-1
one-piece main seal blocks use this one:
OS34500R
Which type you use is dependent on your oil pan, not the block or timing cover.
BBC LISTED ALSO
http://www.jegs.com/webapp/wcs/stores/s ... 4_-1_10197
http://store.summitracing.com/egnsearch ... 5&y=8&x=43
http://garage.grumpysperformance.co...main-seal-in-a-gen-i-chevy-v8.1718/#post-4257
keep in mind on big blocks theres mark IV, mark V and MARK VI oil pan gaskets
Grumpy, what should you torque the bolts to and in what pattern?
this should help, (I generally snug the bolts up on the oil pan by feel and don,t over tighten them, and I generally use a small 1/4" drive ratchet to do so, not a tq wrench, (I think its 14-15 ft lbs or 165-170 inch lbs if you want to get technical) Im sure theres a specification, your supposed to use but Ive seldom had any problems just snugging them up by the feel with a short 1/4" drive ratchet.) I generally tighten in stages and constantly circle the pattern, I think the main problem occur when guys OVER TIGHTEN and crush the gaskets, snug but not tight works, if the gaskets being squished out noticeably between the block and pan lip, your more than likely over tightening the bolts, heres where experience comes into play, if your not sure use a inch rated tq wrench at 170 inch lbs
http://www.digitalcorvettes.com/forums/showthread.php?t=81323
http://www.small-block-chevy.com/assemblyspec.html
http://www.gmpartsdirect.com/performanc ... D=968.html
http://www.sallee-chevrolet.com/oilsystem/index.cfm
BTW oil pan rails are flimsy on some oil pans
ID check the oil pan rails are not bent/warped and if you need to use some black silicone sealant, but Ive never yet had that be necessary, most leaks are the result of EITHER the gasket not being seated correctly or over tightening the bolts bending oil pan.
you might want to Use with P/N 12553058 RH and P/N 12553059 LH oil pan reinforcement plates to distribute the bolt stress on the oil pan rail for 1985 and earlier oil pans P/N 14088501 (LH) and P/N 14088502 (RH).1986 and newer
read this thread, watch the video
http://redlinedetection.com/pages/video/
viewtopic.php?f=54&t=206&p=1154&hilit=+synthetic+gasket#p1154
viewtopic.php?f=51&t=1718&p=11956&hilit=rear+seal#p11956
viewtopic.php?f=54&t=3084&p=11971&hilit=gasket+synthetic#p11971
THE LT1 uses different recessed synthetic valve cover gaskets , than the standard first gen SBC cylinder heads
its a fact that some synthetic oils are not compatible with some of the products, used as gasket sealants,
example
the yellow weather strip adhesive many guys use as a gasket cement , on valve cover and oil pan gasket was NEVER intended to work in applications like valve cover gaskets , and oil pans or being exposed to engine heat and engine oil, and if you use it like that it WILL EVENTUALLY LEAK for example ,
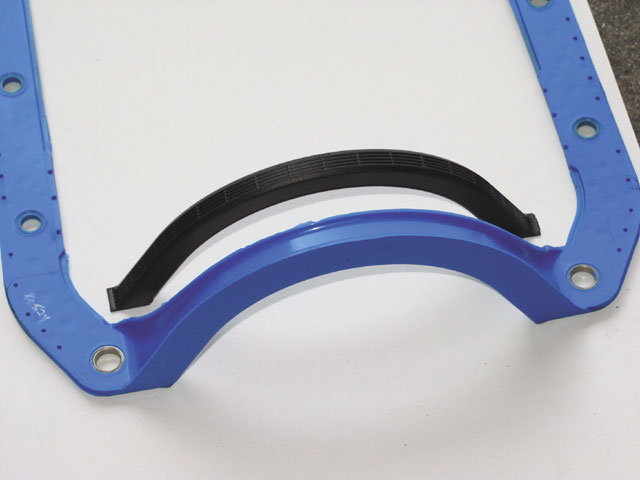
youll want to use the BLACK RTV oil proof sealant, pictured below on the upper surface of the oil pan gasket
youll occasionally find uses for a high temp rated silicone sealant
like ultra-copper that has about twice the temp tolerance of the common black RTV
In my experience, the black rtv works ok,
but the high heat gray or copper gasket sealant has always worked a bit better
I prefer this for most of the jobs where silicone type gasket sealants get used like intake gaskets and valve cover gaskets
http://garage.grumpysperformance.com/index.php?threads/sealants-and-threads.805/#post-71928
NEVER EVER USE YELLOW WEATHER STRIP ADHEASIVE ON GASKETS THAT WILL BE USED TO PREVENT FUEL OR OIL LEAKS< AS THIS SEALANT SLOWLY DEGRADES IN CONTACT WITH FUEL OR OIL
because the yellow weather strip adhesive tends to slowly loose its grip and dissolves in some hot synthetic oils over several months time.. its ok to use sparingly on the one piece oil pan gaskets because the gasket and the oil pan flange pressing it against the block rail,not the gunk does the sealing
obviously use of the correct gasket sealant in the application tends to prevent the problem, this is simply avoided by taking the time to read the labels on sealant and follow directions as to correct applications
80 350 OS34510T Felpro
'90 350 OS34500R Felpro
obviously the first step is locating the oil leak source, front seals, rear seals and oil sensors,oil filter adapters are common sources, any leak can be cured IF you know the EXACT SOURCE, and having access to a lift or sturdy jack stands so you can look carefully under the car while it idles is a big help in locating most leaks
viewtopic.php?f=62&t=1430
viewtopic.php?f=51&t=1718&p=4257&hilit=rear+seal#p4257
viewtopic.php?f=54&t=206&p=242#p242
it may be the gasket OR it may be the gasket cement, or the installation, if you use the yellow weather strip adhesive some guys use your doomed to leaks after awhile as that yellow snot slowly dissolves over time in some oils
keep in mind theres two front pan gasket thicknesses available
viewtopic.php?f=54&t=206&p=1154&hilit=+synthetic+gasket#p1154
your engine if your using the original pan used the thinner gasket
You first have to clean, and degrease the block with a good engine cleaner, spray gunk, and a local car wash with a wand you can use in the engine compartment is a good place to start, when cleaning off and engine to locate the source of oil leaks,youll want to get it completely clean and get it dry. Chalk dust ,or body talc powder or even baking flour in a squeeze plastic bottle like ketchup is occasionally found in restaurants in ,can catch the beginnings of a leak and really help you spot where it is coming from.
IF ALL ELSE FAILS,
theres kits that use UV dye and special light to locate leaks
http://www.amazon.com/Tracerline-TP8621 ... 487&sr=1-2
Typical leak spots are:
Oil pressure sender
rear main seal
front & rear intake rail seal
oil filter seal
rear cam freeze plug
valve cover breather grommet
bent pan or oil pan gasket
front cover seal
valve cover seal
front crank seal
oil filter adapters
oil filter seals
oil coolers and lines
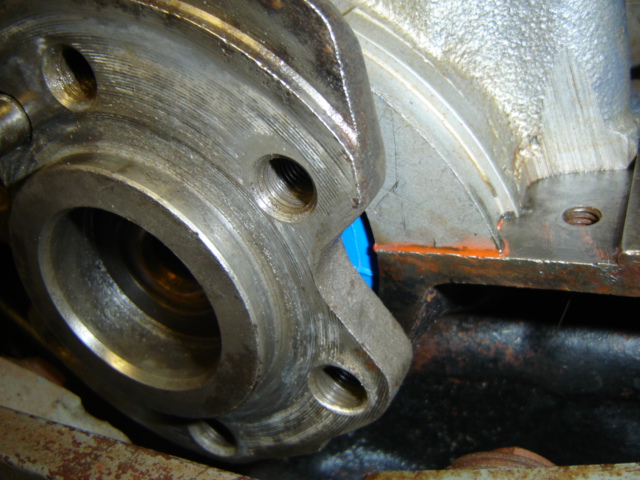
upper pass engine mount bolt hole (shown above)
fuel pump hole.
A fairly complete list but there are other less common ones .
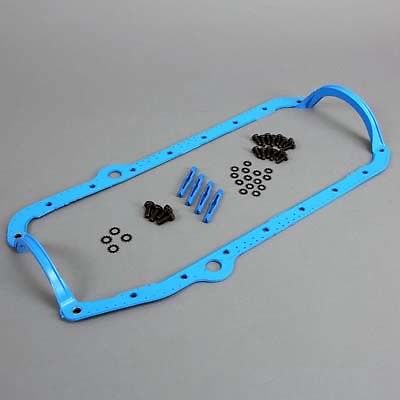
STUDS make oil pan gasket installs easier in some cases
keep in mind theres two distinct sbc gasket thicknesses,
btw be sure its oil your seeing leak, before blaming the engine and not transmission fluid,or brake fluid, because thats obviously going too be a different source
here you can see the thin line of sealant under the rear main cap, thats sometimes overlooked resulting in a slow drip near the rear main seal
most of those one piece synthetic oil pan gaskets come with instructions saying no gasket cement is needed or recommended, I generally use STUDS installed in the oil pan rail on the block and the stiffening plates listed in the linked info under the oil pan flange and Ive always used a bit of contact cement on only the upper surface of the gaskets, as it and the studs holds the gasket firmly in place while the pans aligned and installed
rear seals come in, rubber, silicon rubber,.Fluoroelastomer, and Viton they all work if properly installed but VITOR usually lasts the longest
http://www.summitracing.com/parts/FEL-BS118291/.. rubber
http://www.summitracing.com/parts/FEL-2909/... Fluoroelastomer,
http://www.summitracing.com/parts/FEL-2900/... Silicone
http://www.summitracing.com/parts/FEL-2918/..viton
I prefer to do the timing cover first but theres no reason not to install the oil pan gasket immediately after the timing cover
viewtopic.php?f=54&t=206&p=1154&hilit=+synthetic+gasket#p1154
viewtopic.php?f=51&t=1718&p=4257&hilit=rear+seal#p4257
viewtopic.php?f=54&t=2725&p=7076&hilit=gasket+synthetic#p7076
when installing an oil pan gasket its always preferable to install the front timing cover first if possible, as it makes sealing the oil pan to the block with the current one piece synthetic gaskets far easier
the front timing cover seal, that provides the oil seal on the damper as it slides into the cover on the crank snout is pressed in from the front, most guys tap it in with a plastic mallet,after carefully cleaning and repainting the stock cover or buying a new chrome timing chain cover as they are fairly cheap,youll want to be coating the outside edge of the seal with a liquid sealant while the timing cover is supported from the rear on a block of wood,the seals knocked out from the rear with a flat blade screw driver and a small hammer , used at an angle on the inside lip, replace it so the inner seals lip angles in towards the crank not out toward the front damper
BUT most guys simply buy a new cover since they are cheap and don,t bother cleaning the old one if it looks damaged, at $8-$10, for a new cover its hardly worth taking a chance, with the old one if its damaged
http://www.summitracing.com/parts/SUM-G3200/
Last edited by a moderator:

")