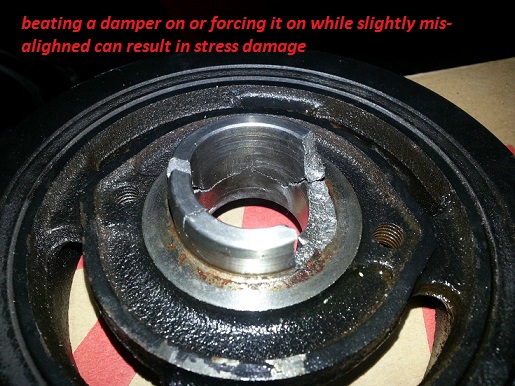
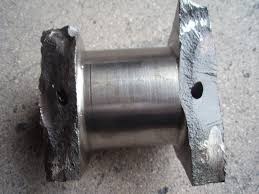
use the correct tool, beating the damper onto the crank, snout frequently damages both the damper and the thrust bearing in the engine, and while the resulting damage is not critical in all cases or instantly obvious it DOES damage and stress the blocks main caps and the crank and the trust bearing
READ
never beat a damper on, use the correct tool. it can damage the crank and thrust bearing
http://garage.grumpysperformance.com/index.php?threads/damper-tool.223/#post-260
http://www.tavia.com/cat12.html#1
https://www.amazon.com/gp/product/B000F5LIW4/ref=oh_aui_detailpage_o01_s00?ie=UTF8&psc=1

https://www.otctools.com/products/harmonic-balancer-pullerinstaller-set
damn the gal in that video, makes that process, look a whole lot more difficult in the video that it generally is,
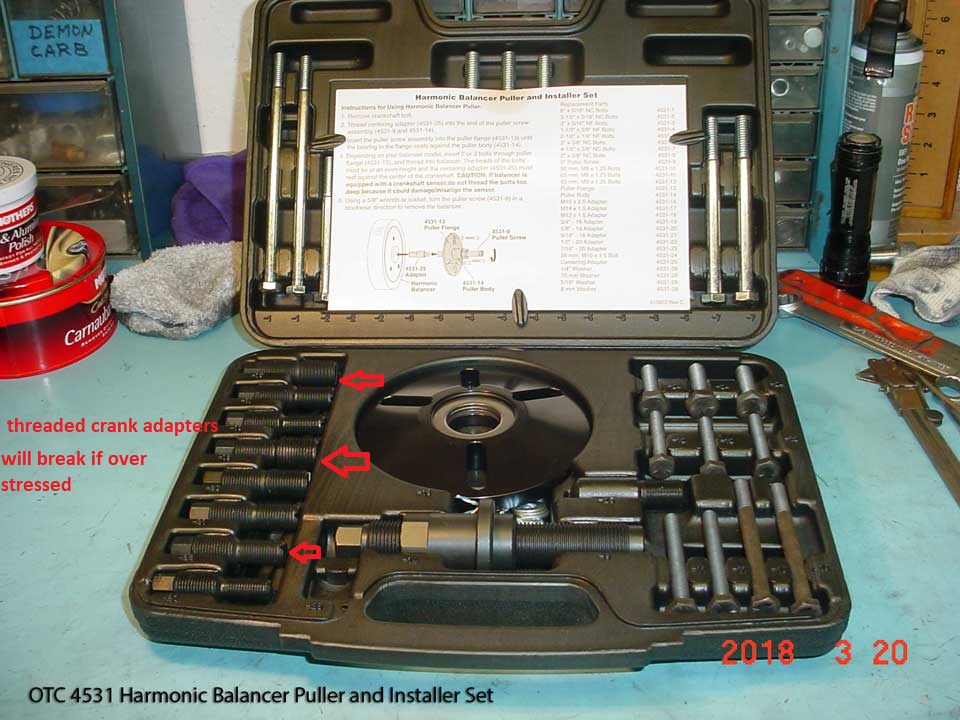
and yes its very easily possible to over tighten the interchangeable central adapter screw,parts
if your not careful, and yes they do sell replacement adapter screws
(never lend tools to your friends, or you'll be buying , and replacing those replacement threaded, adapter components)
use moly grease on tool threads
Rick I have to say... thank you for posting that bit of info......
I never would have thought too even try assembling the damper tool that,way,
but I'm sure your not the first, nor will you be the last guy to do that,
so its a damn informative picture for those members, that might never of had seen that tool in use, most of us learn by making mistakes.. yeah Ive made my share also!
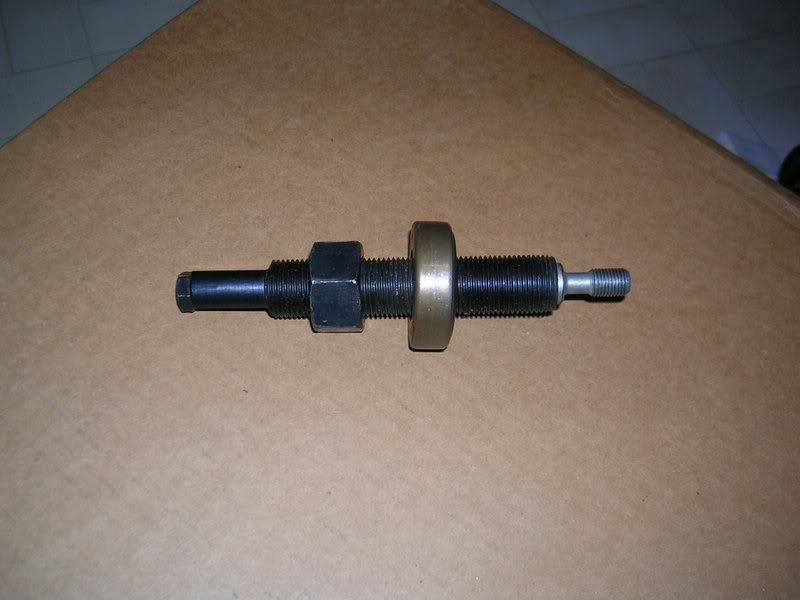
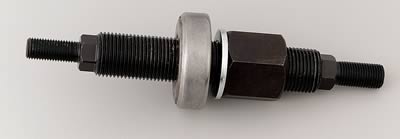
look at the picture carefully, the tool is available from several sources
"You put the damper on the crankshaft after oiling the crank snout and inner damper as far as you can get it with a few soft taps of large plastic mallet.
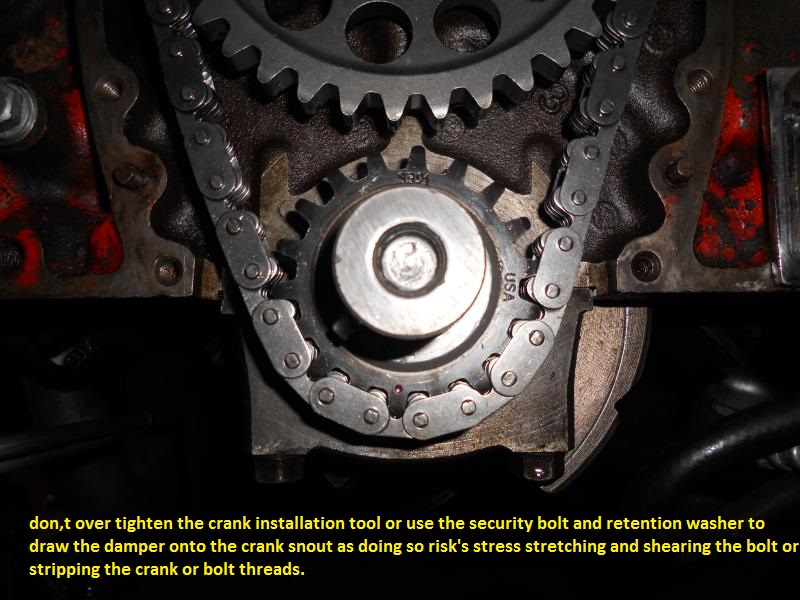
You thread grumpy's tool into the crankshaft as far as possible.REMEMBER TOO OIL THE THREADS...with the roller bearing against the damper, the washer next, between the nut and roller bearing, then the nut,outer most, you turn the nut forcing the damper on, but be aware the damper generally slides on and the tool makes it fairly easy, so easy in fact that first time users over tighten the tools smaller diam. snapping off the tools threaded section in the crank on occasion so carefully watch as over tightening the tool once the damper bottoms against the cranks shoulder will brake the tool..........the picture depicts the tool set up for a sbc, youll need to use the larger end and reverse it for the bbc
http://arp-bolts.com/p/instructions.php
If you want to make installing the damper easier, especially on the very early SBC engines that didn,t have those threaded,retainer bolts in the crank snout) youll find that if you put the damper in boiling water (a running engines easily that hot) and if you pack the crank snout in a bag of crushed dry ice (most grocery stores will sell you a couple pounds if you ask, just don,t touch it without gloves it can stick to skin)that in most cases you can take the pot of boiling water with the damper out to the car location, dump the balancer out spray it with a good penetrating oil and pick it up with insulated oven mitts and just an instant before you install the damper remove the dry ice and slide the damper onto the crank snout, in most cases a couple good whacks with a rubber mallet will seat it as the intense cold on the crank shrinks the steel a bit and the hot water enlarges the damper gaining you most of the required clearance, to make installing the damper far easier, for up to a minute, before the damper contracts and the crank snout expands, but you need to be quick as the temps tend to equalize fast. I,ve done this on a couple very early SBC engines with no damper retaining bolts and it does work a great deal easier than the block of wood and 3 lb hammer Ive seen other guys use!
You then turn the real big nut, and the balancer walks on to the crankshaft
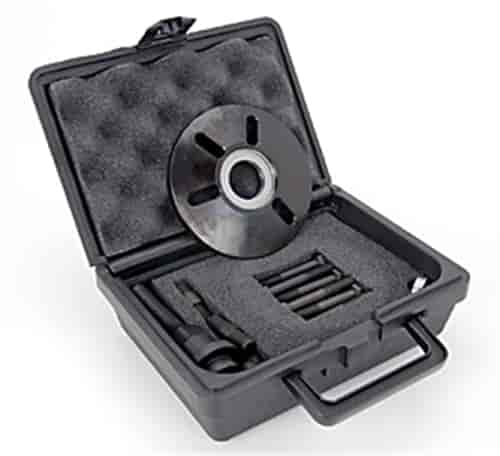
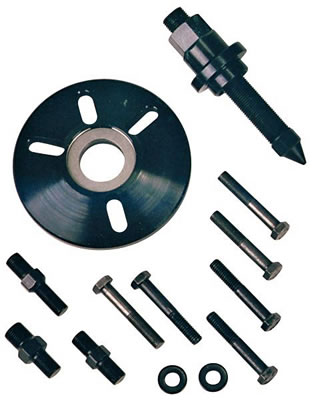
they also make combo puller/installers Proform 66514 - Proform
http://www.jegs.com/webapp/wcs/stores/servlet/product_10001_10002_43866_-1
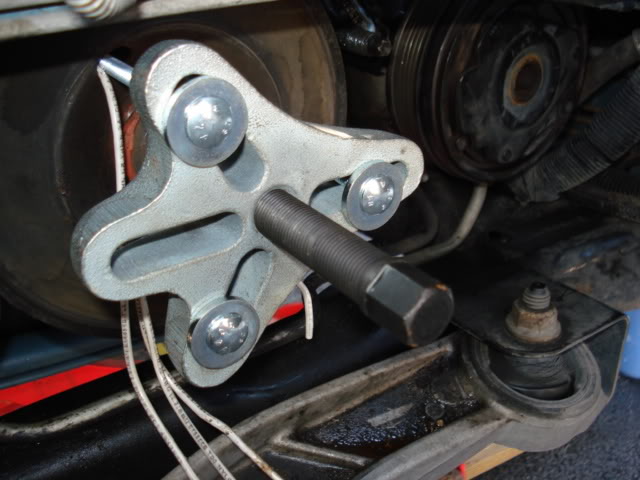
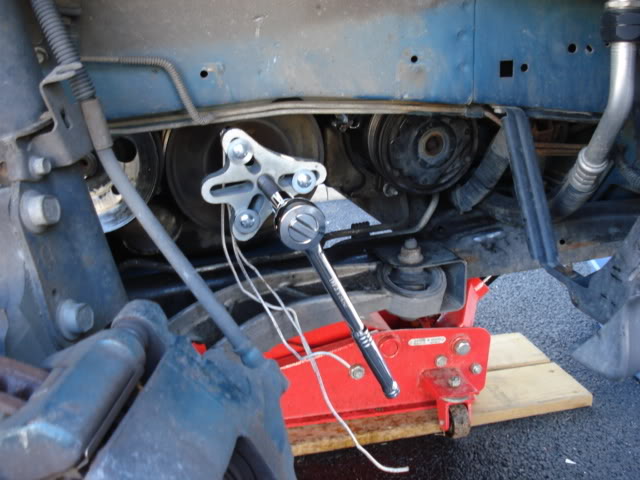
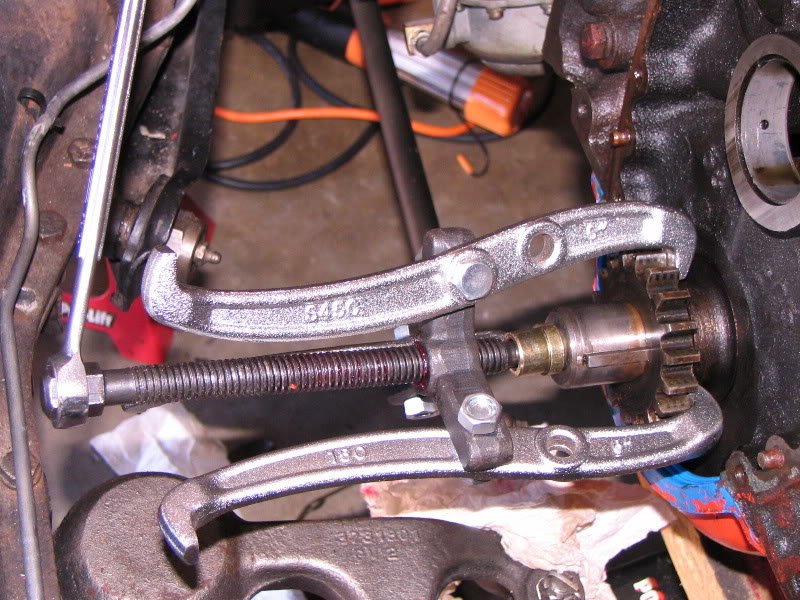
there's a TOOL designed expressly for removing the damper and its NOT a conventional swing jaw type gear puller LIKE THESE
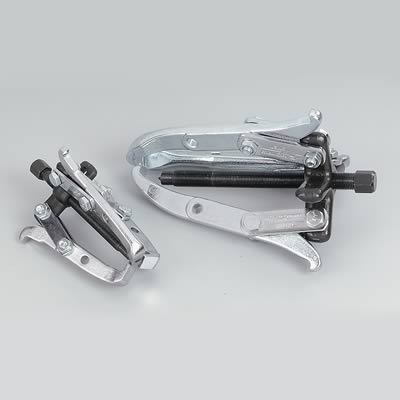
they tend to bind and distort the damper, frequently damaging it
youll need something like this (you can get a cheap version at most auto parts stores for under $40 but the one from summit better quality
http://store.summitracing.com/partdetail.asp?part=PRO-66514&autoview=sku
http://store.summitracing.com/partdetail.asp?part=ATI-918999&autoview=sku
BTW
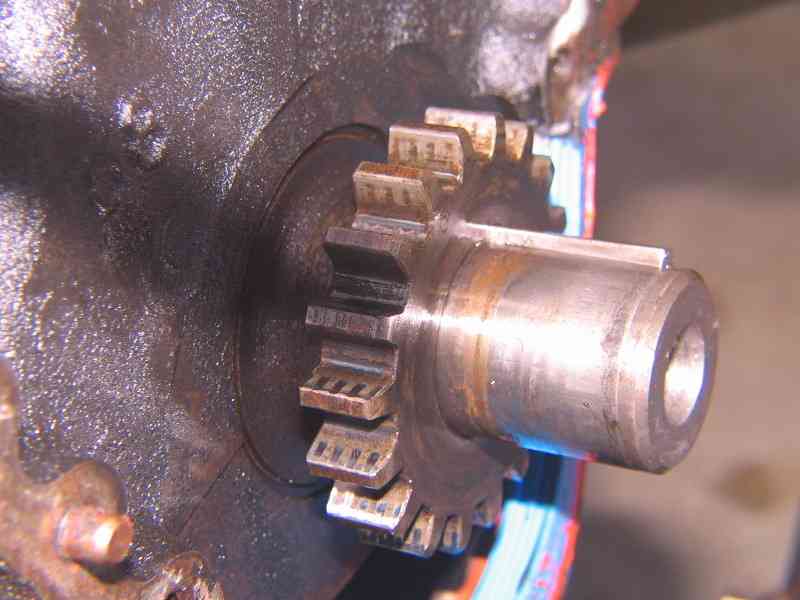
the crank gears requires a 3 or 4 jaw gear puller ,because the two jaw style tends to try and fold/bind the gear into the crank snout, a lighted propane torch applied briefly to heat the crank gear tends to expand & loosen its hold on the crank
BTW the stock damper has an inner hub and outer ring with an elastomer band glued between and effectively cancels most of the engine harmonics only at one rpm range, which is far lower than you'll be during high performance driving simply because stress is cumulative and the factory knows you'll spend far more time below 4500rpm than above that in the engines life.
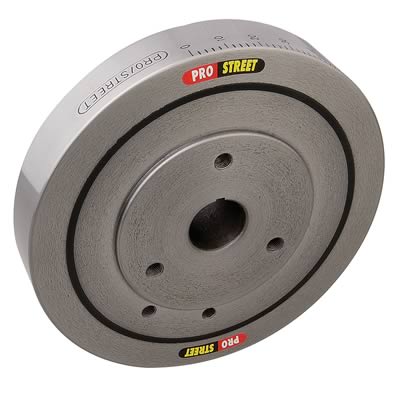
there's several far more effective damper designs that work over a greater rpm spread

stock oem style with elastomer ring
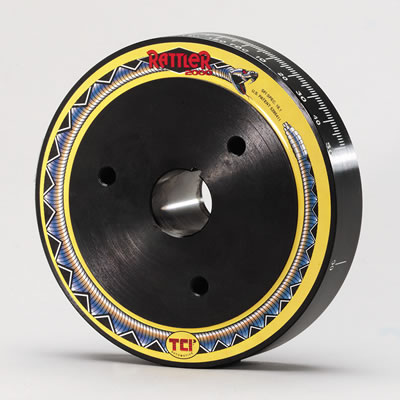
internal roller design (RATTLER)
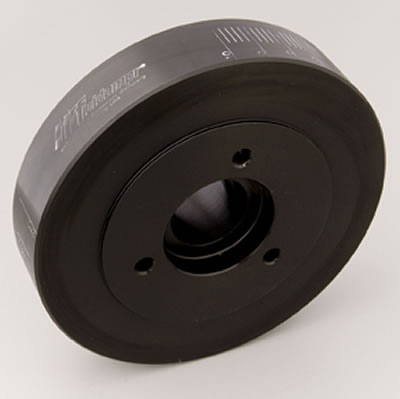
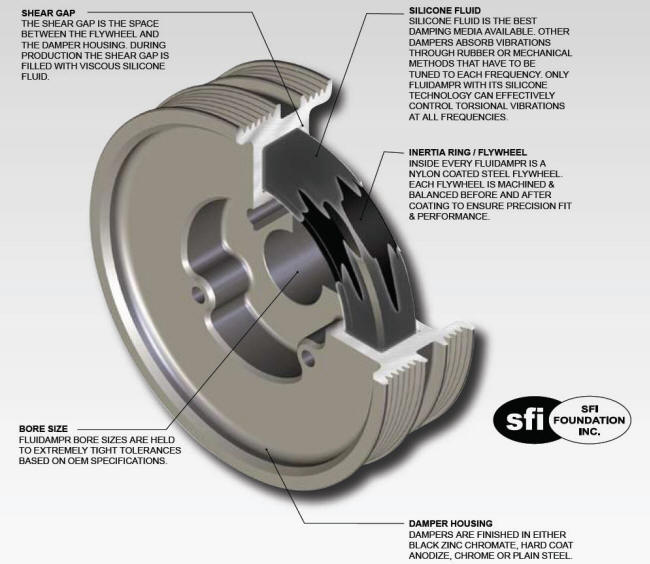
SILICONE FLUID, SUSPENDED, INTERNAL RING DESIGN (FLUIDDAMPER)
http://www.fluidampr.com/CHEVROLET.htm
BTW
READ
http://racingarticles.com/files/general-damper-article-2.pdf
the stock TYPE balancer has a rubber ring glued between the inner hub and outer inertial ring and yes they do deteriorate over time and have been known to slip, especially if subjected to being oil soaked over time
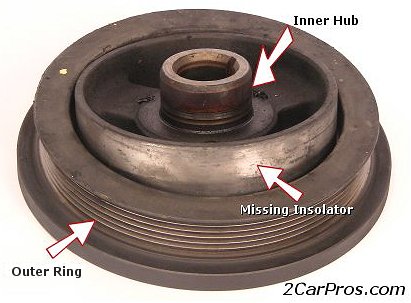
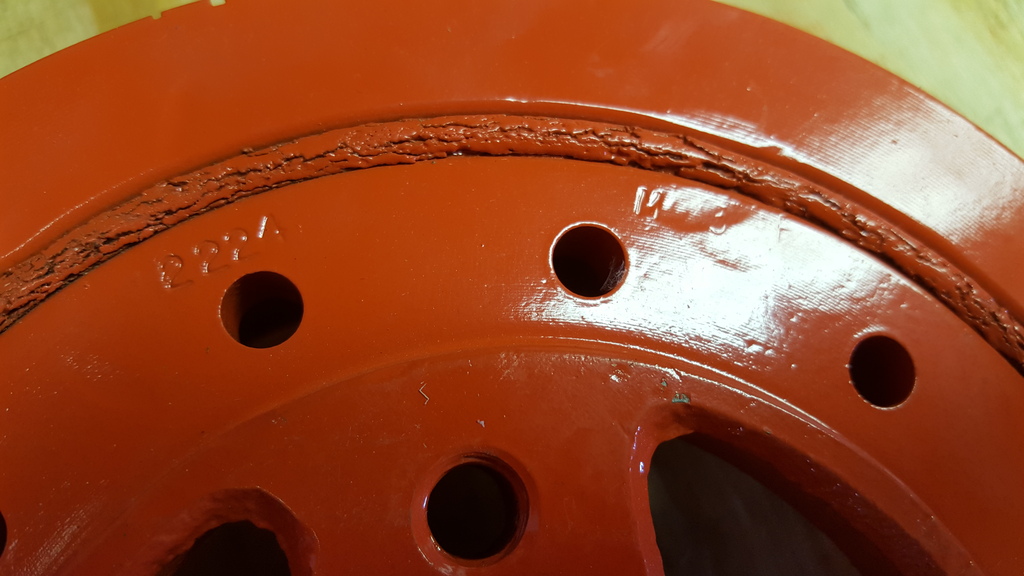
over time solvents like oil, exposure to heat , age, and constant vibration will cause the flexible elastomer band separating the inner and outer damper weights to degrade, this can cause the dampers outer TDC line to move
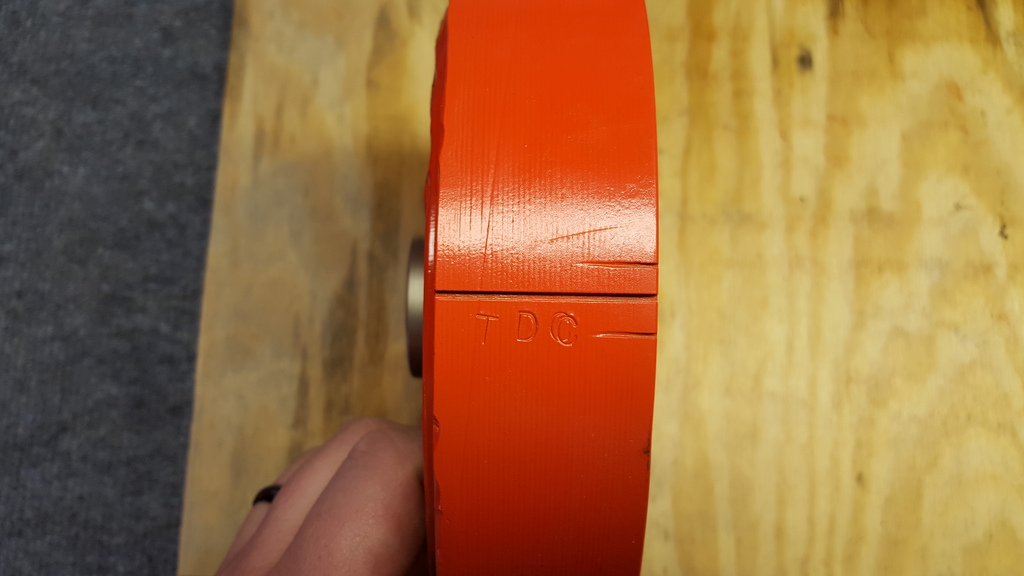
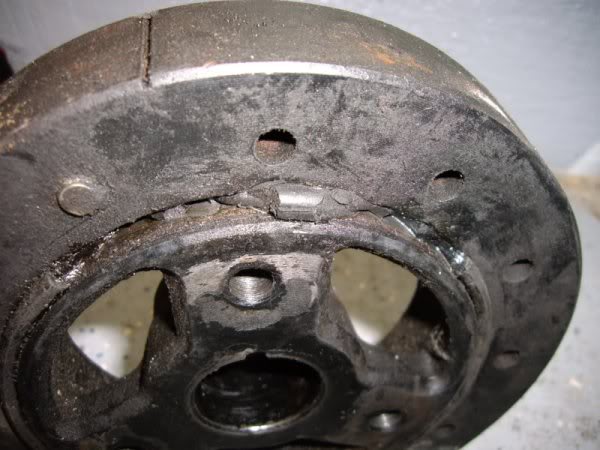
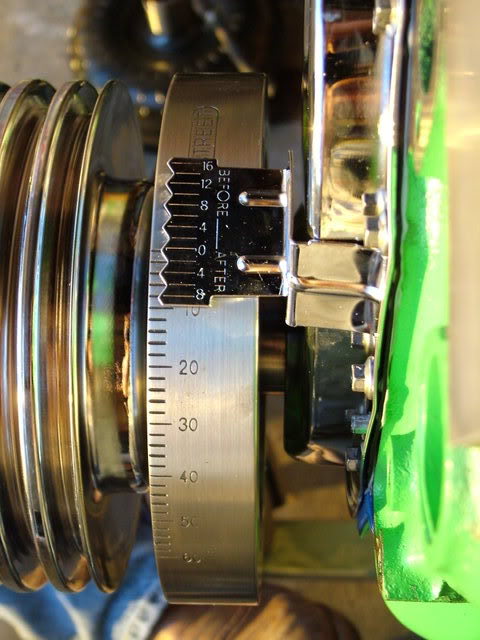
YOU can do a quick test to see if the inner and outer damper ring bond is loose,degrease the damper with some carburetor cleaner spray, then grab your wifes bottle of brite red or orange nail polish, and Draw a line on the front of the balancer across both the inner and outer hub rings, with the little paint brush under the cap, . Start the car , once it warms up reve the engine to 3500 rpm or so 6-7 times and inspect that nail polish line location, too see if the lines continue to align using the timing light. or turn off the engine and and use a brite flash lite ,If the lines are not,still lined up, the outer hub ring is slipping which misaligned the timing mark. So you end up the timing well out of speck and who knows where in relation to true TDC,.
Id suggest replacing your balancer immediately if its outer ring is loose with an SFI certified damper matching your application.
if your front crank seal leaks, over time it can dissolve the elastic, between the inner and outer damper hub weight, beating on a damper tends to hurt the flex ring seal alsos
READ
never beat a damper on, use the correct tool. it can damage the crank and thrust bearing
don,t beat that damper!
use the correct tool, beating the damper onto the crank, snout frequently damages both the damper and the thrust bearing in the engine, and while the resulting damage is not critical in all cases or instantly obvious it DOES damage and stress the blocks main caps and the crank and the trust...
garage.grumpysperformance.com
http://garage.grumpysperformance.com/index.php?threads/damper-tool.223/#post-260
http://www.tavia.com/cat12.html#1
https://www.amazon.com/gp/product/B000F5LIW4/ref=oh_aui_detailpage_o01_s00?ie=UTF8&psc=1
https://www.otctools.com/products/harmonic-balancer-pullerinstaller-set
damn the gal in that video, makes that process, look a whole lot more difficult in the video that it generally is,
and yes its very easily possible to over tighten the interchangeable central adapter screw,parts
if your not careful, and yes they do sell replacement adapter screws
(never lend tools to your friends, or you'll be buying , and replacing those replacement threaded, adapter components)
use moly grease on tool threads
Rick I have to say... thank you for posting that bit of info......
I never would have thought too even try assembling the damper tool that,way,
but I'm sure your not the first, nor will you be the last guy to do that,
so its a damn informative picture for those members, that might never of had seen that tool in use, most of us learn by making mistakes.. yeah Ive made my share also!
look at the picture carefully, the tool is available from several sources
"You put the damper on the crankshaft after oiling the crank snout and inner damper as far as you can get it with a few soft taps of large plastic mallet.
You thread grumpy's tool into the crankshaft as far as possible.REMEMBER TOO OIL THE THREADS...with the roller bearing against the damper, the washer next, between the nut and roller bearing, then the nut,outer most, you turn the nut forcing the damper on, but be aware the damper generally slides on and the tool makes it fairly easy, so easy in fact that first time users over tighten the tools smaller diam. snapping off the tools threaded section in the crank on occasion so carefully watch as over tightening the tool once the damper bottoms against the cranks shoulder will brake the tool..........the picture depicts the tool set up for a sbc, youll need to use the larger end and reverse it for the bbc
http://arp-bolts.com/p/instructions.php
If you want to make installing the damper easier, especially on the very early SBC engines that didn,t have those threaded,retainer bolts in the crank snout) youll find that if you put the damper in boiling water (a running engines easily that hot) and if you pack the crank snout in a bag of crushed dry ice (most grocery stores will sell you a couple pounds if you ask, just don,t touch it without gloves it can stick to skin)that in most cases you can take the pot of boiling water with the damper out to the car location, dump the balancer out spray it with a good penetrating oil and pick it up with insulated oven mitts and just an instant before you install the damper remove the dry ice and slide the damper onto the crank snout, in most cases a couple good whacks with a rubber mallet will seat it as the intense cold on the crank shrinks the steel a bit and the hot water enlarges the damper gaining you most of the required clearance, to make installing the damper far easier, for up to a minute, before the damper contracts and the crank snout expands, but you need to be quick as the temps tend to equalize fast. I,ve done this on a couple very early SBC engines with no damper retaining bolts and it does work a great deal easier than the block of wood and 3 lb hammer Ive seen other guys use!
You then turn the real big nut, and the balancer walks on to the crankshaft
they also make combo puller/installers Proform 66514 - Proform
http://www.jegs.com/webapp/wcs/stores/servlet/product_10001_10002_43866_-1
there's a TOOL designed expressly for removing the damper and its NOT a conventional swing jaw type gear puller LIKE THESE
they tend to bind and distort the damper, frequently damaging it
youll need something like this (you can get a cheap version at most auto parts stores for under $40 but the one from summit better quality
http://store.summitracing.com/partdetail.asp?part=PRO-66514&autoview=sku
http://store.summitracing.com/partdetail.asp?part=ATI-918999&autoview=sku
BTW
the crank gears requires a 3 or 4 jaw gear puller ,because the two jaw style tends to try and fold/bind the gear into the crank snout, a lighted propane torch applied briefly to heat the crank gear tends to expand & loosen its hold on the crank
BTW the stock damper has an inner hub and outer ring with an elastomer band glued between and effectively cancels most of the engine harmonics only at one rpm range, which is far lower than you'll be during high performance driving simply because stress is cumulative and the factory knows you'll spend far more time below 4500rpm than above that in the engines life.
there's several far more effective damper designs that work over a greater rpm spread
stock oem style with elastomer ring
internal roller design (RATTLER)
SILICONE FLUID, SUSPENDED, INTERNAL RING DESIGN (FLUIDDAMPER)
http://www.fluidampr.com/CHEVROLET.htm
BTW
READ
http://racingarticles.com/files/general-damper-article-2.pdf
the stock TYPE balancer has a rubber ring glued between the inner hub and outer inertial ring and yes they do deteriorate over time and have been known to slip, especially if subjected to being oil soaked over time
over time solvents like oil, exposure to heat , age, and constant vibration will cause the flexible elastomer band separating the inner and outer damper weights to degrade, this can cause the dampers outer TDC line to move
YOU can do a quick test to see if the inner and outer damper ring bond is loose,degrease the damper with some carburetor cleaner spray, then grab your wifes bottle of brite red or orange nail polish, and Draw a line on the front of the balancer across both the inner and outer hub rings, with the little paint brush under the cap, . Start the car , once it warms up reve the engine to 3500 rpm or so 6-7 times and inspect that nail polish line location, too see if the lines continue to align using the timing light. or turn off the engine and and use a brite flash lite ,If the lines are not,still lined up, the outer hub ring is slipping which misaligned the timing mark. So you end up the timing well out of speck and who knows where in relation to true TDC,.
Id suggest replacing your balancer immediately if its outer ring is loose with an SFI certified damper matching your application.
if your front crank seal leaks, over time it can dissolve the elastic, between the inner and outer damper hub weight, beating on a damper tends to hurt the flex ring seal alsos
Last edited by a moderator: