engine test run stand

grumpyvette

Administrator
Staff member
honestly, if you've got a decent welder and a tape measure and some time, to kill, this is a reasonably easy project
, and it sure beats paying $2k

http://mycorvetterestoration.com/side-projects/engine-test-stand.php#.VZXATPlViko

http://www.hotrod.com/how-to/additional-how-to/hppp-1103-diy-engine-break-in-stand/

http://www.tommackieracing.com/projects/articles/engine-test-stand/

http://www.averagejoesautos.com/engineteststandpage.html

http://www.ebay.com/itm/Easy-Run-En...hash=item41985f6d11&item=281729264913&vxp=mtr


WATCH VIDEO,s

LOOK AT THE VIDEO THEN THE PRICES AND IF YOU OWN A WELDER AND CAN FABRICATE< AND SHOP CAREFULLY FOR GAUGES ETC. YOU CAN SAVE A GOOD DEAL OF MONEY
http://www.easy-run.net/

http://www.prwonlinestore.com/low-profilesetsaccessorizedunit.aspx
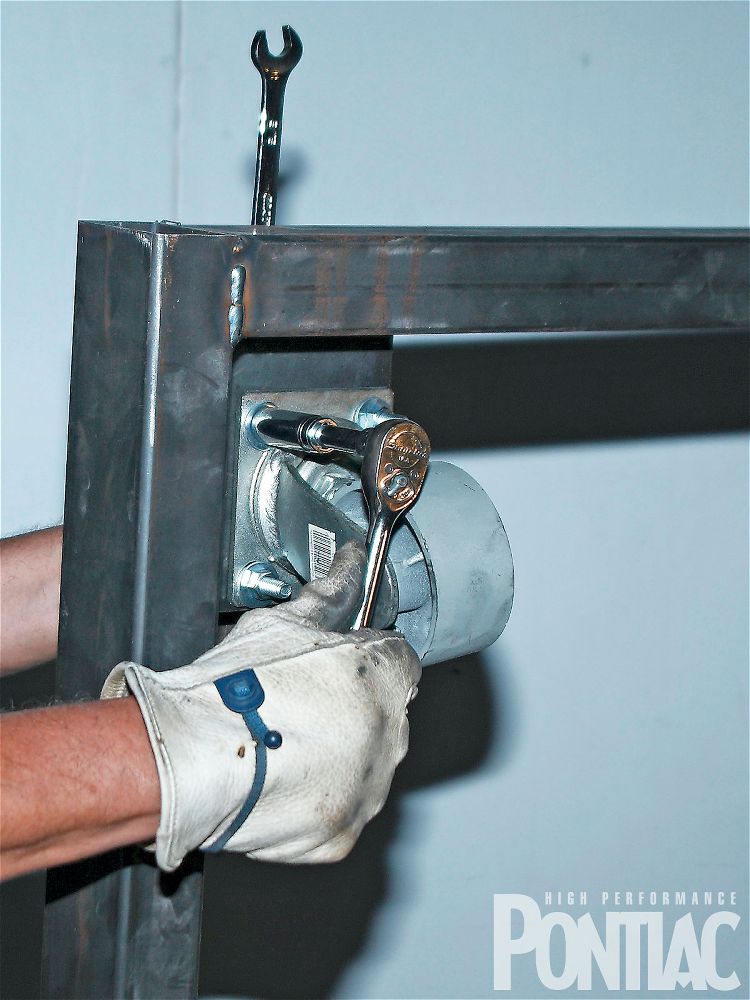
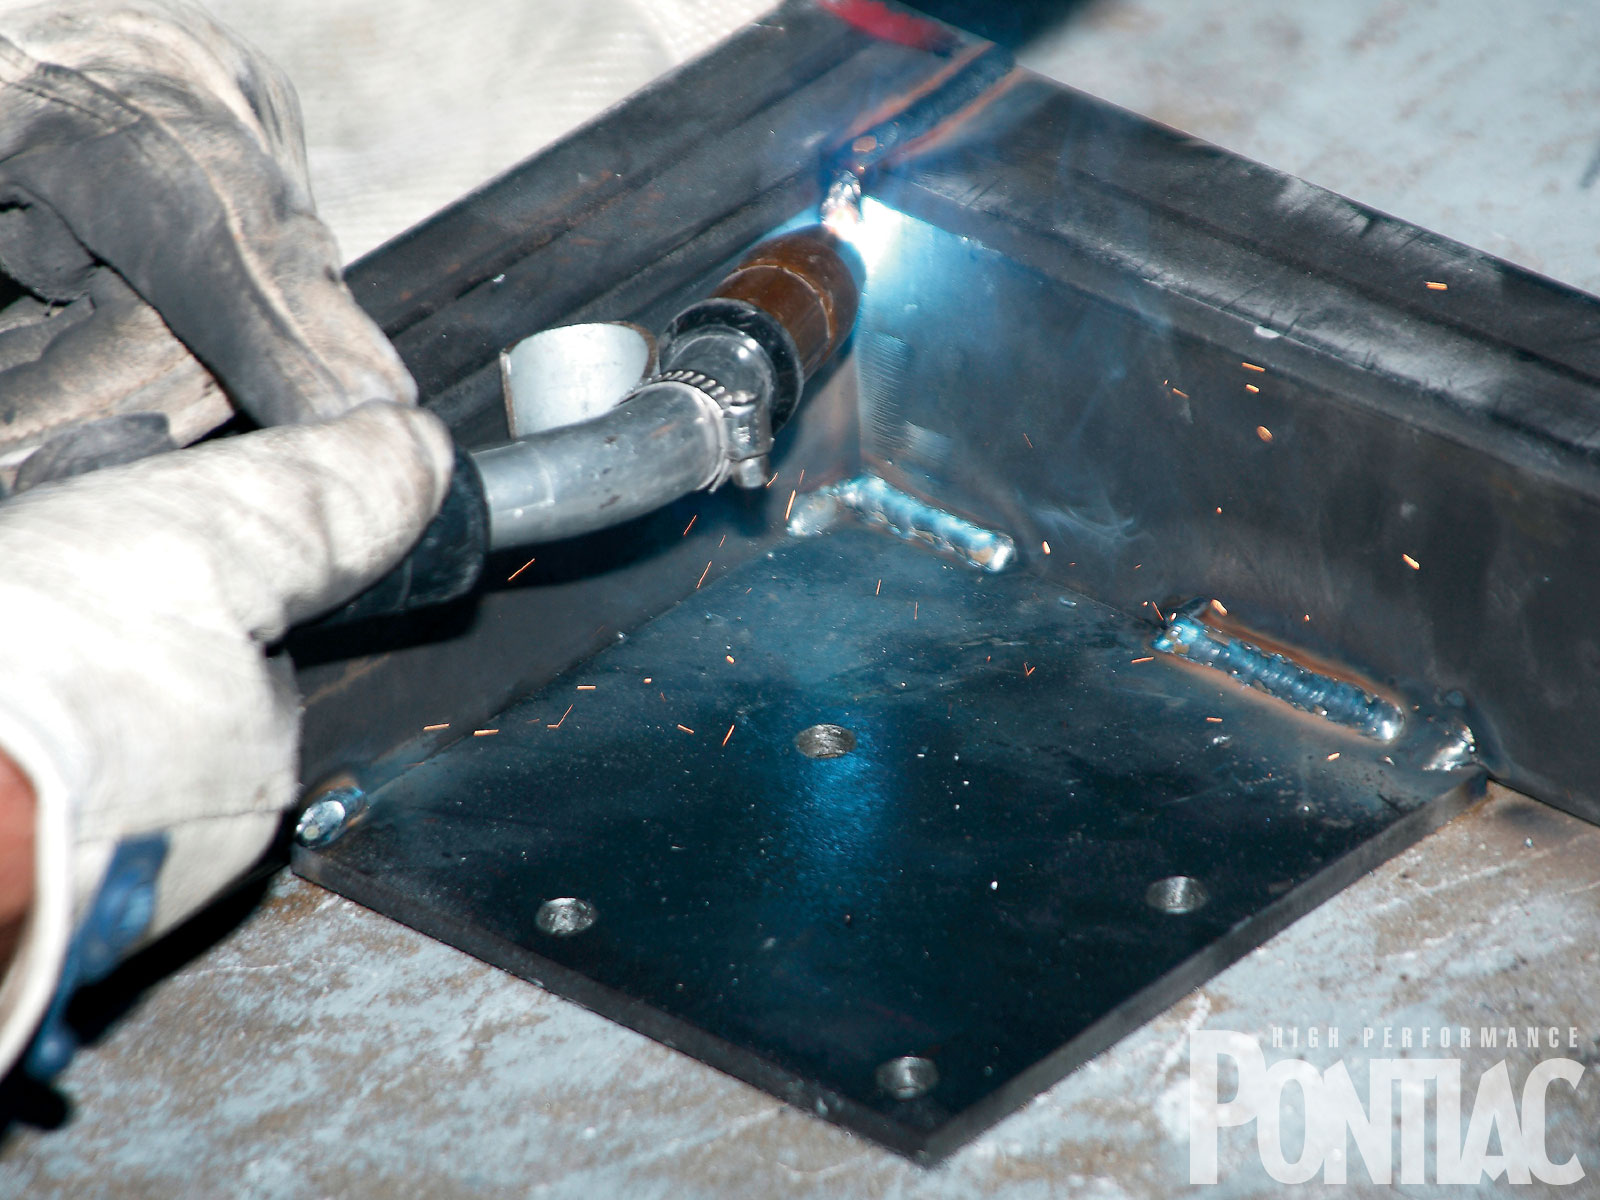
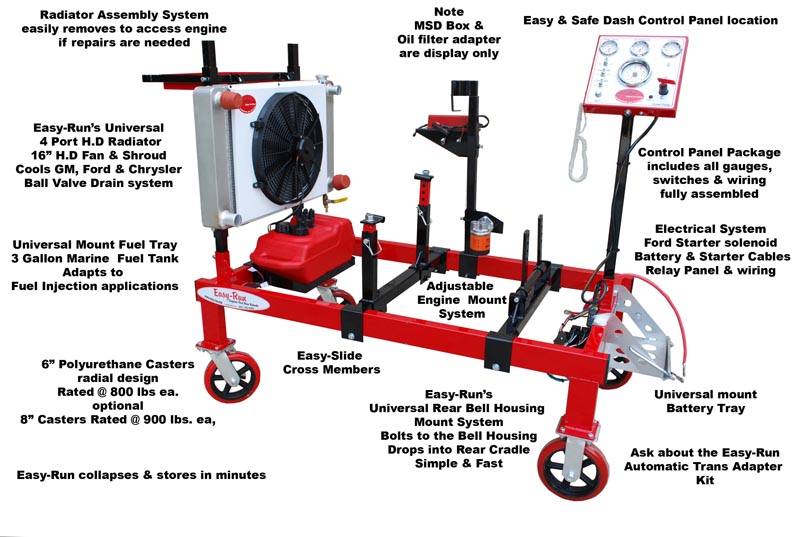
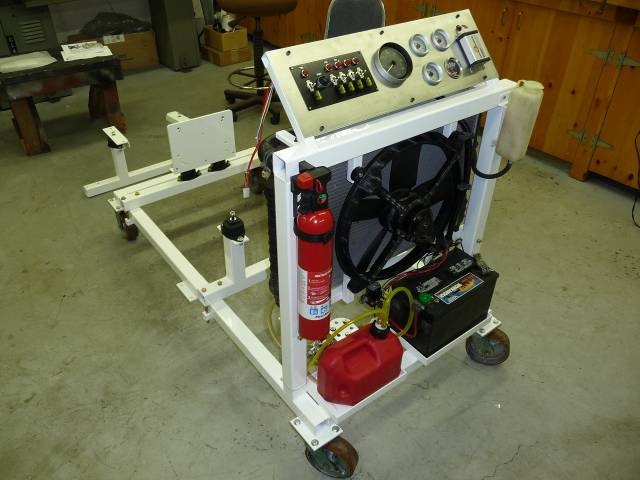
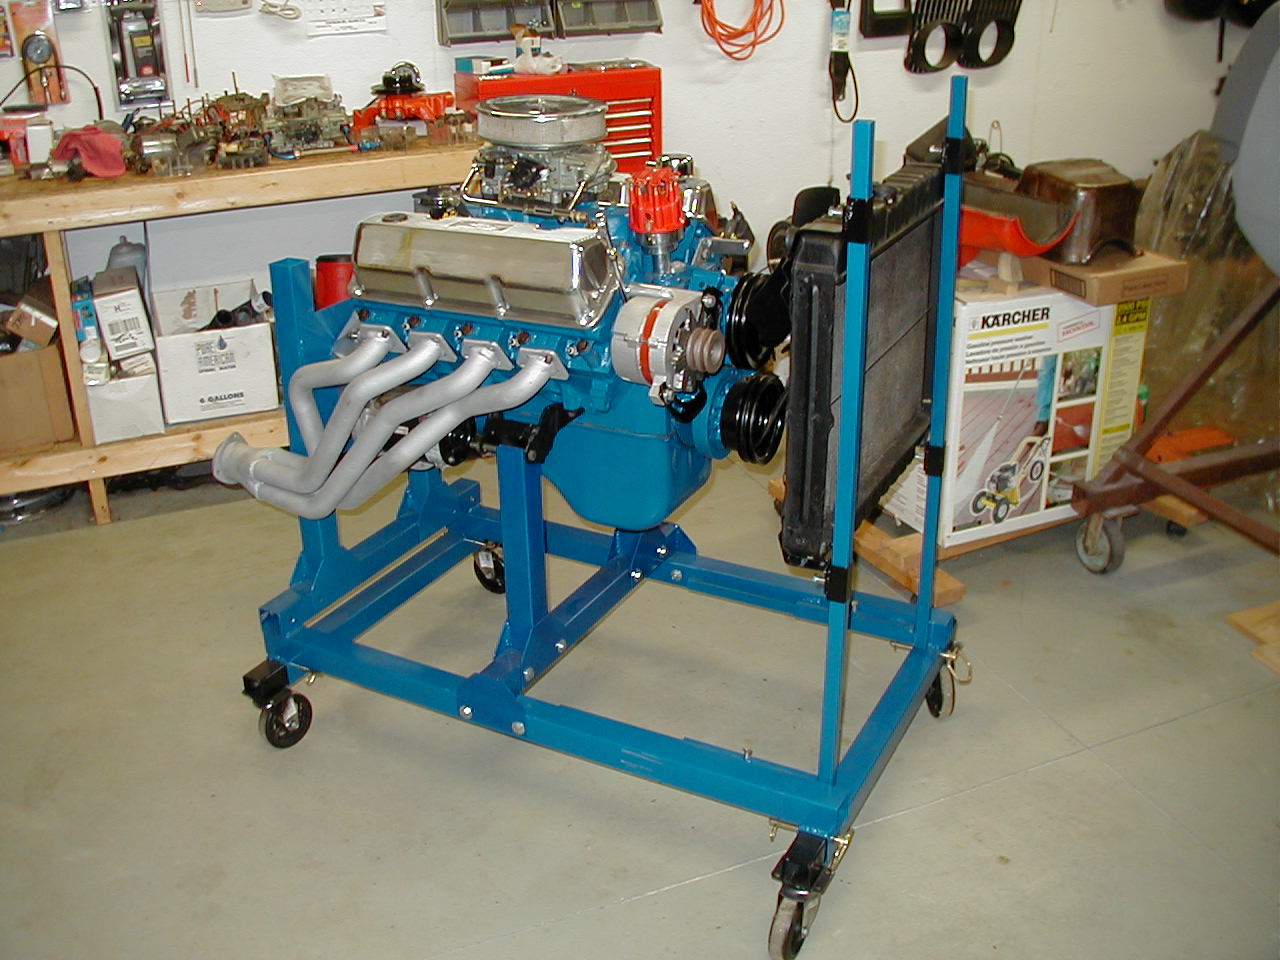
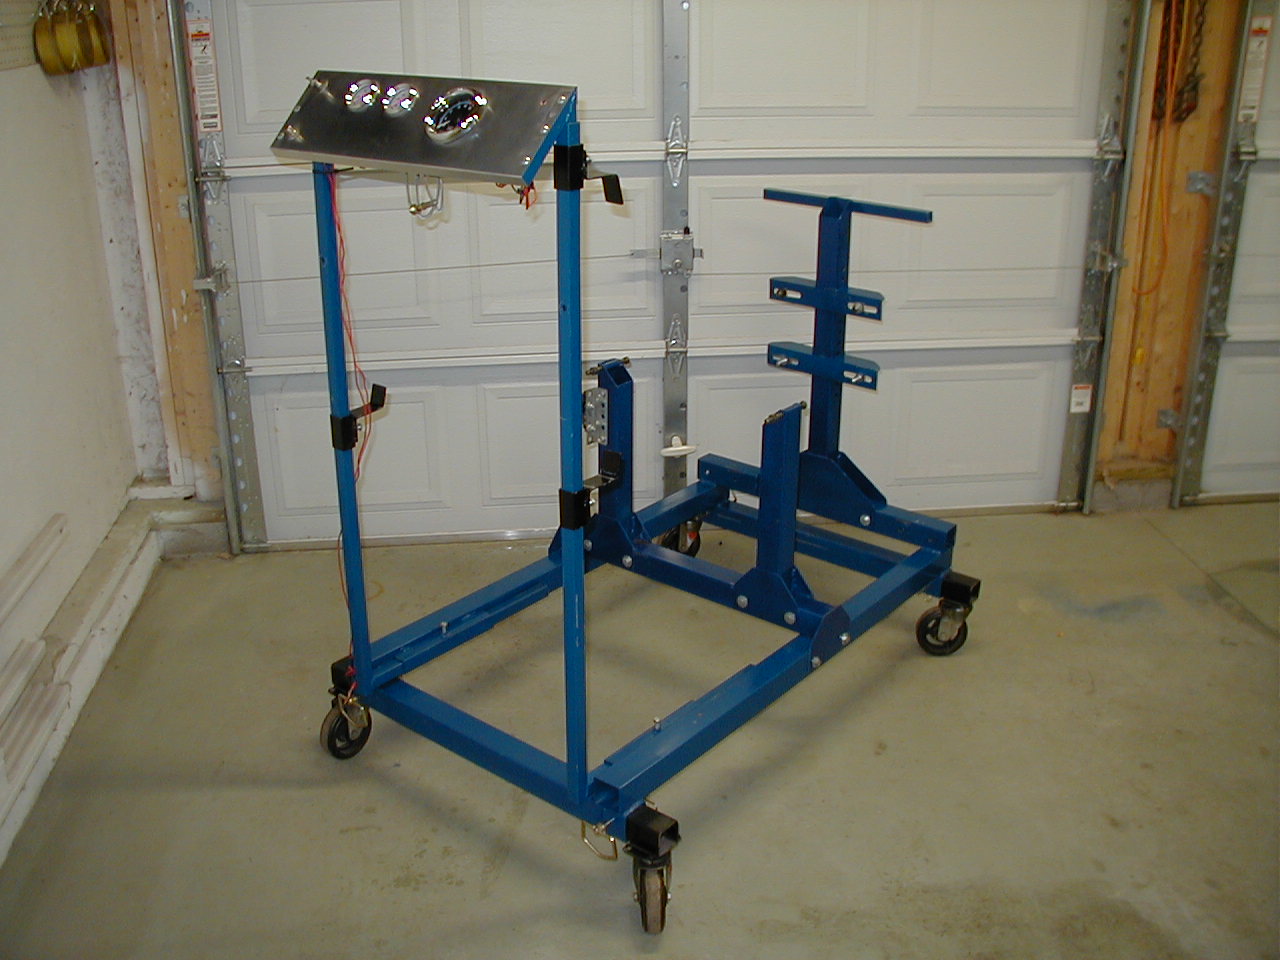
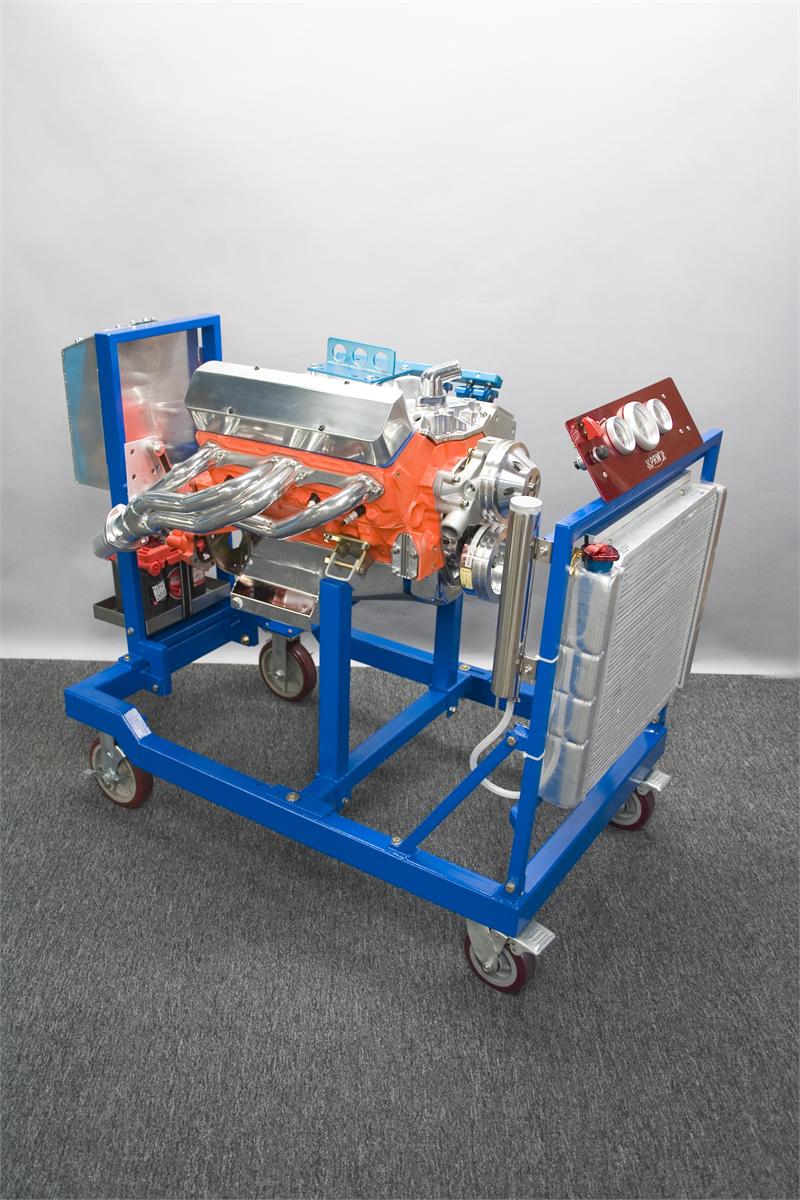
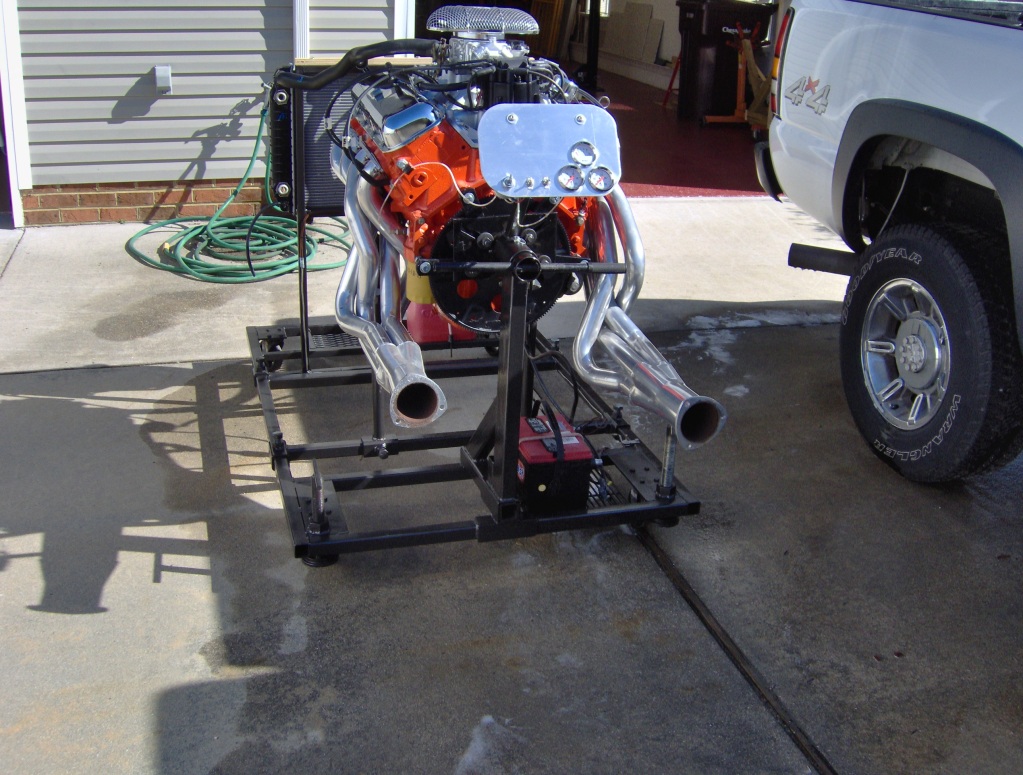
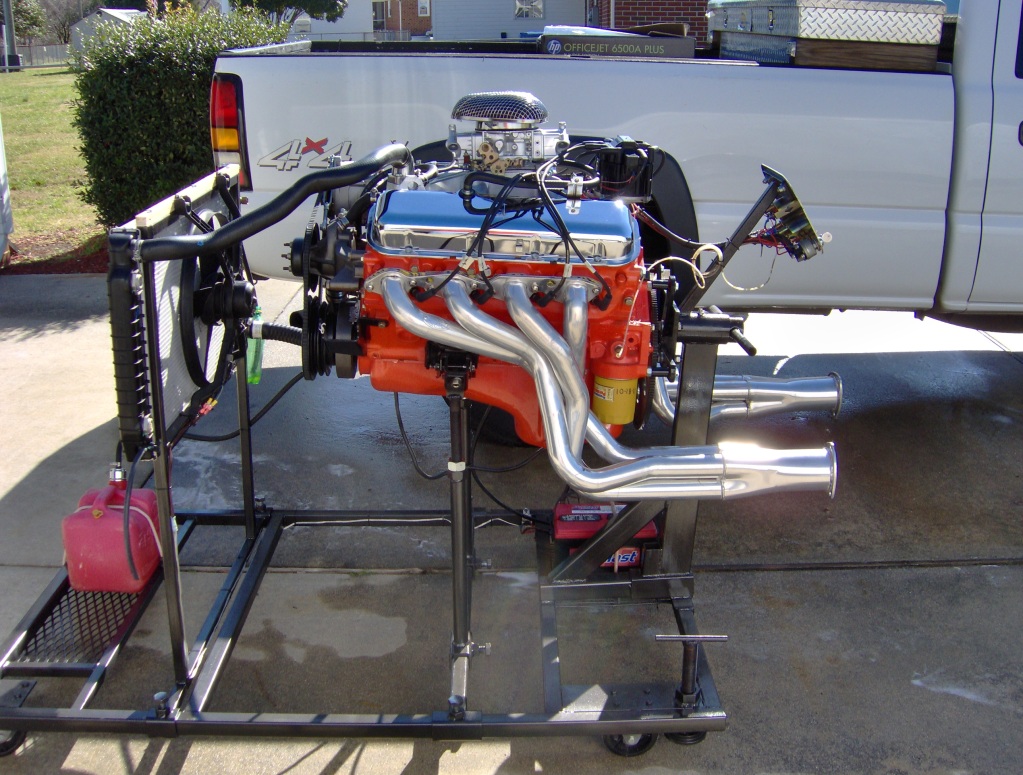
heres some basic design ideas from pictures

http://www.lainefamily.com/EngineStandProject.htm

http://www.mightymount.com/

http://www.hotstands.com/

http://www.rivasteststand.com/

http://www.fordmuscle.com/forums/tech-exchange/471021-homemade-engine-run-stand.html

viewtopic.php?f=80&t=728&p=9217&hilit=sensors+camaro#p9217

http://cgi.ebay.com/ebaymotors/Engi...Z230310166282QQptZMotorsQ5fAutomotiveQ5fTools

http://cgi.ebay.com/ebaymotors/SB-B...Z320324798487QQptZMotorsQ5fAutomotiveQ5fTools


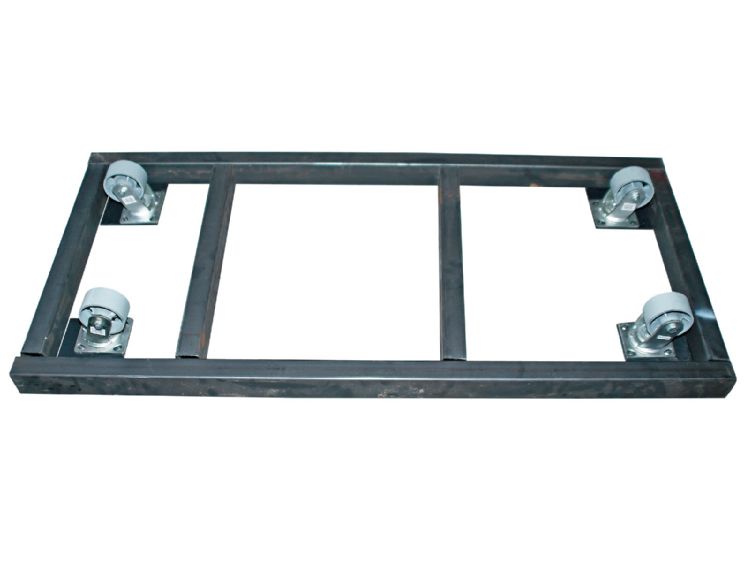
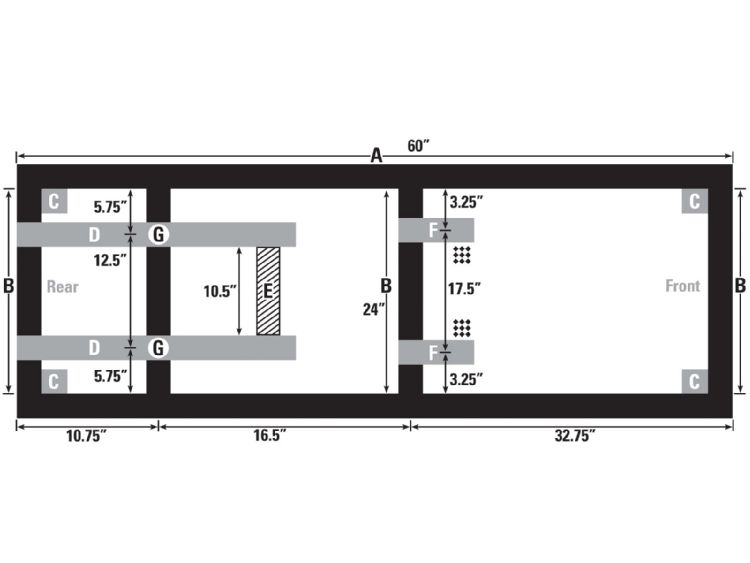
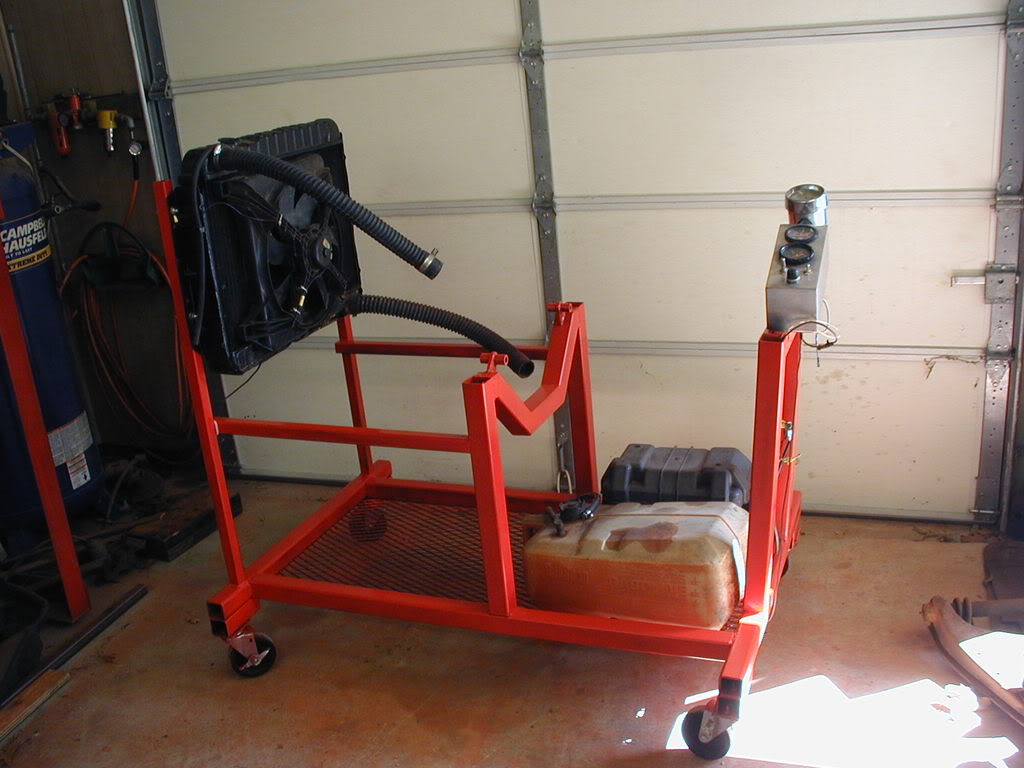
IF i was going to fabricate one ID start with this

http://www.northerntool.com/webapp/wcs/stores/servlet/product_6970_406688_406688

ID buy (2) 3 ft long, and (2) 5 ft long sections of 1.5"x 3" box steel too weld as a base,
and about 20 feet of 1" x 2" box steel as uprights for the gauges, and radiator,battery box, ETC. into. plus a section of 1/8" thick 1ft x 2 ft aluminum diamond plate to mount the gauges,
ID buy (4) of these wheels

http://www.northerntool.com/webapp/wcs/stores/servlet/product_6970_200337096_200337096

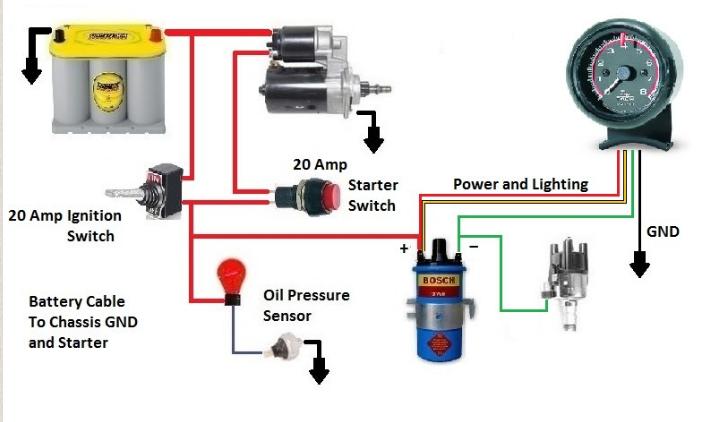
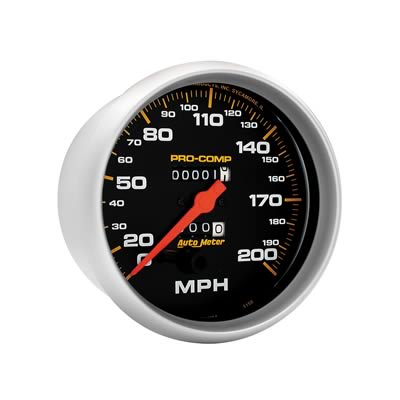
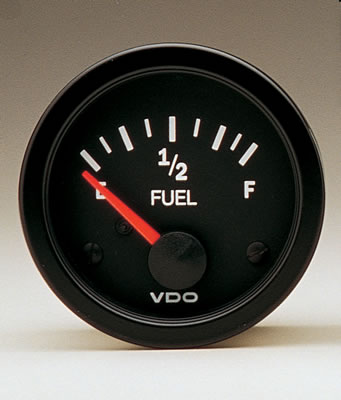
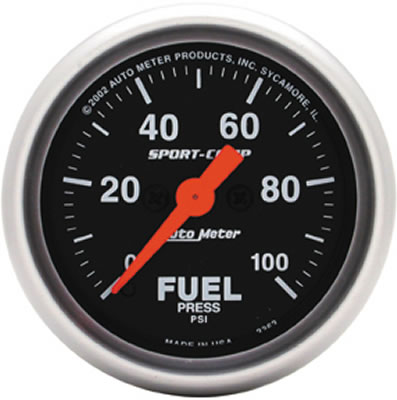
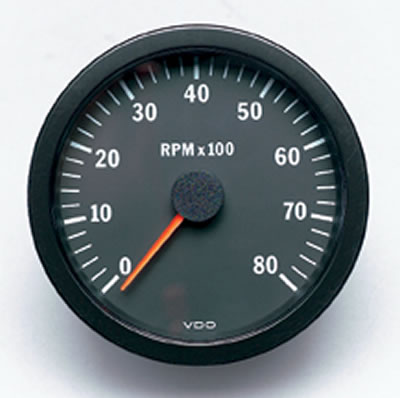
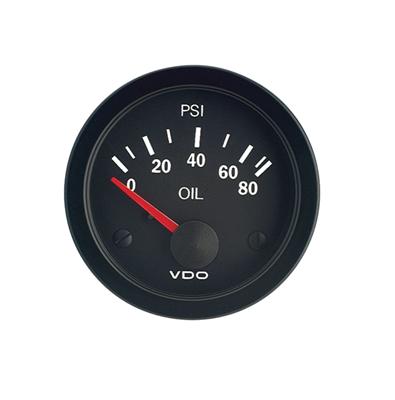
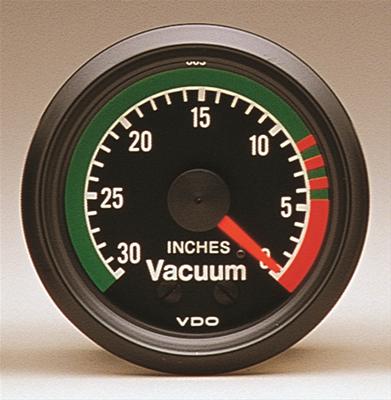
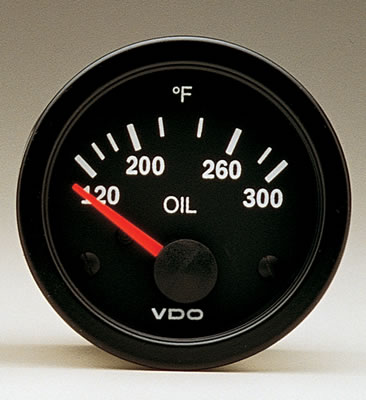
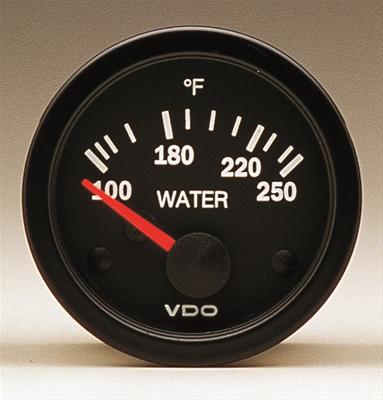
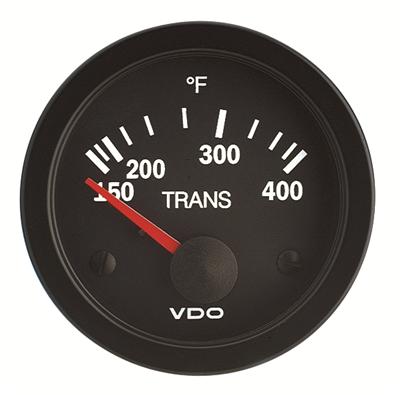
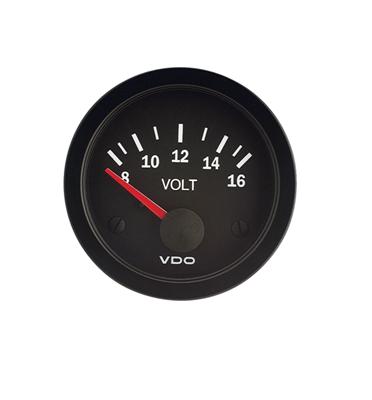
and find a decent radiator from a salvage yard, Id get these gauges

http://store.summitracing.com/partdetail.asp?autofilter=1&part=ATM-4337&N=700+115&autoview=sku

http://store.summitracing.com/partdetail.asp?autofilter=1&part=ATM-4327&N=700+115&autoview=sku

http://store.summitracing.com/partdetail.asp?autofilter=1&part=ATM-4391&N=700+115&autoview=sku

http://store.summitracing.com/partdetail.asp?autofilter=1&part=AVM-30-4100&N=700+115&autoview=sku

http://store.summitracing.com/partdetail.asp?autofilter=1&part=ATM-4498&N=700+115&autoview=sku

http://store.summitracing.com/partdetail.asp?autofilter=1&part=ATM-4301&N=700+115&autoview=sku

http://store.summitracing.com/partdetail.asp?autofilter=1&part=NEX-15512&N=700+115&autoview=sku

for UNDER about $750 and most of thats the cost of GAUGES, and matched sensors you can have a decent engine stand built, the steels reasonably priced its the measurements and fabrication that takes time and precision


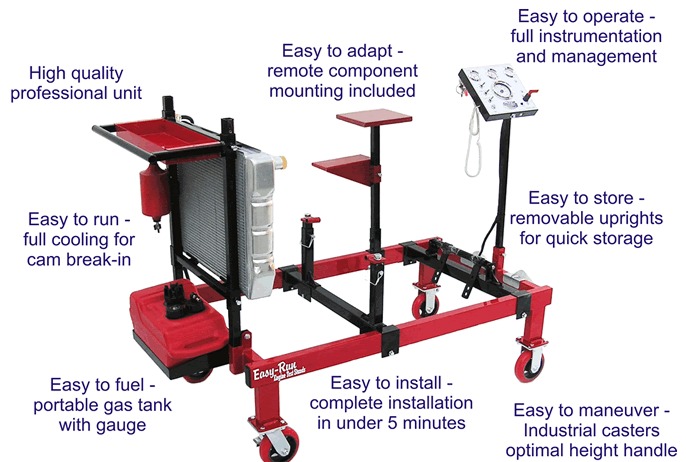
heres an example for ideas
engineteststand.jpg


teststand1.JPG


ETS1.jpg


ETS2.jpg


http://www.prw-usa.com/category/products/test-stands
 
Last edited by a moderator:
3c466b40.jpg


22de97c1.jpg

YnVkLWVzKmNvbXx5YWhvb19zaXRlX2FkbWlufGFzc2V0c3xpbWFnZXN8VEVTVFRVTkVXSVJJTkcqMzExMTAyNDNfc3RkKmpwZw_YnVkLWVzKmNvbXx0ZXN0dHVuZV9zdGFuZA


raceman6135 posted this


a) Connect this to the positive terminal of your battery ("BAT").

b) Connect this to any accessories ("ACC") that you want to power with the engine not running. Such things as the radio normally get powered off this terminal.

c) "IGN" supplies power to things like the BATT terminal on an HEI (the 1975 to 1990-ish, 'coil in cap' design -- maybe others). You'd also want to hook up things like your heater's/air conditioner's blower fan to the IGN terminal.

d) I can't tell from the photo, but if the switch has a momentary 'on' position, that is, one that when you turn the key, it 'springs back' from that position like when you start the engine, then that terminal is probably "START" (or labeled something similar). This supplies power to the "S" terminal on the starter solenoid ("SWITCH", marked as "g) on your photograph). That supplies the momentary power required to spin the starter motor, and hopefully, the engine.

e) You are correct: this terminal connects to the battery's positive terminal.

f) is not used unless the engine you are testing uses ignition points. The "R" next to the terminal is for RELAY, which provides power to the coil when the engine is cranking.

g) See my description of terminal "d)" for details on the "g)" terminal.

For a test stand, I would not use fuses or fusible links. However, I would ensure that at the end of each and every day, the battery gets disconnected from everything (both the positive and negative terminals). If there are any electrical problems when you are running an engine on the test stand, it is open enough that you can quite easily and quickly disconnect the wires.

I prefer to use a fairly heavy 1 or 0 gauge battery cable, mostly because I sometimes test large cubic inch, high compression engines, and the $3 extra for a heavier gauge battery cable is worth the investment.

Also because this is a test stand, I'd run 12 or 14 gauge wire for accessories (if needed) and the SWITCH terminal on the starter.

HEI's BATT terminal require a 10 gauge wire (in my opinion) in order to guarantee full voltage.
 
Last edited by a moderator:
night rider posted this

Pc. of sheet metal to house 1 push to start button, 1 ign. kill switch, oil psi gauge, water temp gauge, volt gauge, and tach

Tray on bottom to sit battery in.

Tray up front to put a rad.

Tray on other side of bottom for a fuel can/cell

To wire it up....

1) Battery cable from + on battery to big post on starter.
2) Battery cable from - on battery to engine block, and test stand
3) 8-4 ga, Wire From back of alt. to battery
4) plug on alt. 2 wires, 1 goes back to the back of alt, other goes to battery but add a 47-50 ohm resistor in line the wire before battery.
5) wire from big post on starter to push button
wire from little post towards oil pan on starter to other side of push button.
6) wire from HEI dist "batt" post to toggle switch
7) wire from other side of toggle switch to battery
8) green wire on tach to HEI dist "tach" post
9) black wire on tach to battery ground to test stand frame
10) tach's other wires to the "non powered" side of toggle switch
11) volt gauge red wire to "non powered" side to toggle switch
10) volt gauge black wire to frame of test stand, battery - or engine block

Now on your oil psi and water temp.. You could use mech. senders (plastic, copper tube going from gauge to engine) or elec. senders where a sender is screwed into engine, then a wire goes from sender to gauge.

http://www.youtube.com/watch?v=tYIS9L7j ... _embedded#!

Wired up like that.. You flip your toggle switch which will power up your dist, gauges, etc, push the start button to turn starter over and fire engine. To shut the engine off you just flip your toggle switch

theres a lot of links and sub-links in this thread (above) that will be use-full, and obviously having a decent shop welder ans possibly a good metal crosscut or miter saw sure helps
(read through the threads posted below) and having a few friends that previously built engine test stands and seeing the good and bad design features of each ID suggest having a 4 ft wide and 5 foot long 2" box steel base with (4) 8" swivel wheels, a very easily adjustable motor mount that sets the engine as close to the floor as possible, yet still allow headers, starter and battery access , so there's far less tendency for the engine to tip over if you rev the engine , a very large radiator with its own electric fan , a 1 gallon fuel tank with a cap that seals and with electric fuel pump and having a 10 lb CO2 fire extinguisher very easily accessed on a bracket on the stand so you have no trouble locating it should something catch fire while testing

http://www.harborfreight.com/8-inch-cus ... 46819.html

egs1.jpg

egs2.jpg

egs3.jpg

egs4.jpg


egs5.jpg

egs6.jpg

egs7.jpg

egs8.jpg

egs9.jpg


egs10.jpg

egs11.jpg

EngineStandWiringforGenerator.jpg

enginewiring84.jpg
 
Last edited by a moderator:
now having an engine test stand could be rather helpful, at times, and its certainly a reasonably easy to build tool if you have a welder and access to some 2" box steel,8" swivel casters, etc. and looking over the pictures above can give you some ideas like how to make easily adjustable motor mounts, but Id make a few suggested changes, obviously you need a rather extensive set of gauges so you can monitor the engine, obviously some gauges like a speedometer are useless on a test stand but a fuel air ratio monitor, fuel pressure,oil and coolant temp, voltage gauge, vacuum gauge and a few others would be useful..

SENSOR ? GAUGE INFO link's

viewtopic.php?f=80&t=728&p=9217&hilit=sensors+camaro#p9217


here are some samples: They have a lifetime guarantee!

http://www.ebay.com/sch/templartech/m.html?item=301922702371&hash=item464bfed423:g:G9gAAOSwcnpTqvTc&vxp=mtr&rt=nc&_trksid=p2047675.l2562

http://www.ebay.com/itm/Intellitron...173849?hash=item464ceae799:g:dFYAAOSwBahVIBGO

http://www.ebay.com/itm/Firebird-Di...477930?hash=item464b538eaa:g:-ugAAOSwAKxWVM1c

http://www.ebay.com/itm/LED-Digital...732294?hash=item464ba3bb86:g:XLMAAOSwiCRUa7W3

http://www.ebay.com/itm/Intellitron...255174?hash=item464caf1c46:g:WlsAAOSw2s1U0rgg

http://www.jandssafeguard.com/monitors.html

http://garage.grumpysperformance.com/index.php?threads/engine-leveler-and-swivel-hook.16160/

teststandgh.jpg

heres a list of gauges Id like in a dash display
keeping a constant eye on whats happening in the engine compartment helps prevent and diagnose problems


http://www.summitracing.com/parts/ATM-2234/

speedometer
http://www.summitracing.com/parts/atm-5156/media/images
gagespeedo.jpg


fuel level
http://www.summitracing.com/parts/vdo-301106/overview/
gagefuel.jpg

fuel pressure
http://www.summitracing.com/parts/atm-3363
gagefuelpressure.jpg

tach/engine rpm
http://www.summitracing.com/parts/vdo-333160/overview/
gagetach.jpg

oil pressure
http://www.summitracing.com/parts/vdo-350104/overview/
gageoilpressure.jpg

engine plenum vacuum
http://www.summitracing.com/parts/vdo-150042/overview/
gagevacuum.jpg

oil temperature
http://www.summitracing.com/parts/vdo-310106/overview/
gageoiltemp.jpg

coolant temperature (plus fan on indicator light)
http://www.summitracing.com/parts/vdo-310105/overview/
gagecoolant.jpg

trans fluid temperature (plus aux cooler fan on indicator light)
http://www.summitracing.com/parts/vdo-310107/overview/
gagetrans.jpg

battery voltage
http://www.summitracing.com/parts/vdo-3 ... dia/images
gagevolt.jpg


NEXT ID SUGGEST HAVING THE BASE WIDER and a bit longer and having the wheels have locks so that the engine test stand is less prone to flip under sudden torque loads if you blip the throttle, Id suggest at least a 36" width, and a 72" length, and mounting the engine crank center line no more than 18"-24" off the floor to insure decent stability,..... if a powerful engine can lift a wheel on a car it can certainly flip a flimsy test stand under the correct conditions.
and having room to pull the cam if required without needing to remove the radiator from the test strand would be a nice feature as would having easily adjustable engine mount stand locations built into the test stand and a small cabinet for test equipment like a timing light and IR temp gun, engine oil primer and a few cans of oil , multi meter and having a blow proof clutch /bell housing . mount location for the ,battery for the starter, and connections for the gauges etc.

http://www.harborfreight.com/8-inch-cus ... 46819.html
16952z.jpg


ctrp-1211-quality-damper-installation-shock-absorber-10.jpg

HAVING THE ENGINE EQUIPPED with proper testing vacuum connection, fuel pressure gauges and timing tabs helps


Last edited by a moderator:
I think building an Engine Test Stand / Dyno is a good idea Grumpy for the springtime coming soon.
I don't like most of the examples shown. Too high off the ground for me.
Crack the throttle hard an it may tip over from Reverse torque reaction.
Think the bottom of the oil pan should be no more than 1 foot off of floor level if not securely anchored to the concrete floor.
Keep the center of gravity low.
Do you think it would be safe to use Pneumatic style tires for easy rolling over irregular cirfuces ?
 
87vette81big said:
I think building an Engine Test Stand / Dyno is a good idea Grumpy for the springtime coming soon.
I don't like most of the examples shown. Too high off the ground for me.
Crack the throttle hard an it may tip over from Reverse torque reaction.
Think the bottom of the oil pan should be no more than 1 foot off of floor level if not securely anchored to the concrete floor.
Keep the center of gravity low.
Do you think it would be safe to use Pneumatic style tires for easy rolling over irregular surfaces ?

YEAH! YOU MUST THINK A BIT LIKE I DO!
I'd want the oil pan bottom surface within 10"-12" of the floor and have a base wide and long enough to be stable under sudden engine generated torque loads, so if you used Pneumatic style tires , there would be stabilizing feet you could drop for actual testing
 
grumpyvette said:
87vette81big said:
I think building an Engine Test Stand / Dyno is a good idea Grumpy for the springtime coming soon.
I don't like most of the examples shown. Too high off the ground for me.
Crack the throttle hard an it may tip over from Reverse torque reaction.
Think the bottom of the oil pan should be no more than 1 foot off of floor level if not securely anchored to the concrete floor.
Keep the center of gravity low.
Do you think it would be safe to use Pneumatic style tires for easy rolling over irregular surfaces ?

YEAH! YOU MUST THINK A BIT LIKE I DO!
I'd want the oil pan bottom surface within 10"-12" of the floor and have a base wide and long enough to be stable under sudden engine generated torque loads, so if you used Pneumatic style tires , there would be stabilizing feet you could drop for actual testing

Yes Grumpy I do most of the time.
I used to have a few extra used 1970-81 Firebird- Camaro Subrames but they are gone now.
Would make an ideal base dirt cheap that could be modified as needed.
An old GM car or truck frame cut down would work also.
 
I remember where I had seen a 1978-79 Firebird Trans Am Front Subframe Grumpy.
Get it Cheap $.
My Easy Spring time project Engine test stand. :mrgreen:
 
Well as I have no plans on doing any more engines I have a partly done SBC engine run stand I have not finished in North Phoenix AZ $150.00 pickup.
 
Back
Top