If there's a local professional auto body supply store near you they will generally have instructional manuals and be only to happy to supply you with info if you buy the required resins, mats and solvents from them, but read the instructions carefully theres several products that are not always compatible, the links and sub links and info below should help
I CAN ASSURE YOU THAT ITS NOT ALL THAT DIFFICULT TO DO CORRECTLY, IVE DONE MORE THAN MY SHARE OF FIBER GLASS AND SHEET MOLD COMPOUND REPAIRS
http://www.up22.com/ScoopInstall.htm
http://www.ehow.com/facts_7673682_smc-v ... resin.html
http://www.corvette-restoration.com/res ... _Paper.pdf
http://www.youtube.com/watch?v=ogoPfYD64fQ
http://www.youtube.com/watch?v=MmDka6IwgSo
http://www.jegs.com/InstallationInstruc ... -95002.pdf
http://www.fibreglast.com/category/Resins
viewtopic.php?f=35&t=353
http://www.andysautosport.com/chevrolet ... all&page=2
http://www.harborfreight.com/automotive ... 98967.html
http://www.harborfreight.com/2-inch-wid ... 39687.html
http://www.ebay.com/itm/20-LARGE-PLASTI ... d=ViewItem
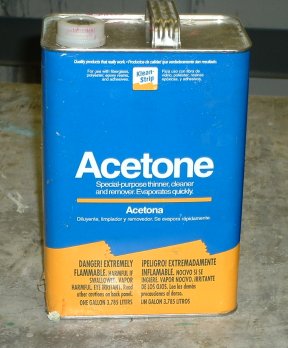
the basic secret is to rought up the two surfaces to be mated with a fairly rough grit like a # 40- #60 sand paper over an area at least 2" wide along the edges and clean it with high pressure air then an acetone wash.
mix the fiberglass/smc compatible bonding resin (read the containers carefully before purchasing the resins)and in most cases thin the mix with a bit of acetone for the first bonding coat to allow it to seep down into micro surface cracks , apply with a couple cheap disposable paint brushes that you'll be pitching in the dumpster, regularly as you can generally only apply thin coats and let each dry before the next coats applied. once the brush is used its got a life expectancy of about 5 minutes before the resin starts to harden a bit once the resins not flowing smoothly pitche the brush and and remaining resin in the dumpster, obviously that means work in small areas and don,t make big batches of resin. youll generally want to use a non-directional fiber glass mat placed between resin layers then soak the layers of mat and use a flexible plastic squeegee to force out any trapped air in the mat fibers and smooth and compact the surface try to wipe off excess resin with a acetone soaked disposable rag.
don,t get in a hurry each stage or layer takes time to dry and if required sand to get the proper surface for the next layer, of mat and resin.
the mat and resin is NOT the top or final coating, youll want to use a type of bondo thats designed to be compatible with and bond to the fiber glass/smc surface but that is used as a surface sealer and its only going to be a few thousands thick if the surface is properly done, once its sanded down with a good 600--800 grit wet/dry paper you can use a good paint primer and sand that with 600-800 grit or finer before the real surface paint work. youll need to taper the surface thickness on any bonded joint and the reverse side should not be ignored, properly done you can duplicate the surface on the factory parts the new repair work is bonded too.,
http://www.youtube.com/watch?v=d70tR5EzV3Y
Sheet molding compound (SMC) resin is a fiberglass-based compression molding that is used in applications that require high strength. SMC is comprised of several materials including fiberglass, polymer resin, release agents and thickeners.
SMC, or sheet molding compound, is polyester-based fiberglass used in the production of automobiles and other modes of transportation. All fiberglass resins are either polyester-based or epoxy-based
Polyester-Based Fiberglass Resin
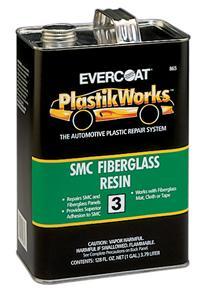
SMC fiberglass resin is polyester-based and used for repairing SMC on automobiles and other fiberglass products. This product is used in conjunction with fiberglass mat, cloth or tape. It is waterproof and impact-resistant. SMC resin sets in 20 to 30 minutes. Repairs using this product are sandable more quickly than with epoxy-based fiberglass resins. A hardener must be added to SMC resin prior to use. SMC resin can be used to repair both polyester-based and epoxy-based fiberglass products.
Epoxy-Based Fiberglass Resin
Epoxy-based fiberglass resin is thick and is not tacky when cured. After curing, it can be filed, sanded and drilled. This resin is designed to be used with fiberglass mats, cloth or tape. A hardener must be added. Epoxy-based resins have been around much longer than SMC resins. This type of resin can be used to repair items made from epoxy-based fiberglass.
Quality Issues
Automobiles made from SMC prior to 2001 had many issues with paint popping, micro-cracking and cratering. SMC polyester-based fiberglass is an improvement over the previous epoxy-based fiberglass composite materials in the automotive industry. Since 2001, more improvements have been made with SMC composite materials and producers are close to an SMC formula that can be used in the production of aircraft.
from a guy s perspective whos repairing a car body panel the main thing that you need to understand is that you can,t get a patch or new section to bond well until all surface waxes and surface coatings are removed, this generally requires both a solvent wash and prepping the surface for a good mechanical grip, requiring a fairly rough or porous surface without the presence of paint or other sealers.
http://www.fibreglast.com/product/fiber ... ite-repair
Composite Repair
Composites have numerous advantages over conventional building materials, including ease and durability of repair. However, damaged parts are often replaced simply because many individuals lack the knowledge to repair them or are intimidated by the prospect of fixing them. This brochure describes in detail the modern repair techniques necessary to restore the function to damaged composite parts. It is divided into two sections, so both structural and cosmetic repairs can be covered thoroughly.
The techniques described will work for any fiberglass structure and many "advanced" composites of Kevlar® or carbon fiber . Please realize that specialized procedures beyond those described here may be necessary with certain parts. Manufacturers of structural parts often publish detailed repair information specific to their parts. The manufacturer's instructions supersede all other information, and should be followed completely. Most of the time, the information is more specific and does not contradict the standard repair procedures as outlined here. When the suggestions in this pamphlet are executed well, strong repairs will result.
Repair Theory
Once a few fundamentals are understood about repairing composites, most projects can be completed successfully and a long life span can be expected. We will begin by listing and explaining three main principles of composite repair.
1) All repairs are secondary bonds, so they rely upon the adhesive quality of the resin for their strength. Structural repair theory begins by recognizing the difference between a repair and the original piece. When a part is first fabricated, all the resin in it cures chemically as a single unit regardless of the number or orientation of the reinforcement plies. This is called the primary structure or bond, and it is the strongest form in which a part can exist. Once the part is damaged, all repairs become secondary bonds attached to the original primary structure. In real life, this means that the repair is only as strong as the adhesive used to make it. For this reason, never use a weaker resin than what the part was made with originally. In fact, stronger adhesive resins are sometimes used for repairs. However, even this substitution must be cautiously tested so it does not change the performance of the part.
2) Increasing the surface area will increase the strength and the durability of the repair. Since repairs depend upon adhesion to the primary structure, increasing the surface area of the bond line will increase the strength and longevity of the bond. This is usually done by taper or scarf sanding the area next to the damage so the void can be filled gradually. The size of the taper is expressed as a ratio comparing the depth of the repair to the width of the taper. Generally, the stronger or more critical the repair needs to be, the larger the taper ratio. An alternate method of increasing the bond surface is step sanding. This procedure defines the size of the inner repair, then removes 1/2 inch per ply of the surrounding material while working toward the part surface. The repaired surface grows considerably and the fiber orientation is quite evident in each step.
3) Strive to duplicate the thickness, density, and ply orientation of the original laminate to maintain the functionality of the part. Many folks go overboard on repairs thinking that if a little bit is good, then more is even better. That is dangerous thinking with reinforced composites, because as a part becomes thicker, it automatically becomes stiffer, regardless of the material in use. The proper approach is to carefully replace every ply that has been removed while preparing the damaged area with an identical material in the same orientation. This ply-for-ply replacement approach will guarantee the structure can withstand the same loads as the original.
These three principles are the basis for understanding composite repair. The complete sequence is explained below, but comprehension of these points will help you understand how the steps are interrelated. The sequence is straightforward and extra explanation has been added for more detail at key stages. However, it is difficult to cover examples of every problem in this small brochure format.
Structural Repair Sequence
1) Inspect the damage, identify the materials involved, and determine whether the part should be replaced or repaired. Damage generally falls into four categories, but they can all be present if the impact was severe enough. Tears, holes or punctures, crushed cores, and delamination are the most common problems. To make reference quicker, use a marker to outline the boundary of the damage. Close inspection is necessary as the problem area often extends farther than can be easily detected visually. A coin tap test is an effective way to test the surrounding area. An audible difference is easy to detect between solid laminate and crushed material when tapped with the edge of a coin. Identification of the materials involved, especially the resin, can be more difficult. Begin by determining the type of fiber reinforcement used. This will often give clues as to the type of resin employed. Marine applications where chopped mat is most prevalent probably used general purpose polyester resin. Fabric based auto and industrial parts are generally made with either polyester or epoxy resin , so epoxy would be the safe repair choice. Carbon fiber and Kevlar® parts can be repaired with either vinyl ester or epoxy resin. Consult the original manufacturer before attempting any repair to an aircraft. They can recommend the exact system to use.
A new composite material is gaining widespread use in the automotive, industrial, and personal watercraft markets that presents unique repair problems. It is called SMC, or Sheet Molded Compound. Recognizing SMC from other types of FRP composites is critical so the proper repair can be performed. Parts made with SMC are produced in compression molds, so they are smooth on both the inside and outside. That is the first clue to look for when identifying them. Next, SMC parts do not have an outer gel coat, but they are usually painted or color molded. When the paint is sanded off, the underlying surface has a marble appearance. Finally, when damaged SMC is sanded, short coarse fibers are exposed and a dryer powdery dust is produced compared to conventional materials. These hints will make SMC identification quite straightforward. SMC is a polyester-based material, but it cannot be repaired with polyester resin. This is due to the mold release agent that is present throughout the entire SMC part. Unlike conventionally molded parts where release agents are applied to the mold surface, SMC is compounded with them in the resin mix for quicker processing. This means that as the damage is sanded to prepare a good bonding surface, fresh mold release agent is exposed. Polyester resin products are not strong enough to adhere to this surface. SMC SHOULD ONLY BE REPAIRED USING EPOXY-BASED RESINS, FILLERS AND ADHESIVES. When painting, use only catalyzed type paint systems. Once the extent of the damage and the type of material used is known, determine if the part should be repaired or replaced. If the manufacturer's specifications are available, check whether the damaged area is too large to be repaired. If no information can be reviewed, make a quick estimate of the materials and labor time needed for the repair and compare the figure to the price of a new part. A savings of at least 50 percent is the typical cut-off point to warrant proceeding with the repair.
2) Remove the damaged material and prepare the area for bonding. Try to identify the sequence and the orientation of the material as it is removed layer by layer. When a part is broken or crushed it is difficult to realign the pieces with each other because the frayed fibers tend to "hang up" on one another. Use a saw blade to cut the length of cracks or tears. This relieves the stress on solid laminates, which often return to their original shape with little force. Cored parts tend to pancake and mushroom, further complicating realignment. A router is excellent for removing damaged core material without disturbing intact face skins. Try to remove as little material as possible so the repair does not grow too large. However, solid laminate must be exposed for a good repair. Continue coin tapping and grinding until all the damaged material is removed. Finally, determine the density of the core so it can be replaced with the same material.
Next, support the part so nothing gets distorted during the repair process. This can be as simple as strips of 2 inch wide masking tape, or as elaborate as a custom-made clamping fixture. Generally, high-performance parts require very precise support systems.
With the part supported, proceed to preparing the bonding surface by grinding a taper or steps around the damage. This is the critical step for functional repairs, but it is also the most overlooked and abused. If a taper is to be used, measure the depth of the valley and calculate how far the sanding must extend to achieve the desired ratio. Mark the outer edge of the taper using a marker, and begin sanding inward toward the valley. Be sure to remove material slowly so the taper progresses evenly. Write down the orientation and type of fabric used as each layer becomes exposed so it can be replaced in the same way.
When step sanding, the initial calculation becomes more precise. Assuming the damage is circular, 2 inches in diameter and there are 5 plies in the laminate, mark concentric circles expanding 1/2 inch per ply from the edge of the innermost circle. The final diameter of the prepared area will be 7 inches. Begin sanding in the center until the deepest layer is exposed. Step out 1/2 inch and sand down to the second deepest layer and so on, until all five steps are prepared. A right angle grinder offers the best feel and control for this delicate procedure.
For personal safety and cleanliness, tape the hose of a shop vacuum to the work surface so dust can be removed while grinding is taking place. When the sanding is complete the whole surface needs to be thoroughly cleaned. Vacuum any remaining dust and then wipe the surface with a solvent rag. Acetone is usually sufficient for removing oils, greases, dust, waxes, or other contaminants which would interfere with repair adhesion.
3) Laminate the repair patch. Begin this procedure by precutting the core replacement and the reinforcement plies that will fill the repair taper. Cut the core first to fill the deepest hole. Some cores like Nomex honeycomb have their own orientation which needs to be aligned in the part. Be sure to check this. Consult the list that was made during the preparation process so that each reinforcement ply is cut to the proper orientation. Cut each ply so it fits precisely into the step that was prepared for it. Modern repairs are made ply-by-ply, so the smallest piece is intended to go into the bottom of the valley. Stack the reinforcements near where they will be used, with the first layer to be placed in the bonding area on top of the pile.
Mix the appropriate resin or adhesive system for the repair patch. Pre-weight the reinforcement schedule and mix only the same weight of resin. This will keep the resin content within a reasonable 50:50 ratio.
Pre-wet the entire bonding area with resin, then begin saturating each ply of reinforcement before it is placed into its step. Work on a sheet of plastic so the fabric can be easily lifted from the table once it is ready. A flexible rubber squeegee is the best tool for spreading the resin evenly through the fabric and removing excess which may be present. Place the reinforcement into its spot on the repair, ensuring the proper orientation. Stop every few layers to compact the patch as much as possible. A squeegee or grooved roller works well for this. Continue stacking the repair plies until all the fabric that was removed has been replaced. A final cover layer is then added over the entire area.
Plan on compacting the final repair patch as densely as possible while the resin is curing. Vacuum bagging is the most uniform method, but squeegees, rollers, or other clamping pressure will work adequately. Follow the manufacturer's recommendations for curing the resin or adhesive. If a two-sided repair has been planned, preparation of the opposite side can begin once the first patch has cured.
4) Inspect the repair before putting the part back into service. Use the coin tap method to inspect the cured repair. The entire structure should resonate the same solid sound. Non-destructive load testing can also be used for greater confidence. This consists of stressing the part up to its expected service limit but not beyond. If the part fails prematurely, it should be discarded. For more critical structures, a testing laboratory or specialized equipment may be necessary before sign-off. If all is well, proceed to the cosmetic repair sequence.
Cosmetic Repair Sequence
A part's outer cosmetic finish is designed to hide and protect the structural reinforcement below, as well as be aesthetically pleasing. It is this surface by which most people will judge the whole structure. Even slight damage like scratches and gouges will mar the finished appearance. Worse, these often create a direct path into the structural layers, causing even larger problems. Cosmetic blisters are a problem which, left untreated, can turn entire boat hulls into sponges. The cosmetic repair sequence is similar to the structural sequence, but filler or gel coat replaces any reinforcing material. Surface preparation is still the most important aspect of a long-lasting repair. Finish sanding and polishing are the only differences, but they make a good job look truly professional. Many fear tackling cosmetic work because they think it requires expensive spray equipment for satisfactory results. Equipment is important, but proper material selection will give better results.
1) Inspect the damage and remove any loose or unsupported surface material. Inspection of cosmetic damage is just as important as it is with structural repairs. Gouges often leave undercut areas of unsupported gel coat which at first appear fine. Press on them with a blunt tool and they will easily crack away. Every such area must be identified so it can be prepared correctly in the next procedure. Use a marker to circle each spot that needs prep work. This is especially important on large blister repair jobs. Once the dust starts to fly, it isn't always easy to see the surface!
2) Prepare the surface for the addition of gel coat or filler. Begin by taping off the area surrounding the damage. This will keep sanding scratches around the damaged area to a minimum. Next, wipe the surface with acetone and a clean rag to remove any wax, oil or grease which might contaminate the repair. When this dries, chip out all the loose material with a knife, then use 40-grit paper to bevel the edges to a taper. The scratches should reach down into the crack or hole for better bonding strength. Even thin cracks will have to be "opened up" before material can be added to fill them. Blisters will have to be completely exposed at this time. Also, be sure the remaining laminate is solid and dry. Wipe down the surface one more time to remove dust and anything else which may disrupt adhesion.
3) Mix and apply the appropriate cosmetic filler material. Shallow scratches can be directly filled with color matched gel coat. Be sure to match the gel coat to a sanded and polished portion of the original, not the overall faded color. The repair may stand out at first, but everything will fade to the same color in about a month. Use a small brush to dab in the gel coat. Be sure it is higher than the surrounding surface so it can be sanded flush. Spray a light coat of PVA over the repair for a tack-free, sandable cure.
Deeper gouges will require structural putty filler to replace the missing material before the gel coat is applied. 1/32 inch milled glass fibers in resin make an excellent structural putty. Use a squeegee to spread it into the bottom of the gouge. Keep this filler slightly below the surrounding surface if gel coat is the intended top coat. When painting, the filler can be level with the surface because paint adds little thickness. When filling hull blisters, be sure to use vinyl ester resin to make the milled glass putty. This will add extra corrosion protection to these weakened areas.
If the cosmetic repair is following a structural repair, it may be necessary to level the structural patch with the solid laminate. Both grinding and filling may be necessary to accomplish this. Grind all high spots until they are flush with the rest of the surface, unless this will compromise the structural strength of the patch. Use filler to level any low spots. If grinding cannot take place for structural reasons, fillers can be mildly added to smooth irregularities, but the patch will always be visible. On marine repairs, use the 1/32 inch milled glass putty filler described previously. Other structures can usually be filled with standard pre-made talc body filler unless otherwise specified. Continue adding filler and sanding until the surface is perfectly flush.
Epoxy repairs are quite stable once they are cured, but polyester repairs should be heated slightly before final finishing. The polyester resin in the repair patch and in standard body filler continues to shrink for some time when exposed to heat. When the repair is nearly finished, sit the project out in the sun for a few days or set up a heat lamp. If the lamp is used, don't put it too close for too long. The concept is to "force" the filler to shrink before it is sanded to the perfect contour. Then, go back and sand the patch to the exact final shape. The surface is then stabilized against future heat problems.
4) Mix and spray the color matched top coat. If gel coat is the intended top coat, it is necessary to mix the gel coat with Duratec Hi-Gloss Additive . The additive will allow a full surface cure, reduce orange-peel and later sanding. Below-the-waterline repairs on marine projects need to use a surfacing agent like PVA or wax to ensure a thorough cure. Wax is excellent on large, hard to reach areas, but it can cloud clear gel coats. PVA is the best for spot repairs where access is easy while the gel is still wet.
If paint is the top coat, a surfacing primer is worth applying underneath. The primer will hide the last fine irregularities and seal the patch. When working on polyester parts, Duratec Surfacing Primer is the best material for the task. It has a higher heat distortion temperature, which further protects already stabilized patches from shrinkage. Most paint systems will stick to cured epoxy, so apply the primer recommended for the paint that will be used.
Blistered boat hulls should be covered in a layer of Duratec Vinyl Ester Surfacing Primer for maximum protection against future water intrusion. Once the barrier of vinyl ester primer is in place and sanded, it can be covered with polyester gel coat , conventional anti-fouling bottom paint, or a polyurethane automobile finish if it is not left in the water for extended periods.
Gel coat will need to be finish sanded prior to final buffing. Use a hard rubber sanding block and 400 grit wet/dry paper to level the gel coat. Focus the sanding effort only on the high spots until everything is flush. Then, switch to a foam sanding pad and even finer paper for the perfect finish. Be sure to change water when the paper is changed so the dust particles from the coarser paper do not continue to cut the surface.
5) Polish the repair area to the desired luster. The last step of a professional cosmetic repair is buffing and polishing. Our #1102 and #1103 Mold Polishes are perfect for both polyester and epoxy patches. Use only Step 2 #1103 when polishing out a paint finish, but gel coat needs both compounds. The fine scratches left by 600-1000 grit paper will quickly disappear with the Step 1 Polish. It will even help remove overspray and some of the halo left after performing spot repairs. The finer compound gives it the final shine!
Conclusion
Composites are gaining larger acceptance in all types of modern vehicles, structures, and recreational equipment. The more they are used, the more they will begin to fatigue and break. When the parts break they do not all have to be replaced. Following these procedures, anyone should feel confident enough to embark on simple repair projects. Even difficult tasks can be tackled by intermediates. This brochure is intended to get anyone started. Practice will truly make perfect, but follow these simple guidelines to get good results the first time!
http://www.amazon.com/Fibreglass-Everco ... B000Q8BCDU