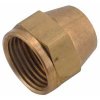
Franzinator Air Dryer

Hard to believe a few fitting could add up to $50. Some are just in case, so I don't have to make another trip. The three 1/4" ball valve cost about $24. Lowes didn't even have 1/4 fitting, except in brass, they only cost $8 for 1/4 x 3" nipple.....NOT going to spend that for 1/4" pipe. Went to Home Depot, they had some 1/4" pipe.

I hope to have the Franzinator hooked up tomorrow....taking Monday off to work on it.

DSC01884.jpg
 
Last edited:
it will be very interesting to see the difference if any in the results we get when our air dry projects are complete and tested, I spent some time on it yesterday and my brother in law spent several hours, we shall see soon enough
 
grumpyvette said:
it will be very interesting to see the difference if any in the results we get when our air dry projects are complete and tested, I spent some time on it yesterday and my brother in law spent several hours, we shall see soon enough
How should we determine how effective the air dryer is??? Can't just measure water drained per hour compressor runs, that would depend on humidity levels in two different locations.

Measure the delta T (Temperature) from input to output maybe.

 
Im just going to spray the high pressure air at a sheet of paper for 3-5 minutes after the compressors been running for an hour and if i don,t get any indication of moisture on the paper, its a huge success
 
Changed my mind about the side of the enclosure to mount the air dryer.

Install_1892.jpg

I must be the only one that didn't know about buying the correct size tubing bender. The Imperial tubing bender says it will bend 1/2" tubing. That should work cause I bought what's called 1/2 copper tubing. But what I didn't know was the Imperial is talking about the outside diameter and when you buy tubing it's determined by the inside diameter. So I suppose I will buy a 5/8" spring tubing bender so I can complete the installation.

Big frustration since I took a day of vacation to complete this, but NO it not going to happen!!!

TubeBenderHalfInch_1891.jpg

 
Last edited:
Ahh that suck.
I gotta take care of that when am getting one of these tool :)
 
just a question here?

obviously the tubing won,t fit the saddle correctly, but did you even TRY bending the tubing with the tool anyway?
yes it sounds like a darn dumb question but you might be surprised it may work
 

I was embarrassed when I posted the picture of the enclosure with the Very Dirty compressor. I've had
it 20 years or more and have never cleaned it. So I removed the pump and motor and cleaned it by hand
with a scraper and WD-40.

Still not a thing of beauty, but it's clean now.

CompressorBefore&After01.jpg
 
Last edited:
grumpyvette said:
just a question here?

obviously the tubing won,t fit the saddle correctly, but did you even TRY bending the tubing with the tool anyway?
yes it sounds like a darn dumb question but you might be surprised it may work
I also thought about that this afternoon.
Looking at the bend this kind of tools make, it make sense.


Indycars said:

I was embarrassed when I posted the picture of the enclosure with the Very Dirty compressor. I've had
it 20 years or more and have never cleaned it. So I removed the pump and motor and cleaned it by hand
with a scraper and WD-40.

Still not a thing of beauty, but it's clean now.


At least you got one, i still dont have a GOOD compressor and i still dont have 220volt, oh well am young and still plenty of time left to accomplish things :D
 
Yes I went ahead and tried to bend the tubing last night, but
all it did was try to push the tube into the saddle leaving scares on the tube.


I can't imagine it not working and providing a significant reduction in moisture.

Is the freon tank where you will drain the condensed water? Will the fan come on automatically with the compressor or will it be switched manually and only when the extra drying is needed?

This is the only thing that stopped me from finishing last night. I looked high and low and could not find the flare nut to make the last connection. Wish I knew where that damn thing was hiding!!!

FlareNut.jpg
 
Last edited:
Indycars said:
I can't imagine it not working and providing a significant reduction in moisture.

Is the freon tank where you will drain the condensed water?


yes


Will the fan come on automatically with the compressor
yes, if condenser coil temp hits 100f it turns on automatically and turns off at 80F

or will it be switched manually and only when the extra drying is needed?


This is the only thing that stopped me from finishing last night. I looked high and low and could not find the flare nut to make the last connection. Wish I knew where that damn thing was hiding!!!
 

Ok, just to pull it all together in one post. Here are the parts that I started with.

FranzPartsID_1851.jpg

I ground the inside of the bushing so that I could slide the 1/2" pipe nipple through the bushing.

FranzRemoveMaterial_1841.jpg

This is how it would look before installing into the 2" Tee.

FranzSubAssembly01_1846.jpg

While working with this sub-assembly it looked like I might be able to unscrew the assembly at the 2" x 3/4" reducing bushing, so I filed the edges of the elbow to help with this. I won't know if it possible to remove this way until someday I try it. It was easy enough, only took a few minutes with a file.

TaperedElbow_1868.jpg

I slide the 1/2 x 6" nipple in, screwed the 1/2" Elbow on. Then I pushed it in until the elbow touched the back of the Tee and applied JB Weld to nipple and pulled it back, thus spreading the JB between the bushing and nipple.

AdditionalJBWeld_1864.jpg

Immediately I screwed the 2" x 16" nipple onto the Tee and put the assembly in the vise so I could center the elbow in the 2" pipe. Let it harden for 24 hours.

NozzleInPipe_1855.jpg

The next day I added more JB to the inside which was harder to do now that the elbow was centered in the tee. I also added JB on the outside between the bushing and nipple.

JBWeldOutside_1862.jpg

The completed Franzinator Air Dryer. Later I will remove the coupling from the nipple extending from the Tee and use a flare fitting with female threads. Look in the installed pictures below, you can see the difference there.

FranzinatorAssembled_1887.jpg

Below in the completed compressor and air dryer assembly.

CopperTubeRouting01_1895.jpg

Notice the bushing is gone from the nipple, makes for a cleaner installation. I was happy with the accuracy of the tubing bender, you can measure the distances and make bends that come out where you want them. The short piece going from the compressor pump to the dryer was my first two bends, so it's not as square as I would like. I can go back now and trim one end to make it shorter and and re-flare, that will fix that problem.

CopperTubeRouting02_1896.jpg

Once I'm happy with everything, I will take the dryer apart and seal all the pipe threads and possibly paint it.

 
Last edited:
now all you need is to run the compressor for a couple hours intermittently and see if the thing functions up to your expectations

please post results after youve tested the fabricated water separation system in actual use, after a couple hours of run time., and let me know both how it works, how much water is trapped and drained and if any moisture was collected in the main storage tank, that managed to get passed the water separation device ?
 
grumpyvette said:
now all you need is to run the compressor for a couple hours intermittently and see if the thing functions up to your expectations

please post results after you've tested the fabricated water separation system in actual use, after a couple hours of run time., and let me know both how it works, how much water is trapped and drained and if any moisture was collected in the main storage tank, that managed to get passed the water separation device ?
I had a couple of leaks to fix, the first one just needed an O-Ring, but this other one maybe a little harder.

I suspect that I won't be able to buy the diaphragm, so patching it will be my best option. I'm thinking of treating it like a inner tube and patching it the same way, although I'm a bit concerned about the change in flexibility of the diaphragm.

Will post some results when I get the project completed.

ShutOffDiaphragm1904.jpg
DiaphragmPinHole1906.jpg

 
Last edited:
I think this will work and fit the budget for $28, instead of trying to fix the original one.

PressureSwitch-Condor.jpg

 
Last edited:

I decided to give repairing the diaphragm a shot. I applied the RTV in the picture and used the scraper
to force the RTV into the hole while I held it stretched out. Then I put a layer on the other side and
let it cure for 24 hours.

So far it's held and it saved me $28, since I didn't have to purchase the pressure switch above in an
earlier post. But who knows how long it will last, I might be at Grainger's next week buying the
new switch anyway........ OR it might out live me. :D

DiaphragmRepair_1908.jpg

 
Last edited:
good luck, that repair may work but I would have tried a patch over the sealant like a bit of plastic wrap stuck on the surface as an extra layer, BTW hows the ( Franzinator Air Dryer) WORKING
 
grumpyvette said:
good luck, that repair may work but I would have tried a patch over the sealant like a bit of plastic wrap stuck on the surface as an extra layer, BTW hows the ( Franzinator Air Dryer) WORKING

I was thinking of a inner tube patch, but thought that might be too stiff. Your idea would have added
a layer without stiffing the diaphragm, but it's done for now. I'm NOT going to deal with that spring
and trying to hold it together while at the same time start screws again. That will teach you
patients, if you don't commit suicide first. :lol:

So far I've not gotten much water from the Franzinator. The temp going in is too hot to touch, but
room temperature as it enters the tank.

With ambient temperatures in the 30-45 F range, there is just not much water vapor in the air
right now. Yesterday it was in the 20's and 100%RH, but I was still getting shocked when I touched
something metal. This spring should be a different story, for example.......................

If there are 30 (grains/lb of air) at 45 F and 70% RH........compared to 146 (grains/lb of air)
at 85 F and 80% RH. There would be 4.9 times more water and therefore a much bigger
problem in the spring time.

Psychrometric-Chart_ZoomRegion01.jpg

PsychrometicExample01.jpg

 
Last edited:
Back
Top