I'll donate $10 for Polishing Stainless steel info

chromebumpers

solid fixture here in the forum
Staff member
This is a four part question to those who really know how to buff stainless and chrome - mostly stainless. For a complete answer I will donate $10 to this site. I need to make the trim rings and center hubs (for the early C3s) shine like they never did before.
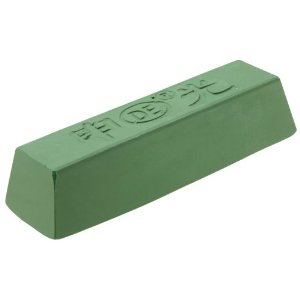
What is the progression of buffing wheels (cleaning to end of final polishing) Ie: type and firmness.
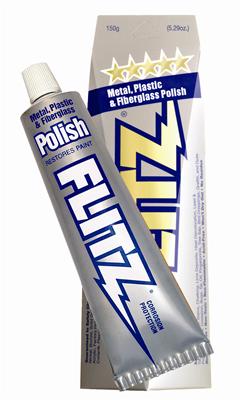
What (sorry don't know what the correct name is) rub do you apply to the wheel?
What speeds?
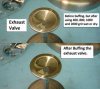
For repairs (like hammering out dents) what progression of sanding grit from start to finish and with wcompoundpond for buffing out the scratches? Ok, so that was actually 5 questions. :D
 
Rich, straightening, removing dents, sanding out minor defects, polishing stainless steel is an Artform along with part science.
I am no expert at this area.
Maybe Grumpy or others can find a HOW TO LINK or Video to help.
The stuff you apply against the buffing wheel is called Polish Rouge.
The finest stuff to give mirror finishes is typically called Jewlers Rouge, typically white colored bar of it.
I have done some polishing aluminum, not much stainless.
The way the cotton buffing wheel is woven has alot to do with how hard the materiel is polished or bitten into.
Tight buffing wheel gives fast cutting action to remove heavier imperfections.
The Loose Flap buffing wheels don't cut as deep but give that mirror finish we all like & desire.

Best sandpaper grit I have found to remove most minor imperfections before starting the buffing wheel & polishing Rouge stage is 600 grit wet & dry.
sprinkle parts with water as you sand gently, water floats away excess metal removed & prevents streaks & blemishes in your work piece.

BR
 
polish stainless steel to chrome like finish

http://www.pjtool.com/jewelersrougepoli ... pound.aspx

http://www.amazon.com/Woodstock-D2902-1 ... lers+rouge

buff1.jpg


IVE always started with 1000 grit wet/dry sand paper and used a hose and water to hand sand trim, then transitioned to 1500 -then-2000-then-3000 grit in succession then finished the polish process by hand with the wet clothe with a bit of dawn dish wash liquid soap and the extra super fine jewelers rouge bar I posted a link to here, then a final buff with a dry towel followed by a wax coating buffed in to reduce exposure and preventing rust


http://www.ehow.com/how_8596438_polish- ... -hand.html

http://www.youtube.com/watch?v=laVdIfMQs90

http://www.harborfreight.com/2-piece-mi ... 60232.html


HERES INFO I SEE POSTED

eHow
Cars
Car Parts & Accessories
Stainless Steel Exhaust
How to Polish Stainless Steel to a #8 Finish by Hand

How to Polish Stainless Steel to a #8 Finish by Hand
By Don Kress, eHow Contributor

Print this article

How to Polish Stainless Steel to a #8 Finish by Hand thumbnail
A #8 finish on stainless steel is used to create safety mirrors.

A #8 finish on stainless steel means the steel is polished to the same finish as a glass mirror's. This can be accomplished using a variety of different grit sandpaper as well as polishing compound. This level of finish is typically used in safety mirrors and in industrial applications. It can be used as a replacement for chrome in decorative fixtures as well as on vehicles that have stainless-steel trim pieces.
Other People Are Reading

How to Polish Stainless Steel for Auto Trim
Homemade Stainless Steel Polish

Things You'll Need

Sanding block
1000-grit sandpaper
1500-grit sandpaper

Show (9) More
Instructions

1

Apply the 1,000-grit sandpaper to the sanding block, and then sand the surface of the stainless steel. Follow this with the 1,500-grit sandpaper, then the 2,000-grit sandpaper. The lighter grades of sandpaper --- 2,500- and 3,000-grit --- are more delicate, so don't press as hard on the sanding block when using them. Once you have finished the 3,000-grit sandpaper, you should be able to see hazy reflections in the steel from a few inches away.

2

Turn on the bench top polisher. Polish the stainless steel with the stainless-steel buffing compound, while being careful to not allow the part you are polishing to either catch on the polishing wheel or become overheated. When you have completed this step, you should be able to see a clear reflection in the stainless steel from 8 to 12 inches away.

3

Apply the automotive polishing compound to the orbital buffer's wool pad. Apply the pad to the stainless steel and buff the surface. Ideally, you will heat up the stainless steel slightly with the pad, but not too much. You should be able to comfortably hold the part in your hand without gloves. This step will allow you to see a reflection in the stainless steel that is clear from between 2 and 5 feet away.

4

Apply the haze-remover compound to the stainless steel. Use a clean, lint-free cloth to buff the surface of the steel by hand. This step is the most time-consuming, but when you are finished, the stainless steel will have a slightly chrome-like appearance, and you will be able to see clear reflections in the stainless steel from as far away as 10 feet.


http://www.summitracing.com/parts/ftz-bu03515

FTZ-BU03515.jpg
 

It will be harder to polish your trim rings and centers, but this is how I polished my SS valves. The buffing was done with white rouge on a bench grinder with a buffing wheel, after wet sanding with the different grits. You could go to 2500 grit or more if you have the time.

Sorry ..... I didn't have any dents in my new valves! ;)


Attachments

  • ExhaustValveBefore&AfterBuffing01.jpg
    ExhaustValveBefore&AfterBuffing01.jpg
    43.7 KB · Views: 462
To remove minor dents in your C3 Corvettes Trim Rings, Use a Body Hammer Pick.
An Old school Leather Sand Bag will give proper support on the opposite side of your work piece.
Work the dent in a spiral pattern from the outside edge of the dent location.
Do Not start knocking the dent by hitting the center of the dent, you will distort your workpiece in a worse than it was before.
Take your time & feel with your fingers for high & low spots in the metal.
Fingers & the palms of your hands tell a visual story that your eyes do not detect easily.

Rick, I have never seen polished stainless steel valves. Pretty Kool.... :D
 
All great information - thanks guys! I have the wheel rings/caps and rocker trim (drivers side rocker trim is dented - looks like somebody used a car jack too close to the edge) I'll post before and after pictures.

As agreed I deposited 1,000 pennies for the great info (I got a great deal!), I'll do this from time to time to make things interesting. I would suggest support drive however it doesn't seem like there are many active members - I'm really surprised because this is such a secrete Gem site! Perhaps adding a badge under a member's Avatar like other forums?
 
Back
Top