it just ain,t running right check list

grumpyvette

Administrator
Staff member
If you were local it would be easy to diagnose, but lets start with the basics

viewtopic.php?f=36&t=767

viewtopic.php?f=36&t=63
this is the most consistently accurate I.R temp gun I've used for testing[/img]
42545.jpg

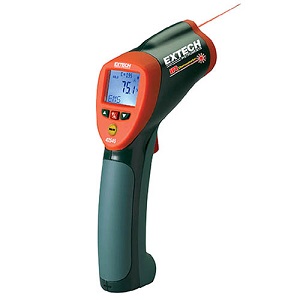
http://www.testequipmentdepot.com/e...1100200223789&utm_content=All Extech Products
INFRARED TEMP GUN
whats the COMPRESSION TEST reading for each cylinder?

HOW did you adjust the valves?

CAN you post detailed pictures of EACH spark plug?

whats your FUEL PRESSURE?(does it stay steady as the rpms build?)

HAVE you verified the throttle blades in the carb and linkage fully open?

how are the carb FLOATS SET?

what air filter SIZE and is it clean?

is there water or crud in the gas or fuel filter?

whats the TOTAL IGNITION ADVANCE?

whats the VACUUM READ AT IDLE?

whats the VOLTAGE at the COIL?

AT WHAT rpm does the advance reach MAX advance?

WHAT is the exhaust back pressure reading? (IDLE and 4000rpm under load)

HOW did you determine true TDC or did you just assume the timing tab and damper are correct?

What color is the ignition spark?

what is YOUR OHMS reading on the plug wires?

whats your spark plug gap?

CARB JETS? METERING RODS?

HAVE you REPLACED the cap and ROTOR?

ANY indication of a MISS or BOG?

HAVE you tried a DIFFERENT CARB?

have YOU verified EACH cylinder is firing?

have you VERIFIED the FIRING ORDER IS CORRECT?

HAVE you VERIFIED the LASH/PRELOAD on the rockers RECENTLY, and are you sure the cam is not worn?

are you SURE the trans fluid and rear differential are filled to the correct levels?

whats the engine temp after it warms up?

whats the trans fluid temp?
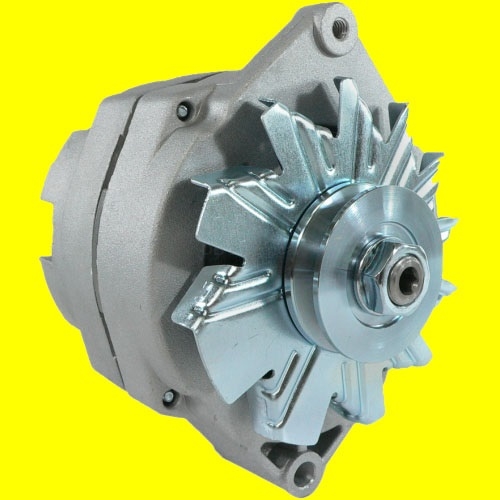
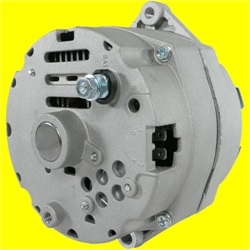
I learned decades ago to swap to a 140 amp-200 amp alternator,
as the stock 75-105 amp alternators on muscle cars and earlier corvettes are marginal at best/
if you shop carefully they can usually be found locally at some alternator re-builders for under $150
both my corvettes have 200 amp versions purchased NEW for under $250
while that may be over-kill to some I find the electric fans on the corvette and ignition and head lights work noticeably better


http://www.ecklerscorvette.com/corvette-alternator-140-amp-chrome-power-master-1969-1982.html
140ampa.jpg

140ampb.jpg


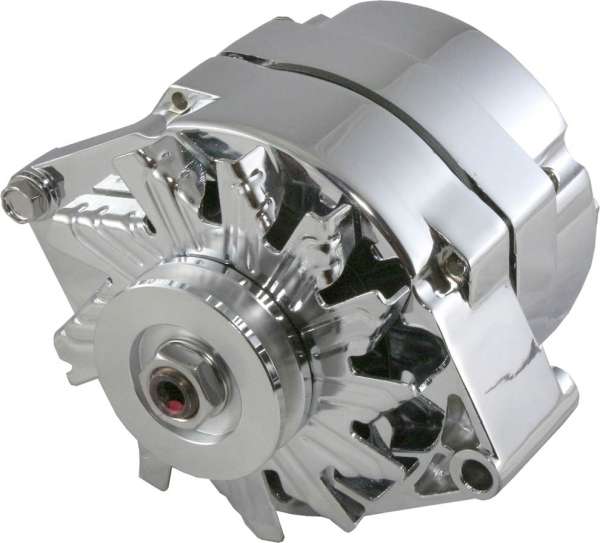
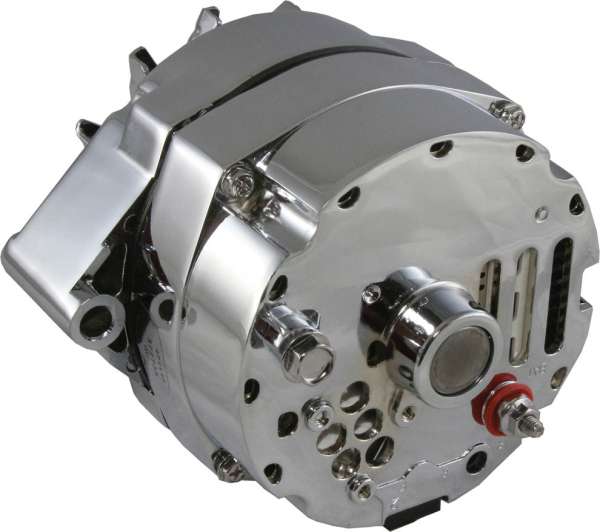
http://www.dbelectrical.com/p-4516-high-output-chevy-3-wire-alternator-140-amp-65-85.aspx
140ampc.jpg

140ampd.jpg

http://www.centuryperformance.com/fueli ... g-140.html

your bound to notice I install links to useful info in most threads,
now obviously not all the info, posted in all threads will be helpful in all cases,
but you'll eventually come to realize the value of reading thru the info links.
theres a great deal of useful info, in those links
info that you might think is useless to you now, but you'll be amazed at the number of times in the future your going to say to yourself...., damn! I remember reading something about that, now where was that posted, and a brief search will turn up your info!, info you swore at the time was a waste of your time to read thru, I know that's been very common for me and I'm sure it will be for those guys that really want to learn how and why things work!.
 
Last edited by a moderator:
Here are some instructionals and tutorials on how to use a VOM

http://www.acmehowto.com/howto/homemain ... eruse2.php

http://blip.tv/file/138422

http://tangentsoft.net/elec/movies/tt06.html

http://www.gmhightechperformance.com/te ... index.html

http://www.kpsec.freeuk.com/multimtr.htm


http://www.doctronics.co.uk/meter.htm

1.To do any logical trouble shooting on electrical issues you must have a good wiring diagram of the car.
(YOULL NEED THAT SHOP MANUAL AND A V.O.M. METER)


http://www.helminc.com/helm/welcome_sel ... 8FHMHFE4J9

2. remove all fuses.
3. place an amp meter in the positive battery line.
4. replace fuses one at a time.
(replace one record the current then remove the fuse, and proceed to the next fuse and circuit.)

5. now with this information you must isolate which circuits should have caused or continute to cause the electrical drain, and which should or are not a problem.
6. once identified and isolated the circuit can be examined isolated from others and fixed, with the shop manual, and A V.O.M. METER.

looking for a problem of this type is like looking for a needle in a hay stack unless you use a procedure like this and it will overwhelm you.
 
CAR WON,T START??

heres a basic check list


step one

clean the battery connections very carefully, and reconnect them tightly to the battery, once youve done that...verify youve got fuel pressure at the injectors and spark at the plugs
verify youve got 12-14 volts at the battery AFTER youve got the starter turning the engine over or at least trying to do so., do the interior lights get dimmer when it cranks over? does the voltage drop off?

step two

try starting the car while youve got it hooked up to a second car with battery cables or hooked up to a high amp battery charger ...is there ANY differance?

step three
get your remote starter switch, bye-pass the ignition and see if the starter works without the ignition solinoid connections thru the ignition switch, if everything else appears to be working correctly, replace the starter and solinoid

http://store.summitracing.com/partdetail.asp?autofilter=1&part=PRO-67406&N=700+115&autoview=sku

http://forum.grumpysperformance.com/viewtopic.php?f=70&t=458


http://www.powermastermotorsports.com/faq-starter.html

http://www.autozone.com has repair guides

http://www.streetrodstuff.com/Articles/Electrical/Hot_Start_Problems/

IF YOU DON,T YET HAVE A FACTORY SHOP MANUAL FOR YOUR CAR YOUR WORKING AT A DISADVANTAGE

Ive been building engines for over 40 years now, eventually even my hard head learned
rule one
read the manufacturers instructions carefully and call the tech guys if ANYTHINGS not 110% clear
RULE two
IF something won,t fit or function....STOP, call the the tech guys after you re-read the manufacturers instructions carefully and measure carefully so you sound at least 1/2 way like you know what talking about, then call the tech guys if ANYTHINGS not 110% clear

RULE three
STOP AND DO THE REQUIRED RESEARCH if youve got questions
I never mind sounding dumb as long as I get the correct answers, so I won,t LOOK dumb by doing something wrong

yes reading the sub linked info is mandatory if you want answers

http://www.helminc.com/helm/welcome_sel ... M2S049ETF8

http://www.clarks-garage.com/shop-manua ... tm#oil-low

http://www.davidfarmerstuff.com/

when ever you get into unexplained symptoms the answer remains the same....in every case,.... you drop back to the basics and do a few tests
find the cause, you isolate, each function or system or malfunction to its related components then test, each individually, use of the shop manual is almost mandatory

erase old trouble codes and pull new codes after each change, made.
read the codes, and follow the FACTORY SHOP MANUAL INFO
there could be several reasons and a few tests will limit the potential problem areas,valve float, restricted fuel pressure,or volume, badly adjusted carb floats, wrong jets, wrong power valves, dirty or restricted air filter, cam timing, ignition timing, carb being badly adjusted,valves being badly adjusted, ignition advance curve not correct, timing tab or damper, not correctly indicating TDC, etc. ignition spark should be bright blue and impressive, if its, weak,narrow, yellow or red theres a problem so research the cause, verify the coil and voltage

you start by dropping back to the basics , adjusting or verifying or correcting each potential problem area and eliminating it as the cause, then and only then moving on to the next area, guessing will drive you nuts and cause you to throw large amounts of un-necessary parts at the problem with little resulting improvements.

can,t get it started? these bits of info should help

drop back to basics, don,t assume you did anything correctly until you verify, its been done correctly.
first remove plug #1 and your valve covers and the distributor cap
stick a large ratchet/socket on the crank bolt and stick your thumb over the #1 plug hole rotate the engine until you feel compression building the rotor on the distributor should be approaching the #1 plug, now watch the timing tab and damper mark, it should line up at the TDC (TOP DEAD CENTER) marks , if its lined up with #6 and you get no compression on the #1 cylinder when the TDC lines up the engine needs another rotation,if you get compression on the #1 cylinder when the TDC lines up with rotor pointing at #6 the distributor 180 out) and the distributor needs to be pulled rotated 180 and re installed.
now verify you have 4-5 psi of fuel pressure and your getting spark at the plugs once the distributor cap and wires are installed, verify the firing order and once it starts back off each rocker nut at idle until the rocker clicks than tighten slowly just to the point it stops clicking and then add 1/4 turn of preload.


http://forum.grumpysperformance.com/viewtopic.php?f=70&t=1411

http://forum.grumpysperformance.com/viewtopic.php?f=70&t=967

http://forum.grumpysperformance.com/viewtopic.php?f=70&t=270

http://forum.grumpysperformance.com/viewtopic.php?f=70&t=1015

http://forum.grumpysperformance.com/viewtopic.php?f=55&t=1115

http://forum.grumpysperformance.com/viewtopic.php?f=52&t=196

http://forum.grumpysperformance.com/viewtopic.php?f=62&t=882&p=1390&hilit=+propane#p1390

viewtopic.php?f=44&t=773&p=1123#p1123

viewtopic.php?f=44&t=808&p=1180#p1180

viewtopic.php?f=44&t=808

viewtopic.php?f=44&t=777

watch the video

http://www.youtube.com/watch?v=YdIGZ-tV ... re=related
LCD dash ground is behind drivers kick panel . There are also several electrical grounds down just above the oil filter and one behind the passenger kick panel for the ECM. and a couple on the rear of the drivers side cylinder head, Grounds are a constant issue on most c4's. Hope this helps.
is it mechanical?
look for broken parts, loose connections, leaky hoses
are the CATS clogged or the O2 sensors faulty
check the compression in all cylinders
re-adjust the valves
look for vacuum leaks
look for loose serpentine belts
look for cooling system problems
check the trans fluid level and condition
check oil and fuel levels
check the rear differentials fluid level and condition
check the engines oil level and condition
check the brake fluid level and condition
change the filters
check the throttle body is opening completely
verify the TPS and IAC are set correctly, and use some carb/throttle body cleaner to clean up the TB.

what are the engines oil pressure, fuel pressure and cooling system temps?
if somethings wrong there's usually symptoms that point to the source!

IS it electrical?
verify the MAT, MAP, and or MAF sensors are working correctly
verify the coolant temp sensor and knock sensor are working
set the ignition timing
install new plugs with a .045 gap
verify the O2 sensors ok
look for loose grounds, on the engine,gauges,battery
check the battery voltage
check the fuel pump and relays
use a V.O.M. to verify plug wire resistance
check/replace the distrib cap.
VERIFY ALL SENSORS and FUSES and CONNECTIONS are ok, verify the voltage on the systems correct

IS it fuel related
verify the pressure and flow
verify the injectors are functioning correctly
read the old plugs
use a ir temp gun to verify exhaust temps
throw a couple cans of injector cleaner and 8 oz of MARVEL MYSTERY OIL into a fresh tank of fuel, it can clean out lots of minor varnish in the system

when you try to track down any problem with a cars engine you need to start with the basics of
fuel pressure,
and a compression check,
checking for vacuum leaks,
checking the valves are adjusted correctly,
verify the battery has a minimum of 12.5 volts
and the alternator boosts that while running to over 13 volts
verifying that your timing marks are at T.D.C,on the damper
verify that the timing tab indicates true T.D.C.
have a quality timing light and know how its used
and your ignition timing curve is correct, and smoothly advancing as the rpms build.
verify the timing is close to the shop manual suggestions
check all the fuses and engine grounds,
and get out a infrared temp gun and look for marked changes in the exhaust temperatures, indicating non-firing cylinders or fuel distribution issues
verify the oil temperature and pressure
verify the engines got less than 2 psi of exhaust back pressure
learn to read spark plugs as they are a great indicator of conditions in the combustion chamber
learn to use a vacuum gauge
if you have one a fuel/air ratio meters a big help
BUT HAVE A SHOP MANUAL and take the time to READ IT!

tools you really need
SHOP MANUAL
timing light
vacuum gauge
IR temp gun
degree wheel
dial indicator and stand
fuel pressure gauge
V.O.M. meter
torque wrench
magnifying spark plug reader
lift or (4) 12 ton jack stands
basic mechanic hand tools
floor jack


90% of your problems will be found just running thru the check list and following the shop manual suggestions, yes diagnostic software , and owning a scanner is a very good idea!

yes I know your 100% sure the ignition timing and the plug wires are correctly installed..CHECK THEM AGAIN CAREFULLY SEVERAL TIMES

The first thing ID do is VERIFY the CAUSE, OF THE PROBLEM FOR THAT, THRU ISOLATING AND TESTING, COMPONENTS AND SYSTEMS
A SHOP MANUAL IS ALMOST MANDATORY,

THESE LINKS should help
remember most problems come down to the basics of DO YOU HAVE FUEL?, IGNITION, OR COMPRESSION?, OR IS THERE SOMETHING MECHANICALLY WRONG,? once youve isolated the basic problem its source will become rather obvious in many cases

step one buy a factory shop manual

your working at a huge dis-advantage,
if you don,t have a factory shop manual for your specific year car,
and basic tools like a multi-meter, and vacuum /pressure gauge
there is NOTHING you can,t isolate .test, and diagnose..and eventually,
once your dealing in facts replace or repair

96manual.jpg


if you purchase a ZR13 auto code scanner, from HF,
AND YES ITS WORTH THE PRICE

you need this info
DOWN-LOAD AND PRINT IT OUT!:D:rolleyes:
then read through it carefully several times
https://manuals.harborfreight.com/manuals/63000-63999/Q63806.pdf

https://manuals.harborfreight.com/manuals/63000-63999/63806.pdf


read these links and sub links

http://garage.grumpysperformance.com/index.php?threads/c4-c5-corvette-trouble-codes.2697/

http://forum.grumpysperformance.com/viewtopic.php?f=32&t=10451&p=43633&hilit=camaro+sensors#p43633

http://garage.grumpysperformance.co...too-common-questions-can-be-found-here.12892/

http://garage.grumpysperformance.com/index.php?threads/code-scanners-software.3096/#post-76215


Measured Value
Engine Coolant Temperature Sensor. 185 Ohms @ 210F, 3400 Ohms @ 68F, 7,500 Ohms @ 39 F.
Engine Oil Temperature Sensor. 185 Ohms @ 210 F, 3400 Ohms @ 68 F, 7,500 Ohms @39 F.
Oil Pressure Sender/Switch. 1 Ohms @ 0 PSI, 43 Ohms @ 30 PSI, 86 Ohms @ 60 PSI.
Fuel Quantity Sender. 0 Ohms @ Empty, 45 Ohms @ 1/2 Full, 90 Ohms @ Full.
MAT (Manifold Absolute Temperature Sensor). 185 Ohms @ 210 F, 3400 Ohms @ 70 F, 15,000 Ohms @ 40 F.
Outside Temperature Sensor. 4400 Ohms @ 60 F, 2200 Ohms @ 85 F.
In Car Temp Temperature Sensor. 4400 Ohms @ 60 F, 2200 Ohms @ 85 F.
MAF (Mass Air Flow) Sensor. .4 Volts @ idle, 5 Volts @ Full Throttle.
Oxygen (O2) Sensor. .1 Volt Lean Mixture, .9 Volt Rich Mixture.
TPS (Throttle Position Sensor). .54 Volts Idle, ~ 5 Volts Full Throttle.

Sensor Locations

Sensor


Location
Engine Coolant Temperature Sensor. Front of engine, below Throttle Body.
Engine Oil Temperature Sensor. Left rear of engine, just above the oil filter.
Oil Pressure Sender/Switch. Top, left hand rear of engine.
Fuel Quantity Sender. Top of fuel tank, beneath filler pipe escutcheon panel.
MAT (Manifold Absolute Temperature Sensor). Underside of manifold air plenum at rear.
Outside Temperature Sensor. Right side of engine, top right corner of radiator.
In Car Temp Temperature Sensor. Coupe: above left seat near interior courtesy light, Convertible: center of cargo compartment lid.
MAF (Mass Air Flow) Sensor. Front of engine ahead of throttle body.
Oxygen (O2) Sensor. Left side of engine, in exhaust pipe.
TPS (Throttle Position Sensor). Right side of throttle body at the front.


viewtopic.php?f=80&t=728

viewtopic.php?f=55&t=1241&p=3037&hilit=+sensor#p3037
 
Last edited by a moderator:
Back
Top