LT1 and a T56 in a 55 Chevy

It's gettin' there, slowly, but it's gettin' there...
55hardtop%20trunk%20patches%2004s%20Apr%202013.JPG


Need to put the supports for the trunk hinges, and a couple more small patches and then seam sealer and paint and the trunk and mini-tubs are done....
Willy

Home Page for this car....
 
Got the trunk done, will carpet it later:
55%20hardtop%20trunk%2004s%20june%202013.JPG

55%20hardtop%20trunk%2003s%20june%202013.JPG


Started working on the inside floors, some patching/welding, but mostly rust removal, metal prep, then coating with the same bed liner I used in the trunk. Carpeting to follow.
55%20hardtop%20floors%2005s%20june%202013.JPG


This project is moving along much slower than I planned, as my other rigs keep developing problems that need immediate attention, like the leaky water pump on my 55 pickup, and the failed brakes on my 58 pickup. It never ends!

But it's still fun, even if it is occasionally frustrating!

Aloha,
Willy
 
2Loose said:
Indy, I love your upgrade on the speed limit sign! That guy with the blown '55 in that photo is a well known hot rodder and racer from Texas, can't quite come up with a name, but I will....

I was looking back thru the whole thread and when I read your words above, suddenly Carroll Caudle jumped into my head. Is Carroll the one you were trying to remember???

This video should take you back in time!
http://www.youtube.com/watch?v=mwrvQaZ9Jek

http://www.division4halloffame.com/?page_id=233


Attachments

  • CarrollCaudle.jpg
    CarrollCaudle.jpg
    70.9 KB · Views: 175
Family, House projects, travel, my two trucks with tech problems, man, there's always something!

Got the inside floors in pretty good shape, welded up as needed, scrubbed 'em good with a wire wheel, then Oshpho (phosphoric acid) to kill any remaining rust "goblins", then hit needed areas with a good quality Napa seam sealer, let that go off, good and hard, then hit it with a rubber compound of some sort from Rustoleum. Will list it in a future post....
55%20HT%20floors%2009s%20Sep%202013.JPG


55%20HT%20floors%2010s%20Sep%202013.JPG


55%20HT%20floors%2008s%20Sep%202013.JPG


Just covering it up with the rubber compound makes a huge difference!

55%20HT%20floors%2011s%20Sep%202013.JPG


55%20HT%20floors%2012s%20Sep%202013.JPG


There's these access holes in the front seat foot area on both sides, I think originally they had rubber plugs, but think I'll just make cover plates and screw them down with seam sealer around the edges...

55%20HT%20floors%2014s%20Sep%202013.JPG


55%20HT%20floors%2015s%20Sep%202013.JPG


Moving on to the front frame clip and firewall...

55%20HT%20firewall%2003s%20Sep%202013.JPG


A lot of scraping, scrubbing, cleaning needed here, only a little welding, some fresh paint, then I can hang the new front suspension on...

55%20HT%20firewall%2002s%20Sep%202013.JPG


More later, thinking about what kind of motor mounts I want to fab for the LT1, getting close to fitting that and the T56 in place....
Aloha,
Willy

LINK to floor/firewall repair page...
 
Not a lot going on, just scraping and cleaning the frame and firewall, trying to get it ready to paint, and still have to repair the rust inside the air ventilation boxes on each side behind the firewall.
-Willy
59%20hardtop%20front%20end%20010s%20Sep%202013.JPG


LINK to '55 Sport Coupe Homepage
 
a great deal of this hobby involves reconditioning or repairing parts, in many cases because older parts are either no longer easy to locate or too expensive, or in some cases because there's little choice if you have the car and want it to run correctly, yet there's a great deal of satisfaction in having a car you rebuild or re-conditioned, especially when you know its rather unique , and the work you've done makes the car better than it was from the factory in many cases!


related
viewtopic.php?f=87&t=9731

viewtopic.php?f=61&t=9263&p=33409&hilit=sheet+metal#p33409

viewtopic.php?f=50&t=321&p=2933&hilit=machine+shop+hobby#p2933

viewtopic.php?f=60&t=8086&p=28037&hilit=learning+weld#p28037

viewtopic.php?f=60&t=4232&p=11182&hilit=learning+weld#p11182
 

Looking back thru the thread, and it seems you have come along ways! All you lack now is finishing. ;)

 
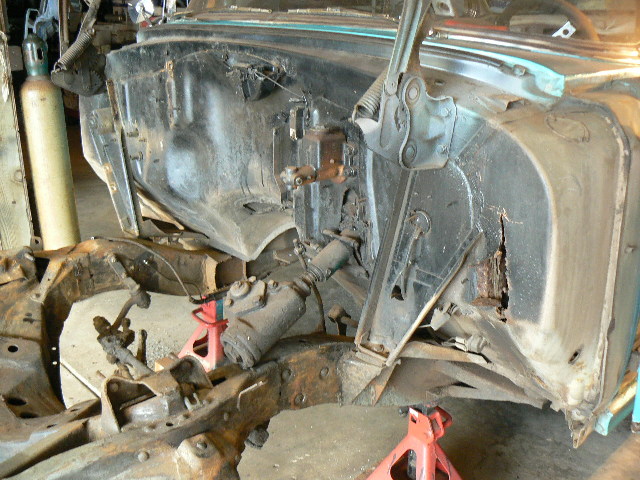
This project had to sit for awhile, some of my other rigs developed problems and needed attention, ya gotta keep 'em on the road and runnin', ya know?

Anyway, dug out all the Heidt's suspension parts that I had sitting on the shelf:
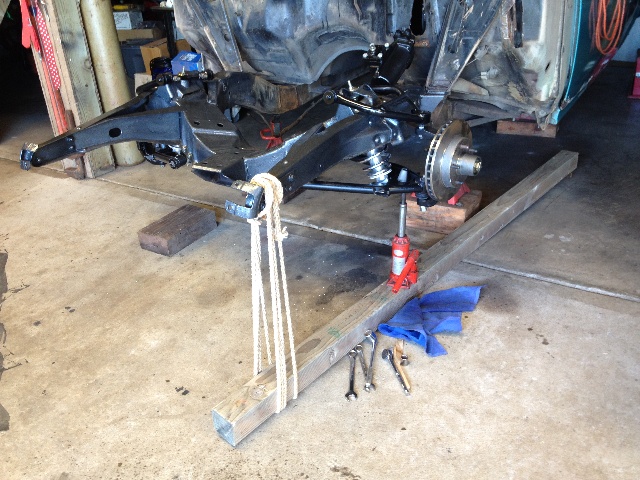
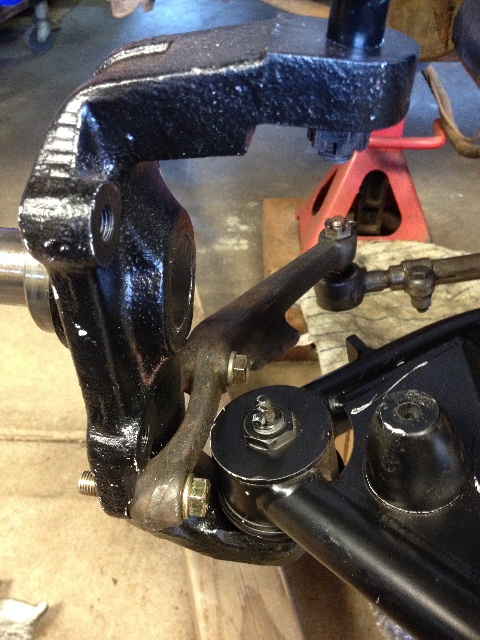
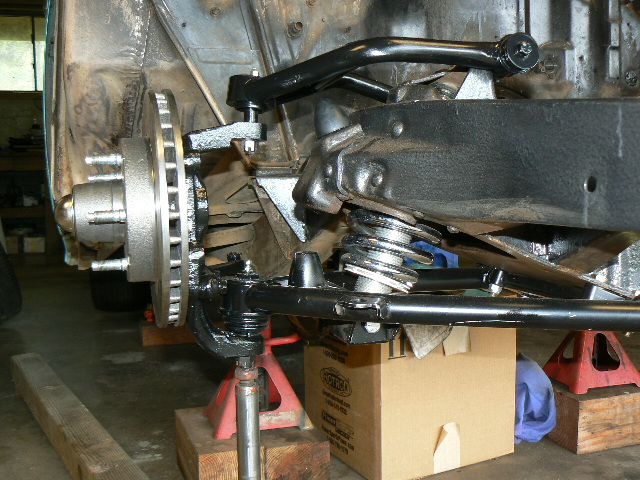
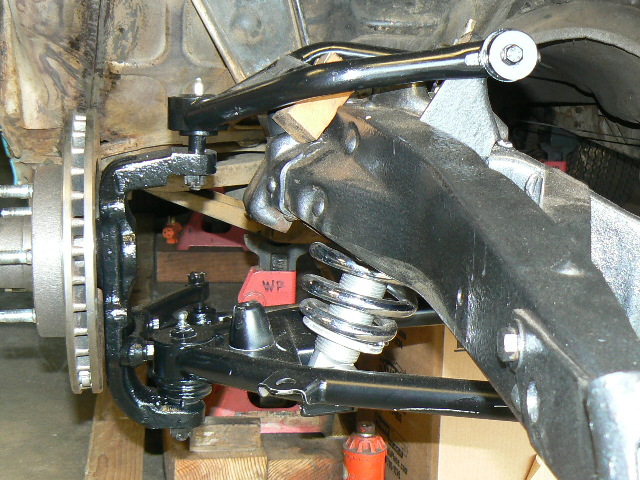
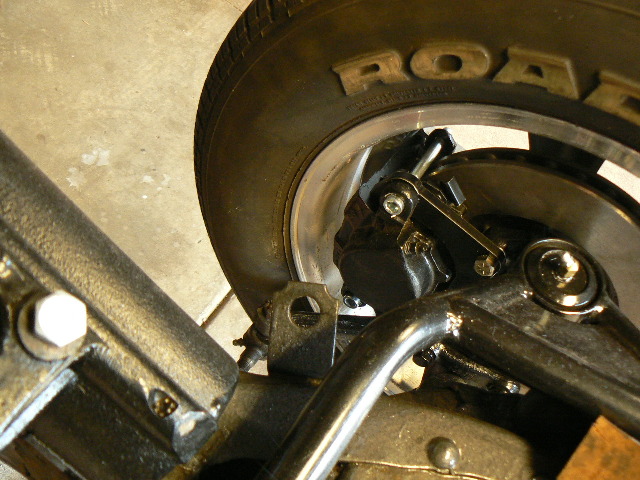
Upper and lower tubular A-arms,
Coil-overs,
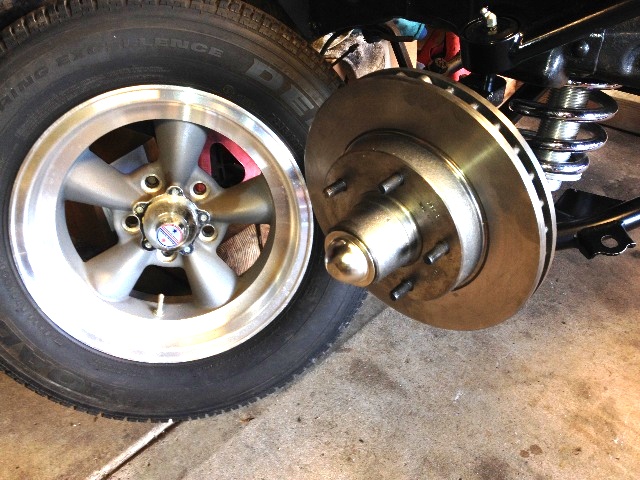
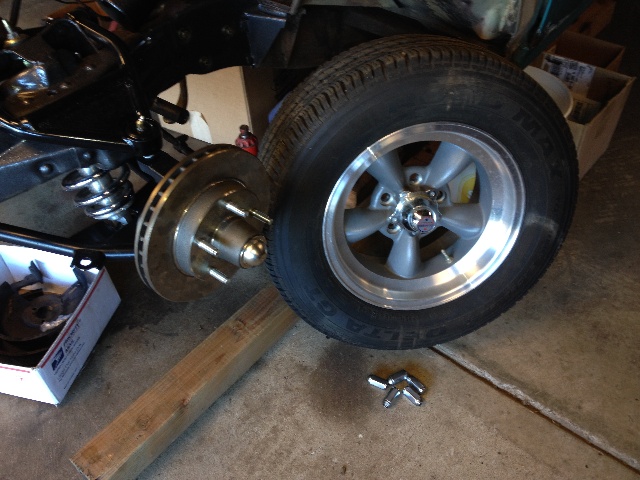
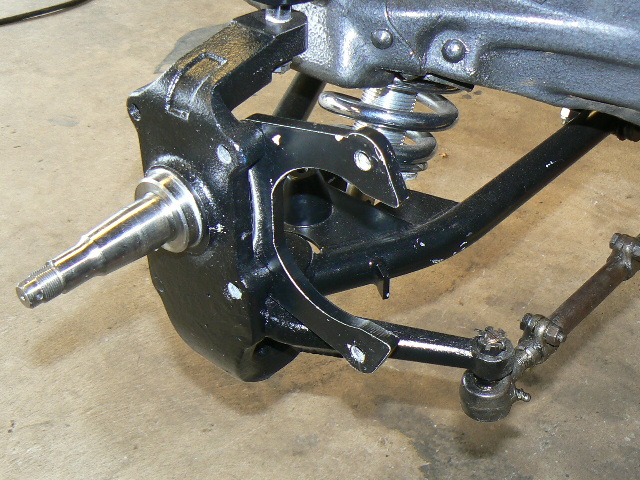
2" dropped spindles,
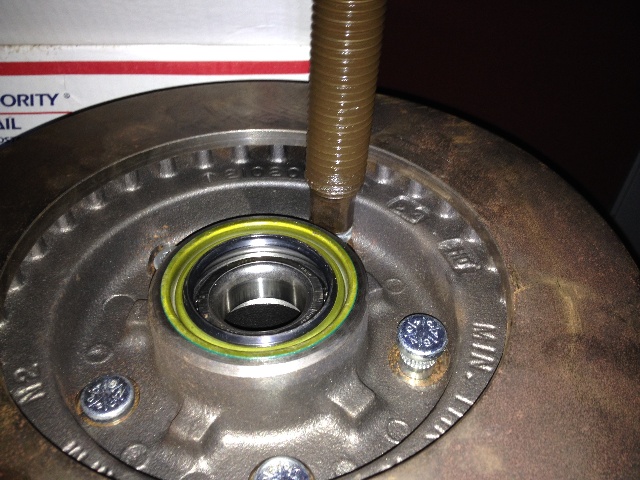
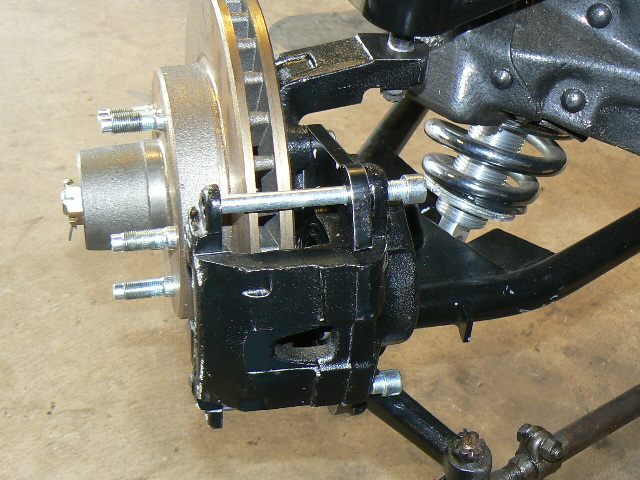
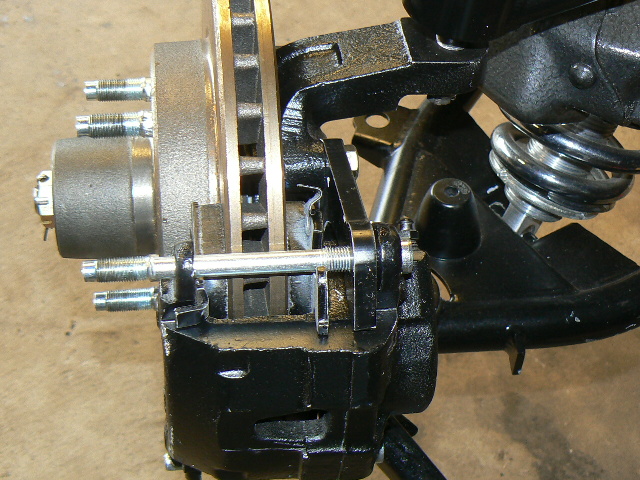
the earlier GM disk brakes for this setup, look like Chevelle to me....

Also picked up a 500 power steering box, and a painted (well, I'm gonna paint it....) Ididit tilt steering column to go with it.

Have the "new style" Earl Williams side mounts, they are very nice!

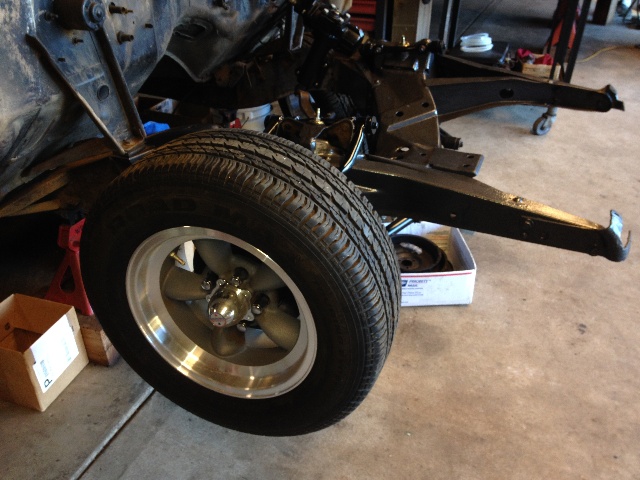
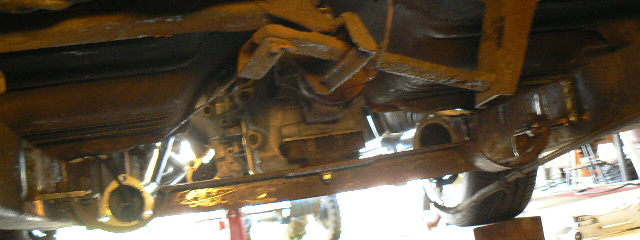
The last time I had it on the road, I had narrowed a 9" and moved the leaf springs under the frame rails in preparation for the "minitubs". I had put "slappers" on the springs to prevent windup, but not have a set of CalTrax to put on. It will take a little bit of modification with the spring setup I have, but they should work well.

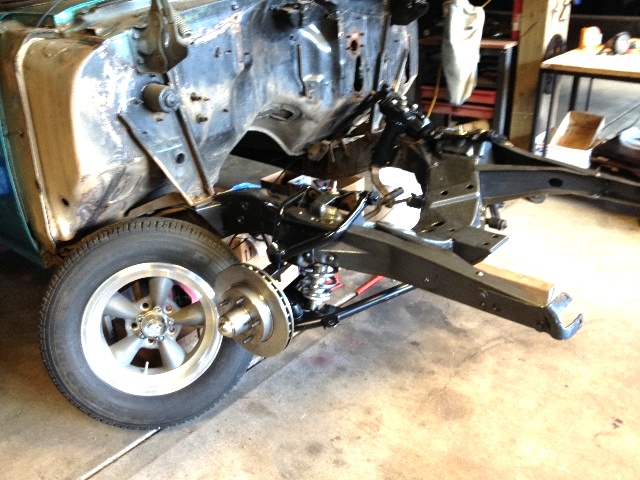
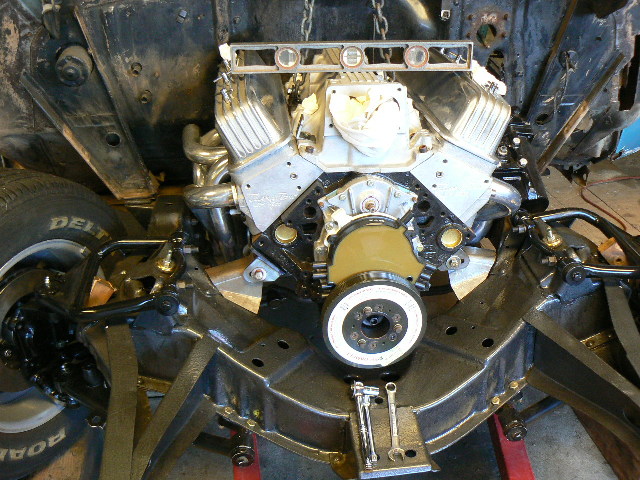
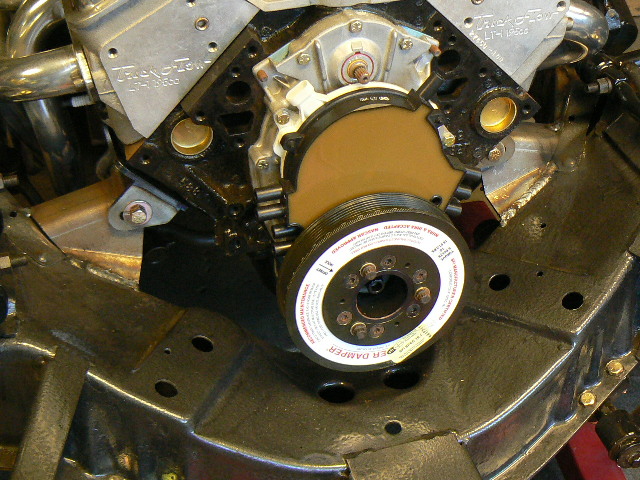
Eventually the body is going to come off, but wanted to have the steering etc. parts all on there when I fitted the LT1 and T56 in, with the Hooker Super Comp headers, and welded in the new motor mounts. Plus I think that tranny is going to hit the floor tunnel, and that might need some modification.

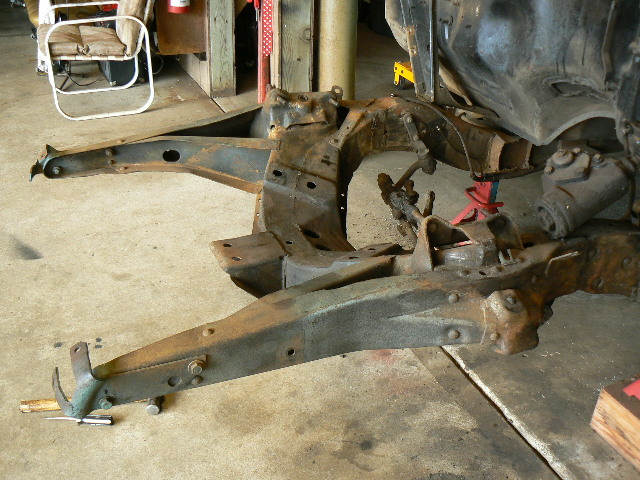
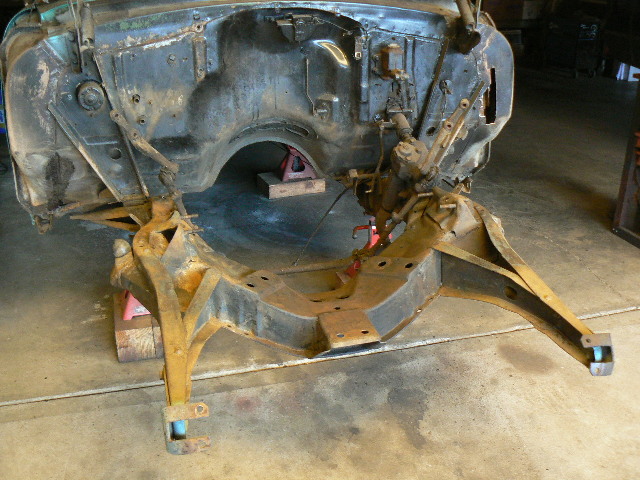
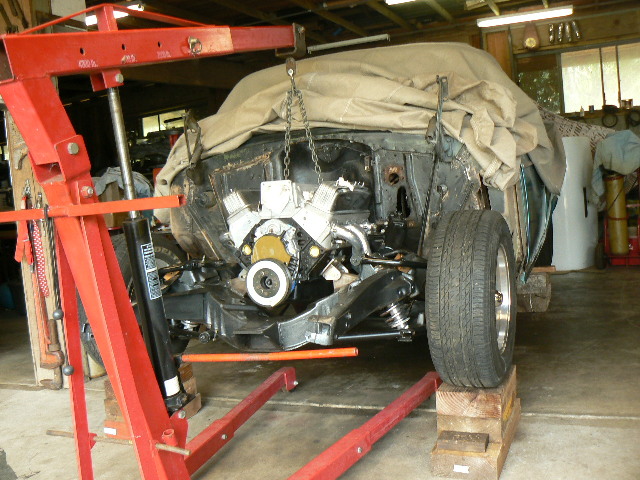
Got the frame well scrubbed in front, and painted it with the Rusteoleum black Hammertone paint, it came out nice. Still needs more paint where the motor mounts will go, but it's a start....

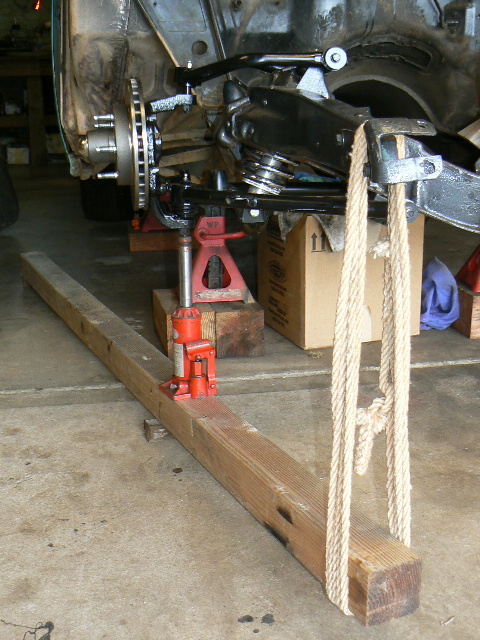
With all that sheet metal gone, no motor, that front end is pretty light. When I jacked the bottom A-arm to compress the coil-overs for installation, had to tie the frame to a 4x4 under the jack! What fun....

55%20HT%20Front%20Rebuild%2010s%20Nov%202013.JPG


I'll post more pix as I get more done here, with the cleaning and painting, where wasn't much to show.

The plan is to install the exhaust system, get all the hangers, etc. that will be needed welded onto the frame, then the body is coming off and the frame will get cherried out.
Aloha,
Willy

Steering and Suspension Page
 
Hard to make any real progress with the holidays, travel, family visiting, all that comes first in our famly, but I have gotten a few things done:
Started bolting on the rest of the suspension and steering hardware, most of it fitted up quite nicely.

Got the steering linkage on and the steering arms were hitting the lower ball joints of the Heidt's assemblies:
55HT%20Front%20End%2015s%20Dec%202013.JPG


Grinding a small relief into the steering arms, just enough to give the necessary clearance, was easy enough to do:
55HT%20Front%20End%2016s%20Dec%202013.JPG


Got some grade 8 bolts with enough unthreaded shank to fill the holes in the steeering arms, then cut off the excess threaded stock flush with the spindles:
55HT%20Front%20End%2017s%20Dec%202013.JPG


The brake rotors came from Heidt's with 7/16" by 1" wheel studs, too small and too short!
55HT%20Front%20End%2018s%20Dec%202013.JPG

55HT%20Front%20End%2019s%20Dec%202013.JPG


Pressed 'em out and pressed in some 1/2" by 1-3/4" wheel studs I got from Moser:
55HT%20Front%20End%2021s%20Dec%202013.JPG

55HT%20Front%20End%2022s%20Dec%202013.JPG


Bolted up nice and snug now!
55HT%20Front%20End%2020s%20Dec%202013.JPG


Happy New Year to all!
Willy
 
Its always nice to see progress being made and posting those photos are a huge help in understanding what your working on obviously
 
Had to put the new upper A-Arm rubber bumpers in place in the frame, so had to jack up the suspension to do that, hauled out the 4x4, jack and rope again....
55HT%20Front%20Brakes%2001s%20Dec%202013.JPG


and stuck that rubber bumper in there....
55HT%20Front%20Brakes%2002s%20Dec%202013.JPG


Didn't want that bumper sitting crushed for long periods of time while I worked on the rest of the car, so stuck a piece of wood in under the upper A-Arm to "take a load off...."
55HT%20Front%20Brakes%2004s%20Dec%202013.JPG


Fitted the caliper mount plates onto the spindles, they can be mounted on the front as easily as on the back with this particular setup, but I've always put them on the back...
55HT%20Front%20Brakes%2005s%20Dec%202013.JPG


Fitted the calipers on, with the bleeder screw facing up....
55HT%20Front%20Brakes%2006s%20Dec%202013.JPG

These are spec'd as 10.5" '79 - '81 Chevelle rotors and calipers, easy to get parts for...

Loaded in the brake pads....
55HT%20Front%20Brakes%2007s%20Dec%202013.JPG


And bolted up the 15" Torque Thrust wheels, they fit just fine, plenty of clearance!
55HT%20Front%20Brakes%2009s%20Dec%202013.JPG


55HT%20Front%20Brakes%2008s%20Dec%202013.JPG


So now I have to bolt the tranny up to the motor, and fit it in place and weld in the new side motor mounts.
Aloha,
Willy


LINK to my web page....
 
No welding, everything pretty much bolts into place, some minor fitting of parts here and there, nothing major.

I wanted all this in place when I put the motor/tranny in, to weld in the new side motor mounts, with the headers on to make sure it all fits properly. The tranny is '93 T56, and I have the parts to move the shifter to a forward position so I can keep my bench seat in the '55. I might have to split and open up the floor over the tranny to give it more room, am waiting to see about that when I put it in.

Then fit/weld in hangers for the exhaust system, try to get everything I need done to the frame, then the body comes off and the frame gets stripped and completely refinished.
Then it all goes back together, with various parts painted, plated, as needed for the final assembly.
Then the rewire job, I have an American Autowire kit, learned a lot when I rewired the '55 gasser, so hopefully this job should go a little easier then the gasser did.
then the paint and upholstery....
I am aiming for initial motor startup in 2014, even though I don't expect to have it all done until sometime in 2015.

Happy New Year to all....
Willy
 
its always amazing how easy it looks when some one with a bit of experience tackles a job like that, posting the pictures, and knowing whats too be done!
Especially when, compared to the out right panic that overwhelms , grips and seems to strangle most guys doing similar jobs the first time,
when they have zero idea what they are getting involved in.
it obviously helps to have a good supply of cash for parts and tools but a good deal of research into whats required and joining a few auto clubs in your area so you can get experienced help is always a good way to learn new skills
 
My problem is now that I'm "retired", I've taken on probably too many projects! Problems have developed in both my '55 gasser, and my '55 4x4 truck, both of which I need to keep on the road, and they are supposed to be "DONE!" And my '58 pro street Chevy truck, which I put on the road in '98, and gets daily use, always seems to need attention somewhere, just redid the brakes and put in a new exhaust system!

And I'm a life long two wheeled addict as well, I have a 2010 HD Dynaglide for daily use, but am working on a complete rebuild of a 60's panhead chopper, a "new" build of a '59 panhead "local boy cruiser" style, a rebuild/repair of a '91 HD Dynaglide, and a new build of a blown 88" STD built HD style V-twin drag bike, using an early Jerry Magnuson 80" roots blower.

My wife thinks I should part with some of my "stuff"...
But that would be like selling off one of my kids, I do love 'em all....
So, 2014 will continue to be a busy year....
In Hawaiian:
Hau'oli Makahiki Hou
Willy
 
Been slow processing my pix and getting my web pages updated. Here's the motor "dummied up" in the car, Earl Williams side mounts in place, Super Comps fit nicely, today installing the cross-member for the tranny support....
55HT%20Motor%20Install%2034s%20Jan%202014.JPG

Got a bunch more pix on my web page HERE....

With the LT1 distributor in front, I tucked it up pretty snug against the firewall. I'll be modifying the firewall to give me plenty of room to get the valve covers off, and will be checking clearance with the brake master cylinder.
Aloha,
Willy
 
Not much to add, the motor mounts are partially welded in place, will weld some more on them after pulling the motor/tranny back out:
55HT%20Motor%20Install%2039s%20Jan%202014.JPG

Meanwhile I cleaned up the old tranny mount that was in this car and located it for the T56, and welded it in place. This car had a "wheeezy" 350/350 combo leakin' all over the place when I got it, sold that for $350 to a guy who is now rebuilding it! The exhaust openings in this one just happen to match up with the Hooker collectors quite nicely!
55HT%20Tranny%20Mount%2001s%20Jan%202014.jpg

I have a good Strange Engineering 3-1/2" driveshaft that had been in my '55 gasser, but I broke the front U-joint at the track and messed up the front of that one. With the T56 I can shorten it a little and weld on a new front yoke and be good to go!!!
Aloha,
Willy

My Webpage
 
Just a couple of pix, crawled under the car and took one of the tranny mount. A cobbled up pos the previous owner put in, but it's actually pretty solid, so I cleaned it up a bit and put it back in service under the tail of the T56 in my '55....

55HT%20Motor%20Install%2055s%20Jan%202014.JPG


Now I gotta patch up a Strange Engineering driveshaft I broke in my '55 "gasser", and shorten it to fit in this rig...

55HT%20Motor%20Install%2054s%20Jan%202014.JPG


After the brackets for the exhaust system are welded in place on the frame rails, the motor is coming out, and the body is coming off....

55HT%20Motor%20Install%2056s%20Jan%202014.JPG


And, YUP, I'm still havin' fun....
Aloha,
Willy
 
Back
Top