- Home
- Forums
- Technical Articles/muscle cars
- American Muscle Cars
- Engine: Repairs , Modifications , Trouble Shooting
You are using an out of date browser. It may not display this or other websites correctly.
You should upgrade or use an alternative browser.
You should upgrade or use an alternative browser.
LT1 and a T56 in a 55 Chevy
- Thread starter 2Loose
- Start date
2Loose
reliable source of info
These are the accessories I have, but they do not fit on the new motor...
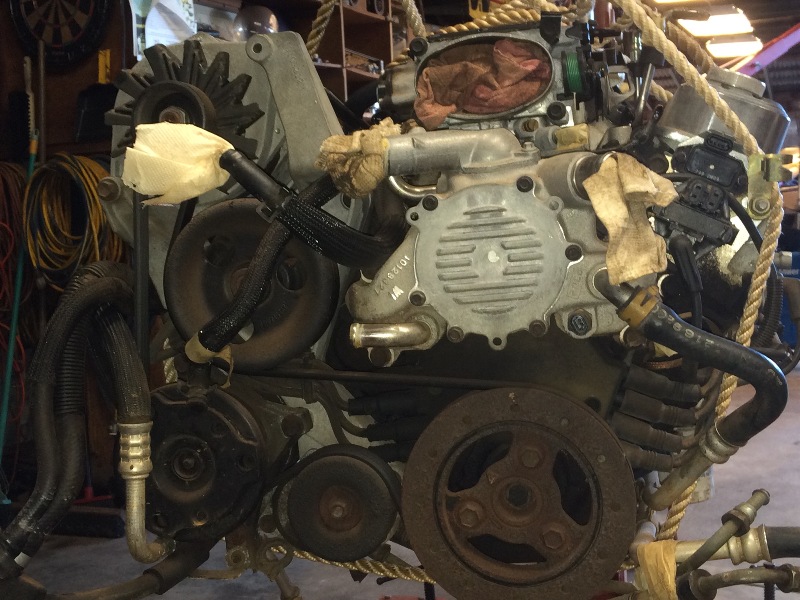
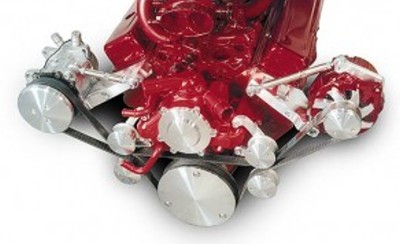
The AC compressor hits the new motor mount on the right side, and the alternator hits the right side valve cover. Looking at alternatives, this setup from March Performance (MP) looks like the best fit...
I have a discussion going with MP to try to get a good fit for my setup.
Aloha,
Willy
The AC compressor hits the new motor mount on the right side, and the alternator hits the right side valve cover. Looking at alternatives, this setup from March Performance (MP) looks like the best fit...
I have a discussion going with MP to try to get a good fit for my setup.
Aloha,
Willy
8
87vette81big
Guest
Another option is to build your own Accessory Mounting bracket Willie.
A Large Modular design made from 1/4" -1/2 " 6061 T-6 / T-7 Aluminium plate.
Like a Race Car Front Motor Plate Layout.
Not usually done in the Hotrod World.
But it is done that way Drag Race World.
Your Labor is Free.
A Large Modular design made from 1/4" -1/2 " 6061 T-6 / T-7 Aluminium plate.
Like a Race Car Front Motor Plate Layout.
Not usually done in the Hotrod World.
But it is done that way Drag Race World.
Your Labor is Free.
2Loose
reliable source of info
My buddy and I spent some time looking at various ways to do it, but as I have a couple of other projects I want to get to, and get this one out of the shop, I've opted to buy the brackets from someone else and just get it finished.
Unfinished projects (mostly unstarted, just collecting parts):
'57 Olds Super 88 hardtop custom cruiser
'70 Buick Skylark pro streeter
'59 Harley Davidson 93 ci hot rod
'60 Harley Davidson 74 ci "Local Boy Hawaiian Style"
'61 Harley Davidson 80 ci blown street digger
'62 Harley Davidson 60's chopper resto, I did this one
originally in the late 60's
And today is my 74th b'day, so how many more years do
I have left??
Aloha,
Willy
8
87vette81big
Guest
Happy Birthday Willie !
You will make it to 101.
You will make it to 101.
2Loose
reliable source of info
The March "Outward Mount" setup shown above, for the LT1 motor, uses the Corvette version of the crank balancer (or damper), as it is mounted further forward than the Camaro version is. Mine is the ATI Super Damper Camaro version, but I've learned from ATI that the only difference is the flanged hub itself, as shown below, so I have a Corvette version of the flanged hub on order to replace my Camaro version:
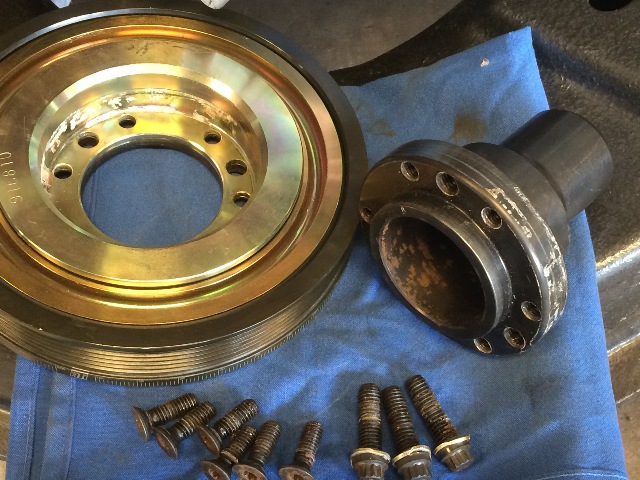
So I need to swap out that flanged hub for this longer Corvette version when I get it:
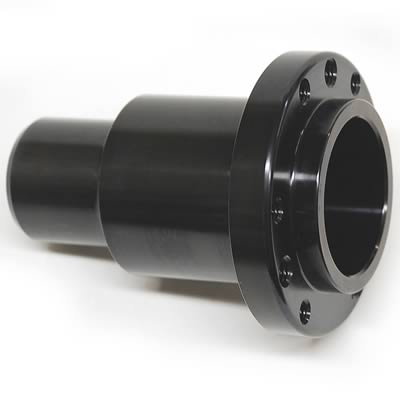
And according to both March Performance and ATI Racing the balancer will work with the new March accessories system.
Aloha,
Willy
More here...
scroll down
So I need to swap out that flanged hub for this longer Corvette version when I get it:
And according to both March Performance and ATI Racing the balancer will work with the new March accessories system.
Aloha,
Willy
More here...
scroll down
8
87vette81big
Guest
Good Deal Willie !
8
87vette81big
Guest
My Pontiacs are going back together this year all CASH $$$$ Willie.
No Credit cards.
No Cash & I wont buy it.
Have lots of parts like You. Been collecting for years.
C4 Corvette build later on.
No Credit cards.
No Cash & I wont buy it.
Have lots of parts like You. Been collecting for years.
C4 Corvette build later on.
2Loose
reliable source of info
One of my close buddies, "Poncho", has collected examples of various Pontiac 60's muscle cars, starting with a seriously hot rodded '63 Le Mans, including GTO's, Judges, etc, and as he runs a small husband/wife body shop, he gets them in poor shape and cherries them out. He's not a computer guy, so I need to get photos of his collection and post them somewhere for the rest of us to enjoy, it's a serious collection of great Poncho stuff...
He says it's his "retirement fund"...
Willy
He says it's his "retirement fund"...
Willy
2Loose
reliable source of info
March Performance not helping me much with this order. Just want brackets and adjusters and idlers, they want to sell me new accessories when mine will work just great! They want to sell me pulleys when I have the right pulleys on all the accessories. I just need brackets and tension adjustors and idlers and am having a difficult time getting them to specify just that.
Let's see what happens. My opinion of their customer service at this point is pretty bad!
Aloha,
Willy
Let's see what happens. My opinion of their customer service at this point is pretty bad!
Aloha,
Willy
8
87vette81big
Guest
My Friend Bob is a really good Machinist Willie.March Performance not helping me much with this order. Just want brackets and adjusters and idlers, they want to sell me new accessories when mine will work just great! They want to sell me pulleys when I have the right pulleys on all the accessories. I just need brackets and tension adjustors and idlers and am having a difficult time getting them to specify just that.
Let's see what happens. My opinion of their customer service at this point is pretty bad!
Aloha,
Willy
Spring is coming. Hotrod Race season.
$$$ for his own projects.
If you drawup the Blueprint maybe he can machine up what you want.
Give him 2-3 weeks to complete.
2Loose
reliable source of info
Many Thanks for that offer,
Went and looked at the different frontal vertical indexes I'd need to establish to produce a decent drawing of where the mounts would fit on the heads, both sides different, and the block, also different, with dimensions of the products itself, the AC comp, the PS pump, and the alt. and have them all line up with the incoming Corvette LT1 pulley, which won't be here for two weeks yet, so went ahead with March....
Kept working with March Performance, got the order pared down to the essentials, no pulley covers, no water pump cover, just functioning parts only. Choices on finish were clear over brushed aluminum, chrome, and black. I went for black, as the final color scheme for this car is red/black. Anything shiny will get color sprayed over it. Anyone know anything about these plastic sheets they put over metal? Seen them do whole cars? Maybe do my alternator and any shiny parts? Red or Black, of course. My favorite colors.
Here's what I have coming:
20931-08 alternator bracket
20932-08 ac bracket
20933-08 ps bracket
20934-08 idler bracket
20140-08 alternator relocator bracket
208a-08 alternator pulley
618-08 ps pulley
P410 polished ac compressor
P315 ps pump
420-08 reservoir
P3222 hose kit
The hose kit should attach to the reverse flair connections on the 500 steering box, and cut and fit fittings on the other end to the pump, and the reservoir of PS oil.
I'll use my '93 Camaro alternator, and will find out how well their PS pump and their AC compressor work. I like to use Vintage Air, have had good luck with them in the past, so will check how their stuff matches up with the AC compressor I'm getting from MP.
Challenges, ahh yes, I love 'em...
Willy
2Loose
reliable source of info
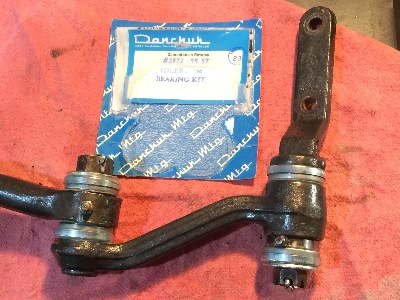
Removed the steering idler arm assembly and took it apart...
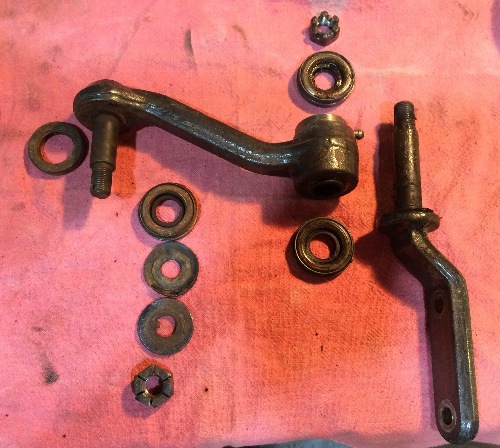
And found that the "upgrade" ball bearings have been added, replacing the OEM bushing system. But the bearings are worn, dry, and have not had grease in some time, so a new ball bearing set is on order from Danchuck, should be here any day now...
In the meantime, I need to drill and tap to relocate that grease fitting where it will not hit the #4 header tube...
2Loose
reliable source of info
Yeah, Grumpy, I seem to keep running into that, think I resolved the grease fitting location though, check this out....
The parts from Danchuck arrived, they are almost identical to the old parts, so the 4 inserts in the new kit will not be used, as the old ones are still in good shape and are pressed into the steering arm and the drag link.
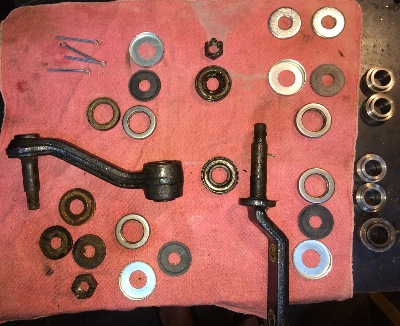
The one exception is that the bearing adapter on the bottom of the idler arm at the frame has the grease zerk on it, the new parts do not, but this grease zerk hits one of the header pipes, as I mentioned above, so I was able to press it out, rotate it 90 degrees or so toward the motor so it would clear the header pipe, and press it back in....

Cleaned up, fresh grease and new bearings on the frame mount end, now to do the drag link end....
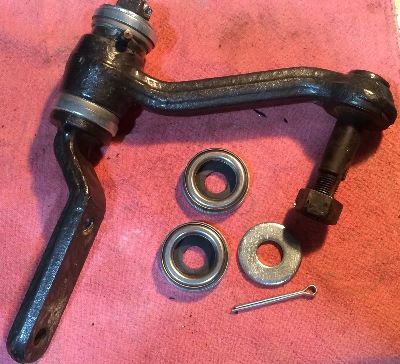
And check to make sure that grease zerk clears the header tube....
And check if I can actually get a grease gun onto that fitting....
I had an argument with myself over where to orient that grease fitting for best access,
Didn't want it straight forward, as oncoming debris would be hitting it, so off to one side
seemed the best, ok, left side or right side, flipped a mental coin and it came up "heads", left side, towards the motor, we'll see how well that works out....
More Pix Here....
More Later...
Aloha
Willy
The parts from Danchuck arrived, they are almost identical to the old parts, so the 4 inserts in the new kit will not be used, as the old ones are still in good shape and are pressed into the steering arm and the drag link.
The one exception is that the bearing adapter on the bottom of the idler arm at the frame has the grease zerk on it, the new parts do not, but this grease zerk hits one of the header pipes, as I mentioned above, so I was able to press it out, rotate it 90 degrees or so toward the motor so it would clear the header pipe, and press it back in....
Cleaned up, fresh grease and new bearings on the frame mount end, now to do the drag link end....
And check to make sure that grease zerk clears the header tube....
And check if I can actually get a grease gun onto that fitting....
I had an argument with myself over where to orient that grease fitting for best access,
Didn't want it straight forward, as oncoming debris would be hitting it, so off to one side
seemed the best, ok, left side or right side, flipped a mental coin and it came up "heads", left side, towards the motor, we'll see how well that works out....
More Pix Here....
More Later...
Aloha
Willy
Last edited:
2Loose
reliable source of info
Update,
Discovered that the drag link at the idler arm does not have a grease fitting, so am drilling and tapping for that, here's some pix....
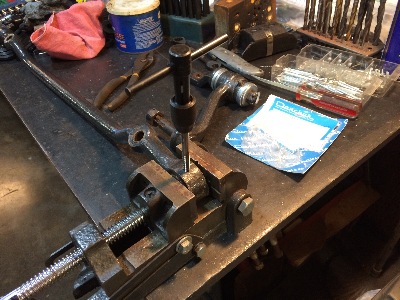
Aloha
Willy
More Pix Here....
Discovered that the drag link at the idler arm does not have a grease fitting, so am drilling and tapping for that, here's some pix....
Aloha
Willy
More Pix Here....