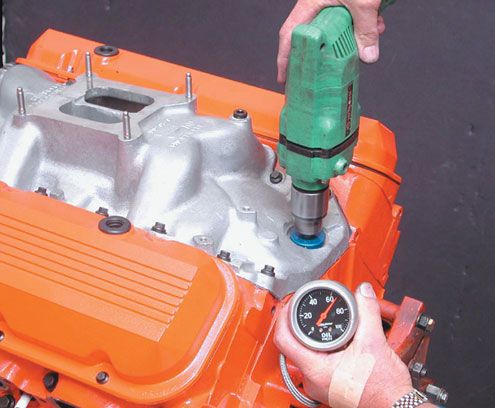
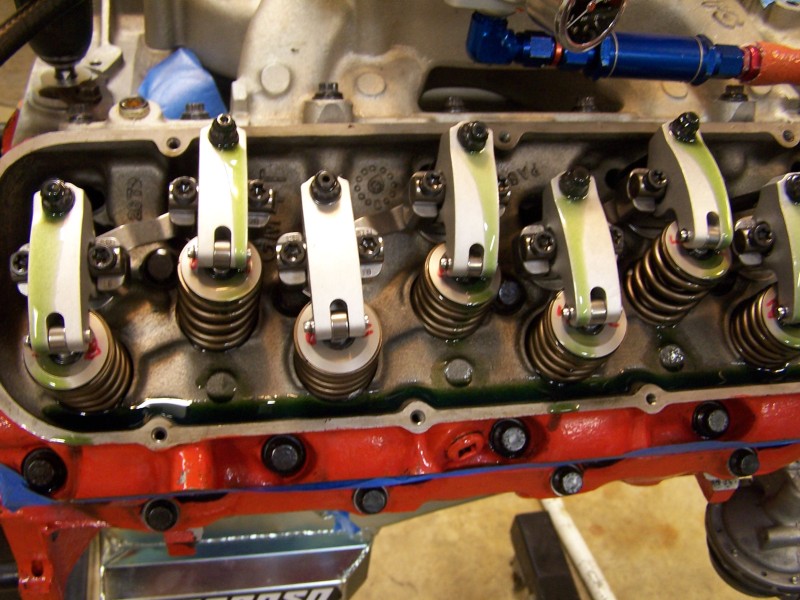
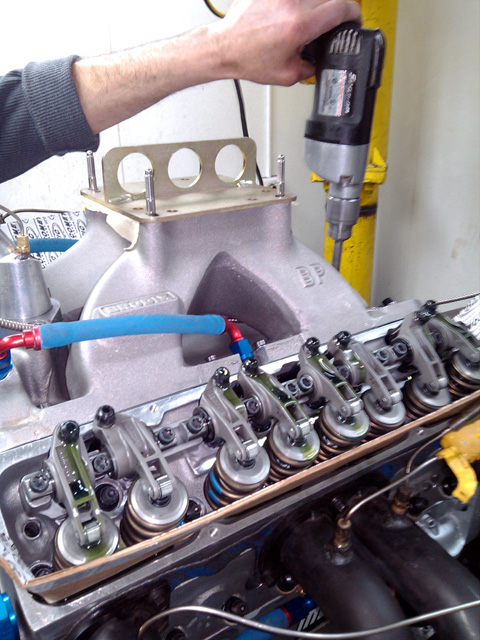
ITS HIGHLY RECOMMENDED that you pre-prime the oil system filter and oil passages on a new engine, with an oil pump primer tool, that has the proper configuration, while you rotate the engine slowly by hand ,and ideally at least try to get the rockers correctly adjusted,during the process, until all the push-rods are flowing oil to the rockers, and lifter lash clearance's or lifter preload, look's correct and that you verify oil flows from each rocker, the simple pre-check can save you from an in creditable amount of problems if done correctly, and if you pay attention to indications something may be binding or clearances or the valve train geometry are not right.
OBVIOUSLY valve train,clearances and valve train geometry, and push rod length etc. should have been verified long before this point.
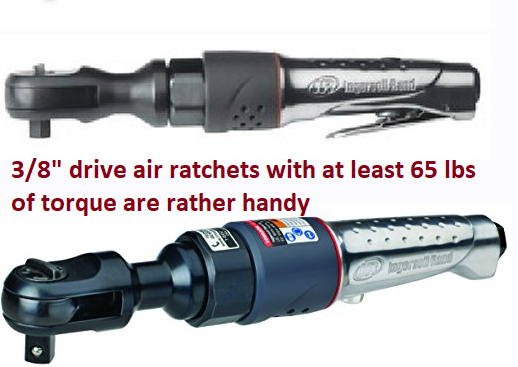
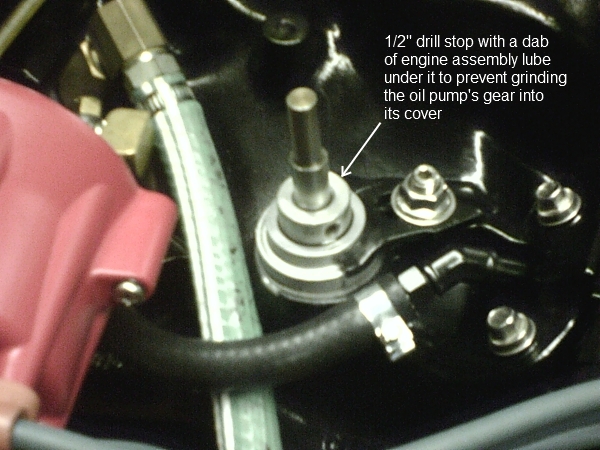
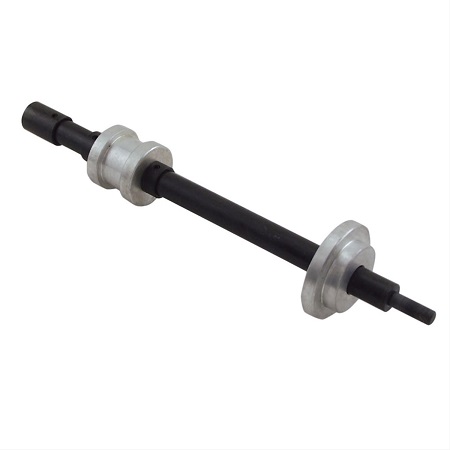
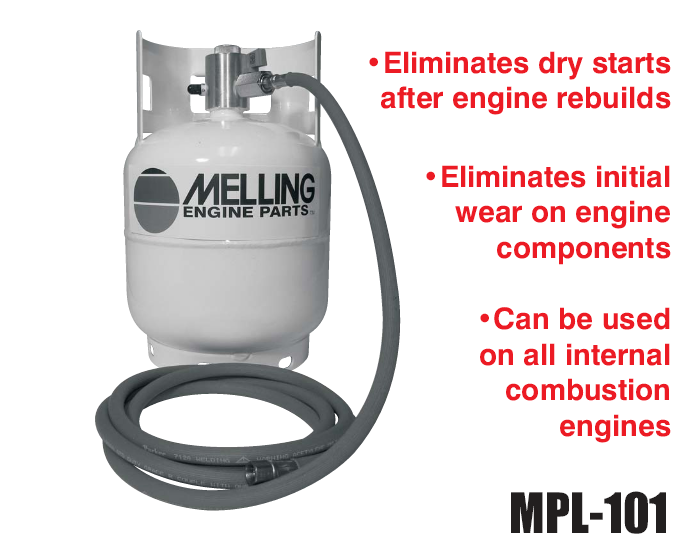
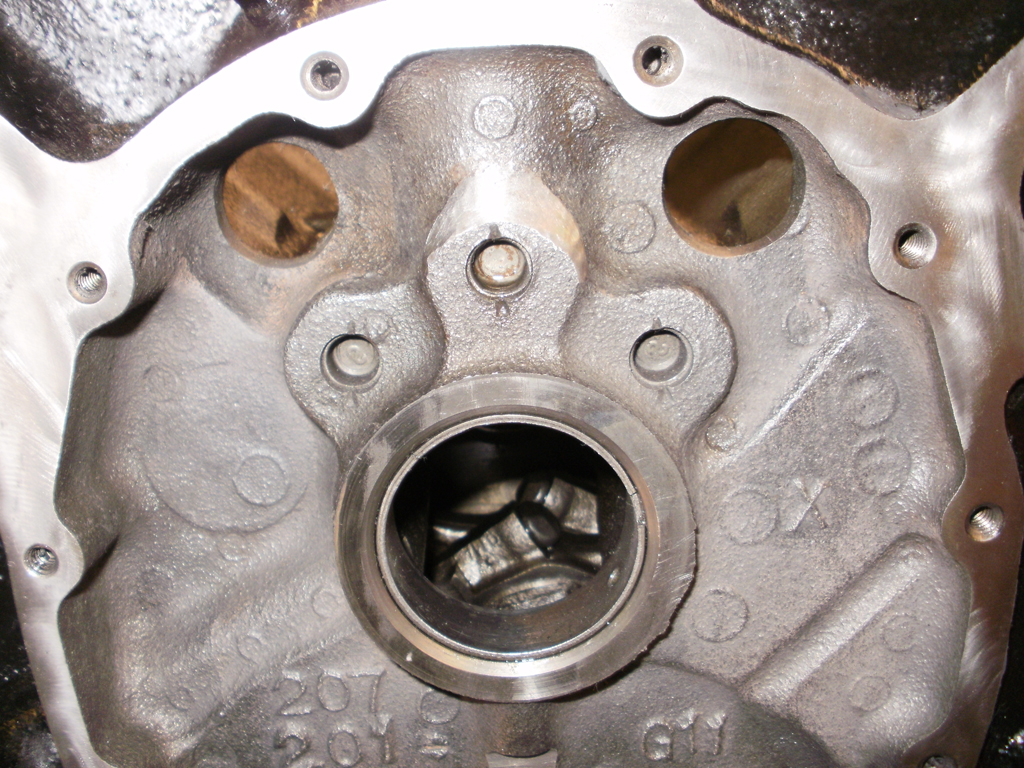
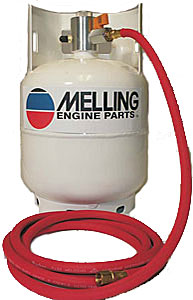
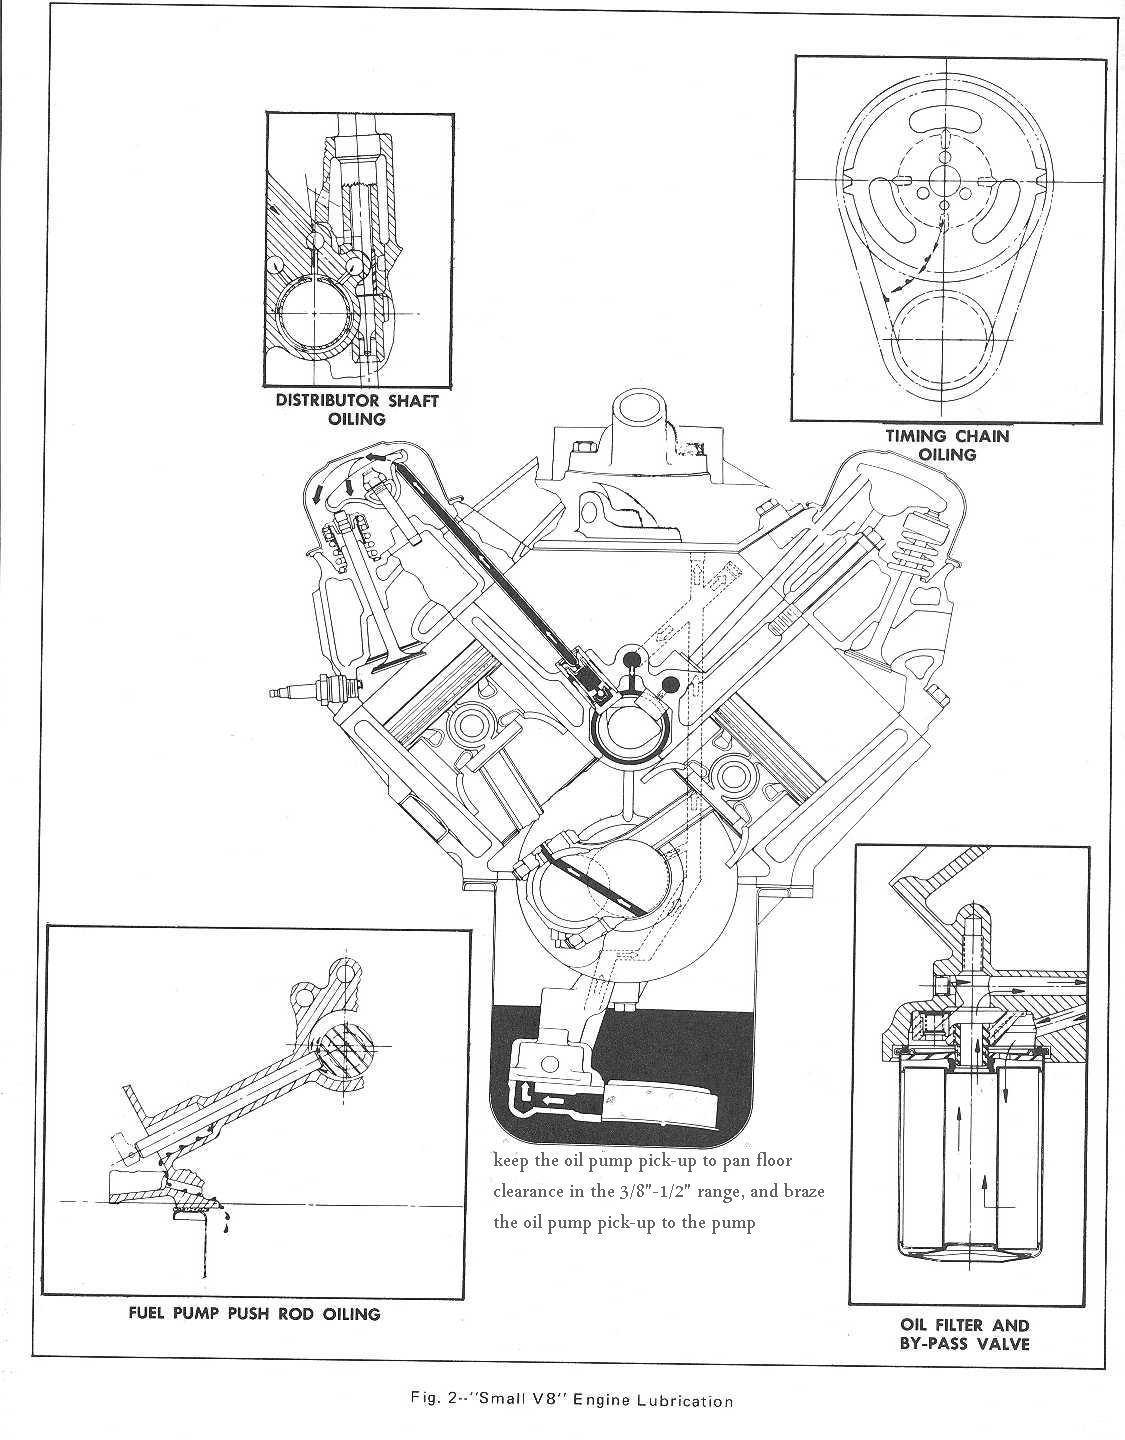
remember the lower distributor housing forms the wall of one oil passage, without it in place only half the lifters get oil , so your better off using an oil pump priming tool with the lower oil band support or one made from and old distributor with the gear teeth ground off the lower gear, and electric drills tend to over heat under the loads so use an air ratchet and a brazed on socket on the upper shaft on the modified distributor housing,to spin the priming tool if you have the option
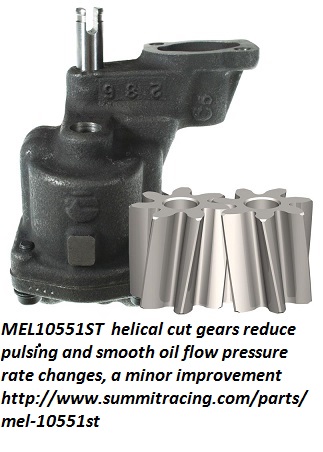
adding "ST" to the end of the existing melling part number denotes the helical gear set option
watch the video
http://www.youtube.com/watch?v=YdIGZ-tV ... re=related
ACCORDING TO CRANE CAMS
"
Big Block Chevrolets have an oil-priming idiosyncrasy. When priming a Big Block Chevy with a drill motor and
priming tool, it is often necessary to prime for as much as 20 minutes (while rotating the engine) to get oil to all
of the lifters and rockers. It is advisable to prime these engines with the valve covers removed so you can
check to see oil coming out of all of the rocker arms before firing the engine. This last step is advisable on all
engines, but particularly on Big Block Chevrolets"

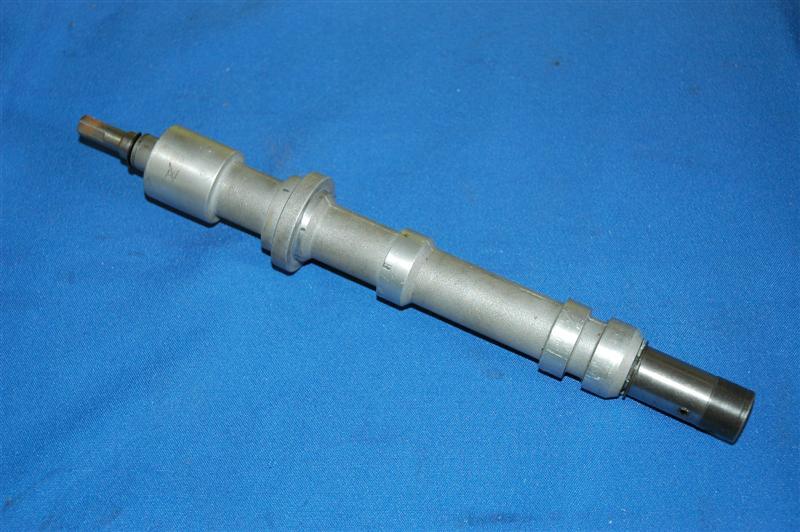
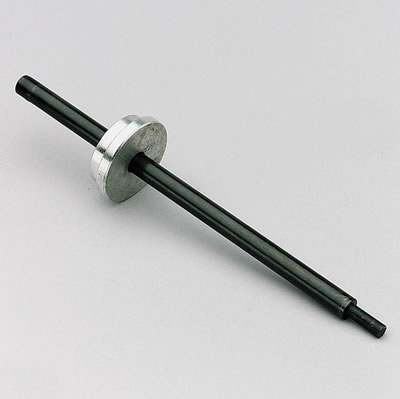
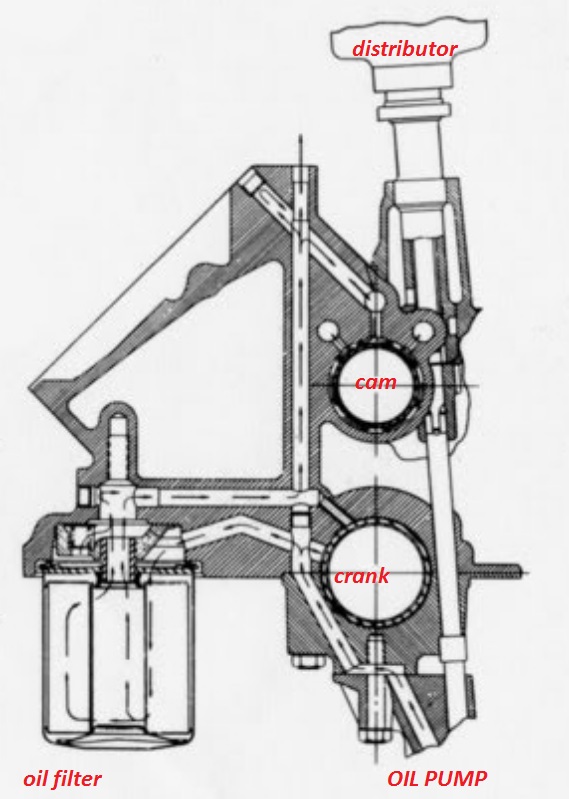
this type above is nearly WORTHLESS, as it leave one complete oil gallery passage open and UN-pressurized, as the seated distributor shaft forms one wall of the lifter gallery oil passage on one bank
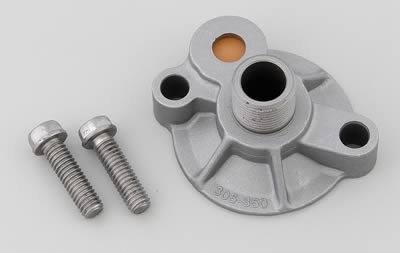
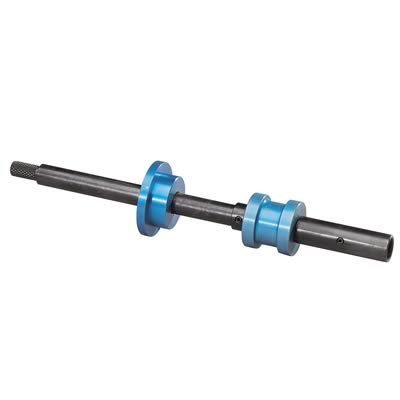
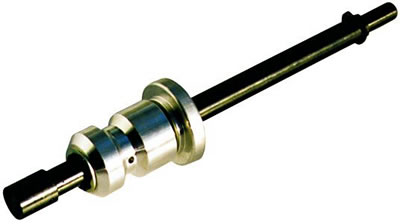
this type bellow works just fine
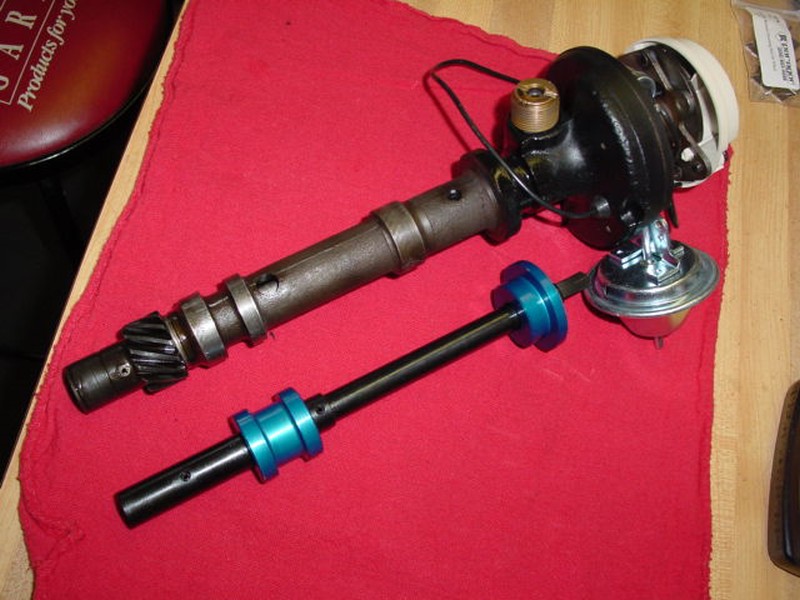
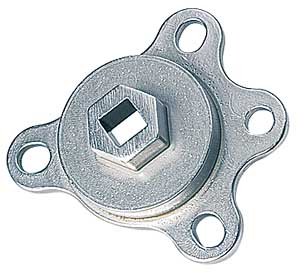
the correct oil pump primer tool duplicates the distributor body and seals the oil passages

http://store.summitracing.com/partdetai ... toview=sku
they are dirt cheap or you can make one from and old distributor
be sure you turn the engine over at least two full turns while applying pressure to and lubing the oil passages to get full access to all the lifters,rockers,bearings etc.
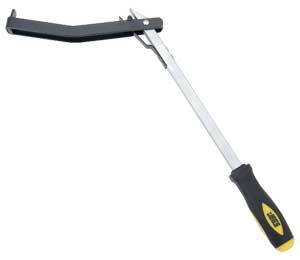
many guys use a drill to spin the primer tool but thats a good way to burn up a drill, an air ratchet works better in my experience
"Why is the first one worthless?"
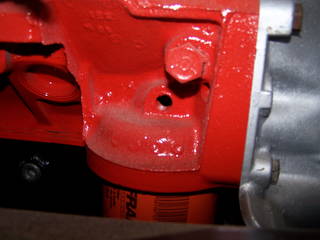
LOOK CLOSELY, the top primer has no collar to keep the drive shaft centered over the pump so it can slightly mis-align and bind, Ive seen them bend the pump drive if guys get them mis-aligned and just throw a high torque 1/2 drill on and spin them without checking, the lower primer has an alignment collar that tends to keep things from breaking,,yes both have the alignment collar for the manifold but only the botom one has the lower block support and alignment sleeve that forms the lower oil passage wall, and the drive collar that assure the oil pump drive itself is lined up correctly,keep in mind,the bottom of the stock distributor forms one wall of the main oil passage to one side of the engine, without that passage wall in place you get no oil pressure to one side and darn little to the other due to the HUGE leak the missing oil passage wall presents, the lower distributor is temporarily replaced with that extra aluminum on the lower primer to simulate the correct oil passage config....THATS WHY!
viewtopic.php?f=54&t=615
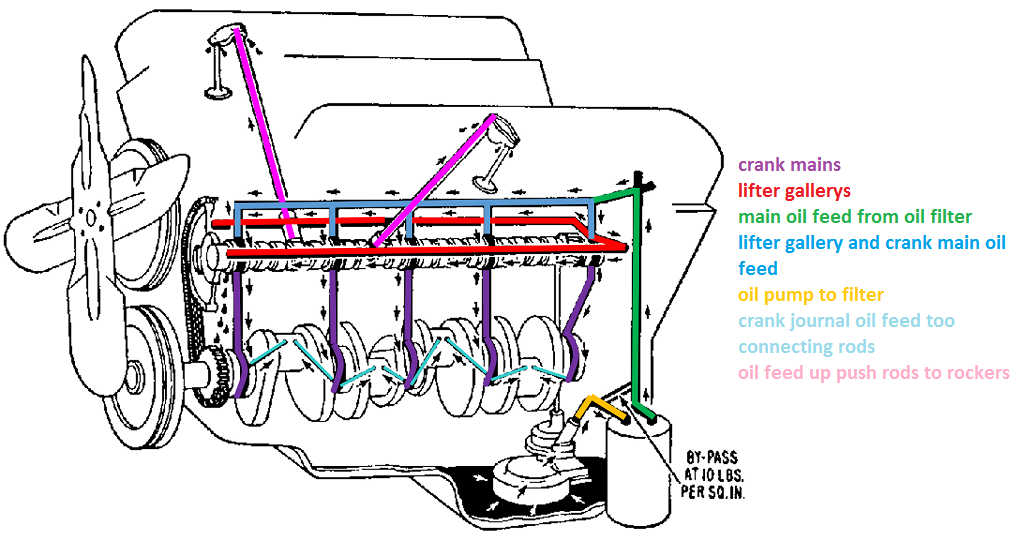
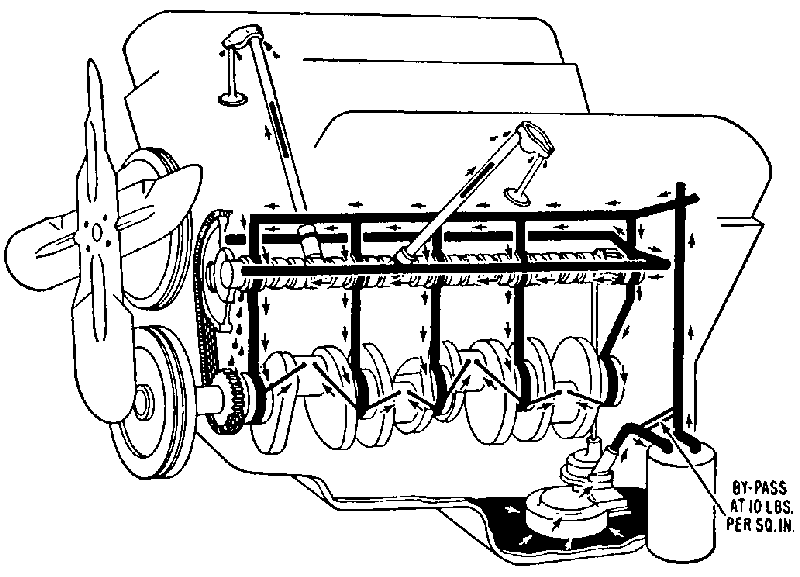
you MUST rotate the engine thru two complete revolutions (720 DEGREES)MINIMUM, and SEVERAL TIMES THAT MANY TIMES IS ADVISED before every oil passage in every part is fully seeing the oil flow from the pump! that one lifter/pushrod may be in the part of the 720 degree cycle where little or no oil supply feeds it, try rotating the engine bye hand with a breaker bar slowly, 720 degrees while a buddy applies full oil pressure with the drill on the oil pump primer tool, before worrying about it!a rod driving the oil pump may never build sufficient oil pressure to get oil to the rocker arms, because the distributor shaft forms part of the wall of the oil feed gallery, an oil pump primer tool must look like this, having the lower distributor housing to seal the passage so that pressure can build through the whole system
putting a load on the rings and bearings with no oil flow or oil pressure to replace the assembly lube that's most likely being forced off those surfaces during those first few seconds, and yes for a short time,yes you can do it that way but there is less stress on the engine doing it CORRECTLY by pre-filling all the oil passages and oil filter with oil and getting oil pressure to the bearings the instant the engine starts turning! theres lots of things that you can GET AWAY WITH,WITHOUT OBVIOUS DAMAGE, but doing things CORRECTLY in most cases is by far the better plan,look Im not saying you CAN,T just hit the starter and spin the engine with the coil wire removed till you read oil pressure,BUT, I am saying that there are valid reasons for doing it correctly (PRE LUBE,& prefill the lube passages) that might not show up instantly but do show up under long term evaluation of the results
read thru these threads
http://www.babcox.com/editorial/ar/ar20128.htm«
http://www.thirskauto.net/BearingPics.html
viewtopic.php?f=54&t=4537&p=13350#p13350
viewtopic.php?f=54&t=1280&p=2741#p2741
viewtopic.php?f=54&t=1057&p=2009#p2009
OBVIOUSLY valve train,clearances and valve train geometry, and push rod length etc. should have been verified long before this point.
remember the lower distributor housing forms the wall of one oil passage, without it in place only half the lifters get oil , so your better off using an oil pump priming tool with the lower oil band support or one made from and old distributor with the gear teeth ground off the lower gear, and electric drills tend to over heat under the loads so use an air ratchet and a brazed on socket on the upper shaft on the modified distributor housing,to spin the priming tool if you have the option
adding "ST" to the end of the existing melling part number denotes the helical gear set option
watch the video
http://www.youtube.com/watch?v=YdIGZ-tV ... re=related
ACCORDING TO CRANE CAMS
"
Big Block Chevrolets have an oil-priming idiosyncrasy. When priming a Big Block Chevy with a drill motor and
priming tool, it is often necessary to prime for as much as 20 minutes (while rotating the engine) to get oil to all
of the lifters and rockers. It is advisable to prime these engines with the valve covers removed so you can
check to see oil coming out of all of the rocker arms before firing the engine. This last step is advisable on all
engines, but particularly on Big Block Chevrolets"
this type above is nearly WORTHLESS, as it leave one complete oil gallery passage open and UN-pressurized, as the seated distributor shaft forms one wall of the lifter gallery oil passage on one bank
this type bellow works just fine
the correct oil pump primer tool duplicates the distributor body and seals the oil passages
http://store.summitracing.com/partdetai ... toview=sku
they are dirt cheap or you can make one from and old distributor
be sure you turn the engine over at least two full turns while applying pressure to and lubing the oil passages to get full access to all the lifters,rockers,bearings etc.
many guys use a drill to spin the primer tool but thats a good way to burn up a drill, an air ratchet works better in my experience
"Why is the first one worthless?"
LOOK CLOSELY, the top primer has no collar to keep the drive shaft centered over the pump so it can slightly mis-align and bind, Ive seen them bend the pump drive if guys get them mis-aligned and just throw a high torque 1/2 drill on and spin them without checking, the lower primer has an alignment collar that tends to keep things from breaking,,yes both have the alignment collar for the manifold but only the botom one has the lower block support and alignment sleeve that forms the lower oil passage wall, and the drive collar that assure the oil pump drive itself is lined up correctly,keep in mind,the bottom of the stock distributor forms one wall of the main oil passage to one side of the engine, without that passage wall in place you get no oil pressure to one side and darn little to the other due to the HUGE leak the missing oil passage wall presents, the lower distributor is temporarily replaced with that extra aluminum on the lower primer to simulate the correct oil passage config....THATS WHY!
viewtopic.php?f=54&t=615
you MUST rotate the engine thru two complete revolutions (720 DEGREES)MINIMUM, and SEVERAL TIMES THAT MANY TIMES IS ADVISED before every oil passage in every part is fully seeing the oil flow from the pump! that one lifter/pushrod may be in the part of the 720 degree cycle where little or no oil supply feeds it, try rotating the engine bye hand with a breaker bar slowly, 720 degrees while a buddy applies full oil pressure with the drill on the oil pump primer tool, before worrying about it!a rod driving the oil pump may never build sufficient oil pressure to get oil to the rocker arms, because the distributor shaft forms part of the wall of the oil feed gallery, an oil pump primer tool must look like this, having the lower distributor housing to seal the passage so that pressure can build through the whole system
putting a load on the rings and bearings with no oil flow or oil pressure to replace the assembly lube that's most likely being forced off those surfaces during those first few seconds, and yes for a short time,yes you can do it that way but there is less stress on the engine doing it CORRECTLY by pre-filling all the oil passages and oil filter with oil and getting oil pressure to the bearings the instant the engine starts turning! theres lots of things that you can GET AWAY WITH,WITHOUT OBVIOUS DAMAGE, but doing things CORRECTLY in most cases is by far the better plan,look Im not saying you CAN,T just hit the starter and spin the engine with the coil wire removed till you read oil pressure,BUT, I am saying that there are valid reasons for doing it correctly (PRE LUBE,& prefill the lube passages) that might not show up instantly but do show up under long term evaluation of the results
read thru these threads
http://www.babcox.com/editorial/ar/ar20128.htm«
http://www.thirskauto.net/BearingPics.html
viewtopic.php?f=54&t=4537&p=13350#p13350
viewtopic.php?f=54&t=1280&p=2741#p2741
viewtopic.php?f=54&t=1057&p=2009#p2009
Last edited by a moderator: