many guys have coolant leaks from studs and head bolts,you don,t need that P.I.T.A.
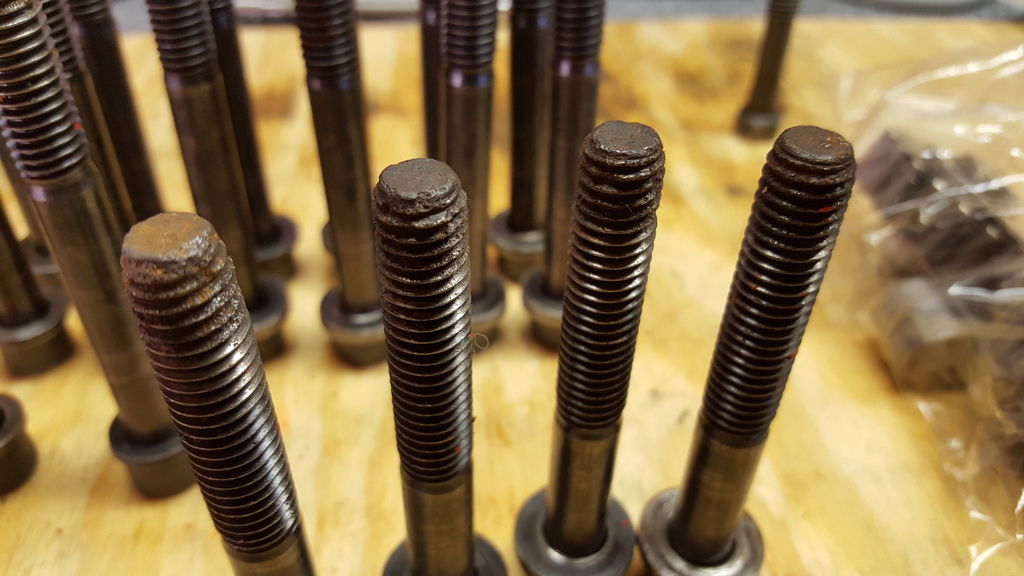
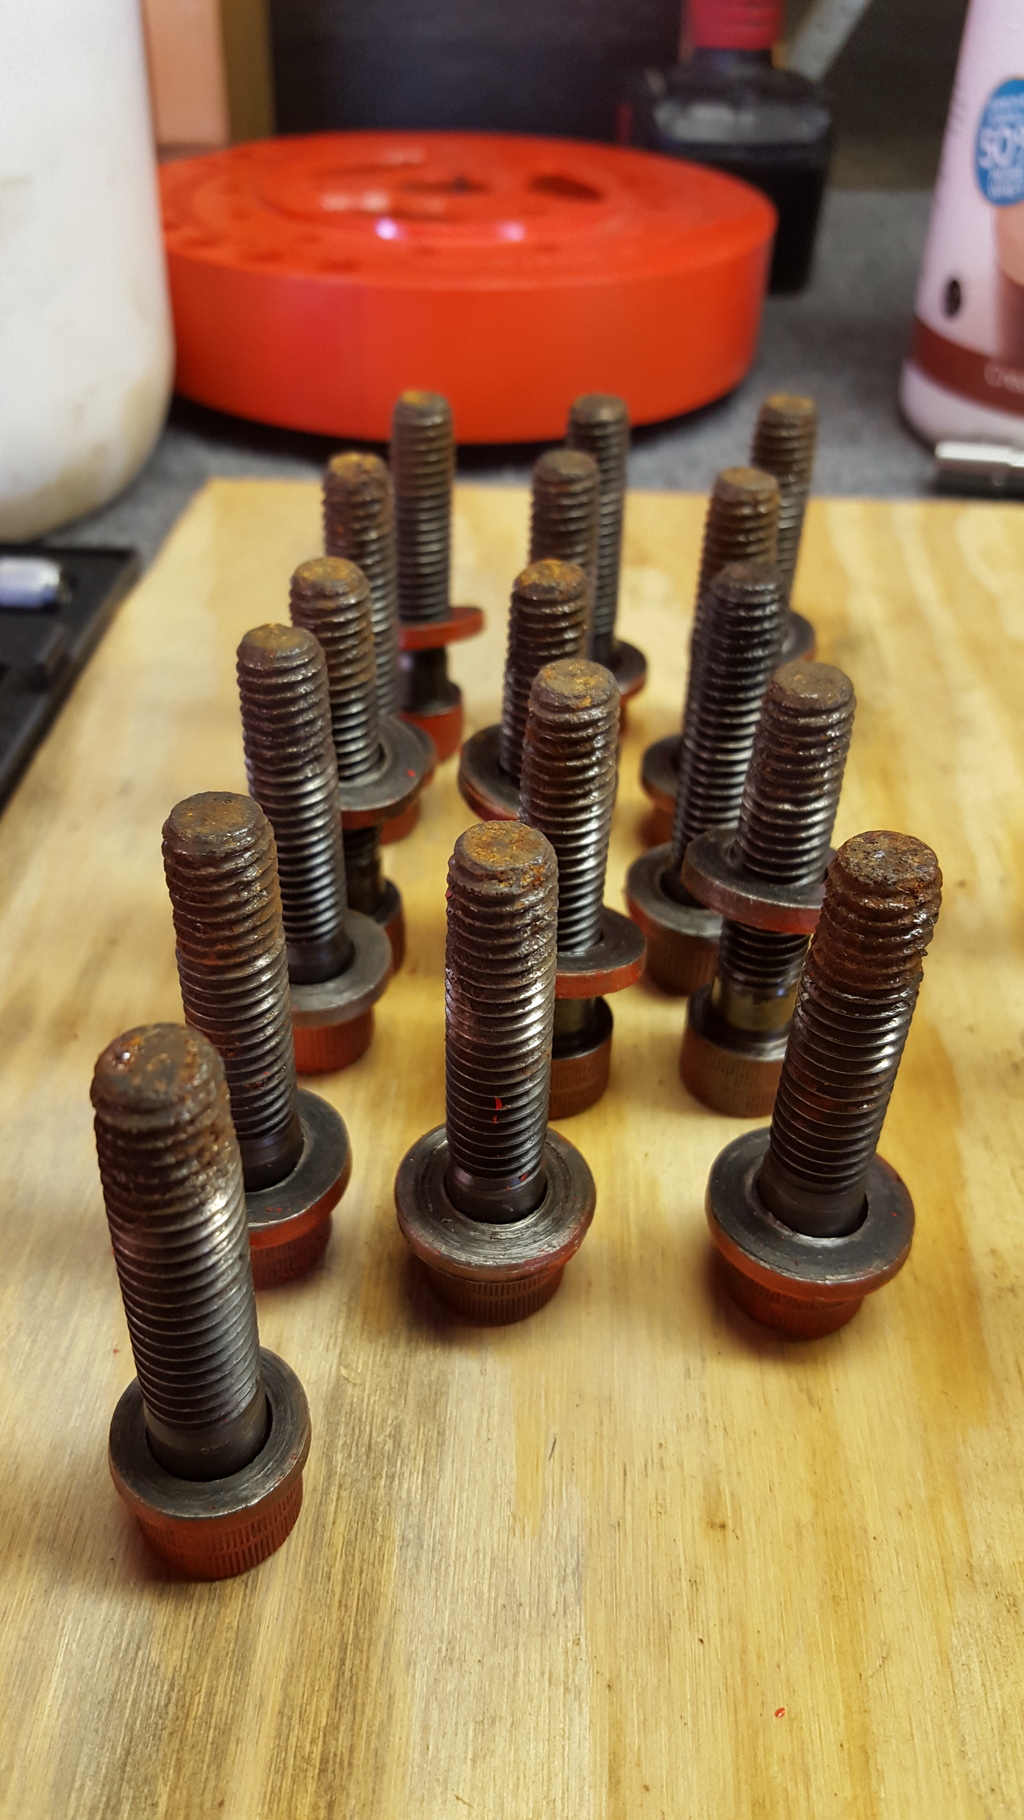
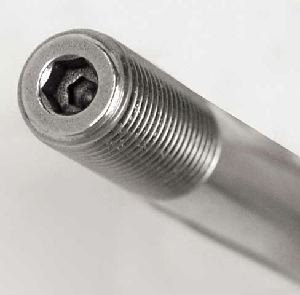
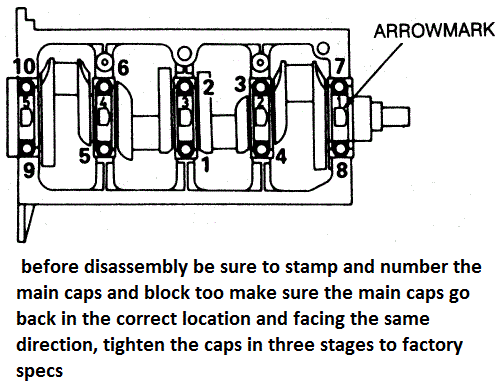
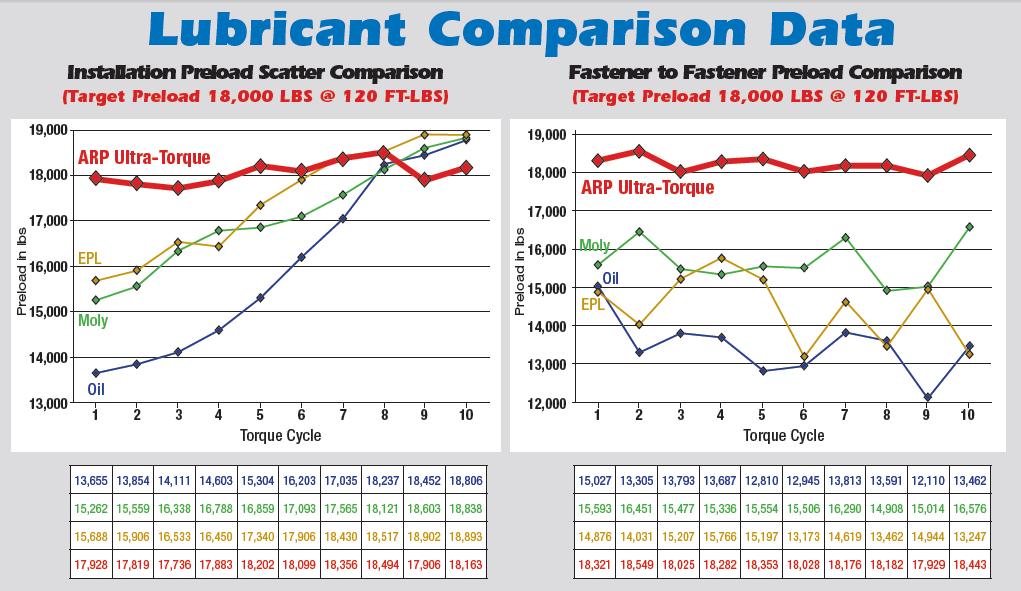
IF your going to use ARP main cap studs THE TORQUE SETTINGS ARE DIFFERENT than the original BOLTS, the STUDS ARE STRONGER, BUT,you might also consider that main studs generally install after cleaning the threads in the block with a tap,blowing them dry with high pressure air, coating the studs course threads with the thread sealant and fine threads end with the ARP thread lube, when you screw them into the block the full thread depth, by hand, or with an allen hex key,then get backed out one quarter turn, the main caps or heads are installed and the nuts torqued in stages to seat and hold the main caps,or heads, now LOOK at those STUDS, the end in the block,has threads that are SAE COURSE thread, the end your torquing the nut on is SAE FINE THREAD with a much different PITCH that requires less tq to give the same clamp loads.
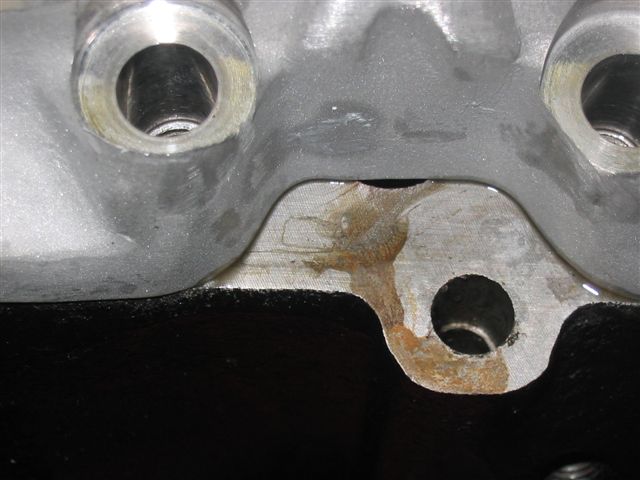
never assume you know where coolant is leaking from UNTIL youve verified it, Ive seen guys replace head gaskets when it was a freeze plug or a leaking intake gasket that was the source of the coolant leaks
the bolts or threads leak IF the coolant flows up thru the threads, the path the coolant takes is exactly the same in either case, studs/bolts only LEAK when they are IMPROPERLY installed, a clean degreased thread in the block and on the stud or bolt you use then, installing either after dipping the thread section in the correct sealant, and letting the sealant start to dry on the threads for a few minutes, before installing them, prevents leaks, how the torque is applied to clamp the head has little effect.
Ive used BOTH studs and bolts on many engine builds and its proper procedure, and working with cleaned threads in both the block and fastener and use of the correct sealant on those threads not the studs or bolts that mater here.
the thread sealant stays liquid until exposed to the air, you need to allow the sealant on the threads a minute of air exposure to start to thicken before installing them,so the sealant forms a barrier to coolant flow in the threads.
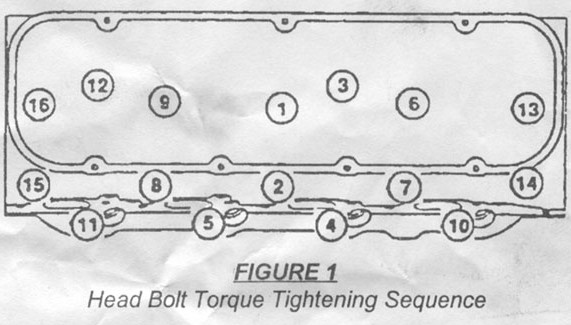
in either case youll want to install all the studs or bolts with the sealant on the threads, and then torque them in sequence (a spiral pattern starting at the center and working outwards ), start at about 35 ft lbs than repeat increasing by about 10-15 ft lbs each time until you reach the specified ft lb value, I usually wait 5 minutes then go back and INDIVIDUALLY slightly loosen the bolts or nuts on the studs AND INDIVIDUALLY RE-TIGHTEN THEM TO THE FINAL TORQUE VALUE at least twice more and bring them back too the final torque value, this cycling tends to result in more consistent clamp values

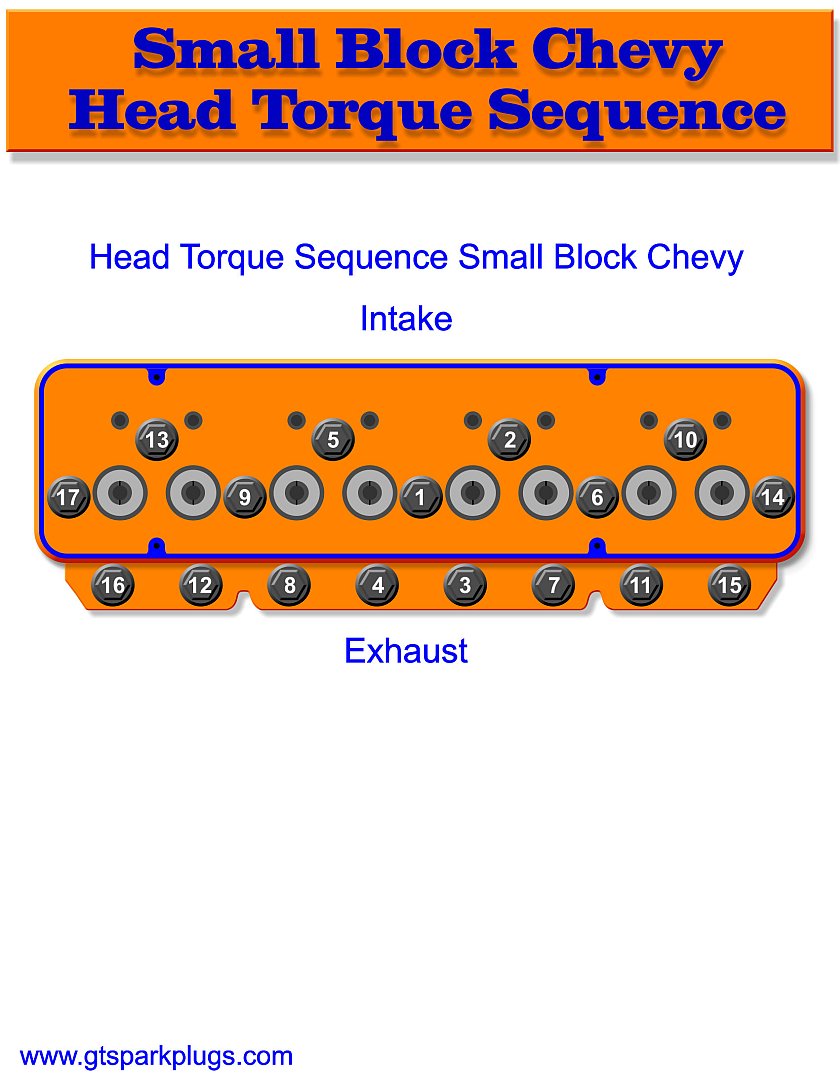
SBC HEADS
Small Chevy
Fastener Type Torque Spec
7/16 in. outer main cap bolt 65 ft.-lbs.
7/16 in. inner main cap bolt 70 ft.-lbs.
3/8 in. outer main cap bolt 40 ft.-lbs.
11/32 in. connecting rod bolt 38-44 ft.-lbs.
3/8 in. connecting rod bolt 40-45 ft.-lbs.
Cylinder head bolts 65 ft.-lbs.
Screw-in rocker arm studs 50 ft.-lbs.
Intake manifold bolts (cast iron heads) 30 ft.-lbs.
Oil pump bolt 60-70 ft.-lbs.
Cam sprocket bolts 18-20 ft.-lbs.
Harmonic damper bolt 60 ft.-lbs.
Flywheel/flexplate bolts 65 ft.-lbs.
Pressure plate bolts 35 ft.-lbs.
Bellhousing bolts 25 ft.-lbs.
Exhaust manifold bolts 25 ft.-lbs.
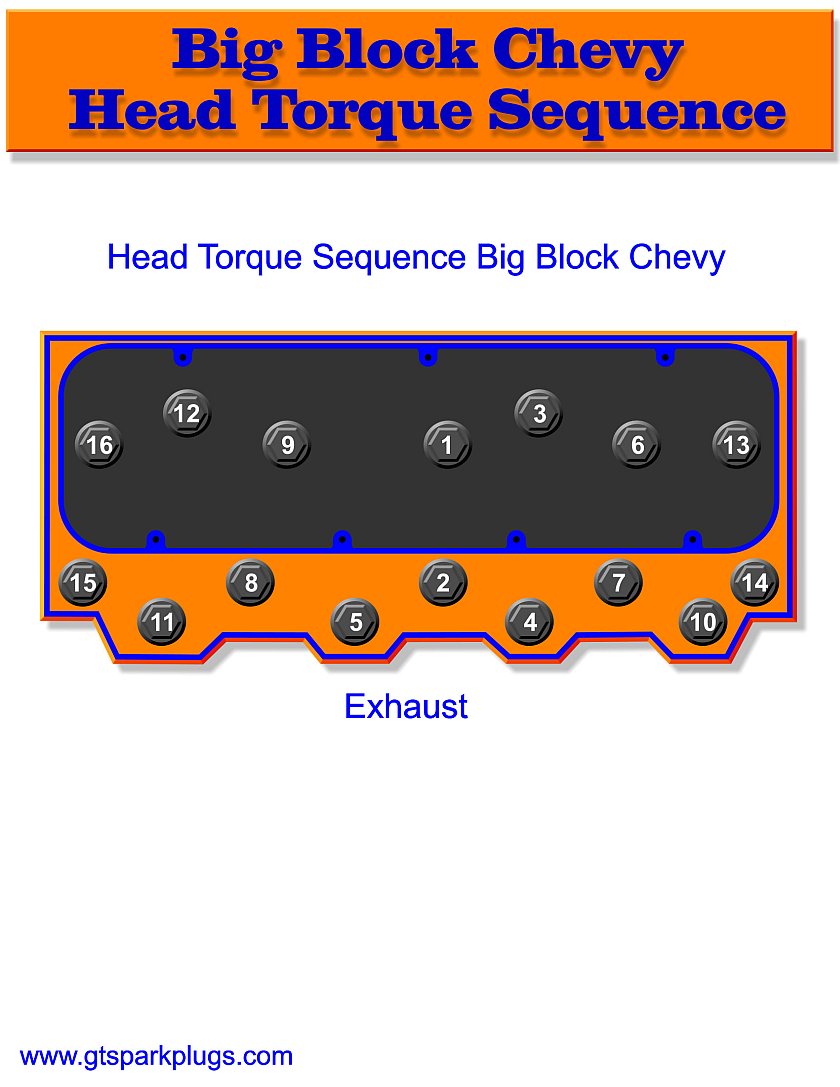
Main cap bolt, 396-427 2-bolt 95 ft.-lbs.
Main cap bolt, 396-454 4-bolt (inner/outer) 110 ft.-lbs.
3/8 in. connecting rod bolt 50 ft.-lbs.
7/16 in. connecting rod bolt 67-73 ft.-lbs.
Cylinder head bolts, long 75 ft.-lbs.
Cylinder head bolts, short 65-68 ft.-lbs.
Screw-in rocker arm studs 50 ft.-lbs.
Intake manifold bolts (cast iron head) 25 ft.-lbs.
Oil pump bolt 65 ft.-lbs.
Cam sprocket bolts 20 ft.-lbs.
Harmonic damper bolt 85 ft.-lbs.
Flywheel/flexplate bolts 60 ft.-lbs.
Pressure plate bolts 35 ft.-lbs.
Bellhousing bolts 25 ft.-lbs.
Exhaust manifold bolts 20 ft.-lbs.
Big Chevy

yeah! its ideally done working outward in a spiral, look up the torque specs in your year shop manual, all years are NOT identical and all heads are NOT identical, but many SBC require a 65lb final tq
I generally run thru in 35lb,,50,lbs -65 lbs, wait an hour and re-torque to 65 again as a check, I don,t re-torque after that as it can screw up the sealant on the studs or bolts preventing coolant leaks
guys! Ive YET to have a single stud or bolt leak!
http://arp-bolts.com/pages/technical_installation.shtml
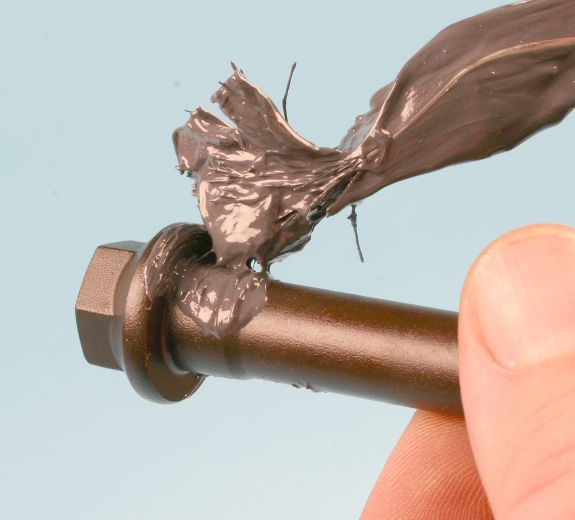
its simple! run a tap thru the threads, test screw the clean/dry stud by hand to verify no clearance or binding then ,clean them and dry the threads on the block and studs,before you start the assembly, and just dip the total threaded surface on the lower studs course thread end of the stud that screws into the block into the correct sealant. spin it in your fingers slowly as you move the stud to the hole in the block to keep from dripping sealant on the deck,
thread it into the block full depth , back it out a 1/2 turn and let it set up for a few minutes before assembling the head gaskets and heads,but assemble the heads while the sealants still fresh/liquid, torque too spec and let the engine set for a few hours (preferably over night)
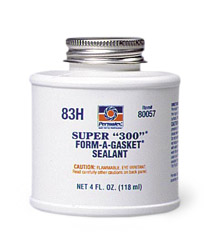
IF you get leaks, thats NOT NORMAL (leaks) and the liquid permatex stuff
http://www.permatex.com/products/Automo ... ealant.htm
or
http://www.permatex.com/products/Automo ... ealant.htm
I use looks almost black, with a slightly reddish tint, you clean both threaded components and then coat both the threads (hole and plug)with the liquid sealant, then screw the components together, and let it set up for an hour or so before adding coolant, if you use it on head bolts you clean the block threads with a tap, degrease the bolts then dip the bolt threads in the container and drop them into place and torque them in stages while wet during the first 20 minutes before the stuff has time to set-up but add coolant only after a few hours so it has time to set up.remember not to allow coolant to contact the sealant for a few hours
I got asked if USING anodes, in an engine is a good idea?
ITS NOT ONLY A GOOD IDEA ITS MANDATORY IN SOME APPLICATIONS!
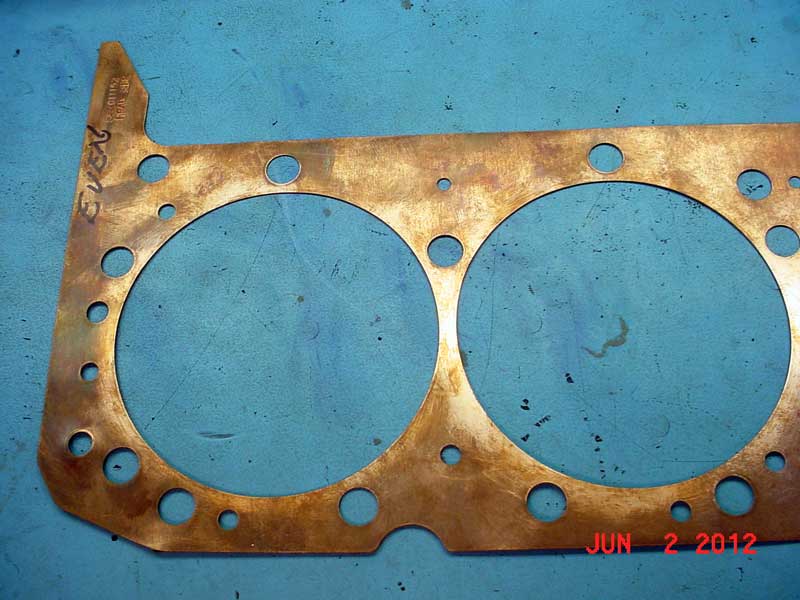
if you were for example to use aluminum heads on a cast iron block with a copper head gasket (something IVE done frequently)
you need to realize you've effectively built a battery if you don,t use both several ANODES and at least a 50% or higher concentration of anti freeze as the dissimilar metals will cause the aluminum, to disintegrate over time without the anodes and high anti freeze concentration.
Ive been building engines for over 40 years and yes I fully agree some head gaskets suggest installing them dry....I spray both sides wet with copper coat and have yet to have problems with them sealing, keep in mind the vast majority of head gaskets don,t "LEAK" they get damaged by "OVER HEATING" or "DETONATION DAMAGED" or " effected by coolant corrosion" then when they fail, its blamed on the "HEAD GASKET FAILURE" THATS A BIT LIKE BLAMING FLYS for CAUSING GARBAGE
READ THRU THESE THREADS
viewtopic.php?f=50&t=1222
viewtopic.php?f=50&t=50&p=1253&hilit=+sealant#p1253
http://www.devcon.com/products/products.cfm?familyID=386
viewtopic.php?f=50&t=50&p=12558&hilit=washers+bolts+studs#p12558
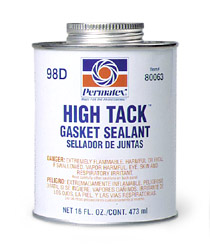
High Tackâ„¢ Gasket Sealant
Red colored, all-purpose sealant that holds even the heaviest of gaskets in place during assembly. Seals and bonds rubber, cork, paper, felt, and metal gaskets. Sets quickly to a very tacky film. Suitable to 500°F (260°C). Contains no ozone-depleting compounds. Resists gasoline, oil, kerosene,antifreeze, propane and butane.
the stuff works far more reliably than most thread pastes or thread sealants, it cleans ,off fingers with a scotch brite pad and gas or alcohol,....provided you have not let it set up on your skin very long, once its started too dry ...good luck
YES it works on BOLTS ALSO
head bolts #5, dip clean dry thread in
http://www.devcon.com/devconfamilyproduct.cfm?familyid=386&catid=69
or this
http://www.permatex.com/products/Automo ... ealant.htm
(NOT QUITE AS GOOD BUT STILL OK)
then insert and tq heads in place
check the gasket surface with a strait edge machinist ruler, degrease it with acetone and use the correct for application, good quality gasket you won,t have any issues.
READ THIS AND LOOK CAREFULLY AT PICTURES
http://garage.grumpysperformance.co...-the-tpi-runners-to-not-leak.5307/#post-15751
http://garage.grumpysperformance.com/index.php?threads/removing-gaskets-the-wrong-way.10464/
http://garage.grumpysperformance.com/index.php?threads/parts-prep-cleaning.6255/#post-41064
http://garage.grumpysperformance.co...hetic-oil-cause-leaky-gaskets.2725/#post-7076
http://garage.grumpysperformance.com/index.php?threads/sealants-and-threads.805/#post-45066
http://garage.grumpysperformance.com/index.php?threads/tracking-down-an-oil-leak.1430/#post-20967
http://garage.grumpysperformance.com/index.php?threads/preventing-leaky-head-bolts-studs.50/#post-59
http://garage.grumpysperformance.com/index.php?threads/locating-vacume-leaks.882/#post-45944
check the gasket surface with a strait edge machinist ruler, degrease it with acetone and use the correct for application, good quality gasket you won,t have any issues.
READ THIS AND LOOK CAREFULLY AT PICTURES
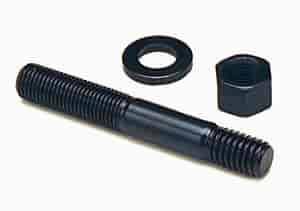
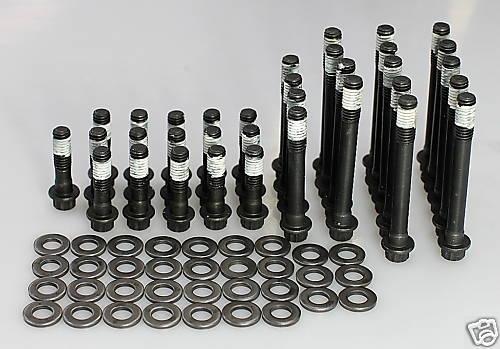
where the application warrants the cost and requires the added strength use of ARP head studs,
and use of main cap studs, is a very valid option,
be very sure you use proper sealants on threads of bolts or studs as both enter the coolant passages on most but not all chevy blocks.
this MANDATEs the use of sealant on the threads of head fasteners.
STUDS having the full thread surface fully engaged with the block threads ,
before any stress or clamping force is applied,
are FAR less likely to leak or strip block threads
http://garage.grumpysperformance.co...-the-tpi-runners-to-not-leak.5307/#post-15751
http://garage.grumpysperformance.com/index.php?threads/removing-gaskets-the-wrong-way.10464/
http://garage.grumpysperformance.co...-in-vs-threaded-rocker-studs.2746/#post-43539
http://garage.grumpysperformance.com/index.php?threads/parts-prep-cleaning.6255/#post-41064
http://garage.grumpysperformance.co...hetic-oil-cause-leaky-gaskets.2725/#post-7076
http://garage.grumpysperformance.com/index.php?threads/sealants-and-threads.805/#post-45066
http://garage.grumpysperformance.com/index.php?threads/tracking-down-an-oil-leak.1430/#post-20967
http://garage.grumpysperformance.com/index.php?threads/preventing-leaky-head-bolts-studs.50/#post-59
http://garage.grumpysperformance.com/index.php?threads/locating-vacume-leaks.882/#post-45944
use the correct stuff for the application, AND READ & FOLLOW THE DIRECTIONS it prevents PROBLEMS
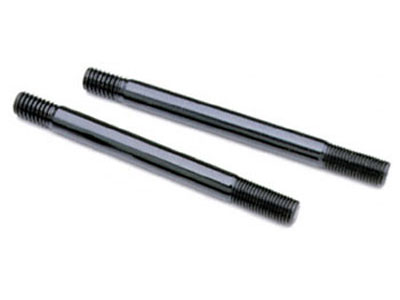
studs put less stress & wear on the block deck threads, and provide more consistent clamp loads, the 12 point, stud nuts and washers tend to have less clearance issues in tight areas, than the head on a 6 point bolt, and are less likely to round off as the tq is applied, but be aware that getting the heads up and out in a confined engine compartment is generally a P.I.T.A. over studs that extend up several inches past the block when fenders and brake boosters, etc. are in the way
thanks grump can you tell me anything about "Undercut" studs are they worth the extra $$$
that depends on the application their used in, the under cut studs maintain their clamp force, more consistently over a longer stretch distance, let me explain that a bit
if you use the standard , studs on a cylinder head the heads get torqued in place at standard temps, when the engine heats up the metals expand, and the clamp loads tend to increase a bit,when it cools the metals contract,and the clamp loads tend to return to original levels, this cycles the stress and clamp loads, on an iron block with iron heads and even with aluminum heads the standard non-under cut studs are fine in most applications,because BOTH the studs and the head gaskets are designed to work with this repetitive cycle, if you have an all aluminum block and heads your probably better off with the under cut studs due to the greater dimensional shifts as the engine changes temp.
either design will tend to keep the clamp forces in a usable and predictable range, but the non-undercut studs are less likely to maintain the same exact clamp forces over the temp shifts the engine sees between running and cooling cycles.
short answer, on a iron block engine ID just sellect the standard ARP studs and follow the installation info posted earier in the thread, keep in mind aluminum thread strength fatigues far faster than iron or steel and it requires about 2.5-3 times the thread dia. to depth ratio to equal the resistance to stripping threads in aluminum vs about 1.7-2 times the thread dia. to depth ratio to equal the resistance to stripping threads in steel or iron
YES it works on BOLTS ALSO
OLD POST COVERS THAT INFO
I can,t believe the stuff I see at times..in the car mags that are SUPPOSED to be articles composed by guys who know what they are doing!!!!!!!
I picked up a copy of one of the more common, chevy based magazines and theres PICTURES of a guy dipping head bolts in yellow weather strip adhesive to be used as a thread sealant on the bolt threads (its not designed to come in direct contact with oil and/or high heat coolant),and its not going to give the correct tq readings either, and on the next page the guys gooping, GOBS of clear silicone like youll use to seal aquariums or bathroom fixtures 1/4 thick on/around the intake manifold ports, NEITHER SEALANT is DESIGNED FOR or is LIKELY to perform correctly IN EITHER APPLICATION, and WHERE does this guy think all that excess silicone will go once the intakes torqued down????
theres only two high probability's, it will flow into the port where it will eventually harden and get sucked into the cylinders or it may hang there causing a restriction in the port, or if it flows down, it gets into the lifter gallery where its eventually going to get into the oil pump pick up screen, restricting or blocking oil flow
i would not let these guys fix a flat tire let alone work on MY ENGINES all I can do is shake my head and wonder who if ANYONE screens these articles
always use the manufacturers suggested installation instructions, as some applications or gasket types REQUIRE differant lubes or sealants but heres a rought guide
http://www.professionalequipment.com/ex ... ermometer/
Wide temperature range from -58 to 1832°F (-50 to 1000°C)
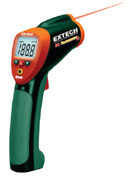
don,t trust your cars temp gauges 100%, cross check oil and coolant temps with a quality accurate infrared temp gun
head bolts #5, dip clean dry thread in
http://www.devcon.com/products/products ... milyid=386
or this
http://www.permatex.com/products/Automo ... ealant.htm
(NOT QUITE AS GOOD BUT STILL OK)
then insert and tq heads in place
head gaskets #3
main bolts #2
rod bolts #2
oil pump stud and nut #4
oil pan bolts #5
oil pan gasket #6
cam spocket bolts #4
timing cover gasket #6
timing cover bolts #1
intake bolts #1
intake gasket #6
thermostat housing bolts #5
thermostat housing gasket (also do you really need it) usually yes #6
Exhaust manifold/header bolts #1
Exhaust manifold/header gaskets #3
Water pump bolts #5
water pump gaskets #6
fuel pump #6
crank/damper bolt #1
Torque converter bolts #4
flywheel/flexplate bolts #4
bellhousing bolts #2
1 antiseize
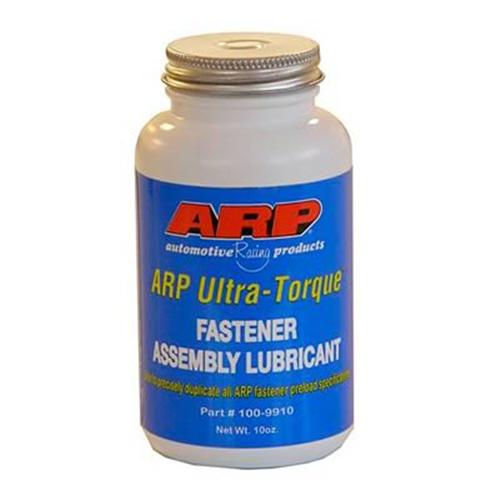
2 oil or ARP thread lube
3 copper coat spray gasket sealer or apply dry in some cases (see manufactures suggestions)
4 loctite (red or blue depends on application ,read the lables)
5 http://www.devcon.com/products/products ... milyid=386
Fast-drying all-purpose sealant dries to a highly tacky, non-brittle film. A reliable general adhesive.Remains effective under temperatures of -65°F to 500°F (-54°C to 260°C). Resists gasoline, oil, antifreeze, axle lube, kerosene, propane and butane. Level 3*
6 black high temp RTV
use the correct stuff for the application, AND READ & FOLLOW THE DIRECTIONS it prevents PROBLEMS
IF your going to use ARP main cap studs THE TORQUE SETTINGS ARE DIFFERENT than the original BOLTS, the STUDS ARE STRONGER, BUT,you might also consider that main studs generally install after cleaning the threads in the block with a tap,blowing them dry with high pressure air, coating the studs course threads with the thread sealant and fine threads end with the ARP thread lube, when you screw them into the block the full thread depth, by hand, or with an allen hex key,then get backed out one quarter turn, the main caps or heads are installed and the nuts torqued in stages to seat and hold the main caps,or heads, now LOOK at those STUDS, the end in the block,has threads that are SAE COURSE thread, the end your torquing the nut on is SAE FINE THREAD with a much different PITCH that requires less tq to give the same clamp loads.
never assume you know where coolant is leaking from UNTIL youve verified it, Ive seen guys replace head gaskets when it was a freeze plug or a leaking intake gasket that was the source of the coolant leaks
the bolts or threads leak IF the coolant flows up thru the threads, the path the coolant takes is exactly the same in either case, studs/bolts only LEAK when they are IMPROPERLY installed, a clean degreased thread in the block and on the stud or bolt you use then, installing either after dipping the thread section in the correct sealant, and letting the sealant start to dry on the threads for a few minutes, before installing them, prevents leaks, how the torque is applied to clamp the head has little effect.
Ive used BOTH studs and bolts on many engine builds and its proper procedure, and working with cleaned threads in both the block and fastener and use of the correct sealant on those threads not the studs or bolts that mater here.
the thread sealant stays liquid until exposed to the air, you need to allow the sealant on the threads a minute of air exposure to start to thicken before installing them,so the sealant forms a barrier to coolant flow in the threads.
in either case youll want to install all the studs or bolts with the sealant on the threads, and then torque them in sequence (a spiral pattern starting at the center and working outwards ), start at about 35 ft lbs than repeat increasing by about 10-15 ft lbs each time until you reach the specified ft lb value, I usually wait 5 minutes then go back and INDIVIDUALLY slightly loosen the bolts or nuts on the studs AND INDIVIDUALLY RE-TIGHTEN THEM TO THE FINAL TORQUE VALUE at least twice more and bring them back too the final torque value, this cycling tends to result in more consistent clamp values
SBC HEADS
Small Chevy
Fastener Type Torque Spec
7/16 in. outer main cap bolt 65 ft.-lbs.
7/16 in. inner main cap bolt 70 ft.-lbs.
3/8 in. outer main cap bolt 40 ft.-lbs.
11/32 in. connecting rod bolt 38-44 ft.-lbs.
3/8 in. connecting rod bolt 40-45 ft.-lbs.
Cylinder head bolts 65 ft.-lbs.
Screw-in rocker arm studs 50 ft.-lbs.
Intake manifold bolts (cast iron heads) 30 ft.-lbs.
Oil pump bolt 60-70 ft.-lbs.
Cam sprocket bolts 18-20 ft.-lbs.
Harmonic damper bolt 60 ft.-lbs.
Flywheel/flexplate bolts 65 ft.-lbs.
Pressure plate bolts 35 ft.-lbs.
Bellhousing bolts 25 ft.-lbs.
Exhaust manifold bolts 25 ft.-lbs.
Main cap bolt, 396-427 2-bolt 95 ft.-lbs.
Main cap bolt, 396-454 4-bolt (inner/outer) 110 ft.-lbs.
3/8 in. connecting rod bolt 50 ft.-lbs.
7/16 in. connecting rod bolt 67-73 ft.-lbs.
Cylinder head bolts, long 75 ft.-lbs.
Cylinder head bolts, short 65-68 ft.-lbs.
Screw-in rocker arm studs 50 ft.-lbs.
Intake manifold bolts (cast iron head) 25 ft.-lbs.
Oil pump bolt 65 ft.-lbs.
Cam sprocket bolts 20 ft.-lbs.
Harmonic damper bolt 85 ft.-lbs.
Flywheel/flexplate bolts 60 ft.-lbs.
Pressure plate bolts 35 ft.-lbs.
Bellhousing bolts 25 ft.-lbs.
Exhaust manifold bolts 20 ft.-lbs.
Big Chevy
yeah! its ideally done working outward in a spiral, look up the torque specs in your year shop manual, all years are NOT identical and all heads are NOT identical, but many SBC require a 65lb final tq
I generally run thru in 35lb,,50,lbs -65 lbs, wait an hour and re-torque to 65 again as a check, I don,t re-torque after that as it can screw up the sealant on the studs or bolts preventing coolant leaks
guys! Ive YET to have a single stud or bolt leak!
http://arp-bolts.com/pages/technical_installation.shtml
its simple! run a tap thru the threads, test screw the clean/dry stud by hand to verify no clearance or binding then ,clean them and dry the threads on the block and studs,before you start the assembly, and just dip the total threaded surface on the lower studs course thread end of the stud that screws into the block into the correct sealant. spin it in your fingers slowly as you move the stud to the hole in the block to keep from dripping sealant on the deck,
thread it into the block full depth , back it out a 1/2 turn and let it set up for a few minutes before assembling the head gaskets and heads,but assemble the heads while the sealants still fresh/liquid, torque too spec and let the engine set for a few hours (preferably over night)
IF you get leaks, thats NOT NORMAL (leaks) and the liquid permatex stuff
http://www.permatex.com/products/Automo ... ealant.htm
or
http://www.permatex.com/products/Automo ... ealant.htm
I use looks almost black, with a slightly reddish tint, you clean both threaded components and then coat both the threads (hole and plug)with the liquid sealant, then screw the components together, and let it set up for an hour or so before adding coolant, if you use it on head bolts you clean the block threads with a tap, degrease the bolts then dip the bolt threads in the container and drop them into place and torque them in stages while wet during the first 20 minutes before the stuff has time to set-up but add coolant only after a few hours so it has time to set up.remember not to allow coolant to contact the sealant for a few hours
I got asked if USING anodes, in an engine is a good idea?
ITS NOT ONLY A GOOD IDEA ITS MANDATORY IN SOME APPLICATIONS!
if you were for example to use aluminum heads on a cast iron block with a copper head gasket (something IVE done frequently)
you need to realize you've effectively built a battery if you don,t use both several ANODES and at least a 50% or higher concentration of anti freeze as the dissimilar metals will cause the aluminum, to disintegrate over time without the anodes and high anti freeze concentration.
Ive been building engines for over 40 years and yes I fully agree some head gaskets suggest installing them dry....I spray both sides wet with copper coat and have yet to have problems with them sealing, keep in mind the vast majority of head gaskets don,t "LEAK" they get damaged by "OVER HEATING" or "DETONATION DAMAGED" or " effected by coolant corrosion" then when they fail, its blamed on the "HEAD GASKET FAILURE" THATS A BIT LIKE BLAMING FLYS for CAUSING GARBAGE
READ THRU THESE THREADS
viewtopic.php?f=50&t=1222
viewtopic.php?f=50&t=50&p=1253&hilit=+sealant#p1253
http://www.devcon.com/products/products.cfm?familyID=386
viewtopic.php?f=50&t=50&p=12558&hilit=washers+bolts+studs#p12558
High Tackâ„¢ Gasket Sealant
Red colored, all-purpose sealant that holds even the heaviest of gaskets in place during assembly. Seals and bonds rubber, cork, paper, felt, and metal gaskets. Sets quickly to a very tacky film. Suitable to 500°F (260°C). Contains no ozone-depleting compounds. Resists gasoline, oil, kerosene,antifreeze, propane and butane.
the stuff works far more reliably than most thread pastes or thread sealants, it cleans ,off fingers with a scotch brite pad and gas or alcohol,....provided you have not let it set up on your skin very long, once its started too dry ...good luck
YES it works on BOLTS ALSO
head bolts #5, dip clean dry thread in
http://www.devcon.com/devconfamilyproduct.cfm?familyid=386&catid=69
or this
http://www.permatex.com/products/Automo ... ealant.htm
(NOT QUITE AS GOOD BUT STILL OK)
then insert and tq heads in place
check the gasket surface with a strait edge machinist ruler, degrease it with acetone and use the correct for application, good quality gasket you won,t have any issues.
READ THIS AND LOOK CAREFULLY AT PICTURES
http://garage.grumpysperformance.co...-the-tpi-runners-to-not-leak.5307/#post-15751
http://garage.grumpysperformance.com/index.php?threads/removing-gaskets-the-wrong-way.10464/
http://garage.grumpysperformance.com/index.php?threads/parts-prep-cleaning.6255/#post-41064
http://garage.grumpysperformance.co...hetic-oil-cause-leaky-gaskets.2725/#post-7076
http://garage.grumpysperformance.com/index.php?threads/sealants-and-threads.805/#post-45066
http://garage.grumpysperformance.com/index.php?threads/tracking-down-an-oil-leak.1430/#post-20967
http://garage.grumpysperformance.com/index.php?threads/preventing-leaky-head-bolts-studs.50/#post-59
http://garage.grumpysperformance.com/index.php?threads/locating-vacume-leaks.882/#post-45944
check the gasket surface with a strait edge machinist ruler, degrease it with acetone and use the correct for application, good quality gasket you won,t have any issues.
READ THIS AND LOOK CAREFULLY AT PICTURES
where the application warrants the cost and requires the added strength use of ARP head studs,
and use of main cap studs, is a very valid option,
be very sure you use proper sealants on threads of bolts or studs as both enter the coolant passages on most but not all chevy blocks.
this MANDATEs the use of sealant on the threads of head fasteners.
STUDS having the full thread surface fully engaged with the block threads ,
before any stress or clamping force is applied,
are FAR less likely to leak or strip block threads
http://garage.grumpysperformance.co...-the-tpi-runners-to-not-leak.5307/#post-15751
http://garage.grumpysperformance.com/index.php?threads/removing-gaskets-the-wrong-way.10464/
http://garage.grumpysperformance.co...-in-vs-threaded-rocker-studs.2746/#post-43539
http://garage.grumpysperformance.com/index.php?threads/parts-prep-cleaning.6255/#post-41064
http://garage.grumpysperformance.co...hetic-oil-cause-leaky-gaskets.2725/#post-7076
http://garage.grumpysperformance.com/index.php?threads/sealants-and-threads.805/#post-45066
http://garage.grumpysperformance.com/index.php?threads/tracking-down-an-oil-leak.1430/#post-20967
http://garage.grumpysperformance.com/index.php?threads/preventing-leaky-head-bolts-studs.50/#post-59
http://garage.grumpysperformance.com/index.php?threads/locating-vacume-leaks.882/#post-45944
use the correct stuff for the application, AND READ & FOLLOW THE DIRECTIONS it prevents PROBLEMS
studs put less stress & wear on the block deck threads, and provide more consistent clamp loads, the 12 point, stud nuts and washers tend to have less clearance issues in tight areas, than the head on a 6 point bolt, and are less likely to round off as the tq is applied, but be aware that getting the heads up and out in a confined engine compartment is generally a P.I.T.A. over studs that extend up several inches past the block when fenders and brake boosters, etc. are in the way
thanks grump can you tell me anything about "Undercut" studs are they worth the extra $$$
that depends on the application their used in, the under cut studs maintain their clamp force, more consistently over a longer stretch distance, let me explain that a bit
if you use the standard , studs on a cylinder head the heads get torqued in place at standard temps, when the engine heats up the metals expand, and the clamp loads tend to increase a bit,when it cools the metals contract,and the clamp loads tend to return to original levels, this cycles the stress and clamp loads, on an iron block with iron heads and even with aluminum heads the standard non-under cut studs are fine in most applications,because BOTH the studs and the head gaskets are designed to work with this repetitive cycle, if you have an all aluminum block and heads your probably better off with the under cut studs due to the greater dimensional shifts as the engine changes temp.
either design will tend to keep the clamp forces in a usable and predictable range, but the non-undercut studs are less likely to maintain the same exact clamp forces over the temp shifts the engine sees between running and cooling cycles.
short answer, on a iron block engine ID just sellect the standard ARP studs and follow the installation info posted earier in the thread, keep in mind aluminum thread strength fatigues far faster than iron or steel and it requires about 2.5-3 times the thread dia. to depth ratio to equal the resistance to stripping threads in aluminum vs about 1.7-2 times the thread dia. to depth ratio to equal the resistance to stripping threads in steel or iron
YES it works on BOLTS ALSO
OLD POST COVERS THAT INFO
I can,t believe the stuff I see at times..in the car mags that are SUPPOSED to be articles composed by guys who know what they are doing!!!!!!!
I picked up a copy of one of the more common, chevy based magazines and theres PICTURES of a guy dipping head bolts in yellow weather strip adhesive to be used as a thread sealant on the bolt threads (its not designed to come in direct contact with oil and/or high heat coolant),and its not going to give the correct tq readings either, and on the next page the guys gooping, GOBS of clear silicone like youll use to seal aquariums or bathroom fixtures 1/4 thick on/around the intake manifold ports, NEITHER SEALANT is DESIGNED FOR or is LIKELY to perform correctly IN EITHER APPLICATION, and WHERE does this guy think all that excess silicone will go once the intakes torqued down????
theres only two high probability's, it will flow into the port where it will eventually harden and get sucked into the cylinders or it may hang there causing a restriction in the port, or if it flows down, it gets into the lifter gallery where its eventually going to get into the oil pump pick up screen, restricting or blocking oil flow
i would not let these guys fix a flat tire let alone work on MY ENGINES all I can do is shake my head and wonder who if ANYONE screens these articles
always use the manufacturers suggested installation instructions, as some applications or gasket types REQUIRE differant lubes or sealants but heres a rought guide
http://www.professionalequipment.com/ex ... ermometer/
Wide temperature range from -58 to 1832°F (-50 to 1000°C)
don,t trust your cars temp gauges 100%, cross check oil and coolant temps with a quality accurate infrared temp gun
head bolts #5, dip clean dry thread in
http://www.devcon.com/products/products ... milyid=386
or this
http://www.permatex.com/products/Automo ... ealant.htm
(NOT QUITE AS GOOD BUT STILL OK)
then insert and tq heads in place
head gaskets #3
main bolts #2
rod bolts #2
oil pump stud and nut #4
oil pan bolts #5
oil pan gasket #6
cam spocket bolts #4
timing cover gasket #6
timing cover bolts #1
intake bolts #1
intake gasket #6
thermostat housing bolts #5
thermostat housing gasket (also do you really need it) usually yes #6
Exhaust manifold/header bolts #1
Exhaust manifold/header gaskets #3
Water pump bolts #5
water pump gaskets #6
fuel pump #6
crank/damper bolt #1
Torque converter bolts #4
flywheel/flexplate bolts #4
bellhousing bolts #2
1 antiseize
2 oil or ARP thread lube
3 copper coat spray gasket sealer or apply dry in some cases (see manufactures suggestions)
4 loctite (red or blue depends on application ,read the lables)
5 http://www.devcon.com/products/products ... milyid=386
Fast-drying all-purpose sealant dries to a highly tacky, non-brittle film. A reliable general adhesive.Remains effective under temperatures of -65°F to 500°F (-54°C to 260°C). Resists gasoline, oil, antifreeze, axle lube, kerosene, propane and butane. Level 3*
6 black high temp RTV
use the correct stuff for the application, AND READ & FOLLOW THE DIRECTIONS it prevents PROBLEMS
Last edited by a moderator:


")