I`m confused on rear gears & dont know what route to go I bought a new carrier that I spent many hours grinding ,sanding & polishing to look like chromb yes we had a long bad winter & I was bored I know its a dana 44 & I want to run 3:73 gears it will eventuially be a 220r4 & a 434 CI motor I dont know wether to have mine rebuilt or buy a new one & what kind & brand any info would help . Also off topic I bought new window motors & gears & they give you a packet of red grease I`m wondering if I should add the whole packet because the car isnt painted yet & I`m worried about seepage
- Home
- Forums
- Technical Articles/muscle cars
- C1-C6 Corvettes
- Drive Train and Tires: Repairs and Modifications
You are using an out of date browser. It may not display this or other websites correctly.
You should upgrade or use an alternative browser.
You should upgrade or use an alternative browser.
rear differential
- Thread starter rlphvac
- Start date
rlphvac said:I`m confused on rear gears & dont know what route to go I bought a new carrier that I spent many hours grinding ,sanding & polishing to look like chrome yes we had a long bad winter & I was bored I know its a dana 44 & I want to run 3:73 gears it will eventuially be a 220r4 & a 434 CI motor I dont know wether to have mine rebuilt or buy a new one & what kind & brand any info would help . Also off topic I bought new window motors & gears & they give you a packet of red grease I`m wondering if I should add the whole packet because the car isnt painted yet & I`m worried about seepage
ok, first the grease generally gets used on the gears and pivot points in the window actuator and roller wheels and its designed not to drip/seep or migrate, if its put on reasonably heavy in the required areas
IM not really clear on what your asking but it seems like your asking if the dana44 that you cleaned and polished up can be rebuilt with 3.73:1 rear gears, the answer depends on the differentials basic structural condition ,but in most cases they get rebuilt
READ
http://www.fluidcapacity.com/
https://bestfordriver.com/oil/best-differential-fluid/
viewtopic.php?f=33&t=905&p=1470#p1470
http://garage.grumpysperformance.com/index.php?threads/diff-oil-for-the-10-bolt.11659/#post-54543
Last edited by a moderator:
grumpy I checked the carrier very well before doing all the polishing -etc I guess my ? is should I go with a whole new assembley & what kind there are so many out there eaton , detroit locker etc & info and answers are harder to find than a 40 year old virgin this is where I`m getting confused
http://cgi.ebay.com/ebaymotors/DANA-44- ... 0410008587
http://www.xtremeterrain.com/dana4430sp ... ocker.aspx
http://findarticles.com/p/articles/mi_m ... _87460214/
http://www.drivetrainamerica.com/store/ ... =19747-010
http://cgi.ebay.com/ebaymotors/ws/eBayI ... 0419395404
http://tech.corvettecentral.com/2015/11/rear-axlerear-end-ratio-information/
Rear Axle/Rear End Ratio Information
Have you ever thought about how the correct rear axle ratio affects your Corvette’s performance? First, learn what ratio you have hidden away in the differential housing. Early Corvettes (1960-1970) may have many different ratios; later Corvettes had fewer choices, in an effort to boost fuel mileage, and by the mid-80s performance gear ratio options were rare.
Raise the rear of your Corvette so both wheels spin freely. You need a jack and stands, or a lift if you are lucky. Be extra careful when lifting any vehicle. If using a floor jack, make sure the front wheels roll as the jack lifts the back end. Place wheel chocks at the front tires to prevent rolling forward. As the jack lifts, your Corvette has to roll back towards you as the distance becomes shorter.
Once in the air, stands should be placed under the frame or trailing arms as protection from jack failure. When your Corvette is securely lowered, rear axle ratio can be safely determined. The transmission must be in neutral with the parking brake off. The objective is to count how many times the driveshaft rotates as the wheel makes one full rotation. Mark the driveshaft near the differential housing (usually the yoke) and make a mark on the differential housing. Mark the tire so you can determine when one full rotation has taken place.
FYI – your Corvette must be equipped with a posi-traction differential for the above procedure to work.

Early Corvettes without posi-traction will require a slightly different approach; only the wheel should be up off the ground, rotating freely. Use the same procedure as above to safely raise and support your Corvette. The free spinning wheel has to be rotated two full turns while counting how many times the driveshaft rotates. This is due to the differential pinion gears rotating inside the differential. You can use the same procedure as the posi-traction equipped Corvette although it is difficult and an error can easily occur. You would require a helper and both wheels must rotate in unison while someone counts the driveshaft rotations.

The equation is simple. If the driveshaft yoke rotates a bit past four turns during one full wheel rotation, you would have a 4.11 rear gear ratio. Divide the driveshaft rotations into one [4.11 / 1]. Non posi-traction Corvettes use the same formula, counting two revolutions of the wheel while using one as the divisor.
What do the numbers mean?
Numerically low gear ratio numbers (3.08, for example) mean more power/torque is required to move your Corvette. Once rolling, the 3.08 gear ratio will keep your engine rpm low and help save fuel. On the flip side, starting line performance suffers. High numerical gear ratios (4.11) have a greater mechanical advantage, requiring less power (torque) to get you rolling. The downside is engine rpm increases at highway speeds as fuel flows rapidly out of your tank.
Wheel/tire diameter also plays an important part in the rear gear ratio equation. Installing a taller tire lowers the mechanical advantage, requiring less rpm to maintain the same speed as the original equipment tire diameter. This affects acceleration performance negatively while increasing top end speed.
Do I Really Care if I Have a Low or High Gear Ratio?
Yes, if overall performance is important to you and especially if you’re planning any performance modifications. The most powerful engine will feel sluggish with the wrong rear axle gear ratio. In some cases, the rear axle gear ratio should be left alone and a transmission change may be the correct direction to take. Some contrary situations arise when dealing with mechanical components, including the driveline. Let me expand on what driveline situations you might be up against.
Overdrive Transmission or Rear Axle Gear Ratio Change?
Overdrive transmission is a great innovation. Early on, overdrive transmissions were marketed with poor results. No one was concerned with fuel mileage. Today, overdrive transmission is considered standard equipment. However, many early Corvette restorers are reluctant to make this modification. Not only do you slow the engine down at highway speed, many overdrive units have a better first gear ratio for more starting line performance.
This means you also need to consider the transmission’s gear ratios for best possible driveline performance. In some cases, changing the transmission to an overdrive unit can help off-the-line performance and save fuel while cruising. Where am I going with this? Take time to analyze what you have to work with. You may be surprised to find not much engine work is required to gain the desired performance.
I know there is never enough performance, but this will send you down the right path to get all you can.
Compound/Combined Gearing
Let’s review how the rear axle gear ratio works in conjunction with the transmission. All Corvettes built before 1981 had 1-1 transmission final drive gear ratios. This is the prime example of how an overdrive transmission change would benefit: 1969 Corvette with an original Muncie M20 that has a 2.52 first gear ratio with a 3.36 rear axle gear ratio. Our combined first gear ratio would be [3.36 x 2.52 = 8.46], not too bad for a 427 cubic inch engine with plenty of low rpm torque. A low torque 327 cubic inch engine would not be very exciting to drive until you got above 35-40 mph.
Changing to a Tremec TKO 500 manual transmission—which has a 3.27 first gear ratio and .68 overdrive ratio—would make this the perfect for performance and cruising. The 3.36 rear axle gear ratio coupled with the 3.27 transmission first gear ratio multiplies providing a 10.98 first gear ratio [3.36 x 3.27 = 10.98]. That 10.98 combined gear ratio will make even a smog motor small block Chevy feel good.
If you went the other way and changed the rear axle ratio, the engine would scream—4000 rpm at 75 mph with a 4.11 rear gear axle ratio, adding extra wear to the engine and to your mental state. The combined gear ratios [4.11 x 2.52 = 10.35] would provide decent off-the-line performance, even with a low horsepower engine. This is why it makes sense to evaluate what you are working with before making any driveline changes, including engine performance.
Tremec also has a TKO 600 five speed overdrive transmission available with a 2.87 first gear ratio. This might be used in engines that produce high torque at low rpm (big blocks or large cubic inch small blocks). Using a 3.90 rear axle gear ratio as an example [2.87 x 3.90 = 11.19], this is on the high side for a high torque engine. A 3.36 rear axle gear ratio would be more livable [3.36 x 2.87 = 9.64]. Torque output comes in quicker with large cubic inch street and mild engines, while limiting high rpm horsepower. Now there are large cubic inch race engines that make good torque and horsepower at higher numbers. That is another article in itself.
Choosing a TKO 500 five speed overdrive transmission for a large cubic engine would require rear axle gear ratios in the high-mid twos. The TKOs 3.27 first gear [3.27 x 2.73= 8.92] makes good use of a large cubic inch engine’s torque. If a 3.50 rear axle gear ratio was used, first gear starts would be very short lived; great for a heavy duty truck with a 10,000 pound gross vehicle weight.
Automatic Transmission Torque Converters also play into the Equation
Torque converters are more than a slipping clutch to stop your Corvette at the light without taking the transmission out of gear. Torque converters multiply torque to move the vehicle’s weight. Typical torque conversion is a 2:1 multiplication rate. If your engine is producing 250 foot pounds of torque, it would be in the 500 foot pound range as the torque converter approaches stall speed. That means the same rear axle gear ratio with an automatic transmission would help you leave the stoplight quicker.
As far as automatic transmission first gear ratios are concerned, the list below covers all factory equipped automatics. 4L60 and 4L60E have .70 overdrive gear ratio. The same formulas apply for the automatic gear ratios concerning the combined ratio. The beauty is in the converter’s torque multiplication.
TH350 2.52
TH400 2.48
700R4 or 4L60 3.06
4L60E 3.06
An automatic Corvette could potentially have a better launch than a manual. Automatic transmissions are also easier on the drivetrain, avoiding the shock loading when the clutch is released quickly on manual transmissions.
You can expect improved performance from a rear axle gear ratio change on 1982 and up Corvettes equipped with overdrive transmissions.
When fuel mileage standards were raised, auto manufacturers decided an overdrive transmission was the easiest way to comply. In an attempt to increase the fuel mileage even further, high mechanical advantage rear axle ratios were used. It was common to find 3.08 and lower rear axle gear ratios in 1982 and older vehicles. 1984 Corvette Crossfires took full advantage of this technology with 3.07-3.31 rear axle gear ratios and an engine that ran out of power at 4000 rpm due to the restrictive intake manifold.
By 1985-1991, the L98 Tuned Port Injection was introduced with excellent torque at low engine rpm, although horsepower faded above 4500 rpm. This required a conservative rear axle gear ratio choice. Later, when LT1, LT4, and LS series engines were introduced, engine torque and horsepower levels increased. There was no longer a need for 2.50 or 2.73 rear axle gear ratios to take advantage of the L98 Tuned Port engine’s torque.
A great example is an early 90s L98 engine with 2.59 rear axle ratio. Changing to a 3.50 rear axle gear ratio makes them feel like they gained 50 horsepower. Now the same 90s Corvette does not do as well with a 4.11 rear axle gear ratio, unless you plan to run full throttle stoplight to stoplight. This is how gear ratios make a direct impact on vehicle driveline performance.
Let’s Wrap it Up
Now that we know how driveline ratios play into overall performance, let’s cover how important it is to match engine torque curve to gear ratios. Camshaft specification predicates torque curve rpm band. A typical early Corvette engine has torque/horsepower band in the 2000-5500 range. To sum things up, large cubic inch engines tend to have more torque at lower rpm, performing better with lower combined gear ratios. Small cubic engines require more rpm before torque builds, requiring higher combined gear ratios.
All too often, I see owners who are disappointed with poor performance after major high performance engine work has been completed. Most of the time, too much camshaft duration and incorrect combination of gear ratios are to blame.
Always consider what type of driving you expect to do. If you’re drag racing, the rear axle ratio should be 3.90 or higher. Everyday cruiser rear axle gear ratios tend to be less aggressive, in the 3.50 or lower range. Time to do the calculations!
1953-1967 Rear Axle Ratios & Identification Codes
Code Ratio Type Application
1953
LW 3.55:1 Standard Early
MW 3.55:1 Standard Late
1954
MW 3.55:1 Standard All
1955
AE 3.55:1 Standard Powerglide
AH 3.55:1 Standard 3-Speed
AD 3.27:1* Standard 3-Speed
*May not have been used on the 1955 Corvette
1956
AE 3.55:1 Standard Powerglide
AH 3.70:1 Standard 3-Speed
AD 3.27:1 Standard 3-Speed
AJ 4.11:1 Standard 3-Speed
NOTE: A very few 1956 Corvettes used Positration Rear Axles stamped “3.70.11 HT” or “4.56.1HT” indicating gear ratio and Hi-Tork.
1957-1958
AE 3.36:1 Standard Powerglide
AH 3.70:1 Standard Manual Transmission
AN 3.70:1 Positraction Manual Transmission
AP 4.11:1 Positraction Manual Transmission
AQ 4.56:1 Positraction Manual Transmission
AS 3.70:1 Positraction Manual Trans. & H.D. Brakes & Suspension
AT 4.11:1 Positraction Manual Trans. & H.D. Brakes & Suspension
AU 4.56:1 Positraction Manual Trans. & H.D. Brakes & Suspension
1959-1960
AE 3.55:1 Standard Powerglide
AH 3.70:1 Standard Manual Transmission
AN 3.70:1 Positraction Manual Transmission
AP 4.11:1 Positraction Manual Transmission
AQ 4.56:1 Positraction Manual Transmission
AS 3.70:1 Positraction Manual Trans. & H.D. Brakes & Suspension
AT 4.11:1 Positraction Manual Trans. & H.D. Brakes & Suspension
AU 4.56:1 Positraction Manual Trans. & H.D. Brakes & Suspension
FJ 3.70:1 Standard Manual Trans. & Metallic Brakes
FK 3.70:1 Positraction Manual Trans. & Metallic Brakes
FL 4.11:1 Positraction Manual Trans. & Metallic Brakes
FM 4.56:1 Positraction Manual Trans. & Metallic Brakes
1961
AC 3.36:1 Standard 3-Speed
AE 3.55:1 Standard Powerglide
AH 3.70:1 Standard 4-Speed
AN 3.70:1 Positraction Manual Transmission
AP 4.11:1 Positraction Manual Transmission
AQ 4.56:1 Positraction Manual Transmission
AF 3.36:1 Positraction Manual Transmission
AS 3.70:1 Positraction 4-Speed & H. D. Brakes & Suspension
AT 4.11:1 Positraction Manual Trans. & H. D. Brakes & Suspension
AU 4.56:1 Positraction Manual Trans. & H. D. Brakes & Suspension
FJ 3.70:1 Standard 4-Speed & Metallic Brakes
FK 3.70:1 Positraction 4-Speed & Metallic Brakes
FL 4.11:1 Positraction Manual Trans. & Metallic Brakes
FM 4.56:1 Positraction Manual Trans. & Metallic Brakes
1962
CA 3.36:1 Standard Manual Transmission or Powerglide
CB 3.36:1 Positraction Manual Transmission or Powerglide
CC 3.55:1 Positraction 4-Speed
CD 3.70:1 Positraction 4-Speed
CE 4.11:1 Positraction 4-Speed
CF 4.56:1 Positraction 4-Speed
CG 3.70:1 Standard 4-Speed
CX* 3.70:1 Standard Close-Ratio 4-Speed
CH 3.36:1 Standard Manual Trans. & Metallic Brakes
CY 3.70:1 Standard 4-Speed & Metallic Brakes
CK 3.36:1 Positraction 4-Speed & Metallic Brakes
CL 3.55:1 Positraction 4-Speed & Metallic Brakes
CM 3.40:1 Positraction 4-Speed & Metallic Brakes
CN 4.11:1 Positraction 4-Speed & Metallic Brakes
CP 4.56:1 Positraction 4-Speed & Metallic Brakes
CQ 3.70:1 Positraction 4-Speed & H. D. Brakes & Suspension
CR 4.11:1 Positraction 4-Speed & H.D. Brakes & Suspension
CS 4.56:1 Positraction 4-Speed & H.D. Brakes & Suspension
CT 3.08:1 Standard 4-Speed
CU 3.08:1 Positraction 4-Speed
CV 3.08:1 Standard 4-Speed & Metallic Brakes
CW 3.08:1 Positraction 4-Speed & Metallic Brakes
*1962 “CX” Code Unverified
1963-1964
CA 3.36:1 Standard Manual Transmission or Powerglide
CB 3.36:1 Positraction Manual Transmission or Powerglide
CC 3.55:1 Positraction 4-Speed
CD 3.70:1 Positraction 4-Speed
CE 4.11:1 Positraction 4-Speed
CF 4.56:1 Positraction 4-Speed
CJ 3.08:1 Positraction 4-Speed
CX 3.70:1 Standard Close-Ratio 4-Speed
CZ 3.08:1 Standard Wide-Ratio 4-Speed
1965-1967
AK 3.36:1 Standard Manual Transmission or Powerglide (327)
AL 3.08:1 Positraction 4-Speed (327)
AM 3.36:1 Positraction Manual Transmission (327)
AN 3.55:1 Positraction 4-Speed (327)
AO 3.70:1 Positraction 4-Speed (327)
AP 4.11:1 Positraction 4-Speed (327)
AQ* 4.56:1 Positraction 4-Speed (327)
AR* 3.08:1 Standard Wide-Ratio 4-Speed (327)
AS 3.70:1 Standard Close-Ratio 4-Speed (327)
AT 3.08:1 Positraction 4-Speed (396/427)
AU 3.36:1 Positraction 4-Speed (396/427)
AZ 3.55:1 Positraction 4-Speed (396/427)
FA 3.70:1 Positraction 4-Speed (396/427)
FB 4.11:1 Positraction 4-Speed (396/427)
FC 4.56:1 Positraction 4-Speed (396/427)
NOTE: All 1965-167 Corvette Rear Axles were manufactured at Warren and are suffixed “W”.
*Listed 1967 “AQ” and “AR” codes & ratios may only have been used early in the 1967 model-year, or not at all.
1968-1969
AK 3.36:1 Standard (327/350)
AL 3.08:1 Positraction (327/350)
AM 3.36:1 Positraction (327/350)
AN 3.55:1 Positraction (327/350)
AO 3.70:1 Positraction (327/350)
AP 4.11:1 Positraction (327/350)
AS 3.70:1 Standard (327/350)
AT 3.08:1 Heavy Duty Positraction (427)
AU 3.36:1 Heavy Duty Positraction (427)
AV 3.08:1 Positraction (427)
AW 3.08:1 Heavy Duty Positraction (427)
AY 2.73:1 Heavy Duty Positraction (427 Turbo Hydra-Matic)
AZ 3.55:1 Heavy Duty Positraction (427)
FA 3.70:1 Heavy Duty Positraction (427)
FB 4.11:1 Heavy Duty Positraction (427)
FC 4.56:1 Heavy Duty Positraction (427)
NOTE: 1968-69 Corvette Rear Axles were manufactured at Warren and are suffixed “W”. 1969 models built after approximately August of 1969 use 1970 coded rear axles.
1970 (Late 1969)
CAK 3.36:1 Standard
CAL 3.08:1 Standard
CAM 3.36:1 Positraction
CAN 3.55:1 Standard
CAO 3.70:1 Positraction
CAP 4.11:1 Standard
CAS 3.70:1 Standard (LT1)
CAT 3.08:1 Heavy Duty Positraction
CAU 3.36:1 Heavy Duty Positraction
CAV 3.08:1 Standard
CAW 3.08:1 Standard
CAX 3.36:1 Heavy Duty Positraction
CAY 2.73:1 Positraction (454 Turbo Hydra-Matic)
CAZ 3.55:1 Heavy Duty Positraction
CFA 3.70:1 Positraction
CFB 4.11:1 Heavy Duty Positraction
CFC 4.56:1 Heavy Duty Positraction
CLR 3.36:1 Standard
NOTE: Positraction became standard equipment on the 1970 Corvette and the inclusion of Non-Positraction (standard) axle codes by Chevrolet is in conflict
1971
AA 3.55:1
AB 3.70:1
AC 4.11:1
AD 4.56:1
AW 3.08:1
AX 3.36:1
LR 3.36:1
1972
AA 3.55:1
AB 3.70:1
AC 4.11:1
AX 3.36:1
LR 3.36:1
1973-1974
AA 3.55:1
AB 3.70:1
AC 4.11:1
AW 3.08:1
AX 3.36:1
LR 3.36:1
1975
AA 3.55:1
AB 3.70:1
AC 4.11:1
AY 2.73:1
AW 3.08:1
AX 3.36:1
LR 3.36:1
1976-1977
OA 3.08:1
OD 3.36:1
LR 3.36:1
OB 3.55:1
OC 3.70:1
1978
OK 3.08:1
OM 3.36:1
OH 3.55:1
OJ 3.70:1
1979
OM 3.36:1
OH 3.55:1
OJ 3.70:1
1980
OF 3.07:1
OH 3.07:1
1981
OJ 2.87:1 Automatic Transmission
OK 2.72:1 Manual Transmission
1982
OA 2.72:1 Standard Wheels
OF 2.87:1 Aluminum Wheels
NOTE: All 1970-1982 Corvette Rear Axles were Positraction
C4
GHO 3.54
GM1 2.59 Rear Axle
GM3 3.45 Rear Axle
GT7 3.33 Rear Axle
GU2 2.73 Rear Axle
GW4 3.31 Rear Axle
HE3 3.07 (1984) Rear Axle
G44 3.07 (1985) Rear Axle
GUU 3.07 (1986-1996) Rear Axle
For a street car the Eaton/Detroit Tru Trac is good choice. The Detroit Locker might be a little stronger but most people don't care for the way it sounds or feels as it releasing.
The week point will be the gears on the Dana 44, which are about the size of a 10 bolt rear, if your going to put a serious torque load and slicks on the car a live rear axle like a dana 60 rather than a IRS is preferred
heres some more, info on swapping to a dana 44 that skidownit posted
I recently installed a Dana 44 with 3.07 as a result of upgrading the
motor to a 406. I know many people here do not trust the reliability of
the d36's and often upgrade. As a result, many questions on what is
needed and how hard it is to covert over are asked. I hope to supply some
instructions on how to do the job and give some comfort to those about to
take on the challenge.
I am not gonna go through the details of
each bolt and what size each are, for if you can't figure that out, I
wouldn't advice you going any further than reading this.")
OK.
Lets get started. I am gonna assume you are replacing just the
differential, cover (batwing), driveshaft and C-beam. If you have to
replace the entire unit, this tech tip may not offer direct assistance,
but some of the pictures might help.
The Dana 44 is much larger
than the dainty36, as a result you will need a driveshaft from a manual
car that is about 1" shorter and also a different C -Beam, both of these
are usually supplied with the differentials, but you should check to make
sure before you find out too late.
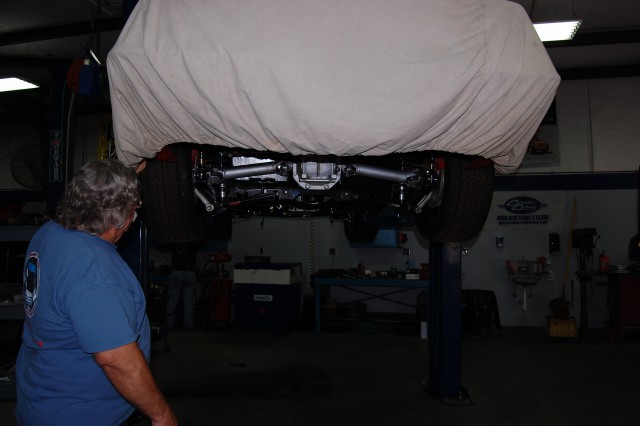
The first thing you will need to
do is secure the car up off the ground. Use all the safety needed to make
sure you don't get hurt. Once the car is off the ground and you will
need a bit of clearance, as the spring will bend downward quite a bit once
released.
Here is a shot of the Dainty36

When
I did mine I undid as little as possible, to make life easier, I will try
to explain this is the same fashion I did mine.
The first thing
your gonna want to do is remove the 3 bolts that hold the torsion bars in
place, you can see this in the upper right hand corner of the picture.
And the clean hole were they came out of on the rear. DO NOT TURN the
torsion bars themselves. I did my swap and never had to mess with
re-aligning the car. If you turn them you will mess up the alignment
etc.
Here
is another shot of it straight from the rear.

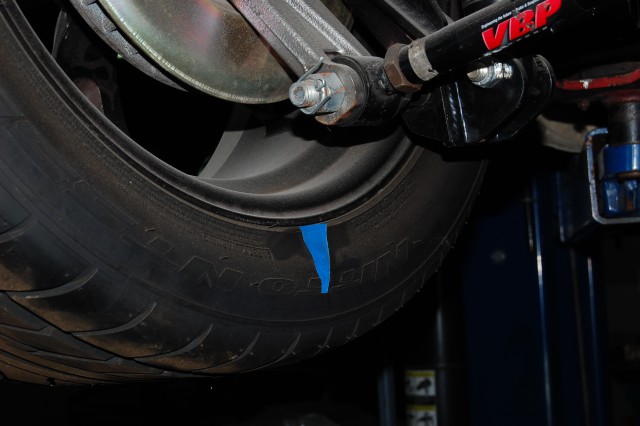
Next
you are gonna want to just pull it back out of the way for now. Now move
over to the end of the black spring, seen in the picture here. There is a
bolt on either side, you will need to support the spring SECURELY with
something, a jack or something that is not gonna let go and rip your
arm/hand off when you take the bolt out. There is ALOT of potential
energy there and it comes down WAY past the end of the threaded rod, so
when you pull the nut off you will then need to let the end down slowly
with whatever you used to keep it in place. Make sure you are high enough
off the ground, for the spring will make a virtual upside down U when
fully let down.


Now
that the spring ends are completed relieved, you can move to the middle
section and remove the two bolts that sand-witch the spacers and spring
itself into place. Seen here in this picture.
Now
the spring is completely out of the way. I noted the orientation of it
with a small scribe mark, as you will need to re-secure all the
pieces.
OK these next few pictures are pretty busy so i will try to
walk you through what you see.
On the first picture it shows the
next two bolts you need to remove. DO NOT TURN THE BIG BOLT that looks
like the washer if off center. That is another alignment bolt. Remove
the other two seen just to the upper left of the big one. ( the bolts
that hold the spring are suppose to be gone at this point)

With
those bolts removed you should be able to rotate those dog bones down
towards the ground and over to the wheel. Again this is why you need alot
of clearance under the car. These will become very valuable tools to help
you get the half shafts out. with both of the dog bones rotated down out
you should look like this, except the 1/2 shafts are still
connected.

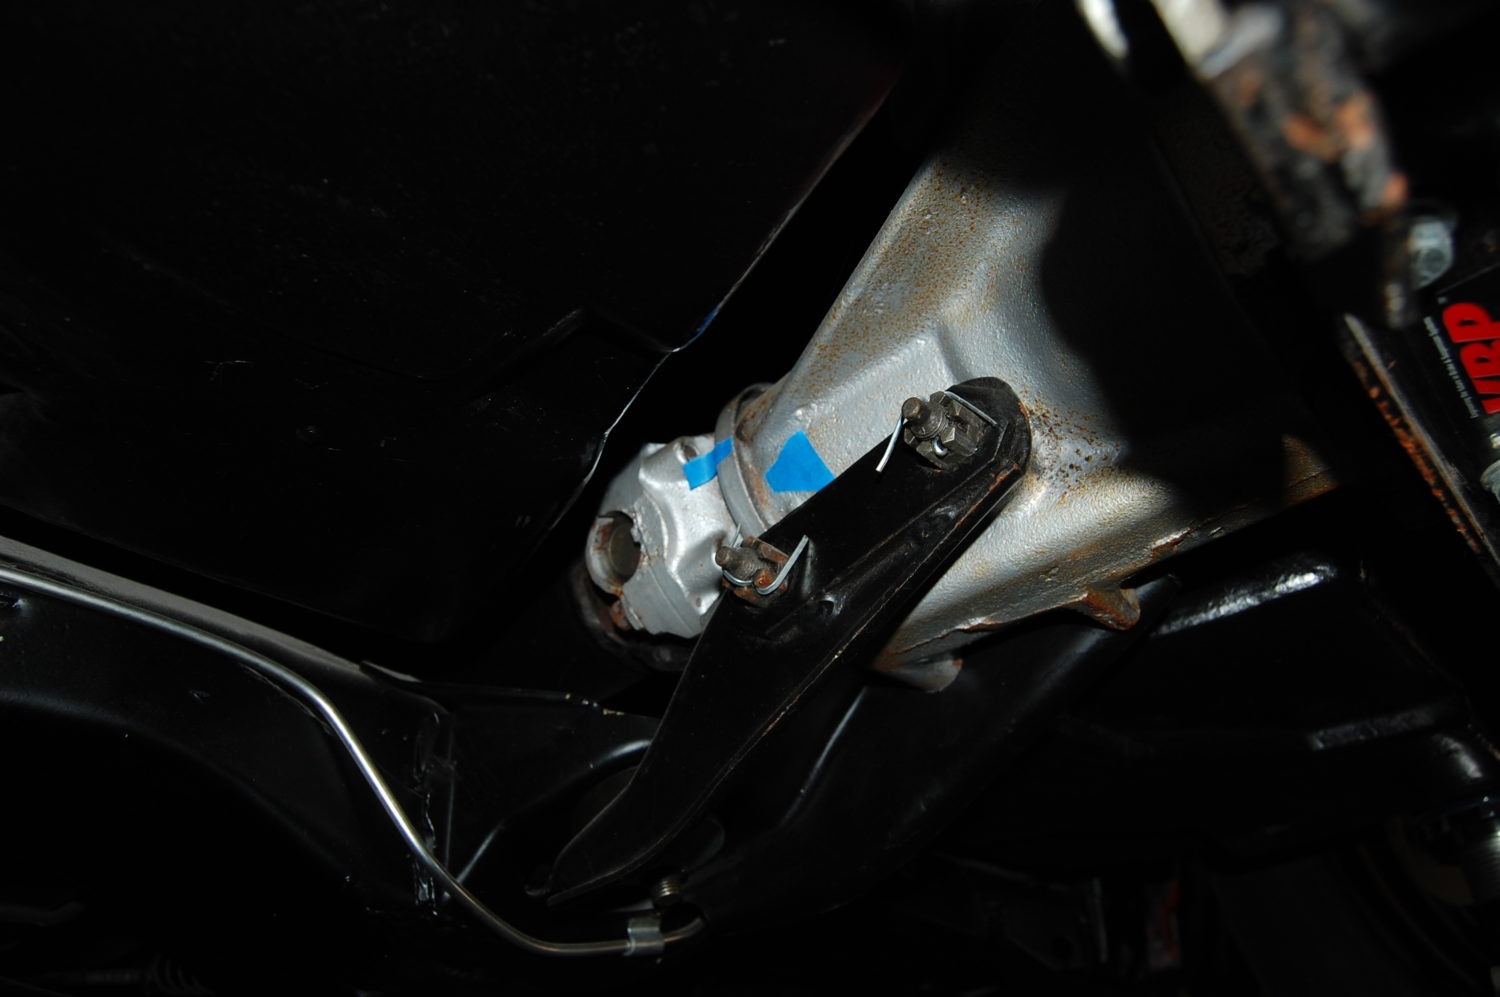
Now
I am gonna have to fire my camera man for he was slacking through this
part of the project, and did not get a shot of the U-Joint straps that you
need to remove at this point. There are two little straps that hold the
U-joints in place, these need to be taken off each of the two 1/2 shafts
at the differential's side. Leave the wheel side alone. Again look at
the last picture for reference.
Two things to be conscious of here.
1. The u joint caps can and will fall off, when you start moving the 1/2
shafts around. I wrapped them with electrical tape to keep them in
place.
2. The 1/2 shafts are kinda trapped in the
differential's cups that the straps are bolted to, so here is where the
dog bones come into play. You can use them as a lever to move the wheel
and 1/2 shaft out away from the differential, since the wheel is not being
help in place anymore. This will give you just enough room to get the 1/2
shaft to the position you see above. Again, you need to push outward
using the dog-bones to create enough room to get the 1/2 shafts down out.
It should now look like this

You
almost have it licked now! All there is left to do is obviously get a
support you can then lower on the differential itself and take the
remaining two bolts out that hold it in. These are located at the ends of
the batwing/cover. This is an earlier picture, but you can see one of the
bolts up near the yellow that needs to be removed now.

Now
your ready to lower the dainty 36 down out!
Just jocky things around
until it clears everything.

Take
a break and drink a beeer for lubrication!

If
your new D44 is apart as mine was, make sure that both maing surfaces are
free of dirt and dings that may lead to leaks. Thanks Dad for taking that
responsibility on while I drink my beer.


Next
you are gonna want to have already purchased some gasket sealer called
"The Right Stuff". Apply it to each mating surface and put the two
together.


Once
you have it torqued to the specifications in your manual, install the unit
in the exact reverse order that you took it out! This is what the
finshied product looks like!
Congratulations!

http://www.xtremeterrain.com/dana4430sp ... ocker.aspx
http://findarticles.com/p/articles/mi_m ... _87460214/
http://www.drivetrainamerica.com/store/ ... =19747-010
http://cgi.ebay.com/ebaymotors/ws/eBayI ... 0419395404
http://tech.corvettecentral.com/2015/11/rear-axlerear-end-ratio-information/
Rear Axle/Rear End Ratio Information
Have you ever thought about how the correct rear axle ratio affects your Corvette’s performance? First, learn what ratio you have hidden away in the differential housing. Early Corvettes (1960-1970) may have many different ratios; later Corvettes had fewer choices, in an effort to boost fuel mileage, and by the mid-80s performance gear ratio options were rare.
Raise the rear of your Corvette so both wheels spin freely. You need a jack and stands, or a lift if you are lucky. Be extra careful when lifting any vehicle. If using a floor jack, make sure the front wheels roll as the jack lifts the back end. Place wheel chocks at the front tires to prevent rolling forward. As the jack lifts, your Corvette has to roll back towards you as the distance becomes shorter.
Once in the air, stands should be placed under the frame or trailing arms as protection from jack failure. When your Corvette is securely lowered, rear axle ratio can be safely determined. The transmission must be in neutral with the parking brake off. The objective is to count how many times the driveshaft rotates as the wheel makes one full rotation. Mark the driveshaft near the differential housing (usually the yoke) and make a mark on the differential housing. Mark the tire so you can determine when one full rotation has taken place.
FYI – your Corvette must be equipped with a posi-traction differential for the above procedure to work.
Early Corvettes without posi-traction will require a slightly different approach; only the wheel should be up off the ground, rotating freely. Use the same procedure as above to safely raise and support your Corvette. The free spinning wheel has to be rotated two full turns while counting how many times the driveshaft rotates. This is due to the differential pinion gears rotating inside the differential. You can use the same procedure as the posi-traction equipped Corvette although it is difficult and an error can easily occur. You would require a helper and both wheels must rotate in unison while someone counts the driveshaft rotations.
The equation is simple. If the driveshaft yoke rotates a bit past four turns during one full wheel rotation, you would have a 4.11 rear gear ratio. Divide the driveshaft rotations into one [4.11 / 1]. Non posi-traction Corvettes use the same formula, counting two revolutions of the wheel while using one as the divisor.
What do the numbers mean?
Numerically low gear ratio numbers (3.08, for example) mean more power/torque is required to move your Corvette. Once rolling, the 3.08 gear ratio will keep your engine rpm low and help save fuel. On the flip side, starting line performance suffers. High numerical gear ratios (4.11) have a greater mechanical advantage, requiring less power (torque) to get you rolling. The downside is engine rpm increases at highway speeds as fuel flows rapidly out of your tank.
Wheel/tire diameter also plays an important part in the rear gear ratio equation. Installing a taller tire lowers the mechanical advantage, requiring less rpm to maintain the same speed as the original equipment tire diameter. This affects acceleration performance negatively while increasing top end speed.
Do I Really Care if I Have a Low or High Gear Ratio?
Yes, if overall performance is important to you and especially if you’re planning any performance modifications. The most powerful engine will feel sluggish with the wrong rear axle gear ratio. In some cases, the rear axle gear ratio should be left alone and a transmission change may be the correct direction to take. Some contrary situations arise when dealing with mechanical components, including the driveline. Let me expand on what driveline situations you might be up against.
Overdrive Transmission or Rear Axle Gear Ratio Change?
Overdrive transmission is a great innovation. Early on, overdrive transmissions were marketed with poor results. No one was concerned with fuel mileage. Today, overdrive transmission is considered standard equipment. However, many early Corvette restorers are reluctant to make this modification. Not only do you slow the engine down at highway speed, many overdrive units have a better first gear ratio for more starting line performance.
This means you also need to consider the transmission’s gear ratios for best possible driveline performance. In some cases, changing the transmission to an overdrive unit can help off-the-line performance and save fuel while cruising. Where am I going with this? Take time to analyze what you have to work with. You may be surprised to find not much engine work is required to gain the desired performance.
I know there is never enough performance, but this will send you down the right path to get all you can.
Compound/Combined Gearing
Let’s review how the rear axle gear ratio works in conjunction with the transmission. All Corvettes built before 1981 had 1-1 transmission final drive gear ratios. This is the prime example of how an overdrive transmission change would benefit: 1969 Corvette with an original Muncie M20 that has a 2.52 first gear ratio with a 3.36 rear axle gear ratio. Our combined first gear ratio would be [3.36 x 2.52 = 8.46], not too bad for a 427 cubic inch engine with plenty of low rpm torque. A low torque 327 cubic inch engine would not be very exciting to drive until you got above 35-40 mph.
Changing to a Tremec TKO 500 manual transmission—which has a 3.27 first gear ratio and .68 overdrive ratio—would make this the perfect for performance and cruising. The 3.36 rear axle gear ratio coupled with the 3.27 transmission first gear ratio multiplies providing a 10.98 first gear ratio [3.36 x 3.27 = 10.98]. That 10.98 combined gear ratio will make even a smog motor small block Chevy feel good.
If you went the other way and changed the rear axle ratio, the engine would scream—4000 rpm at 75 mph with a 4.11 rear gear axle ratio, adding extra wear to the engine and to your mental state. The combined gear ratios [4.11 x 2.52 = 10.35] would provide decent off-the-line performance, even with a low horsepower engine. This is why it makes sense to evaluate what you are working with before making any driveline changes, including engine performance.
Tremec also has a TKO 600 five speed overdrive transmission available with a 2.87 first gear ratio. This might be used in engines that produce high torque at low rpm (big blocks or large cubic inch small blocks). Using a 3.90 rear axle gear ratio as an example [2.87 x 3.90 = 11.19], this is on the high side for a high torque engine. A 3.36 rear axle gear ratio would be more livable [3.36 x 2.87 = 9.64]. Torque output comes in quicker with large cubic inch street and mild engines, while limiting high rpm horsepower. Now there are large cubic inch race engines that make good torque and horsepower at higher numbers. That is another article in itself.
Choosing a TKO 500 five speed overdrive transmission for a large cubic engine would require rear axle gear ratios in the high-mid twos. The TKOs 3.27 first gear [3.27 x 2.73= 8.92] makes good use of a large cubic inch engine’s torque. If a 3.50 rear axle gear ratio was used, first gear starts would be very short lived; great for a heavy duty truck with a 10,000 pound gross vehicle weight.
Automatic Transmission Torque Converters also play into the Equation
Torque converters are more than a slipping clutch to stop your Corvette at the light without taking the transmission out of gear. Torque converters multiply torque to move the vehicle’s weight. Typical torque conversion is a 2:1 multiplication rate. If your engine is producing 250 foot pounds of torque, it would be in the 500 foot pound range as the torque converter approaches stall speed. That means the same rear axle gear ratio with an automatic transmission would help you leave the stoplight quicker.
As far as automatic transmission first gear ratios are concerned, the list below covers all factory equipped automatics. 4L60 and 4L60E have .70 overdrive gear ratio. The same formulas apply for the automatic gear ratios concerning the combined ratio. The beauty is in the converter’s torque multiplication.
TH350 2.52
TH400 2.48
700R4 or 4L60 3.06
4L60E 3.06
An automatic Corvette could potentially have a better launch than a manual. Automatic transmissions are also easier on the drivetrain, avoiding the shock loading when the clutch is released quickly on manual transmissions.
You can expect improved performance from a rear axle gear ratio change on 1982 and up Corvettes equipped with overdrive transmissions.
When fuel mileage standards were raised, auto manufacturers decided an overdrive transmission was the easiest way to comply. In an attempt to increase the fuel mileage even further, high mechanical advantage rear axle ratios were used. It was common to find 3.08 and lower rear axle gear ratios in 1982 and older vehicles. 1984 Corvette Crossfires took full advantage of this technology with 3.07-3.31 rear axle gear ratios and an engine that ran out of power at 4000 rpm due to the restrictive intake manifold.
By 1985-1991, the L98 Tuned Port Injection was introduced with excellent torque at low engine rpm, although horsepower faded above 4500 rpm. This required a conservative rear axle gear ratio choice. Later, when LT1, LT4, and LS series engines were introduced, engine torque and horsepower levels increased. There was no longer a need for 2.50 or 2.73 rear axle gear ratios to take advantage of the L98 Tuned Port engine’s torque.
A great example is an early 90s L98 engine with 2.59 rear axle ratio. Changing to a 3.50 rear axle gear ratio makes them feel like they gained 50 horsepower. Now the same 90s Corvette does not do as well with a 4.11 rear axle gear ratio, unless you plan to run full throttle stoplight to stoplight. This is how gear ratios make a direct impact on vehicle driveline performance.
Let’s Wrap it Up
Now that we know how driveline ratios play into overall performance, let’s cover how important it is to match engine torque curve to gear ratios. Camshaft specification predicates torque curve rpm band. A typical early Corvette engine has torque/horsepower band in the 2000-5500 range. To sum things up, large cubic inch engines tend to have more torque at lower rpm, performing better with lower combined gear ratios. Small cubic engines require more rpm before torque builds, requiring higher combined gear ratios.
All too often, I see owners who are disappointed with poor performance after major high performance engine work has been completed. Most of the time, too much camshaft duration and incorrect combination of gear ratios are to blame.
Always consider what type of driving you expect to do. If you’re drag racing, the rear axle ratio should be 3.90 or higher. Everyday cruiser rear axle gear ratios tend to be less aggressive, in the 3.50 or lower range. Time to do the calculations!
1953-1967 Rear Axle Ratios & Identification Codes
Code Ratio Type Application
1953
LW 3.55:1 Standard Early
MW 3.55:1 Standard Late
1954
MW 3.55:1 Standard All
1955
AE 3.55:1 Standard Powerglide
AH 3.55:1 Standard 3-Speed
AD 3.27:1* Standard 3-Speed
*May not have been used on the 1955 Corvette
1956
AE 3.55:1 Standard Powerglide
AH 3.70:1 Standard 3-Speed
AD 3.27:1 Standard 3-Speed
AJ 4.11:1 Standard 3-Speed
NOTE: A very few 1956 Corvettes used Positration Rear Axles stamped “3.70.11 HT” or “4.56.1HT” indicating gear ratio and Hi-Tork.
1957-1958
AE 3.36:1 Standard Powerglide
AH 3.70:1 Standard Manual Transmission
AN 3.70:1 Positraction Manual Transmission
AP 4.11:1 Positraction Manual Transmission
AQ 4.56:1 Positraction Manual Transmission
AS 3.70:1 Positraction Manual Trans. & H.D. Brakes & Suspension
AT 4.11:1 Positraction Manual Trans. & H.D. Brakes & Suspension
AU 4.56:1 Positraction Manual Trans. & H.D. Brakes & Suspension
1959-1960
AE 3.55:1 Standard Powerglide
AH 3.70:1 Standard Manual Transmission
AN 3.70:1 Positraction Manual Transmission
AP 4.11:1 Positraction Manual Transmission
AQ 4.56:1 Positraction Manual Transmission
AS 3.70:1 Positraction Manual Trans. & H.D. Brakes & Suspension
AT 4.11:1 Positraction Manual Trans. & H.D. Brakes & Suspension
AU 4.56:1 Positraction Manual Trans. & H.D. Brakes & Suspension
FJ 3.70:1 Standard Manual Trans. & Metallic Brakes
FK 3.70:1 Positraction Manual Trans. & Metallic Brakes
FL 4.11:1 Positraction Manual Trans. & Metallic Brakes
FM 4.56:1 Positraction Manual Trans. & Metallic Brakes
1961
AC 3.36:1 Standard 3-Speed
AE 3.55:1 Standard Powerglide
AH 3.70:1 Standard 4-Speed
AN 3.70:1 Positraction Manual Transmission
AP 4.11:1 Positraction Manual Transmission
AQ 4.56:1 Positraction Manual Transmission
AF 3.36:1 Positraction Manual Transmission
AS 3.70:1 Positraction 4-Speed & H. D. Brakes & Suspension
AT 4.11:1 Positraction Manual Trans. & H. D. Brakes & Suspension
AU 4.56:1 Positraction Manual Trans. & H. D. Brakes & Suspension
FJ 3.70:1 Standard 4-Speed & Metallic Brakes
FK 3.70:1 Positraction 4-Speed & Metallic Brakes
FL 4.11:1 Positraction Manual Trans. & Metallic Brakes
FM 4.56:1 Positraction Manual Trans. & Metallic Brakes
1962
CA 3.36:1 Standard Manual Transmission or Powerglide
CB 3.36:1 Positraction Manual Transmission or Powerglide
CC 3.55:1 Positraction 4-Speed
CD 3.70:1 Positraction 4-Speed
CE 4.11:1 Positraction 4-Speed
CF 4.56:1 Positraction 4-Speed
CG 3.70:1 Standard 4-Speed
CX* 3.70:1 Standard Close-Ratio 4-Speed
CH 3.36:1 Standard Manual Trans. & Metallic Brakes
CY 3.70:1 Standard 4-Speed & Metallic Brakes
CK 3.36:1 Positraction 4-Speed & Metallic Brakes
CL 3.55:1 Positraction 4-Speed & Metallic Brakes
CM 3.40:1 Positraction 4-Speed & Metallic Brakes
CN 4.11:1 Positraction 4-Speed & Metallic Brakes
CP 4.56:1 Positraction 4-Speed & Metallic Brakes
CQ 3.70:1 Positraction 4-Speed & H. D. Brakes & Suspension
CR 4.11:1 Positraction 4-Speed & H.D. Brakes & Suspension
CS 4.56:1 Positraction 4-Speed & H.D. Brakes & Suspension
CT 3.08:1 Standard 4-Speed
CU 3.08:1 Positraction 4-Speed
CV 3.08:1 Standard 4-Speed & Metallic Brakes
CW 3.08:1 Positraction 4-Speed & Metallic Brakes
*1962 “CX” Code Unverified
1963-1964
CA 3.36:1 Standard Manual Transmission or Powerglide
CB 3.36:1 Positraction Manual Transmission or Powerglide
CC 3.55:1 Positraction 4-Speed
CD 3.70:1 Positraction 4-Speed
CE 4.11:1 Positraction 4-Speed
CF 4.56:1 Positraction 4-Speed
CJ 3.08:1 Positraction 4-Speed
CX 3.70:1 Standard Close-Ratio 4-Speed
CZ 3.08:1 Standard Wide-Ratio 4-Speed
1965-1967
AK 3.36:1 Standard Manual Transmission or Powerglide (327)
AL 3.08:1 Positraction 4-Speed (327)
AM 3.36:1 Positraction Manual Transmission (327)
AN 3.55:1 Positraction 4-Speed (327)
AO 3.70:1 Positraction 4-Speed (327)
AP 4.11:1 Positraction 4-Speed (327)
AQ* 4.56:1 Positraction 4-Speed (327)
AR* 3.08:1 Standard Wide-Ratio 4-Speed (327)
AS 3.70:1 Standard Close-Ratio 4-Speed (327)
AT 3.08:1 Positraction 4-Speed (396/427)
AU 3.36:1 Positraction 4-Speed (396/427)
AZ 3.55:1 Positraction 4-Speed (396/427)
FA 3.70:1 Positraction 4-Speed (396/427)
FB 4.11:1 Positraction 4-Speed (396/427)
FC 4.56:1 Positraction 4-Speed (396/427)
NOTE: All 1965-167 Corvette Rear Axles were manufactured at Warren and are suffixed “W”.
*Listed 1967 “AQ” and “AR” codes & ratios may only have been used early in the 1967 model-year, or not at all.
1968-1969
AK 3.36:1 Standard (327/350)
AL 3.08:1 Positraction (327/350)
AM 3.36:1 Positraction (327/350)
AN 3.55:1 Positraction (327/350)
AO 3.70:1 Positraction (327/350)
AP 4.11:1 Positraction (327/350)
AS 3.70:1 Standard (327/350)
AT 3.08:1 Heavy Duty Positraction (427)
AU 3.36:1 Heavy Duty Positraction (427)
AV 3.08:1 Positraction (427)
AW 3.08:1 Heavy Duty Positraction (427)
AY 2.73:1 Heavy Duty Positraction (427 Turbo Hydra-Matic)
AZ 3.55:1 Heavy Duty Positraction (427)
FA 3.70:1 Heavy Duty Positraction (427)
FB 4.11:1 Heavy Duty Positraction (427)
FC 4.56:1 Heavy Duty Positraction (427)
NOTE: 1968-69 Corvette Rear Axles were manufactured at Warren and are suffixed “W”. 1969 models built after approximately August of 1969 use 1970 coded rear axles.
1970 (Late 1969)
CAK 3.36:1 Standard
CAL 3.08:1 Standard
CAM 3.36:1 Positraction
CAN 3.55:1 Standard
CAO 3.70:1 Positraction
CAP 4.11:1 Standard
CAS 3.70:1 Standard (LT1)
CAT 3.08:1 Heavy Duty Positraction
CAU 3.36:1 Heavy Duty Positraction
CAV 3.08:1 Standard
CAW 3.08:1 Standard
CAX 3.36:1 Heavy Duty Positraction
CAY 2.73:1 Positraction (454 Turbo Hydra-Matic)
CAZ 3.55:1 Heavy Duty Positraction
CFA 3.70:1 Positraction
CFB 4.11:1 Heavy Duty Positraction
CFC 4.56:1 Heavy Duty Positraction
CLR 3.36:1 Standard
NOTE: Positraction became standard equipment on the 1970 Corvette and the inclusion of Non-Positraction (standard) axle codes by Chevrolet is in conflict
1971
AA 3.55:1
AB 3.70:1
AC 4.11:1
AD 4.56:1
AW 3.08:1
AX 3.36:1
LR 3.36:1
1972
AA 3.55:1
AB 3.70:1
AC 4.11:1
AX 3.36:1
LR 3.36:1
1973-1974
AA 3.55:1
AB 3.70:1
AC 4.11:1
AW 3.08:1
AX 3.36:1
LR 3.36:1
1975
AA 3.55:1
AB 3.70:1
AC 4.11:1
AY 2.73:1
AW 3.08:1
AX 3.36:1
LR 3.36:1
1976-1977
OA 3.08:1
OD 3.36:1
LR 3.36:1
OB 3.55:1
OC 3.70:1
1978
OK 3.08:1
OM 3.36:1
OH 3.55:1
OJ 3.70:1
1979
OM 3.36:1
OH 3.55:1
OJ 3.70:1
1980
OF 3.07:1
OH 3.07:1
1981
OJ 2.87:1 Automatic Transmission
OK 2.72:1 Manual Transmission
1982
OA 2.72:1 Standard Wheels
OF 2.87:1 Aluminum Wheels
NOTE: All 1970-1982 Corvette Rear Axles were Positraction
C4
GHO 3.54
GM1 2.59 Rear Axle
GM3 3.45 Rear Axle
GT7 3.33 Rear Axle
GU2 2.73 Rear Axle
GW4 3.31 Rear Axle
HE3 3.07 (1984) Rear Axle
G44 3.07 (1985) Rear Axle
GUU 3.07 (1986-1996) Rear Axle
For a street car the Eaton/Detroit Tru Trac is good choice. The Detroit Locker might be a little stronger but most people don't care for the way it sounds or feels as it releasing.
The week point will be the gears on the Dana 44, which are about the size of a 10 bolt rear, if your going to put a serious torque load and slicks on the car a live rear axle like a dana 60 rather than a IRS is preferred
heres some more, info on swapping to a dana 44 that skidownit posted
I recently installed a Dana 44 with 3.07 as a result of upgrading the
motor to a 406. I know many people here do not trust the reliability of
the d36's and often upgrade. As a result, many questions on what is
needed and how hard it is to covert over are asked. I hope to supply some
instructions on how to do the job and give some comfort to those about to
take on the challenge.
I am not gonna go through the details of
each bolt and what size each are, for if you can't figure that out, I
wouldn't advice you going any further than reading this.
OK.
Lets get started. I am gonna assume you are replacing just the
differential, cover (batwing), driveshaft and C-beam. If you have to
replace the entire unit, this tech tip may not offer direct assistance,
but some of the pictures might help.
The Dana 44 is much larger
than the dainty36, as a result you will need a driveshaft from a manual
car that is about 1" shorter and also a different C -Beam, both of these
are usually supplied with the differentials, but you should check to make
sure before you find out too late.
The first thing you will need to
do is secure the car up off the ground. Use all the safety needed to make
sure you don't get hurt. Once the car is off the ground and you will
need a bit of clearance, as the spring will bend downward quite a bit once
released.
Here is a shot of the Dainty36
When
I did mine I undid as little as possible, to make life easier, I will try
to explain this is the same fashion I did mine.
The first thing
your gonna want to do is remove the 3 bolts that hold the torsion bars in
place, you can see this in the upper right hand corner of the picture.
And the clean hole were they came out of on the rear. DO NOT TURN the
torsion bars themselves. I did my swap and never had to mess with
re-aligning the car. If you turn them you will mess up the alignment
etc.
Here
is another shot of it straight from the rear.
Next
you are gonna want to just pull it back out of the way for now. Now move
over to the end of the black spring, seen in the picture here. There is a
bolt on either side, you will need to support the spring SECURELY with
something, a jack or something that is not gonna let go and rip your
arm/hand off when you take the bolt out. There is ALOT of potential
energy there and it comes down WAY past the end of the threaded rod, so
when you pull the nut off you will then need to let the end down slowly
with whatever you used to keep it in place. Make sure you are high enough
off the ground, for the spring will make a virtual upside down U when
fully let down.
Now
that the spring ends are completed relieved, you can move to the middle
section and remove the two bolts that sand-witch the spacers and spring
itself into place. Seen here in this picture.
Now
the spring is completely out of the way. I noted the orientation of it
with a small scribe mark, as you will need to re-secure all the
pieces.
OK these next few pictures are pretty busy so i will try to
walk you through what you see.
On the first picture it shows the
next two bolts you need to remove. DO NOT TURN THE BIG BOLT that looks
like the washer if off center. That is another alignment bolt. Remove
the other two seen just to the upper left of the big one. ( the bolts
that hold the spring are suppose to be gone at this point)
With
those bolts removed you should be able to rotate those dog bones down
towards the ground and over to the wheel. Again this is why you need alot
of clearance under the car. These will become very valuable tools to help
you get the half shafts out. with both of the dog bones rotated down out
you should look like this, except the 1/2 shafts are still
connected.
Now
I am gonna have to fire my camera man for he was slacking through this
part of the project, and did not get a shot of the U-Joint straps that you
need to remove at this point. There are two little straps that hold the
U-joints in place, these need to be taken off each of the two 1/2 shafts
at the differential's side. Leave the wheel side alone. Again look at
the last picture for reference.
Two things to be conscious of here.
1. The u joint caps can and will fall off, when you start moving the 1/2
shafts around. I wrapped them with electrical tape to keep them in
place.
2. The 1/2 shafts are kinda trapped in the
differential's cups that the straps are bolted to, so here is where the
dog bones come into play. You can use them as a lever to move the wheel
and 1/2 shaft out away from the differential, since the wheel is not being
help in place anymore. This will give you just enough room to get the 1/2
shaft to the position you see above. Again, you need to push outward
using the dog-bones to create enough room to get the 1/2 shafts down out.
It should now look like this
You
almost have it licked now! All there is left to do is obviously get a
support you can then lower on the differential itself and take the
remaining two bolts out that hold it in. These are located at the ends of
the batwing/cover. This is an earlier picture, but you can see one of the
bolts up near the yellow that needs to be removed now.
Now
your ready to lower the dainty 36 down out!
Just jocky things around
until it clears everything.
Take
a break and drink a beeer for lubrication!
If
your new D44 is apart as mine was, make sure that both maing surfaces are
free of dirt and dings that may lead to leaks. Thanks Dad for taking that
responsibility on while I drink my beer.
Next
you are gonna want to have already purchased some gasket sealer called
"The Right Stuff". Apply it to each mating surface and put the two
together.
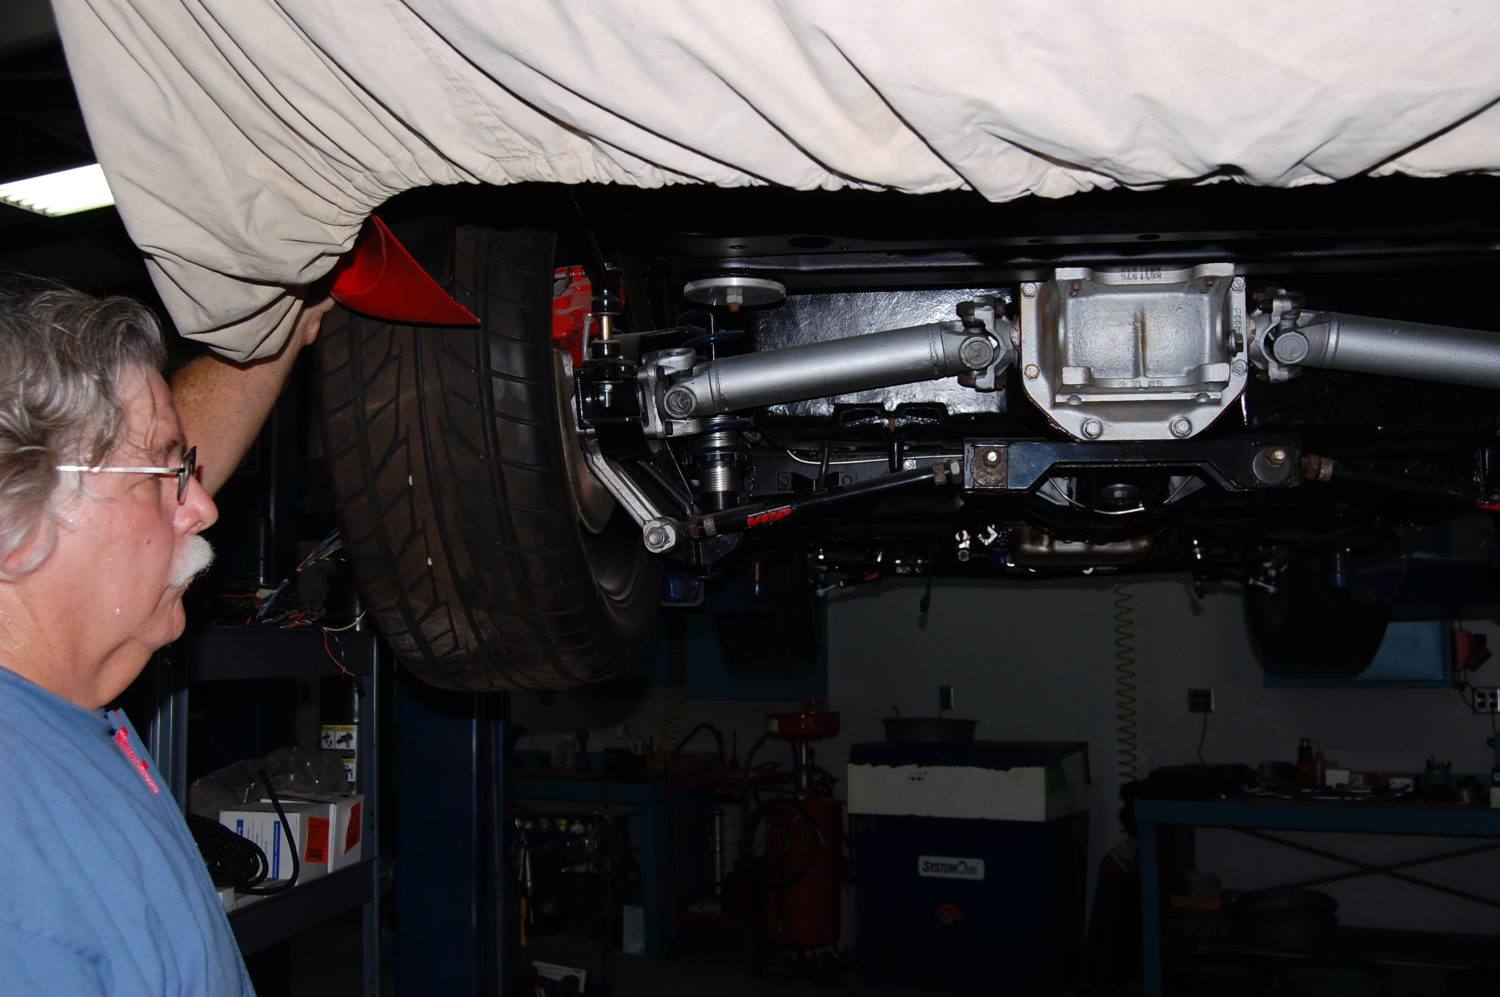
Once
you have it torqued to the specifications in your manual, install the unit
in the exact reverse order that you took it out! This is what the
finshied product looks like!
Congratulations!
Last edited by a moderator: