Rebuilding A Doug Nash 4+1 Street 5 Speed

2Loose

reliable source of info
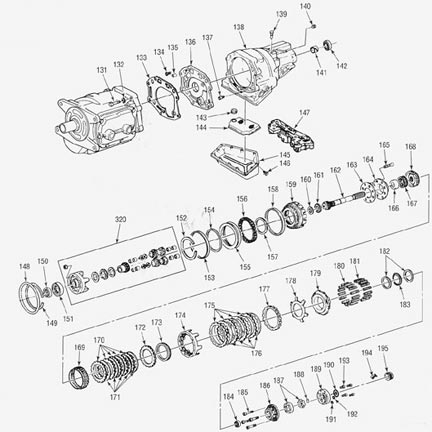
Finally got my tranny tear down pix posted to my website, there are a whole bunch of 'em, as I wanted to record how it is so I can get 'er back together again in the right order....
Here's some of them:

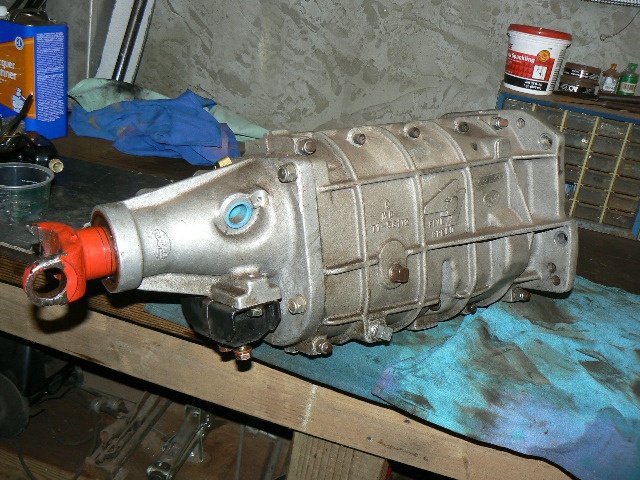
This tranny was built sometime in the 80's...
DougNashRebuild001Jan2014.JPG


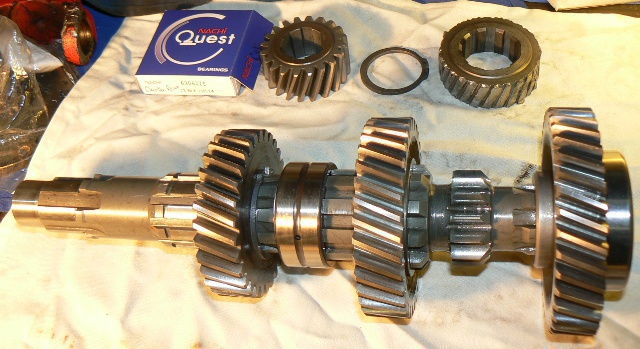
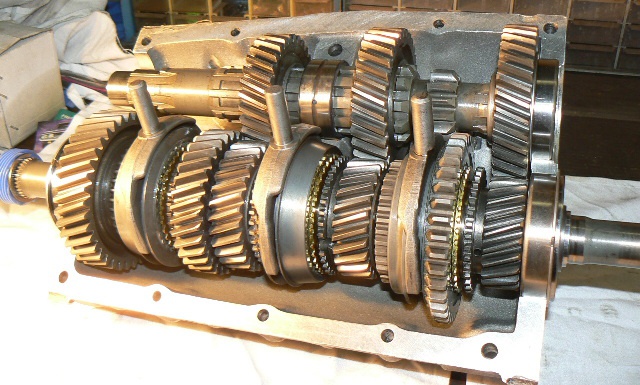
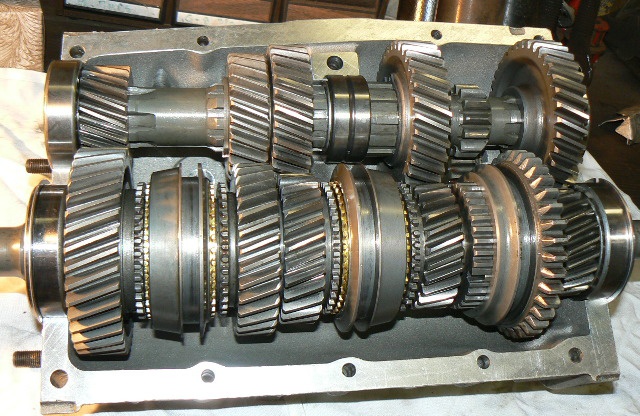
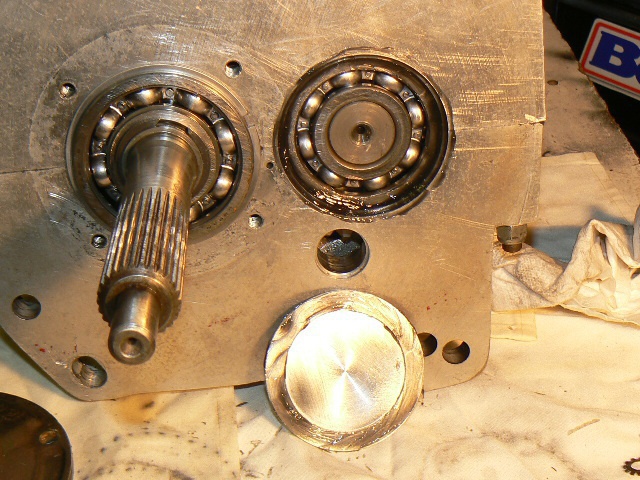
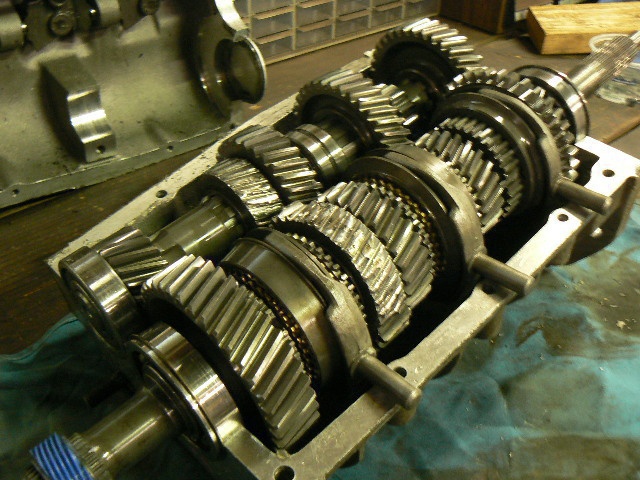
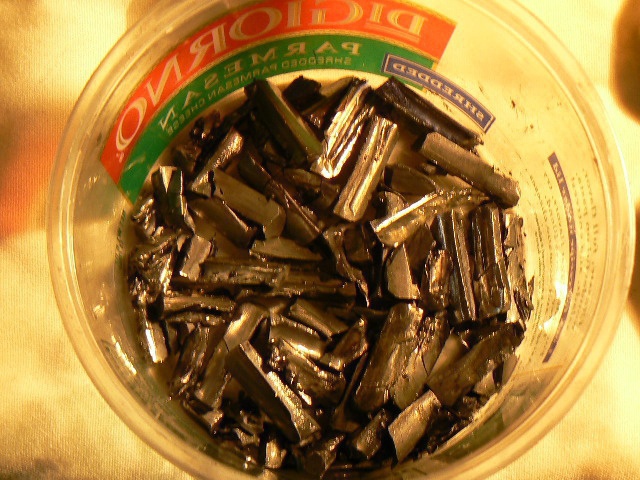
When I split 'er open, this was what I found, with lots of loose teeth in the bottom of the case, and many small pieces in some of the bearings....
DougNashRebuild008Jan2014.JPG


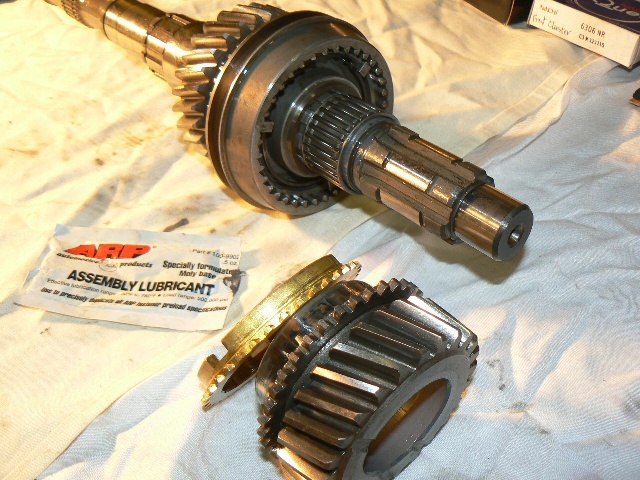
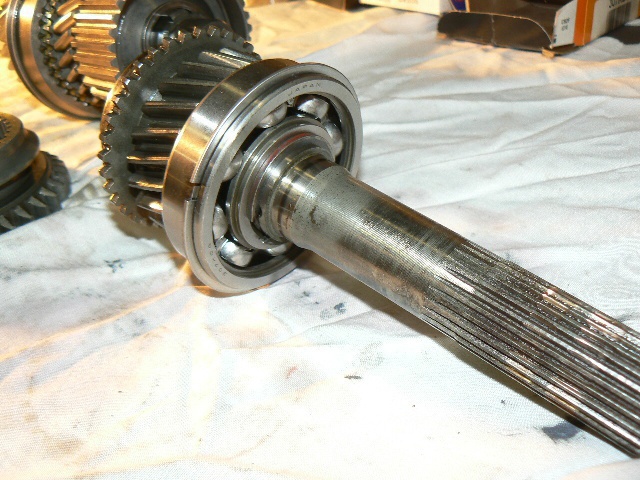
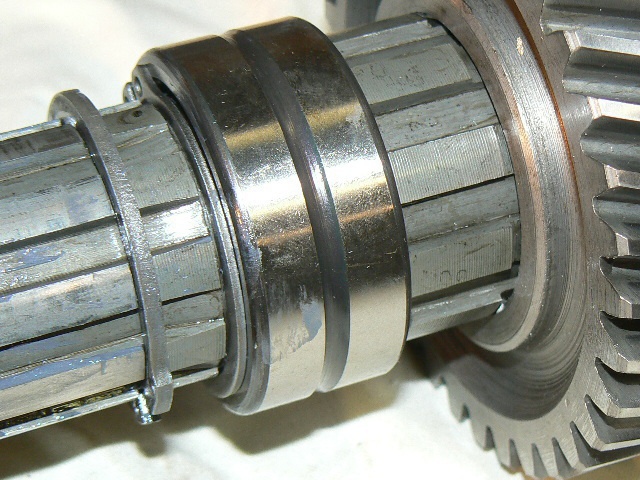
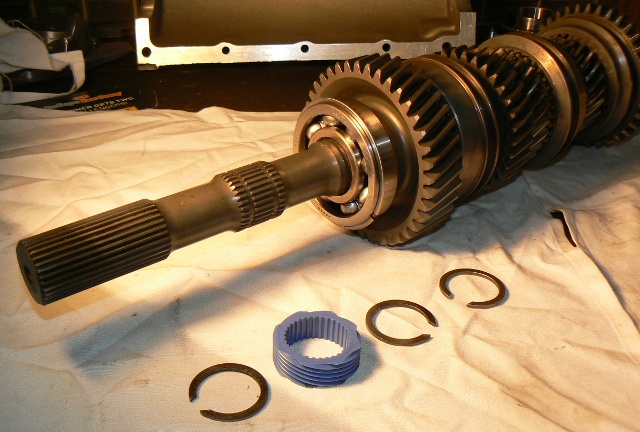
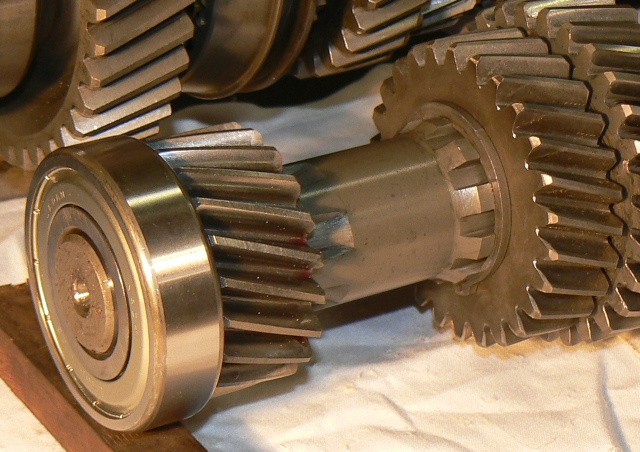
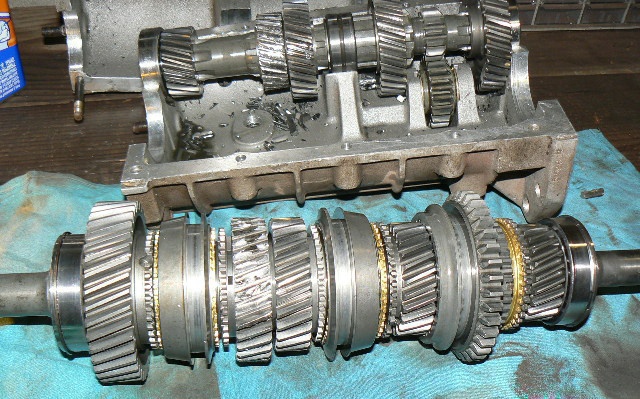
Pulled the mainshaft out first and took it apart. The main bearings at the front and back had metal in them, and were noisy after I cleaned them thoroughly and spun them by hand, so replaced them. My local bearing house had them in stock.
DougNashRebuild013Jan2014.JPG


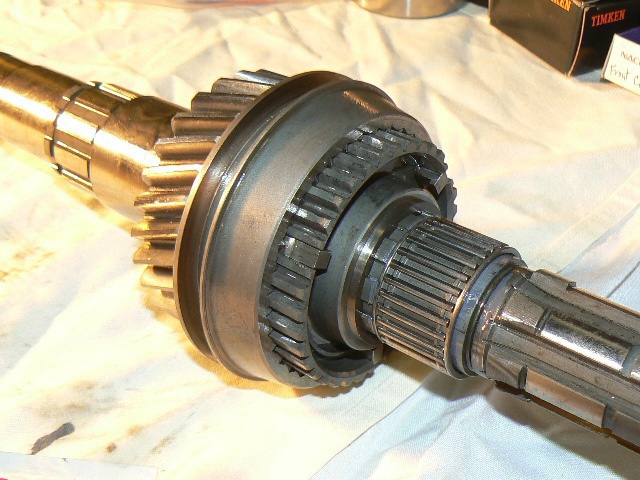
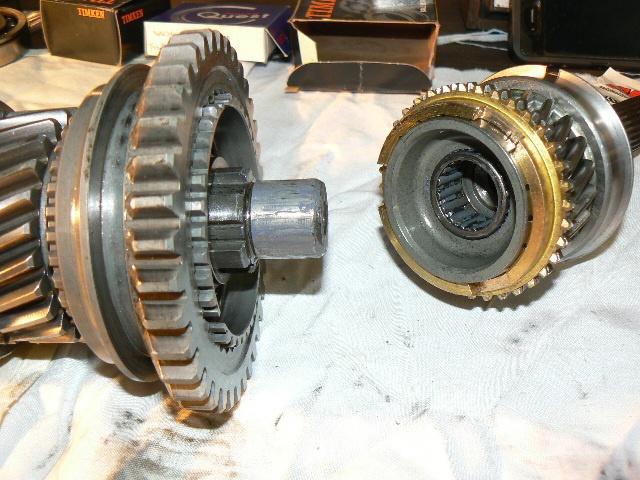
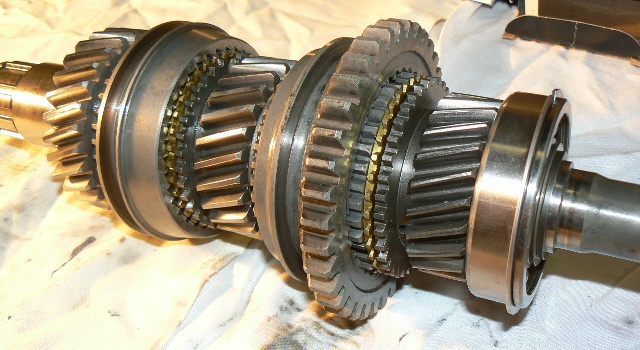
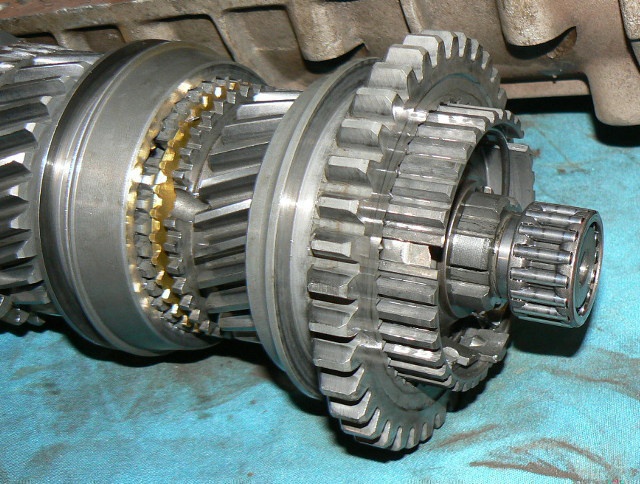
The gears, other than 2nd, all look great, as do the synchronizer rings (brass) and the needle bearings under each mainshaft gear....
DougNashRebuild014Jan2014.JPG

DougNashRebuild015Jan2014.JPG


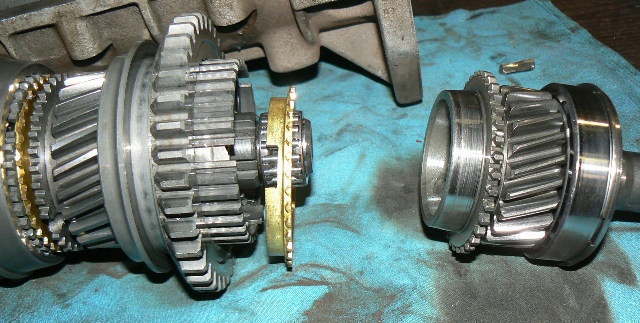
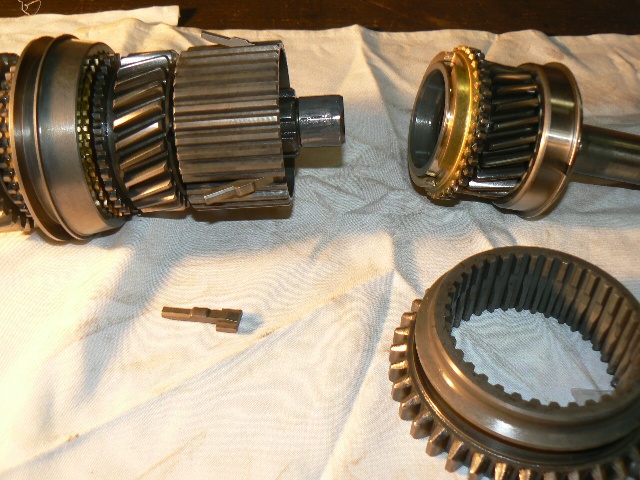
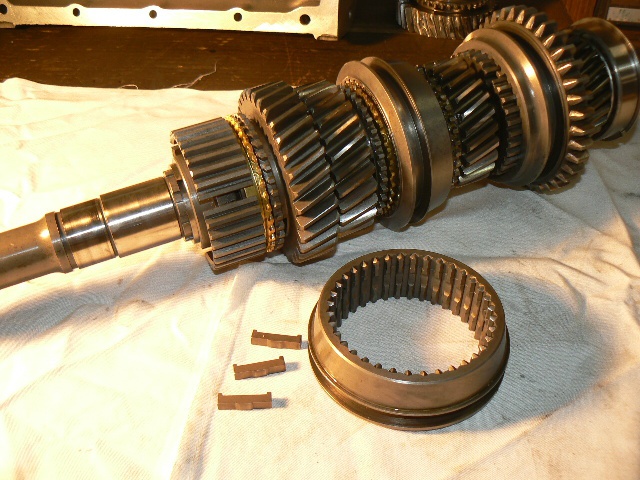
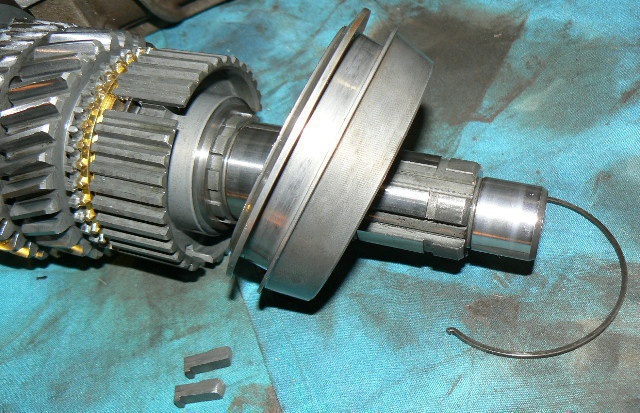
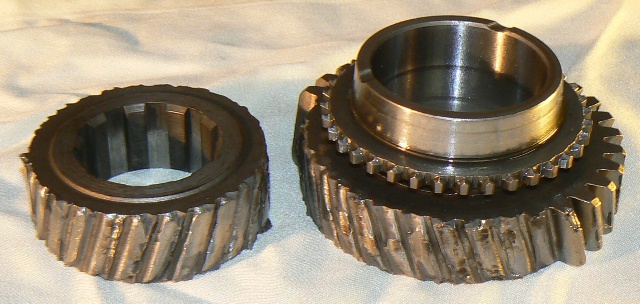
Each slider, and the receiver it slides on, has three spring loaded detent keys that give a positive feel to the neutral position for each slider, they were broken in this 5-rev slider above, and in the 3-4 slider. The keys in the 1-2 slider were good. I don't know why these broke.
DougNashRebuild016Jan2014.JPG


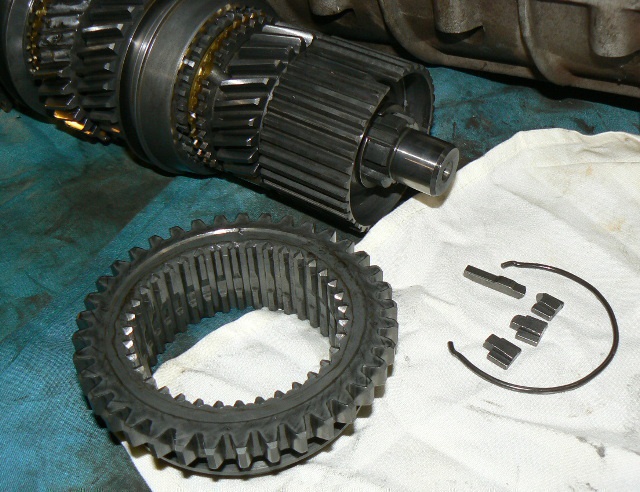
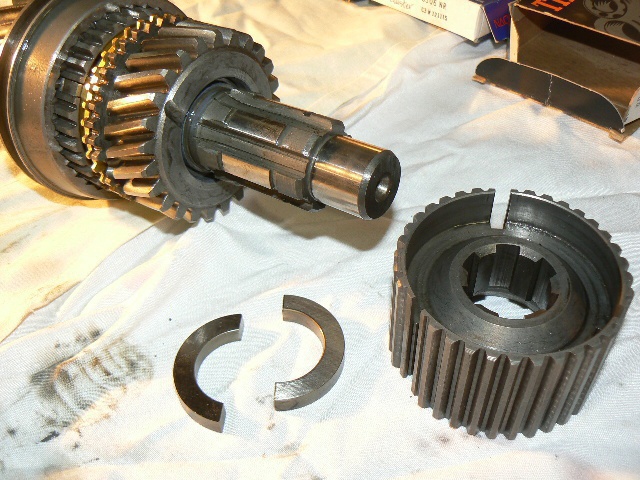
Here's the 3-4 slider and the broken keys. Later I found the missing pieces mixed in with all the broken teeth....
DougNashRebuild022Jan2014.JPG

DougNashRebuild040Jan2014.JPG


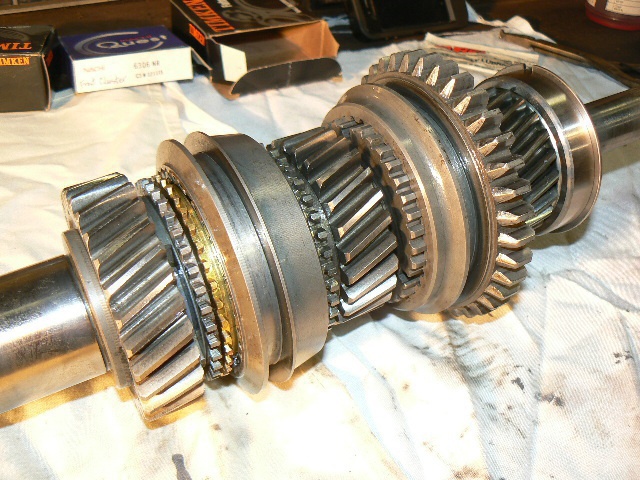
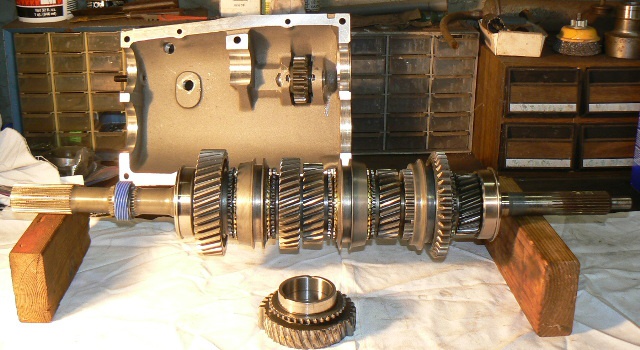
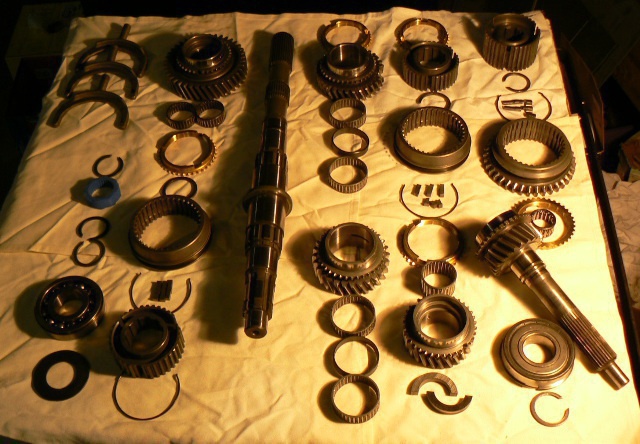
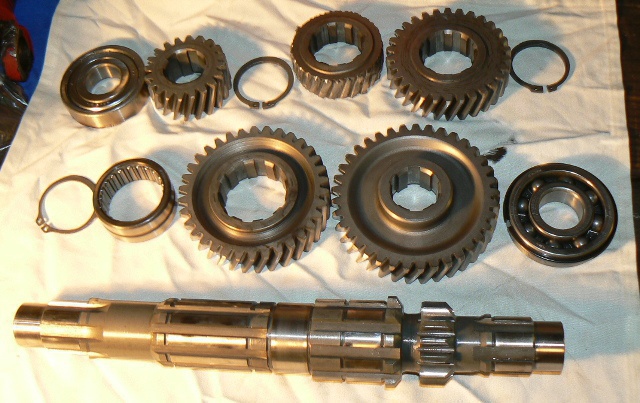
Here's all the mainshaft pieces laid out in order so I can put 'em back together again....
DougNashRebuild037Jan2014.JPG


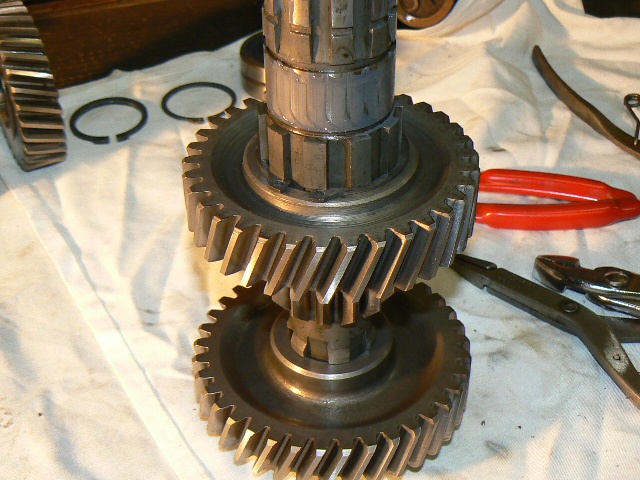
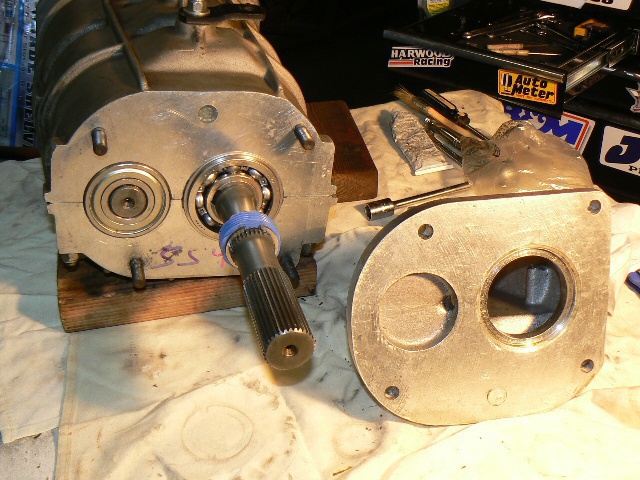
Then washed up the countershaft and started taking it apart....
DougNashRebuild042Jan2014.JPG


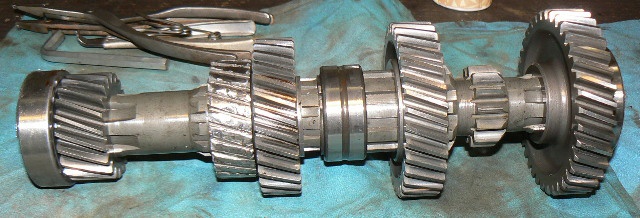
The main bearings on both ends, and that needle bearing in the middle, are noisy, so are being replaced. Again, I was able to obtain them locally....
DougNashRebuild045Jan2014.JPG


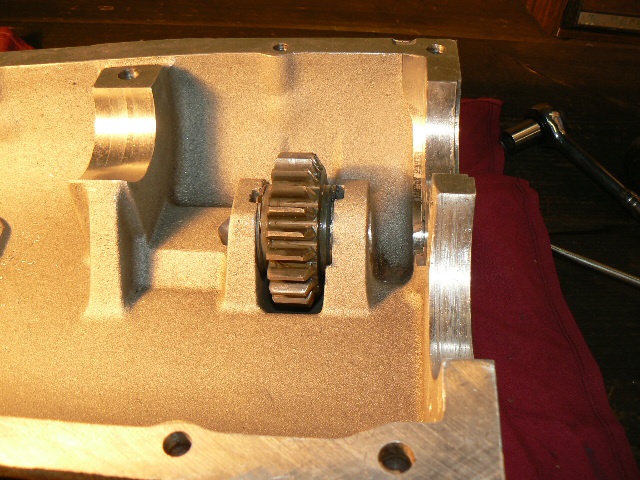
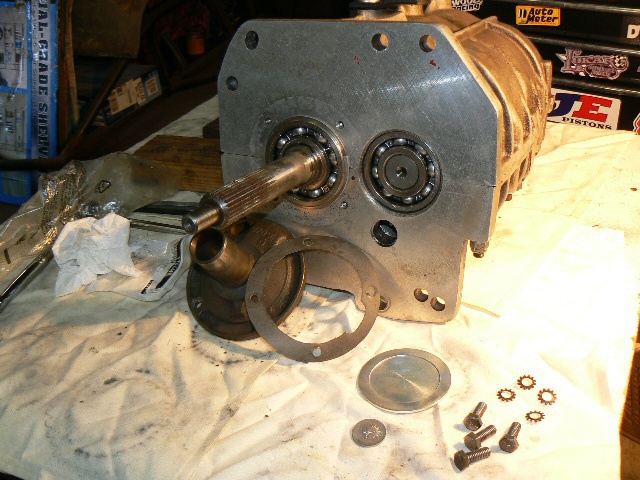
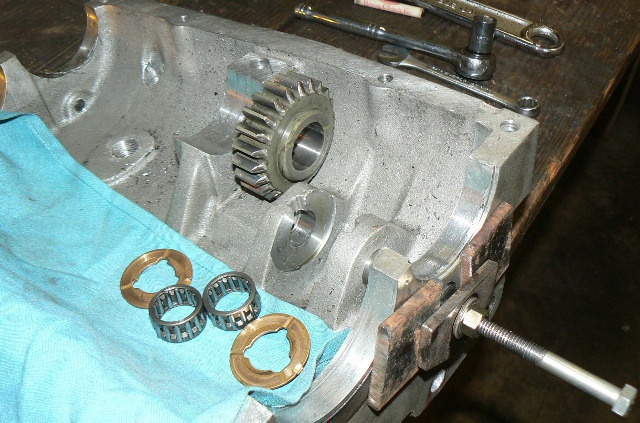
Then I had to pull the reverse idler gear stub shaft and check it all out....
DougNashRebuild051Jan2014.JPG


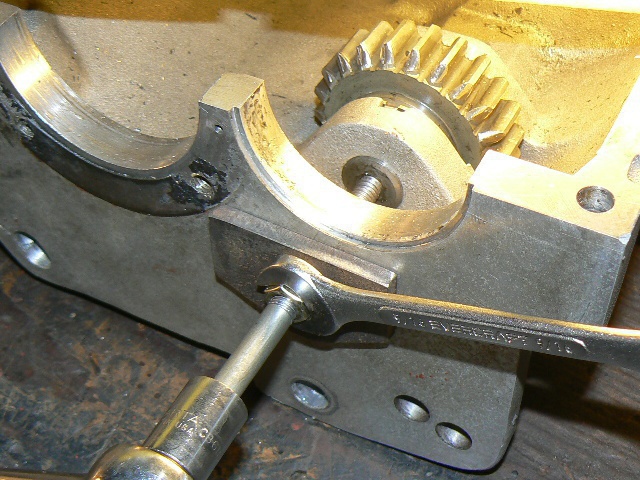
It's all good, but decided to replace those needle bearings anyway, just to be safe....
DougNashRebuild052Jan2014.JPG


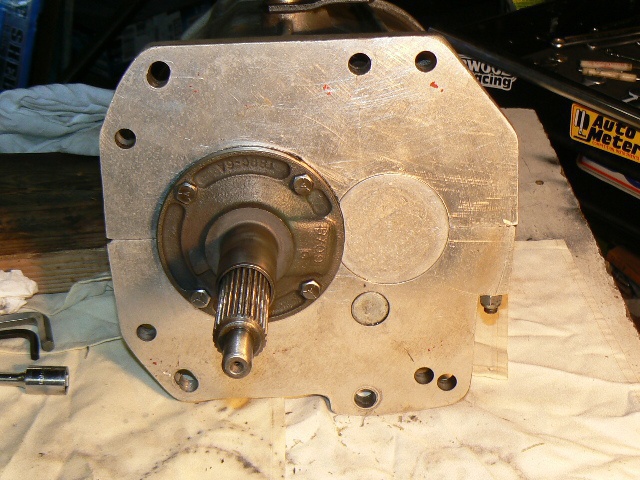
Richmond Gear said that I have the later model Doug Nash 4+1 (from the serial # stamped on the case), and a pair of 2nd gears are on the way from them....
DougNashRebuild046Jan2014.JPG


It actually was fun taking this apart. Hope I can say that again when I get it all back together....
Aloha,
Willy

LINK to the Doug Nash Tranny Rebuild Page 1
 
thumbs up great detailed pics... maybe you should send those to car craft for "blown up part of the month contest"
 
Yup, I definitely got lucky with this one, it coulda been much, much worse!
And since I was able to get all the bearings I needed, except the reverse idler gear bearings, which are on their way from Richmond, I went ahead and started reassembling the mainshaft and countershaft.

Assembled the counter shaft from the front back, as far as third gear, when the new 2nd gear set comes, will finish it:

DougNashRebuild057Jan2014.JPG


Then started assembling the front portion of the output shaft back to where second gear has to go on:

DougNashRebuild061Jan2014.JPG


Originally the detent keys under this 3-4 gear slider were broken, but they are the same as the 1-2 detent keys, which are ok, so I put them in here, and will put the new ones in the 1-2 slider when they come....

DougNashRebuild062Jan2014.JPG


DougNashRebuild064Jan2014.JPG


DougNashRebuild065Jan2014.JPG


The input shaft portion of the mainshaft went together quickly....

DougNashRebuild066Jan2014.JPG


DougNashRebuild067Jan2014.JPG


Lubed up the needle bearings for the input shaft/output shaft assembly with assembly lube...

DougNashRebuild068Jan2014.JPG


And everything fit together quite nicely....

DougNashRebuild069Jan2014.JPG


I still have to put new detent keys in under this slider, but that's easy, just pull the input shaft apart, slide the slider off, and put the keys in....

DougNashRebuild070Jan2014.JPG


Waiting anxiously for the new Richmond Gear parts to arrive!

So far it's all looking good!
Aloha,
Willy

LINK to rebuild page 1
LINK to rebuild page 2
 
even though Ive watched guys I know rebuild similar manual and a few automatic transmissions ,several times during similar manual trans rebuilds, I'm always very much impressed that anyone can remember where each component goes in which order its assembled and how you remember which direction each component faces, I'm fairly sure Id need a clear detailed, exploded transmission assembly diagram to to do that assembly.
nashodp1_large.jpg


https://www.jericoperformance.com/5speedroad.htm
 
Last edited by a moderator:
The pix help a great deal. There's many more on my website than I posted here. And there's more on my laptop than I put on my webpage. They were a great help when I started reassembling them, had the laptop right there next to the parts....
Also had the exploded view of the Richmond Gear, and found a few very small details that were different between the two, like two snap rings on the Richmond Gear 5 speed counter shaft that are not on the Nash.

DougNashRebuild056Jan2014.JPG

The Richmond has an additional snapring on the left side of that 3rd gear, and one more on the right side of that needle bearing. The gear is pressed on, and the normal thrust pattern tends to push it to the right against the stops on the shaft, and the needle bearing is clamped in the case, so I guess Nash decided they didn't need them there, but Richmond added them. At least that's my guess.
Willy
 
Willy I like the Fact you can replace individual gears on the Countershaft of the Richmond/ Nash 5-speed.
Unique feature not found on Muncies, New Process 883 Hemi 4-speed, Ford Top Loader, ect.

THE Mopar Hemi Coarse Spline Input shaft 4-speed still has the most Bullet Proof Gear Tooth Nomeclature design of any Manual Trans I ever have rebuilt & seen 1st hand.
Makes a Muncie M22 look like a toy.
 
those are some great pics, i agree with paul, i cant even begin to speculate how badly i would ruin the process of rebuilding a tranny having never done it before and only watched a couple guys do it in the past. very tedious work. my hat goes off to you guys.
 
I'm doing this work at shop number two, which is about 15 miles from my house. My computer tells me the Richmond Gear Parts were delivered today, so I'm on my way to check them out! That calls for a cold one, or even something stronger!
Willy
 
2Loose said:
I'm doing this work at shop number two, which is about 15 miles from my house. My computer tells me the Richmond Gear Parts were delivered today, so I'm on my way to check them out! That calls for a cold one, or even something stronger!
Willy

i enjoy a few celebratory ounces of mcallan when i do something awesome like that.
 
It's Dr. Dewar's at our shop. Always a bottle in the top of the main toolbox!

Some of the Richmond Gear parts came, the detent keys I needed for the 1-2 and the 5-rev sliders came, and the 2nd mainshaft gear came.

Was not able to get replacement needle bearings for the reverse idler gear, but the originals look ok, so cleaned them up, lubed em and put it back together...
DougNashRebuild072Jan2014.JPG


Put the new detent keys in the 5-rev slider:
DougNashRebuild073Jan2014.JPG


Put the new 2nd main gear on and put the new detent keys in the 1-2 slider:
DougNashRebuild074Jan2014.JPG


Put the new rear main shaft bearing on:
DougNashRebuild083Jan2014.JPG


Put the speedo gear back on, and the mainshaft is finished:
DougNashRebuild084Jan2014.JPG


Just for fun, stuck it in the box with the unfinished cluster shaft (still waiting for that second gear to arrive) to see how it looks and feels. There are new front and center bearings on that shaft:
DougNashRebuild087Jan2014.JPG


It all rotates smoothly, the sliders shift smoothly and with a good solid "click" into and out of each gear. When the 2nd cluster gear arrives I can put that and the new rear bearing on and finish up the cluster shaft assembly.

Aloha,
Willy
 
One question maybe somebody can comment on, I used a lot of assembly lube on this job, and will make sure gear oil is through the entire assembly as I button it up. Will drive it easy for awhile, just in case it needs some "breakin" time. But do I need to drain it and put fresh gear oil in at some point?

I didn't the first time, as it was a new tranny just out of the box, but had been on my back shelf for about 30 years before I used it. I found out when I put oil in it that it was dry, did not have oil the whole storage time! I think it should have, I should have checked that, and maybe even rotated it every once inna while to make sure the innards got properly oiled up and stayed that way with time!

I do use magnets on my drain plugs, and it's a quick way to check to see what might be wearing down inside the box. And I don't think that assembly lube mixed in with the gear oil is going to hurt anything.

I wouldn't be surprised if there was some sort of rust that got formed inside that tranny over those 30 years of storage. It was just never quite right from the very start when I first put it on the road.

Hopefully all those problems are behind me now.
Willy
 
most assembly lubes will blend with gear oil and cause you no issues at all, in fact the added moly in the assembly lube should be beneficial
or put a different way, if it was my transmission I would not give a seconds thought to the small bit of assembly lube mixed in with the gear oil
 
Moly Assembly lube is Ok for assembling a Manual Trans Willy.
I use White Lithium Grease. It disolves with gear oil immediate.
I always changed the gear oil after 1/2 hour driving time a fresh rebuilt gearbox.

Not All gear oils perform the same.
Some are too slippery for the synchronizer blocker rings to work correct at WOT High Rev shifts.
RICHMOND GEAR GL-6 Best for your Doyg Nash 5.
Redline oils good too.
I use Torco RTF in my Muncie 4-Speed in the TA.
Its hard to find. GL-6. Have to special order by the quart. Best I found fpormy uses.
 
Richmond Gear Lube, GL-6 Gear Oil, 75W140, Limited Slip, Synthetic, 1 qt., Each$23 plus shipping !
(Summit Racing)
 
my dad likes dewars too, as long as i can remember hes been sippin that stuff on occasions. i always can think of a good excuse for a scotch every now and then. looks like youre about to be on the home stretch with this rebuild! thumbs up
 
Got the new 3rd gear from Richmond Gear, and got a new snap ring to put on the cluster shaft by the 4th gear, that was missing when I disassembled the trans. I wonder if it broke and that's what caused the trans failure, if it got up into the second gear set about the time I hit the gas???

There were so many small shreds of metal in the trans case, that could have been the cause....

New snap ring holding 4th gear in place:
DougNashRebuild098sFeb2014.JPG


Assembled the rest, new second gear:
DougNashRebuild096sFeb2014.JPG


DougNashRebuild099sFeb2014.JPG


Buttoned up the case halves with RTV, and tested the shifters, nice solid clicks into and out of eachgear.

I'm a happy guy!
Willy

LINK to page two, added more photos....
 
Added a few more pix:

Cut a new gasket for the "nose cone"...

DougNashRebuild102sFeb2014.JPG


Sealed up the counter shaft and reverse idler gear shaft holes with those disks and some rtv...

DougNashRebuild103sFeb2014.JPG


Then bolted everything up in front...

Those two disks are bolted up tight against the bell housing, so they don't come loose...

DougNashRebuild104sFeb2014.JPG


Then bolted the tailshaft housing on with rtv sealer to keep it all dry...

DougNashRebuild105sFeb2014.JPG


Aloha,
Willy
 
Well, it's together and running just fine!!
Went for a drive on back roads, as only one headlight and it was after dark....
Now to fix the busted headlight and straighten out the fender from the flat towing accident I had, so I can put the hood back on when I want to...
Just easy drivin' for awhile though, make sure everything is ok...
Will get it out on the highway today and up to speed to make sure the vibration that I think was in the tranny rear mainshaft bearing is gone....
Aloha,
Willy
 
Back
Top