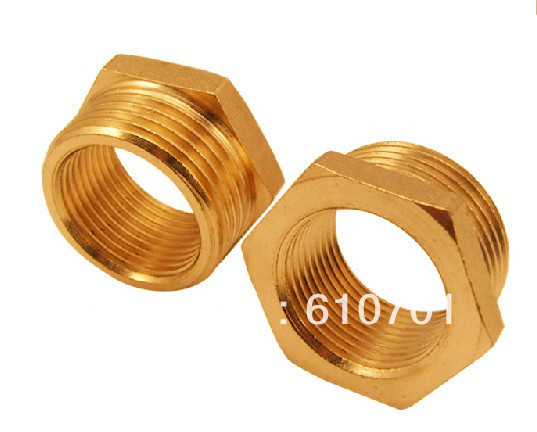
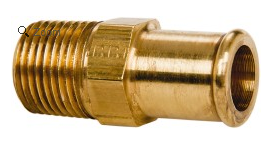
repair your intake manifold vs buy new

grumpyvette

Administrator
Staff member
1966_L78 said:
So I stripped the threads on my intake trying to remove the heater hose nipple... I have another used manifold, but it also has a stuck hose nipple..

So I may need a new intake... Nothing fancy, 402 Big block, unknown cam, headers, and I'll be running a square bore carb ( "Summit" vacuum secondary carb I have sitting here)... I want to go with an aluminum intake.

Checking out Summit, I came up with these choices (in random of cost):

1) Summit Brand Stage 2, SUM-226024, $230, dual plane
2) Summit Brand Stage 3, SUM-226020, $240, dual plane, "air gap" style
3) Edelbrock RPM, EDE-7161, $258
4) Edelbrock RPM Air Gap, EDE-7561, $290
5) GM, NAT-12363407, $293


I have also considered:
Ground Up, #3885069, $330 plus shipping...
I know this is a Rectangular port intake and I have oval heads. I KNOW it works fine, and I like the "stock" look AND the horizontal heater hose fitting (I have a '67, and that's the way the came. IMO the heater hose sticking straight up just doesn't look right with no alternator to block the view)...

Not sure I want to spend that much though... Although its really not a huge difference in price... Trying to be "low budget", but also trying to get this thing up and running really soon...

I guess I am mainly looking at the quality... I'd guess performance is going to be similar (not a race car anyway)...

I really like Summit, and their prices and free shipping, and I have used their brand many times, and usually satisfied... But not sure on the manifolds...


having a good local machine shop TIG WELDING THE DAMAGED AREA on that ALUMINUM INTAKE and re-drilling and re-tapping the area for the appropriate NPT size sounds like it would be cheaper and easier than buying a complete new intake manifold
and yeah, owning a decent tig welder and owning a good drill press with a good vise or mill sure helps.
now I can,t help but think thats the smarter route simply because its not all that un-usual to have put 6-9 hours or more into custom porting and plenum modifications and if you have the welder and machine tools welding up damaged threads and re-drilling and re-tapping the threads is going to take less effort and cash than starting over

http://garage.grumpysperformance.com/index.php?threads/tap-die-sets.1262/#post-6142

http://garage.grumpysperformance.co...op-needs-a-decent-drill-press.970/#post-45483

http://garage.grumpysperformance.com/index.php?threads/most-versital-shop-welder.1594/#post-50625


Last edited:
ID also point out that coating the threads with a good quality ANTI-SEIZE paste before they were assembled will go a long way toward preventing it from re-occurring , using a brass vs steel hose nipple would also be a good idea
antiseize.jpg


read thru this thread
http://garage.grumpysperformance.com/index.php?threads/removing-rusted-broken-bolts.807/#post-43180

http://garage.grumpysperformance.com/index.php?threads/anodes.74/#post-93

and next time heat and rapidly cool the sensor or hose nipple with a mix of MMO/ACETONE several times PRIOR to trying to remove it, chances are very good youll have far less chance of stripping the threads, and it should be obvious the use of a 50% antifreeze mix and ANODES will reduce corrosion
http://garage.grumpysperformance.com/index.php?threads/anodes.74/#post-4127


bras1.jpg

bras2.png


let me introduce a bit of experience
threads rusted into an intake or cylinder head can be freed with a fairly easy method,
step one clean the area with a wire brush to remove as much external corrosion as you can
HEAT WITH A TORCH, untill you know its hot, if you have a IR temp gun 300F-350F
T504-4254_product.jpg

STEP two
spray with a 50%/50% mix of marvel mystery oil and ACETONE
untill cool to the touch
acetone.jpg

mmo.jpg

whack the corroded fitting medium lightly with a hammer a few dozen times as vibration helps the lubricant penetrate,(don,t hit hard enough to damage it)
step three REPEAT the first two steps 4-6 times as the CYCLING of heat expansion followed by cooling with the penetrating lubricant allows the penetrating lubricant to seep into the rusted threads

AA300torch.jpg


keep some penetrating oil (MARVEL MYSTERY OIL AND /ACETONE MIXED 50%/50% and a torch, and freeze spray plus the IR temp gun, in the shop
Some of you might appreciate this. Machinist's Workshop magazine
tested penetrants for break out torque on rusted nuts.
They are below, as forwarded by an ex-student and professional
machinist, Bud Baker.
They arranged a subjective test of all the popular penetrants
with the control being the torque required to remove the nut from
a "scientifically rusted" environment.
*Penetrating oil ..... Average load*
None ...................... 516 pounds
WD-40 ..................... 238 pounds
PB Blaster ................ 214 pounds
Liquid Wrench ............. 127 pounds
Kano Kroil ................ 106 pounds
ATF-Acetone mix..............53 pounds

The ATF-Acetone mix was a "home brew" mix of 50 - 50 automatic
transmission fluid and acetone,
( IN MY EXPERIENCE MARVEL MYSTERY OIL AND ACETONE MIXED 50%/50% works slightly better and faster).
Note the "home brew" was better
than any commercial product in this one particular test.AND ID POINT OUT THAT MMO/ACETONE MIX PENETRATES QUICKLY AND SEEMS TO WORK WHERE MANY OTHER PENETRATING OIL FAILS, heat and spray cycles over several cycles are the key prep here!
now let it sit for 30 minutes and soak,Like anything else, it was not immediate but it worked.

freeze.jpg


step 4 BUY LOC TITE FREEZE SPRAY

http://www.henkelna.com/industrial/product-search-1554.htm?nodeid=8797940809729

after you have prepped the part with several heat and cooling cycles spray the corroded threaded part for 20-30 seconds the freeze spray thermal shock should and usually does shrink the threads away from the larger part its installed in enough for it to break free with noticeably less effort.

ALLEN said:
what do you keep that acetone MMO penetrating oil IN,
I made some up and put it in a spray bottle and in 30 minutes the plastic bottle dissolved and leaked..
.yeah the stuff works. the bolt came free after a couple heating and soaking with the mix cycles with minimal effort as you posted, but how do you keep some of it handy around?


don,t over complicate it,its just not all that difficult.
YEAH SOME PLASTICS AND ACETONE WON,T PLAY WELL TOGETHER, SO DON,T USE PLASTIC
youve got DOZENS OF OPTIONS, and MOST oil cans will not be effected with the mix and those that are ,USUALLY can be repaired with a new o-ring designed to not be effected by common solvents
OBVIOUSLY YOULL WANT TOO,LABEL THE CAN SO YOU DON,T MIX IT UP WITH REGULAR LUBRICANT OIL

18294sa.JPG

6vs12.png


BTW use of a 6 point socket and a sliding t-bar rather than a breaker bar allows the torque applied to the fitting to have the force applied directly on center while a traditional breaker bar or wrench applys a great deal of side torque thats counter productive
sliding-t-bar-280.jpg


use of anti-seize paste on the threads prior to instal tends to reduce the chances of this in the future
antiseize.jpg
 
Last edited:
Back
Top