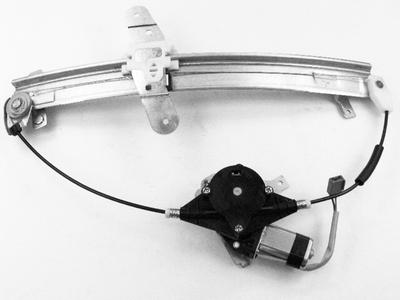
well as usual, just when I think todays going a bit better than expected, the drivers side window in the wife's mercury quits working, so here is a few links, posted below, so far I think its a mechanical linkage failure , as the switch seems to make the window motor run or at least I can hear it, obviously further testing and inspection to follow after the door panel gets removed
You need to remove any screws that are in the vicinity of pull handles and door pockets. These screws will be under little trim covers that you need to pry off to get to their heads. Look for the screws around the edge of the panel and also the screw in the latch release handle recess.
The lock knob, if there is one there, will have to be screwed off and then carefully work your way around the door, freeing the panel's clips from their holes in the door frame.
Finally the panel will probably have to be lifted out if the window slot. (If the panel does not come off, work out what is retaining it and remove that screw or slide it off the clip that is still holding the panel. Disconnect any electrical plugs behind the panel. Under the panel you will find a plastic dust sheet that is stuck to the door frame, remove this carefully, you will have to replace it before replacing the panel.
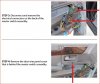
Remove 2 screws at bottom of door and 1 on side of door.Pry off plastic cap behind inside door handle and remove "star head" screw.To get to last screw- need to pop out the control switches for power windows,door lock,etc. to get to the screw.
After all are out,start prying off door at bottom of panel.There are 4 or 5 plastic hooked shaped "latches" to pull out.They are fairly sturdy and can take a firm pull.Once they are off need to lift up and out on the panel to get it free.Be careful not to bend lock knob at top of panel.
http://www.youtube.com/watch?v=gcDRJr4ekU0
http://www.justanswer.com/ford/2d38x-20 ... -work.html
http://www.2carpros.com/articles/how-to ... ndow-motor
http://ww2.justanswer.com/uploads/fordg ... 500_a1.pdf
watch the videos they hold a great deal of useful info
http://www.youtube.com/watch?v=Ivnt6Ifj06A
http://www.youtube.com/watch?v=o3QvtJIMY48
You need to remove any screws that are in the vicinity of pull handles and door pockets. These screws will be under little trim covers that you need to pry off to get to their heads. Look for the screws around the edge of the panel and also the screw in the latch release handle recess.
The lock knob, if there is one there, will have to be screwed off and then carefully work your way around the door, freeing the panel's clips from their holes in the door frame.
Finally the panel will probably have to be lifted out if the window slot. (If the panel does not come off, work out what is retaining it and remove that screw or slide it off the clip that is still holding the panel. Disconnect any electrical plugs behind the panel. Under the panel you will find a plastic dust sheet that is stuck to the door frame, remove this carefully, you will have to replace it before replacing the panel.
Remove 2 screws at bottom of door and 1 on side of door.Pry off plastic cap behind inside door handle and remove "star head" screw.To get to last screw- need to pop out the control switches for power windows,door lock,etc. to get to the screw.
After all are out,start prying off door at bottom of panel.There are 4 or 5 plastic hooked shaped "latches" to pull out.They are fairly sturdy and can take a firm pull.Once they are off need to lift up and out on the panel to get it free.Be careful not to bend lock knob at top of panel.
http://www.youtube.com/watch?v=gcDRJr4ekU0
http://www.justanswer.com/ford/2d38x-20 ... -work.html
http://www.2carpros.com/articles/how-to ... ndow-motor
http://ww2.justanswer.com/uploads/fordg ... 500_a1.pdf
watch the videos they hold a great deal of useful info
http://www.youtube.com/watch?v=Ivnt6Ifj06A
http://www.youtube.com/watch?v=o3QvtJIMY48