heres a bit of potentially useful info GOFAST POSTED
["quote=GOFAST"]
SBC Stepped Nose Cam in Early Block?
Just curious if anyone has devised a way to use the later SBC "stepped-nosed" cams in the early SBC's?
We are trying to eliminate the required use of any cam-buttons in the 100% stock-appearing builds on the roller platform?
Thanks, Gary in N.Y.
P.S. Open to any suggestions/recommendations. Have my own idea but like to hear some add'l possibilities/thoughts.
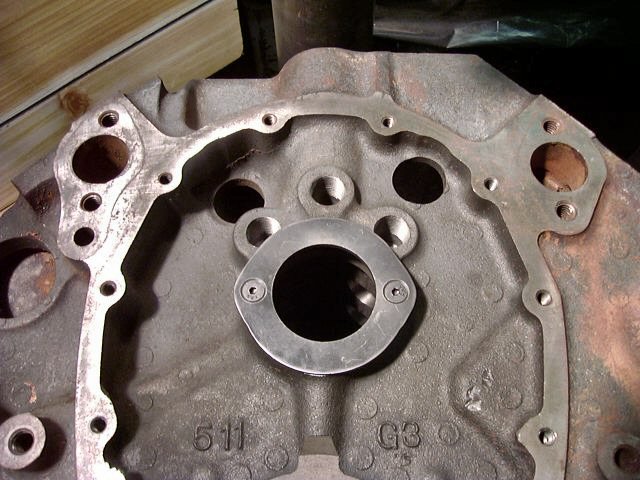
I brought this back because it turned out to be a fairly simple resolution. Wasn't sure it could be done without extensive machining, solved it easily.
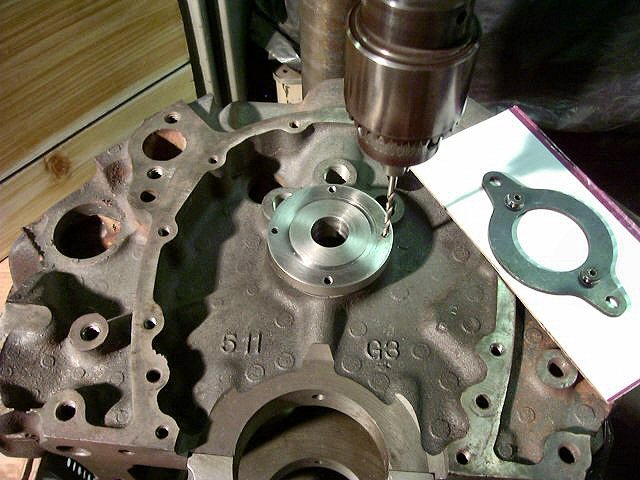
I'll put a couple shots below showing the basic's of the "fix". Takes about 30/40 minutes or so for the entire machining and can be done on a simple (decent) drill press capable of holding the block on the table.
Quote:
Originally Posted by novaderrik View Post
just use a roller cam block... the only real striking visual difference between them and an old small block once it's in the car is the size of the pad by the water pump where the id codes are stamped.
Hi nova, we do a bunch of 100% stock-appearing builds where ANY replacement block is NOT an option. Now we can set up the roller cams (mostly retro-hydraulics) with the late thrust plate. No more "playing-around" with cam buttons/end play. Much easier for us here.
Thanks, Gary in N.Y.
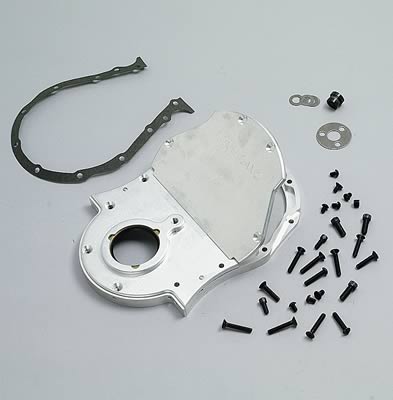
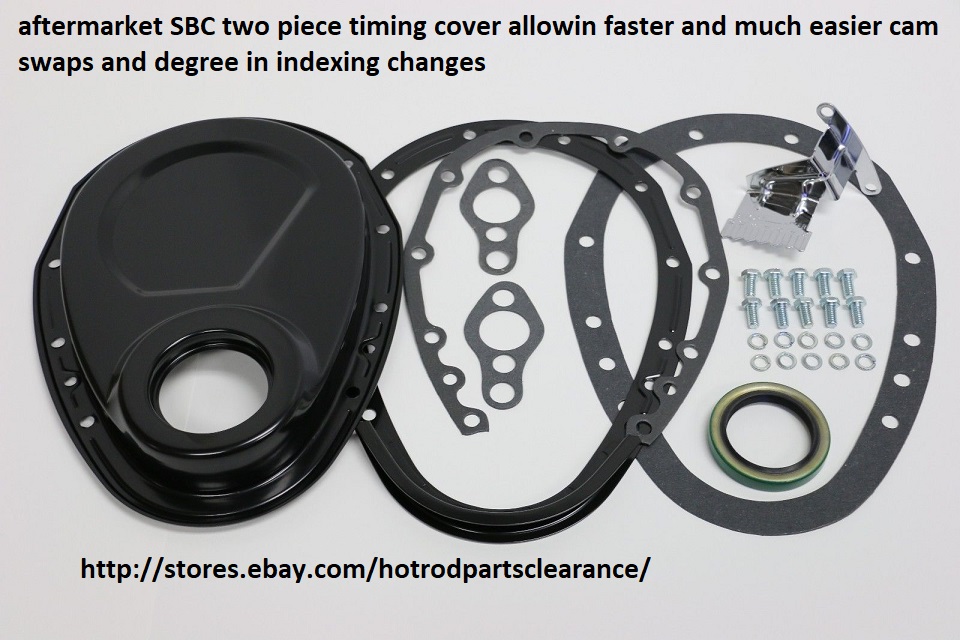
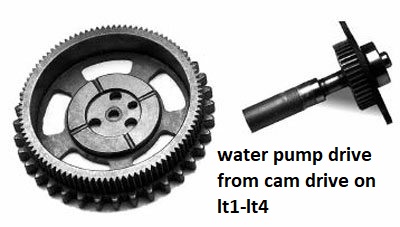
btw the multi part timing chain covers that allow a faster cam change are available at a not much increased price for some 1966-1990 BBC applications,
obviously youll want to ask questions and get the correct matched components for your application.
https://www.summitracing.com/parts/cca-312/overview/
and sbc
$265
https://www.summitracing.com/parts/cca-310
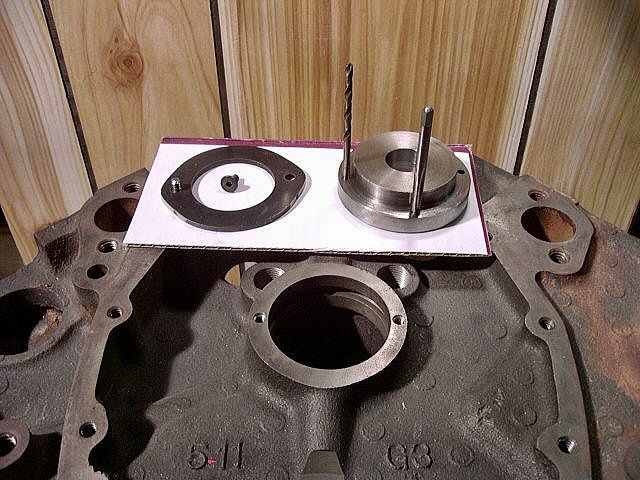
P.S. Anyone with any machining experience can accomplish this mod easily. With the way we designed the tool in the photo we can pick the 2 best spots on the original thrust surface to locate the 2 allen-head screws, an area that has some extra "meat" for the screw-threads.
don't need those ears on the sides anymore?
small taps in cast iron, any troubles there?
Hi Tom, correct on the "ears", they aren't needed with this method. Later today I'll put another shot here with the plate finished, "ears" removed!
No problem drilling/tapping for the fasteners, entire procedure went smoothly after devising the jig to set all the holes in place. The jig is used to locate/drill the new holes in the plate also, in the first photo you can see the "register" that holds the plate in place to back-drill these holes.
Like I stated above, was fairly easy when I finally got a handle on exactly how I was going to get it to come together.
The only potential issue on some blocks is the uniformity of the original cam-thrust surface face, many favor one side more that the other. In other words (looking at the block from the front) some castings are wider on one side making the other side narrower, we can position the 2 bolts anywhere on the surface. They don't need to be "clocked" so to speak!
(Add) This a huge breakthrough for us when doing the 100% stock-appearing builds on any roller platform. In the larger picture the cost is also less, no cam button/locking plate, just the cost of the OEM plate. Cost/labor of installing the plate is about a "wash" with the time spent on setting up the end-play with the button. We can layout the plate at the same time we drill/tap for the front (3) oil galley plugs, which are also done while on the drill press
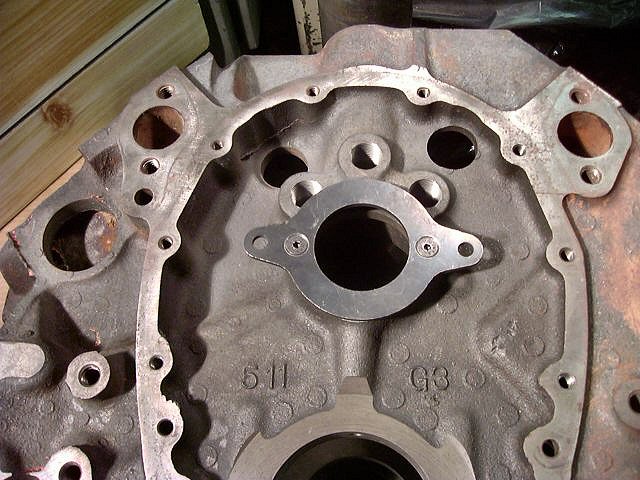
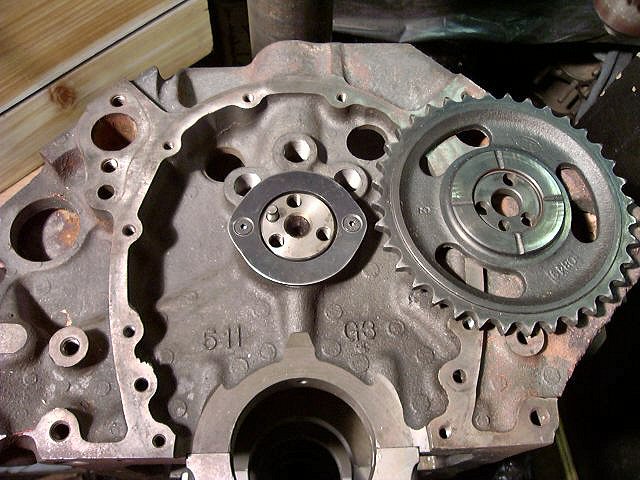
(Add) Below is a shot of the finished plate installed.
Thanks, Gary in N.Y.
P.S. On a side note, we didn't find it necessary to drill (deep enough) into the oil groove behind the cam brg but it would not have made any difference when the bolts are installed. Also, I could put 2 more fasteners in the plate if I felt it necessary. Would take about an extra 10 minutes simply by "turning" the jig 90* and drilling the 2 add'l holes.
P.S. I've already "kicked" this around with a couple local builders just for opinion's sake, all are in agreement, looks like all will be fine! I most definitely would NOT attempt this procedure by "hand", you'll most likely ruin the casting. It takes a decent lathe, the Bridgeport, and a decent rotating table to make the tooling! Also necessary is a 10-24 "bottom" tap to get every last thread possible.
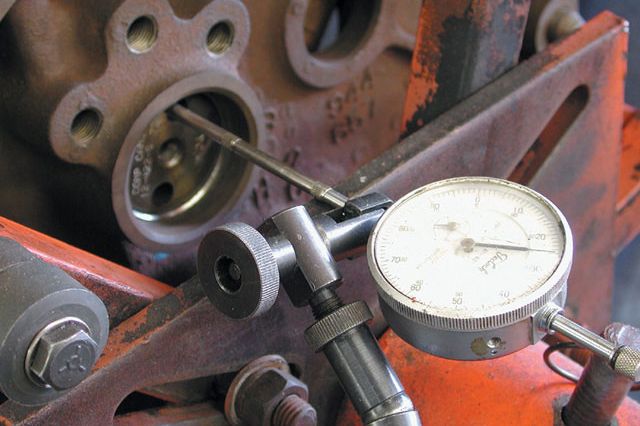
ast shot, "late" cam installed, .003" (nominal) end-play.
Worked like a charm, really.
Thanks, Gary in N.Y.
P.S. Mike (Wolfplace) thanks for the support. I'll say it once more, for us here we consider this a major accomplishment. I still need to dyno test a build or two but don't anticipate any adverse effects!
http://www.jegs.com/i/JEGS-Performa...MIiNrGptbX1gIVzYJ-Ch0grAi6EAQYAiABEgKuRvD_BwE
http://paceperformance.com/i-648452...ines-chevrolet-performance-parts-engines.html
old school
http://www.jegs.com/p/COMP-Cams/Comp-Cams-Cam-Buttons-Wear-Plate/753163/10002/-1
[/quote]
I doubt you every will with quality components, like a cloyes timing set and a name brand cam, being installed correctly, but like I posted drilling a .030 hole in the left side lifter oil passage plug to add more oil flow to the rear of the timing sets a good mod to think about doing, as is adding a nylon cam button and checking your cams forward/backward clearance.
if your converting too a roller cam from a flat tappet design don,t forget the cam button, or cam retainer plate is mandatory on a roller cam

You Identify them by measuring the retainer plate hole spacing
youll generally use LOC-TITE on the retainer bolts threads
use loc-tight on the bolt threads to reduce any tendency for them coming loose

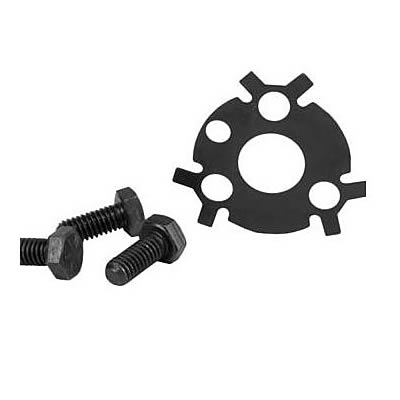
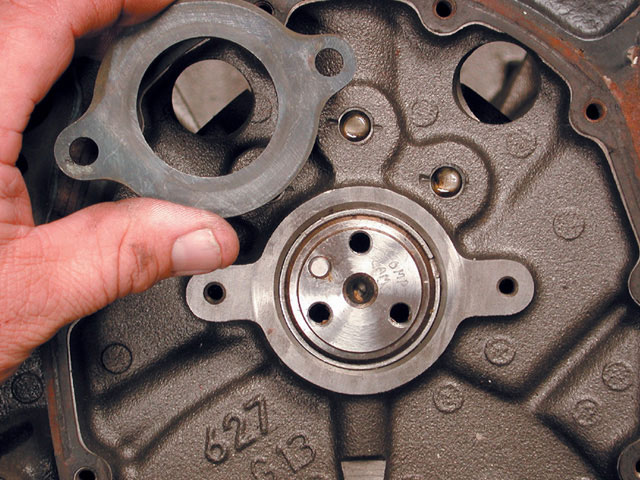
(#10088128) GM roller cam thrust plate, used on all roller cam engines.
First design with 3.620" bolt pattern.
1991-2000 engines use # 10168501 with 3.294" bolt pattern.Please measure your center to center mounting bolt pattern if unsure.
related threads
viewtopic.php?f=52&t=1793&p=4553&hilit=+button+cam#p4553
viewtopic.php?f=69&t=3814&p=17997#p17997

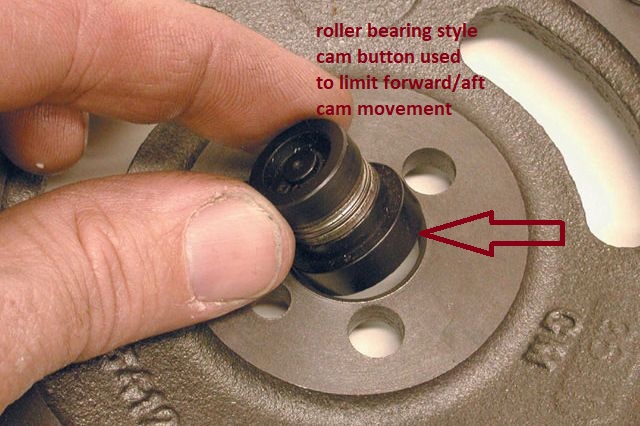
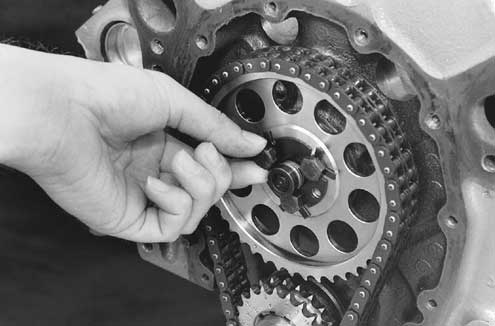
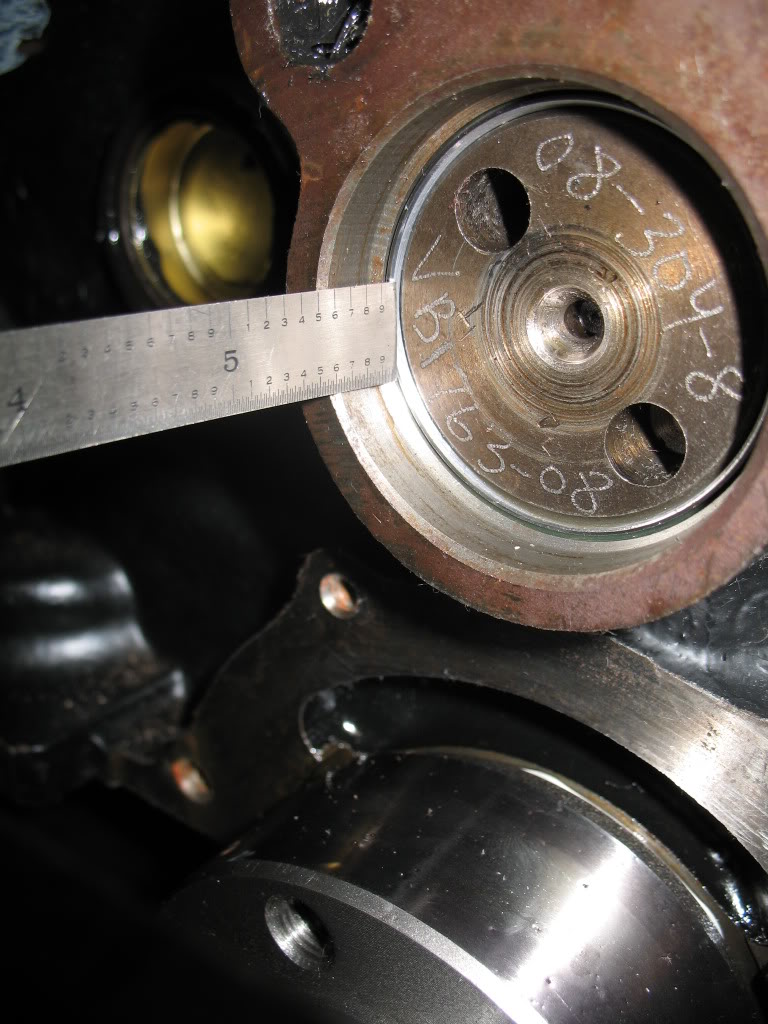
youll want to use a cam button and bolt retainer plate the picture above shows the cam button installed without one, thats wrong
example
http://garage.grumpysperformance.com/index.php?threads/semi-fool-proof-cam-sellection.82/
http://garage.grumpysperformance.co...-street-roller-cam-selection.5709/#post-46850
http://garage.grumpysperformance.co...a-better-cam-to-a-zz3-350-sbc.182/#post-26013
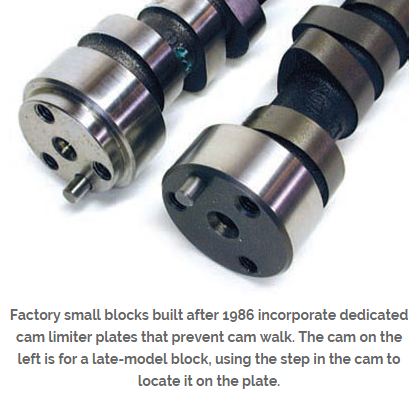
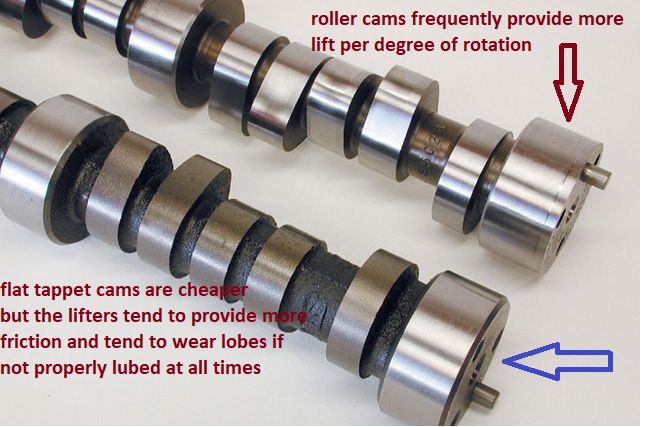
notice the more aggressive cam lobe acceleration rate on the roller cam lobes
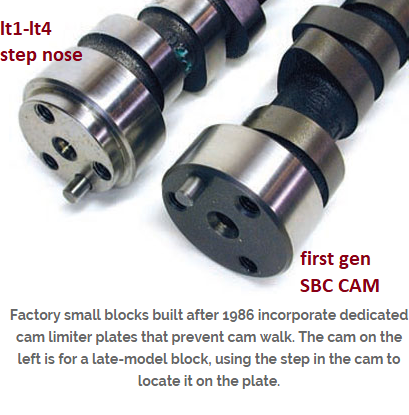
notice the stepped cam nose to fit retainer plate
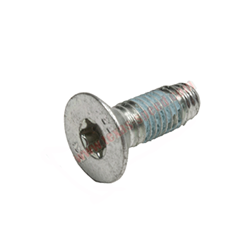
they usually use TORX SCREWS LIKE THIS
below you see the more modern block with the cam retainer plate and this uses a step nose cam, un-like the standard first gen non-roller cam blocks
youll really want to use a cam retainer lock plate, over the cam button and under the three cam bolts to hold the cam button into the timing gears, and lock the bolts from getting loose
http://www.chevyhiperformance.com/techa ... index.html
Last edited: