TBucket Engine Project (Dart SHP)

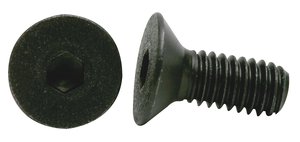
Those thick washers that Mr Gasket uses I have found to be too soft because they bend inwards when torqued.
which is probably why yours managed to loosen Rick. I can't really tell for sure in your photo. For added safety,
I always use Red Loctite on those threads with no lock washer that can deform and squish out, as you have
experienced. You can get a hardened die washer, that will not go concave, or just use the ARP.
 
The ARP bolt, Fluidampr damper and new timing pointer for the 6.25 inch damper are on their
way now. Should be here Friday.

ARP does not show a lock washer, so we will see when it gets here.
 
Nice, i love ARP hardware. Fluiddamper look like a good choice.(i dont know them very much but i keep hearing good thing about them).
 
use loc-tight on the bolt threads, after cleaning the threads with solvent and drying the threads to reduce any tendency for them coming loose
266loc.JPG
 
OK, this is going to be painful !!! :mad:

I never even thought about it, I just assumed that the harmonic balancer was small enough diameter
that it would come off without hitting the water pump pulley..... looks like I was wrong!!! :rolleyes:

FP02_WaterPumpPulleyBent_00204.jpg

At first when I looked at the 2 pulleys side-by-side like in the photo above, I said ....."That's NOT
going to work! But then I realized it's the distance inside that I should be comparing. It's the distance
from the water pump shaft to the v-belt grooves that matter.

When I measured from the inside, then there was only .005 inches difference in the two pulleys.

FP02_WaterPumpPulleyDepth_00208.jpg

The quality of the Summit pulley looks good. The one thing I can't tell yet is how true it rotates
about the center. Guess I will find out when it's on and it's too late to send back. I don't really
anticipate any problems thou.

$49.97
https://www.summitracing.com/parts/sum-g3960 ...... Looks like to me it needs some polishing.

FP02_WaterPumpPulleySummitG3960_00207.jpg

.
 
looks darn impressive and obviously a custom touch thats instantly obvious, to anyone looking at the t-bucket,
congrats

266loc.JPG


39940_hr4c.jpg

(use loc-tite on the retention bolt threads, mating/locking it to the water pump)
and personally ID select grade #8 fasteners
 
I want to set TDC with the new balancer and pointer. There is no problem turning the engine
CW (looking at the front) since it wants to tighten the balancer bolt.

But what is the best way to turn it backwards without loosening the balancer bolt ???
 
how are you setting TDC?with a piston stop or you pull the head?.

i just use 2 of the 3 pulley bolt in the front of balancer(without the pulley of course) and i use a pry bar on the bolt.
Be carefull not to break those bolt ;).

I dont like to use the balancer bolt for some reason.
 
how are you setting TDC?with a piston stop or you pull the head?.

i just use 2 of the 3 pulley bolt in the front of balancer(without the pulley of course) and i use a pry bar on the bolt.
Be carefull not to break those bolt ;).

I don't like to use the balancer bolt for some reason.

I need to set TDC with the head on. To do that I need to turn the engine both directions.

Guess I could use the balancer pulley bolts, but would have to tape the front of the balancer to keep it pretty. Although
it won't be seen with the pulley on.
 
BTW I assume you gentlemen do know theres
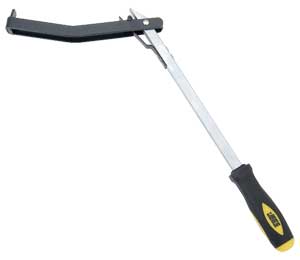
even a correct and very inexpensive tool for spinning it from the flex-plate or flywheel,
once the cylinder heads are installed
I didn't realize that they were that cheap for a quality flex plate tool.

Since I'm a Amazon Prime member and get free shipping I checked out Amazon. The Lisle
PN: 23800 qualified for free 1-day shipping if I ordered $35, so I added a couple of items
from my Wish List. Should be here Tuesday.

$25.38
https://www.amazon.com/Lisle-23800-...37928&sr=8-15&keywords=Flywheel+Turning+Tools

LisleFlexPlateTurningTool.jpg
 
Yeah, thats what i do to spin it both direction, just remove the sparkplug first.
If the balancer paint/finish is that soft/weak then it dont deserve to be installed on my engine.
 
Well I don't know about how many Gentlemen are working on this project, but I have been
sidetracked while the Beer Keg/Gas Tank is being repaired for a leak.

I should have told the radiator shop that I wanted to grind the weld smooth and polish it so
it did not show. What I got was a weld that was laying on the surface, so when I ground it off
flat it started leaking again. Now he told me not to grind it smooth when I asked, but for me
that was not going to be acceptable even if it meant welding it again.

So I took my chances and like he said it would probably leak again. I used to 25-30 psi and
water to identify the crack. Once I thought I had exposed the entire crack, then I ground it out
with a die grinder about 1/8 inch deep and pressure checked again. I'm going to take it back
to him tomorrow so that he can weld it again but it won't be a surface weld this time.

I will tell him to make a pass down the middle and one on each side overlapping about 33%. So
I can ground it smooth and not have a low spot.

FPx_BeerKegPatch01_00214.jpg

FPx_BeerKegPatch02_00216.jpg

FPx_BeerKegPatch03_00220.jpg

.
 
Back
Top