You are using an out of date browser. It may not display this or other websites correctly.
You should upgrade or use an alternative browser.
You should upgrade or use an alternative browser.
The Force Awakens...
- Thread starter DorianL
- Start date
On that broken bolt, Id wire brush it clean, then ID first try, too drop a 3/8" nut on top of the remaining part of the broken bolts stud like remains,
and mig weld the stub to the inside of the nut and, use a wrench too back it out.
if thats not working Id heat it several times with an acetylene torch with a fine blue tip flame and cool it with a 50% 50% mix of MMO and acetone ,
that will soak into the old threads, then center drill and use an easy-out
http://garage.grumpysperformance.co...studs-bolts-rusted-in-place.11410/#post-52306
http://garage.grumpysperformance.co...-of-busted-bolt-repair-info.11095/#post-49451
http://garage.grumpysperformance.com/index.php?threads/removing-rusted-broken-bolts.807/#post-43181
Last edited:


great pictures THANK YOU!
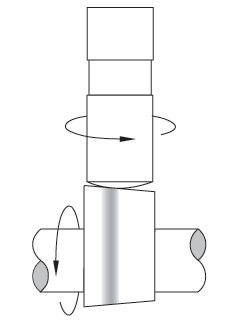
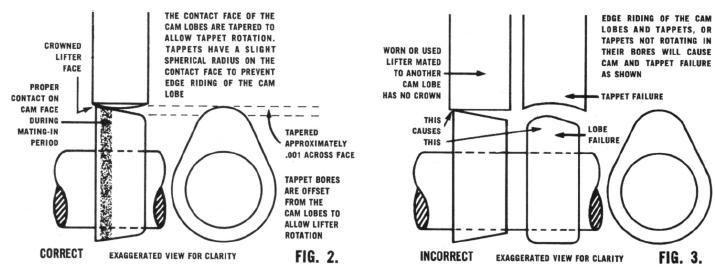
if that cam lasted almost 30 years it was good quality, the wear was more likely , partly due to lack of frequent oil and filter changes, or improper valve adjustment A improperly adjusted lifter without the required valve adjustment clearance can stop rotating on the lobe correctly.
but keep in mind they drastically changed oil formulas when all the manufacturers swapped to roller lifters and for several years and even much of the currently made auto engine oil is not designed for flat tappet cam use, you'll want to be careful what oil you select.
(for an engine that old there's very little sludge so the previous owner obviously did occasionally change the oil.) adding a qt of MMO to the other 5-6 quarts of what ever premium oil you select to use adds extra solvents and detergent additives you might need.
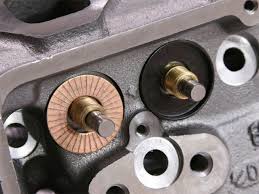
(looks like youll have to spend a bit of time removing two broken off cam timing cover bolts)

http://garage.grumpysperformance.com/index.php?threads/cam-wear-articles-you-need-to-read.282/
http://garage.grumpysperformance.co...il-choices-for-cam-break-in.13602/#post-70237
http://garage.grumpysperformance.com/index.php?threads/break-in-oil-quality-tested.11145/#post-52501
http://garage.grumpysperformance.co...lifter-to-increase-oil-flow.11152/#post-49968
https://www.summitracing.com/parts/crn-10013/overview/
Brand:Crane Cams
Manufacturer's Part Number:10013
Part Type:Camshafts
Product Line:Crane Hydraulic Flat Tappet Camshafts
Summit Racing Part Number:CRN-10013
UPC:021174018271
Cam Style:Hydraulic flat tappet
Basic Operating RPM Range:2,000-5,800
Intake Duration at 050 inch Lift:222
Exhaust Duration at 050 inch Lift:222
Duration at 050 inch Lift:222 int./222 exh.
Advertised Intake Duration:278
Advertised Exhaust Duration:278
Advertised Duration:278 int./278 exh.
Intake Valve Lift with Factory Rocker Arm Ratio:0.467 in.
Exhaust Valve Lift with Factory Rocker Arm Ratio:0.467 in.
Valve Lift with Factory Rocker Arm Ratio:0.467 int./0.467 exh.
Lobe Separation (degrees):110
Computer-Controlled Compatible:No
Grind Number:278 H10
Valve Springs Required:Yes
Quantity:Sold individually.
Notes:9.5 to 10.75 compression ratio advised.
if that cam lasted almost 30 years it was good quality, the wear was more likely , partly due to lack of frequent oil and filter changes, or improper valve adjustment A improperly adjusted lifter without the required valve adjustment clearance can stop rotating on the lobe correctly.
but keep in mind they drastically changed oil formulas when all the manufacturers swapped to roller lifters and for several years and even much of the currently made auto engine oil is not designed for flat tappet cam use, you'll want to be careful what oil you select.
(for an engine that old there's very little sludge so the previous owner obviously did occasionally change the oil.) adding a qt of MMO to the other 5-6 quarts of what ever premium oil you select to use adds extra solvents and detergent additives you might need.
(looks like youll have to spend a bit of time removing two broken off cam timing cover bolts)
http://garage.grumpysperformance.com/index.php?threads/cam-wear-articles-you-need-to-read.282/
http://garage.grumpysperformance.co...il-choices-for-cam-break-in.13602/#post-70237
http://garage.grumpysperformance.com/index.php?threads/break-in-oil-quality-tested.11145/#post-52501
http://garage.grumpysperformance.co...lifter-to-increase-oil-flow.11152/#post-49968
https://www.summitracing.com/parts/crn-10013/overview/
Brand:Crane Cams
Manufacturer's Part Number:10013
Part Type:Camshafts
Product Line:Crane Hydraulic Flat Tappet Camshafts
Summit Racing Part Number:CRN-10013
UPC:021174018271
Cam Style:Hydraulic flat tappet
Basic Operating RPM Range:2,000-5,800
Intake Duration at 050 inch Lift:222
Exhaust Duration at 050 inch Lift:222
Duration at 050 inch Lift:222 int./222 exh.
Advertised Intake Duration:278
Advertised Exhaust Duration:278
Advertised Duration:278 int./278 exh.
Intake Valve Lift with Factory Rocker Arm Ratio:0.467 in.
Exhaust Valve Lift with Factory Rocker Arm Ratio:0.467 in.
Valve Lift with Factory Rocker Arm Ratio:0.467 int./0.467 exh.
Lobe Separation (degrees):110
Computer-Controlled Compatible:No
Grind Number:278 H10
Valve Springs Required:Yes
Quantity:Sold individually.
Notes:9.5 to 10.75 compression ratio advised.
Last edited:
(looks like youll have to spend a bit of time removing two broken off cam timing cover bolts)
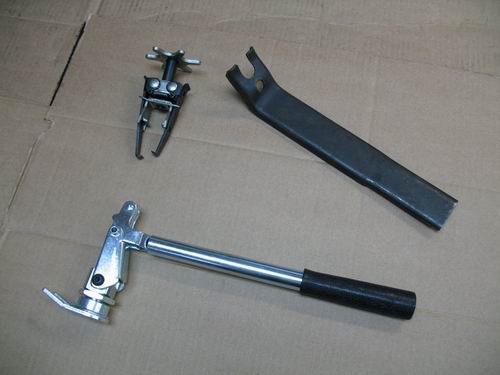
Any links or advice on how to dig that out ?
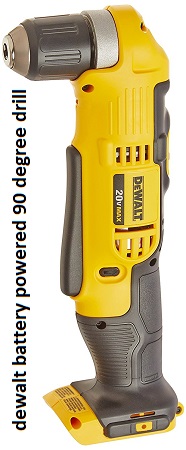
your almost sure to need a 90 degree drill to gain access to drill and use an easy out tool
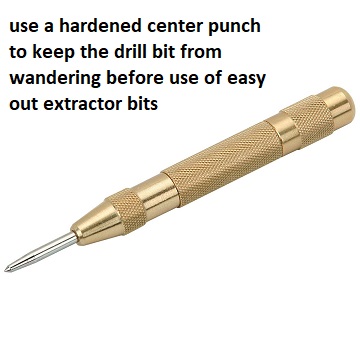
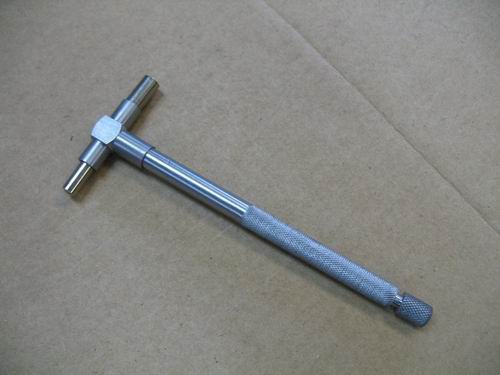
be sure to accurately center punch the broken bolt before drilling it to use an easy out screw extractor
https://www.harborfreight.com/spring-loaded-center-punch-621.html
https://www.amazon.com/DEWALT-DCD74...636101&sr=8-1&keywords=dewalt+90+degree+drill
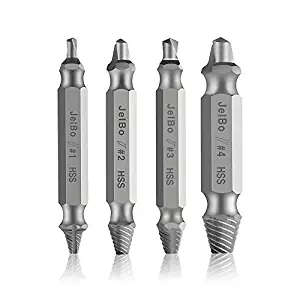
https://www.amazon.com/Extractor-Ha...+bolt+extractor+set&psc=1&smid=A2O3U707GC6UX7
http://garage.grumpysperformance.co...studs-bolts-rusted-in-place.11410/#post-52306
http://garage.grumpysperformance.co...-of-busted-bolt-repair-info.11095/#post-49451
http://garage.grumpysperformance.com/index.php?threads/removing-rusted-broken-bolts.807/#post-43181
be sure to accurately center punch the broken bolt before drilling it to use an easy out screw extractor
https://www.harborfreight.com/spring-loaded-center-punch-621.html
https://www.amazon.com/DEWALT-DCD74...636101&sr=8-1&keywords=dewalt+90+degree+drill
https://www.amazon.com/Extractor-Ha...+bolt+extractor+set&psc=1&smid=A2O3U707GC6UX7
http://garage.grumpysperformance.co...studs-bolts-rusted-in-place.11410/#post-52306
http://garage.grumpysperformance.co...-of-busted-bolt-repair-info.11095/#post-49451
http://garage.grumpysperformance.com/index.php?threads/removing-rusted-broken-bolts.807/#post-43181
Last edited:
Intake Valve Lift with Factory Rocker Arm Ratio:0.467 in.
Exhaust Valve Lift with Factory Rocker Arm Ratio:0.467 in.
Valve Lift with Factory Rocker Arm Ratio:0.467 int./0.467 exh.
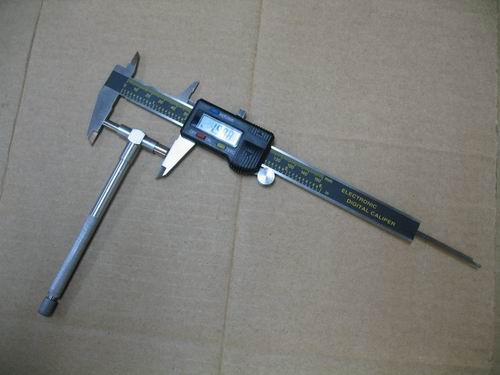
Hmmm, is it just me or does this cam exceed the lift limits of a stock 882 head?
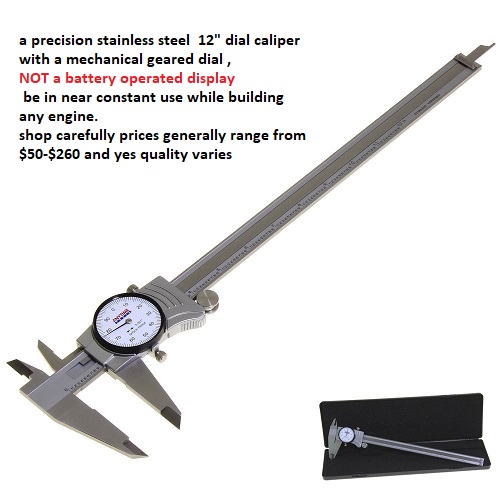
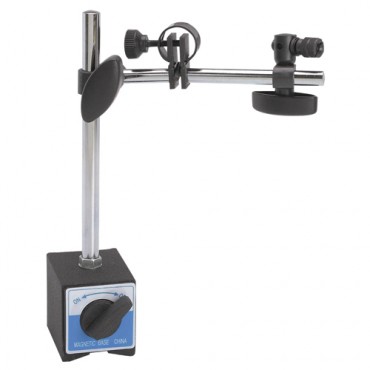
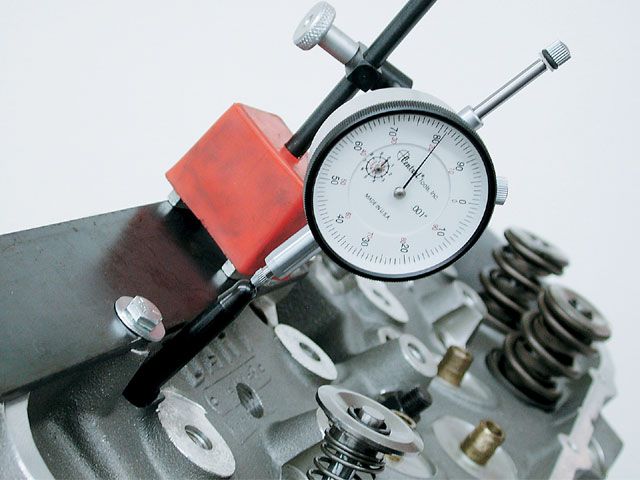
I really doubt it, obviously you can check clearances with a caliper and or a dial indicator but most ... not all, stock heads easily clear .480, and more than a few clear .530 in stock form.
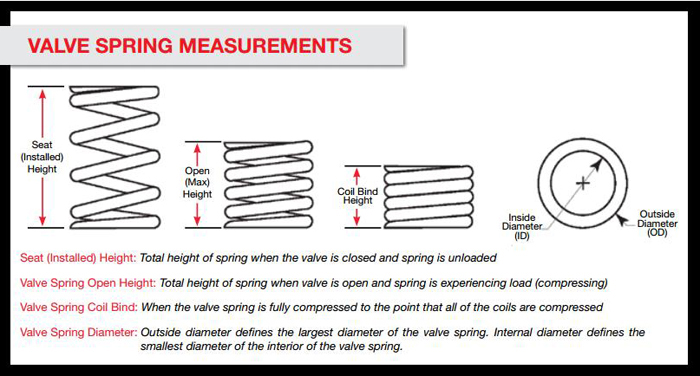
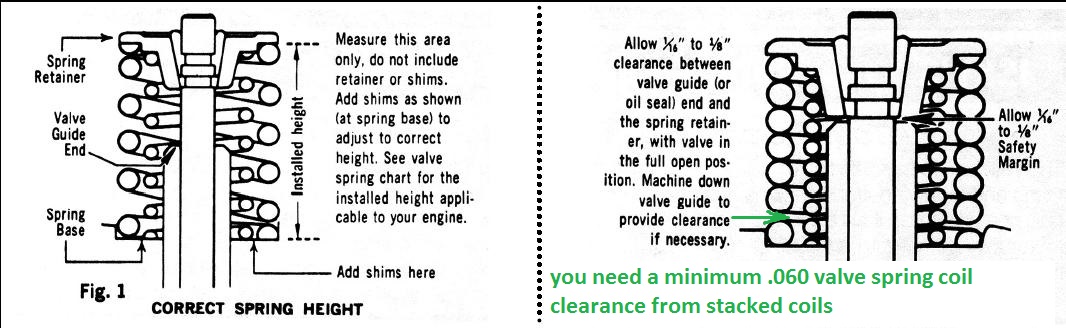
obviously checking the open / closed valve spring height and coil bind and retainer too valve seal clearance helps here

http://garage.grumpysperformance.co...e-springs-and-setting-up-the-valve-train.181/
http://garage.grumpysperformance.co...s-in-vs-threaded-rocker-studs.2746/#post-7475
http://garage.grumpysperformance.co...ange-in-valve-spring-iinstalled-height.12791/
obviously checking the open / closed valve spring height and coil bind and retainer too valve seal clearance helps here
http://garage.grumpysperformance.co...e-springs-and-setting-up-the-valve-train.181/
http://garage.grumpysperformance.co...s-in-vs-threaded-rocker-studs.2746/#post-7475
http://garage.grumpysperformance.co...ange-in-valve-spring-iinstalled-height.12791/
Last edited:
Well, the rest of the story is that there was no broken bolt in the top hole; just a botched attempt at a helicoil. Bottom one was helicoil and a broken bolt. Go figure ! It’s a wonder it didn’t leak from the timing chain cover.


Let’s leave this over here. My new lifters.

Let’s leave this over here. My new lifters.
https://www.amazon.com/dp/B000ITQ5D...y=9012039&hvtargid=pla-273265664819&camp=3638
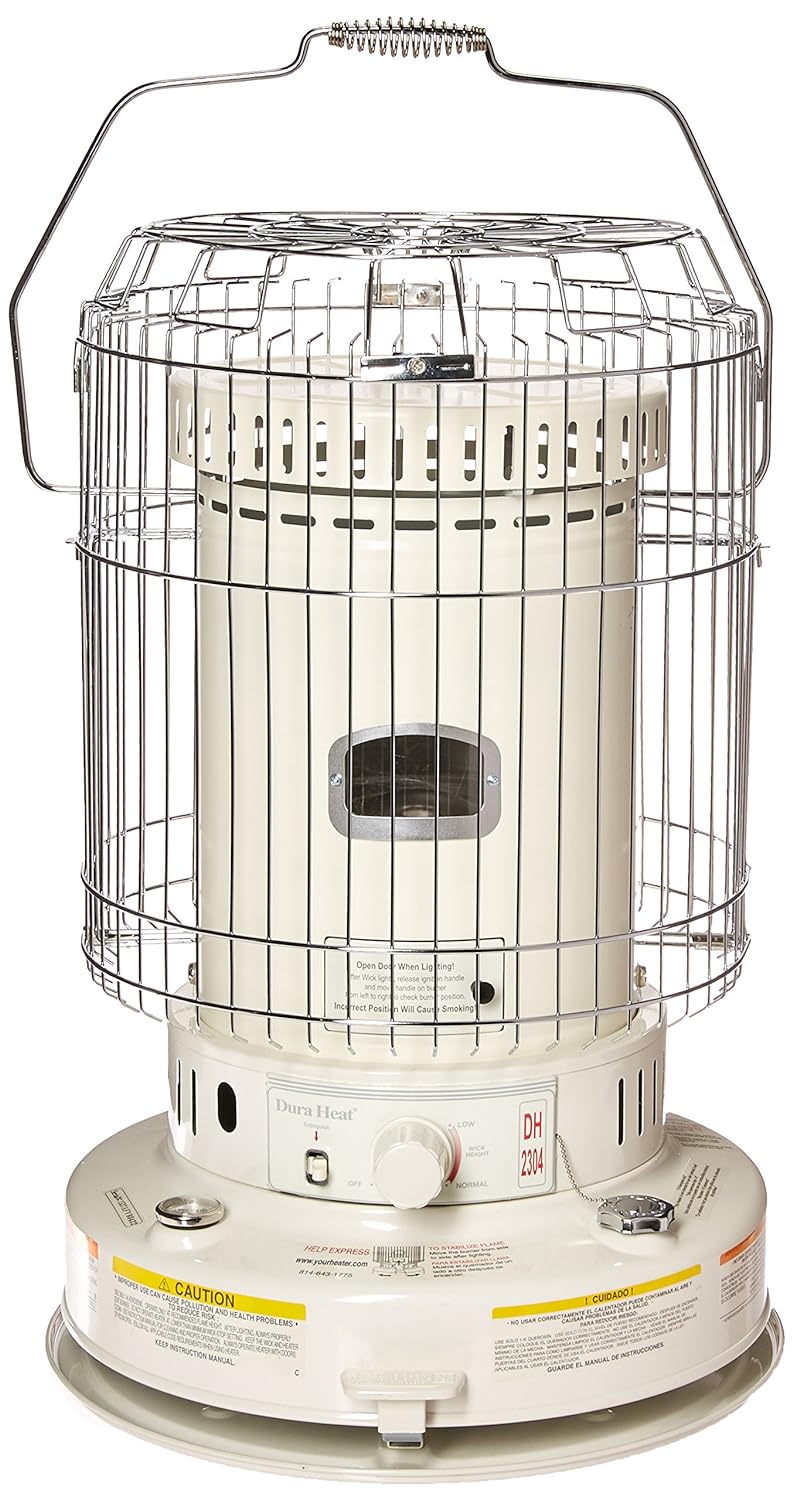
it only gets rather cold here about 1 week a year ,
but I purchased a kerosene heater for the shop years ago,
its effective and not difficult to use and a couple gallons of fuel lasts all day if you were to want to run it that long,
(use mineral spirits as fuel it smells much better)
a few minutes running is enough take the edge out of the low shop temps around here,(usually high 30F at worst) but of course your conditions are a bit more extreme,
so Id have no doubt youll have to keep it running a few minutes
Loves302Chevy
"One test is worth a thousand expert opinions."
Your timing set has also seen better days. Replace it.
BTW, using a left-handed drill bit will usually unscrew the broken stud before you even get to use the easy-out, unless the broken stud is rusted in place.
It would also be a good idea to replace the water pump. It's already out.
BTW, using a left-handed drill bit will usually unscrew the broken stud before you even get to use the easy-out, unless the broken stud is rusted in place.
It would also be a good idea to replace the water pump. It's already out.


Hmmmm. Well this would explain the vague steering
Well in that case, you might as well yank the body off and do a rotisserie restoration !!!
