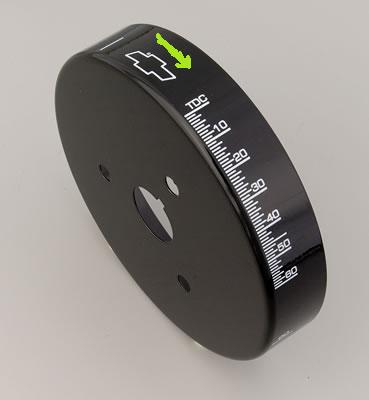
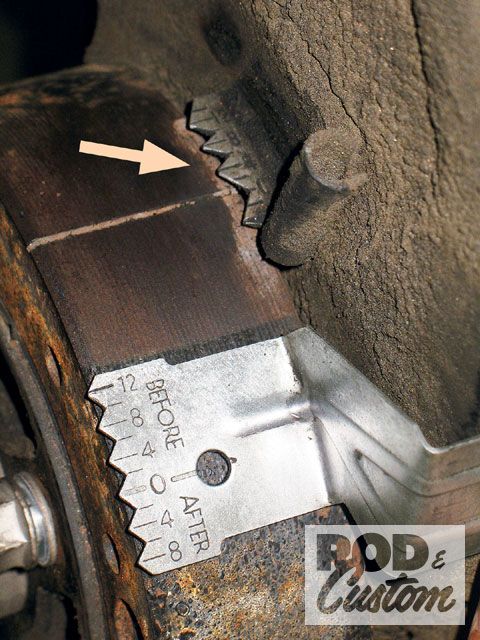
IM only too aware that most guys have a timing light or at least know what they are used for and its just not that glamorous, but its a very necessary tool, and the first step in timing any engine will be a mandatory CHECK to insure the MARKS ON THE DAMPER INDICATE TRUE TDC, FIRST, to be sure that the TDC mark on the DAMPER lines up with the TDC mark on the timing tab/pointer... Often these two marks are MIS ALIGNED
http://www.superchevy.com/how-to/ad...now-about-vacuum-advance-and-ignition-timing/
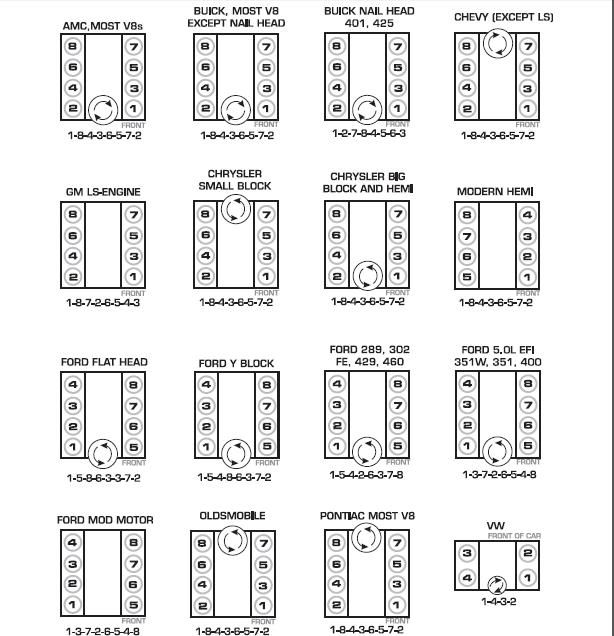
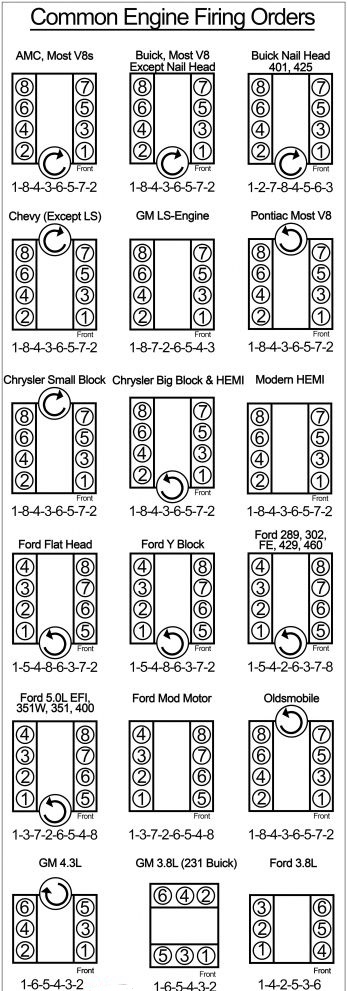
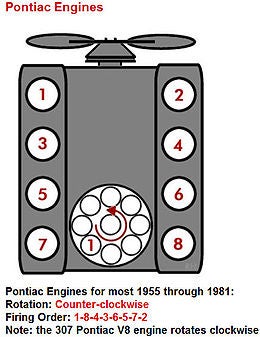
pontiac engines have a distributor that rotates counter clock wise in direction
http://garage.grumpysperformance.com/index.php?threads/timing-tabs-and-indicators.1015/
http://garage.grumpysperformance.com/index.php?threads/timing-lights.875/
http://garage.grumpysperformance.com/index.php?threads/finding-top-dead-center.967/
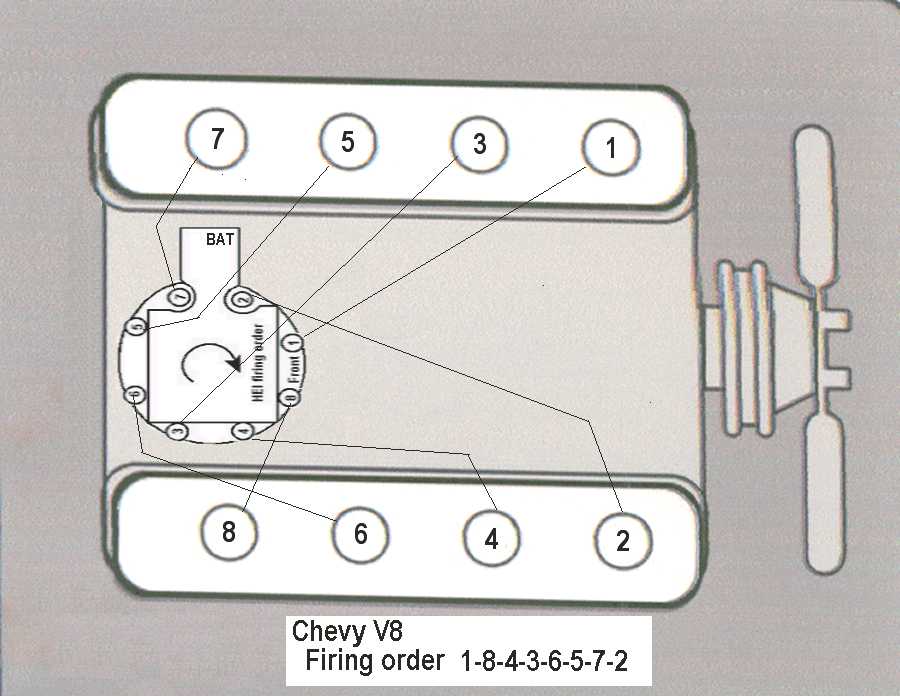
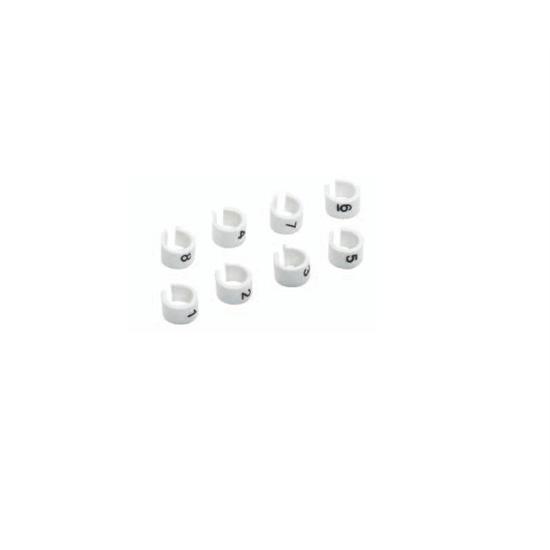
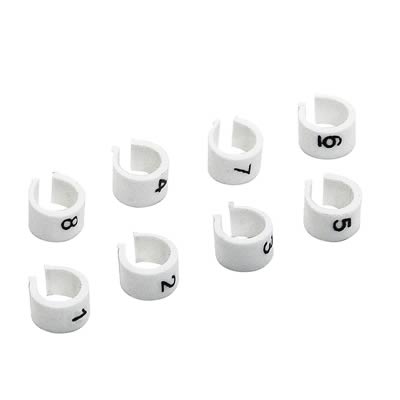
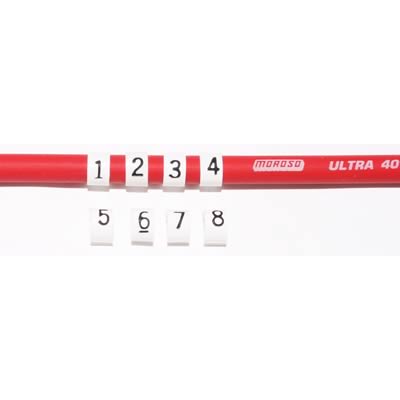
marking the plug wires helps
https://www.speedwaymotors.com/Accel-170018-Spark-Plug-Wire-Markers,43973.html?sku=105170018&utm_matchtype={match_type}&msclkid=27642748ecf91336b2e947fa833b8515&utm_source=bing&utm_medium=cpc&utm_campaign=SMI - Shopping (CSE) (Bing)&utm_term=4577404346894113&utm_content=All Products (Feb28_2020)
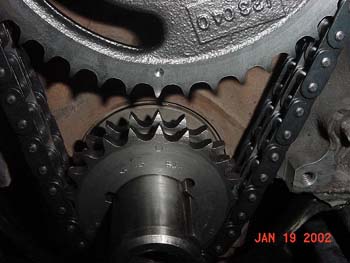
Id , put the trans in neutral, pull plug #1 and stick my finger over the plug hole and remove the distributor cap to watch the rotor as it rotates use a breaker bar on the crank/damper bolt to turn the engine
you should feel cylinder pressure as the piston raises on the compression stroke, from that info and with a timing light you should find the answer
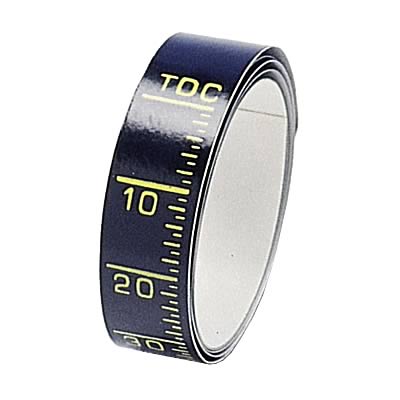
as will a timing tape on the damper
https://www.summitracing.com/parts/SUM-161588?rrec=true
having a few basic meters,gauges etc. helps
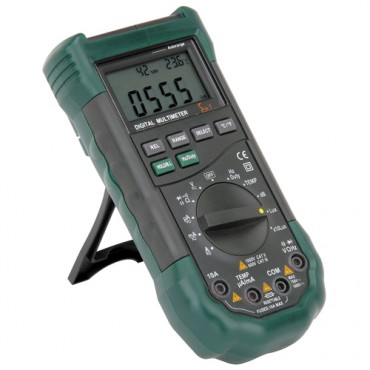
MULTI METER
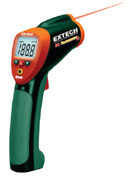
INFRARED TEMP GUN
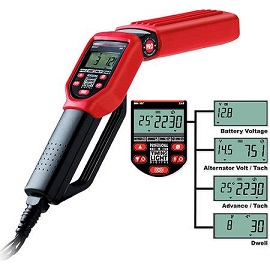
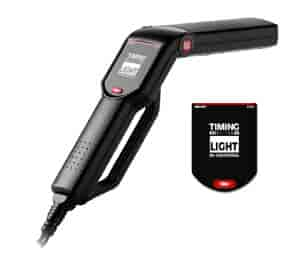
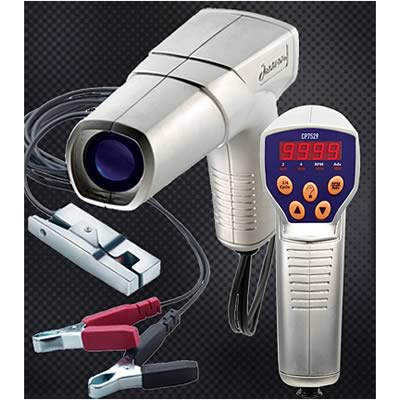
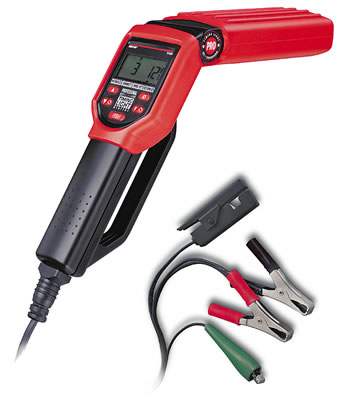
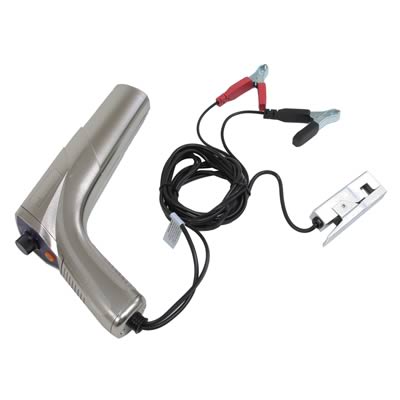
TIMING LIGHT

COMPRESSION GAUGE
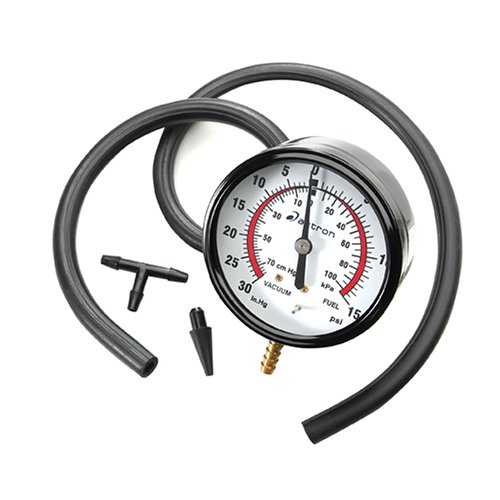
PRESSURE/VACUUM GAUGE
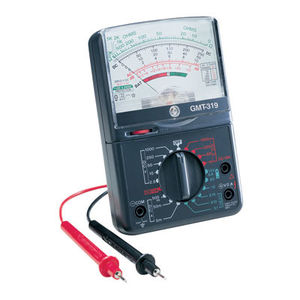
every mechanic needs an ANALOG multi meter for testing capacitors with a micro farad scale, AND a DIGITAL MULTI METER
READ THRU THIS
viewtopic.php?f=70&t=967&p=1683#p1683
There's no question that timing lights are a rather basic tool,and are reasonably easy to use, but there's a great difference in accuracy between different models.
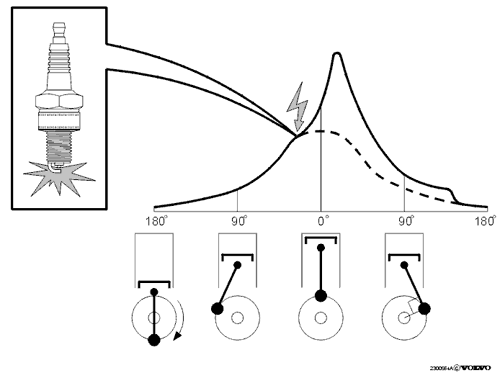
the basic concept is deceptively simple, get the ignition to light off the compressed cylinder full of that fuel/air mix at the exactly correct instant that will produce the best torque and least wasted pressure working against the piston before it passed over TDC to drive the connecting rod down against the crank journal and spin the crank.
naturally its nearly useless to try and time the ignition until you've carefully verified TDC marks on the damper are correct
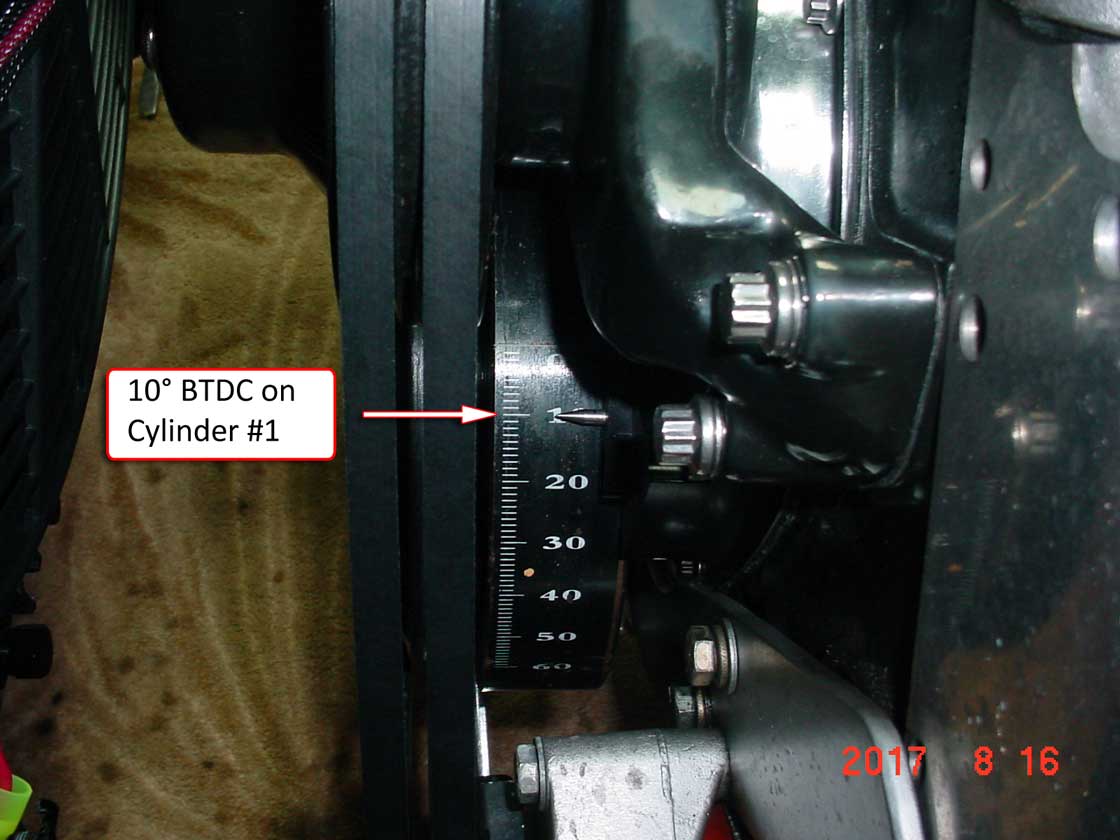
To do that you need to know the exact piston location in its repetitive 720 degree cycle. by watching the TDC indicator mark on the damper in relation to a timing tab on the timing chain cover.
but accuracy is critical to success,CONSISTENCY, AND REPEATABILITY and A BRIGHT STROBE YOU CAN EASILY SEE IN DAYLIGHT too SEE WHAT YOUR DOING IS CRITICAL.
Get that ignition to fire a bit early and detonation can cause major problems, if its delayed in relation to the pistons location it will result in less effective pressure and a hotter exhaust header.
http://www.dragracingonline.com/technic ... hts-1.html
http://www.amazon.com/gp/top-rated/automotive/15707511
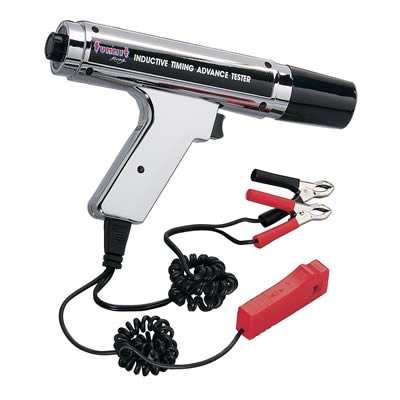
Many timing lights are less than consistent or accurate, nor can they give exactly consistent results at different rpm levels.
MANY are cheaply constructed and not all that accurate. some won,t work well with solid core wire, some are heat sensitive. the type that allows you to set the timing advance or retard for the flashing strobe light,with a dial are usually not nearly as consistent, as many of the ones without that feature.
IF you own a couple timing lights check them all at the same engine at at least 3000 rpm, and you'll commonly see variations in the results and THAT'S BAD, if its off a couple degrees at 3000rpm, at 6000-7000rpm it can and probably will cause problems, when your engine timing is not even close to what you expect it to be.
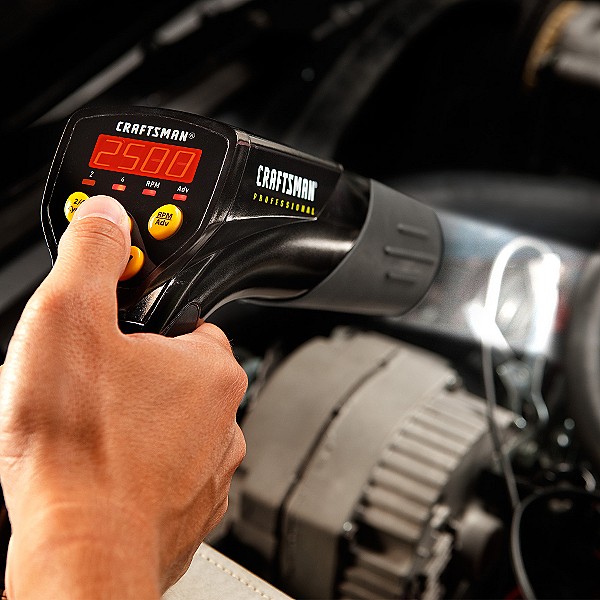
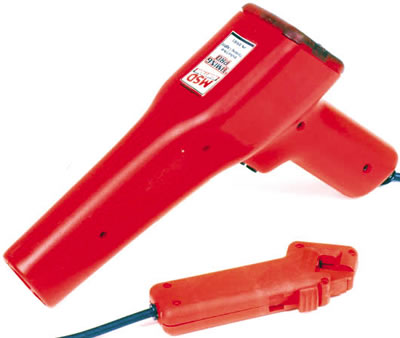
The older model Sears Craftsman Timing Light (P/N A-2134) is usually consistent, MSD, makes their own, timing light (P/N 8990). that is also one of the better ones. When your using a timing light you'll need to verify the battery connections are correct as to polarity, and the wires cant contact moving components like fans, fan belts and pulleys, you'll need to verify that only the wire from the #1 cylinder contacts the timing lights inductor clip, and that NOTHING contacts the hot headers, and you should NEVER wear a TIE or LOOSE clothing around a running engine!
read these links
http://www.dragracingonline.com/technic ... hts-1.html
http://www.corvette-restoration.com/res ... ing101.pdf
watch video
http://www.youtube.com/watch?v=UYGU7mTw ... r_embedded
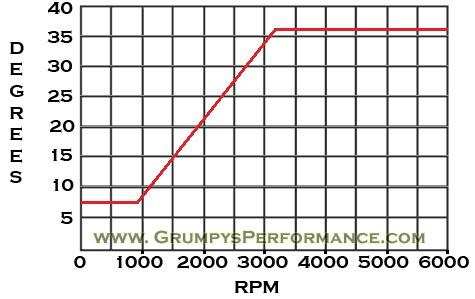
Obviously getting the ignition timing correct in relation to the compression stroke and piston location in the engine will result in far less chance of detonation and piston damage or loss of potential hp, and getting the ignition advance curve correct is also critical, IVE generally found havering full advance all in by about 2900-3100rpm is a good compromise and while the components used in the engine can change the results, full advance at about 36-38 degrees at 3100rpm is a good basic starting point.
your total timing will be in the 32-40degree range, on a timing tape on the damper
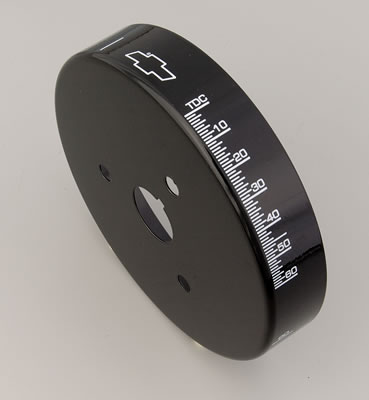
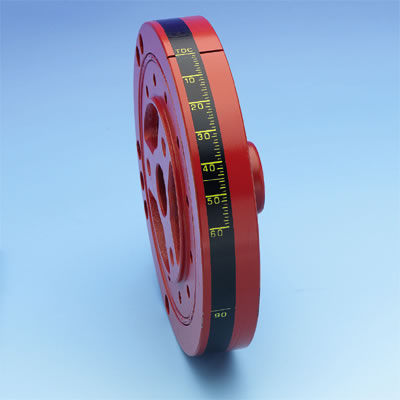
the use of timing tape on the damper is a huge help and yeah, the glue on the tape tends to get loose so use some contact cement sparingly, the contact cement works, but a simple spray coat of a clear lacquer spray paint sprayed over the tape and allowed to dry locks it on the damper fairly well also, or you can spend just a bit more, and buy a damper cover, and adjustable timing tab, just remember to verify TDC
obviously you need to have a consistent base line advance curve to work with,
on most Chevy v8 engines that run cams designed for street/strip use Ive generally found a advance that goes from about 8 degrees at idle speed (800-900rpm in most cases) and smoothly advances the ignition to about 36 degrees or about 28 degrees at about 3200rpm , is generally a good place to start, or about 82 degrees advance per hundred rpm, you can then play with the engine and determine what changes MIGHT be required.
viewtopic.php?f=70&t=1809&p=4671#p4671
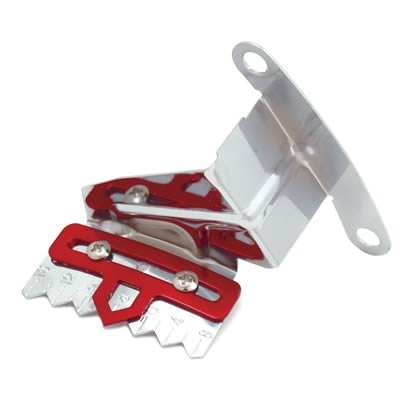
stock timing marks are very limited in the extent of timing changes that can be indicated
you start by verifying TDC on the damper and timing tab reflects TRUE TDC
viewtopic.php?f=52&t=966&p=6799&hilit=+timing#p6799
viewtopic.php?f=70&t=2798
viewtopic.php?f=48&t=2828&p=7301&hilit=fuel+gauge#p7301
http://www.dragracingonline.com/technic ... hts-1.html
viewtopic.php?f=70&t=1015&p=6237&hilit=+timing+tabs#p6237
you then use a timing light and a tach to verify the ignition advance stops advancing with rpm increases at about 3000rpm-3200rpm
vacuum drops as the throttle opens, and centrifugal force pulls the distributor weights outward against spring pressure as rpms increase

YOULL FIND INFO BELOW USEFUL
viewtopic.php?f=42&t=2623&p=6773&hilit=distributor+advance#p6773
viewtopic.php?f=7&t=1616&p=3817&hilit=+distributor+advance#p3817
viewtopic.php?f=70&t=1135&p=2289&hilit=+distributor+advance#p2289
viewtopic.php?f=70&t=751&p=1159&hilit=+HEI+DISTRIBUTOR#p1159
viewtopic.php?f=70&t=875&p=6241&hilit=+timing+light#p6241
links with info that's well worth reading thru
finding TDC
viewtopic.php?f=70&t=967
viewtopic.php?f=53&t=279
http://www.equus.com/product_info.php?p ... ry_id=1_20
timing
http://www.centuryperformance.com/ignit ... g-219.html
viewtopic.php?f=50&t=365&p=1094&hilit=+firing+order#p1094
viewtopic.php?f=70&t=1411
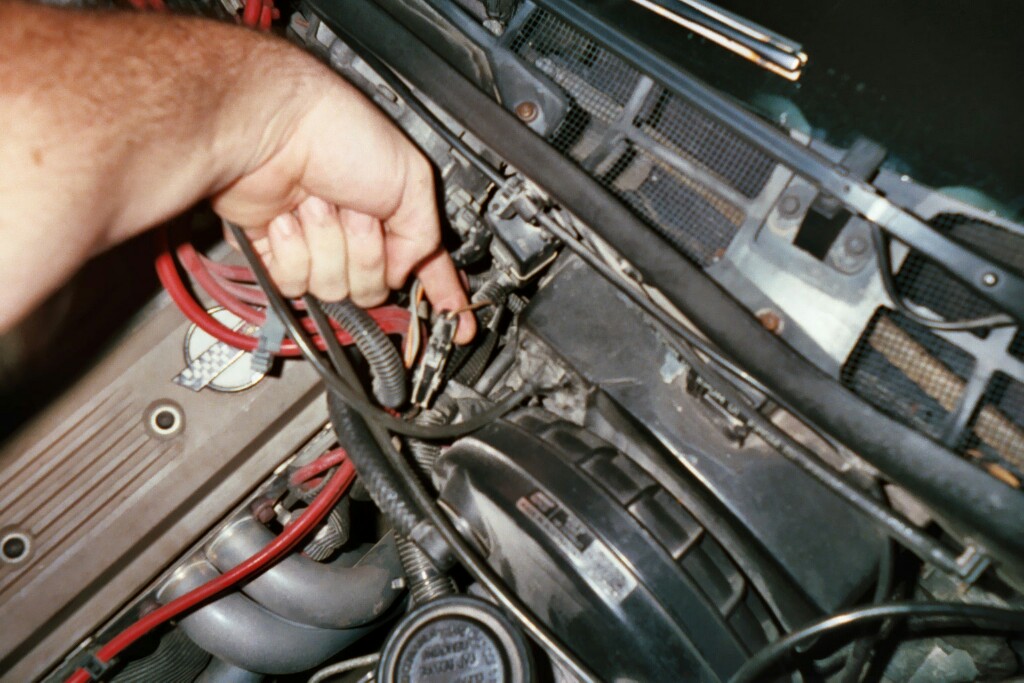
remember you'll YOULL want to read the shop manual for instructions for specific. info that applies, to your car and year, like youll need to disconnect this connector before setting the timing on a tpi c-4 vette, or anything else that pertains to your specific cars engine
http://www.digitalcorvettes.com/corvett ... /2/cat/652
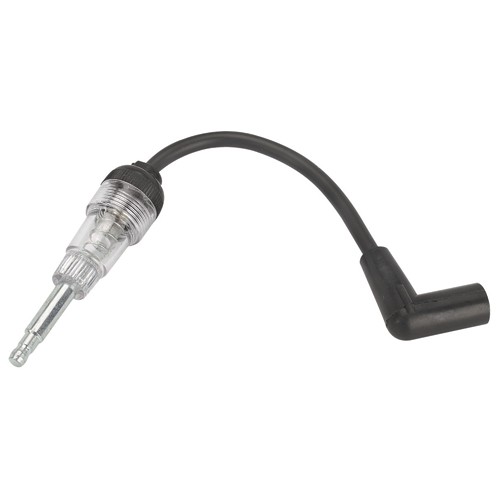
a spark checker can be useful
Id also label BOTH ends of each ignition wire, any decent label maker can produce sticky number tags far cheaper that the kits but even the kits are cheap
viewtopic.php?f=50&t=6098&p=18837&hilit=label#p18837
3M sells these really handy number tape tags
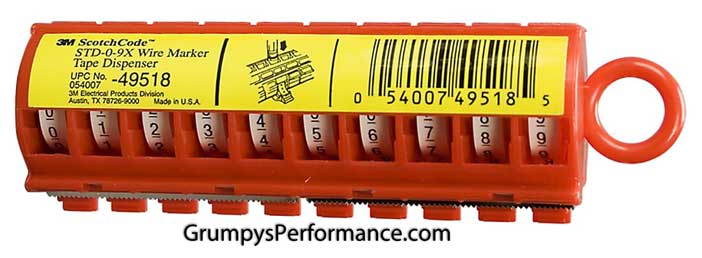
http://www.clarcorpindustrialsales.com/ ... -p/wmd.htm
at about $30- $45 for a fully loaded dispenser it seems expensive but its really a bargain
KEEP IN MIND that theres TWO totally different damper and timing tab locations that are correct on the SBC engines and you must use matched components for almost all years the ting tabs and dampers show TDC to be at about 2 o,clock, but theres a few applications that used a 12 o,clock timing tab and damper combo and you can,t mix&match the two types
http://www.summitracing.com/parts/SUN-CP7529/
http://www.summitracing.com/parts/EQU-5568/
http://www.summitracing.com/parts/SUN-CP7528/
http://www.summitracing.com/parts/SUM-G1059/
http://www.summitracing.com/parts/MSD-8991/
be aware that some damper designs do tend to fail over time!
so be sure to verify TDC on the damper and TRUE TDC match!
beating a balancer onto a crank, pulling it with the wrong type of tool, or letting it get fuel or oil soaked can damage a damper, this can easily result in the outer damper ring with the TDC mark rotating to a random location
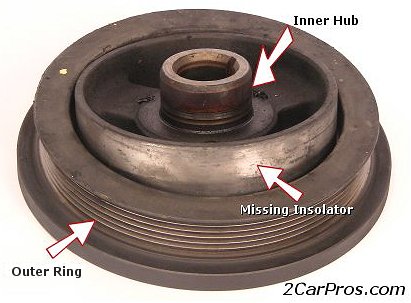
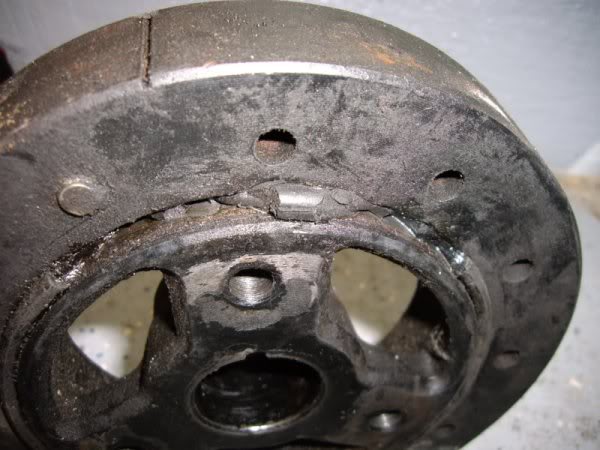
if your front crank seal leaks, over time it can dissolve the elastic, between the inner and outer damper hub weight, beating on a damper tends to hurt the flex ring seal alsos
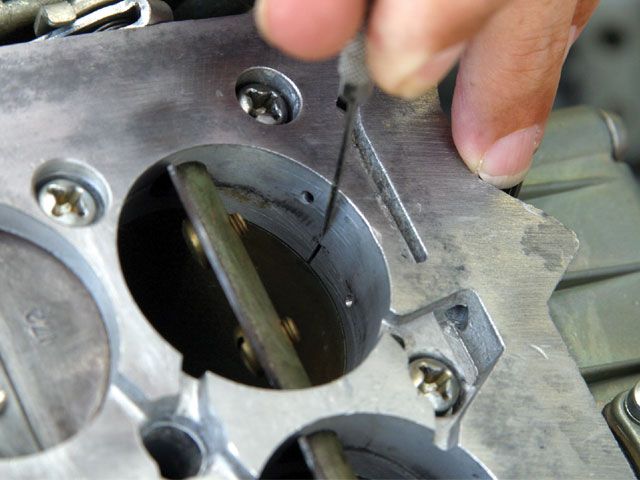
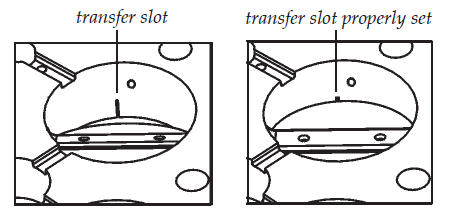
in many or most cases engine dieseling after the ignition is turned of is caused by a combination of a bit too rich of a fuel/air mix being drawn in and a bit too much heat in the combustion chambers this is common when a holley carbs transfer slot is badly adjusted to expose too much slot at idle

http://www.superchevy.com/how-to/ad...now-about-vacuum-advance-and-ignition-timing/
pontiac engines have a distributor that rotates counter clock wise in direction
http://garage.grumpysperformance.com/index.php?threads/timing-tabs-and-indicators.1015/
http://garage.grumpysperformance.com/index.php?threads/timing-lights.875/
http://garage.grumpysperformance.com/index.php?threads/finding-top-dead-center.967/
marking the plug wires helps
https://www.speedwaymotors.com/Accel-170018-Spark-Plug-Wire-Markers,43973.html?sku=105170018&utm_matchtype={match_type}&msclkid=27642748ecf91336b2e947fa833b8515&utm_source=bing&utm_medium=cpc&utm_campaign=SMI - Shopping (CSE) (Bing)&utm_term=4577404346894113&utm_content=All Products (Feb28_2020)
Id , put the trans in neutral, pull plug #1 and stick my finger over the plug hole and remove the distributor cap to watch the rotor as it rotates use a breaker bar on the crank/damper bolt to turn the engine
you should feel cylinder pressure as the piston raises on the compression stroke, from that info and with a timing light you should find the answer
as will a timing tape on the damper
https://www.summitracing.com/parts/SUM-161588?rrec=true
having a few basic meters,gauges etc. helps
MULTI METER
INFRARED TEMP GUN
TIMING LIGHT
COMPRESSION GAUGE
PRESSURE/VACUUM GAUGE
every mechanic needs an ANALOG multi meter for testing capacitors with a micro farad scale, AND a DIGITAL MULTI METER
READ THRU THIS
viewtopic.php?f=70&t=967&p=1683#p1683
There's no question that timing lights are a rather basic tool,and are reasonably easy to use, but there's a great difference in accuracy between different models.
the basic concept is deceptively simple, get the ignition to light off the compressed cylinder full of that fuel/air mix at the exactly correct instant that will produce the best torque and least wasted pressure working against the piston before it passed over TDC to drive the connecting rod down against the crank journal and spin the crank.
naturally its nearly useless to try and time the ignition until you've carefully verified TDC marks on the damper are correct
To do that you need to know the exact piston location in its repetitive 720 degree cycle. by watching the TDC indicator mark on the damper in relation to a timing tab on the timing chain cover.
but accuracy is critical to success,CONSISTENCY, AND REPEATABILITY and A BRIGHT STROBE YOU CAN EASILY SEE IN DAYLIGHT too SEE WHAT YOUR DOING IS CRITICAL.
Get that ignition to fire a bit early and detonation can cause major problems, if its delayed in relation to the pistons location it will result in less effective pressure and a hotter exhaust header.
http://www.dragracingonline.com/technic ... hts-1.html
http://www.amazon.com/gp/top-rated/automotive/15707511
Many timing lights are less than consistent or accurate, nor can they give exactly consistent results at different rpm levels.
MANY are cheaply constructed and not all that accurate. some won,t work well with solid core wire, some are heat sensitive. the type that allows you to set the timing advance or retard for the flashing strobe light,with a dial are usually not nearly as consistent, as many of the ones without that feature.
IF you own a couple timing lights check them all at the same engine at at least 3000 rpm, and you'll commonly see variations in the results and THAT'S BAD, if its off a couple degrees at 3000rpm, at 6000-7000rpm it can and probably will cause problems, when your engine timing is not even close to what you expect it to be.
The older model Sears Craftsman Timing Light (P/N A-2134) is usually consistent, MSD, makes their own, timing light (P/N 8990). that is also one of the better ones. When your using a timing light you'll need to verify the battery connections are correct as to polarity, and the wires cant contact moving components like fans, fan belts and pulleys, you'll need to verify that only the wire from the #1 cylinder contacts the timing lights inductor clip, and that NOTHING contacts the hot headers, and you should NEVER wear a TIE or LOOSE clothing around a running engine!
read these links
http://www.dragracingonline.com/technic ... hts-1.html
http://www.corvette-restoration.com/res ... ing101.pdf
watch video
http://www.youtube.com/watch?v=UYGU7mTw ... r_embedded
Obviously getting the ignition timing correct in relation to the compression stroke and piston location in the engine will result in far less chance of detonation and piston damage or loss of potential hp, and getting the ignition advance curve correct is also critical, IVE generally found havering full advance all in by about 2900-3100rpm is a good compromise and while the components used in the engine can change the results, full advance at about 36-38 degrees at 3100rpm is a good basic starting point.
your total timing will be in the 32-40degree range, on a timing tape on the damper
the use of timing tape on the damper is a huge help and yeah, the glue on the tape tends to get loose so use some contact cement sparingly, the contact cement works, but a simple spray coat of a clear lacquer spray paint sprayed over the tape and allowed to dry locks it on the damper fairly well also, or you can spend just a bit more, and buy a damper cover, and adjustable timing tab, just remember to verify TDC
obviously you need to have a consistent base line advance curve to work with,
on most Chevy v8 engines that run cams designed for street/strip use Ive generally found a advance that goes from about 8 degrees at idle speed (800-900rpm in most cases) and smoothly advances the ignition to about 36 degrees or about 28 degrees at about 3200rpm , is generally a good place to start, or about 82 degrees advance per hundred rpm, you can then play with the engine and determine what changes MIGHT be required.
viewtopic.php?f=70&t=1809&p=4671#p4671
stock timing marks are very limited in the extent of timing changes that can be indicated
you start by verifying TDC on the damper and timing tab reflects TRUE TDC
viewtopic.php?f=52&t=966&p=6799&hilit=+timing#p6799
viewtopic.php?f=70&t=2798
viewtopic.php?f=48&t=2828&p=7301&hilit=fuel+gauge#p7301
http://www.dragracingonline.com/technic ... hts-1.html
viewtopic.php?f=70&t=1015&p=6237&hilit=+timing+tabs#p6237
you then use a timing light and a tach to verify the ignition advance stops advancing with rpm increases at about 3000rpm-3200rpm
vacuum drops as the throttle opens, and centrifugal force pulls the distributor weights outward against spring pressure as rpms increase
YOULL FIND INFO BELOW USEFUL
viewtopic.php?f=42&t=2623&p=6773&hilit=distributor+advance#p6773
viewtopic.php?f=7&t=1616&p=3817&hilit=+distributor+advance#p3817
viewtopic.php?f=70&t=1135&p=2289&hilit=+distributor+advance#p2289
viewtopic.php?f=70&t=751&p=1159&hilit=+HEI+DISTRIBUTOR#p1159
viewtopic.php?f=70&t=875&p=6241&hilit=+timing+light#p6241
links with info that's well worth reading thru
finding TDC
viewtopic.php?f=70&t=967
viewtopic.php?f=53&t=279
http://www.equus.com/product_info.php?p ... ry_id=1_20
timing
http://www.centuryperformance.com/ignit ... g-219.html
viewtopic.php?f=50&t=365&p=1094&hilit=+firing+order#p1094
viewtopic.php?f=70&t=1411
remember you'll YOULL want to read the shop manual for instructions for specific. info that applies, to your car and year, like youll need to disconnect this connector before setting the timing on a tpi c-4 vette, or anything else that pertains to your specific cars engine
http://www.digitalcorvettes.com/corvett ... /2/cat/652
a spark checker can be useful
Id also label BOTH ends of each ignition wire, any decent label maker can produce sticky number tags far cheaper that the kits but even the kits are cheap
viewtopic.php?f=50&t=6098&p=18837&hilit=label#p18837
3M sells these really handy number tape tags
http://www.clarcorpindustrialsales.com/ ... -p/wmd.htm
at about $30- $45 for a fully loaded dispenser it seems expensive but its really a bargain
KEEP IN MIND that theres TWO totally different damper and timing tab locations that are correct on the SBC engines and you must use matched components for almost all years the ting tabs and dampers show TDC to be at about 2 o,clock, but theres a few applications that used a 12 o,clock timing tab and damper combo and you can,t mix&match the two types
http://www.summitracing.com/parts/SUN-CP7529/
http://www.summitracing.com/parts/EQU-5568/
http://www.summitracing.com/parts/SUN-CP7528/
http://www.summitracing.com/parts/SUM-G1059/
http://www.summitracing.com/parts/MSD-8991/
be aware that some damper designs do tend to fail over time!
so be sure to verify TDC on the damper and TRUE TDC match!
beating a balancer onto a crank, pulling it with the wrong type of tool, or letting it get fuel or oil soaked can damage a damper, this can easily result in the outer damper ring with the TDC mark rotating to a random location
if your front crank seal leaks, over time it can dissolve the elastic, between the inner and outer damper hub weight, beating on a damper tends to hurt the flex ring seal alsos
in many or most cases engine dieseling after the ignition is turned of is caused by a combination of a bit too rich of a fuel/air mix being drawn in and a bit too much heat in the combustion chambers this is common when a holley carbs transfer slot is badly adjusted to expose too much slot at idle
Last edited by a moderator: