one of the more common problems I see in older muscle cars and corvettes is that, many of the guys that own those cars, have the cars used rather intermittently or only on weekends, not as daily transportation, and as a result when they do go to use the car the battery's dead.
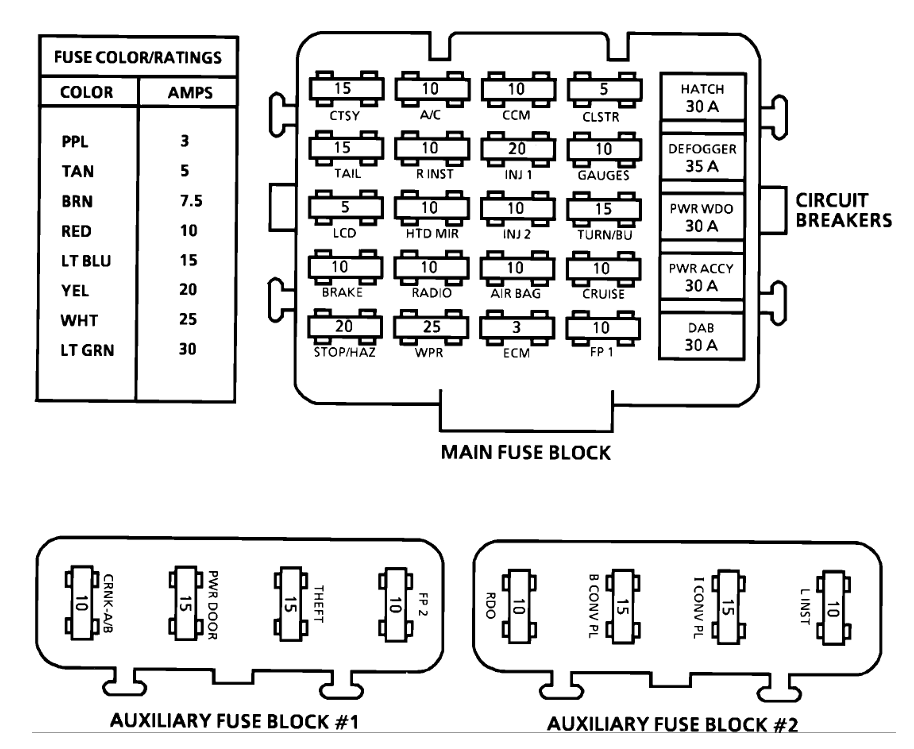
this is almost always a case where your forced to track down the source of the electrical drain issue by isolating the individual circuits by pulling fuses and testing each individual circuit,with a multi-meter. and Id sure pull trouble codes and get out the correct shop manual as they can be very useful in tracking down an electrical drain.
if you use a trickle charger verify its functioning with the multi meter before you start, both the battery and the trickle charger can be defective and just because the trickle charger has an LED light that works is no indication it actually works correctly, and battery's do wear out or become defective, so don,t jump to the conclusion your cars got a problem until you verify everything , battery don,t fully recover from repeated full discharged condition, so yes you need a trickle charger on a seldom used car.
leaving your interior lights or head lights on will kill the battery in as little as a few hours, thats not a fault in anything but the guy operating the car, but if you find the car battery dead and you didn,t cause the problem by neglecting the cause, you can track it down and isolate the offending electrical drain.
now if you don,t use a battery minder or charger its totally understandable, if you leave the car for several weeks between brief trips, that the battery will go dead, simply because the car never gets the battery fully charged. this is a fairly common complaint, obviously you'll want to locate the battery drain source,if this happens frequently or in only a few days time. and thats best done with the correct meter and pulling fuses until you locate the defective circuit, thats causing the electrical drain.
obviously you want to verify the battery takes a full charge and the alternator functions correctly and your battery connections and electrical grounds are good during the process.
a logical step by step approach will lead you to the problem, youll be amazed at what youll learn reading links. use of a shop manual and multi meter can be very helpful
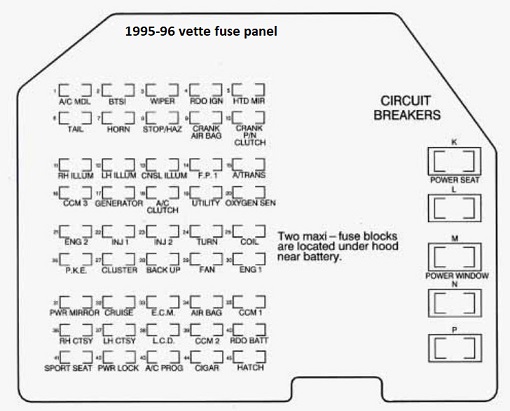
Chevrolet Corvette (1995 – 1996) – fuse box diagram
Year of production: 1995, 1996
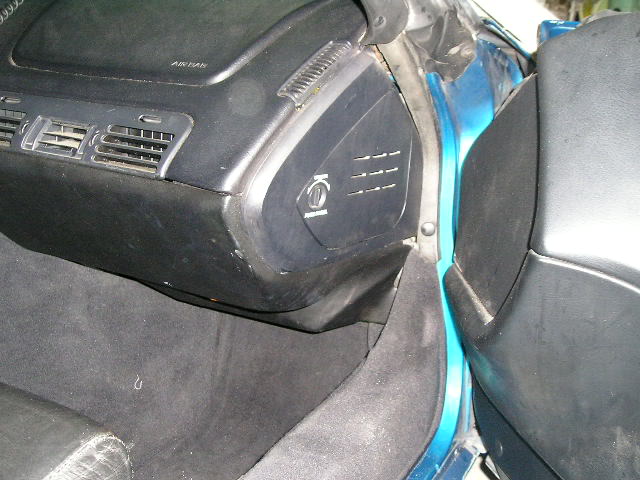
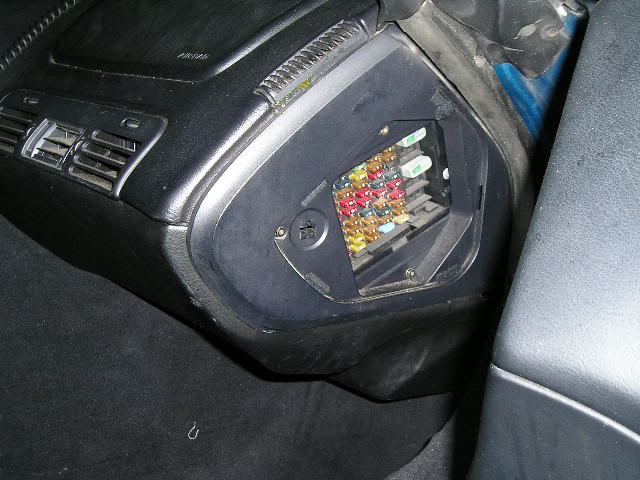
Instrument panel fuse block
The interior fuse center is on the right side of your instrument panel. Turn the knob and pull the door to access the fuses.
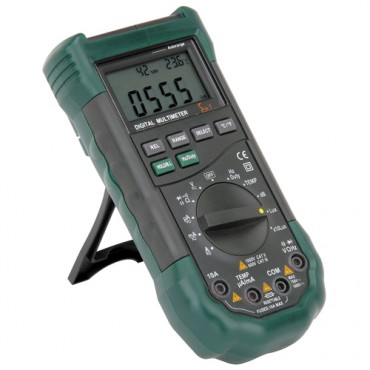
you really need to purchase a multi meter and a SHOP MANUAL and look thru the schematics
without testing theres almost no way to locate the source of your problem,, testing will tell you
http://www.helminc.com/helm
http://www.harborfreight.com/5-in-1-dig ... 98674.html
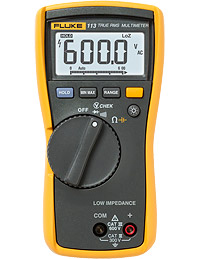
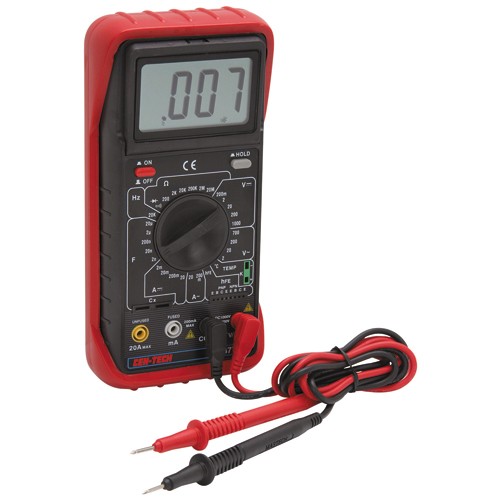
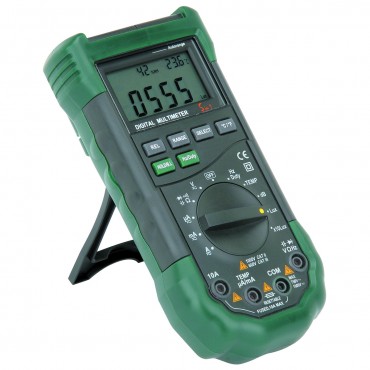
heres a cheap yet effective multi meter
glitch.986/#post-1738
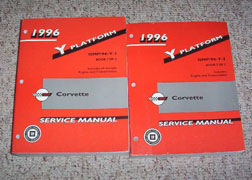
I really hate to bring this up, but when ANYONE purchases "a new to them" corvette, its almost MANDATORY
your forced to purchase a factory shop manual for your exact year corvette .
in either book form or the CD you can download each page from.
its very common to have electrical issues with c4 corvettes your dealing with a car thats over 35 years old and that probably spend decades exposed to moist air , rain, snow etc, like most of us you'll be forced to test and replace electrical connectors , bulbs, grounds fuses and fuse pannels etc.
ID also replace any suspect light sockets and bulbs
and of course a multi meter, with test leads that are designed to pierce insulation, without permanently damaging wires
https://www.amazon.com/TestHelper-T...cphy=9026987&hvtargid=pla-1326201592204&psc=1

https://www.amazon.com/TestHelper-A...t=&hvlocphy=9026987&hvtargid=pla-599334123044

 www.harborfreight.com


 www.summitracing.com
garage.grumpysperformance.com
garage.grumpysperformance.com
Chevrolet Corvette – fuse box – instrument panel
Fuses Usage
1 Heater, A/C Programmer
2 Brake-Transmission Shift Interlock
3 Windshield WiperNasher Switch Assembly
4 Radio Receiver (Ignition)
5 Heated Mirrors, Heater and A/C Control Head, Heater and A/C Programmer
6 Light Switch, Daytime Running Lamps Module
7 Horn Relay
8 Hazard Flashers, Brake Switch
9 Crank-Air Bag
10 Crank-Park/Neutral Switch (Automatic), Clutch Switch (Manual)
11 RH Illumination
12 LH Illumination
13 Console Illumination
14 Fuel Pump 1
15 Automatic Transmission
16 Central Control Module, Daytime Running Lamps Module
17 Generator
18 A/C .Compressor Clutch, Heater and A/C Control Head, Heater and A/C Programmer, Rev Defog Relay
19 Accessory Plug
20 Heated Oxygen Sensors
21 Real Time Damping Module, ABS Module, HVAC Solenoid Assembly
22 Injectors #1,4,6,7
23 Injectors #2,3,5, 8
24 Turn Signal Flashers
25 Ignition Coil and Ignition Coil Module
26 Passive Keyless Entry Module
27 Instrument Cluster, Driver Information Center, Air Bag System
28 Back-up Lamps Switch, Transmission Position Switch, One to Four Shift Solenoid
29 Cooling Fan Relay Coil #1 , 2,3
30 Canister Purge Solenoid, EGR Circuit (LTl), Mass Airflow Sensor, One to Four Shift Relay, Brake Switch (Automatic), Air Pump Relay
31 Power Mirror Adjuster Control, Lighted Rearview Mirror, Visor Vanity Mirrors
32 Cruise Control Engage Switch, Daytime Running Lamps Module, Low Tire Pressure Warning Module, Cruise Control Cut-off Relay
33 Engine Control Module
34 Air Bag System
35 Central Control Module
36 Footwell Courtesy Lamps, Door Courtesy Lamps, Glove Compartment Lamps, Lighted Rearview Mirror
37 Bose Amplifier Relay, Power Antenna Relay, Cargo Compartment Lamps
38 Instrument Cluster, Tone Generator, Dome Lamp Relay
39 Central Control Module
40 Radio Receiver (Battery), Radio Control Head, Passive Keyless Entry Module
41 Sport Seats
42 Power Door Lock Switches, Driver Information Center, Passive Keyless Entry Module
43 Heater and A/C Programme
44 Cigarette Lighter, Accessory Plug
45 Hatch or Deck Lid Release Relay
K Power Seats
L Blank
M Power Window
N Blank
P Blank
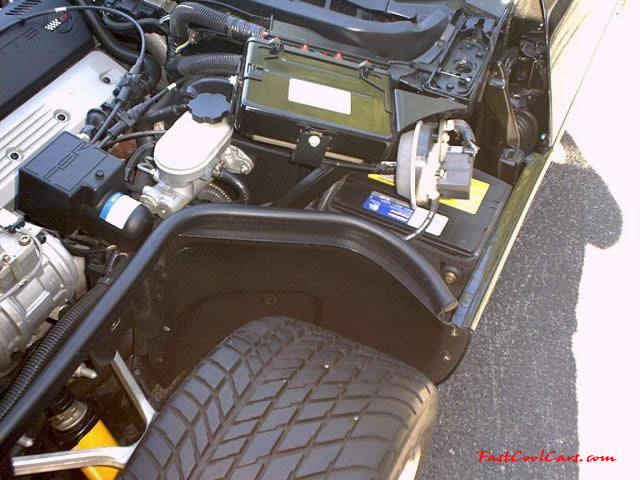
Engine compartment fuse block
There are two maxi-fuse blocks in the engine compartment. One is part of the forward lamp wiring harness and the other is part of the ECM-engine wiring harness.
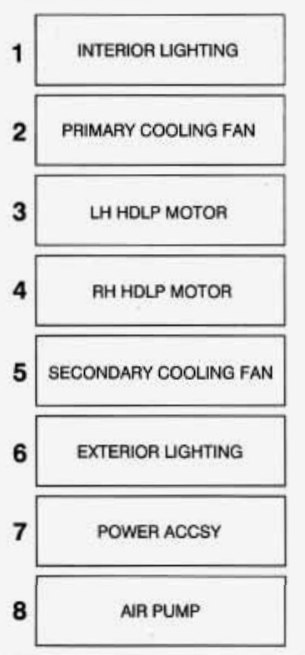
Forward Lamp Fuse Block
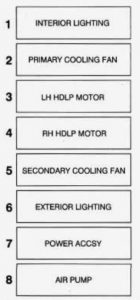
Chevrolet Corvette – fuse box – forward lamp fuse block
Fuse Usage
1 Interior Lighting
2 Primary Cooling Fan
3 LH Headlamp Motor
4 RH Headlamp Motor
5 Secondary Cooling Fan
6 Exterior Lighting
7 Power Accessory (Power Locks, Hatch, Lighter, Seats)
8 Air Pump
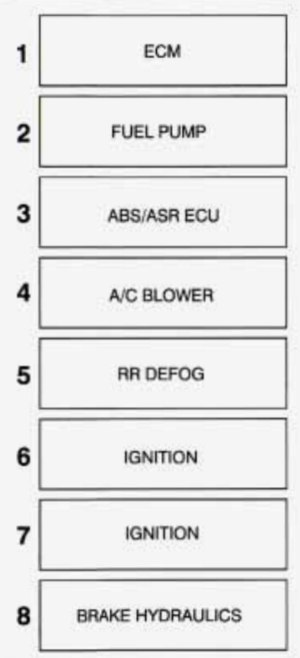
ECM Engine Fuse Block
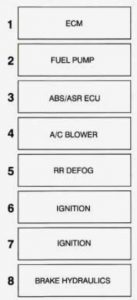
Chevrolet Corvette – fuse box – ECM engine fuse block
Fuse Usage
1 Engine Control Module
2 Fuel Pump
3 Anti-Lock Brakes, Acceleration Slip Regulation System
4 A/C Blower
5 Rear Defogger
6 Ignition
7 Ignition
8 Brake Hydraulics
WARNING: Terminal and harness assignments for individual connectors will vary depending on vehicle equipment level, model, and market.
But heres a few tips.
http://garage.grumpysperformance.co...rical-glitches-in-newer-cars.5492/#post-50908
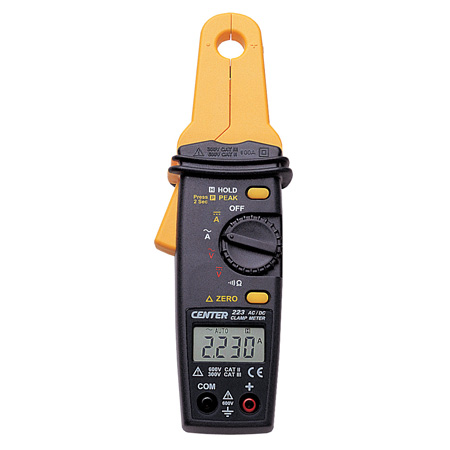
having an amp draw meter can be quite useful at times, knowing how to use it obviously helps also,
SO READ THE INSTRUCTIONS THAT COME WITH IT AND FOLLOW THEM
the amp draw meter can be used to measure the current flow and as you disconnect fuses you can isolate the source of the current drain
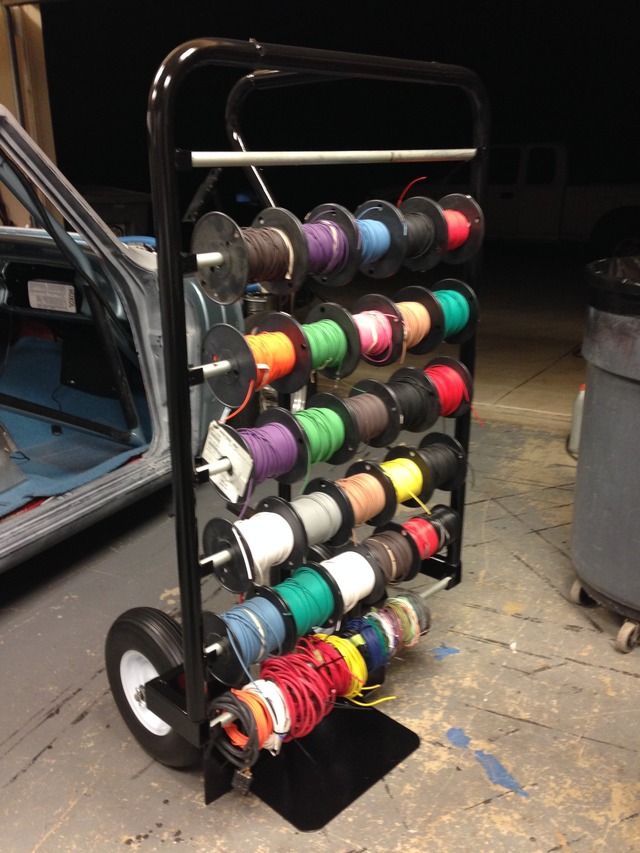
having a wire roll caddy , thats easy to access or fabricating one for working around the cars helpful
http://custombatterycables.com/product_info.htm
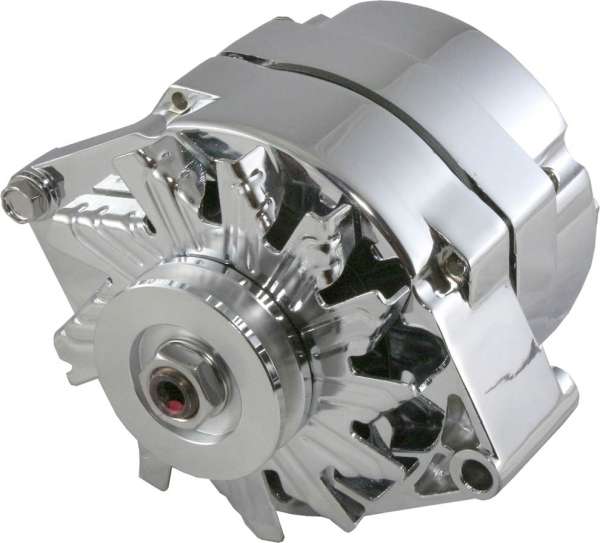
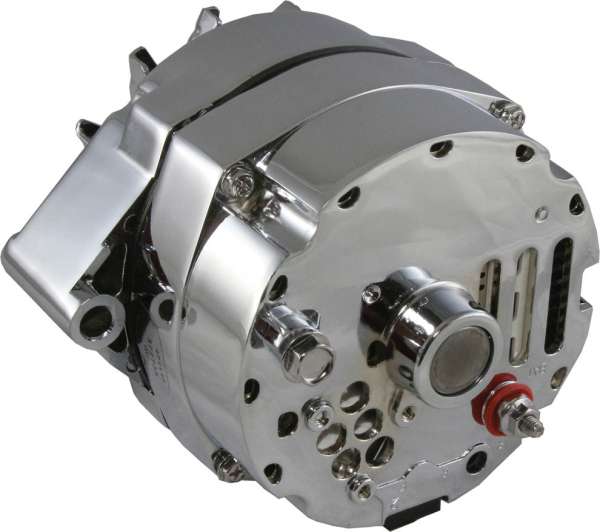
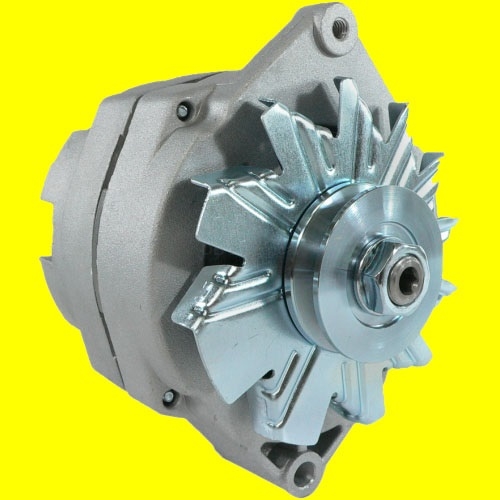
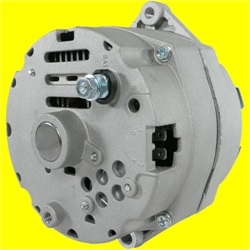
for those reading through the thread, Ill point out, that having heavy gauge COPPER battery and ground connection cables with the correct ends, and a 140 amp-to-200 amp alternator goes a long way towards
reducing potential battery and starter related issues
http://www.harborfreight.com/5-in-1-dig ... 98674.html
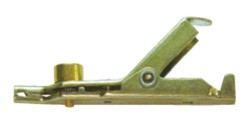
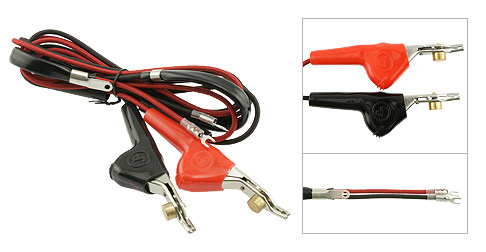
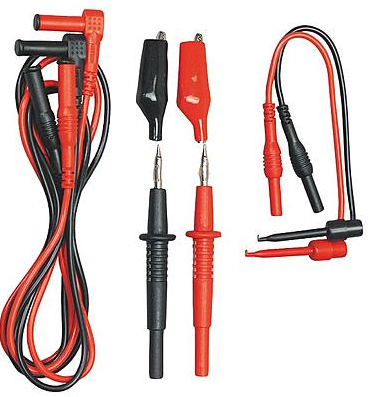
]having a wide assortment of different multi meter test leads available is a huge benefit while testing
the clip test leads that test thru a wires insulation without much damage are a big help
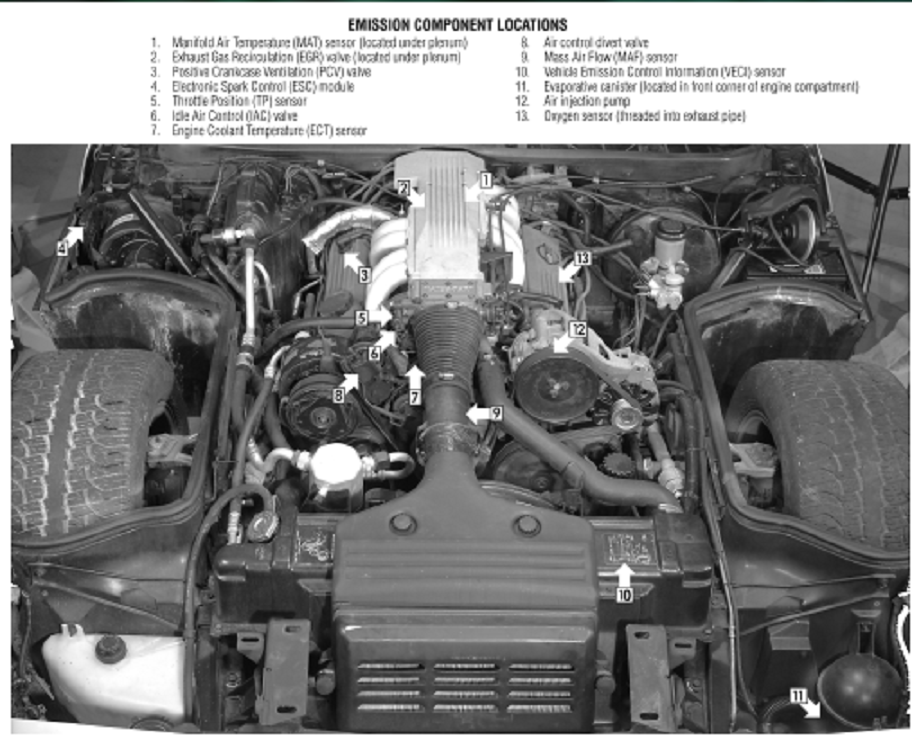
SENSOR LOCATION INFO
Sensor Locations

http://www.madelectrical.com/electrical ... ging.shtml
http://www.corvettefever.com/techarticl ... placement/
http://www.hotrod.com/techarticles/gene ... ewall.html
http://tech.corvettecentral.com/2007/08 ... diagnosis/
if your car sits for days at a time you need a trickle charger
http://www.harborfreight.com/automatic- ... ader-42292
I bought 4 for $5 each when they were on sale a few years ago, two still work fine and two crapped out , and stopped working in that time.
still at the price no real complaints
(1)If the cars fairly modern and you have the option pull trouble codes.
(2) if you don,t have a shop manual GET ONE, your working at a disadvantage without one!
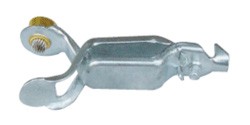
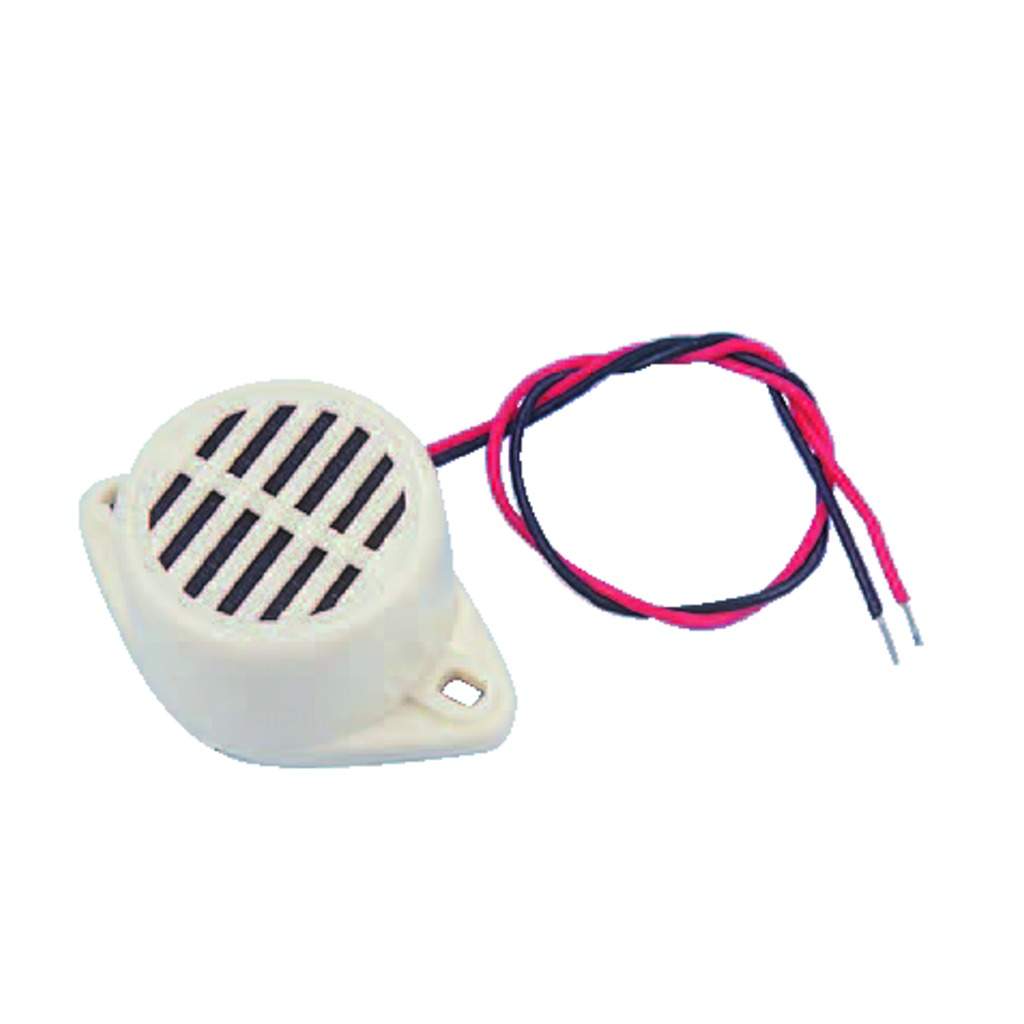
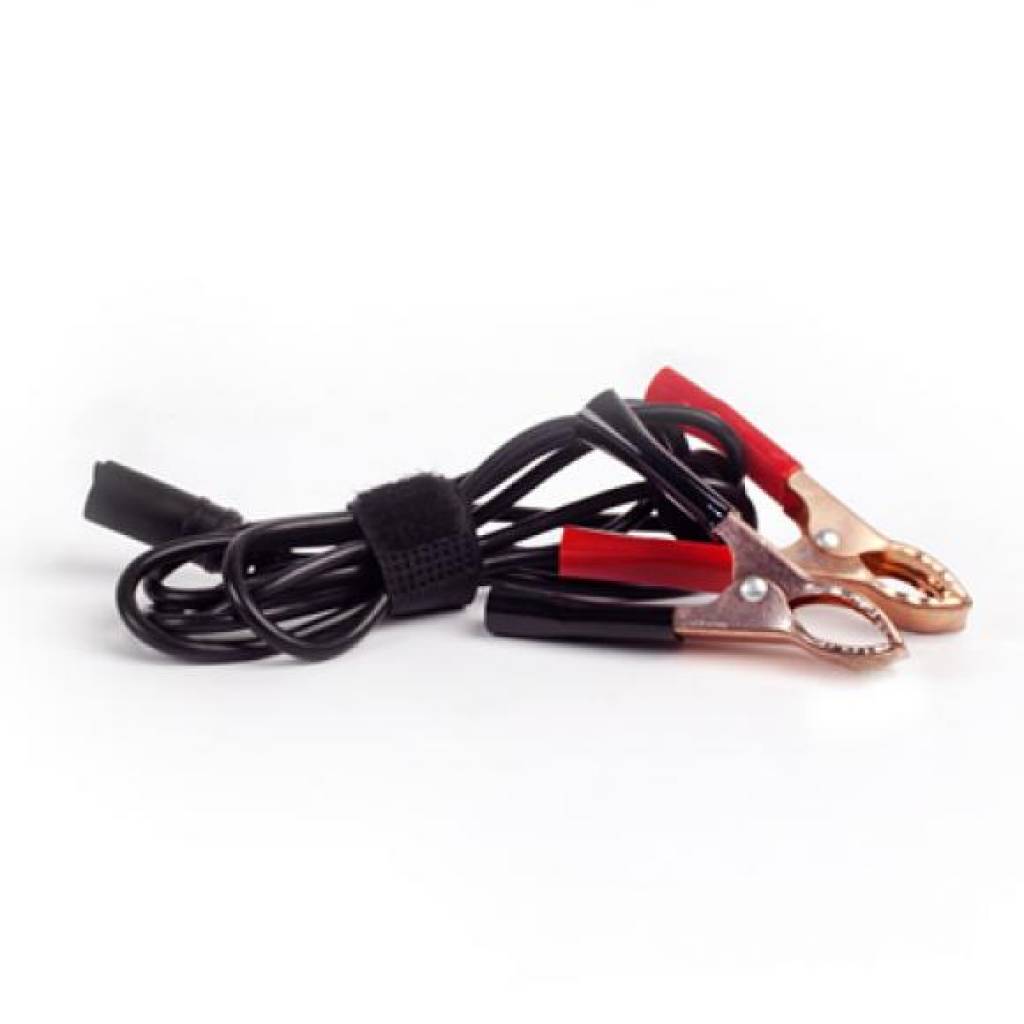
(3) youll need a multi meter and it sure helps if you fabricate a 12 volt buzzer with about 8 ft long leads and alligator clip ends
(4) obviously youll want to know where the cars fuse block is located (SHOP MANUAL HELPS)
Youll generally want to start by disconnect the neg battery cable and connect the 8 foot long test leads you fabricated on the 12 volt DCV voltage buzzer with the alligator clips between the battery and the disconnected cable, the buzzer well start buzzing, thats normal, now go to the fuze panel and remove one fuze at a time and listen to the buzzer (the reason it has 8 foot long leads is that you can keep in near you), when you remove a fuse that controls a circuit where current flows you will notice either a slight reduction in buzzer volume or the buzzer will stop,buzzing until the fuze is replaced.
Id also strongly suggest you don,t touch the ignition key for two reasons, first if you try to start the car with the battery cable disconnected and the buzzer in place the buzzer will almost instantly burn up, a good quality 12 volt 10-20 amp DC buzzer to test with is usually very useful and secondly, your battery drain occurs while the ignitions off so turning it on changes the circuits that are energized and gives you bad info[/color]
Once the offending circuits located get out the shop manual and find and fix the problems source
having a good set of needle nose pliers helps here!

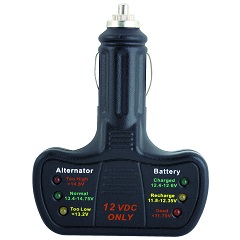
Most alternators fail when they can,t keep the battery charged , most defective battery's fail to maintain 12-13 volts or retain a charge, usually reading less than 12 volts or drop off very rapidly under load, If your getting over 15 volts at the battery Id suggest retesting, the first step would be to remove the fan belt temporarily for a short duration test, and start the engine with the MULTI meter to see what the battery is actually doing under load VS what the alternator is producing.
if the battery stays under 14 volts and only reads higher than 15 volt with the alternator connected its more than likely the alternators internal voltage regulator is defective, its also a good idea to have more than a single multi meter to confirm voltage or resistance readings, if they seem really odd.
http://www.harborfreight.com/5-in-1-dig ... 98674.html
heres a cheap yet effective multi meter
Ive purchased several 200 amp alternators from the guys at DB ELECTRIC for friends and my 1985 corvette, and for my 1996 vette at summit
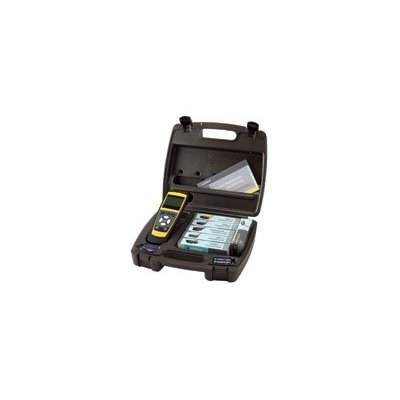
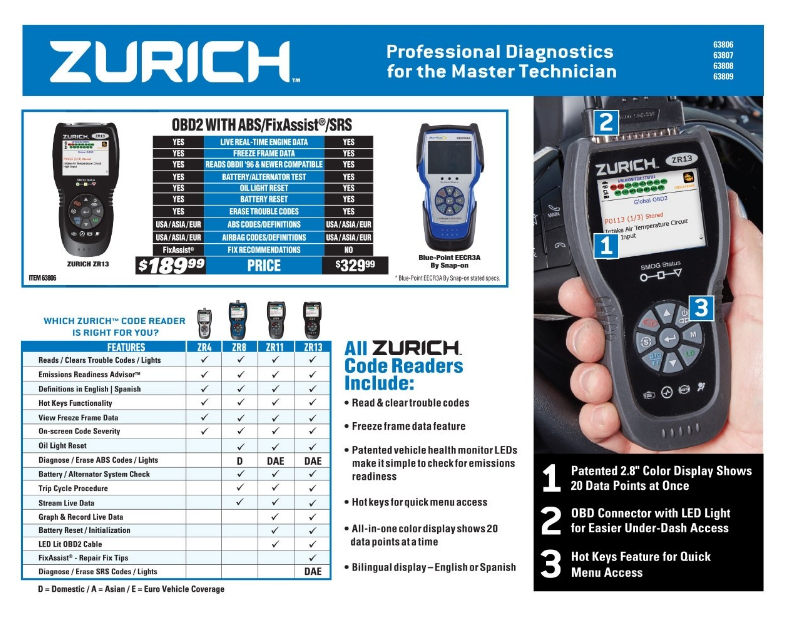
if you purchase a ZR13 auto code scanner, from HF,
you need this info
DOWN-LOAD AND PRINT IT OUT!
https://manuals.harborfreight.com/manuals/63000-63999/Q63806.pdf
https://manuals.harborfreight.com/manuals/63000-63999/63806.pdf

all the answers are readily available, theres known testing procedures and listed test results you can expect, and procedures listed in the shop manual for isolating and testing components, you don,t need to be a genius, you just need to be logical and persistent and not afraid to learn new things while getting your hands dirty at times, don,t get overwhelmed , break everything down too easy individual problems and tests, verify and test all the sensors,and test for factors like consistent fuel pressure, known temps,expected voltage or ohms resistance, and vacuum readings and don,t randomly start replacing parts as that gets expensive and its rarely the most efficient way to eliminate problems(unless you get really lucky) with modern computer diagnostic software you,ll have some advantages but think logically, most automotive problems still concern, loose electrical connectors, defective sensors, lack of compression, fuel delivery issues ,fuel pressure, vacuum, temperature or electrical issues.
get a multi meter and test leads, read the links and ideally get a trouble code scanner
youll need a MULTI METER

http://www.harborfreight.com/5-in-1-dig ... 98674.html
http://www.summitracing.com/parts/tff-8173nep/applications/year/1996
http://www.dbelectrical.com/casearch.as ... ageSize=60
http://www.dbelectrical.com/p-9594-alte ... -1993.aspx
http://www.dbelectrical.com/p-3478-ford ... t-101.aspx
http://garage.grumpysperformance.co...rvette-after-battery-failed.10291/#post-41710
and Ive also had several minor NON_RELATED electrical issues with alternators and electrical drains that they were very helpful in diagnosing, the main thing youll want to do is install a new direct connection, 4 gauge power lead from the new alternator to the batter positive terminal.
youll very likely find that your engine runs cooler and your fans run much more efficiently once they can get all the current they want, youll also find the ignition spark is much brighter if you get the same results Ive seen every time.
Youll also want to make very sure your electrical grounds are solid and think thru your ignition instal, most MSD control boxes fail due to heat or moisture, mounting them in a reasonably cool dry location helps and that ELIMINATES inside the engine compartment,mounting the controller in the upper most possible location in pass side foot well as far up under the dash as you can mount it is a frequently suggested and used location
RELATED THREADS, don,t forget too check for defective sensors and relays and grounds
http://www.msdignition.com/page.aspx?id=3206
http://www.electronics-cooling.com/...s-in-automotive-alternator-power-electronics/
TESTING AN MSD IGNITION
I make this info stuff easy to find
RELATED THREADS, and as always theres a ton of related info there that if you skip reading youll find it takes you longer to locate your problem
this is almost always a case where your forced to track down the source of the electrical drain issue by isolating the individual circuits by pulling fuses and testing each individual circuit,with a multi-meter. and Id sure pull trouble codes and get out the correct shop manual as they can be very useful in tracking down an electrical drain.
if you use a trickle charger verify its functioning with the multi meter before you start, both the battery and the trickle charger can be defective and just because the trickle charger has an LED light that works is no indication it actually works correctly, and battery's do wear out or become defective, so don,t jump to the conclusion your cars got a problem until you verify everything , battery don,t fully recover from repeated full discharged condition, so yes you need a trickle charger on a seldom used car.
leaving your interior lights or head lights on will kill the battery in as little as a few hours, thats not a fault in anything but the guy operating the car, but if you find the car battery dead and you didn,t cause the problem by neglecting the cause, you can track it down and isolate the offending electrical drain.
now if you don,t use a battery minder or charger its totally understandable, if you leave the car for several weeks between brief trips, that the battery will go dead, simply because the car never gets the battery fully charged. this is a fairly common complaint, obviously you'll want to locate the battery drain source,if this happens frequently or in only a few days time. and thats best done with the correct meter and pulling fuses until you locate the defective circuit, thats causing the electrical drain.
obviously you want to verify the battery takes a full charge and the alternator functions correctly and your battery connections and electrical grounds are good during the process.
a logical step by step approach will lead you to the problem, youll be amazed at what youll learn reading links. use of a shop manual and multi meter can be very helpful
Chevrolet Corvette (1995 – 1996) – fuse box diagram
Year of production: 1995, 1996
Instrument panel fuse block
The interior fuse center is on the right side of your instrument panel. Turn the knob and pull the door to access the fuses.
Weird wiring glitch 84 C4
I wish I had something more fun to talk about, but need some information about tracking down a wiring glitch. The weird problem my 84 C4 has consists of failure of my left front sided turn signal lights including the signal side light and the emergency front left flashers. But when the parking...
garage.grumpysperformance.com
you really need to purchase a multi meter and a SHOP MANUAL and look thru the schematics
without testing theres almost no way to locate the source of your problem,, testing will tell you
http://www.helminc.com/helm
Good alternator putting out low voltage
I learned decades ago to swap to a 140 amp-200 amp alternator, as the stock 75-105 amp alternators on muscle cars and earlier corvettes are marginal at best/ if you shop carefully they can usually be found locally at some alternator re-builders for under $150 both my corvettes have 200 amp...
garage.grumpysperformance.com
heres a cheap yet effective multi meter
glitch.986/#post-1738
I really hate to bring this up, but when ANYONE purchases "a new to them" corvette, its almost MANDATORY
your forced to purchase a factory shop manual for your exact year corvette .
in either book form or the CD you can download each page from.
its very common to have electrical issues with c4 corvettes your dealing with a car thats over 35 years old and that probably spend decades exposed to moist air , rain, snow etc, like most of us you'll be forced to test and replace electrical connectors , bulbs, grounds fuses and fuse pannels etc.
ID also replace any suspect light sockets and bulbs
and of course a multi meter, with test leads that are designed to pierce insulation, without permanently damaging wires
https://www.amazon.com/TestHelper-T...cphy=9026987&hvtargid=pla-1326201592204&psc=1
https://www.amazon.com/TestHelper-A...t=&hvlocphy=9026987&hvtargid=pla-599334123044
14 Function Digital Multimeter with Sound Level and Luminosity
Amazing deals on this 14 Function Digital Multimeter, Sound at Harbor Freight. Quality tools & low prices.
1984 CHEVROLET CORVETTE Bishko Automotive Literature 1070 Bishko Factory OEM Service Manuals | Summit Racing
Free Shipping - Bishko Factory OEM Service Manuals with qualifying orders of $109. Shop Reference Books at Summit Racing.
tracking down the problem getting the engine started
If your car won,t start consistently, you need to isolate the problem to the source, you can,t isolate the cause without understanding the process, so you may as well start looking into how and why each step in the process starts , and how each step functions and triggers the next step. your...garage.grumpysperformance.com
tracking down an electrical drain
one of the more common problems I see in older muscle cars and corvettes is that, many of the guys that own those cars, have the cars used rather intermittently or only on weekends, not as daily transportation, and as a result when they do go to use the car the battery's dead. this is almost...garage.grumpysperformance.com
Chevrolet Corvette – fuse box – instrument panel
Fuses Usage
1 Heater, A/C Programmer
2 Brake-Transmission Shift Interlock
3 Windshield WiperNasher Switch Assembly
4 Radio Receiver (Ignition)
5 Heated Mirrors, Heater and A/C Control Head, Heater and A/C Programmer
6 Light Switch, Daytime Running Lamps Module
7 Horn Relay
8 Hazard Flashers, Brake Switch
9 Crank-Air Bag
10 Crank-Park/Neutral Switch (Automatic), Clutch Switch (Manual)
11 RH Illumination
12 LH Illumination
13 Console Illumination
14 Fuel Pump 1
15 Automatic Transmission
16 Central Control Module, Daytime Running Lamps Module
17 Generator
18 A/C .Compressor Clutch, Heater and A/C Control Head, Heater and A/C Programmer, Rev Defog Relay
19 Accessory Plug
20 Heated Oxygen Sensors
21 Real Time Damping Module, ABS Module, HVAC Solenoid Assembly
22 Injectors #1,4,6,7
23 Injectors #2,3,5, 8
24 Turn Signal Flashers
25 Ignition Coil and Ignition Coil Module
26 Passive Keyless Entry Module
27 Instrument Cluster, Driver Information Center, Air Bag System
28 Back-up Lamps Switch, Transmission Position Switch, One to Four Shift Solenoid
29 Cooling Fan Relay Coil #1 , 2,3
30 Canister Purge Solenoid, EGR Circuit (LTl), Mass Airflow Sensor, One to Four Shift Relay, Brake Switch (Automatic), Air Pump Relay
31 Power Mirror Adjuster Control, Lighted Rearview Mirror, Visor Vanity Mirrors
32 Cruise Control Engage Switch, Daytime Running Lamps Module, Low Tire Pressure Warning Module, Cruise Control Cut-off Relay
33 Engine Control Module
34 Air Bag System
35 Central Control Module
36 Footwell Courtesy Lamps, Door Courtesy Lamps, Glove Compartment Lamps, Lighted Rearview Mirror
37 Bose Amplifier Relay, Power Antenna Relay, Cargo Compartment Lamps
38 Instrument Cluster, Tone Generator, Dome Lamp Relay
39 Central Control Module
40 Radio Receiver (Battery), Radio Control Head, Passive Keyless Entry Module
41 Sport Seats
42 Power Door Lock Switches, Driver Information Center, Passive Keyless Entry Module
43 Heater and A/C Programme
44 Cigarette Lighter, Accessory Plug
45 Hatch or Deck Lid Release Relay
K Power Seats
L Blank
M Power Window
N Blank
P Blank
Engine compartment fuse block
There are two maxi-fuse blocks in the engine compartment. One is part of the forward lamp wiring harness and the other is part of the ECM-engine wiring harness.
Forward Lamp Fuse Block
Chevrolet Corvette – fuse box – forward lamp fuse block
Fuse Usage
1 Interior Lighting
2 Primary Cooling Fan
3 LH Headlamp Motor
4 RH Headlamp Motor
5 Secondary Cooling Fan
6 Exterior Lighting
7 Power Accessory (Power Locks, Hatch, Lighter, Seats)
8 Air Pump
ECM Engine Fuse Block
Chevrolet Corvette – fuse box – ECM engine fuse block
Fuse Usage
1 Engine Control Module
2 Fuel Pump
3 Anti-Lock Brakes, Acceleration Slip Regulation System
4 A/C Blower
5 Rear Defogger
6 Ignition
7 Ignition
8 Brake Hydraulics
WARNING: Terminal and harness assignments for individual connectors will vary depending on vehicle equipment level, model, and market.
But heres a few tips.
http://garage.grumpysperformance.co...rical-glitches-in-newer-cars.5492/#post-50908
having an amp draw meter can be quite useful at times, knowing how to use it obviously helps also,
SO READ THE INSTRUCTIONS THAT COME WITH IT AND FOLLOW THEM
the amp draw meter can be used to measure the current flow and as you disconnect fuses you can isolate the source of the current drain
having a wire roll caddy , thats easy to access or fabricating one for working around the cars helpful
http://custombatterycables.com/product_info.htm
for those reading through the thread, Ill point out, that having heavy gauge COPPER battery and ground connection cables with the correct ends, and a 140 amp-to-200 amp alternator goes a long way towards
reducing potential battery and starter related issues
http://www.harborfreight.com/5-in-1-dig ... 98674.html
]having a wide assortment of different multi meter test leads available is a huge benefit while testing
the clip test leads that test thru a wires insulation without much damage are a big help
SENSOR LOCATION INFO
Sensor Locations
http://www.madelectrical.com/electrical ... ging.shtml
http://www.corvettefever.com/techarticl ... placement/
http://www.hotrod.com/techarticles/gene ... ewall.html
http://tech.corvettecentral.com/2007/08 ... diagnosis/
if your car sits for days at a time you need a trickle charger
http://www.harborfreight.com/automatic- ... ader-42292
I bought 4 for $5 each when they were on sale a few years ago, two still work fine and two crapped out , and stopped working in that time.
still at the price no real complaints
(1)If the cars fairly modern and you have the option pull trouble codes.
(2) if you don,t have a shop manual GET ONE, your working at a disadvantage without one!
(3) youll need a multi meter and it sure helps if you fabricate a 12 volt buzzer with about 8 ft long leads and alligator clip ends
(4) obviously youll want to know where the cars fuse block is located (SHOP MANUAL HELPS)
Youll generally want to start by disconnect the neg battery cable and connect the 8 foot long test leads you fabricated on the 12 volt DCV voltage buzzer with the alligator clips between the battery and the disconnected cable, the buzzer well start buzzing, thats normal, now go to the fuze panel and remove one fuze at a time and listen to the buzzer (the reason it has 8 foot long leads is that you can keep in near you), when you remove a fuse that controls a circuit where current flows you will notice either a slight reduction in buzzer volume or the buzzer will stop,buzzing until the fuze is replaced.
Id also strongly suggest you don,t touch the ignition key for two reasons, first if you try to start the car with the battery cable disconnected and the buzzer in place the buzzer will almost instantly burn up, a good quality 12 volt 10-20 amp DC buzzer to test with is usually very useful and secondly, your battery drain occurs while the ignitions off so turning it on changes the circuits that are energized and gives you bad info[/color]
Once the offending circuits located get out the shop manual and find and fix the problems source
having a good set of needle nose pliers helps here!
Most alternators fail when they can,t keep the battery charged , most defective battery's fail to maintain 12-13 volts or retain a charge, usually reading less than 12 volts or drop off very rapidly under load, If your getting over 15 volts at the battery Id suggest retesting, the first step would be to remove the fan belt temporarily for a short duration test, and start the engine with the MULTI meter to see what the battery is actually doing under load VS what the alternator is producing.
if the battery stays under 14 volts and only reads higher than 15 volt with the alternator connected its more than likely the alternators internal voltage regulator is defective, its also a good idea to have more than a single multi meter to confirm voltage or resistance readings, if they seem really odd.
http://www.harborfreight.com/5-in-1-dig ... 98674.html
heres a cheap yet effective multi meter
Ive purchased several 200 amp alternators from the guys at DB ELECTRIC for friends and my 1985 corvette, and for my 1996 vette at summit
if you purchase a ZR13 auto code scanner, from HF,
you need this info
DOWN-LOAD AND PRINT IT OUT!
https://manuals.harborfreight.com/manuals/63000-63999/Q63806.pdf
https://manuals.harborfreight.com/manuals/63000-63999/63806.pdf
all the answers are readily available, theres known testing procedures and listed test results you can expect, and procedures listed in the shop manual for isolating and testing components, you don,t need to be a genius, you just need to be logical and persistent and not afraid to learn new things while getting your hands dirty at times, don,t get overwhelmed , break everything down too easy individual problems and tests, verify and test all the sensors,and test for factors like consistent fuel pressure, known temps,expected voltage or ohms resistance, and vacuum readings and don,t randomly start replacing parts as that gets expensive and its rarely the most efficient way to eliminate problems(unless you get really lucky) with modern computer diagnostic software you,ll have some advantages but think logically, most automotive problems still concern, loose electrical connectors, defective sensors, lack of compression, fuel delivery issues ,fuel pressure, vacuum, temperature or electrical issues.
get a multi meter and test leads, read the links and ideally get a trouble code scanner
youll need a MULTI METER
http://www.harborfreight.com/5-in-1-dig ... 98674.html
http://www.summitracing.com/parts/tff-8173nep/applications/year/1996
http://www.dbelectrical.com/casearch.as ... ageSize=60
http://www.dbelectrical.com/p-9594-alte ... -1993.aspx
http://www.dbelectrical.com/p-3478-ford ... t-101.aspx
http://garage.grumpysperformance.co...rvette-after-battery-failed.10291/#post-41710
and Ive also had several minor NON_RELATED electrical issues with alternators and electrical drains that they were very helpful in diagnosing, the main thing youll want to do is install a new direct connection, 4 gauge power lead from the new alternator to the batter positive terminal.
youll very likely find that your engine runs cooler and your fans run much more efficiently once they can get all the current they want, youll also find the ignition spark is much brighter if you get the same results Ive seen every time.
Youll also want to make very sure your electrical grounds are solid and think thru your ignition instal, most MSD control boxes fail due to heat or moisture, mounting them in a reasonably cool dry location helps and that ELIMINATES inside the engine compartment,mounting the controller in the upper most possible location in pass side foot well as far up under the dash as you can mount it is a frequently suggested and used location
RELATED THREADS, don,t forget too check for defective sensors and relays and grounds
http://www.msdignition.com/page.aspx?id=3206
http://www.electronics-cooling.com/...s-in-automotive-alternator-power-electronics/
I make this info stuff easy to find
RELATED THREADS, and as always theres a ton of related info there that if you skip reading youll find it takes you longer to locate your problem
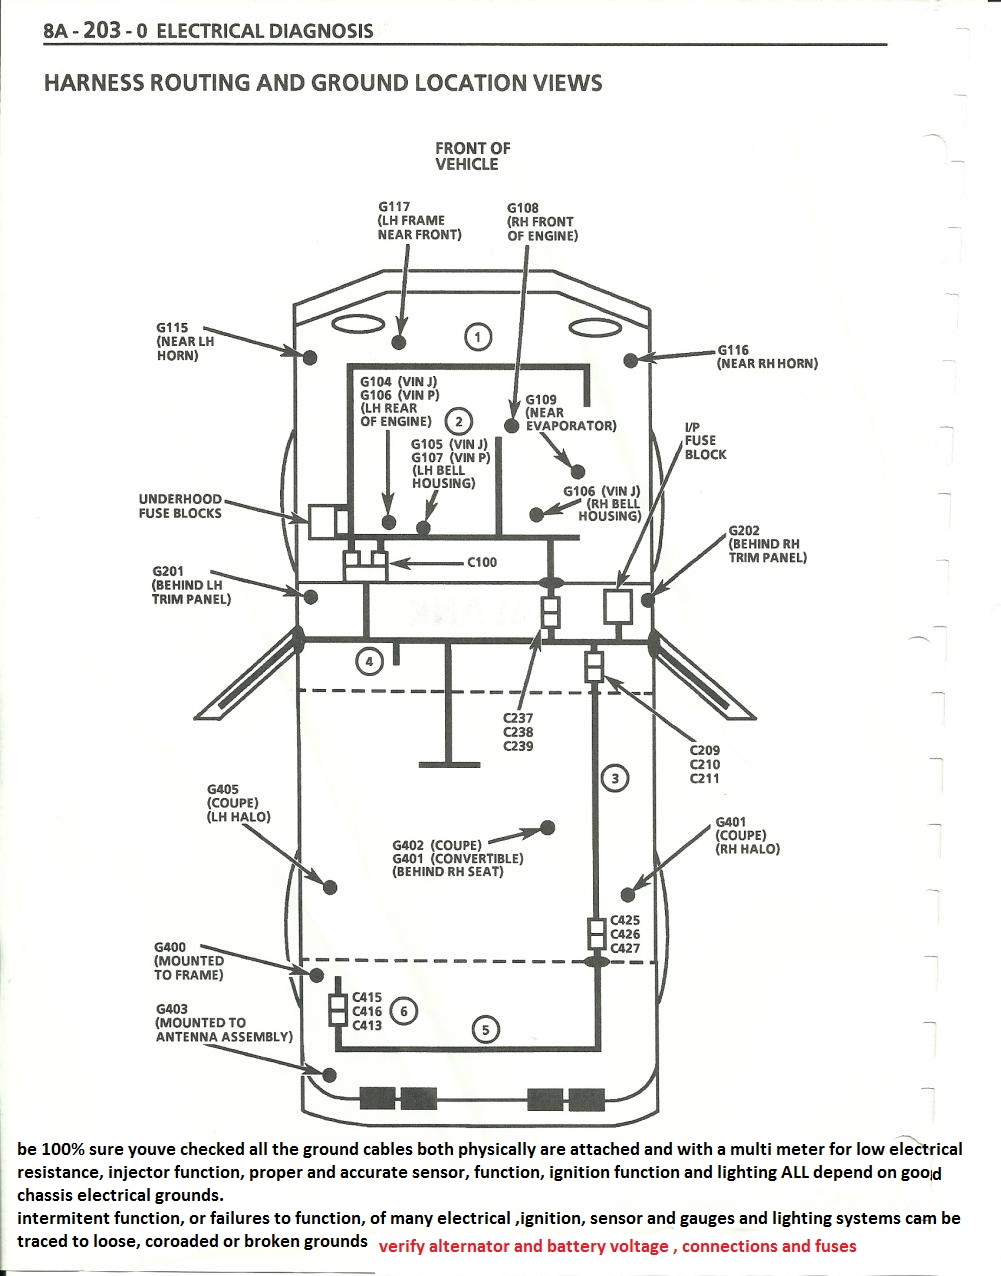
Last edited by a moderator: