Trans Cooler Install On Lincoln Navigator

Im looking forward to actual road trip, tested temp data.
 
Are you going to get another pan to cut down the swap time?
I wasn't planning on it, but if I could find one at the salvage yard that would certainly be helpful. I think
a new one is about $100 and has a drain plug already. I would only have to install the bung for temperature
sensor.

They also came with a plastic pan that incorporated the filter for roughly $100, another fine piece of engineering !
 
.
Started building the bracket for the cooler and decided that I needed 1-1/4 inch angle iron. I went
this big because you really only have 1 inch of flat surface on the inside where I needed to get a 3/8
inch flat washer with an OD of 7/8 inch.

FP03_CoolerMountFabrication_01254.jpg

Ground the seam along the bottom of the frame so the bracket would have a flat surface to bolt
onto. Primed and painted black again.

FP03_FrameGroundSmooth_01253.jpg

Made the vertical and horizontal members extra long so I could adjust the position up/down - in/out once it was bolted into place. I drilled several holes in the vertical member to further make it adjustable.

FP03_CoolerMountFabrication_01260.jpg

FP03_CoolerMountFabrication_01259.jpg

I drilled and tapped for a 8-32 screw to allow me to position the cooler without holding it myself,
freeing me up to check clearances and then mark and drill the other side accurately. Then I came
back to the first side and adjusted, drilled and tapped it for the new best fit.

FP03_CoolerMountFabrication_01261.jpg

After drilling and tapping two 3/8 x 16 threads in the frame, you see the cooler in it’s final position
for now. I will not cut any of the brackets for length until it’s plumbed with the remote filter
mounted next to the cooler. The filter will be connected to the 180° fitting you see below.

FP03_Cooler180DegreeFitting_01267.jpg

You can see below the cooler is about 1-2 inches above the transmission cross member. There is
more clearance from the muffler than the photo below shows. I still need to extend the heat shields
that are already there to keep the fans from pushing hot air thru the cooler.

FP03_CoolerMountFabrication_01266.jpg

I had these 3/8 x 16 grade 8 flange bolts in my inventory ….. perfect!

FP03_CoolerMountFabrication_01268.jpg
.
 
IMPRESSIVE RICK!
once again both exceptional attention too the details
, obviously thinking things through, and great quality photos
If your doing this Trans Cooler Install On Lincoln Navigator,
ID expect you used an even larger more efficient trans fluid cooler on the T-bucket?
got any of those pictures?
 
Last edited:
Very nice. You really make me step up my game to not be embarrassed when we go cruise.

I am never embarrassed by what I myself have accomplished, even if yours is better looking or performs better than mine, as you may have PAID for yours and I built mine. Be proud of all you accomplish in life. And age has nothing to do with it.
 
.
Got the Derale cooler mounted, but it's not spaced out from the frame 2-1/2 inches like I said
earlier. There was not enough room and keep it a safe distance from the exhaust. I did have to
space the rear of cooler out about 3/4 inch to allow the hose that connects it to the remote filter
to pass between the cooler and frame. The hose portion between the -8AN fittings is only 1 inch
long. Did this to keep the filter mounted high as possible on the frame.

FP04_CoolerAndHose_01274.jpg
FP04_CoolerAndHose_01275.jpg

Since the hose was so short, I made the hose first and then installed it on both the cooler and
remote filter before I drilled and tapped the holes for the filter mount. That worked as planned,
I can screw the hose on the filter by hand without any binding.

FP04_Hose_CoolerToFilter_01290.jpg

FP04_CoolerAndFilter_01276.jpg

My first attempts at welding thin metal to heavy didn't go so well, but it's .045" thick and my
transmission pan is .078". I got the idea for a heat sink and screwed a nut on the inside and
outside, this worked so well that I took it a step further. I found a pipe fitting and ground off
the corners on a 1/2"-20 nut. I initially drilled the pipe fitting but that made the nut too loose.
I have Wilton machinist vise that I used to press the nut into the pipe fitting without drilling
first. To get the best contact possible with the sheet metal, I ground it flush. I will put this on
the inside of the transmission pan and tighten a 1/2-20 nut on the outside before I weld it to
the pan.

This will work for the drain plug, but I will have to come up with something else for the 1/8 inch NPT bung for the sensor.

FP04-DrainPlugWeldingPractice_01277.jpg
FP04-DrainPlugWeldingPractice_01279.jpg
FP04_DrainPlugWeldingHeatSink_01280.jpg
FP04_DrainPlugWeldingHeatSink_01288.jpg
.
 
Last edited by a moderator:
youll gain a great deal of experience and skill with the welder as you practice,
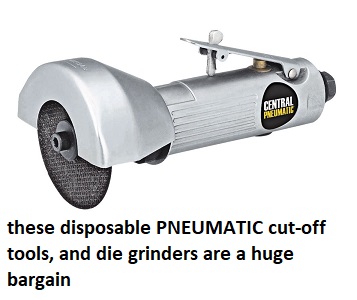
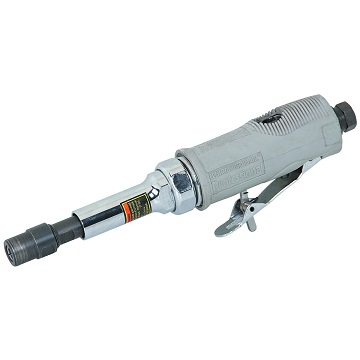
and youll eventually find a die grinder and carbide cut-off wheel handy for removing ,
the minor welds in that progress youll have made.


https://www.harborfreight.com/3-in-high-speed-air-cut-off-tool-60243.html

diecutr.jpg


https://www.harborfreight.com/3-in-...el-10-pc-61180.html?_br_psugg_q=cut+off+wheel

burty.jpg

image_12256a.jpg
 
I am never embarrassed by what I myself have accomplished, even if yours is better looking or performs better than mine, as you may have PAID for yours and I built mine. Be proud of all you accomplish in life. And age has nothing to do with it.

WELL SAID!!!!!
 
Very nice looking set-up Rick!
How hot do you think the air being pulled through will be... in relationship to that muffler?
 
I verified in the Derale manual that the fans pull air, so the air will be coming from the frame
side. When the Nav is moving, there shouldn't be any heat coming from the muffler, it's
behind the cooler.
 
Thanks, Unforgiven !!!

Decided I needed to have the same metal thicknesses to practice and get the settings right, so I
went by the local Metal Supermarket. I bought a piece 18x24 inches of 14 gauge (.075) cold
rolled sheet metal.

FP05_14GaugeSheetMetal_01292.jpg

Friday my SpeedHut trans temp gauge came in, so I have everything that I need now! That is,
that I know about!!! ;)

FP05_TransTempGauge_Speedhut_01293.jpg

When I drop the pan to do the filter change and add the drain plug and 1/8 in NPT bung, I will
also be doing a complete fluid change, somewhere around 12 quarts. I will have to cut and flair
the OEM cooler line so I can make the fluid go thru the new cooler and filter. I will have to get
this all done in a day or two, so I have a vehicle to drive. Should be no problem if I don't have an
unexpected surprise.

To change the fluid, I have an old Holley fuel pump that will pump in the new fluid as the trans
pump pushes the fluid out with the engine running. There is NO dipstick, so this will all happen
thru the plug on the side of the trans.
 
purchasing a sheet of similar gauge steel to practice welding on is a darn smart move,
and something Ive done regularly in the past.
I'm certainly not an expert, but I keep improving as I get more practice.
 
Buy some galvanized sheet metal (AC duct work) and put a partition between the muffler and trans cooler. Bend one end at a 90* and screw to what you can. Let it hang down. May have to curl/bend to make work, but it will help.
 
Back
Top