Tuning a TBucket Dart 400 cuin Engine

Indycars

Administrator
Staff member
I've decided to split the tuning post from my engine build thread, even thou I have
already posted some pertinent information. To read about the AEM AQ-1 data
logger and drill passages in my Speed Demon start with the link below. The
information is in the next 4-5 pages.

http://garage.grumpysperformance.co...gine-project-dart-shp.3814/page-85#post-46076

To start with I wanted to set a baseline for fuel mileage.

Filled tank to 11.5 inches and set trip meter to zero. Used the north most pump and
the car was pointed west. Had to return home to plug the electrical connector in the
trans so I could lock up the torque converter. Drove five miles before getting on the
highway. The trip was driven mostly at 65 MPH.

Returned the same pump headed west again to fill up to 11.5 inches.

Trip was 52.5 miles and the tank took 3.6 gallon to return it to the 11.5 inch mark.
That equates to 14.6 MPG. The AFR meter was hovering around 11.0/1, should be
around 15.0/1

I finally got the AQ-1 installed and wired, but I'm having trouble with the RPM trace.

My RPM is varying between 900 and 29,000 which is greatly out of range on the top
end. I didn't rev the motor over 3500 RPM. I tried logging at 20/sec and 10/sec, but
as expected that did not make a difference. The RPM graph does shift up and down
depending on the throttle position.

Green line is RPM, Purple is MAP and Tan is TPS

AQ1GraphOfRPM.JPG

FP01_AQ1InstalledAndWired_6160.jpg

I disconnected the one new device(SpeedHut Tach) that also connects to the (-) side
of the MSD Blaster coil. That made no difference.

I have a different configuration this time than I did last summer when it worked as
expected on the same car. I have rewired the complete car, so that is different.

Any ideas as to what is causing the erratic RPM graph? What can I do to fix the problem?

Below I'm programming the AQ-1 for all 8 inputs, 5 of which are coming from the gauges
in the dash. The other 3 are MAP, TPS and RPM. Therefore I'm logging:
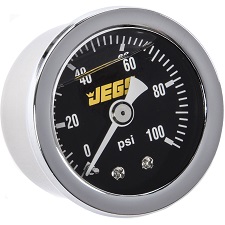
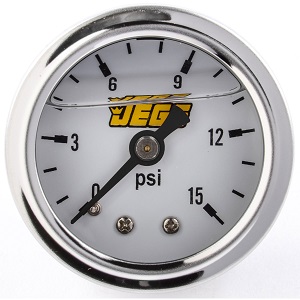
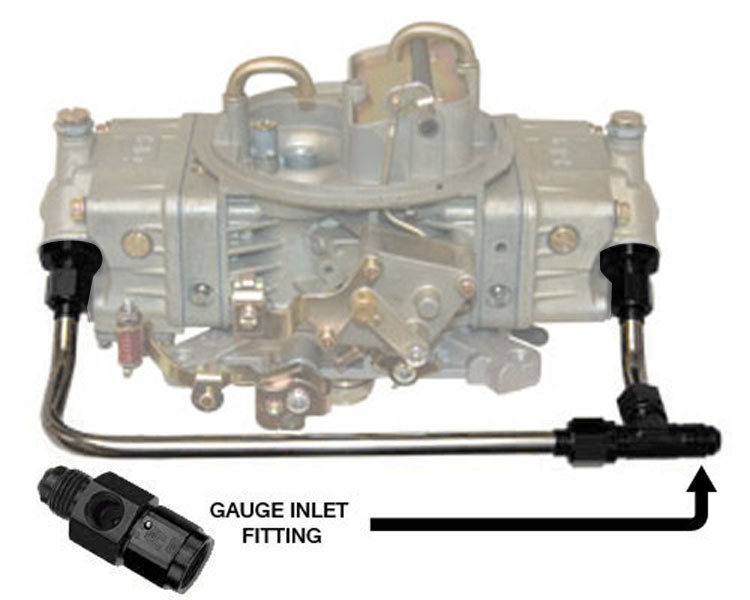
Fuel Pressure
Oil Pressure
Water Temp
Trans Temp
AFR
MAP
TPS
RPM

AQ1_ProgrammingSetup.jpg
 
RFI - Radio Frequency Interference is the Issue with the Erratic RPM Datalog Trace.
Caused by the MSD Ignition system & possible the Secondary Ignition Wires.
 
Turns out all I had to do was connect the AQ-1 input to the distributor tach ouput. This must of
been how I did it last time. The highest RPM during a somewhat normal acceleration from a
stoplight was 3500 RPM. Problem solved.

Just too much noise when connected to the coil negative terminal.

AQ1GraphOfRPMFixed.JPG
 
Last edited:
set the float levels and verify the fuel pressure consistent at about 5 psi entering the carb inlet port.
your fuel/air ratio should be in these ranges
and yes, use of a small handy and accurate fuel pressure gauge, mounted on the fuel injector fuel rail (0-100 psi for FUEL INJECTION)
fpgg3a.jpg

or carb inlet port (0-15 psi for carburetors)is almost mandatory, they generally cost under $30
fpgg1a.jpg
fpgg2a.jpg

555-BO-1672-wGa.jpg


Idle- up too about 2500 rpm try for 14.7:1-15:1 f/a ratio
from about 2500 rpm- too about 4500 rpm try to smoothly and predictably transition the fuel/air ratio mix richer to about 13.5:1
from about 4500 rpm- too about 6500 rpm and higher ,try to smoothly and predictably transition the fuel/air ratio mix richer to about 12.5:1
this is only a starting point on the tune but it generally gets you in the ball park and tends to reduce the chances of the engine reaching detonation conditions.
the ignition advance curve needs to be checked, the chart below is a very good starting point to work from

chart3e.jpg

set the plug gaps at about .045, make sure the valves are adjusted correctly
Stoich.gif


related
http://garage.grumpysperformance.com/index.php?threads/carb-tuning-info-and-links.109/

http://garage.grumpysperformance.com/index.php?threads/spark-plug-info.202/

http://garage.grumpysperformance.com/index.php?threads/holley-accelerator-pumps-cams.1790/

http://garage.grumpysperformance.com/index.php?threads/holley-annular-vs-down-leg-boosters.5229/

http://garage.grumpysperformance.com/index.php?threads/holley-carb-power-valves.1639/

http://garage.grumpysperformance.com/index.php?threads/how-do-i-know-the-power-valves-working.11157/

http://garage.grumpysperformance.com/index.php?threads/holley-carb-tune-info.264/

http://garage.grumpysperformance.co...-the-holley-4150-and-4160-series-carbs.10736/

http://garage.grumpysperformance.com/index.php?threads/adjusta-jet-carb-metering-plates.1961/

http://forum.grumpysperformance.com/viewtopic.php?f=55&t=1961

http://garage.grumpysperformance.com/index.php?threads/tune-or-problem.10992/#post-48514

http://garage.grumpysperformance.com/index.php?threads/adjusting-valves.196/
 
Last edited:
Today in preparation for collecting data, I decided I needed to adjust the valve lash. I never did like the way #7 adjusted, in fact I fell back to adjusting it while the engine was NOT running last time. It might have been too tight.

I noticed the the exhaust note was decidedly different when you really got loosen the lash adjustment. I knew for sure that I was not hearing another rocker when this happened.

FP02_OilDeflector_5284.jpg

Basically, below are my steps for adjust lash on one side only, then repeat for the other side.

- Warm engine until it reaches operation temperature.
- Shut engine off.
- Loosen every adjusting nut very slightly.
- Loosen every set screw one full turn.
- Tighten every adjusting nut 1/2 turn [to make sure there were no other rockers were ticking].
- Start engine and loosen first rocker until I hear the ticking sound, but keep loosening until I hear the exhaust note change. [Verification that it was loose]
- Tighten the adjusting nut until the ticking sound JUST goes away.
- Continue to tighten nut an additional 1/2 turn.
- Shut engine off
- Tighten all the set screws
- Tighten all the adjusting nuts. [This might be just 1/16 turn and for me the set screws didn't turn, so I didn't need to hold them. Your setup might require holding the set screws while tightening the adjust nut.]

I found this time I needed a spacer under the oil deflector, so I use a 5/16 inch washer. When I touched the deflector I could feel the rockers hitting. I checked again after installing the washer and NO tapping was felt.

FP01_OilDeflectorSpacers_6162.jpg

I would also suggest that when adjusting the rocker nut, don't have the socket all the way on and pushing down into the rocker. This could effect the sound and therefore it might make the rocker sound like it was at zero lash when it was just you pushing down on the socket. If you use a box end wrench then the above may not apply.
 
I'm sure RICK, knows this, but for the newer guys reading the thread..
http://garage.grumpysperformance.com/index.php?threads/adjusting-valves.196/
index.php

BTW, I like those valve covers and the way the easily installed oil deflection plate can be used with them, thats a great idea
did the lifter adjustment process seem to result in a smoother running engine?

generally immediately after each hydraulic lifter is adjusted the engine runs like crap for a couple seconds then smooths out as each lifters push rod seat settles into its proper adjustment clearance, and the oil pressure, and oil volume trapped in the lifter stabilizes.
once all the lifters are properly adjusted the engine generally runs noticeably smoother that it would if one or more lifters were previously slightly mis-adjusted, especially if they were overly tight, .....slightly loose may tap slightly but overly tight can limit the heat transfer and seal, especially on exhaust valve seats , this can result in a burnt valve.
hylifters.jpg

rockadj.jpg

obviously anyone making valve adjustments on roller rockers, will need to know the thread pitch to get some idea of how far the adjustment nut base forces the rockers trunion down toward the cylinder head with each partial turn that changes the pre-load, but as you stated a 1/4 turn to a 1/2 turn , just past the point the rocker stops clicking due to excess clearance, as the slacks taken up and the lifter seats starting to be depressed, is almost a standard in adjusting hydraulic lifters
15-Exploded2.jpg

wrenchturna.gif
 
Last edited:
Don't know what advice to give Rick.
You added ajustable air bleeds of your own to the Demon carb.
Hit it sooner or later.
Its best to tune at the Racetrack by best ET & Mph trap speeds.
Back road testing late at night.

I would read the spark plugs & use AFR As secondary guidline.
 
did the lifter adjustment process seem to result in a smoother running engine?

No, but then I was only slightly too tight on #7 exhaust, compared to the other lifters. Certainly
not out of the range of compensation the lifter was designed for.

If all the lifters are adjusted with different preloads, but within the designed range
of the lifter ..... will the valves open with a different duration or lift ?
 
YES THERE WILL BUT THE DIFFERENCE, in lift and duration, if you have accurate precision tools you could see it, but it will be so minor it can be ignored, for any purpose.
I generally find a 1/4 turn after the clicking stops at idle is a good compromise.
keep in mind the whole process from valve leaving the seat to full lift and back happens about 7 times a second at idle and may be 55 plus times per second at peak power rpm levels
 
Put some Marvel Mystery oil in the crankcase Rick.
Drive the T.
See what happens.
MM Will remove the dirt from inside a lifter.
 
I actually found that 3/4 to 1 full turn provided a better idle and quieter valve train. Everyone's setup is different though.

What's you AFR at Idle? Does you demon have the Idle-Eze feature? if so don't use it. It's for big cams. What’s you transition slot idle setting on the primary and secondary? I ended up setting my secondary T-slot to where it was just barely visible. This provided the best idle and response for me.
 
What's you AFR at Idle? Does you demon have the Idle-Eze feature? if so don't use it. It's for big cams. What’s you transition slot idle setting on the primary and secondary? I ended up setting my secondary T-slot to where it was just barely visible. This provided the best idle and response for me.

My idle AFR is 10.5.

Yes I have Idle-Eze, but found it to be not effective. It has little effect on
the idle speed.

I would have to check, but I think it's set at slightly less than .020 inches.
I don't have to pull the carburetor to check anymore, I made the following
modification........

The adjustment has to be made with the carburetor off the car so you
can see the bottom side. I won't have to do that anymore.

I found a spacer that just fit over the idle speed adjustment screw and
ground it to .517 inches. I also needed a bigger ID spring to go over the
large spacer now, which I had in inventory. The way this works now is to
adjust the idle screw down until it seats on the spacer, then back it out
2-1/2 turns and I have the .020 inches showing. That gives me plenty of
adjustment if I want to speed the idle way up like when plotting the ignition
timing curve.

So at any time, if I wonder how much of the transition is showing, I can
count the number of turns to seat the screw on the spacer, then subtract
2.5 turns.

FP04_IdleSpeedScrewModification_5761.jpg
FP04_IdleSpeedScrewModification_5764_5765.jpg
FP04_TransistionSlot.jpg
 
10.5 is way rich at idle. You should be in the 13.5 - 14 range.

How any turns out are you on the idle screws?

I like your spacer idea for setting the base TS gap. Thats a cool idea.
 
Last edited:
13 to 15:1 range for idle AFR but there's more to it.
Check rpm and vacuum, set idle AFR so you get the most vacuum and highest idle rpm.(should end in the 13-15:1 ballpark) only way to get good throttle response.

12.8:1 for WOT(11-12:5 for boost application). cruise 13.5 - 15:1 idle 13-15:1. decel 14-16:1
10.5 is overly rich, not good for the cylinder and oil.
 
Last edited:
If you have another Holley 750 Double Pumper install it in place of the Demon.
Retest Rick.
Know if its in the Demon carb or a Faulty lifter then.

Demon Carb is Jazzed up I think.
 
Yep, crank them in some and see what you get. You are on the verge of adjustment on the idle screws. Once you get down to 1 to 3/4 turns, you don't have good control of your idle circuit. The adjustment range is very corse meaning a very small turn on the idle adjust screw makes a big difference in the AFR. After I adjusted my idle restriction and air bleed, I had 2 to 2 1/2 turns out on my idle screws. This provides a very good control range of the idle AFR. Don't jump into making any IFR or air bleed adjustments yet. tweak the idle screws and see what you get.

In my opinion, the Demon carbs suffer from too much emulsion in the primary circuit and odd transition slot fuel curves. Most Holleys have only 2 emulsion holes in the metering block. The Speed demon has 3 that are a little bigger I think. In my situation this caused a non linear fuel AFR curve. The Holley will have a flatter curve out of the box. I found the transition circuit needed some adjustment in conjunction with making the primaries come online a little earlier to cover up the transition hole I had.

Don't give up on the Demon yet, lets get some AFR graphs and see what you got...
 
Holley Carbs were meant for Drag Racing.
Maximized VE Of the engine of choice its bolted on to.
Rochester Q-jet provided best all around AFR For daily driving needs.
Certain Pontiac Musclecar Q-jets work best.
The Best Aftermarket Holleys are custom made one by one.
Built to each application .
In Florida where Grumpy is.
Need $2,000 Cash.
Still cheaper than EFI.
 
Back
Top