Unforgiven Project

Nope! My radiator is in the bed near the front of the box.. It stays clean. I made a custom metal shroud that helps alot.
Now that I have my cage installed... I will sheet the rear bars with .032 metal for additional cover. All the coolers will be under a roof per say.
They will stay even cleaner with that mod. ;)

I do like the 20w/50 oils though. Its prolly what saved the old motor
When we were dirt track racing out LaSalle Speedway here in Illinois the F-body Monte Carlo radiator plugged up solid with dirt and mud after 1-2 laps.
Rest of the night water temps were 280-300 F steady.
50 -200 laps turning 8000 Rpm steady.
010 4-bolt block
Isky Flat Tappet solid oval track cam.
Straight 40w racing oil in the pan.
The Thick oil saved the engine.
 
I started the block fill tonight. I got one side done.
I used this product..
IMG_0227.JPG


They said to mix 3 pints of water to 10 lbs of filler. The pail was full so I dumped half the powder into a seperate pail for the other side.
I recommend wearing latex gloves when using this. They said you only have 15 minutes before it starts to set up.. and they ARE correct!
I only had paint sticks to mix it up and it was taking too long so I just stuck my (gloved) hands in and mixed it faster.
I prepped the block prior to mixing. Very Important step because of how fast it sets up.
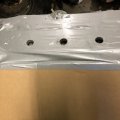
IMG_0218.JPG

That pic was after the pour.. but I wanted to show how to protect the block. Yes , I used a clear 1/4" tube and inserted it into the petcock and up through the head.
IMG_0214.JPG


I started with the back hole on the deck surface and poured in about 2 cups and prodded with a long screwdriver . It flows really well!
I then went to the middle hole and repeated the pour. and then to the front hole and added the same 2 cups.
I used a short piece of 2x4 to tap on the side of the block to try and level it.
I did not install the freeze plugs because I was only pouring enough to reach the bottom of the SIDE plugs.... NOT the front of the block freeze plugs.
IMG_0212.JPG

Now I recommend installing the rear plugs after I discovered the mix was not settling fast enough by the time I poured the the front holes.

The stuff was flowing out the rear of the block freeze plug and boy what a mess I had! I got it cleaned up and wiped down but I am still going to need to use a small
brush to remove the residue on the block. Lesson learned!

.IMG_0211.JPG

I ended up with a 3" fill around the cylinders by only filling to the side freeze plugs.

IMG_0230.JPG


IMG_0228.JPG

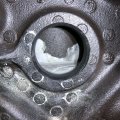
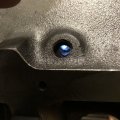
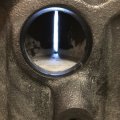
Her are a few pics of a camera shot down the deck water jacket holes I poured through to show the fill around the cylinders. first pic is between 1 and 3 cylinder.

IMG_0221.JPG

this pic below is between 3 and 5 cylinder.

IMG_0220.JPG


The next pic blow is between 5 and 7 cylinder.
IMG_0219.JPG


I tried to scrape as much as I could off the cylinders because I thought that the grout would act as an insulator. I'm a little concerned about how the gap between 3 and 5 got sealed some what between
the cylinders also. There is a gap near the top for coolant to flow, but I could not clear the grout any lower.

Overall I thought that for the first time doing something like this... I was pleased with the experience. Hopefully tomorrow will go the same... less the overflow in the back. hehe

That's it for tonight.. Have to get some rest.
 
it looks like your doing a better than average job for that block fill process.

thank you:Dfor posting the pictures it helps everyone see what you've done ,
so much better,
especially for the guys that have yet to go that route.


and yes using a level to get the
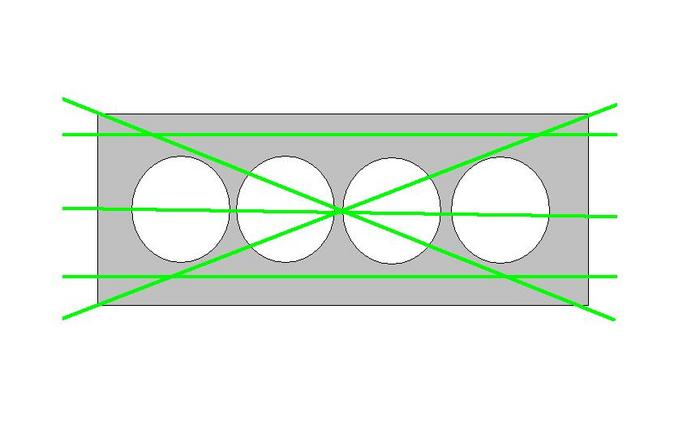
block deck perfectly level on each bank before you pour is critical,
btw about 80% of the heat the engine generates is developed in the heads and upper 2" of the bore, obviously combustion is a huge contributor ,but the vast majority of the fuel burnt is consumed in that first 2" of piston travel on the power stroke.
bearings and the valve train are cooled mostly by oil flow,
heat transferred to the oil is transferred too the block, surfaces then coolant,
as hot oil flows over the comparatively cooler block
having an oil cooler, and a 7-8 quart oil pan capacity,
helps engine cooling efficiency a great deal

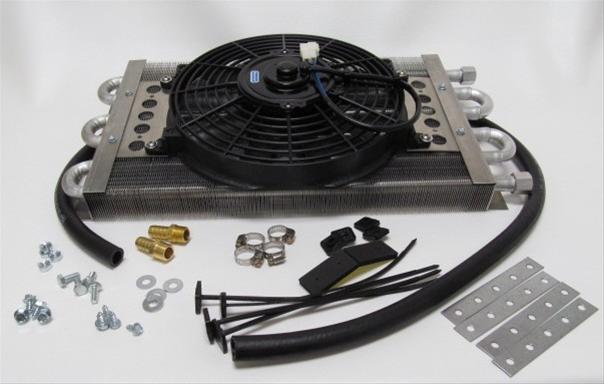
prm-13182_rz_xl.jpg


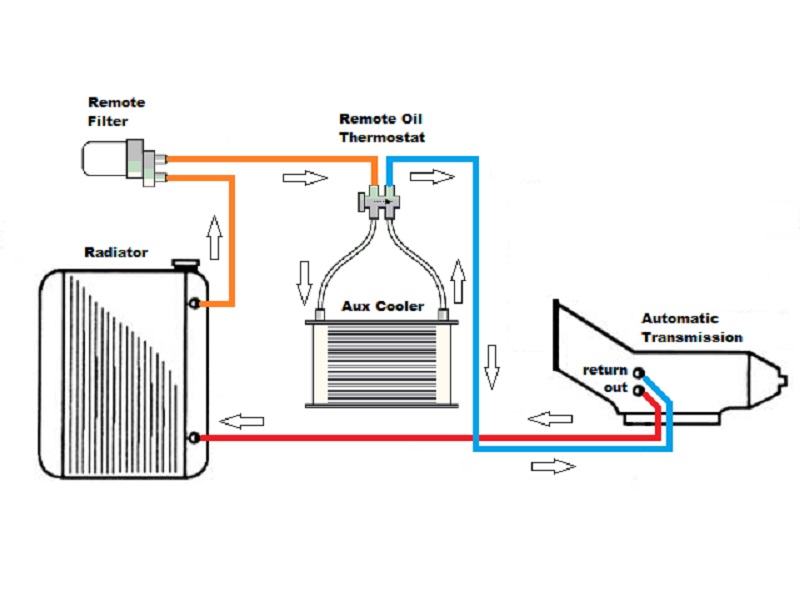
these diagrams that will be helpful
autotransf1.jpg

related threads

http://garage.grumpysperformance.com/index.php?threads/block-fillers.11033/#post-48899

http://garage.grumpysperformance.com/index.php?threads/sbc-cylinder-wall-thickness.7646/#post-26895

http://garage.grumpysperformance.co...-block-cylinder-wall-thickness.976/#post-1706

http://garage.grumpysperformance.com/index.php?threads/block-prep.125/

http://garage.grumpysperformance.co...k-after-a-cam-lobe-rod-or-bearings-fail.2919/

http://garage.grumpysperformance.com/index.php?threads/oil-system-mods-that-help.2187/

http://garage.grumpysperformance.com/index.php?threads/thoughts-on-cooling.149/

http://garage.grumpysperformance.co...sion-and-oil-cooler-increases-durability.176/

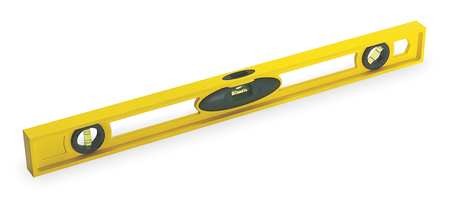
24" carpenter levels are generally priced under $9

https://www.zoro.com/stanley-level-24in-42-468/i/G2998992/
Z_G9t_fo5oy.JPG

check.jpg

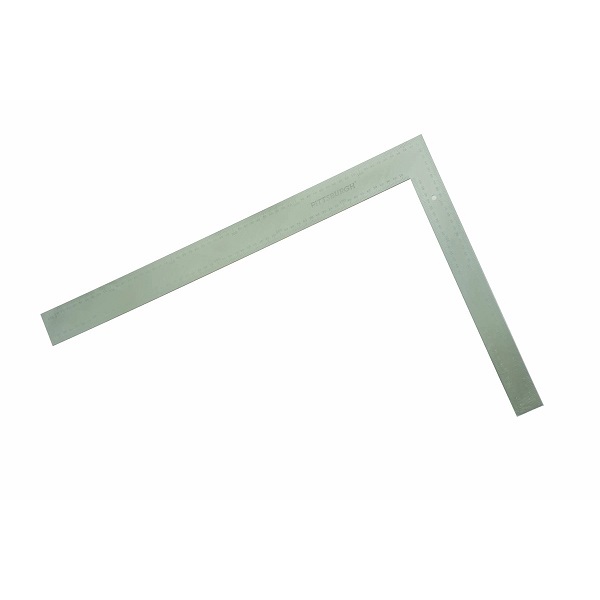
It might be a surprise to many guys but a $10, METAL CARPENTERS SQUARE can be used , to verify a block thats is significantly warped on the deck surface
squarea.jpg

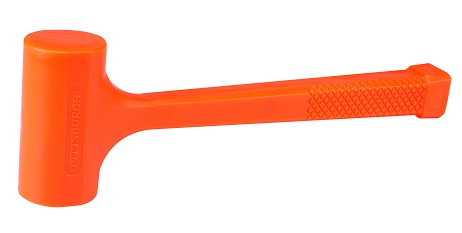
a dead blow mallet ,used on the blocks oil pan rails occasionally during the fill helps the slurry settle evenly, a funnel to get the slurry in the coolant passages helps
20443a.jpg

a transmission fluid funnel helps you direct the slurry to the correct areas
longfunnel.JPG

STEEL SHOT
http://www.ballisticproducts.com/Steel- ... info/SH08/
EPOXY
http://www.mscdirect.com/product/detail ... 0=00261255
 
Last edited:
Thank you Grumpy.

I was amazed that when I bolted the block back onto the engine stand...I actually did not have to jack the front of the block up to get it level.
I used a 4' level to check and found that the the deck was within a 1/16" out from front to back!
I got it dead on side to side. :)
I highly recommend taping and covering the block . It is very easy to get drips and what not
on the motor.
I wanted to let the readers who might consider using this product that it only took roughly 6-7 cups to fill to the lower side freeze plug level.
The product is way more than what is needed for a partial fill. The cost was around $80 for the 25lbs. pail.

I did not blend in the steel shot with this mix.
 
most people don,t bother to mix the steel shot or use epoxy,
they do almost exactly what you did, and yes you should be just fine
I only use the steel shot in an epoxy slurry , but then I have only used the epoxy, mix
most of my friends went the less expensive route ,doing exactly what you did.
 
I only use the steel shot in an epoxy slurry

That is why I decided against using it.
The stuff I bought was more of a grout....and I have seen what happens to untreated steel rerod in concrete..
It rusts away and leaves the concrete with hollow spots that are susceptible to cracking.
 
Grumpy.. where did you find that oil cooler pic?
That looks like the cooler I was looking to purchase... But it only had 08an fittings.
 
I don,t remember, where I purchased most of the oil/trans fluid coolers Ive used ,
but I've purchased and installed several oil and trans fluid coolers
over the decades, almost all were used 1/2" or an#8 connections and were purchased from summit or jegs
as always read carefully,
and measure accurately, remembering you must be leaving room for the hot oil or trans fluid hose and connections
and access to get the cooler in and mounted and connections made too it!
you would certainly not be the first or last guy to buy a cooler that will not fit in the space you though it would,
due to the connections and hoses required or forgetting about the thickness or lack of easy access.
and
yes adding an auxiliary electrical fan cooled,
oil cooler and or trans fluid cooler,
does drop your engines operational temps and in the case of transmissions,
a trans fluid cooler,
and reduces the heat load on the existing radiator.
btw, adding a few accurate dash gauges ,
to monitor the fluid temps certainly won,t hurt either.

http://garage.grumpysperformance.co...flow-rates-and-heat-transfer.9880/#post-64431

http://garage.grumpysperformance.co...ps-and-infrared-thermometers.4974/#post-15425

http://garage.grumpysperformance.com/index.php?threads/digital-dash-swap-questions.3399/#post-26865

http://garage.grumpysperformance.co...-and-wiring-in-gauges-and-gauge-sources.1469/


http://garage.grumpysperformance.co...ans-cooler-on-a-c4-corvette.10514/#post-44478

https://www.summitracing.com/parts/der-15820

https://www.summitracing.com/search?PageSize=100&SortBy=BestKeywordMatch&SortOrder=Ascending&keyword=oil cooler with fan

https://www.jegs.com/i/Derale/259/15850/10002/-1

https://www.jegs.com/webapp/wcs/sto...&submodel=&engine=&Nrpp=&No=&persistYmm=false
 
Last edited:
Thank you Grumpy.

I was amazed that when I bolted the block back onto the engine stand...I actually did not have to jack the front of the block up to get it level.
I used a 4' level to check and found that the the deck was within a 1/16" out from front to back!
I got it dead on side to side. :)
I highly recommend taping and covering the block . It is very easy to get drips and what not
on the motor.
I wanted to let the readers who might consider using this product that it only took roughly 6-7 cups to fill to the lower side freeze plug level.
The product is way more than what is needed for a partial fill. The cost was around $80 for the 25lbs. pail.

I did not blend in the steel shot with this mix.
Looks nice.
Depending who you talk to about Hardblocking partial or full fill your supposed to run an electric water pump for drag use.
Circle track endurance you need to use a mechanical pump.
The Thermostat is always left out.
Use a water restrictor plate by Moroso.
Use the 1.000" Red anodized plate.
Not a street engine.
Going WOT and staying there.
On a,Small block Chevy coolant lines are run to the rear off the cylinder heads to a T-stat Housing spacer plate tapped for AN fittings. High Hp 4 lines ran to each corner of both heads.
Gets the steam pockets out from Hardblocking Fill done.
Important all hot summer time racing 90-110 F out.
Electric water pump cools the engine during runs with engine off.
 
We tried T-stats from Stewert Racing And Robert Shaw. Drilled full of holes.
Not dependable WOT after block fill done.
Stick closed at wrong times.
Steam pockets...! Block fill does that.
Take T-stat out and use a water restrictor plate.
Race engine.
Not Street at all . Street T-stat needed for Fast engine warm-up.
 
On a,Small block Chevy coolant lines are run to the rear off the cylinder heads to a T-stat Housing spacer plate tapped for AN fittings. High Hp 4 lines ran to each corner of both heads.

Thank you Brian,

I need to know more about this quote you talked about above.

I have a t-stat housing that I drilled and taped for a ball valve that was installed.
This was there so I could burp the coolant system of all the air.
Is the same thing you were talking about?
 
My gauges consist of:
volt
fuel level
fuel pressure (under the hood)
water temp
oil temp (being ordered on the next purchase)
oil pressure
trans oil temp
boost
AEM A/F (with lambda face)
 
Different options.
Thank you Brian,

I need to know more about this quote you talked about above.

I have a t-stat housing that I drilled and taped for a ball valve that was installed.
This was there so I could burp the coolant system of all the air.
Is the same thing you were talking about?
Different options. Be back.
 
Grumpy has somewhere in his archives adding deck stiffener plugs.
Good idea with a SBC Raced real hard.
Done Dirt track.
Tap the Water holes in deck for 4 total 3/4" inch NPT steel plugs.
Then mill decks true flat with plugs in.
Drill for new water outlet steam holes .
Size varies.
 
Brian,
the blower will not allow me to add anything to the t-stat housing. The blower overhangs the t-stat and is so close the I have to remove the blower
in order to remove the t-stat.
I was going to make another modified t-stat...but the incorporated relief valve has to be lower than the top of the housing in order to fit.
I have some Idea's but thats to far down the build road.

I do not like the idea of having a fuel line in the cab. Possibility of a leak and fire.
Though I have thought about some sort of old school hood display... but I doubt that I would be able to see the gauge once the mud starts flying.

Yea I forgot to mention the Tach. I don't look at it much while driving... just use the shift light.
 
Tap the Water holes in deck for 4 total 3/4" inch NPT steel plugs.
Then mill decks true flat with plugs in.
Drill for new water outlet steam holes .
Size varies.

Would like to read up on that article.
been searching for it

It seems similar to what I did to the old t-stat. but I never added the 2 lines from the rear.
I figured that the engine tilts back on a 3* angle and trapped air would work it's way forward
into the t-stat.

Yea my idea was to custom make a billet t-stat to work with the blower.
 
What about an inline thermostat housing in the upper radiator hose? If it will take a thermostat, it will also take the restrictor disc.

cimg0940-1-jpg.202246
 
Hello Mike,
I have one of those at the radiator already. its all in the bed of the truck.
I still feel even though the motor is lower than the radiator .... air will still get trapped in the motor
because it is not a straight upward shot to the radiator. The t-stat rad hose connects to a 1 5/8" pipe that
is following the frame of the truck.
I believe Brian is concerned that because I filled the block, it is going to create steam now. He is trying to explain how to get rid of it...

Sorry Mike. I reread your post.
What I have is an inline fill tube... not an inline t-stat.
That,s a good idea.
I could just move it off the motor a bit.

Mike, go back up to post 241 and look at the link.
That spacer won't fit under my housing
 
OH!
WOW! I have to think about that for a bit. I would be restricting water flow for a stronger deck as a trade off.

I am trying to wrap my head around the two hoses and where and how they connect as shown in that link in post 241
 
Back
Top