take the time to read thru the linked info, its well worth the effort
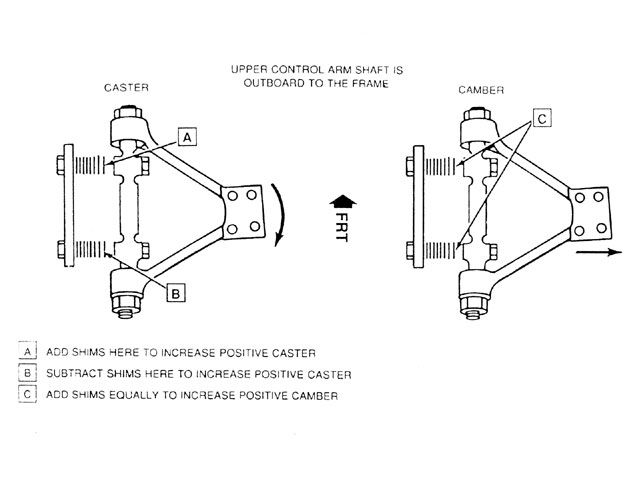
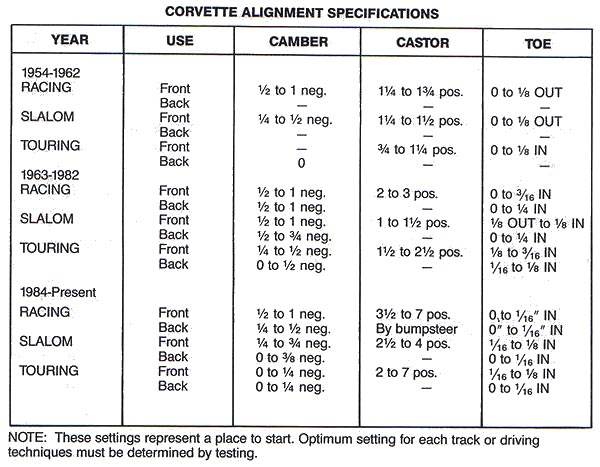
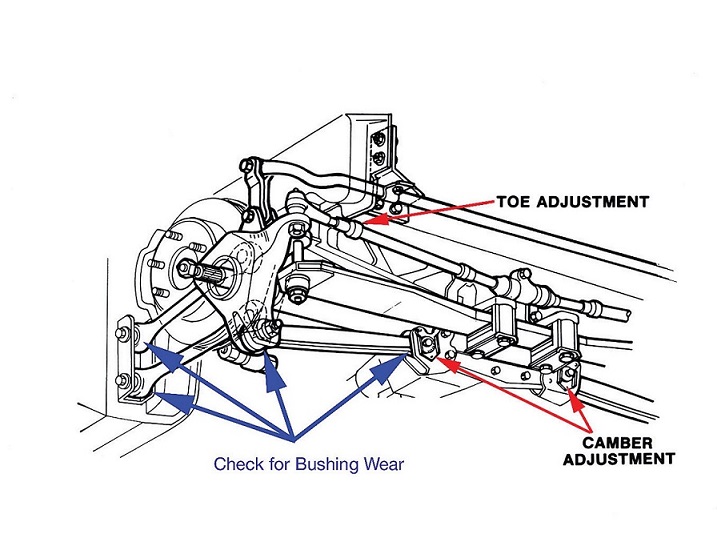
c4 alignment specs (Bluewasp)
VetteBrakes recommends straight from their 2002 catalog page6:
Daily Street:
Front: Toe = 1/32" in
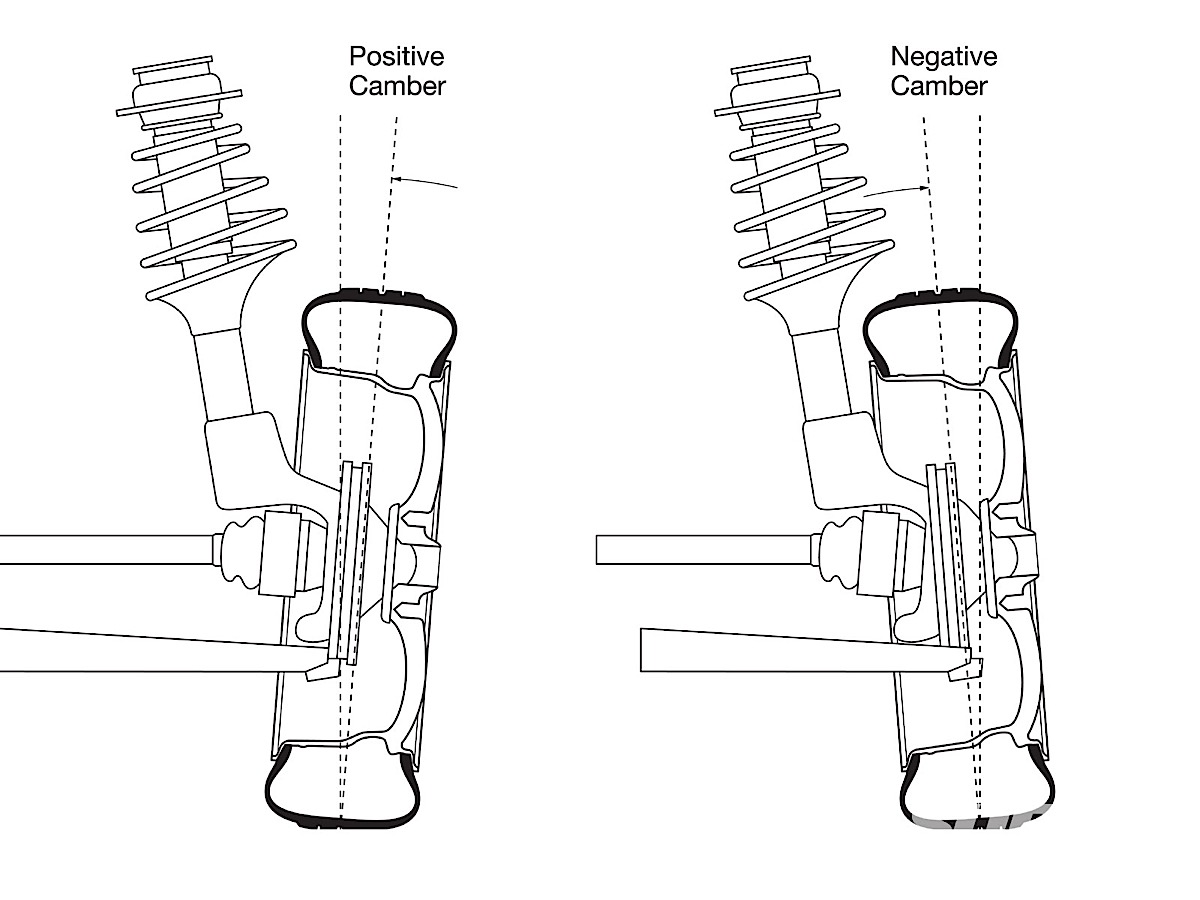
Camber = 0 degrees
Caster = 5-7 degrees positive
Rear: Toe = 1/8" in
Camber = 0 degrees
Advanced Street:
Front: Toe = 0"
Camber = 1/4 degree negative
Caster = 5-7 degrees positive
Rear: Toe = 1/8" in
Camber = 1/2 degree negative
Autocross baseline:
Front: Toe = 3/16" out
Camber = 1 1/2 - 3 degrees negative
Caster = 4-5 degrees positive
Rear: Toe = 1/16" in
Camber = 3/4 - 2 1/2 degrees negative
Track baseline:
Front: Toe = 0 - 1/16" out
Camber = 1 - 3 degrees negative
Caster = 4-7 degrees positive
Rear: Toe = 1/8" in
Camber = 3/4 - 2 1/2 degrees negative
http://tech.corvettecentral.com/2013/11/c4-suspension-overview/
http://garage.grumpysperformance.com/index.php?threads/you-need-decent-jack-stands.672/#post-28211
http://garage.grumpysperformance.com/index.php?threads/c4-vette-alignment-specs.14542/
http://garage.grumpysperformance.co...c4-corvette-wheel-tech-info.12099/#post-58082
https://www.wheel-size.com/calc/?wh...-18X9.5ET40&fcl=50mm&wcl=30mm&scl=50mm&sr=0mm
viewtopic.php?f=27&t=2735&p=7113&hilit=press+hydraulic#p7113
viewtopic.php?f=71&t=1770&p=12626&hilit=press+hydraulic#p12626
viewtopic.php?f=34&t=11058&p=49146#p49146
http://www.miata.net/garage/tirecalc.html
http://garage.grumpysperformance.co...one-to-get-the-vette-to-run.12668/#post-64847
http://www.airbagit.com/product-p/fbx-f-che-52.htm
http://www.ridetech.com/store/suspe...97-chevy-corvette-shockwave-front-system.html
http://www.truckshop.com/product.php?productid=20871
http://www.streetdreams.org/interactive/
http://www.vansteel.com/index.cfm?fusea ... Group=1972
http://temp.corvetteforum.net/c4/vader8 ... joint.html
http://www.corvetteactioncenter.com/tec ... kDSAhA9mqE
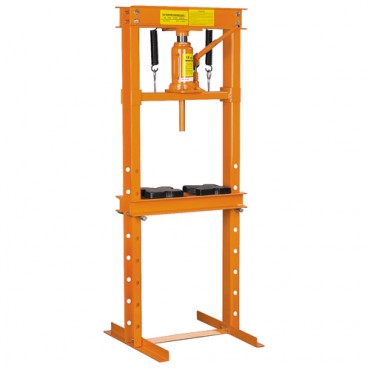
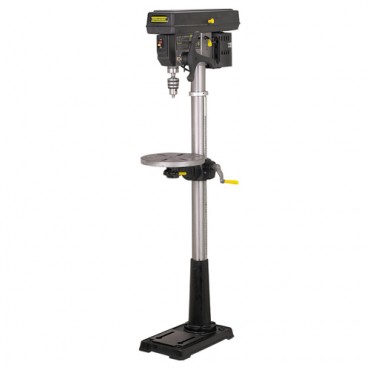
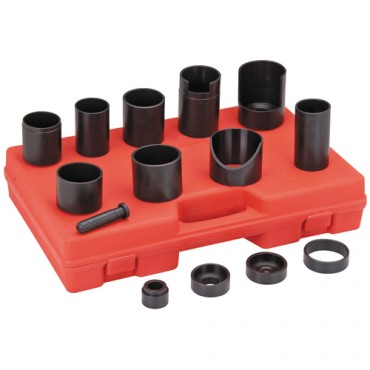
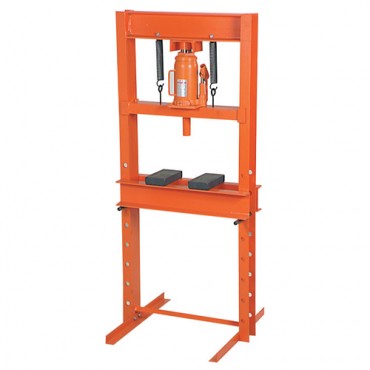
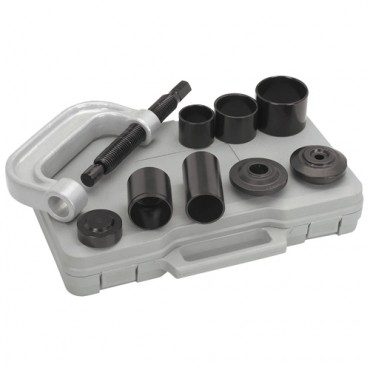
owning a low cost hydraulic press and a drill press will sure make the process go smoother, obviously if you do work frequently youll tend to want better than bargain basement tools
http://www.harborfreight.com/12-ton-sho ... 33497.html
http://www.harborfreight.com/heavy-duty ... 38144.html
if your car shakes or pulls its usually a symptom of a suspension, or tire related problem, swapping the tires from side to side will usually tell you if its tires, because the location of the problem should change with the tire swap[/color]
but its usually well worth the time and cost have a decent corvette shop, or dealership or tire store you trust, inspect and check your ball joints and control arm bushings,wheel bearings,brakes ,shocks and motor and transmission mounts
these components can and do fail and result in different symptoms with shaking at higher speeds being far from rare
http://www.summitracing.com/parts/ENS-3-18123R/
http://vette.ohioracing.com/susp.html
http://corvetteactioncenter.com/tech/c4/susp_chart.html

replacing c4 corvette suspension bushings
http://webpages.charter.net/khasting/ut ... hings.html
http://corvettes.about.com/od/restorati ... ndling.htm
http://garage.grumpysperformance.com/index.php?threads/wheel-bearing-replacement.3128/#post-8340
http://www.banskimotorsports.com/C4_Rea ... sioin.html
http://www.oddfiddlythings.com/2009/roc ... uspension/
http://www.corvettemagazine.com/suspens ... joint.html
http://www.corvettefever.com/techarticl ... index.html
http://en.wikipedia.org/wiki/Corvette_l ... eaf_spring
http://www.idavette.net/hib/c4/sustunch.pdf
http://www.miata.net/sport/Physics/
viewtopic.php?f=87&t=2031&p=5411#p5411
http://www.corvetteactioncenter.com/kb/ ... l+Corvette
AS AN EXAMPLE
,I recently helped install a front end suspension upgrade kit ,in my opinion its component parts were just barely functional and the parts were of low quality, the grease seals all the ball joints had flaws
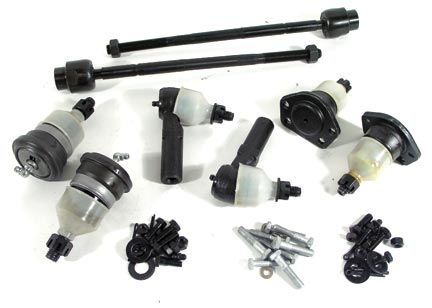
the owner got a DEAL on IMPORTED ball joints, we took them out of the packaging and noticed the crappy grease boot seals, as cast body and metric thread,s I suggested returning them, but we had them and the owner felt returning them would be difficult and waste a week or more time, they were difficult to press into the lower a-arm so we measured the diameter of the clamping surface diam. where it inserts into the a-arms, the original ball joints measured 2.070, the replacements measured 2.085" obviously they needed to be carefully machined to the slightly smaller diam.
a bit of research showed the import ball joints sell for about $30 each, the American made replacement parts sell for about -$57-$110 each depending on the vendor and brand selected, locally so its no surprise that many guys select the less expensive route, but it may be a mistake, the quality looked to be significantly lower, the parts needed to be slightly modified to fit and the grease boots were leaking right out of the packaging.
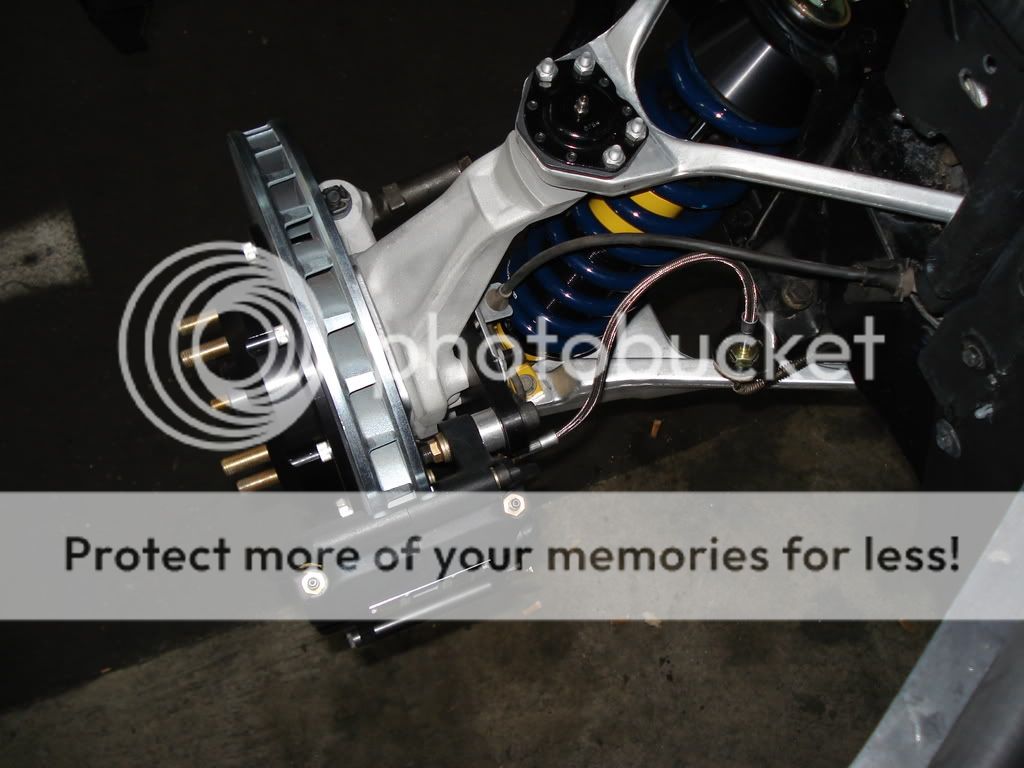
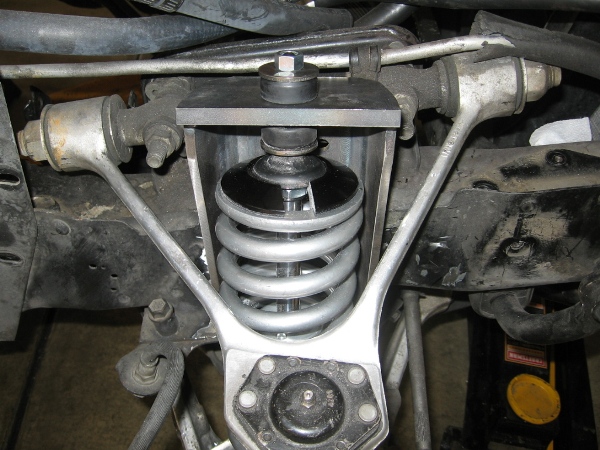
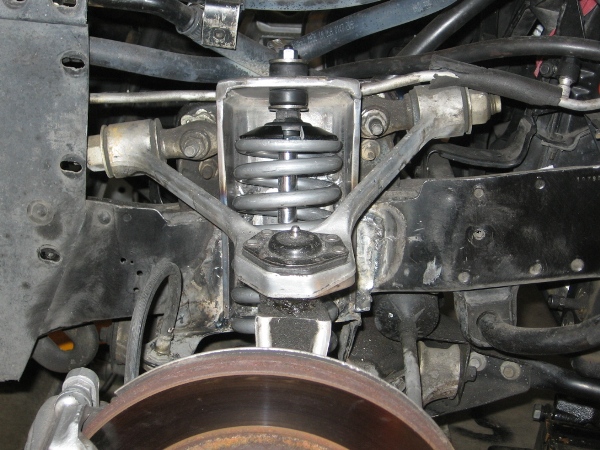
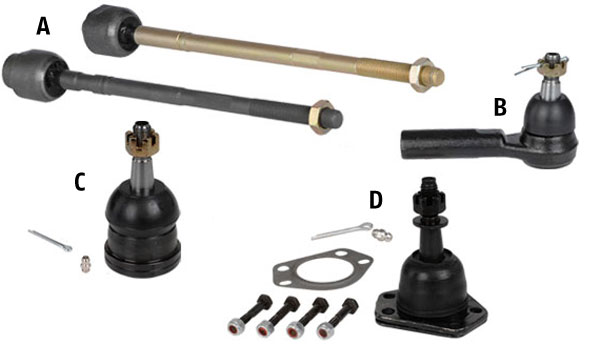
ON a C4 corvette,(1984-1996) the OEM ,top or upper ball joints are installed with rivets that need to be drilled out and replaced with bolts
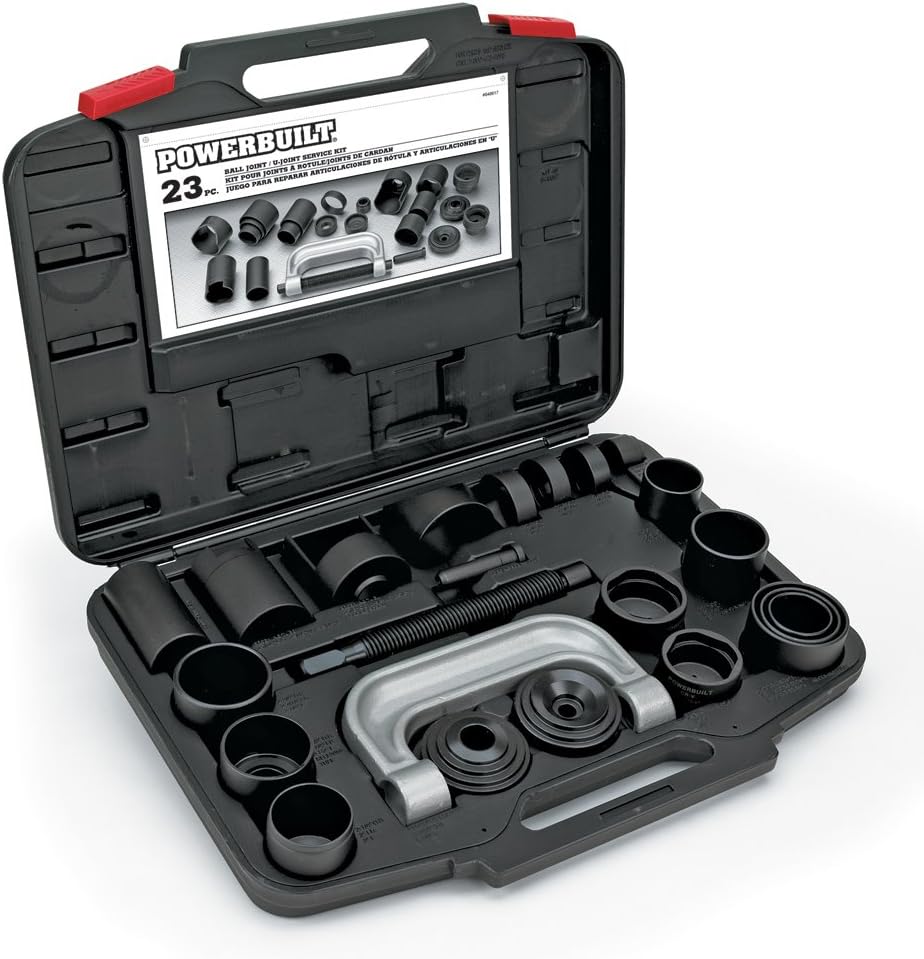
the lowers are pressed into and out of the lower a-arm so youll need a decent press to install or remove those
these look to be better in the picture but I have not seen these personally
http://www.mamotorworks.com/corvette-c4 ... -1122.html
KITS SOLD BY MANY VENDORS INCLUDE LESS THAN DESIRABLE QUALITY PARTS (IMPORTS OF UNKNOWN QUALITY)TO KEEP THE PRICE LOW, THIS IS ONE AREA WHERE IT PAYS TO SPEND A BIT MORE AND SELECT BETTER QUALITY PARTS
THESE JOINTS BELOW APPEAR TO BE MUCH BETTER QUALITY
http://www.autopartswarehouse.com/detai ... K6345.html
http://www.autopartswarehouse.com/detai ... K6346.html
http://www.corvettefever.com/techarticl ... index.html
http://www.ehow.com/how_7649253_replace ... te-c4.html
MOGG and Mevotech make a decent replacement ball joint
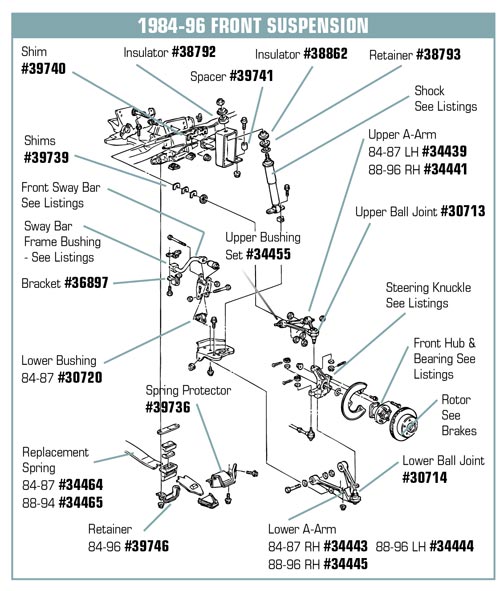
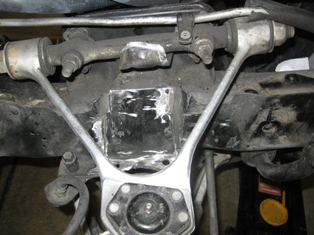
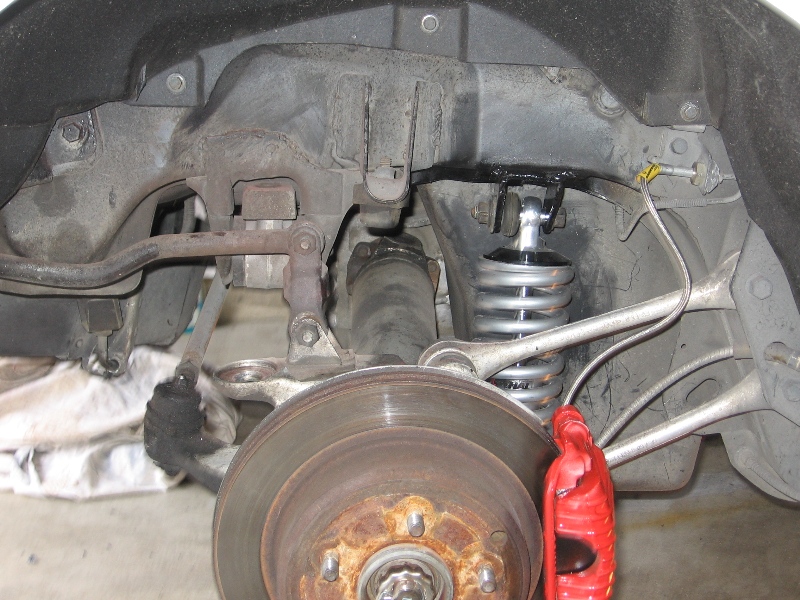
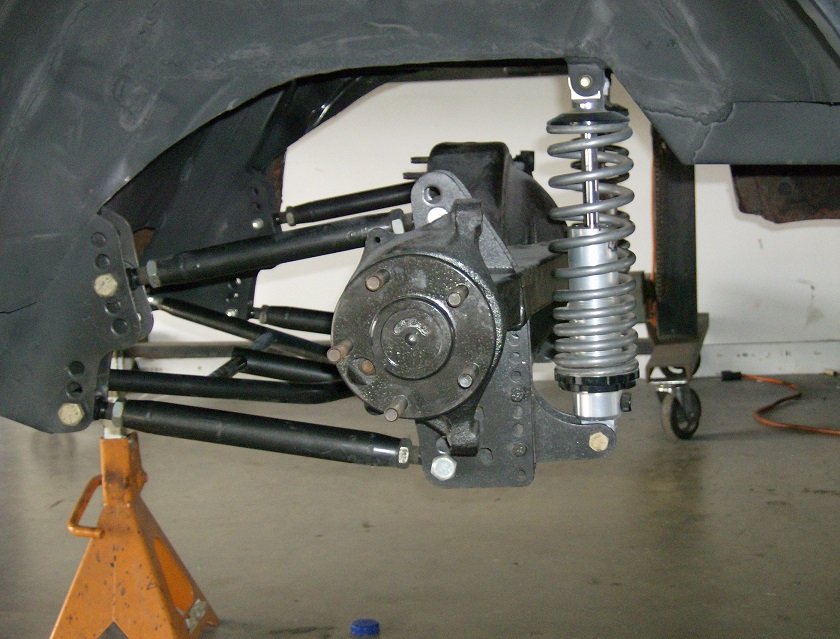
The C4 Corvette was produced from 1984 though 1996 by Chevrolet with a control arm-based front suspension. This suspension incorporated both upper and lower ball joints. Ball joints require replacement over time. Ball joints cannot be repaired and should be replaced when the rubber boots are split or worn out. Signs of wear can include uneven tire wear, poor handling and movement of the front wheel when inspected.
Difficulty:
Moderately Challenging
Instructions
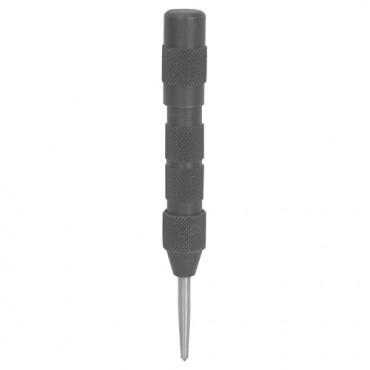
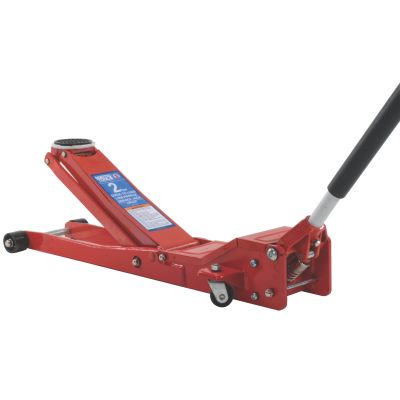
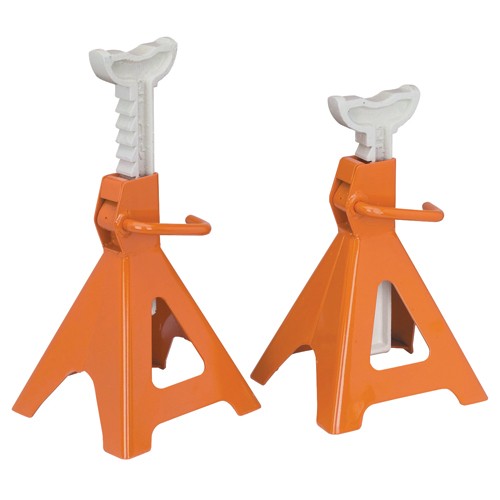
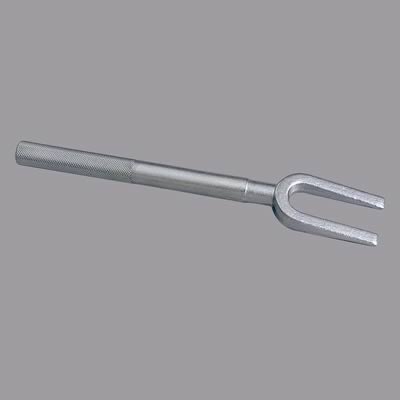
things you'll need:
Wheel chocks
Floor jack
Jack stands
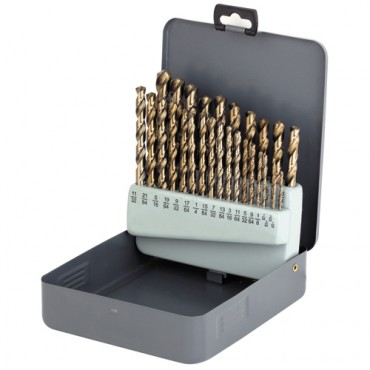
Metric sockets
Breaker bar
Pliers
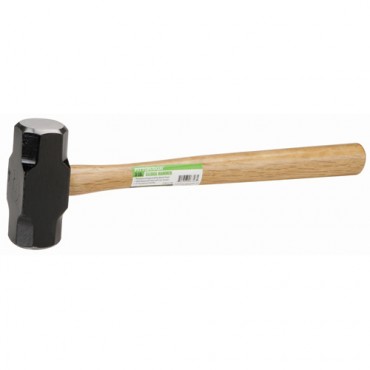
Hammer
Ratchet and extensions
Metric wrench
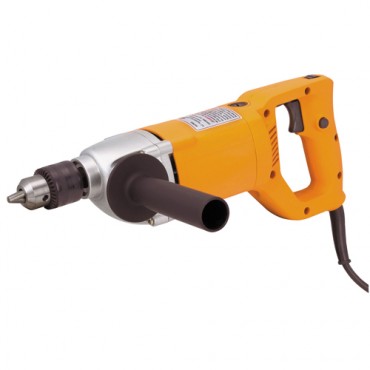
Hydraulic press
Lower ball joint
Light lubrication oil
Torque wrench
1
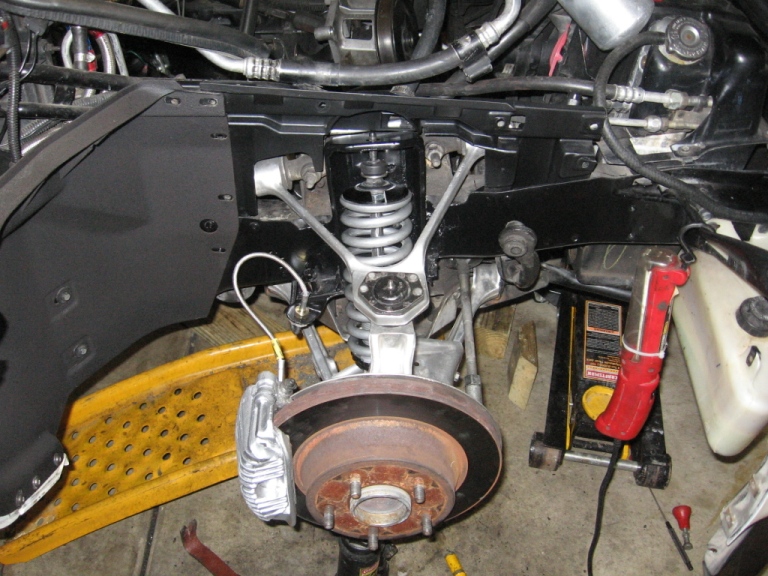
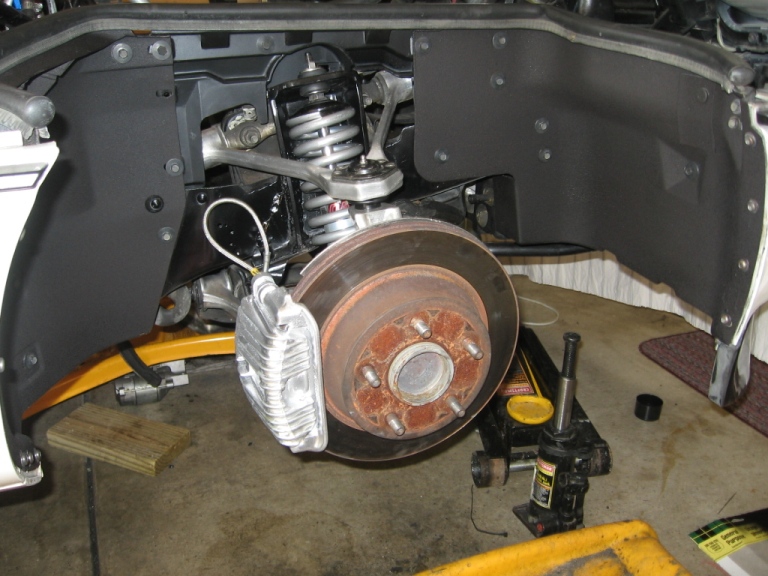
Engage the emergency brake and place wheel chocks behind and in front of the rear wheels. Raise the vehicle using the floor jack, place the jack stands and lower the Corvette to securely rest on the jack stands.
2
Remove the front wheels with the assistance of the metric socket and breaker bar.
3
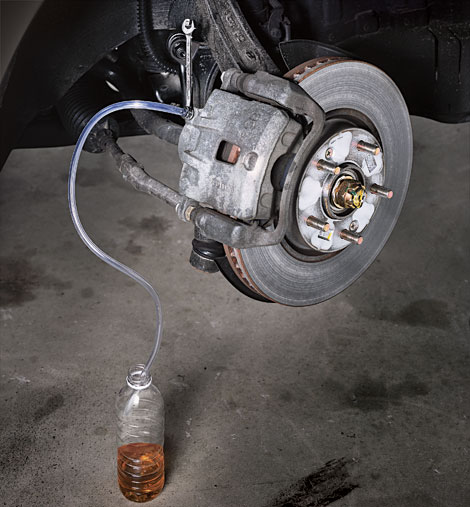
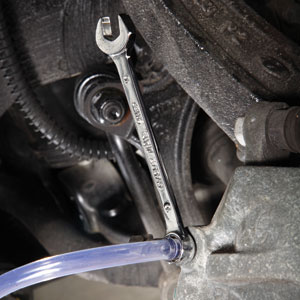
Place the floor jack under the front control arm and raise the jack to compress the shock absorber. Remove the two bolts securing the shock absorber to the lower control arm with a ratchet, extension and socket. Remove the cotter pin from the lower ball joint with the aid of pliers. Remove the nut securing the lower ball joint with a metric wrench. Gently tap on the lower ball joint with a hammer to disconnect it from the suspension mounting point. Lower the floor jack and pull it away from the car.
4
Remove the four bolts that secure the control arm to the cross-member. Use a wrench on the nut side and the ratchet with a socket on the bolt side to loosen each bolt.
5
Remove the two carriage bolts that secure the lower control arm to the chassis. Use a ratchet and socket to turn the bolt and a wrench to secure the nut. Pull the
6
Remove the lower control arm from the car and position it in a hydraulic press. Use the hydraulic press to apply pressure to the top of the lower ball joint. Press the ball joint out the bottom of the control arm.
7
Apply a thin coat of oil on the control arm, in the hole for the lower ball joint. Insert the new ball joint into the control arm. Use the hydraulic press to seat the ball joint into the lower control arm.
8
Replace the lower control arm into the brackets attached to the chassis. Insert the two carriage bolts securing the control arm to the chassis. Tighten the bolts to 96 foot-pounds of torque with the torque wrench.
9
Insert the remaining bolts used to secure the control arm to the cross-member. Tighten each bolt to 96 foot-pounds with the torque wrench. Raise the control arm with the floor jack to install the shock absorber mounting bolts. Tighten the mounting bolts to 22 foot-pounds of torque.
10
Insert the shaft of the lower ball joint into the steering knuckle. Install the nut securing the lower ball joint to the steering knuckle and tighten to 33 foot-pounds of torque. Insert a cotter pin into the lower ball joint and secure the cotter pin using a pair of pliers.
11
Install the wheels on the hubs and secure using the lug nuts. Tighten each lug nut to 100 foot-pounds of torque with the torque wrench.
12
Use the floor jack to remove the jack stand and lower the Corvette. Remove the wheel chocks and release the emergency brake.
http://www.harborfreight.com/four-wheel ... -4065.html
http://www.harborfreight.com/14-piece-m ... 66958.html
http://www.harborfreight.com/20-ton-sho ... 32879.html

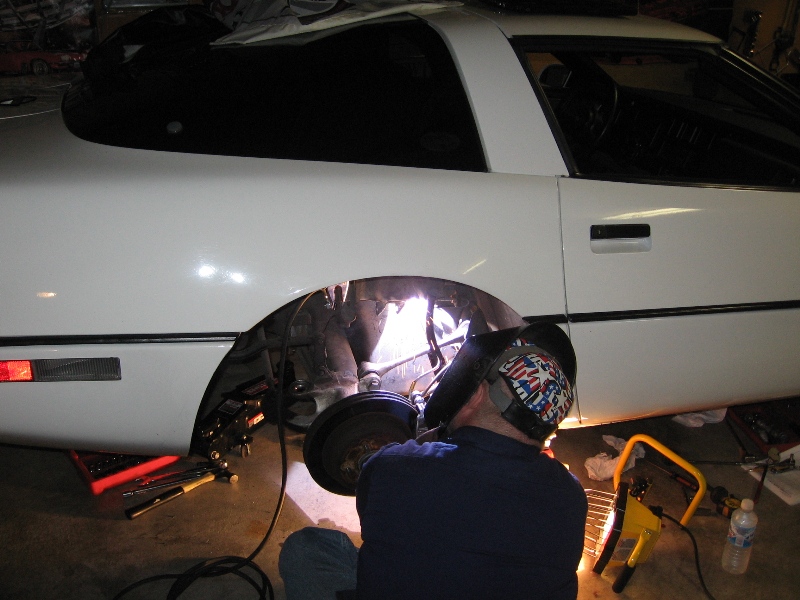
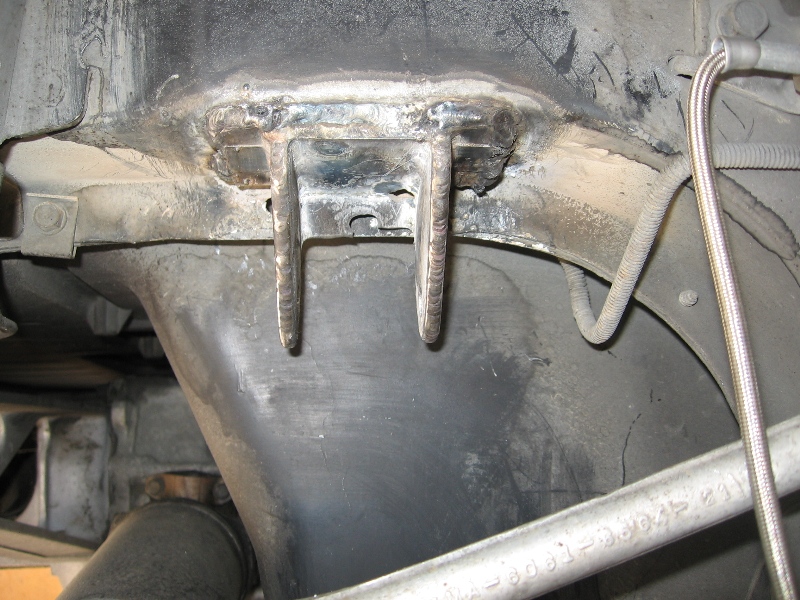
keep in mind that if you have BOTH a two post LIFT and a HYDRAULIC PRESS, an the tools listed above you can press the lower ball joint IN AND OUT while the A-arms still on the car in MANY cars if you can move the press into the wheel well, and raise the car to the correct height to use the press
c4 alignment specs (Bluewasp)
VetteBrakes recommends straight from their 2002 catalog page6:
Daily Street:
Front: Toe = 1/32" in
Camber = 0 degrees
Caster = 5-7 degrees positive
Rear: Toe = 1/8" in
Camber = 0 degrees
Advanced Street:
Front: Toe = 0"
Camber = 1/4 degree negative
Caster = 5-7 degrees positive
Rear: Toe = 1/8" in
Camber = 1/2 degree negative
Autocross baseline:
Front: Toe = 3/16" out
Camber = 1 1/2 - 3 degrees negative
Caster = 4-5 degrees positive
Rear: Toe = 1/16" in
Camber = 3/4 - 2 1/2 degrees negative
Track baseline:
Front: Toe = 0 - 1/16" out
Camber = 1 - 3 degrees negative
Caster = 4-7 degrees positive
Rear: Toe = 1/8" in
Camber = 3/4 - 2 1/2 degrees negative
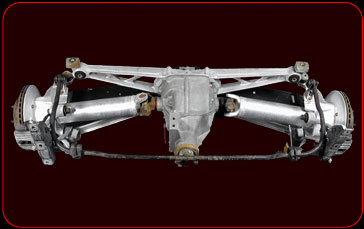
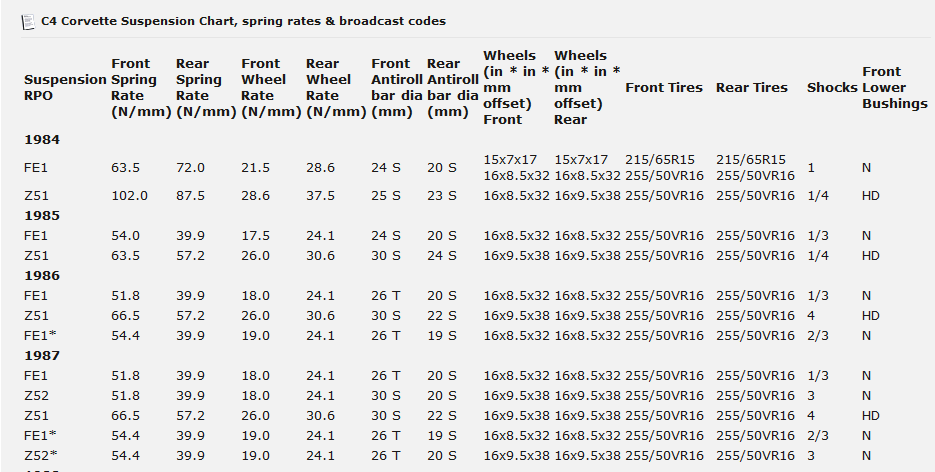
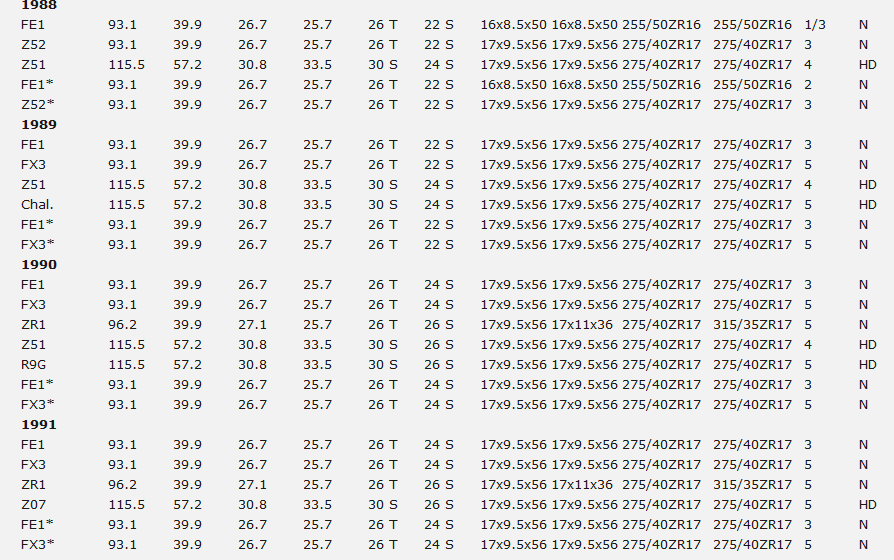
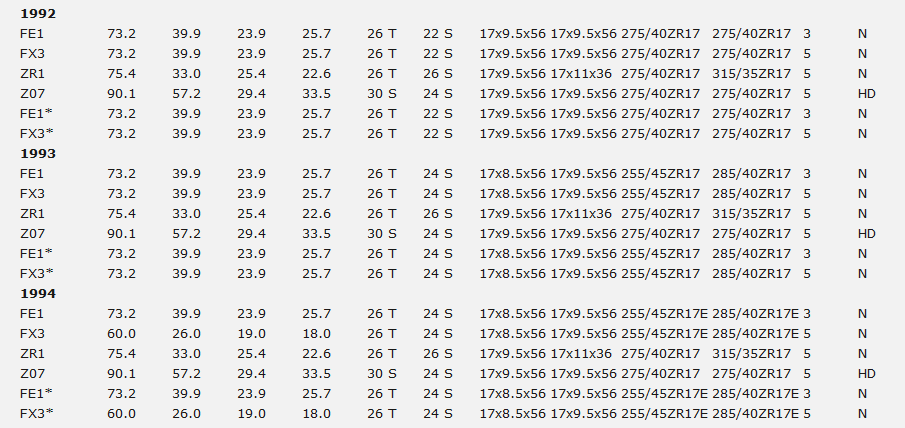
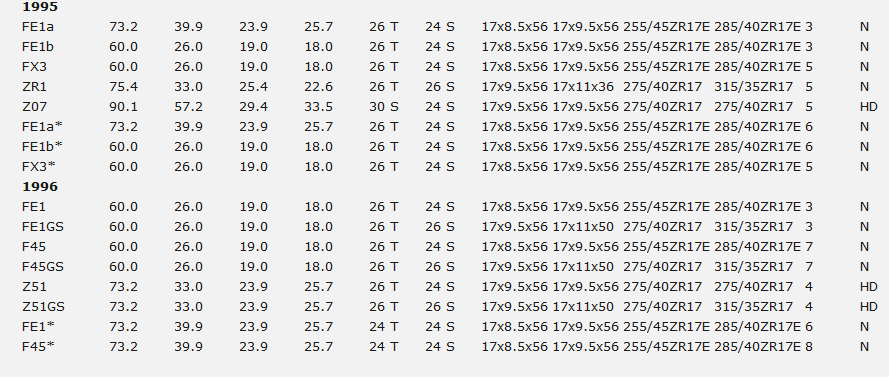
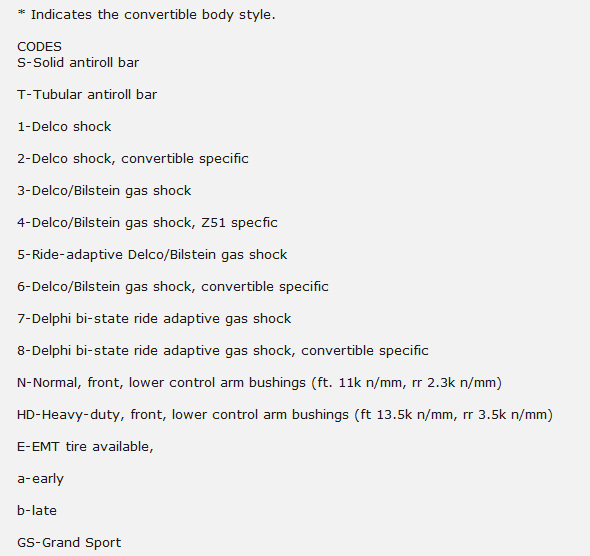
C4 Z51 spring rates/codes and sway bar sizing.
I thought I would share some facts found researching Z51 spring rates and swaybar sizes that some people might find interesting.
I posted this info in c4 tech, but thought that some of the c4 guys in this section might find the info usefull.
i will put the year/front spring/rear spring/front bar/rear bar.
also quote in N/mm and Lbs/inch.
'84 - 102 nmm/582 lbs 87.5/499 25/23
widely regarded as the stiffest suspension put on the c4, front BMB/rear BMH code springs (but wait till we get to '88)
'85 - 63.5/362 57.2/326 30/24
after customer feedback GM engineers go softer on the springs, but bigger on the swaybars. NYU code for the new rear spring.
'86 - 66.5/380 57.2/326 30/22
slightly more front spring rate, 2mm less on the rear bar.
'87 - 66.5/380 57.2/326 30/22
no change.
These are the 4 years that the c4 Corvette dominates the SCCA championship and promptly gets banned from the series !
From what I have read a lot of racers used the 102/582 front spring with the 57.2/326 rear spring with 30/24 swaybars, although there was some mixing and matching (within the rules of course)
'88 was the beginning of the Corvette Challenge series, a race series for the Corvette only. The front geometry of the C4 was also changed.
'88 - 115.5/659 - 57.2/326 30/24
where did that front spring come from, it makes the 84 BMB spring look like it came off a luxury car ! The GM engineers had racing on their minds for sure with this combo.
'89 - 115.5/659 - 57.2/326 30/24
this is the year the R9G was offered for sale, a factory race car !
R9G 115.5/659 - 57.2/326 30/24
no doubt that spring/swaybar combo was being developed for racing.
'88 and '89 were the only 2 years of the Corvette Challenge Series.
'90 - 115.5/659 57.2/326 30/24
R9G 115.5/659 57.2/326 30/24
Corvettes were invited back this year to the World Challenge Series.
'91 - Z51 number dropped, replaced with Z07 code. No R9G available.
'91 - 115.5/659 57.2/326 30/26
the only year of the 26 mm rear bar, 2 mm more in the rear bar, engineers looking for more oversteer ?
'92 - 90.1/514 57.2/326 30/24
softer front spring, smaller rear bar.
'93 - 90.1/514 57.2/326 30/24
no change.
'94 - 90.1/514 57.2/326 30/24
no change.
'95 - 90.1/514 57.2/326 30/24
no change.
'96 - Z51 designation returns.
'96 - 73.2/418 33.0/188 26T/24
the 96 Z51 was the Cadillac version, spring rates verging on FE1 rates.
Interestingly, the rear Z51 spring rate did not change from 85 to 95, even though the front rates varied quite a bit.
Ride comfort in the C4 is mainly affected by rear spring rate, the engineers were obv happy with the 57.2/326 as a performance/street driven rear spring rate.
People who have used the 84 BMH rear spring 87.5/499 have stated it gives a harsh street ride, and tends to bind up the rear end of the c4 under cornering in racing.
Reference is from the Corvette Action Centre 84-96 suspension chart.
Does anyone else have any information (or corrections), especially spring codes ?
Hopefully this will be helpful to anyone looking at changing spring rates whilst using leaf springs in a performance/racing application.
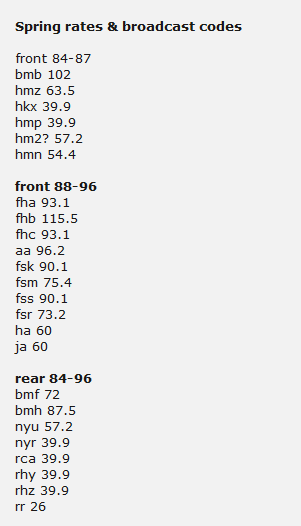
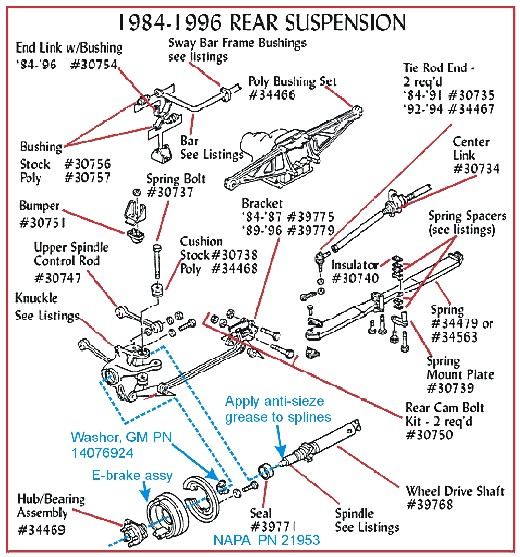
SPRING CODES
FRONT 84-87
BMB 102
HMZ 63.5
FHU 63.5
HKX 39.9
HMP 39.9
HM2? 57.2
HMN 54.4
FRONT 88-96
FHA 93.1
FHB 115.5
FHC 93.1
AA 96.2
FSK 90.1
FSM 75.4
FSS 90.1
FSR 73.2
HA 60
JA 60
REAR 84-96
BMF 72
BMH 87.5
NYU 57.2
NYR 39.9
RCA 39.9
RHY 39.9
RHZ 39.9
RR 26
REAR SPRING CODES
Code #/in N/mm Year(s) GM part # GM Service Parts Catalog
---- ---- ------- ------- -------- ------------------------
BMH 499 [87.5] 1984 14045786 . . . . . . . . . . 7-H19
BMF 411 [72.0] 1984 14045785 . . . . . . . . . . 7-H19
NYU 326 [57.2] 1985-95 14080196 . . . . . . . . . . 7-H19 7-H22 7-I3
NYR 228 [39.9] 1985-93 22112253 . . . . . . . . . . 7-H19 7-H22 7-I3
RCA 228 [39.9] 1986-96 14106787 . . . . . . . . . . 7-H19 7-H22 7-I4
RHY 188 [33.0] 1992-96 17999322 . . . . . . . . . . 7-I4
RHZ 148 [26.0] 1994-96 22112253 . . . . . . . . . . 7-I4
___?d 148 [26.0] 1994-95 22112254 conv FE1 (SR) FX3 . 7-I3 no 3 letter code -
Code #/in N/mm Year(s) GM part # GM Service Parts Catalog
---- ---- ------- ------- -------- ------------------------
FRONT SPRING CODES
FHB 590 [115.5] 1988-91 10048553 . . . . . . . . . . 7-E9 7-E13 7-E19
BMB 521 [102.0] 1984 14045782 . . . . . . . . . . - not in microfiche
AA 491 [96.2] 1990-91 17988598 . . . . . . . . . . 7-E13 7-E19
FHA 476 [93.1] 1988-91 10048552 coupe FX3 FE7 + L98 7-E9 7-E13 7-E19
FHC 476 [93.1] 1988-91 10048574 conv FE1 (SR) . . 7-E9 7-E1347-E19
FSK 460 [90.1] 1992-95 17997091 . . . . . . . . . . 7-E19
FSM 385 [75.4] 1992-95 17997093 . . . . . . . . . . 7-E19
HMZ?a 379 [66.5] 1986-87 14106617 coupe FE7 ___ . . - not in microfiche
FSR 374 [73.2] 1992-95 17999031 conv FE1 (SR) . . 7-E19
FSS 374 [73.2] 1992-96 17999032 coupe FE1 (SR) . . 7-E19 7-E20
HMP 362 [63.5] 1984-87 14106617 . . . . . . . . . . 7-E5
HMP 379 [66.5] 1984-87 14106617 . . . . . . . . . . 7-E5
HA 306 [60.0] 1989-95 22145203 coupe FE1 (SR) FX3 7-E13 7-E20
JA 306 [60.0] 1994-95 22145227 conv FE1 (SR) FX3 7-E19
...?b 306 [60.0] 1995 22173029 conv FX3 (ER) . . 7-E19 no 3 letter code
...?c 306 [60.0] 1996 22173028 coupe FE1 (SR) . . 7-E19 no 3 letter code
HMN 278 [54.4] 1986-87 14094457 conv FE1 (SR) . . -
HKX 276 [54.0] 1985 14094458 . . . . . . . . . . page 7-C24 microfiche
HMP 261 [51.8] 1986-87 14094458 . . . . . . . . . .
http://tech.corvettecentral.com/2013/11/c4-suspension-overview/
http://garage.grumpysperformance.com/index.php?threads/you-need-decent-jack-stands.672/#post-28211
http://garage.grumpysperformance.com/index.php?threads/c4-vette-alignment-specs.14542/
http://garage.grumpysperformance.co...c4-corvette-wheel-tech-info.12099/#post-58082
https://www.wheel-size.com/calc/?wh...-18X9.5ET40&fcl=50mm&wcl=30mm&scl=50mm&sr=0mm
viewtopic.php?f=27&t=2735&p=7113&hilit=press+hydraulic#p7113
viewtopic.php?f=71&t=1770&p=12626&hilit=press+hydraulic#p12626
viewtopic.php?f=34&t=11058&p=49146#p49146
http://www.miata.net/garage/tirecalc.html
http://garage.grumpysperformance.co...one-to-get-the-vette-to-run.12668/#post-64847
http://www.airbagit.com/product-p/fbx-f-che-52.htm
http://www.ridetech.com/store/suspe...97-chevy-corvette-shockwave-front-system.html
http://www.truckshop.com/product.php?productid=20871
http://www.streetdreams.org/interactive/
http://www.vansteel.com/index.cfm?fusea ... Group=1972
http://temp.corvetteforum.net/c4/vader8 ... joint.html
http://www.corvetteactioncenter.com/tec ... kDSAhA9mqE
owning a low cost hydraulic press and a drill press will sure make the process go smoother, obviously if you do work frequently youll tend to want better than bargain basement tools
http://www.harborfreight.com/12-ton-sho ... 33497.html
http://www.harborfreight.com/heavy-duty ... 38144.html
if your car shakes or pulls its usually a symptom of a suspension, or tire related problem, swapping the tires from side to side will usually tell you if its tires, because the location of the problem should change with the tire swap[/color]
but its usually well worth the time and cost have a decent corvette shop, or dealership or tire store you trust, inspect and check your ball joints and control arm bushings,wheel bearings,brakes ,shocks and motor and transmission mounts
these components can and do fail and result in different symptoms with shaking at higher speeds being far from rare
http://www.summitracing.com/parts/ENS-3-18123R/
http://vette.ohioracing.com/susp.html
http://corvetteactioncenter.com/tech/c4/susp_chart.html
replacing c4 corvette suspension bushings
http://webpages.charter.net/khasting/ut ... hings.html
http://corvettes.about.com/od/restorati ... ndling.htm
http://garage.grumpysperformance.com/index.php?threads/wheel-bearing-replacement.3128/#post-8340
http://www.banskimotorsports.com/C4_Rea ... sioin.html
http://www.oddfiddlythings.com/2009/roc ... uspension/
http://www.corvettemagazine.com/suspens ... joint.html
http://www.corvettefever.com/techarticl ... index.html
http://en.wikipedia.org/wiki/Corvette_l ... eaf_spring
http://www.idavette.net/hib/c4/sustunch.pdf
http://www.miata.net/sport/Physics/
viewtopic.php?f=87&t=2031&p=5411#p5411
http://www.corvetteactioncenter.com/kb/ ... l+Corvette
AS AN EXAMPLE
,I recently helped install a front end suspension upgrade kit ,in my opinion its component parts were just barely functional and the parts were of low quality, the grease seals all the ball joints had flaws
the owner got a DEAL on IMPORTED ball joints, we took them out of the packaging and noticed the crappy grease boot seals, as cast body and metric thread,s I suggested returning them, but we had them and the owner felt returning them would be difficult and waste a week or more time, they were difficult to press into the lower a-arm so we measured the diameter of the clamping surface diam. where it inserts into the a-arms, the original ball joints measured 2.070, the replacements measured 2.085" obviously they needed to be carefully machined to the slightly smaller diam.
a bit of research showed the import ball joints sell for about $30 each, the American made replacement parts sell for about -$57-$110 each depending on the vendor and brand selected, locally so its no surprise that many guys select the less expensive route, but it may be a mistake, the quality looked to be significantly lower, the parts needed to be slightly modified to fit and the grease boots were leaking right out of the packaging.
ON a C4 corvette,(1984-1996) the OEM ,top or upper ball joints are installed with rivets that need to be drilled out and replaced with bolts
the lowers are pressed into and out of the lower a-arm so youll need a decent press to install or remove those
these look to be better in the picture but I have not seen these personally
http://www.mamotorworks.com/corvette-c4 ... -1122.html
KITS SOLD BY MANY VENDORS INCLUDE LESS THAN DESIRABLE QUALITY PARTS (IMPORTS OF UNKNOWN QUALITY)TO KEEP THE PRICE LOW, THIS IS ONE AREA WHERE IT PAYS TO SPEND A BIT MORE AND SELECT BETTER QUALITY PARTS
THESE JOINTS BELOW APPEAR TO BE MUCH BETTER QUALITY
http://www.autopartswarehouse.com/detai ... K6345.html
http://www.autopartswarehouse.com/detai ... K6346.html
http://www.corvettefever.com/techarticl ... index.html
http://www.ehow.com/how_7649253_replace ... te-c4.html
MOGG and Mevotech make a decent replacement ball joint
The C4 Corvette was produced from 1984 though 1996 by Chevrolet with a control arm-based front suspension. This suspension incorporated both upper and lower ball joints. Ball joints require replacement over time. Ball joints cannot be repaired and should be replaced when the rubber boots are split or worn out. Signs of wear can include uneven tire wear, poor handling and movement of the front wheel when inspected.
Difficulty:
Moderately Challenging
Instructions
things you'll need:
Wheel chocks
Floor jack
Jack stands
Metric sockets
Breaker bar
Pliers
Hammer
Ratchet and extensions
Metric wrench
Hydraulic press
Lower ball joint
Light lubrication oil
Torque wrench
1
Engage the emergency brake and place wheel chocks behind and in front of the rear wheels. Raise the vehicle using the floor jack, place the jack stands and lower the Corvette to securely rest on the jack stands.
2
Remove the front wheels with the assistance of the metric socket and breaker bar.
3
Place the floor jack under the front control arm and raise the jack to compress the shock absorber. Remove the two bolts securing the shock absorber to the lower control arm with a ratchet, extension and socket. Remove the cotter pin from the lower ball joint with the aid of pliers. Remove the nut securing the lower ball joint with a metric wrench. Gently tap on the lower ball joint with a hammer to disconnect it from the suspension mounting point. Lower the floor jack and pull it away from the car.
4
Remove the four bolts that secure the control arm to the cross-member. Use a wrench on the nut side and the ratchet with a socket on the bolt side to loosen each bolt.
5
Remove the two carriage bolts that secure the lower control arm to the chassis. Use a ratchet and socket to turn the bolt and a wrench to secure the nut. Pull the
6
Remove the lower control arm from the car and position it in a hydraulic press. Use the hydraulic press to apply pressure to the top of the lower ball joint. Press the ball joint out the bottom of the control arm.
7
Apply a thin coat of oil on the control arm, in the hole for the lower ball joint. Insert the new ball joint into the control arm. Use the hydraulic press to seat the ball joint into the lower control arm.
8
Replace the lower control arm into the brackets attached to the chassis. Insert the two carriage bolts securing the control arm to the chassis. Tighten the bolts to 96 foot-pounds of torque with the torque wrench.
9
Insert the remaining bolts used to secure the control arm to the cross-member. Tighten each bolt to 96 foot-pounds with the torque wrench. Raise the control arm with the floor jack to install the shock absorber mounting bolts. Tighten the mounting bolts to 22 foot-pounds of torque.
10
Insert the shaft of the lower ball joint into the steering knuckle. Install the nut securing the lower ball joint to the steering knuckle and tighten to 33 foot-pounds of torque. Insert a cotter pin into the lower ball joint and secure the cotter pin using a pair of pliers.
11
Install the wheels on the hubs and secure using the lug nuts. Tighten each lug nut to 100 foot-pounds of torque with the torque wrench.
12
Use the floor jack to remove the jack stand and lower the Corvette. Remove the wheel chocks and release the emergency brake.
http://www.harborfreight.com/four-wheel ... -4065.html
http://www.harborfreight.com/14-piece-m ... 66958.html
http://www.harborfreight.com/20-ton-sho ... 32879.html
keep in mind that if you have BOTH a two post LIFT and a HYDRAULIC PRESS, an the tools listed above you can press the lower ball joint IN AND OUT while the A-arms still on the car in MANY cars if you can move the press into the wheel well, and raise the car to the correct height to use the press
Last edited by a moderator: