what heads are these?

Grumpy

The Grumpy Grease Monkey mechanical engineer.
Staff member


I’m a long time reader of this forum for new knowledge and entertainment. Now I’m helping with a project that would benefit from Grumpy’s extensive experience and information archiving and I just joined the forum.

The project is my son’s resto-rod ’66 Chevy pickup. He and I just pulled and disassembled the engine that was in it, a small block 350 Chevy, 0.030” oversize, sleeves in 2 adjacent holes and a crankshaft badly scored as if there was metallic debris in the oil. The purpose of the disassembly was to find out why it had been running so poorly. The answer is that it is a junk engine that the previous owner painted Chevy orange to make it look fresh. Fortunately, another 350 engine core came along locally on Craigslist just when we needed it 2 weeks ago. Disassembly showed it to be in really nice shape with all standard bore and crankshaft dimensions. It’s a 1979 4-bolt truck engine that was my son’s for the asking price of $50. It looks like the cylinders will clean up with a 0.020” bore and the crankshaft journals look excellent. That’s fortunate because in the rural area where I live it’s doubtful that competent crankshaft grinding is available.

The goal is an enjoyable weekend cruiser and no racing is planned. My son is an off road motorcycle racer on the California Mojave desert and that satisfies his need for a bi-monthly adrenalin hit. The trans in his ’66 PU is a TH350 and the present 4.11 rear gears will be changed to a highway friendly 3.08 set that he already has. He wants to use Vortec heads, and in fact he has some no-name heads that have only a casting number on them, 070421.

He would like to be able to run 89 octane gas. So the questions to Grumpy are what are these heads and are they any good for his intended use? If they have potential, are there any “low hanging fruit” improvements that can be made like pocket porting that would actually yield a benefit at low to mid RPM?, what pistons to use to get a pump gas tolerant compression ratio (does 8.5:1 to 9:1 sound OK?) and what would be a suitable flat tappet camshaft?. Also, can he use a set of new non-guided 1.5:1 Crane roller tip rocker arms on the Vortec heads if guide plates and screw in studs are installed? I have a milling machine in my home shop so modifying the head guide bosses and spring seats, if necessary to avoid coil bind and guide boss-retainer interference, and threading for screw in studs can be done accurately at home. I understand that both Comp Cams and Crane cams offer a guide boss/spring seat cutter for use on Vortec heads.

He also has a new Crane Cams true roller timing set I gave him long ago when I gave him the Crane roller tip rocker arms. He has a Q-jet carburetor that I put new throttle shaft bushings in and I’m suggesting an Edelbrock Performer if that is a good choice for his intended use of moderate street performance and gas economy. We will experiment with various main jets and primary and secondary metering rods that I have collected over the years.

The exhaust system is already complete, block hugger 1 5/8” headers, 2 ½” “H-pipe” exhaust pipes I made for him, Flowmaster noisemakers (ugh, too loud!), and 2 1/2” tailpipes. At age, nearly 71, I’m not doing any more exhaust fabrication except on a rolling chassis with the body off! Crawling around on the garage floor cutting, fitting and welding exhaust tubing is no longer fun for this senior citizen.

He will use a GM HEI distributor and we will experiment with initial timing, various advance weight springs and an adjustable vacuum can to get the timing right for Vortec heads.

Any other suggestions regarding components will be appreciated, for example hypereutectic pistons?, moly rings?, specific valve springs?, high volume oil pump?, hardened oil pump shaft?, any specific head bolt requirements for Vortec heads on a ’79 block?, 8” harmonic damper that he already has OK to use?.

Thank you so much Grumpy.

Here's a link to photos my son Brian took of the "mystery heads"

https://helpidvortecheads.shutterfly.com/

We hope you and/or somebody else will be able to ID them and know if they have potential. Not being knowledgeable on Vortec heads and having only seen the pictures I only notice that they have screw in studs, 2.02 intake valves and dampers inside the valve springs.

Stinky,

Thank you for clarifying your recommendation on the rear gear ratio for this '66 Chevy PU resto-rod project. This truck's hauling and towing days are over. All it will carry in the future will be a cooler and some lawn chairs for my son to take his family on picnics, so it won't be sportin' any big meats.

He and my daughter in law have a Silverado pickup and a Ford Expedition to tow and haul loads. When the whole family goes to a desert race they load their bikes, the kids' bikes and gear in their Toyhauler trailer and tow it with the Expedition. When just a couple of them go to a race the Silverado and trailer go.

Thank you both very much for helping my son and I hope someone recognizes the mystery heads.
I sent my son a link to this topic and asked him to read all of your information and send some more pictures of the heads. How can I get the pictures to you? My computer skills are very limited.

He will definitely understand and appreciate your compiled information because he is a mechanical engineer. In the Marine Corps he was a Harrier jet mechanic but his experience with cars is a work in progress so I'm trying to help, without being intrusive.

Will those iron Vortec heads really tolerate a 9-9.5:1 compression ratio with a mild cam without detonation problems?

Lynn, I also have a deuce. Mine is a "chin in the wind" roadster. I pulled the TH350 and replaced it with a 200 4R from Bow Tie Overdrives as you suggest and found the OD trans to be a really nice upgrade, requiring only relocating the trans mount 6" rearward, a new shifter and a change from 2.79 to 3.80 rear gears.

One reason I worry about detonation on my son's engine build is that the engine in my roadster is a sbc 350 with 70cc Edelbrock "Performer RPM" heads yielding 9.1:1 compression and a moderate Crane Camshaft (218*/230* @ 0.050). Some careful jetting and distributor tweaking was required to get good gas economy and also avoid detonation pulling a grade on a really hot day. My ancient ears don't hear the pinging if if occurs so my wife gives me an elbow in the ribs.

Lynn, a back burner project on the roadster is fabrication of a cold air source for the air cleaner. I can keep you updated on how that goes if you're interested.

Thanks again guys. I really appreciate your input.
Ray W


thank you for posting clear pictures
I looked through my rather extensive data base and found no reference to that 070421 casting number
can you post clear detailed pictures of the heads from several angles so the combustion chambers, intake and exhaust ports and rocker stud areas are clearly shown?
all sbc cylinder heads benefit from basic port and bowl clean up so I can,t imagine yours won,t also, but of course without knowing what your dealing with and some measurements I can,t say how much is likely,the cam you select will obviously effect your working or dynamic compression but I would try for at least a 9:1-9.5:1 static compression
the links and sub links should help.
measuring the valve spring clearance, spring load rates and valve sizes would also be rather useful

http://garage.grumpysperformance.co...alves-and-polishing-combustion-chambers.2630/

http://garage.grumpysperformance.com/index.php?threads/porting-can-help.462/

http://garage.grumpysperformance.co...e-springs-and-setting-up-the-valve-train.181/

http://garage.grumpysperformance.co...-vortec-heads-and-other-heads.401/#post-17237

http://garage.grumpysperformance.com/index.php?threads/rocker-push-rod-wear-issues.9815/#post-54088

http://garage.grumpysperformance.co...all-block-chevy-guide-plates.2839/#post-12739


ortid1.png

the saw tooth casting mark

ortid2.png

2.02" intake valves
ortid3.png

1.60 exhaust valves
ortid4.png

combustion chamber design
ortid5.png

lack of center intake manifold mount bolt locations
ortid6.png

the use of screw in rocker studs, rather than OEM press in studs

all show this is an aftermarket clone of the vortec head and most likely a good cylinder head


there are several different versions of even the G.M. vortec heads and several aftermarket companys supplying similar "vortec style cylinder heads" , some are very good , others are not as good so shop carefully if your buying them.
GM vortec heads
smallvorteccast.jpg

28651d1053228766-still-having-problems-problem-child-lean-miss-stumble-backfire-vortec1.jpeg


p110643_image_large.jpg

vortechpl1.jpg


smoothing the machine work produced ledges and ridges in the vortec head port and bowl area under the valve helps increase air flow rates and power
vortechpl2.jpg


vortechpl3.jpg


http://www.superchevy.com/how-to/95518-small-block-cylinder-head-porting/

http://www.superchevy.com/how-to/engines-drivetrain/sucp-0209-chevy-gm-cylinder-heads/

http://www.enginebuildermag.com/200...ts-what-you-need-to-know-to-go-with-the-flow/

http://carprogrammer.com/Z28/CylinderHeads/Hot Heads, Joe Mondello, Automotive Rebuilder, March 1999.htm

http://garage.grumpysperformance.co...-vortec-heads-and-other-heads.401/#post-34996

http://garage.grumpysperformance.com/index.php?threads/the-new-215cc-vortec-heads.266/#post-35948

http://garage.grumpysperformance.com/index.php?threads/sellecting-cylinder-heads.796/#post-49711

http://garage.grumpysperformance.co...olishing-combustion-chambers.2630/#post-50247

http://garage.grumpysperformance.co...ing-tools-abrasives-sources.10683/#post-46209

http://garage.grumpysperformance.co...lve-seat-angles-and-air-flow.8460/#post-31961

http://www.superchevy.com/how-to/148-0506-gm-bow-tie-vortec-small-block-engine/

http://garage.grumpysperformance.com/index.php?threads/sportsman-ii-or-procomp.10377/#post-42862
 
Last edited:
The Science of Horsepower: Porting & Matching Heads & Manifolds.
Larry Carley, Underhood Service, November 2001

Air flow makes horsepower. The more cubic feet per minute (cfm) of air that flows through the intake ports and into the combustion chambers, the more horsepower the engine makes.

A larger carburetor or throttle body, bigger valves, a high-lift, long-duration camshaft, three-angle valve job and exhaust headers are all performance enhancements that increase air flow for more power. Add a turbocharger or supercharger and even more air is forced through the engine. But bolt-ons can accomplish only so much. To realize the utmost performance potential from a given combination of cubic inches and mechanical modifications, you also have to optimize the ports in the cylinder heads and match the ports to the runners in the intake manifold.

There are two ways to port and match cylinder heads: The right way and the wrong way. The right way is to refine the flow characteristics of the head and manifold so as much air as possible enters the cylinders at the engine’s peak power curve. Every engine is different so there’s no "standard" port configuration that is guaranteed to deliver maximum air flow on every application. The port profile that works best will be limited by the physical dimensions of the cylinder head.

Limiting factors include the size, position and angle of the stock ports; the size, configuration and angle of the valves; the thickness of the casting around the ports; and the location of the water jackets, head bolts and other valvetrain components. But other factors must be taken into account, too, such as engine displacement (big block versus small block), the engine’s bore and stroke, the shape of the combustion chambers, compression ratio, the depth and angles on the valve seats, total valve lift, camshaft profile(duration, overlap, etc.), and type of intake manifold and induction system.

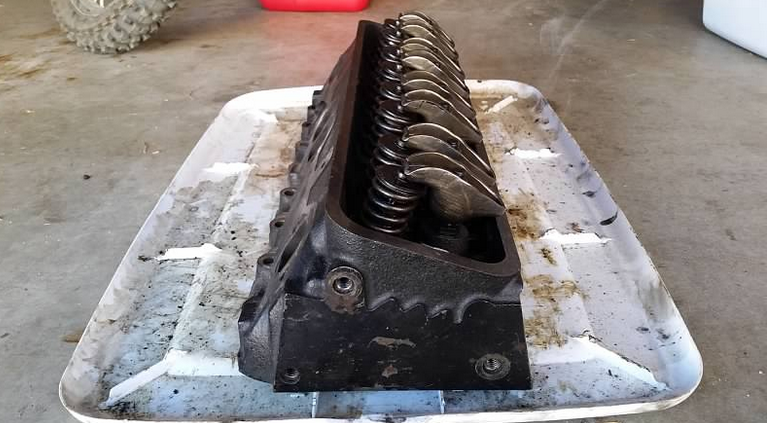
Porting can unleash hidden horsepower by increasing air flow - but it requires know-how, a flow bench and special tools to successfully pull it off.

Opening Up
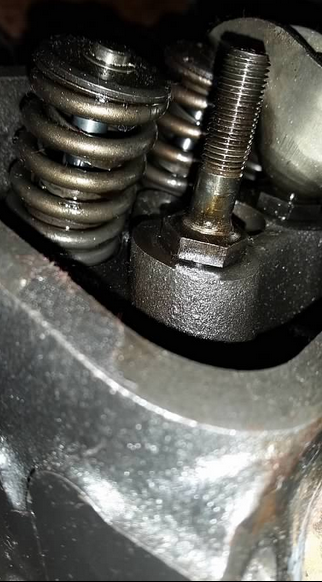
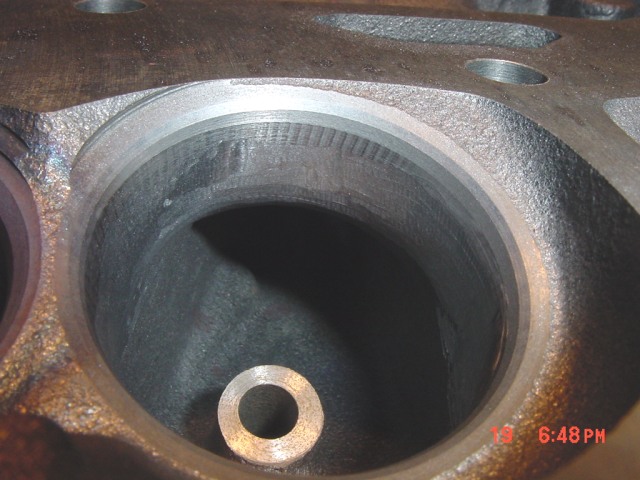
One of the basic goals of head porting is to minimize obstructions so air can flow relatively unimpeded from the throttle plate to the valves. Two things that get in the way are the valve guides and valve guide bosses. Cutting down the length of the valve guide stem and narrowing the valve guide boss can improve air flow past these obstacles. So too can using smaller diameter valve stems or valves that are necked down just above the valve head.

Bolt bosses that protrude into ports also create bumps in the ports that disrupt air flow. Grinding these flush with the surrounding port surface can also smooth out the route, provided you don’t run out of metal and grind all the way through the boss or dangerously weaken the head.

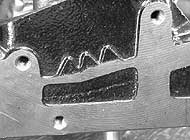
Transition areas in the port also need to be reworked so air will flow more easily around corners with a sharp radius and into the seat throat just above the valves. Sharp edges and rough castings also need to be smoothed and blended to eliminate turbulence and improve air flow.

The cross-sectional area of most intake ports becomes gradually smaller as the air moves toward the valve. This causes the air to accelerate as it approaches the valve, and actually helps ram more air past the valve into the cylinder when the valve opens. Any sudden changes in the cross-section of the port can disrupt this effect and restrict air flow. That’s why port modifications that are made in the area just above the valve must not upset the normal increase in air velocity. The same goes for the exhaust side, too, except here the cross-section of the ports gets larger as the exhaust gases flow away from the valves. Again, the secret to maximizing flow is to have a smooth transition and as few obstructions as possible.

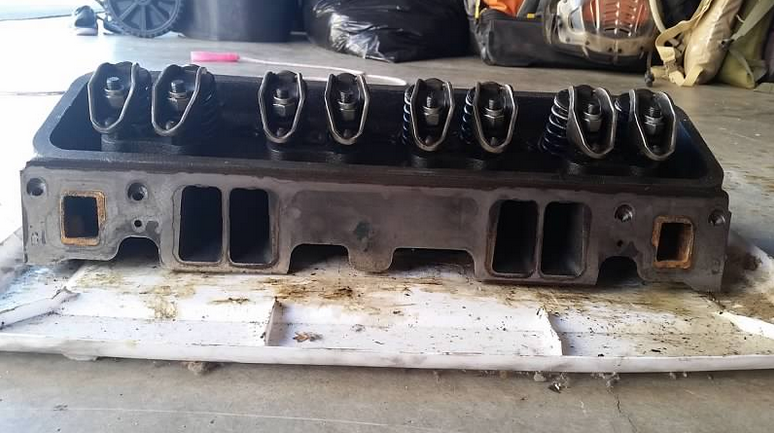
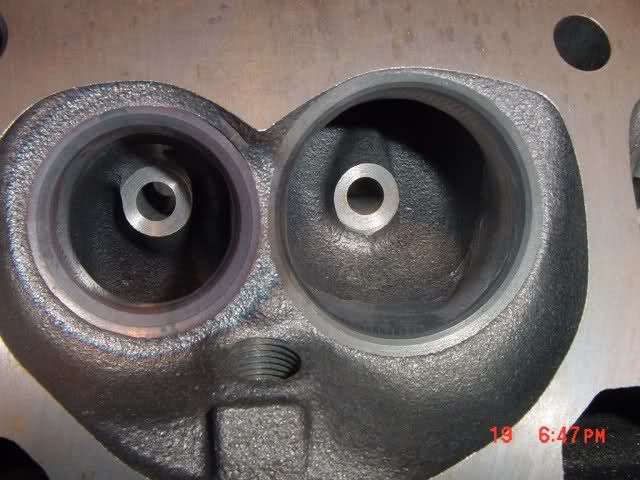
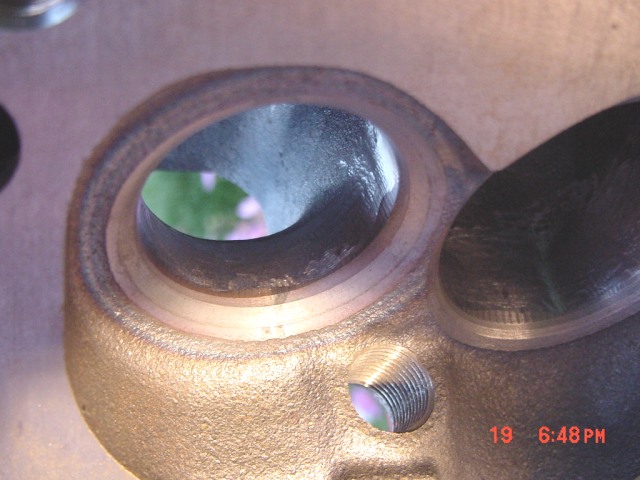
The joint where the intake manifold and cylinder head meet also is a critical area. If the runners in the intake manifold are not perfectly aligned with the ports in the head, sharp edges can interrupt normal air flow and impair performance. Matching up the ports so there’s a smooth transition from manifold to head will ensure maximum air flow. The same goes for exhaust ports. The head ports must be aligned with the header openings so the exhaust gases can pass freely out of the engine without encountering any sharp edges or obstacles.

The right way to improve air flow is to locate the best places to remove metal (or in some cases, to even add metal). This takes experience (knowing what kind of changes work and what ones don’t), using the right tools (properly shaped cutters for reworking the various portions of the ports, valve pockets and manifold), and a flow bench to measure the changes in air flow produced by the various changes that have been made.

The wrong way to go at it is to grab a die grinder and start hogging out the intake and exhaust ports with no idea of where you’re going or what you’re trying to accomplish other than to open up the ports.

Bigger is not always better. Grind away too much metal and you may end up ruining the casting if you cut into a water jacket. But even if you don’t grind all the way through, removing metal in the wrong places can actually end up hurting air flow more than it helps.

Here’s why: The secret to maximizing air flow and engine performance is maximizing volumetric efficiency and air flow velocity.

Big ports with lots of volume will obviously flow more air than a smaller port with less volume - but only at higher rpm. A lot of people don’t know that. At lower rpm and mid-range, a smaller port actually flows more efficiently and delivers better torque and performance because the air moves through the port at higher speed. This helps push more air and fuel into the cylinder every time the valve opens. At higher rpm, the momentum of the air helps ram in more air, so a larger port can flow more air when the engine needs it.

The ultimate port would actually be one with a variable cross-section that’s small at low rpm for high air flow velocity and gradually opens up for more air flow as engine speed increases. That’s sort of the idea behind staged split-plenum intake manifolds that open up and feed more air into the engine at higher rpm.

The bottom line is this: To realize the most power and performance out of an engine, air flow has to match the breathing requirements of the engine within the engine’s rpm range where it is designed to make the most power.

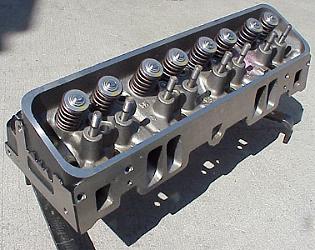
A set of killer aftermarket heads with huge ports and valves that are engineered to flow more than 500 cfm with a 0.800" valve lift at 8,000 rpm may be the hot setup for a 585-cubic-inch Pro Stock engine, but would be overkill on a street-driven, big-block Chevy that has a less radical cam, gearing and a redline of only 5,500 rpm. That’s why big-block Chevy heads with smaller oval ports work better on the street, and big-block heads with larger rectangular ports perform better on the strip.

Therefore, when choosing either an OEM cylinder head or an aftermarket head, you should try to match the port size with the engine’s power curve and rpm range. Don’t waste your money bolting a set of high-flow heads onto an engine that can never realize the head’s full performance potential because of limitations in gearing, the valvetrain, cam specifications or carburetion. Likewise, if you’re going all out, then start with the highest flowing heads you can find and try to add even more cfm potential by massaging the ports and manifold.

Kevin Self of Self Racing Heads & Engines, Durant, OK, said CNC (computer numeric controlled) machined aftermarket heads are a great place to start because the port configurations are based on designs that have already been proven to deliver maximum air flow. Even so, there’s always some room for improvement. Self said he can usually find an additional 25 to 30 cfm improvement in air flow in many CNC heads by tweaking the head on a flow bench.

"One of the advantages of CNC heads is that they all have very consistent flow characteristics. But, because they’re all the same, you don’t necessarily gain any advantage over a competitor if he buys the exact same set of heads as you. If you can’t improve the head, you’ll have to find more horsepower someplace else, otherwise you’re not going to go any faster than the next guy." CNC machining is much faster than hand grinding, and produces ports that have uniform profiles. But someone still has to develop the initial profile by hand and then prove it works on a dyno and on the track.

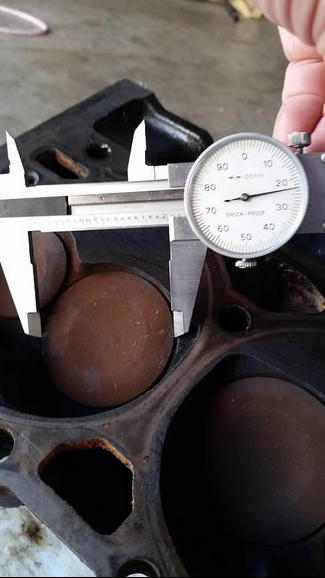
As for port alignment, Self said the runners in the intake manifold should be about .050" smaller than the port opening in the cylinder head to allow for any misalignment that occurs during engine assembly.

"We’ve developed a special ‘Port Intruder’ kit that allows you to narrow the thickness of the wall between the intake ports on small-block Chevy heads without increasing the risk of cracking the manifold or deck area of the head. The kit allows the use of a shorter head bolt between the ports, eliminating the need for a head bolt or bolt sleeve between the ports. The head must be machined to accept the Port Intruder plugs. This change alone can increase air flow up to 30 cfm," said Self.

Bob Irvin of M2 Race Systems, Farmingdale, NJ, said his company specializes in CNC-machined cylinder heads. "We use outsiders to develop the port configurations, then digitize the ports for reproduction on customers’ cylinder heads." Irvin said he charges a one-time fee of $2,000 to digitize and program a port configuration, and $1,200 to $1,500 to CNC machine a pair of cylinder heads (which includes valve seat and guide work, too). "CNC is foolproof and is much faster than trying to port a set of heads by hand from scratch. But there’s no reason why you can’t do additional finishing on the heads after they’ve been CNC machined to find some extra power," said Irvin.

Where It Counts
As a rule, the roof of an intake or exhaust port has much more influence on air flow than the floor or sides of the port. The greatest gains in air flow can often be realized by removing metal from the top of the port only and leaving the sides and floor relatively untouched. This can have the same effect as using a different head casting or an aftermarket head that has the ports relocated slightly higher to give a straighter shot at the valves.

Additional gains in air flow can often be found by carefully smoothing and blending the short-side radius in the port floor where the port bends toward the valve seat. This helps air round the corner more easily for improved air flow.

In the area where the intake manifold and head are bolted together, using a template to scribe alignment marks on the head and manifold can serve as a guide for hand grinding and smoothing this area.

Mr. Gasket Company’s plastic "UltraSeal Port Gauge" templates for small-block and big-block Chevys can be used for this purpose, and are much more accurate than using a gasket as a template.

Expert Advice
Joe Mondello, who’s name has long been synonymous with high-performance cylinder heads, said a lot of people who don’t really know what they’re doing jump into head porting and make big mistakes. "They take out metal where they shouldn’t be taking out metal and end up with ports that are too big and don’t flow as well as they should. The shape of the port is far more critical than the overall size of the port," stated Mondello.

Mondello, who teaches the secrets of building, porting and flow testing high-performance cylinder heads at his Mondello Technical School in Paso Robles, CA, said he also sells special porting tools that are designed for every part of the cylinder head.

"When you’re doing the short-side radius of a port, you don’t want to take out too much metal. You just want it to be nice and smooth," instructed Mondello. "Trying to get around the short-side radius bend is difficult unless you use a cutter that’s designed for that purpose. "When cleaning up the bowl area, blending alone won’t improve flow unless you also remove some metal to increase volume. Many people don’t do valve bowls properly. You have to blend everything from the base of the valve guide to the base of the primary valve seat, and then do a 3-angle valve job. Otherwise you’re just scratching the valve bowl and ports, and aren’t really gaining anything."

As for matching ports, Mondello said not to use gaskets as a guide because there’s too much variation in gaskets and most aftermarket gaskets have openings that are up to 1/8" larger than the port runners. If the port is enlarged to match the gasket, it can reduce air velocity and hurt performance. "We teach port matching, not gasket matching. I pick the largest port, match all the others to it, then do all the work inside the port to maximize air flow around the pushtube turn because that’s where the biggest restriction is in the port," said Mondello.

"The largest gains in horsepower are found on the intake side by raising the roof of the port (the side closest to the valve cover) by .100" to .175". The amount of metal in the top of the intake manifold runner will determine how high you can raise the roof.

"On late-model Chevy Vortec heads, you don’t want to change the shape of the port much. The best advice here is to clean up and equalize the ports so they have the same height and width. On small-block heads, there’s a large pocket right below the rocker arm stud in the roof of the port. This should be filled in with epoxy to improve air flow. Doing that will give you an extra 15 cfm.

"On exhaust ports, if you tried to match the port to a header gasket you’d probably destroy the port. The secret of exhaust porting today is not how big the port is, but the shape of the port and the velocity of the exhaust flowing through it. We don’t even flow test exhaust ports anymore because most heads have plenty of flow capacity as is. All we care about is velocity and pressure. "Nearly every single exhaust port today, except for Ford 302, 5.0L and 351 heads, are big enough. The only thing we do to enhance air flow is raise the roof of the port about 0.100", depending on the headers used. We don’t touch the floor of the exhaust port or the sides unless we have to get rid of a hook, seam or rough area in the casting," said Mondello. "Any time you start making the ports bigger on the exhaust side, you usually end up killing air flow in the head. I’m talking a reduction of 25 to 30 cfm. All you need to do is clean up the valve bowl, blend the short-side radius, and raise the roof slightly. Don’t touch the floor or walls."

Mondello explained that CNC machining and hand grinding are two different techniques for porting heads. "Everybody says CNC is the way to go. But you first need someone who can take a raw casting and rework it so it has good air velocity and flows well. Then you can digitize it and reproduce it with CNC tooling on other heads. There are a lot of CNC profiles being sold today, but I think most have some room for improvement. Additional hand grinding can usually pick up another 10 to 12 or more cfm."

As for polishing, Mondello said a smooth finish is great for exhaust ports, but a rougher finish flows better on the intake side. He recommends using 300- or 400-grit paper followed by a Cross Buff for polishing exhaust ports, and 50- or 60-grit paper for the intake ports. A slightly rough surface texture in the intake ports and intake manifold runners creates a boundary layer of air that keeps the rest of the air column flowing smoothly and quickly through the port.

DIY Porting
Though the greatest gains in horsepower will be realized only when heads are flow tested and professionally ported, do-it-yourselfers who are racing on a limited budget can still do some basic porting themselves to improve air flow and increase the performance potential of their engines.

The technical staff at Standard Abrasives (www.sa-motorsports.com) have an online DIY Cylinder Head Porting Guide complete with photos that provides detailed step-by-step instructions for head porting and manifold matching.

All you need are a basic porting kit (which includes various grinding stones and abrasive rolls), some common tools and some free time (typically 10 to 12 hours to port a pair of V8 heads). A basic DIY port job should focus on reducing restrictions caused by steps that may obstruct intake air flow as it transitions from the intake manifold to a smaller intake port entry in the head. These restrictions could be casting bumps, ridges or other marks, such as those on port floors or roofs, sharp edges, such as those around the valve guide bosses at the top of the valve pockets, and the area where the intake port floor curves down to the valve seat.

The job itself consists of six steps:
1. Enlarging and matching the intake port entrances;
2. Smoothing the intake short-side radii, valve guides and valve pockets;
3. Smoothing the exhaust short-side radii, valve guides and bowls;
4. Polishing the exhaust ports and bowls;
5. Polishing the combustion chambers (to reduce carbon buildup)
6. Matching the intake manifold ports to the head.

Some porting suggestions offered by Standard Abrasives include:
• Use an air-powered die grinder with a maximum speed of 18,000 to 20,000 rpm and a 1/4" collet. An electric die grinder is OK, but you have to be careful to limit the grinder’s speed.
• Wear proper eye protection. Grinding throws off a lot of chips, and you don’t want any debris to end up in your eyes. Good lighting is also essential so you can see what you’re doing, and gloves are recommended to protect your hands.
• To keep grinding stones from clogging when working on aluminum heads, lubricate the stones with WD-40.
• To figure out how much metal needs to be removed to match up the ports, apply machinists bluing to the gasket template and bolt the template to the head and manifold. Then scribe the outline of the port opening on both the head and manifold. Remove all metal inside the scribed lines.
• When you start grinding, use a rotary round grinding stone for maximum metal removal. As you approach the scribe marks you’ve made, blend or feather the larger port into the remaining port by progressively removing less material as you move farther down into the port. In most cases, you want to grind about 1" to 1.5" into the port.
• Once the port has been ground to size, switch to a smaller diameter conical rotary stone to profile the small radii at the corners of each port.
• To finish the port, use the tapered rolls of abrasive, starting with 40 grit, then 80 grit.
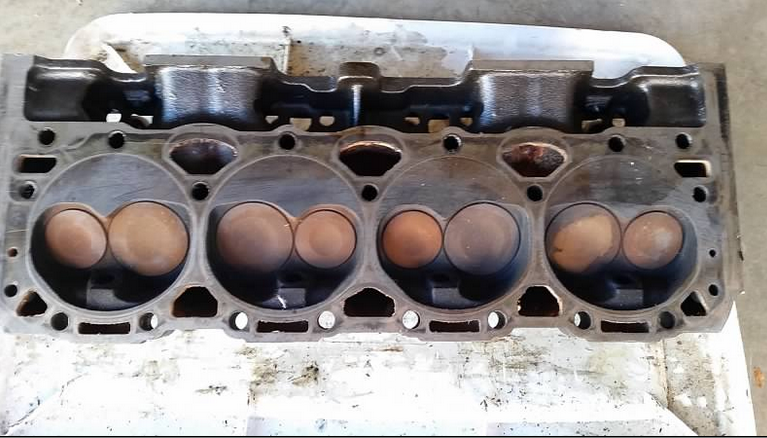
• The point where the intake port floor curves down to the valve seat is known as the "short-side radius." From an air flow standpoint, this area is the most critical in any port. Smooth that spot and you can usually realize a significant increase in flow through the port. On most production heads, the short-side radius will be sharp-edged and rough. The goal here is to soften those sharp edges and smooth out the roughness.
• Bowl work includes blending the area under the valve seat. The valve throat, which is the smallest diameter in the valve pocket just above the valve seat, should be about 85% of the valve diameter. If the throat is smaller than that, use a combination of the rotary stone and cartridge rolls to open it up to the 85% figure.
• Exhaust ports flow best with a polished finish. A smooth finish also helps reduce the buildup of carbon deposits. Use a 120-grit or finer flap wheel after using the 40-grit and 80-grit abrasives, then polish with the medium Cross Buff and finally the fine grade Cross Buff.
• In most cases, you should not attempt to match the exhaust ports in the head with the ports in the exhaust manifold or headers. Many stock exhaust manifolds, and virtually all tube headers, have larger port sizes than the heads. You want that "step" from the port to the larger header tube or exhaust manifold because, as pressure pulses flow back and forth in the exhaust system, it acts as a "reversion dam" by resisting back flow of exhaust gases into the port.
 
We really appreciate your input on the heads. We have some new Crane Cams roller tip rocker arms from the days when Crane was a thriving company and those heads already have screw in studs. Based on that, it seems like a good idea to use those Crane rocker arms and guide plates unless there is a reason not to. What do you think?

I made an adjustable length pushrod in my home shop to figure out what length pushrod is required when mixing parts like this. I'm trying to remember how exactly I did it but I used a solid lifter for checking even though hydraulic lifters were planned on my roadster engine build (memory's the second thing to go). I think I factored in the effective difference in length between the solid lifter and the hydraulic lifter with the plunger down 1/2 turn on the rocker arm stud.

Gabe, it doesn't get as hot where my son lives in Orange County as it does up in Redding but he'll want to build in a compression ratio that won't cause trouble on hot days. I did study Grumpy's link on cold air intake ducting and I'll suggest that to Brian. I know it works from having done it on my '71 Dodge van (that I still have) decades ago.

I last assembled an engine using non-stock heads and rocker arms about 12 years ago and that's when I did that push rod length figuring. That was a block like the one my son is using (4-bolt 70s era 350 Chevy truck), Edelbrock Performer RPM 70cc heads, Comp 1.5:1 roller tip rocker arms and a moderate Crane camshaft. That engine is in my street rod roadster and is doing fine with a little over 20K miles on it now.

At age nearly 71 my memory's a little vague on how I did it. I do recall using a sharpie to color the tip of the valve stem to center the travel of the rocker arm roller. What I don't exactly remember is how I dealt with a hydraulic lifter's tendency to compress under valve spring pressure when doing the length check by turning the rotating assembly through a couple of revolutions. I think I used a solid lifter with a spacer to match the effective length of a hydraulic lifter with the plunger down 1/2 turn of the poly lock.

That was all done before I discovered this forum, so I had to use my own creativity in figuring it out. It worked out OK but I'm always looking for better ways to do this stuff.

Ray W


you might want to read thru these links and sub links it will help you avoid costly mistakes
viewtopic.php?f=52&t=1376&p=3033#p3033

http://www.lunatipower.com/Tech/Valvetr ... metry.aspx

http://garage.grumpysperformance.co...alves-and-polishing-combustion-chambers.2630/

viewtopic.php?f=52&t=181

viewtopic.php?f=52&t=9687&p=48105#p48105

http://www.summitracing.com/search/...d-length-checkers?autoview=SKU&ibanner=SREPD5
Proform Pushrod Length Checkers 66789 SBC 3/8" rocker studs

Proform Pushrod Length Checkers 66790 SBC 7/16" rocker studs

Proform Pushrod Length Checkers 66806 BBC 7/16" rocker studs


prctool.png


http://garage.grumpysperformance.co...nd-check-info-you-might-need.5931/#post-18267

http://www.summitracing.com/search/...d-length-checkers?autoview=SKU&ibanner=SREPD5

Proform Pushrod Length Checkers 66789 SBC 3/8" rocker studs

Proform Pushrod Length Checkers 66790 SBC 7/16" rocker studs

Proform Pushrod Length Checkers 66806 BBC 7/16" rocker studs


http://garage.grumpysperformance.co...swap-in-1-6-1-ratio-rockers.10671/#post-46039


http://garage.grumpysperformance.co...e-springs-and-setting-up-the-valve-train.181/

http://garage.grumpysperformance.com/index.php?threads/rocker-push-rod-wear-issues.9815/

http://garage.grumpysperformance.co...1-6-1-ratio-rockers-and-the-pushrods-rub.198/

http://garage.grumpysperformance.co...ind-height-060-safety-margin.4957/#post-13739


http://garage.grumpysperformance.co...e-train-clearances-and-problems.528/#post-668
 
http://www.strokerengine.com/SBCHeadsFlow.html

http://purplesagetradingpost.com/sumner/techinfo/heads1.html

http://www.hotrod.com/how-to/engine/ccrp-1209-eight-budget-sbc-head-shootout/

http://www.chevydiy.com/ultimate-chevy-big-inch-small-block-cylinder-heads-cheat-sheet/


_______________________________________________________________

Intake Port cc & CFM @. 500" Lift

Chevrolet Production 441 Iron Head 155/201

h441.jpg
The 882 head may have out-flowed this head but with the addition of larger 2.02-inch intake valves and some decent pocket port work these heads will out flow the 882’s. Keep in mind that with a small 155cc port volume these heads are great for making torque.

_______________________________________________________________

Chevrolet Production Iron 882 Head 151/205

h882.jpg
This head had the smallest port size of all the heads we tested. A set of 2.02/1.60-inch valves can be swapped in but be aware that without blending in the short side radius, the results usually find lost airflow.

_______________________________________________________________

Chevrolet Production 462 Iron Head 156/212

h462.jpg
This head was a small chamber head used on 327ci motors until the end of 1968. The flow can be improved a little with larger valves and port work but the additional cost of this is impractical in comparison to what you can by some other aftermarket casting for.

_______________________________________________________________

Chevrolet Production Vortec Iron Head 885 170/239

hvortec.jpg
This head can be seen as a sleeper when compared to other GM production heads. It outflows the LT-1 aluminum Corvette head on the intake side, plus its mid lift numbers are very impressive. This head is perfect when iron heads are required. GM designed this head and put it on trucks as well as on the later Impala SS but with a different intake bolt pattern. As for production pieces these are one of our favorites.

_______________________________________________________________
Chevrolet Production L98 TPI Aluminum Head 163/196


hL98.jpg
This aluminum head was used on the Corvette TPI engines from the mid-Eighties until the LT-1 1992 motors were introduced. The 882-iron head out-flowed this head across the board. This piece is not our first choice for a performance head considering that the largest valve this head fits is a 2.00/1.55-inch combination and it has a 58cc chamber.

_______________________________________________________________

Chevrolet Production GM LT1 372 Aluminum Head 170/214

hLT1.jpg
The LT-1 head was the next generation head developed for the small blocks after the L98 head. This head uses a reverse-cooling system, which means it can not be swapped onto older blocks. The 0.400-inch airflow numbers are great and with some port work, the addition of 2.00/1.55-inch valves can really wake these heads up.

_______________________________________________________________
Chevrolet Production LT4 Aluminum Head
195/250

hLT4.jpg
The LT-4 is substantially different from the LT-1 casting, and the flow numbers explain why. The larger intake ports are definitely a contributing factor. For a production head these babies put up some pretty good flow numbers. Remember, like the LT-1 the LT-4 can only be used on a reverse cooling system block.
_______________________________________________________________
Chevrolet LS1 Aluminum Head 204/240


hLS1.jpg
GM won’t be left out of category 3 with these heads. This head has great 0.400-inch lift numbers as well as a good E/I ratio. They also feature a more flat valve angle (15 degrees) in order to promote a better combustion chamber that’s shaped like a kidney to help direct combustion and reduce possible detonation. Remember that this head will not interchange with pre-‘93 small-block heads.


_______________________________________________________________

AirFlow Research 180 Aluminum Head 181/250
hAFR%20180.jpg
This head is the smallest of AFR’s line. It is intended for engines up to 350ci. The flow numbers are especially impressive on the exhaust side of this head, leading us to believe that a single pattern cam may be the best choice here. The E/I relationship is outstanding with and 84%, almost higher than any other head in this category.

_______________________________________________________________
AirFlow Research 190 Aluminum Head 191/262


hafr%20190.jpg
This head has the best flow numbers of all the category 2 heads. Offering great flow throughout the entire lift range you can see this head doesn’t just put up one big number at maximum lift. If you’re looking for great flow from a mid-sized cylinder head this is definitely one of the top contenders.

_______________________________________________________________

AirFlow Research 210 Aluminum Head 215/271
hAFR%20210.jpg
Here is an extraordinary head. It has larger intake ports but with 240cfm at 0.400-inches of lift who cares? The E/I ratio is an incredible 75% making it hard to find anything wrong with these heads. This head may be a little much for a mouse motor but it is perfect for a big mouse somewhere in the 383 inch range up.
_______________________________________________________________
Brodix-8 Pro Aluminum 181/254


hbrodix.jpg
This head features larger 2.08/1.60-inch valves combined with a 181cc-intake port. With smaller intake port this head flows outstanding at 220cfm by 0.400-inches of lift and even better by 0.500-inches. Combined with a mid-sized port this, this is an outstanding choice for a strong 350ci or 383ci motor.

_______________________________________________________________


Brodix Track 1 Aluminum Head 216/246

hbrodixt1.jpg
The Track 1 head may be down on the numbers at 0.400-inch lift but it’s really competitive once it sees the 0.500-inch lift point. Add some short-side radius work and wow you’ve got a killer head. If you have a set of these heads there’s definite potential.

_______________________________________________________________

Brodix -11X 220 Aluminum Head 216/246

hbrodixt1.jpg
Brodix offers this large-port, 23-degree valve angle, small-block head as one of its largest ports in the stock valve-angle lineup. The low lift numbers are down a bit but in comparison to some of the others once the lift numbers increase you can see there is some serious airflow. These come available with minor or major port work depending on how you order them.

_______________________________________________________________


Brodix -1X Aluminum Head 223/278

hbrodix223.jpg
The Brodix -1x heads feature a 40/60 valve spacing, meaning the centerline of each valve has been moved away from its standard location to accommodate a larger diameter valve and move both valves away from chamber walls for unshrouding. This means special offset shaft mounted rockers are needed and available from Brodix. It seems like a lot of R & D went into these bad boys and the numbers show it.

_______________________________________________________________

Canfield Aluminum Head 195/258

hcanfield%20194.jpg
Canfield only sells this head with valves. One area to pay close attention to is the excellent low and mid-lift numbers. This head actually out-flows the Category 3 heads from 0.050- through 0.400-inches of lift.

_______________________________________________________________

Canfield 220 Aluminum Head 223/260

hcanfield220.jpg
This race oriented small-block head requires the use of 0.150-inch offset intake rocker arm to accommodate the repositioned intake valve. The idea of spreading the valves apart is to increase valve diameter and improve flow. This head has 2.08/1.60-inch valves and probably works best on larger displacement mouse motors around 383-plus cubic inches.

_______________________________________________________________

Dart Iron Eagle S/S 165/210

hdartss.jpg
Dart offers everything from street performance heads to full race heads. This Iron Eagle piece is the smallest head at 165cc port volume but its just what you need when building a stout street motor that sees occasional strip time. Compare its flow numbers to others and you can be the judge on this one.

_______________________________________________________________
Dart Iron Eagle 180 174/210


Dart%20180%20Heads.bmp
This head is also a big brother but to the 165cc Dart Iron Eagle head. The 180cc head reveals a respectable intake flow curve and an outstanding exhaust port. This head comes in many different combinations. You can order the head with straight or angle plugs, a 64cc or 72cc chamber, and in iron or aluminum. You will notice this head has better mid lift intake flow figures but the same full lift numbers as the 165cc heads, however the exhaust side flows better.

_______________________________________________________________

Dart Iron Eagle 220 220/258

hdart%20conq.jpg
The Dart Iron Eagle head here offers a budget alternative to the aluminum Conquest head. With similar flow numbers the only real big difference here is iron verse aluminum and cost. This head is offered in 200 or 220cc intake ports and with 2.02 or 2.05-inch intake valves.

_______________________________________________________________

Dart Conquest Iron 220 220/252

hdart220.jpg
This head really likes to flow at lifts above 0.500-inches. The E/I ratio at 0.400-inch is a very good 72% and 68% at 0.500-inches. This head comes machined for both center-bolt and perimeter-style valve covers. The Conquest can be optioned with 200 or 220cc intake ports, valves up to 2.08/1.60, and in 64 or 72cc chamber sizes.

_______________________________________________________________
Dart Pro 1 Aluminum 215 221/253


hdartpro1.jpg
This is perhaps one of the most versatile heads out there. While the low lift numbers don’t stand out, the higher lift numbers are on par with the rest of the heads on the market. This head is definitely best on high winding motors where consistent rpm is what wins a race.

_______________________________________________________________

Dart Iron Eagle 230 229/254

hdart229.jpg
This is the largest of the Dart Iron Eagle series heads. They perform best on motors above 400ci-inches and with cam lifts above 0.500-inches lift. The E/I ratio is acceptable and the castings are made of good quality. These heads flow well and do not really require too much handwork to improve airflow.

_______________________________________________________________
Edelbrock Performer Aluminum 166/235


hedel%20perf.jpg
This head may first appear subtle in comparison to its flow numbers but don’t be fooled. The 166cc port makes for great torque and the E/I flow relationship is good. This head is perfect for a street/strip application. In our own personal experience we had a 355ci motor with 9:1 compression, a streetable Comp Cam (DEH 275), and an Edelbrock RPM manifold. With this combination we were able to achieve 420hp at 6,000rpm and 440 lb-ft of torque at 4,250 rpm.

_______________________________________________________________
Edelbrock Performer RPM Aluminum 170/237


hedelRPM.jpg
The Edelbrock RPM head is the big brother to the Performer version. It still retains a small 170cc intake port volume providing great torque down low where it’s needed. The E/I percentage is no less than 70% with much higher numbers in the low-lift areas. This head is a step up from the Performer, flowing more air, which in return will make more power on the top end.

_______________________________________________________________
Edelbrock E-TEC 170 Vortec Aluminum 170/240
hetec.jpg
With the tremendous popularity of GM’s Vortec head, Edelbrock decided to design a head around the GM casting. This head features a 1.94/1.55-inch valve combination, and different port configuration allowing it to out perform the stock production Vortec head. However, the E-TEC heads are aluminum typically costing more than the production GM heads.

_______________________________________________________________

Edelbrock E-TEC Vortec 200/252


hetec%20200.jpg
This head is the next step up from the smaller 170 E-TEC. It features larger valves and bigger intake ports. However, a Vortec style intake manifold must be matched with these heads. Up to 0.500-inches these heads don’t really out flow the stock Vortecs. On the other hand their exhaust ports are extremely efficient which help improve performance throughout the entire power curve. They are also aluminum, which can allow more compression with out detonation.

_______________________________________________________________


Edelbrock Victor Jr. Aluminum 219/255

hedel210.jpg
This is an impressive head. It features a kidney shaped combustion chamber keeping the combustion moving, the flow is awesome from 0.400-inches all the way up to our tested 0.700-inches, and the E/I ratio is an amazing 81%. We see a head that flows some serious air and likes high lift roller cams.

_______________________________________________________________

Holley 300-570 Aluminum 172/232

hholley.jpg
This head from Holley comes with angled plugs and 69cc chambers, which are a big change from the stock 76cc smog chambers. The combustion chamber is typical of a late model design with a kidney shape that increases combustion turbulence lessening the possibility of detonation.

_______________________________________________________________

Holley SysteMAX Aluminum 186/242

hholley186.jpg
This head is very similar to the -8 Brodix but it appears to flow a little better on the exhaust side. Again this head looks like it offers great torque potential with its well-proportioned 186cc-intake runner

_______________________________________________________________

Pro Action Iron 220 225/239

hprotop1.jpg
These heads can be purchased in many different intake port sizes. They are available with 180, 200, 220, and 235cc intake ports. They also feature a 64cc and 72cc chamber for your desired compression levels.

_______________________________________________________________

Pro Action Iron 235 Iron 245/242

hpro235.jpg
These are the largest of the Pro Action lineup. The heads are advertised as 235cc intake ports but in our testing we found them to be 245cc’s. These heads are definitely for use on big mouse motors that like to see some rpm.

_______________________________________________________________

Trick Flow Specialties 195 195/250
hTF%20196.jpg
These heads may not flow the biggest numbers but there should be little question regarding their performance that they can perform well. In CHP’s Nov. ’99 issue they were bolted on a mild 383ci motor and were able to pump up peak engine power by 15.5%. These heads offer some of the best power for the dollar on a mild small Chevy.

_______________________________________________________________

TFS Twisted Wedge 200/254

htfs%202.jpg
In an attempt to be different for the better, this TSF twisted Wedge head changed the valve angles from 23 degrees to 13 degrees. The really big difference here is what the exhaust side of this head is capable of. Only one other head (AFR 210) was even close on the exhaust side. The E/I was also a very respectable 77%. This head really can wake up your engine.

_______________________________________________________________

World Products Iron S/R Torquer 170/225

hworldsr.jpg
 
Back
Top