You are using an out of date browser. It may not display this or other websites correctly.
You should upgrade or use an alternative browser.
You should upgrade or use an alternative browser.
Wisps Of Smoke Coming From Breather
- Thread starter DorianL
- Start date
Yeah- that was actually the epiphanyLike 302 said they were put on there they will come off


Now just the corner bolts which could be a PITA. For some reason they are Allen heads.
Then we drop pan and inspect the bores. The should be new and still sporting a cross hatch.
Oil pan should be interesting to inspect was well.
Then we pull the damper and the timing cover... and we find out what cam is in here.
Then we drop pan and inspect the bores. The should be new and still sporting a cross hatch.
Oil pan should be interesting to inspect was well.
Then we pull the damper and the timing cover... and we find out what cam is in here.
And there we have it.
The oil pan was about glued on there and I had to get medieval to drop it. But it looks clean and new. Nothing in the oil either. Nice and clean.

The underside looks clean and new. Fresh crosshatch. Pistons look new. Eagle rods. Good looking bolts.
I’m just a bit concerned by the coloring.


I think I do believe the guy when he said the motor has less than 1000 miles on it.
The oil pan was about glued on there and I had to get medieval to drop it. But it looks clean and new. Nothing in the oil either. Nice and clean.
The underside looks clean and new. Fresh crosshatch. Pistons look new. Eagle rods. Good looking bolts.
I’m just a bit concerned by the coloring.
I think I do believe the guy when he said the motor has less than 1000 miles on it.
busterrm
solid fixture here in the forum
Looks pretty good, has cap screw rods, those look like speed pro hyperuetectic pistons. Still see some of the cross hatch in that one cylinder! What coloring are you talking about Dorian? Are you talking about the discoloration on the small end of the rods, that may be because they are press fit pins, you have to put them in a heater to warm the end of the rod so the pin slides in and then when it cools its locked in place?
Other than that, I think it looks very good, clean and looks like good quality components were used to build it.
Other than that, I think it looks very good, clean and looks like good quality components were used to build it.
busterrm
solid fixture here in the forum
Thats exactly what I was going to suggest, I use those little fellows a lot in hard to get places. those socket head wrenches and a racheting box end wrench are a life saver sometimes.View attachment 14881
I realized overnight that the bolts could not be on there tight and these might be thin wall... 10 minutes, maybe ?
btw, if you buy an engine you did not assemble and you have the oil pan off,
before you re-install the oil pan, on any reasonably newly rebuilt engine,
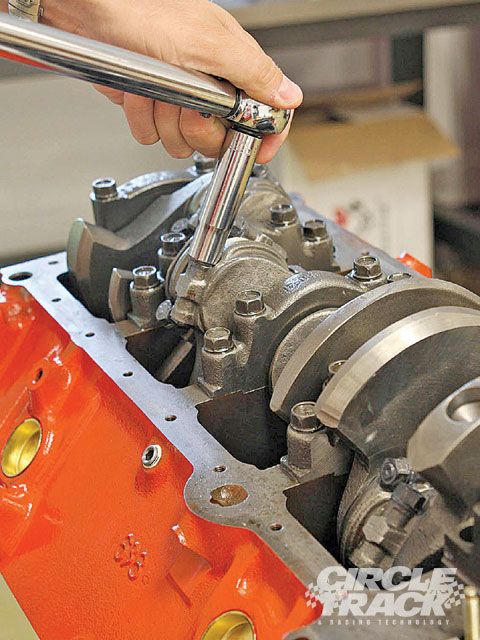
get out your torque wrench and verify the rod bolt torque is consistent,
its not all that rare for someone to forget to go back over the rod bolts torqueing them to a consistent value,
or for a bolt to loosen a bit if it was not properly torqued,
this may prevent future issues you could easily prevent in doing so.
just start tightening a couple and see if they are consistently torqued.
don,t get crazy just verify
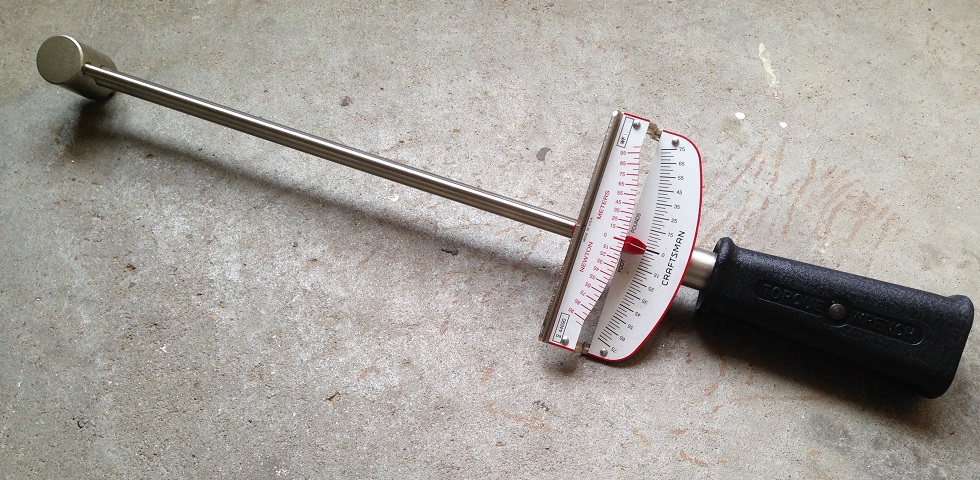
many guys prefer to use a torque beam deflection torque wrench to check that.
you may want to look up the correct torque value for the rods used if you know.
but its likely close to 55 ft lbs, as you check, they should all be consistently torqued to a similar value
https://www.amazon.com/Craftsman-9-...hvlocphy=&hvtargid=pla-4584413735823572&psc=1
https://www.lowes.com/pd/Presa-3-8-in-Drive-Beam-Torque-Wrench-10-ft-lb-to-80-ft-lb/1002330568
before you re-install the oil pan, on any reasonably newly rebuilt engine,
get out your torque wrench and verify the rod bolt torque is consistent,
its not all that rare for someone to forget to go back over the rod bolts torqueing them to a consistent value,
or for a bolt to loosen a bit if it was not properly torqued,
this may prevent future issues you could easily prevent in doing so.
just start tightening a couple and see if they are consistently torqued.
don,t get crazy just verify
many guys prefer to use a torque beam deflection torque wrench to check that.
you may want to look up the correct torque value for the rods used if you know.
but its likely close to 55 ft lbs, as you check, they should all be consistently torqued to a similar value
https://www.amazon.com/Craftsman-9-...hvlocphy=&hvtargid=pla-4584413735823572&psc=1
https://www.lowes.com/pd/Presa-3-8-in-Drive-Beam-Torque-Wrench-10-ft-lb-to-80-ft-lb/1002330568
Last edited:


the timing set looks new Id most likely reuse it.
you really need a cam button with a roller cam
https://www.jegs.com/i/Comp+Cams/24...4579397212853732&utm_content=Other Categories
you really need a cam button with a roller cam
https://www.jegs.com/i/Comp+Cams/24...4579397212853732&utm_content=Other Categories
Loves302Chevy
"One test is worth a thousand expert opinions."
You did get a nice engine there, with quality work.
I found this on your cam: https://www.chevelles.com/threads/need-help-identifying-cwc-camshaft.556625/#post-5337929
230/230 .480/.480 109 This is NOT a small cam.
1-piece oil pan gasket that requires no sealants - I guess I am not the only one that can get thesed to seal.
You see how those oil pan bolts have sealer on them? That's so they don't vibrate loose, but you need to use sealant on the 2 back corner bolts. If you don't you will have an oil leak there, or so I was told.
I'm glad you overcame your paranoia about those little 1/4-20 bolts. Did you think that they were tightened like tractor-trailer lug nuts?
You are planning to replace the cam with a roller? I hope you kept the lifters in order from this cam.
Now it's time to make some measurements so you can select a cam that suits the way you want to drive this car.
busterrm
solid fixture here in the forum
That does not seem to be a big cam, but it’s not small either.
I would go maybe 5 degrees less on duration(.050)for the roller cam your going to replace it with! And yes a good cam button is in order for sure! You could probably get 0.525 lift in a roller with about 225 duration!
I would go maybe 5 degrees less on duration(.050)for the roller cam your going to replace it with! And yes a good cam button is in order for sure! You could probably get 0.525 lift in a roller with about 225 duration!
I am impressed yo9u guys figured out what cam this is. My plan is to go with the Voodoo cam... the numbers look good, it was well-explained and recommended by Lunati and it's a nice hat tip to my roots.
https://www.summitracing.com/parts/lun-20120711
Duration at 050 inch Lift:219 int./227 exh.
Valve Lift with Factory Rocker Arm Ratio:0.515 int./0.530 exh.
Lobe Separation (degrees):112
I kept everything in order even though I am not planning to reuse the lifters.
https://www.summitracing.com/parts/lun-20120711
Duration at 050 inch Lift:219 int./227 exh.
Valve Lift with Factory Rocker Arm Ratio:0.515 int./0.530 exh.
Lobe Separation (degrees):112
I kept everything in order even though I am not planning to reuse the lifters.