http://www.helminc.com/helm/Result....dule=&mscsid=BJUVXMALDJKB9GQ0THUFJ5LAKTTP9VS4
ECM Fault Code List (LT5; VIN J)
Code Definition13 Left Oxygen Sensor (Open)
14 Coolant Sensor (High Temp)
15 Coolant Sensor (Low Temp)
16 DIS Fault Line Malfunction
21 TPS (Voltage High)
22 TPS (Voltage Low)
23 IAT Sensor (Temp Low)
24 Vehicle Speed Sensor
25 IAT Sensor (Temp High)
31 Cam Sensor Signal Problem
33 MAP Sensor (Voltage High)
34 MAP Sensor (Voltage Low)
36 DIS Fault Line/Missing or Extra EST Signal
41 Cylinder Select Error
42 EST System Malfunction
43 ESC System Malfunction
44 Left Oxygen Sensor (Lean)
45 Left Oxygen Sensor (Rich)
46 PASS-Key Circuit
51 MEM-CAL Problem
52 Engine Oil Temp Sensor (Low Temp)
53 System Voltage Error
54 Fuel Pump Voltage Low
55 Fuel Lean Monitor
56 Vacuum Sensor Voltage Problem
61 Secondary Port Throttle System Malfunction
62 Engine Oil Temp Sensor High
63 Right Oxygen Sensor Circuit (Open)
64 Right Oxygen Sensor (Lean)
65 Right Oxygen Sensor (Rich)
66 Engine Power Switch Voltage (High or Low)
ECM Fault Code List (L98; VIN 8)
Code Definition13 Oxygen Sensor (Open)
14 Coolant Sensor (High Temp)
15 Coolant Sensor (Low Temp)
21 TPS (Voltage High)
22 TPS (Voltage Low)
23 IAT Sensor (Temp Low)
24 Vehicle Speed Sensor
25 IAT Sensor (Temp High)
32 EGR System Malfunction
33 MAP Sensor (Voltage High)
34 MAP Sensor (Voltage Low)
41 Cylinder Select Error
42 EST System Malfunction
43 ESC System Malfunction
44 Oxygen Sensor (System Lean)
45 Oxygen Sensor (System Rich)
46 PASS-Key Circuit
51 MEM-CAL Problem
52 Engine Oil Temp Sensor Low
53 System Voltage Problem
54 Fuel Pump Voltage Low
62 Engine Oil Temp Sensor High
CCM Fault Code List
Code Definition
12 On-Board Diagnostics Operational; No Codes
13 DIC Switches Open or Shorted to B+
14 DIC Switches Shorted to Ground
16 Ignition 3 Fuse Circuit Open
21 Horn Relay Coil Shorted to B+ or CCM Internal Open
22 Rear Defogger Relay Coil Shorted to B+ or CCM Internal Open
24 Courtesy Lamp Relay Coil Shorted to B+ or CCM Internal Open
25 Courtesy Lamp Relay Coil Circuit Open or Shorted to Ground
26 LCD Blanking Control Circuit Shorted to B+ or CCM Internal Open
27 LCD Blanking Control Circuit Open or Shorted to Ground
31 LCD Data Circuit Shorted to B+ or CCM Internal Open
32 LCD Data Circuit Open or Shorted to Ground
33 Data Clock Circuit Shorted to B+ or CCM Internal Open
34 Data Clock Circuit Open or Shorted to Ground
35 Data Strobe Circuit Shorted to B+ or CCM Internal Open
36 Data Strobe Circuit Open or Shorted to Ground
37 M Clock Circuit Shorted to B+ or CCM Internal Open
38 M Clock Circuit Open or Shorted to Ground
41 Loss of ECM Serial Data Communication
51 Pass-Key - Invalid Key Detection
52 Pass-Key - Key Detection Circuit Shorted
53 Pass-Key - Key Detection Circuit Open or Shorted to B+
54 Pass-Key - Fuel Enable Failure
61 Pass-Key - Key # 1 Programming Resistance Out of Range
62 Pass-Key - Key # 2 Programming Resistance High
63 Pass-Key - Key # 2 Programming Resistance Low
71 LCD Dimming Output Circuit Shorted to B+ or CCM Internal Open
72 LCD Dimming Output Circuit Open or Shorted to Ground
73 LED Display Dimming Output Circuit Shorted to B+ or CCM Internal Open
74 LED Display Dimming Output Circuit Open or Shorted to Ground
LTPWS Fault Code List Code Definition
99 Receiver/Control Module Diagnosis
23 Right Tire Rear Low Tire
24 Right Tire Rear Sensor Fault
33 Left Tire Rear Low Tire
34 Left Tire Rear Sensor Fault
43 Left Tire Front Low Tire
44 Left Tire Front Sensor Fault
53 Right Tire Front Low Tire
54 Right Tire Front Sensor Fault
ABS Fault Code List Code Definition
21 Right Front Wheel Speed Sensor Fault
22 Right Front Toothed Wheel Frequency Error
25 Left Front Wheel Speed Sensor Fault
26 Left Front Toothed Wheel Frequency Error
31 Right Rear Wheel Speed Sensor Fault
32 Right Rear Toothed Wheel Frequency Error
35 Left Rear Wheel Speed Sensor Fault
36 Left Rear Toothed Wheel Frequency Error
41 Right Front Solenoid Valve Fault
45 Left Front Solenoid Valve Fault
55 Rear Wheels Solenoid Valve Fault
61 Pump Motor or Motor Relay Fault
63 Solenoid Valve Relay Fault
71 Electronic Brake Control Module Fault
72 Serial Data Line Fault
75 Lateral Accelerometer Fault (Short ot Open)
76 Lateral Accelerometer Fault (Signal out of Range)
SIR (Airbag) Fault Code ListCode Definition
21 Steering Column Circuit Resistance too High
22 Steering Column Circuit Resistance too Low
23 Steering Column Circuit Voltage too High
23 Steering Column Circuit Voltage too Low
25 Short to Battery in Steering Column Circuit
26 Open in Steering Column Circuit
31 Open 36 VLT to Deployment Loop
32 Grounded 36 VLT to Deployment Loop
33 History Code, Diode B Shorted in Wiring Harness to Arming Sensor
34 Open in Ignition 1 Feed to Deployment Loop
35 Discriminating Sensor Open
41 and / or 42 Deployment Loop Energy Reserve Voltage Fault
51 Accident Detected
52 EEPROM Accident Data Area Full
61 Force Low or "INFL REST" Warning Lamp Circuit Failure
71 Internal DERM Fault
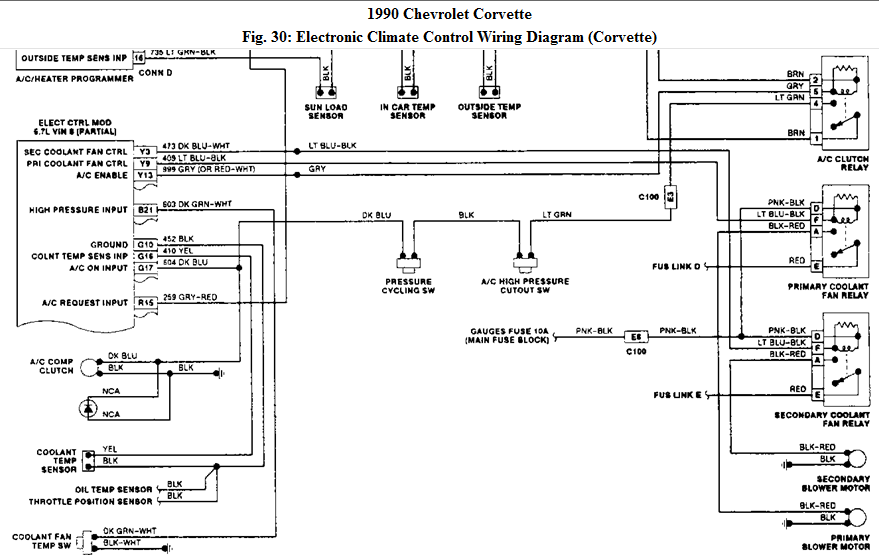
Automatic Air Conditioning Fault Code List01 + 02 Temperature Door Motor Circuit Fault
03 (Open) + 04 (Short) Outside (Ambient) Air Temperature Sensor Fault
05 (Open) + 06 (Short) In-Vehicle Temperature Sensor Circuit Fault
07 (Open) + 08 (Short) Solar (Sun-Load) Sensor Circuit Fault Open or Shorted
09 Low Freon Detected
10 or --- Uart or "E" and "C" Bus Failure
Diagnostic mode = push and hold the fan "up" arrow and fan "down" arrow at the same time (5 sec.)
Push "Auto Fan" to show the fault codes
LED flash at 60 times per minute = Fault codes be stored
Reset = Remove Negative Battery Cable for 1 Minute
Code Liste Selective Ride Control FX3:12 Start of code sequence
13 Left Rear time out
14 Right Front time out
21 Left Front time out
22 Right Rear time out
23 Loss of vehicle speed signal
31 Left Front out of position
32 Right Front out of position
33 Left Rear out of position
34 Right Rear out of position
41 Selective Ride Control Switch short to Voltage
42 Selective Ride Control Switch open cantacts
43 Selective Ride Control Switch open circuit
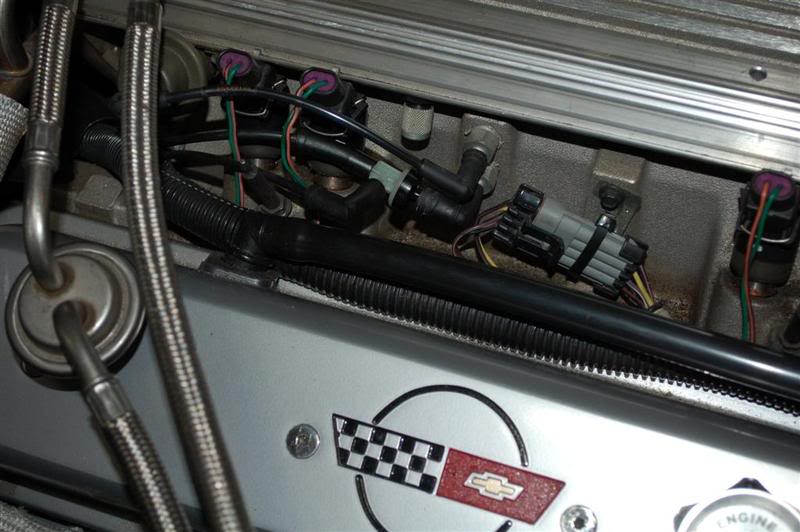
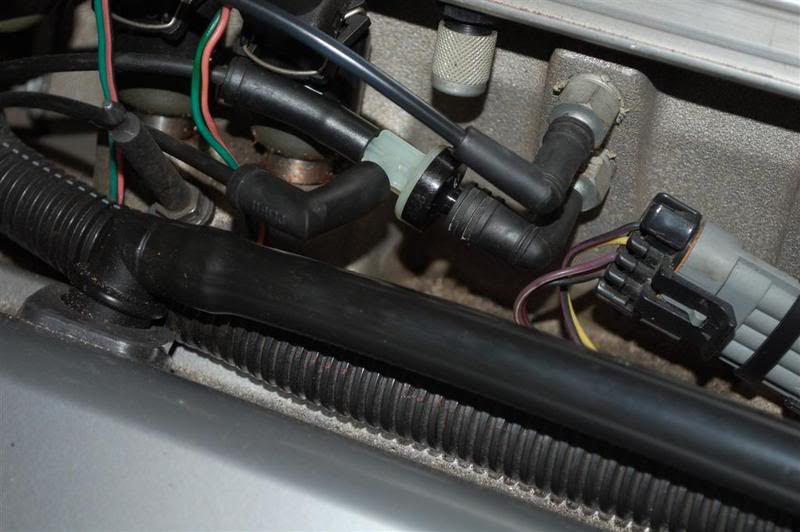
you will need a shop manual, and it helps to have a multi meter vacuum gauge and trouble code readers
http://www.digitalcorvettes.com/forums/showthread.php?t=61402
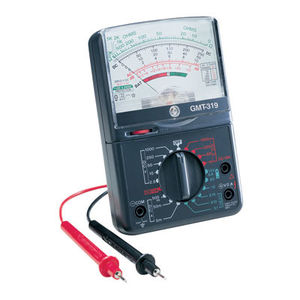
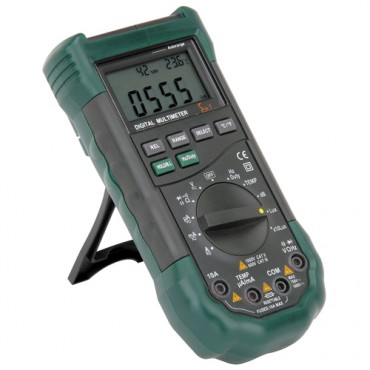
every mechanic needs an ANALOG multi meter for testing capacitors with a micro farad scale, AND a DIGITAL MULTI METER
http://forum.grumpysperformance.com/viewtopic.php?f=36&t=63&p=3403&hilit=vats#p3403
use of a shop manual and multi meter can be very helpful
http://www.totalcardiagnostics.com/toad/
http://www.corvettebuyers.com/c4vettes/codes.htm
https://www.autoenginuity.com/
http://www.ebay.com/gds/Automotive-Diagnostic-Software-Buying-Guide-/10000000177404580/g.html
http://garage.grumpysperformance.co...lay-switch-locations-and-info.728/#post-54562
http://www.amazon.com/ScanTool-4258...4?s=automotive&ie=UTF8&qid=1445959029&sr=1-24
http://www.amazon.com/ScanTool-4230...se_s_cp_3?ie=UTF8&refRID=0AY7FJ8EWKRKCRWRMPZ0
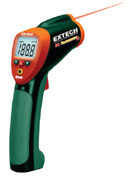
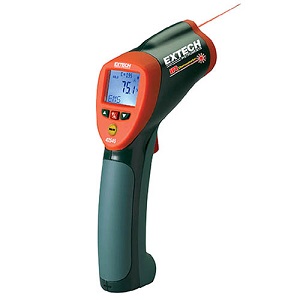
infrared thermometers are a very useful tool to track down issues with tuning, or mal functioning sensors , without verified facts your guessing.
this is the most consistently accurate I.R temp gun I've used for testing[/img]
http://www.testequipmentdepot.com/e...1100200223789&utm_content=All Extech Products
INFRARED TEMP GUN
Wide temperature range from -
58 to 1832°F (-50 to 1000°C)
READ TROUBLE CODES
http://garage.grumpysperformance.com/index.php?threads/c4-c5-corvette-trouble-codes.2697/#post-51440
per
bdw18_123
Here is how to enter the diagnostic mode of the electronic A/C controller. Taken directly from the 1990 FSM:
"If a system fault is detected, the LED of the operating mode the system is in at the time of fault detection will flash at a rate of 60 times per second. Fault codes will then be stored.
To enter into the diagnostic mode, the fan 'up' and fan 'down' buttons must be pushed simultaneously for approximately 5 seconds. Upon entry into the diagnostic mode, the LCD will display any fault codes stored by the programmer.
FAULT CODES DESCRIPTION
00................................................NO SYSTEM FAULTS
01............................TEMP. DOOR MOTOR CIRCUIT OPEN
02..........................TEMP. DOOR MOTOR CIRCUIT SHORT
03............................................AMBIENT SENSOR OPEN
04..........................................AMBIENT SENSOR SHORT
05.....................................IN-CAR TEMP. SENSOR OPEN
06...................................IN-CAR TEMP. SENSOR SHORT
07.......................................SOLAR LOAD SENSOR OPEN
08.....................................SOLAR LOAD SENSOR SHORT
09.............................................LOW FREON DETECTED
10........................................................UART FAILURE
While in the diagnostic mode, it is possible to check several different system parameters (circuits or systems). This is done by pressing the fan 'up' or fan 'down' button. Once the parameter to be checked has been chosen, the fan 'AUTO' button is pressed and a diagnostic value is displayed on the LCD.
The following is a list of diagnostic parameters:
PARAMETER DESCRIPTION
02............................................IN-CAR TEMP. SENSOR
03..........................OUTSIDE (AMBIENT) TEMP. SENSOR
04..............................................SOLAR LOAD SENSOR
For further diagnosis of ECC system codes, refer to the diagnostic charts in this section. To exit diagnostics, change to a different ECC system mode."
Find out what codes are stored in your A/C controller, and report here what they are and I will send you the troubleshooting page(s) for that code.
You should purchase an FSM, while they are a bit pricey, they are worth it if you are going to do any work/troubleshooting on your vette.
 0 Comments
For 90-96
owners these are the codes you can read from your AC control
panel.
To access these codes do the folowing procedure.
1.
Press both fan(up and down)buttons together and hold them for roughly 5
seconds. This will display a 00 on the A/C control panel LCD.
2.
Use the fan up and down buttons to select the desired code you wish to
read.
3. After selecting the code press button inbetween the fan
controls. This will display the code information on the A/C
LCD.
Here are the codes:
HVAC Diagnostic codes
0-
System Faults
(one of these will be set if your air conditioning
controls have an LED flashing)
00=No Faults
01= Temp Door Motor
Circuit Fault
02= Temp Door Motor Circuit Fault
03 = Ambient
Sensor Open
04 = Ambient Sensor Short
05 = In-Vehicle Temp Sensor
Open
06 = In-Vehicle Temp Sensor Short
07 = Solar Load Sensor
Open
08 = Solar Load Sensor Short
09 = Low Freon Detected
10 =
UART Failure
1- Temp Setting 60F to 90F
2- In-Car Temp
Sensor 10 = HOT -130 = 230 = COLD
3- Outside Temp Sensor 10 = HOT
-130 = 230 = COLD
4- Sun Load Sensor Max light Max Dark
L98 38
183
LT5 115 -110 = 210
5- Ignition System Voltage 0 = 9 Volts
-155 = 255 = 16 V
6- Engine Speed (RPM divided by 25)
7-
Vehicle Speed
9- A/C System Mode
00 = OFF
01 =
Re-Circulation
02 = A/C
03 = Bi-Level
04 = Heater
06 =
Defrost
07 = Vent
10 = Manual Re-Circulation
10- Blower PWM
0 = 0 Volts 128 = 14 Volts
11- Program Number 00 = COLD -155 = 255
= HOT
12- Mix Number -155 = 255 = COLD 00 = COLD
16- Coolant
Temperature In degrees C
17- Solar Correction 114 = Max light 128 =
max dark
30- Stored Full Hot Value 0 to 50
31- Temp Door
Travel Range 100 to 200
34- Temp Door Position Requested 00=Full
HOT -153=253=Full COLD
35- Compressor On Time 0.1 second
increments
36- Number Of Times Below Critical Time
37-
Software Version Number
The early ALDL connector has room for 12 pins however only 7 are populated and of those we are only interested in Pin "A" and "B" for this procedure.
Remove the ALDL cover (in the unlikely event that there still is one in the automobile...they usually were lost early in the automobile's lifetime) and as you view the pins, you will find the top row fully populated whereas not all are populated pin on the bottom row.
On the top row (as you view the connector from the cockpit), the pin designators are F,E,D,C,B,A.
First locate your car's alcl
this component is located just below the instrument panel and
to the left of the center console. Remove the plastic cover
the first two slots to your right are the A & B slots for a drawing of
the alcl module's picture is added below.
The A slot is the diagnostic slot and the B slot is the ground
slot. insert the computer key into these slots (with the engine
off) this is very important...now only put the ignition key
to on ( not start !!!) the check engine light will display a
code 12 which is one flash followed by two flashes.
this code will be flashed three times ..followed by the
trouble code stored in your car's computer.
what ever the code is it will be flashed three times.
have a paper and pencil ready and write down the
code .
code 13 =1 flash followed by 3 flashes =>oxygen sensor
code 14 =1 flash followed by 4 flashes =>coolant sensor
code 15 =1 flash followed by 5 flashes =>coolant sensor
code 21 = 2 flashes followed by 1 flash =>throttle position sensor
code 22 = 2 flashes followed by 2 flashes=> throttle position sensor
code 23 = 2 flashes followed by 3 flashes=> manifold air temp sensor
code 24 = 2 flashes followed by 4 flashes=> vehicle speed sensor
code 25 = 2 flashes followed by 5 flashes=> manifold air temp sensor
code 32 =>egr system
code 33 =>map sensor
code 34 =>maf sensor
code 35 => idle air control
code 41 => cylinder select error
code 42 => electronic spark control
code 43 => electronic spark control
code 44 => lean exhaust
code 45 => rich exhaust
code 51 => PROM
code 52 => fuel calpak
code 53 => system over voltage
code 54 => fuel pump circuit
code 55 => ecm
code 62 => oil temp
please remember that if you have the computer key installed
in the alcl and you start the engine ( you will ruin the engine's computer
)
only put the ignition to on (not to start)
If you should get a check engine soon display.. you can use
the above procedure and codes to buy the right part
or at the very least to keep from getting taken for a ride
and be made to pay hight prices for some inexpensive
module that you could have installed yourself.
You never ask a barber if you need a haircut ..
so you have to be on guard they will see you comming
a mile away.
If your engine displays a trouble code ... your engine will
go into limp mode ..it will still run but very poorly.
you might be able to reset the computer if it will not start
( just to get home ) by disconnecting both battery cables
and re-installing them ...this is not recommended ..but if
you are stranded it might help unitl you get your car home
or to a repair shop..good luck
http://www.tonkabaygroup.com/vette/c4codes.html
 http://www.c4vettes.com/ecm.htm
http://chevythunder.com/199091_corvette_1227727_ecm.htm
http://www.c4vettes.com/ecm.htm
http://chevythunder.com/199091_corvette_1227727_ecm.htm