200-4r Rebuild Questions

Trying to put together the overrun clutch assembly #510 I tore the inner seal #512. I used too big of a wire with the tool I made and I didn’t use enough finesse. Where do you suggest purchasing miscellaneous transmission parts like seals?
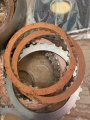
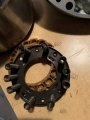
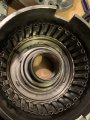
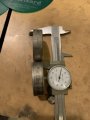
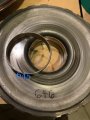
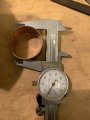
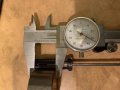
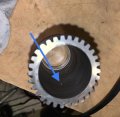
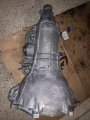
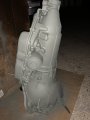
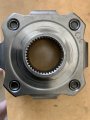
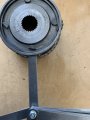
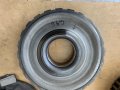
A few times I have used about a .005" feeler gauge to install a lip seal. I also got a Lip Wizard in one
of my kits. You could buy one or call Transtar and see if they won't send you one since you bought
their kit. Hard to pay $15 for a thin piece of plastic. Maybe you could make one from something
around the house.


If you have to buy a Wizard, then you might want to spend a few dollars more and buy this tool.

https://www.amazon.com/SST-0015-Uni...9Y2xpY2tSZWRpcmVjdCZkb05vdExvZ0NsaWNrPXRydWU=
upload_2020-3-1_11-35-52.png

OKC has a couple of places that sell part specifically for automatic transmissions. When I needed
something small or needed it right now I would use them. I would think that San Diego would
also have something similar. The local trans repair shops have to get their parts somewhere locally
I would think. They might also have tools for purchase.

https://www.google.com/search?clien...ws-wiz.......0i71j0j0i22i30j33i10.bxZ-QR-seRU

Also pictured is the transtar deluxe kit, their best kit, some price it at $250 but I got it for $100.
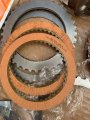
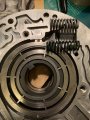
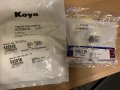
Wow, that saved a few bucks then. How did you get it for $100 ?

I thought the $589 CK performance kit would be more than I needed but I don’t know if I should have gotten it anyway, strangely it doesn’t come with the extra wide band #601.
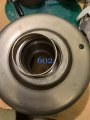
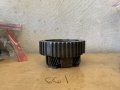
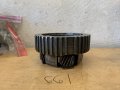
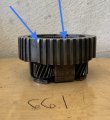
It won't be the last time you second guess your decisions ! :)

Are you sure about the wide band, their website says "1 ALTO WIDE RED INTERMEDIATE BAND"

https://www.ckperformance.com/View/MASTER-REBUILD-KIT-C
.
 
After I tore the seal I actually thought I could use my feeler gauge for the next one.
CARID.com sold it for $137 but they made a mistake and after talking to customer service, discounted it to $100.
I was mistaken about the band. There’s a washer kit for $13 but I don’t know if it has the thrust washer and I don’t think it has the plastic selective center section #629.
I also don’t know if I should replace any bearings.
Pros and cons to trying to make my own kit.
 
CK’s C kit doesn’t have the billet servo.

Do these friction clutches look like Raybestos? They say Alto and BorgWarner. I read somewhere the Transtar 54008B deluxe kit is supposed to have Raybestos but they don’t look like high performance. I imagine if they were Raybestos their name would be printed on the clutches.
 

Attachments

  • 6FE06E77-8CC2-4588-8ECC-62FFE7F1A22F.jpeg
    6FE06E77-8CC2-4588-8ECC-62FFE7F1A22F.jpeg
    165.9 KB · Views: 2
  • 81A5341F-C161-467D-9779-FF6F873A9F57.jpeg
    81A5341F-C161-467D-9779-FF6F873A9F57.jpeg
    175.4 KB · Views: 2
  • 736728A6-D5F2-498A-B809-E209FC16FBC6.jpeg
    736728A6-D5F2-498A-B809-E209FC16FBC6.jpeg
    179.3 KB · Views: 2
Pros and cons to trying to make my own kit.
Sounds like a lot of work trying to figure out exactly what you need and get it right the first time. If you have to
make two orders the shipping might eat up anything you have saved.

Do these friction clutches look like Raybestos? They say Alto and BorgWarner.
Gosh I don't have enough experience to recognize specific manufactures parts ..... sorry !

https://www.raybestospowertrain.com/automatic-transmission-parts
 
Yeah in hindsight I shouldn’t have asked that question. I have to restrain myself and make sure I don’t ask something I can figure out myself, and in that way I can value and appreciate your time and any input you can give.

Weird welds in some of these parts. Maybe this is a sign I should invest in a $400 billet forward drum (I wish).
I recently got a good deal on a table press. Here’s my makeshift clutch press.
And missing more springs that the last rebuilder didn’t care about.
 

Attachments

  • E2D0A621-EAF3-4984-BDF1-8AD5A340B625.jpeg
    E2D0A621-EAF3-4984-BDF1-8AD5A340B625.jpeg
    151.7 KB · Views: 6
  • B90FB78F-4E8C-41C6-8D56-16947132CF22.jpeg
    B90FB78F-4E8C-41C6-8D56-16947132CF22.jpeg
    147.4 KB · Views: 6
  • 3FF7891E-887D-4E8D-BF66-D532D320ABA4.jpeg
    3FF7891E-887D-4E8D-BF66-D532D320ABA4.jpeg
    118.8 KB · Views: 6
  • 46C40E7C-9194-4149-8CFE-84A3309BC104.jpeg
    46C40E7C-9194-4149-8CFE-84A3309BC104.jpeg
    159.8 KB · Views: 5
  • 85DFC4C2-9B4D-4B2D-8205-880EB7D81AA1.jpeg
    85DFC4C2-9B4D-4B2D-8205-880EB7D81AA1.jpeg
    142 KB · Views: 4
I recently got a good deal on a table press. Here’s my makeshift clutch press.
Yes, that would be nice to have. That's creative using some pliers to press with !

And missing more springs that the last rebuilder didn’t care about.
Actually some of them came that way, I have one in my inventory just like it. I did buy a 16 spring
assembly from Huzek for $40 in July 2018.

I've started a box with the things you are needing possibly, did you want me to put 6 springs (611) in
the box ? It could be tricky making them stay in place, looks like you would have to use a punch with
a tapered end to swell the spring locator. You would need to support it directly under the spring since
there are 4 tabs that are lower, see photo. Notice that some of the springs have a smaller coil at one end.
Or maybe they would stay in place until it's assembled, just depends on your situation.

FP04_DirectClutchSpringPack_611_01924.jpg

The spring specs are below .....

DirectDriveClutchSpringsCalcs.JPG

I'm enjoying this, it's kinda like building another one for me.
.
 
Last edited:
Sure, better to have 16 springs instead of 10?

I installed most of the seals today.
I have a transgo hardened pump spring but it’s shorter than what came in the pump. I’ve seen some rebuilds with a spring inside a spring (not sure if that would be worth the trouble).

The new pump bushing I installed is a little shorter but installed fine.
 

Attachments

  • 9ADF752D-BE79-408B-BE69-04E4771D97FF.jpeg
    9ADF752D-BE79-408B-BE69-04E4771D97FF.jpeg
    165.7 KB · Views: 1
  • E1EC1DCF-74A8-47F8-B6E5-A6371CDAFE26.jpeg
    E1EC1DCF-74A8-47F8-B6E5-A6371CDAFE26.jpeg
    91.1 KB · Views: 1
I’m worried about the new 605 being too wide compared to the old one, pretty significant. It sticks out a little on both sides of where it installed - doesn’t show up in a photo. I don’t know if that will be an issue.
How is 602 supposed to be replaced? Too risky to chisel it out. Can’t tap it from the inside, pressing/tapping from the other side just pushes it in even more.
 

Attachments

  • 8F12F9C8-ADEB-4647-8A7C-2A269F39A89E.jpeg
    8F12F9C8-ADEB-4647-8A7C-2A269F39A89E.jpeg
    122.8 KB · Views: 2
  • 5E976654-7DEF-4580-9055-2C6DA6F7E0D1.jpeg
    5E976654-7DEF-4580-9055-2C6DA6F7E0D1.jpeg
    140.5 KB · Views: 2
  • B9B5F78A-F2AA-4CD8-B0A4-01EEAD2A2728.jpeg
    B9B5F78A-F2AA-4CD8-B0A4-01EEAD2A2728.jpeg
    111.1 KB · Views: 1
I didn’t see bushing ‘how to’s’ in your thread.

645: difficult to remove, no access. Would be easy to install.

634: the old bushing looks solid and smooth. The new one separates (like many do) but solid would be better right?

641: don’t know exactly how I’ll remove the old one. The new one slides in loose. So unless the inner diameter of 642 tapers smaller it won’t press in and hold.

Last photo: what bushing is this? I’ve seen it in other bushing kits but I don’t know where it goes.
 

Attachments

  • 76F83332-40BE-4D1C-A20C-CC686E18BB83.jpeg
    76F83332-40BE-4D1C-A20C-CC686E18BB83.jpeg
    138 KB · Views: 1
  • CE877723-9ED2-4CB4-982A-52078227CC3D.jpeg
    CE877723-9ED2-4CB4-982A-52078227CC3D.jpeg
    148.8 KB · Views: 1
  • 269F41F7-5359-4605-8265-18B7EBBD570C.jpeg
    269F41F7-5359-4605-8265-18B7EBBD570C.jpeg
    85.5 KB · Views: 1
  • 7F0E8ED1-9908-406B-AB0D-30538750365A.jpeg
    7F0E8ED1-9908-406B-AB0D-30538750365A.jpeg
    90.9 KB · Views: 1
  • 6E078036-5791-4FA5-919B-E37F2B99A7B5.jpeg
    6E078036-5791-4FA5-919B-E37F2B99A7B5.jpeg
    101 KB · Views: 1
  • C17B3C39-485F-4EC6-ACA8-5E313C55C4A7.jpeg
    C17B3C39-485F-4EC6-ACA8-5E313C55C4A7.jpeg
    116.8 KB · Views: 1
Sure, better to have 16 springs instead of 10?

I installed most of the seals today.
I have a transgo hardened pump spring but it’s shorter than what came in the pump. I’ve seen some rebuilds with a spring inside a spring (not sure if that would be worth the trouble).

The new pump bushing I installed is a little shorter but installed fine.
OK, I put the springs in your box.

If it's new and the correct Transgo spring, then you should be fine. The final say will come when
you can connect a pressure gauge to the trans port and check your pressures in each gear.

I’m worried about the new 605 being too wide compared to the old one, pretty significant. It sticks out a little on both sides of where it installed - doesn’t show up in a photo. I don’t know if that will be an issue.

Below is from CK's book, page 60 and 61. The wider bushing is the preferred bushing. See the underlined text.

FP05_CKBook_Pg60_ID605.jpg
FP05_CKBook_Pg61_ID605.jpg

How is 602 supposed to be replaced? Too risky to chisel it out. Can’t tap it from the inside, pressing/tapping from the other side just pushes it in even more.

I didn't replace the bushings myself, I had it done at Precision Machine Shop. You could take it to a
local transmission shop and see if they will remove it for you.

645: difficult to remove, no access. Would be easy to install.
I took one from my inventory and drove it out with a pin punch from the back side. Just be sure to work
your way around it moving it a little at a time. Try to keep it even as it comes out.

634: the old bushing looks solid and smooth. The new one separates (like many do) but solid would be better right?
The old solid bushing won't be better if it's worn much. I've not heard of any problems with newer type.

641: don’t know exactly how I’ll remove the old one. The new one slides in loose. So unless the inner diameter of 642 tapers smaller it won’t press in and hold.
I took one here and drove it out with a pin punch from the back side. In the photo you would insert the
punch in from far side and start driving it out toward the camera going around doing it evenly. Yes there
is a smaller ID where the bushing resides. You can see the lip shown by the 3 white arrows

DO NOT drive the new on in until it touches the lip shown by the single BLACK arrow. Press the bushing in and stop when it clears the hole shown in the photo.

FP05_SunGearBushingSurface642_01961.jpg

Last photo: what bushing is this? I’ve seen it in other bushing kits but I don’t know where it goes.
Looks like the one that goes in the tail housing (bushing #32).

Thrust-Bushing Diagram.jpg
 
Your response helped a lot! I got a pin punch and installed the rest of the bushings except for the tail housing one. I think it requires a special tool. I think I saw someone make something to help, I’ll do a search for it. I drove through the end towards the bell housing and in the process I got another bushing stock in there, the old one is still in there too.

First two images are of bushing 645. I hate these puzzle fit bushings. Why they don’t make them a solid piece is beyond me. It’s not flush so I’ll have to get another one.

3rd photo is of 642. Looks like I should sand down what the arrow is pointing to, probably part of initial manufacturing.
 

Attachments

  • EA0DB1EC-1E00-4602-8E9E-58133E50679F.jpeg
    EA0DB1EC-1E00-4602-8E9E-58133E50679F.jpeg
    118.9 KB · Views: 2
  • 3C642D4E-E090-411A-8266-A95869987362.jpeg
    3C642D4E-E090-411A-8266-A95869987362.jpeg
    102.1 KB · Views: 2
  • F9A3F93F-E507-4998-97D0-86E0E9BB0515.jpeg
    F9A3F93F-E507-4998-97D0-86E0E9BB0515.jpeg
    136.7 KB · Views: 2
First two images are of bushing 645. I hate these puzzle fit bushings. Why they don’t make them a solid piece is beyond me. It’s not flush so I’ll have to get another one.
I see what you mean, that sure doesn't look idea!

3rd photo is of 642. Looks like I should sand down what the arrow is pointing to, probably part of initial manufacturing.
I wonder if that's going to help anything, although I'm not sure ? I think the Output shaft 665 extends thru those gears 642 but does not ride on that surface. You certainly won't hurt it either by smoothing out that lip surrounding the hole you pointed to in the photo.

What do you have to smooth out that lip, it will be tough to get it with a file ?

I found a 2nd shift kit like the other one, just springs, did you want both ?
 
Last edited:
I don’t think I have a need for both sets of springs. I was thinking about sanding it down with a dremel but like you said it doesn’t make a difference.

I removed and installed the tail bushing with a combination of a race/bearing installer, washer and 1-3/16” socket.

Waiting for parts I decided to paint the transmission to kill time. I wasn’t going to but found some self etching primer (used the entire can) then will use a high heat engine paint, aluminum color. I hope I cleaned it up enough. I pressure washed it a while back, then used oven cleaner, mineral spirits, brake kleen.

I found cheap parts on Amazon from TruTrans. Thrust washer $7, bearing kit $15, both including shipping. Half the cost, not including shipping elsewhere. Then found out they have a washer kit and selective washers but trying to get those in one order. They use different part numbers. For some reason they were difficult to find.
 

Attachments

  • 9F7E014F-19A5-4569-8F76-CA0518E49CC4.jpeg
    9F7E014F-19A5-4569-8F76-CA0518E49CC4.jpeg
    115.2 KB · Views: 3
  • 60285F86-E9F3-4997-B069-311F5C12F028.jpeg
    60285F86-E9F3-4997-B069-311F5C12F028.jpeg
    116.1 KB · Views: 3
  • 01A43F51-3F50-4C61-9A6B-F29FAA7CE2C3.jpeg
    01A43F51-3F50-4C61-9A6B-F29FAA7CE2C3.jpeg
    107.1 KB · Views: 3
  • D079990B-43DA-42BA-8E5D-94F9843FA60A.jpeg
    D079990B-43DA-42BA-8E5D-94F9843FA60A.jpeg
    198.7 KB · Views: 3
  • 49991724-1A54-48BF-8B91-3EDE82BB4B33.jpeg
    49991724-1A54-48BF-8B91-3EDE82BB4B33.jpeg
    89.3 KB · Views: 3
  • 54052826-955F-4A3B-BA91-6A6952E5A15F.jpeg
    54052826-955F-4A3B-BA91-6A6952E5A15F.jpeg
    114.3 KB · Views: 3
I don’t think I have a need for both sets of springs. I was thinking about sanding it down with a dremel but like you said it doesn’t make a difference.

Not a problem. I do like the attention to the details you are showing. I do things that don't
necessarily make a functional difference like removing sharp edges. So don't let me stop
you from doing this.

I removed and installed the tail bushing with a combination of a race/bearing installer, washer and 1-3/16” socket.

Good, glad to see you figure out how to get it done.

Waiting for parts I decided to paint the transmission to kill time. I wasn’t going to but found some self etching primer (used the entire can) then will use a high heat engine paint, aluminum color.

When will you need your parts from me ?

Looks really nice so far ! Getting something this big clean enough to paint is always a concern
when it comes to getting it spotless. I usually end with Acetone and a paper towel that I fold
and turn after each pass until the paper towel remains white. This doesn't work on Aluminum
thou, it always makes the towel dirty looking.

Are you planning on doing all the air tests as you re-assemble the trans ?
.
 
Did you find a new inner seal (512) for your overrun drum 510 that you tore, I might have a
new one. I have the outer (larger) seal.

Did you want my overrun drum 510 ?

Did you find the thrust washer 643 ?
 
Thanks. I will do the air tests. I’ll use the overrun drum from cobra and thrust washers should be coming in the mail Tuesday.

I don’t necessarily need the solid Teflon. I heard putting solid on all is better than scarf.

636 looks messed up. I may need to get another one.

524 needs another washer for this gear to make the clearance less than 0.024” but maybe I can get that at a hardware store.

It’s hard to know how much wear is tolerable on 661.

512 seal diameters.

646 has the bushing that didn’t install as I hoped. It is smooth at the 643 washer area except there is a ridge where the arrow is pointing. I imagine that is normal.
 

Attachments

  • 48B0158B-6942-45D5-B725-117DAA4F0561.jpeg
    48B0158B-6942-45D5-B725-117DAA4F0561.jpeg
    93.2 KB · Views: 4
  • E3E0BF20-AB5F-4958-A4A5-CB05F0FF8FBB.jpeg
    E3E0BF20-AB5F-4958-A4A5-CB05F0FF8FBB.jpeg
    123.6 KB · Views: 3
  • 401FB5B5-1BD2-4E17-9E6B-8996E669A57B.jpeg
    401FB5B5-1BD2-4E17-9E6B-8996E669A57B.jpeg
    129.3 KB · Views: 3
  • A3DA6D00-2AE4-4133-B7E8-C7DC22356295.jpeg
    A3DA6D00-2AE4-4133-B7E8-C7DC22356295.jpeg
    116.2 KB · Views: 2
  • 220758CE-74D2-4689-890E-69AEB9B4BB71.jpeg
    220758CE-74D2-4689-890E-69AEB9B4BB71.jpeg
    129.3 KB · Views: 2
  • 83089139-79AB-44F2-B40D-EABC773DDDB9.jpeg
    83089139-79AB-44F2-B40D-EABC773DDDB9.jpeg
    140.1 KB · Views: 2
  • 1B399177-AEDB-4280-A533-1BA48CFE0576.jpeg
    1B399177-AEDB-4280-A533-1BA48CFE0576.jpeg
    161.8 KB · Views: 2
Last edited:
I don’t necessarily need the solid Teflon. I heard putting solid on all is better than scarf.
Yes it's better, but a lot harder to install. So did you get any solid teflon seals in the kits you bought?

636 looks messed up. I may need to get another one.
Hard to tell from this angle how deep the grooves are. That outside ring is original, see photo below.
If it will support the thrust bearing and be flat, then you maybe OK. If it was a thrust washer against
that surface, then I would say Yes it needs to be replaced. How deep are the grooves?

FP06_FrontCarrierAssembly_636.jpg

524 needs another washer for this gear to make the clearance less than 0.024” but maybe I can get that at a hardware store.
Get a copper washer with the correct ID and and wet sand with 320 grit sandpaper to near the
correct thickness. Then maybe finish off with some 800 grit.

It’s hard to know how much wear is tolerable on 661.
I'm not completely sure what you are questioning, unless it's the gears. If it's the gears, flip it over
so it get more light and take several pics up close of the worst parts.

512 seal diameters.
Nope, don't have that one.

646 has the bushing that didn’t install as I hoped. It is smooth at the 643 washer area except there is a ridge where the arrow is pointing. I imagine that is normal.
I have three and they are all different on that surface. If that ridge is outside the thrust washer surface,
then you should be golden !

FP06_LowReverseClutch_646.jpg
.
 
I only got one solid Teflon ring the rest are scarf.

grooves are significant. Do you have a spare front planetary gear, 636?

661, arrows point to where the clutch steels wear into it. I think this area is more square new. Not sure how much roundness (at the arrows) is tolerable.

646, yes i believe it’s outside the washer area so I should be ok.

I’m using this transmission mount to help with the install.
 

Attachments

  • 91257509-E80A-475B-9E75-687C2CF20C54.jpeg
    91257509-E80A-475B-9E75-687C2CF20C54.jpeg
    152.8 KB · Views: 2
  • 28B2A806-9CA0-4E8B-ACE9-8BA852807BFF.jpeg
    28B2A806-9CA0-4E8B-ACE9-8BA852807BFF.jpeg
    156.2 KB · Views: 2
  • 26F0F62E-DF87-42E9-BB06-EE9F988A0841.jpeg
    26F0F62E-DF87-42E9-BB06-EE9F988A0841.jpeg
    101.5 KB · Views: 1
I only got one solid Teflon ring the rest are scarf.

Call who ever you have done the most business with CK or Dave and see if they will sell you
half dozens. Wouldn't hurt to order something else at the same time.

grooves are significant. Do you have a spare front planetary gear, 636?

I only have 10 of them, how many did you want ? :rolleyes:

FP07_FrontPlanetaryCarrier_636_01969.jpg

661, arrows point to where the clutch steels wear into it. I think this area is more square new. Not sure how much roundness (at the arrows) is tolerable.

Good question, I have several if you want one. They also have the roller clutch that inside if
you want that also.

I’m using this transmission mount to help with the install.

Looks like a nice one, it's sure alot easier than rolling a trans around on the bench top or an old tire !

If you decided to order those solid Teflon seals, then you might want to also order a 636 OR 661 from
them to make it worth their time. If you go with the scarf cut seals then I have what you need. I know
the solid seal are better, but I'm not sure they would make a big difference in your case if you think
400 HP is the most you will be putting thru your trans.

Are you building the trans to hold 400 HP now or will you go back in later ?

I would also suggest you think about the 2 mods below from CK's book, starting on page 84. They are
easy and things you can do yourself. I have the Wave Spring 651. But feel free to order anything from
the other guy, it will NOT hurt my feelings and it will help support them so they are around later when
we need them again. But if money is a big factor, my prices will be lower.

Remove the wave spring (651) as shown in figure 5B-4, and- inspect it for damage or breakage. It is
not uncommon to find it broken. Regardless of its condition, it is advisable to replace it with a new one
during overhaul. In all applications, especially if you are running high line pressure or a transmission
brake, it is advisable to install two wave springs when reassembling the transmission.

This will accomplish two things. The first is that it will further cushion the low/reverse clutch pack upon
application of reverse reducing harsh reverse engagements. Second, it will speed up manual 1-2 shifts
by releasing the low/reverse clutch pack faster. This will reduces shift overlap caused by the band
applying and the rear planetary carrier not being released fast enough. If you decide to do this just
stack the two waved springs on top of each other as if they were one.

In all applications, especially if you are running high line pressure or a transmission brake, it is advisable
to drill a .060" bleed hole in the low/reverse clutch housing (646) as shown in figure 5B-5. This will
accomplish two things. The first is that it will further cushion the low/reverse clutch pack upon application
of reverse reducing harsh reverse engagements. Second, it will speed up manual 1-2 shifts by releasing the
low/reverse clutch pack faster. This will reduces shift overlap caused by the band applying and the rear
planetary carrier not being released fast enough.
 
Thanks for the info. I’ll let you know but I’ll need to get new 636 and 651.
Not the best picture for drilling into 646 in the book. I’d like to build a 400HP tranny now but I haven’t finished reading everything I need to. Dave Husek said the KC5 valve body can be made to be good but I’m not sure how or what he meant by that.
I’m debating on getting another $200 salvage yard tranny.
 
Back
Top