NOW FOR THE NEWS THAT YOU REALLY DON,T WANT, TO THINK ABOUT!
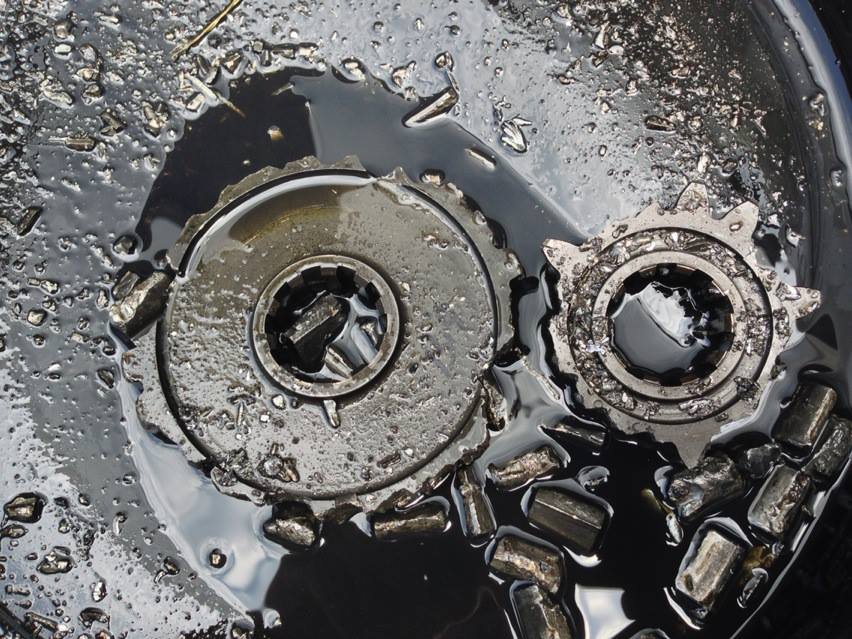
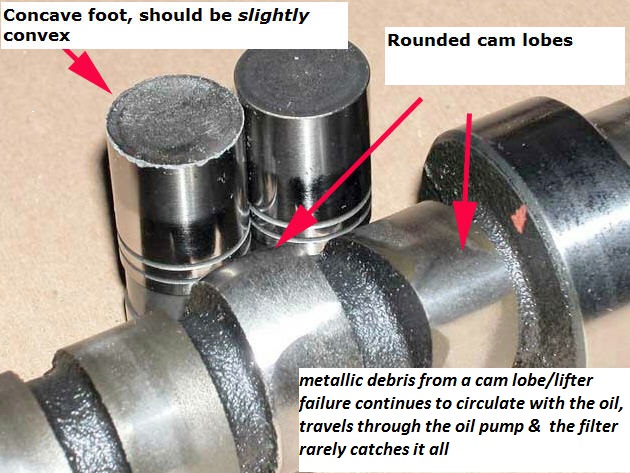
AND for yet another an unpleasant moment in your thought process, just ask yourself "where did all that material , metallic trash, etc. that wore off the cam lobes, lifters, cam gear go before MOST it ended up in the oil filter? What instantly comes into mind for me is the obvious question, "why did the cam or lifter wear excessively, what can I do to prevent a repeat failure" . That is the first thing to logically be determined.
A properly installed and maintained valve train and cam, even a flat tappet cam while using quality top shelf parts , and having the clearances checked and oil flow checked, should not have wear issues for many tens of thousands of miles..
in most cases youll want to remove all oil passage plugs and the cam bearings
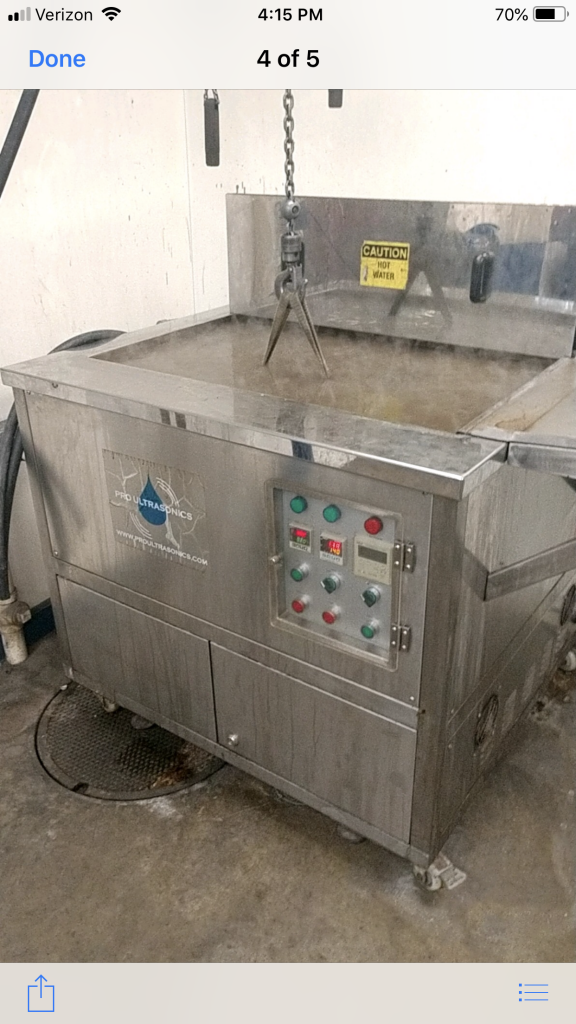
before having a local trusted machine shop hot tank the block,
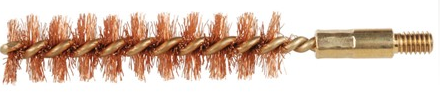
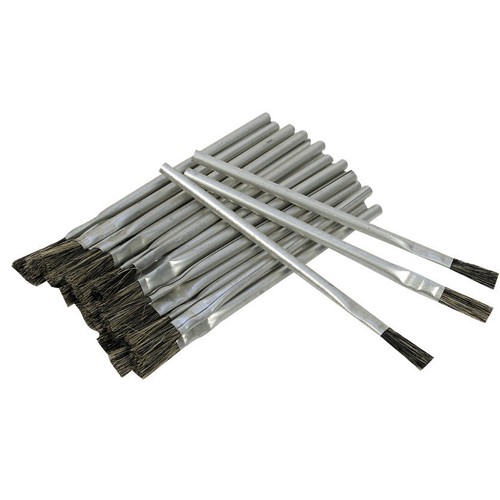
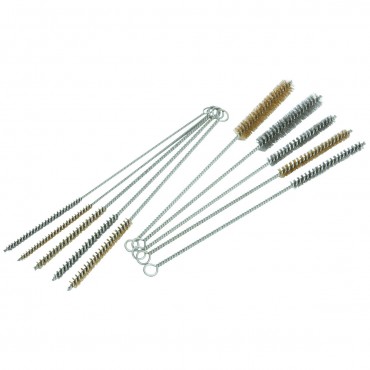
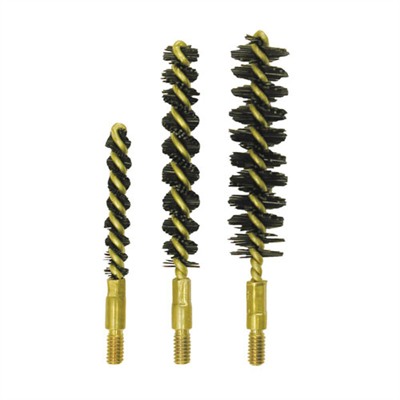
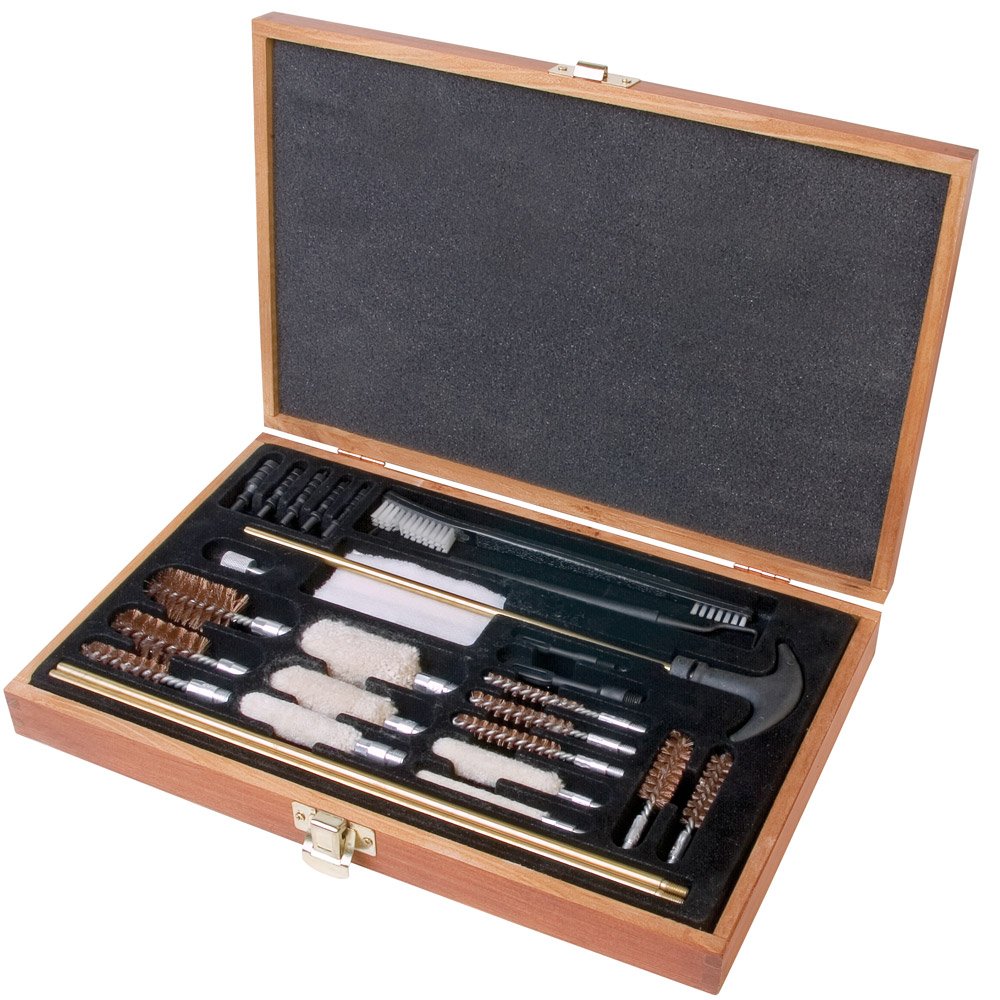
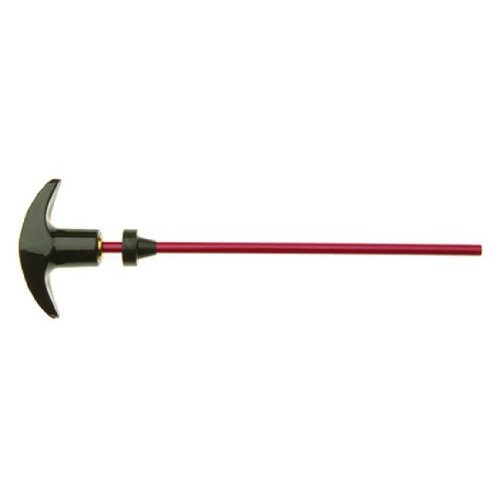
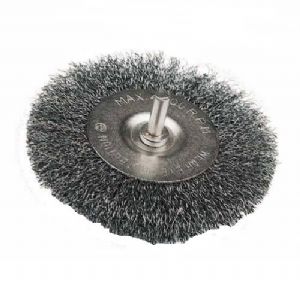
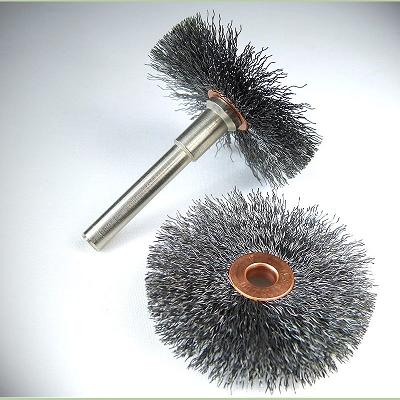
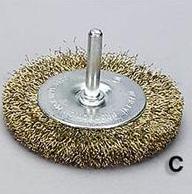
and use ultrasonic cleaning, use a rifle bore brush on all the oil passages
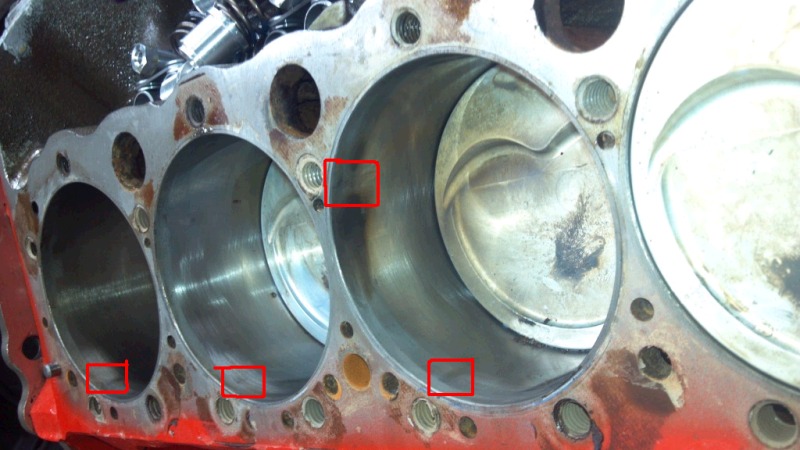
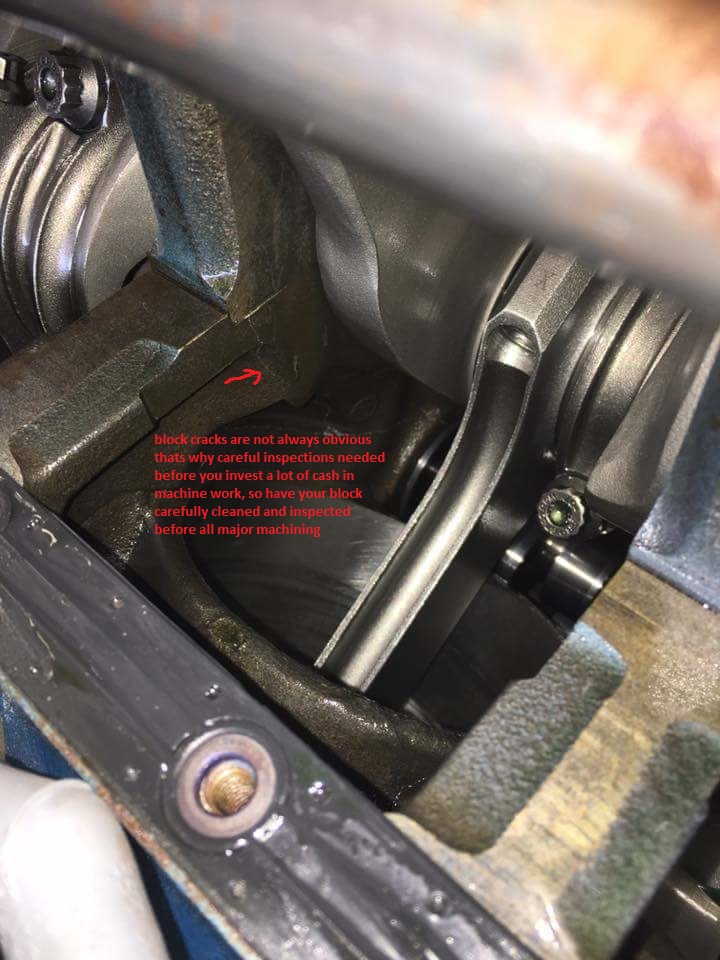
carefully inspect for cracks and damage
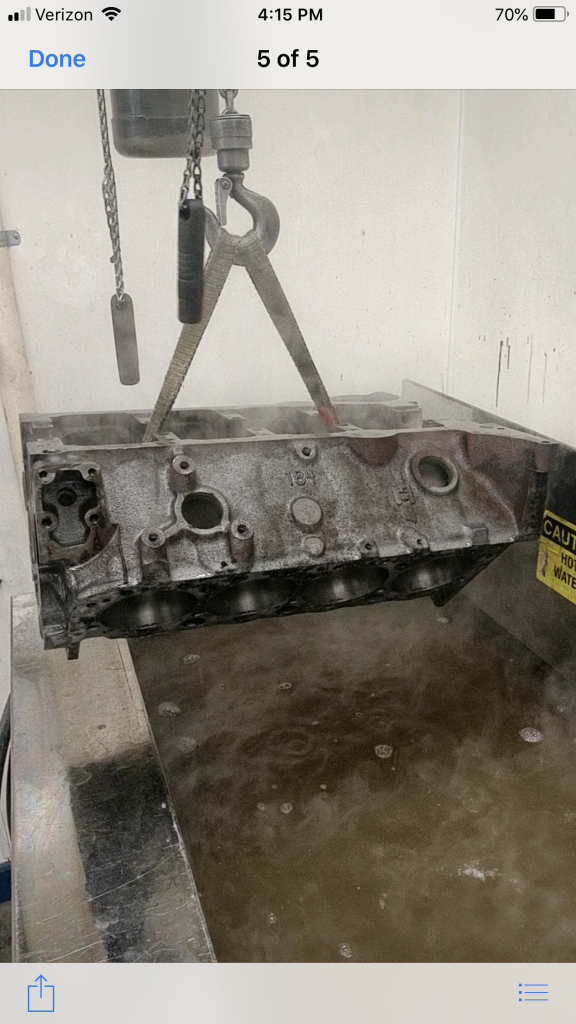
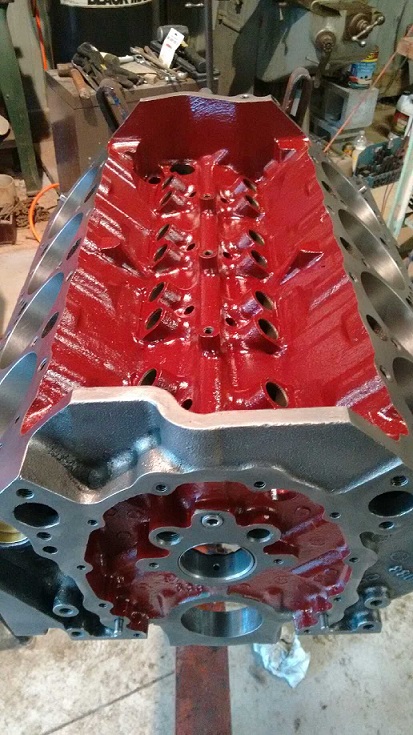
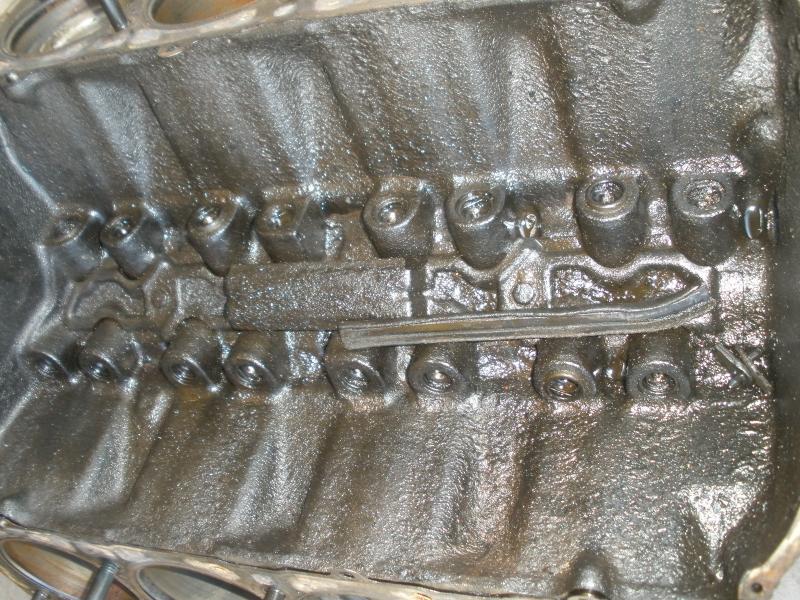
as soon as you get the block back pressure clean, dry and paint the non-machined surfaces and use WD40 on the machined
surfaces
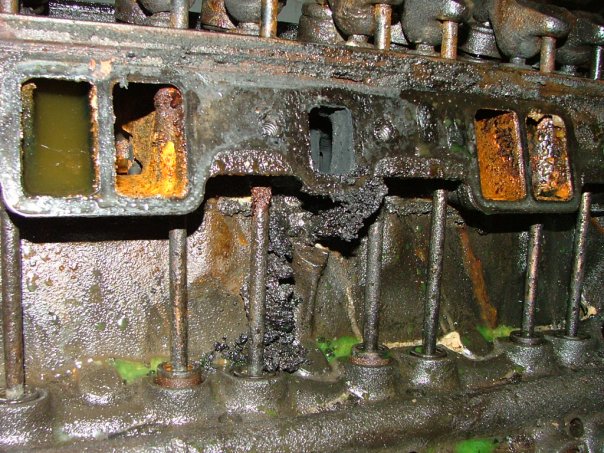
I can,t begin to tell you the number of times I see guys have a cam lobe fail and they barely clean anything, they simply slide a new cam into the block, drop in new lifters and then get that stupid deer in the head lights look when the new cam lobes fail!
This is simply a matter of a good deal of residual metallic debris remaining in the block from the previous cam &lifter failure, being washed into moving parts by pressurized oil flow upon start up, theres almost certainly several tea spoons of metallic trash from the previous cam failure trapped in the oil passages and behind the cam bearings if you don,t carefully remove the old cam bearings and use a rifle bore brush, solvent and high pressure air to remove any debris, this Has nothing to do with the condition of the block. Oil galleys are always a great place for this kind of grit and metallic trash to accumulate during the previous lift and cam lobe failure , it get's trapped. ALL the oil passage plugs in a block need to be removed, brushes run through with solvent, then hot soapy water then high pressure air. Cam bearings should be removed and replaced , and yes we all know guys that simply slipped in a new cam and lifters and seemed to get away with it ,but in the vast majority of cases the residual debris will eventually cause durability issues if its not removed, ALL oil galleys and passages need to be flushed out before final Re-assembly and especially after machining. An hour in the parts washer, will frequently does not get the job done.Id highly recommend removing all the oil passage plugs and use of a pressure washer and rifle bore brushes and installing new cam bearings.
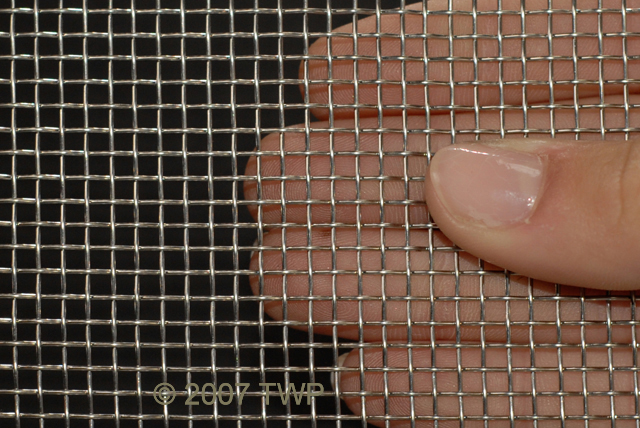
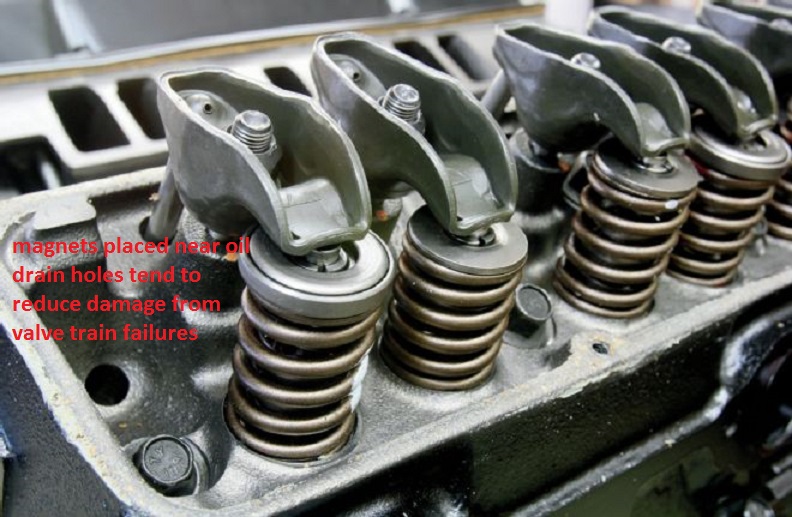
ID also strongly recommend use of several high temp rated magnets , as they are very effective at trapping metallic trash from reaching the bearings and valve train.
READ THESE THREADS
http://garage.grumpysperformance.com/index.php?threads/magnets.120/#post-49772
http://garage.grumpysperformance.com/index.php?threads/block-prep.125/page-2#post-48605
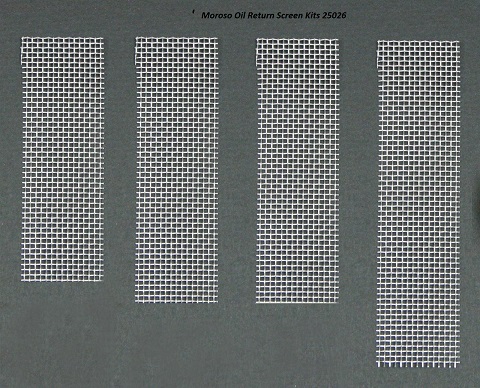
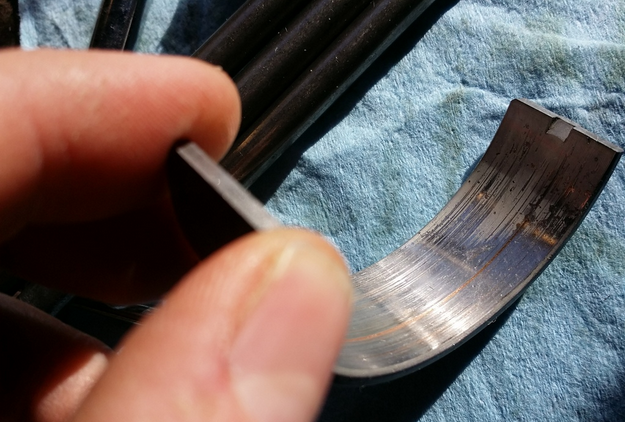
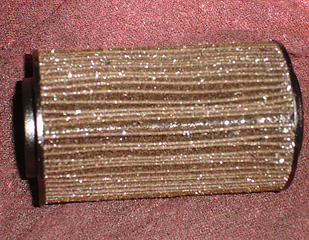
YES all that METALLIC TRASH from the cam lobes and lifters DID get into the OIL and MOST of it probably DID get sucked thru the oil pump and at least some of that fine metallic trash bye-passed the oil filter and got embedded in the bearings....ESPECIALLY if you failed to install magnets and shrapnel screens to limit the amount of metallic debris from reaching the oil pump
you first job should be to inspect the worn or defective components and correct the CAUSE of the parts failing so you don,t just replace the components and repeat the problem
Its a fact of life that if you start pushing the engine performance to its limits that youll eventually have components fail, and that can get expensive rapidly.
But parts rarely just "FAIL" theres usually a REASON that parts fail,that can be traced to the CAUSE, thru a careful inspection.
the cause is frequently, use of the wrong component for the application, miss matched components ,improper installation, improper clearances , or lack of proper lubrication , or cooling ,are high on the list, but there's an opportunity to learn what went wrong and what process or clearance issue, lack of cooling or lubrication,or improper tuning caused the part to fail!
post very clear pictures of all damaged components, and theres a good chance the CAUSE will be indicated, by the type of failure or damage
if you don,t understand why a part failed and just blindly replace it, your certainly going to have similar failures operation under similar conditions with similar parts
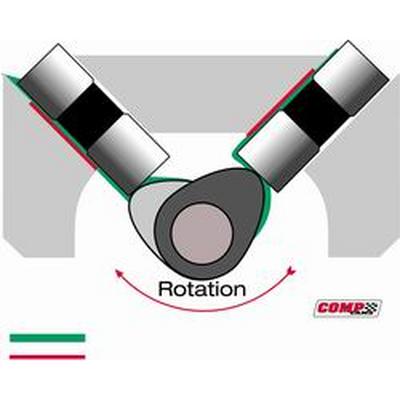
valve train failures seldom result is ONLY busted valve train components, its rather common for the shrapnel formed during a catastrophic valve train failure to spread metallic debris thru the engine , that causes extensive secondary damage especially if the engine run for long after the valve train failure, obviously the extent of damage will be effected by the component(S) that failed and if you've installed safety measures like shrapnel screens , quality filters and magnets and a well designed oil pan , but the whole oil system, its passages and anyplace the debris could flow to needs to be cleaned to prevent future damage, simply replacing a worn lifter and cam won,t generally provide a long term cure as the metallic debris will tend to migrate into areas where it caused further damage if its not cleaned out of the block and oil passages.
almost any trash suspended in the oil eventually gets sucked back thru the oil pump before its going to reach the oil filter and as soon as the oil filter becomes partly clogged most oil filters bye-pass at least some metallic crud to the oil passages in the block, if you've installed shrapnel screens and magnets you can significantly reduce the potential amount of crud reaching the bearings
it only takes a few seconds running a new engine for an improperly installed cam , lifters and valve train, during the break-in process to generate teaspoons of metallic trash that ,once in the engine oil flow ,rapidly destroys bearings if the clearances ,spring load rates or valve train geometry is wrong
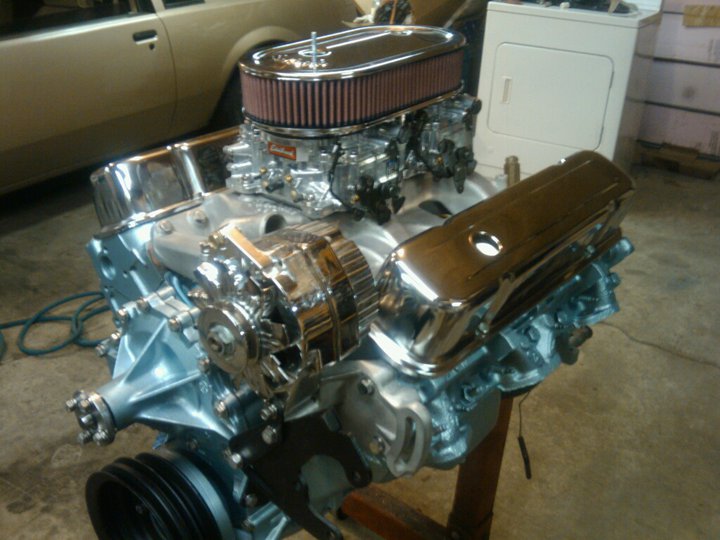
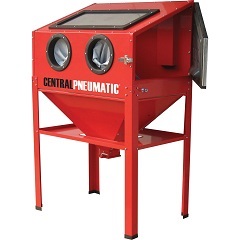
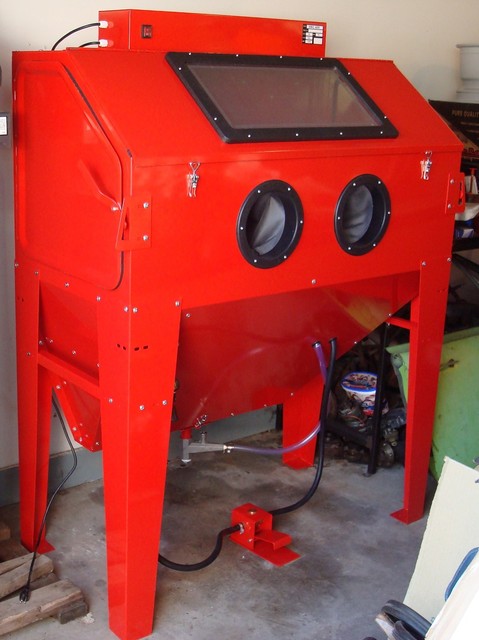
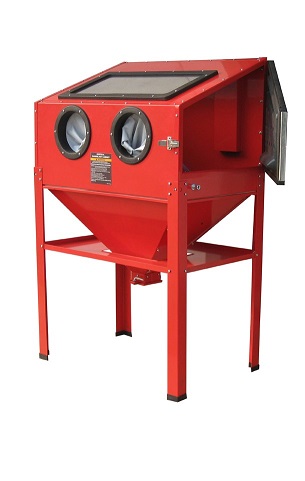
as I'm sure your aware, after careful dis-assembly,an older engine that looks rather well used and un-loved and homely ,can look much different after a careful cleaning those parts will come out of a cleaning,wither you do it or have a local machine shop do it in far better condition and once cleaned and painted look like a totally different engine. personally Ive found the price of a 3200psi pressure cleaner, and particle blast cabinet, pays for itself very rapidly in what you save in cleaning costs you would have other wise spent at the machine shop.
theres a strong tendency for newer guys to want to just install new parts, rather than research the reason the old part failed and that can lead to expensive mistakes and repeated failures, if your cam wiped a lobe and lifter, or you spun a bearing or busted a timing chain ETC.
all that metalic debris is potentially circulating through the engine and the oil filter RARELY collects all of it before a significant amount gets embeded in bearings , so its best to remove the block, dissasemble it, clean out the oil passages and replace ALL the bearings and freeze plugs and oil passage plugs after a careful cleaning.
yes adding a quart of MARVEL MYSTERY OIL

will tend to free up stuck lifters, but it won,t cure all potential issues
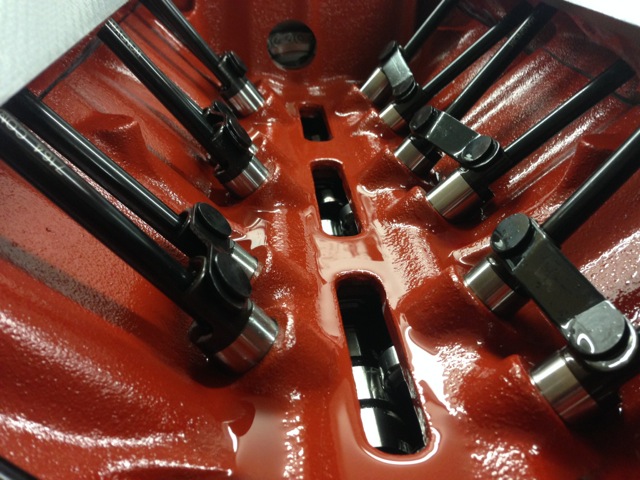
if you find one or a couple rockers are not flowing oil at idle,
first step, Id suggest you back off the rocker nut on that push rod, pull that push rod and flush it out internally,
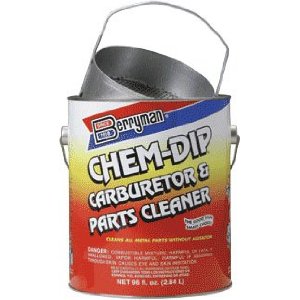
with carburetor cleaner or gasoline,just like is usually done before a new cams installed too limit the potential abrasive micro-crap in the engine,from any previous issues.
if any engine shows signs of having sludge build-up or a cam, or bearings, or lifters, have previously failed, you'll need to carefully clean all of the internal parts, before re-use.
In most cases you would soak the rockers and push rods in gas over night and use an air compressor too blow out the push rod internal passages, soak the push rods for several hours in gasoline, then, run some pipe cleaners through it, to be sure its totally clean and free of internal sludge and debris, like anyone should have done with all the push-rods, prior to assembly.
Id suggest you back off the rocker nut on that push rod adjustment slowly too the point it clicks softly, on that one push rod thats not spurting oil, ,this, indicating the clearance has reached the maximum allowable,
too safely run, and then stop the engine, squirt a bit (maybe 2-3 table spoons)of diesel down on that lifter and let that seep in for an hour then restart the engine and let it run with that lifter softly clicking for at least 15 minutes so it frees up internally.
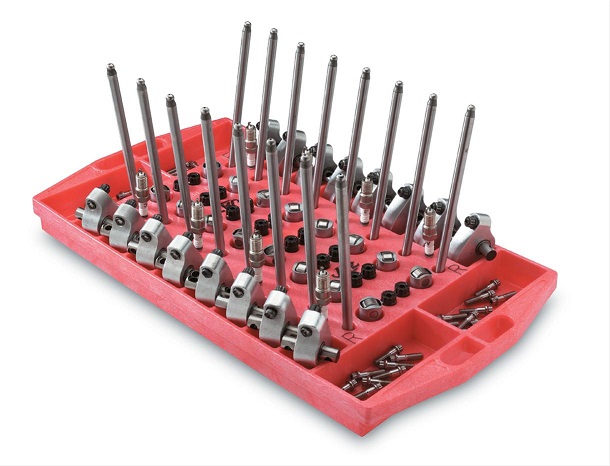
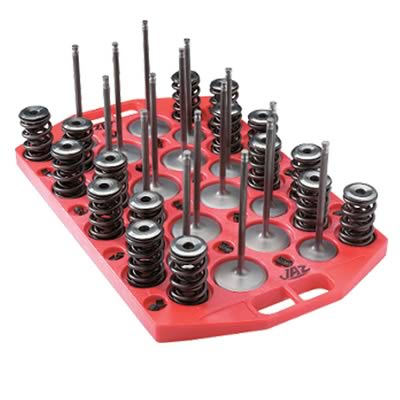
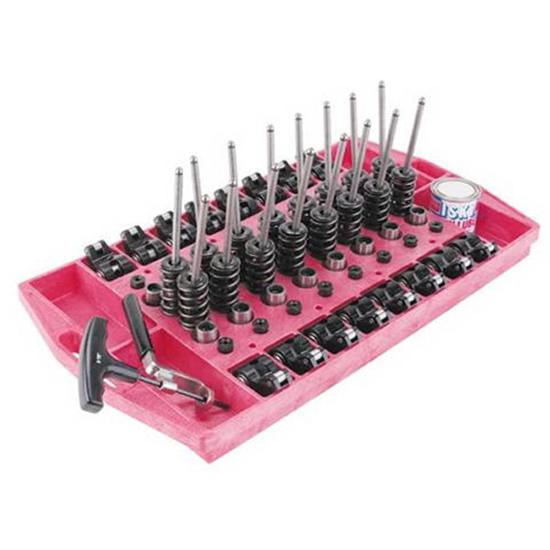
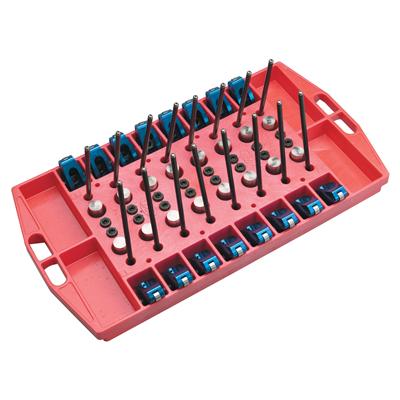
rockers and rocker nuts and rocker pivot balls should ideally be kept together as individual matched sets , if you don,t have a valve train disassembly tray, tye-wrap the matched parts together
and reassembly with a good coat of moly assembly lube.
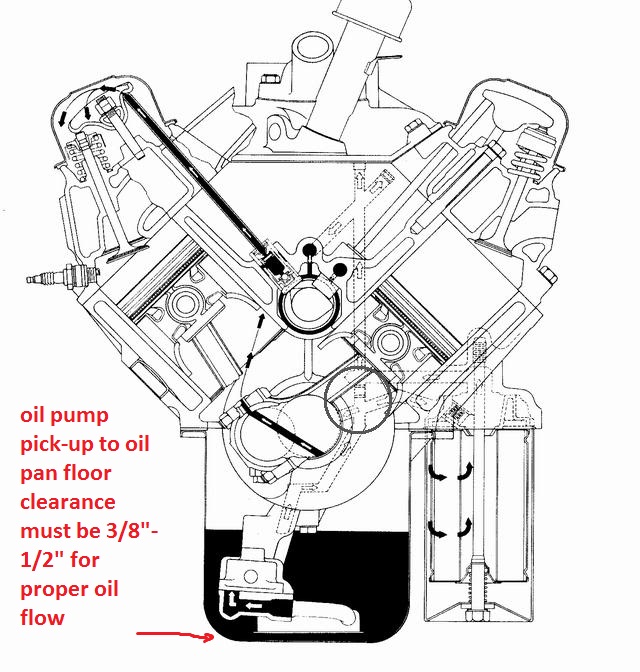
have you verified the oil pump pick-up to oil pan floor clearance?
this tends to be reduced when swapping to a high volume oil pump restricting oil flow rates
https://www.ebay.com/i/402584062207...1291&msclkid=d17e7155654a1a20769a115a09f43c68
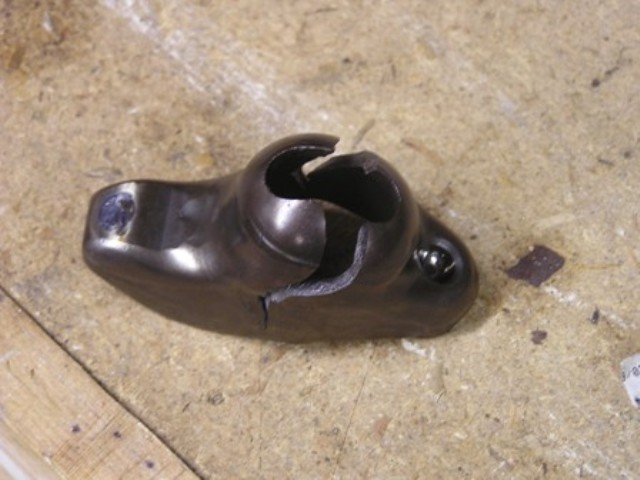
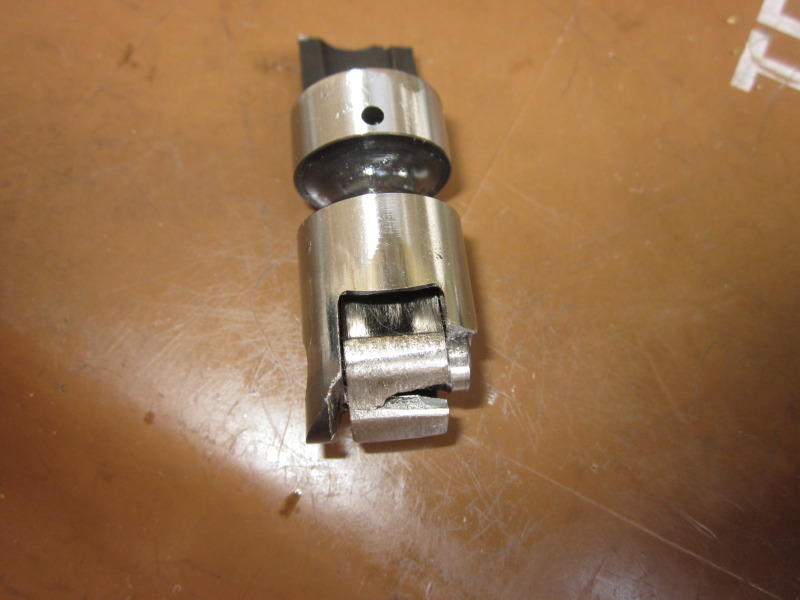
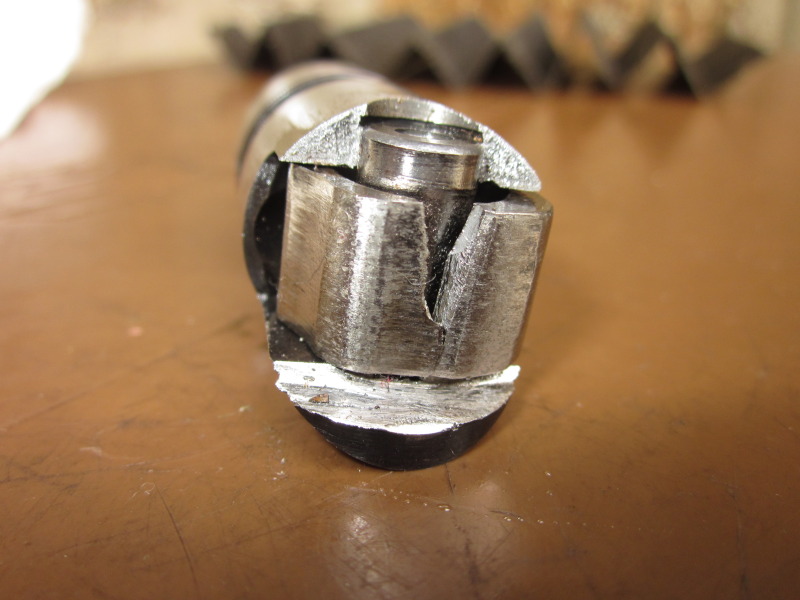
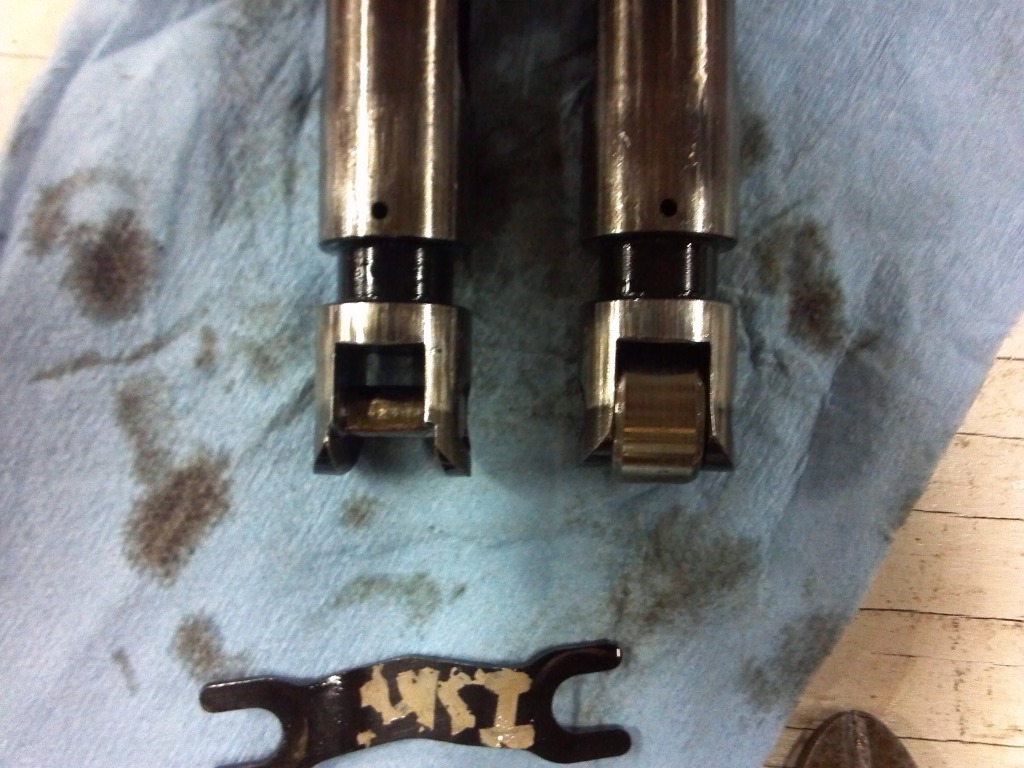
if the lifter base is well worn you can bet the farm the cam lobe is most likely also worn, and you'll need a lifter removal tool to pull the damage lifters up out through the blocks lifter bores

keep in mind all that metallic trash, cycles through the oil pump BEFORE it reaches the oil filter
http://garage.grumpysperformance.com/index.php?threads/testing-a-chevy-oil-pump.6479/
http://garage.grumpysperformance.com/index.php?threads/oil-system-mods-that-help.2187/
http://garage.grumpysperformance.co...m-sure-your-convinced-its-the-oil-pump.11085/
http://garage.grumpysperformance.com/index.php?threads/installing-an-oil-pump-pick-up-tube.1800/
http://garage.grumpysperformance.com/index.php?threads/not-getting-oil-to-rockers.4537/
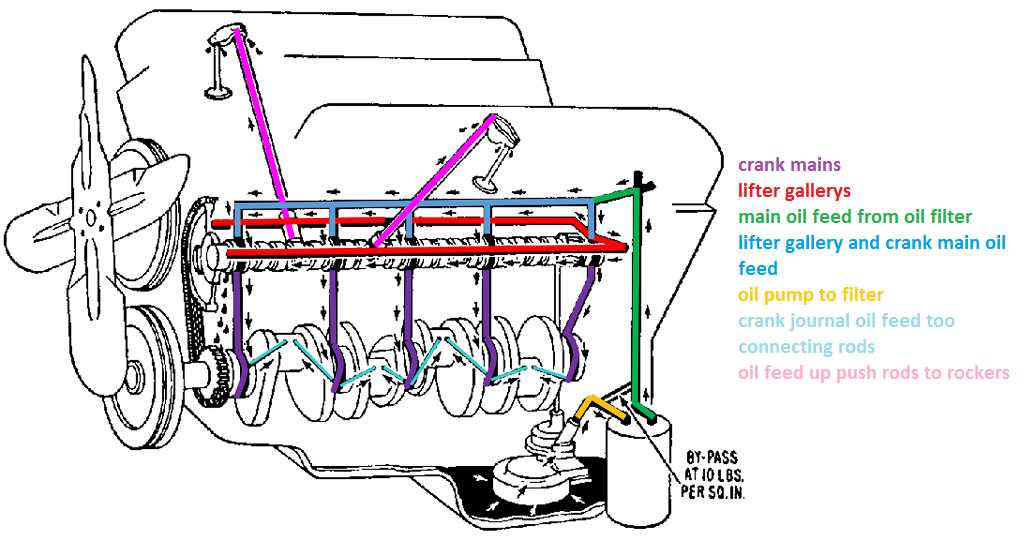
http://garage.grumpysperformance.com/index.php?threads/basic-info-on-your-v8-lube-system.52/
http://garage.grumpysperformance.co...oil-passages-and-improved-oil-flow-mods.3834/
READ THIS LINK AND ITS SUB LINKED INFO
READ THE LINKS
http://garage.grumpysperformance.com/index.php?threads/cam-bearing-install-tools-install-info.1479/
http://garage.grumpysperformance.co...oil-passages-and-improved-oil-flow-mods.3834/
http://garage.grumpysperformance.co...h-the-oil-when-a-cam-failed.11542/#post-53323
http://garage.grumpysperformance.co...d-what-goes-in-the-dumpster.13135/#post-68515
oven cleaner or a good commercial paint remover can usually remove old sludge and paint, from hart to reach crevices, if left for a few hours, to soften the surface mess,then use the pressure cleaner, but only use them on cast iron NOT ALUMINUM
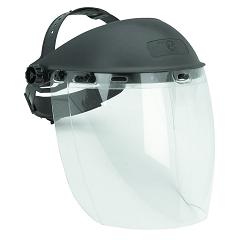
Ive generally used and strongly suggest you consider using, one or both of these face and eye shields , and wearing a rain coat , while working outside in a well ventilated area , that's not near any building or car,when using chemicals and a high pressure washer due to learning from past experiences
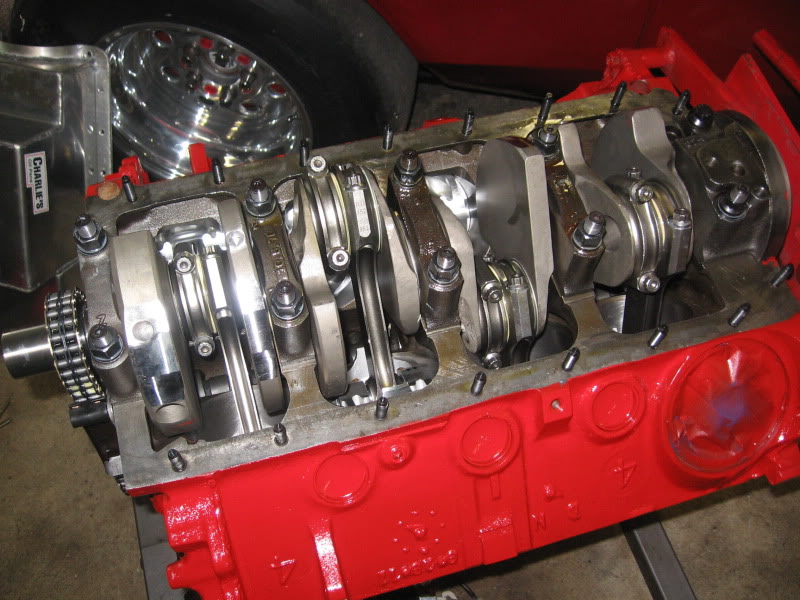
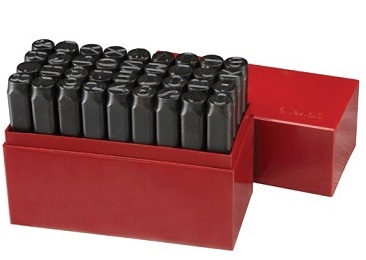
make damn sure you number stamp ,the rods and rod caps and main journal main caps so they go back together correctly
http://www.harborfreight.com/36-piece-3 ... 60669.html

http://www.homedepot.com/p/DEWALT-Safet ... 220499-_-N
http://www.harborfreight.com/adjustable ... 46526.html

http://www.harborfreight.com/40-lb-capa ... 68893.html
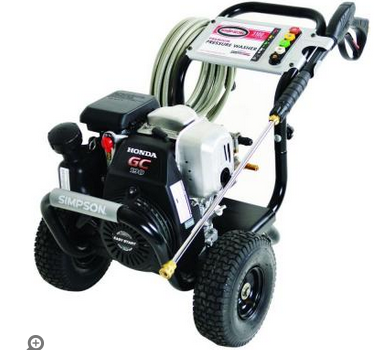
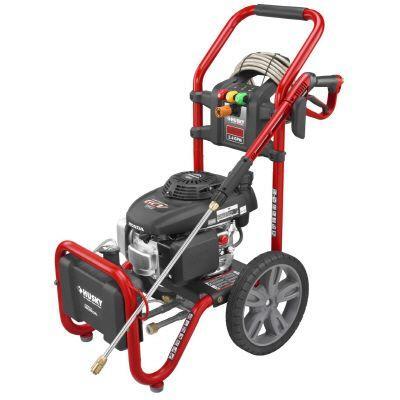
http://www.homedepot.com/p/Simpson-Hond ... 177499-_-N
heres one area where harbor freight has a few real good items, the cheap long reach air gun nozzles and brushes come in very handy cleaning oil passages
http://www.harborfreight.com/cpi/ctaf/d ... mber=95100

http://www.harborfreight.com/cpi/ctaf/d ... mber=97014
http://www.harborfreight.com/Air-Blow-G ... 68260.html
http://www.harborfreight.com/cpi/ctaf/d ... mber=95947
if you don,t think the trouble and expense of installing a few shrapnel screens and a dozen magnets is worth the time and effort consider how much metallic crap will circulate through the oil pump if they are not in place when something unpleasant happens
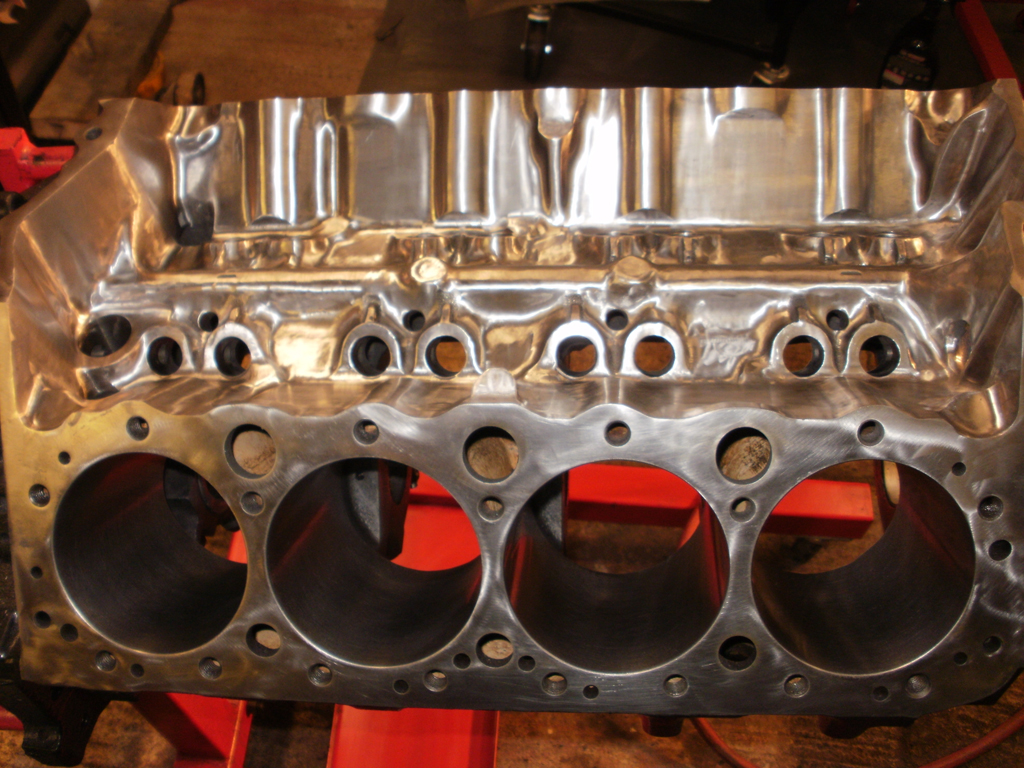
lifter bores
and lifter gallery
,piston bore walls,
block main cap web support areas
heads between the valves in valve seat area
look for stripped head and manifold and oil pan mounting bolt threads,
in threaded holes and cracks in block radiating from the holes
http://garage.grumpysperformance.co...block-cylinder-wall-thickness.976/#post-21036

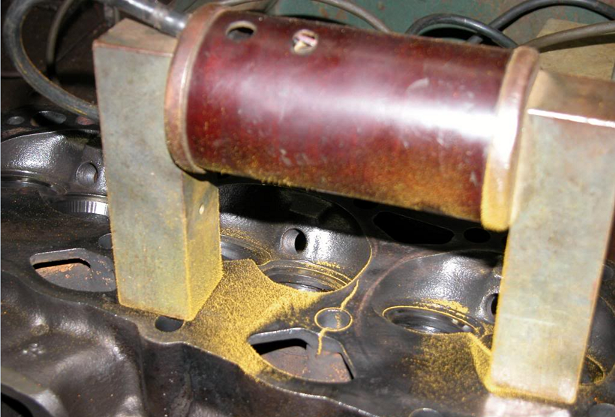


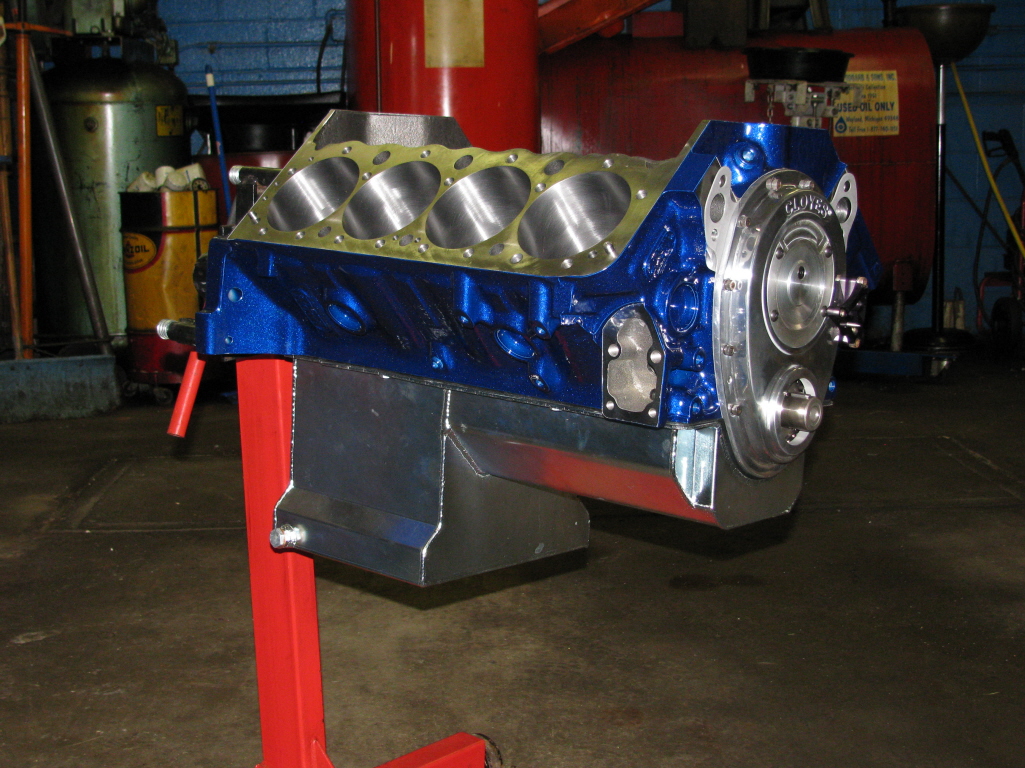
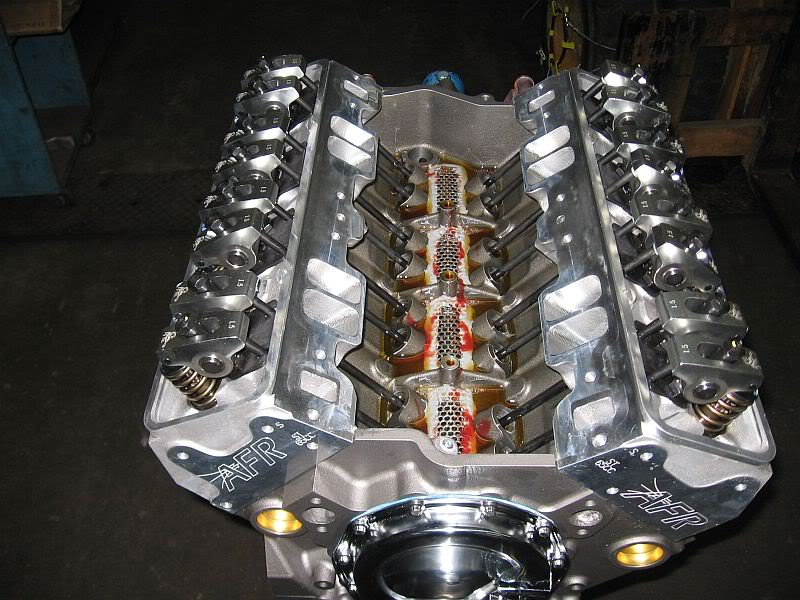
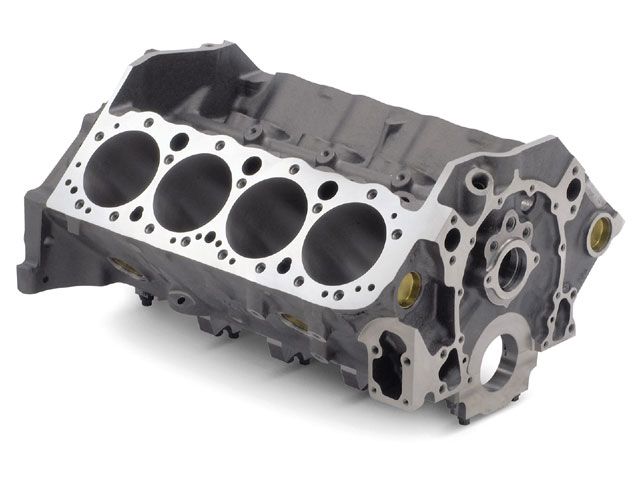
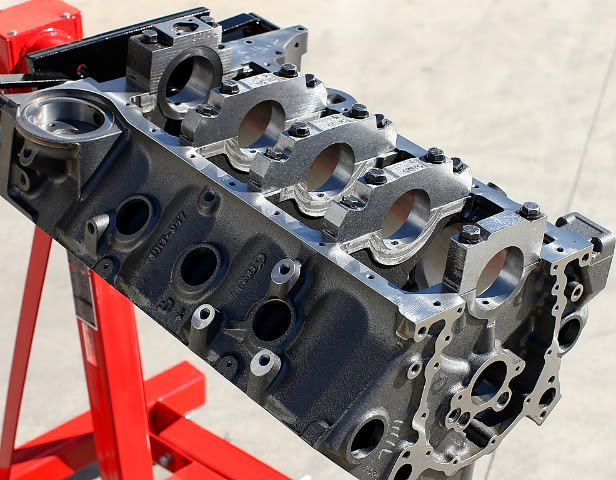
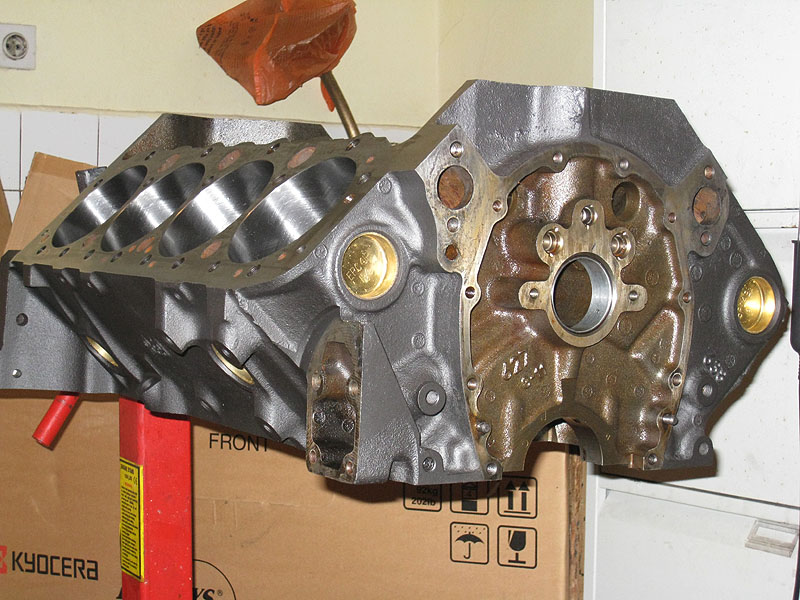
even high quality parts like this DART block can fail under high enough stress so think through your choices carefully
when you have a block magnetically or dye checked for cracks , and sonic tested for bore wall thickness, don,t forget to check lifter bores, and lifter gallery areas, and main cap webs etc. just because its not easy to access does not mean cracks can be ignored

BTW I have on several occasions seen guys who complain about various oil leaks on valve covers and rear seals ETC.
Used, engine parts will have oil embedded deeply into the micro surfaces.
almost all replacement parts will have a wax or grease preservative coating to prevent corrosion during shipping!
IF YOU simply wipe off oil soaked surfaces with a paper towel, who then smear on the sealant of there choice and proceed to install gaskets,
YOU WILL OCCASIONALLY HAVE LEAKS!
and then they wonder or maybe be in shock when you find the seeping oil leak has returned in a few weeks time!
metal surfaces may look smooth as glass but under a microscope they look like the surface of the moon , with lots of jagged surface cracks, so you really need to wash out the micro lubricants trapped in those cracks with a thin fast evaporating grease solvent and a lint free rag , followed by a second repeat of the process and in many cases a few minutes with a heat gun to dry and evaporate the solvent in the micro cracks ,
STOP AND READ THE SEALANT PACKAGE DIRECTIONS!
you'll generally find some rather amazing , bits of info such as temperature requirements, temperature limitations, what solvents work best to remove the cement or sealant, only after reading the directions, do you then smear the gasket sealant on both mating surfaces before bonding the two gasket & metal surfaces.(and in many cases you use a brush as dirt or oil on fingers prevents a good seal!)
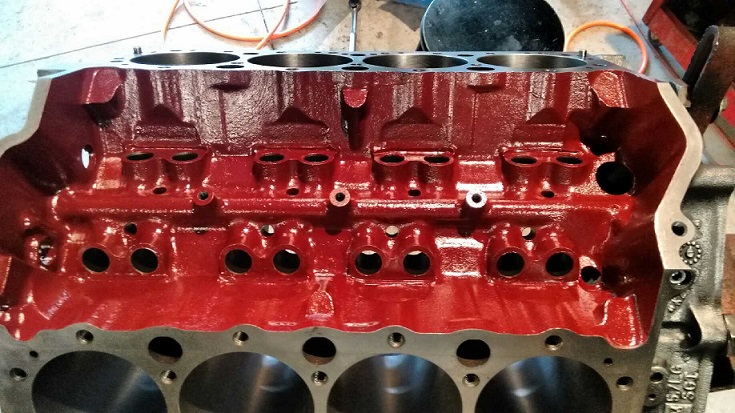
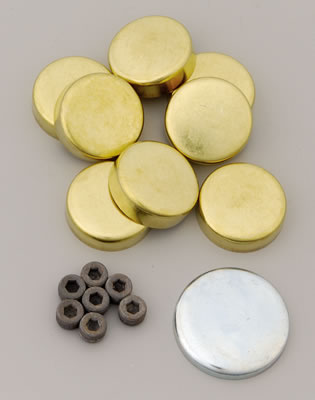
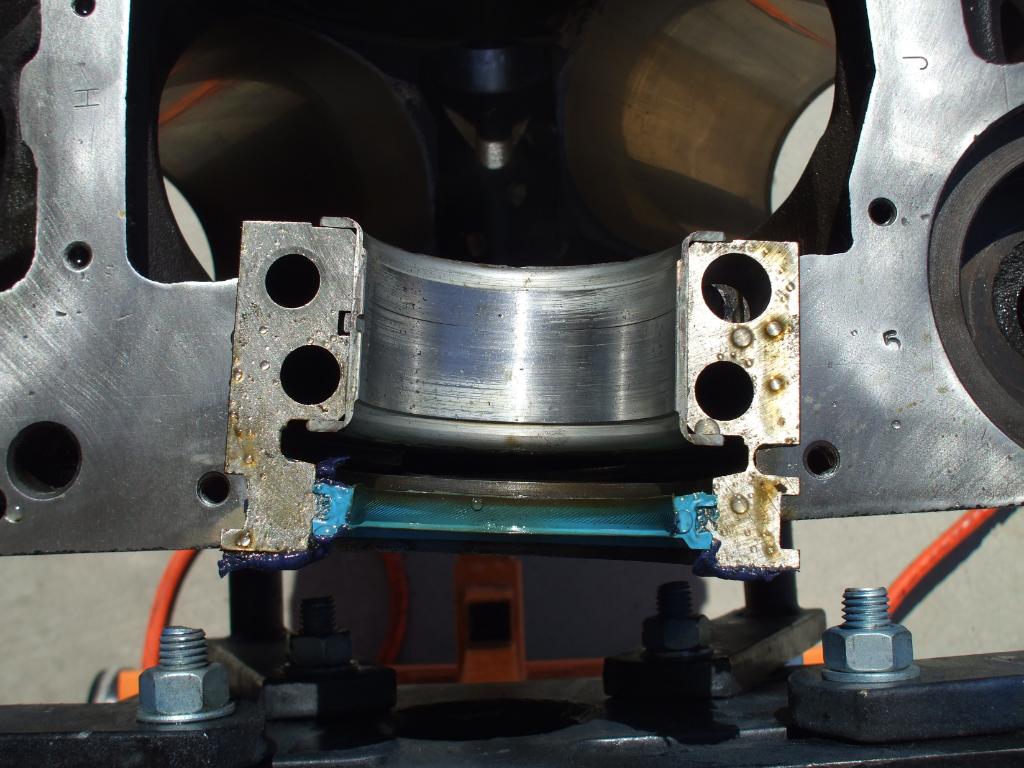
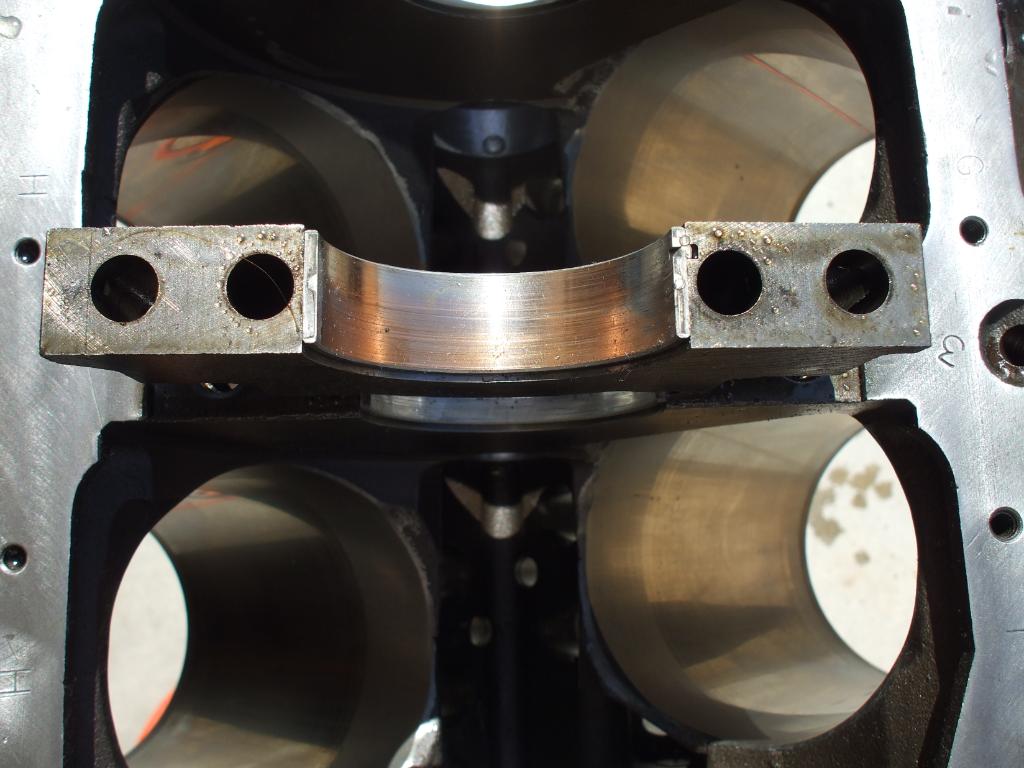
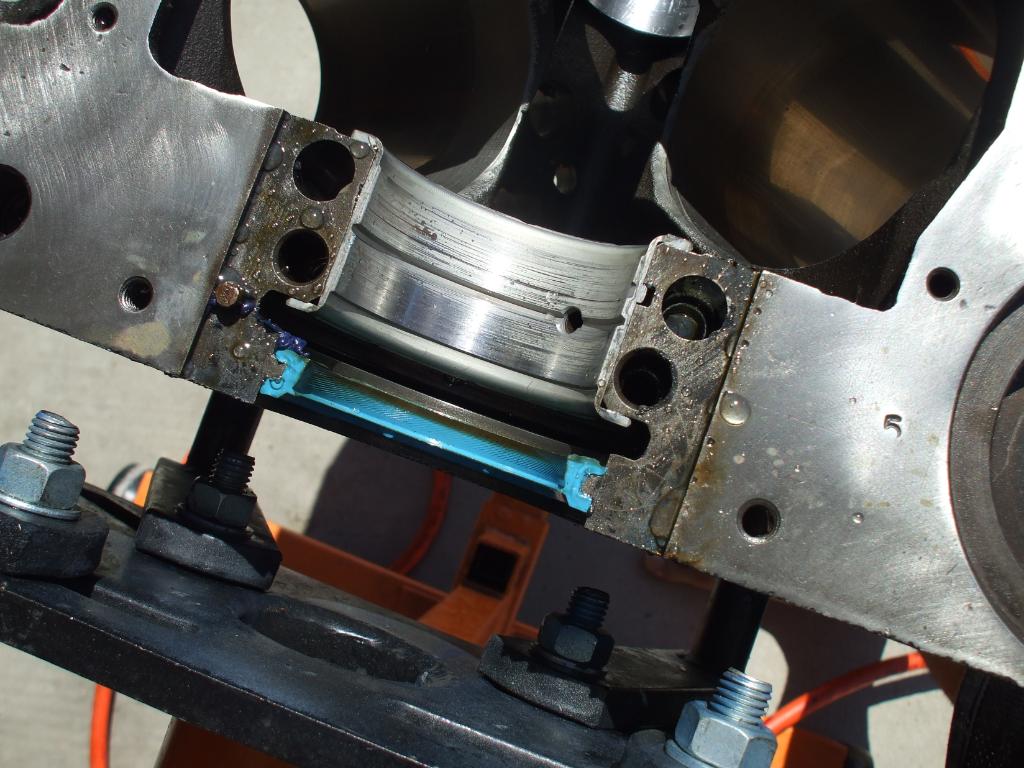
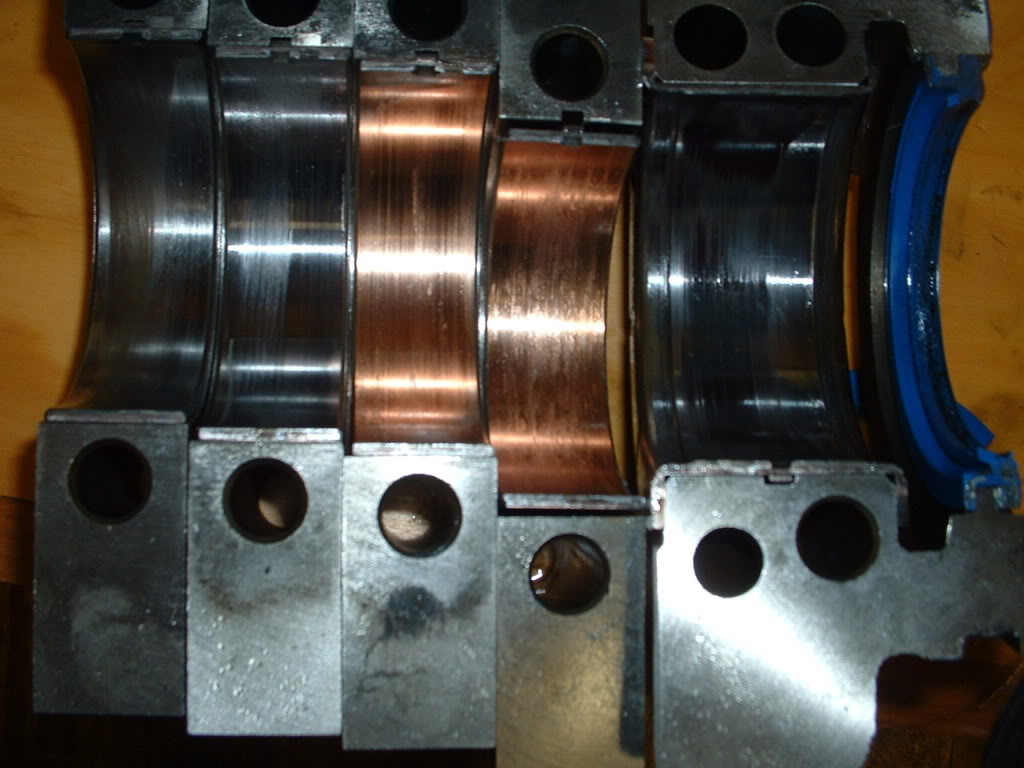
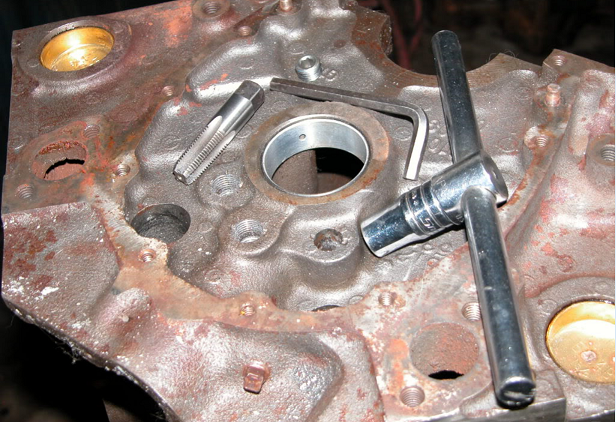
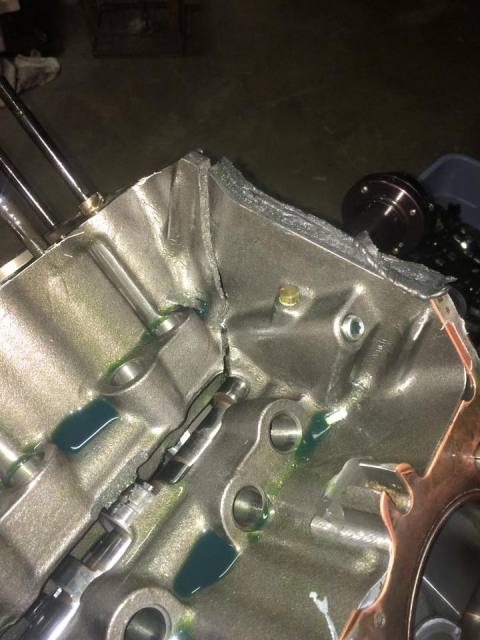
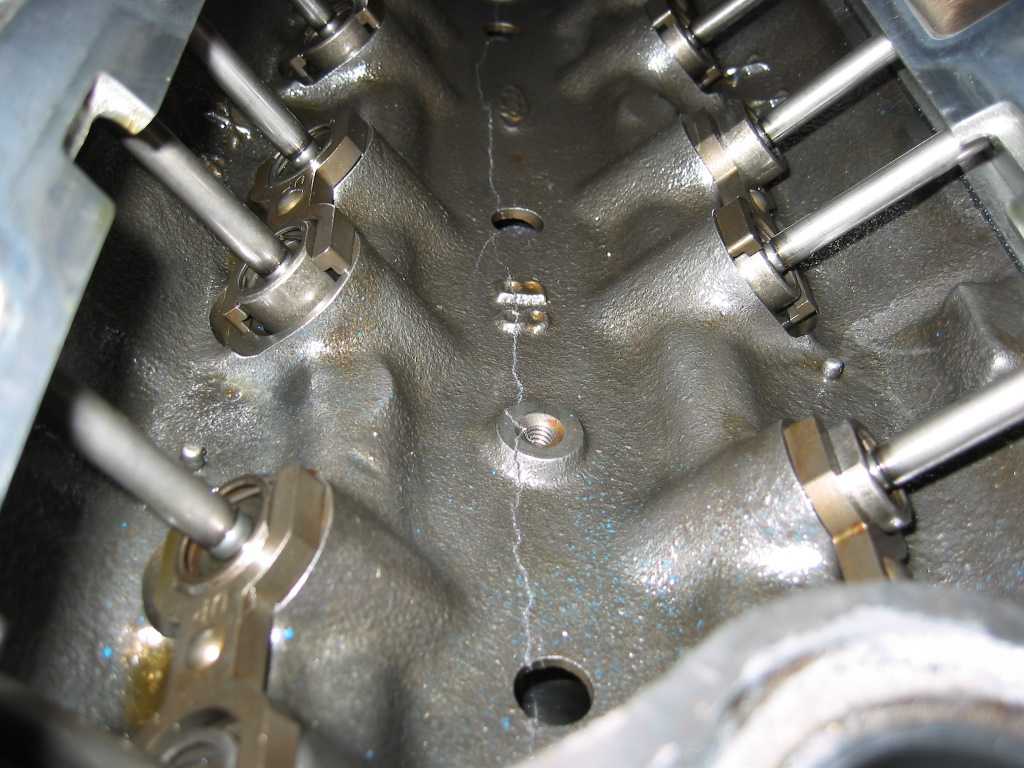
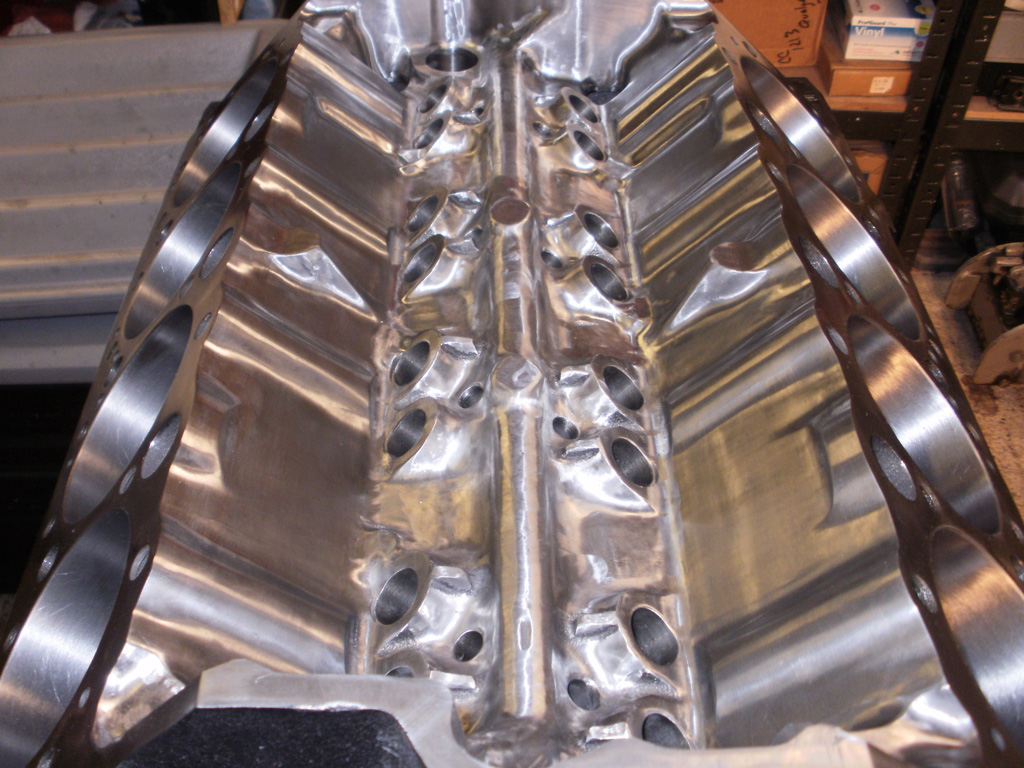
splayed 4 bolt
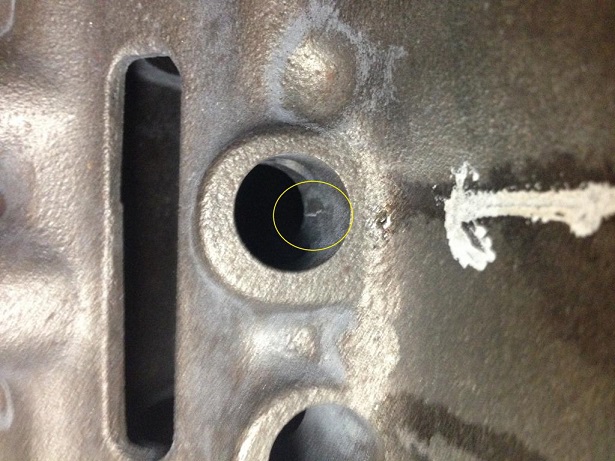

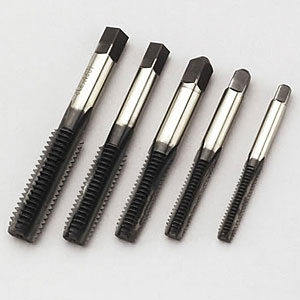
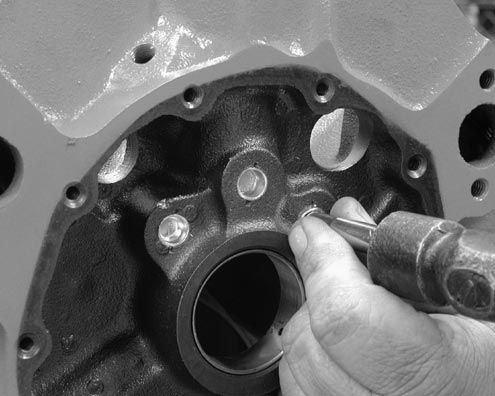
threading the oil passage plugs increases durability and I generally suggest drilling an oil pray jet hole thats .031-.035 in the pass side oil pass plug, THE ONE AS YET UN THREADED IN THE PICTURE ABOVE
RELATED INFO
viewtopic.php?f=51&t=125
viewtopic.php?f=51&t=1479
viewtopic.php?f=54&t=117
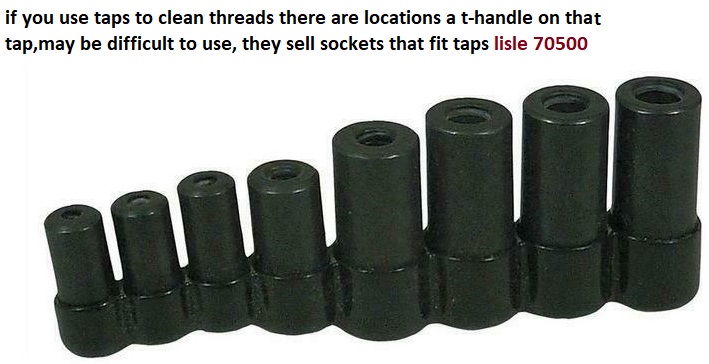
viewtopic.php?f=51&t=3774&p=10002&hilit=taps+threads#p10002
viewtopic.php?f=51&t=281&p=344&hilit=brass#p344
http://www.homedepot.com/webapp/wcs/sto ... yID=502376
http://www.mcmaster.com/#standard-taps/=ke36u2
http://www.mcmaster.com/#thread-forming-taps/=ke38k5
I got darn tired of running old engine blocks to the local car wash to degrease and blow out the internal oil passages or wasting time and money ,dropping them off at the local machine shop to have them cleaned, and have new cam bearings installed, only to find they took 3 weeks and did a crappy job, so I bought a pressure washer and a heat gun, a bunch of thread cleaning taps and several cans of engine paint, several sets of freeze plugs and a rifle bore cleaning rod and a dozen bore brushes.
that way I could do my own block cleaning.
[/color] [/size]
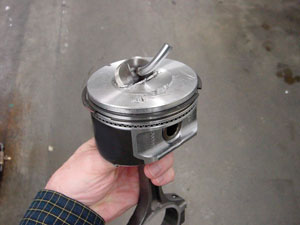
anytime you loose a cam lobe or a few lifters and and cam lobes theres an excellent chance theres enough metallic micro crud circulating with the oil to trash the bearings with or without the new or used cam being reinstalled. that fine metallic debris was from the previous worn components and pumping all that hardened steel shaving stuff though the engine passages. the oil filter and oil pump are most likely loaded with shavings & debris the pump,bye-pass is probably open much of the time. You REALLY need to tear that engine down to the bare block and start fresh, after pulling all the oil passage plugs and roding out the passages and carefully cleaning the block.. These's very likely to be micro debris/ pieces of lobe and roller embedded in the piston skirts and cylinder walls. They'll eventually damage your new components too. get every plug out of the block, have it cleaned and carefully inspected, and most likely youll need to bore &hone it to the next oversize and get new bearings pistons and rings along with a new cam and lifters.
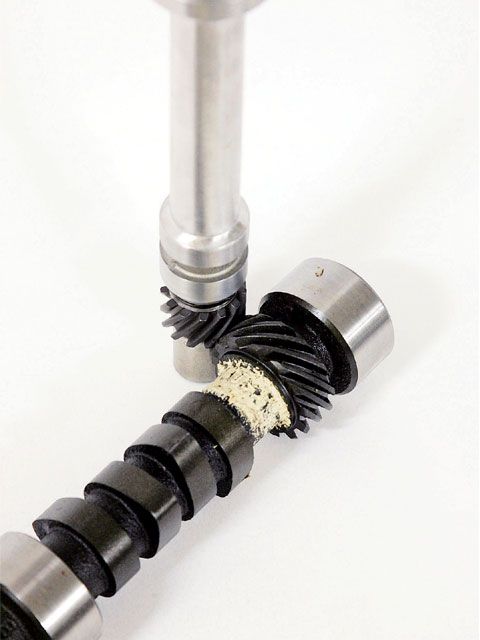
not all roller cams can use Melonited gears, check with the grinder to be sure. Some require bronze distributor gears.
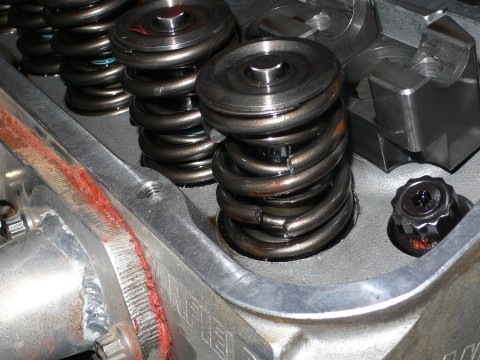
on eny engine you don,t want to stress components till the oils up to art least 200F ,so stay out of it when it's cold. Anything over 10 lbs at idle is usually OK for hot idle oil pressure, 30 is more than needed. High volume oil pumps can add stress to the distributor gears and the front of the block behind the timing gear and really should not be used unless matched to a 7-8 quart baffled oil pan and windage tray, shrapnel screens and magnets are a huge help in limiting damage potential. BTW, that steel filings stuff is embedded in the oil pump gears too. replace the pump .. You'll get new cam bearings anyway,if your smart when the blocks cleaned. youll Need to disassemble and clean the valve train and the heads, take them down completely clean all the parts. It's in your roller rocker bearings too. I'd clean them carefully and if they show any were retire those roller lifters, you'll almost never get all the stuff out of the lifter wheels, and that could cause the next cam to fail.[/b]
Roller cam and lifter grindings are murder on engines. that's 8620 hardened steel. I've seen guys try to cut corners on this cleaning and rebuilding after that, it never works. Imagine breaking up a file into microscopic pieces and feeding it into the engine.
AFTERMARKET BLOCKS LIKE DART PRODUCES HAVE FAR THICKER CYLINDER WALL CASTINGS
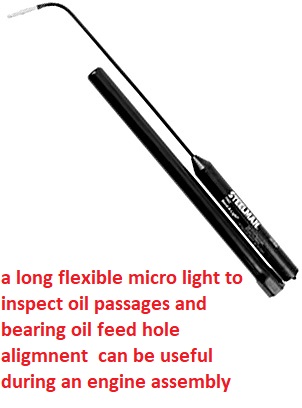
the tools use is more a tweak or refinement than mandatory, but increasing cool lubricant flow to the lifter contact area can,t hurt a bit!I bought mine simply because I liked the idea, and its proved to be useful.
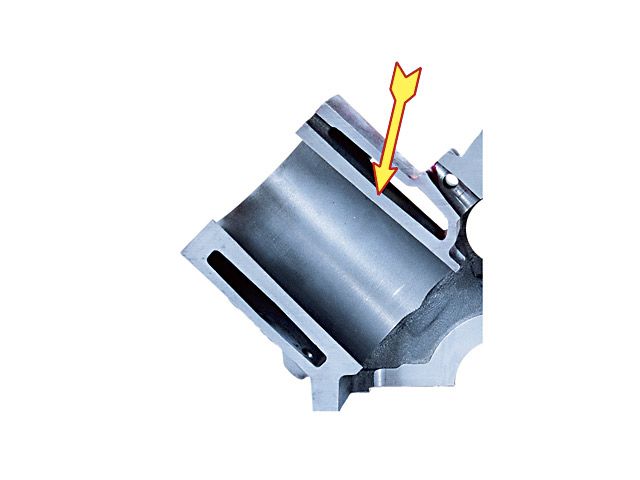
I usually groove my blocks lifter bores lower 1/3rd regardless of the lifter type used, but Id point out that the grooves are shallow and designed to flow extra cooling lubricant, so you'll want to also use a windage tray to control the extra coolant flow volume.
I don,t think they are as big a benefit to roller cam applications, as the flat tappet lifter applications but obviously your more or less stuck with the grooves in the lifter bores even if you change lifter types after the lifter bores grooved unless you sleeve them.
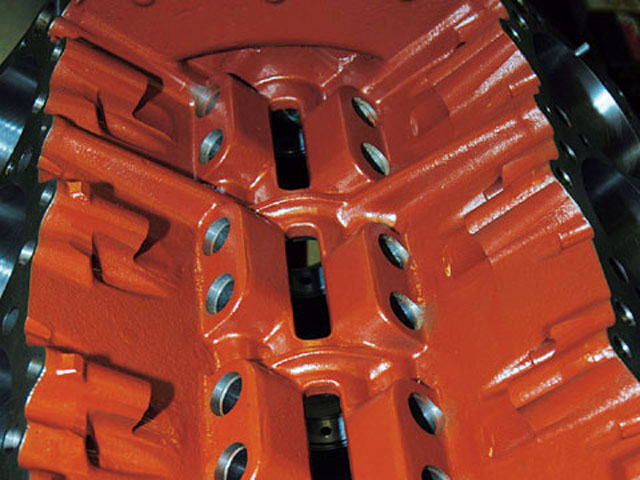
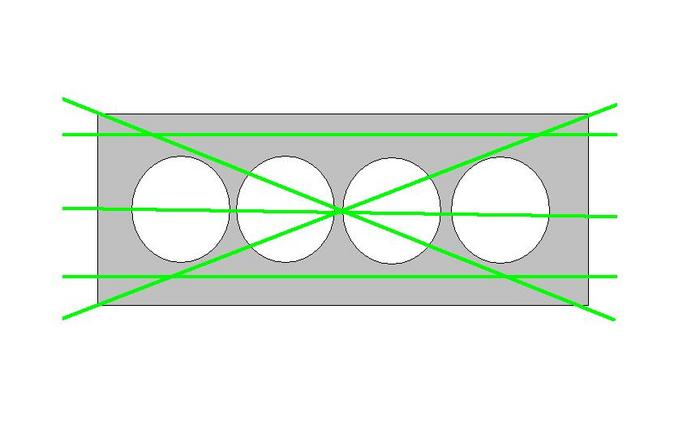
mag check for cracks in the block
http://www.circletrack.com/enginetech/c ... index.html

PARTS THAT FAIL TEND TO LEAVE SHRAPNEL/DEBRIS that can cause problems
for a GOOD job, at a minimum, you'll want to remove ALL the oil passage plugs , and clean the block out with solvent and high pressure air, and some rifle bore brushes, run thru the passages. IF you've had a cam or bearings fail, you need to clean out the oil passages and replace the cam bearings
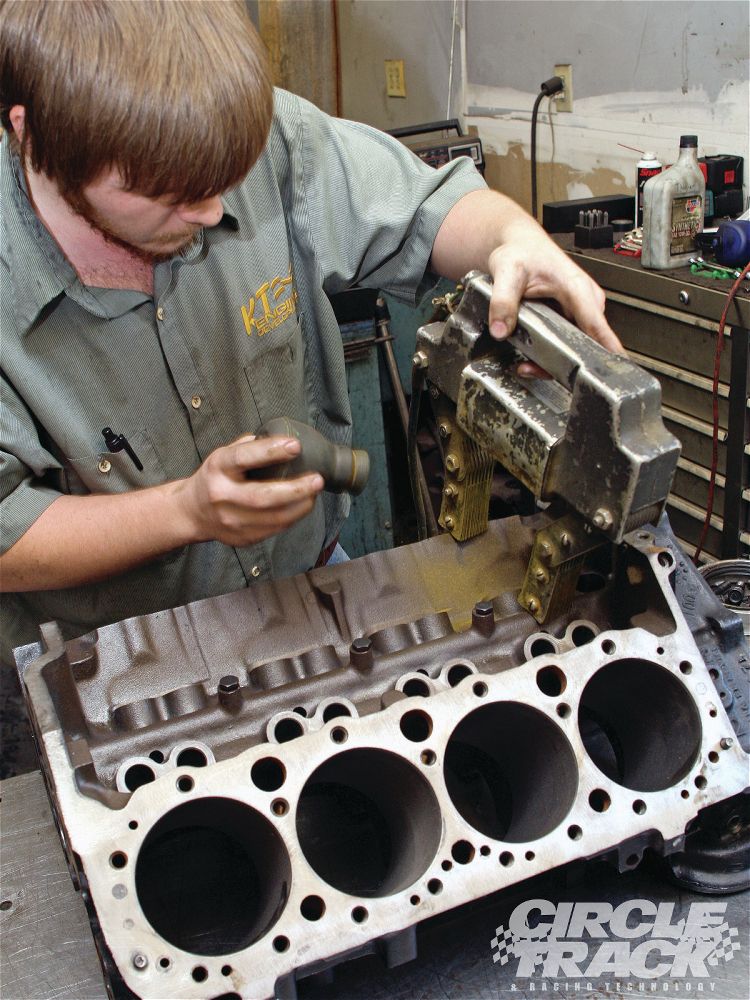
first PULL ALL THE OLD CAM bearings and INSTALL new ones so you can remove crud trapped behind them
and rod out all the oil passages.
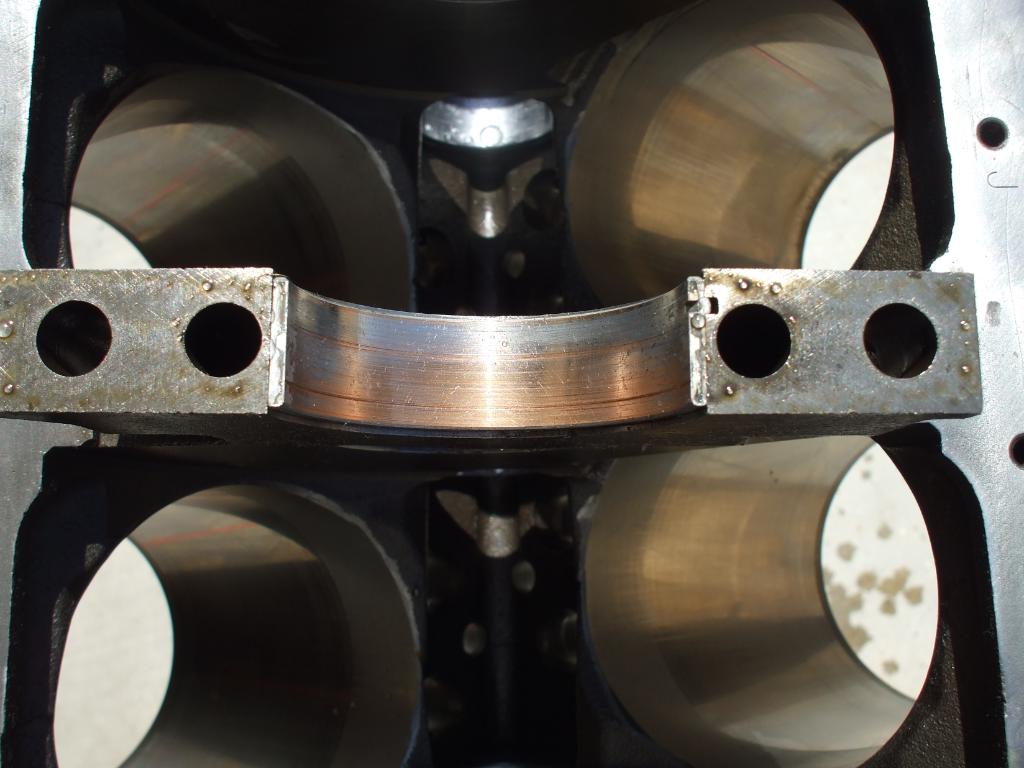
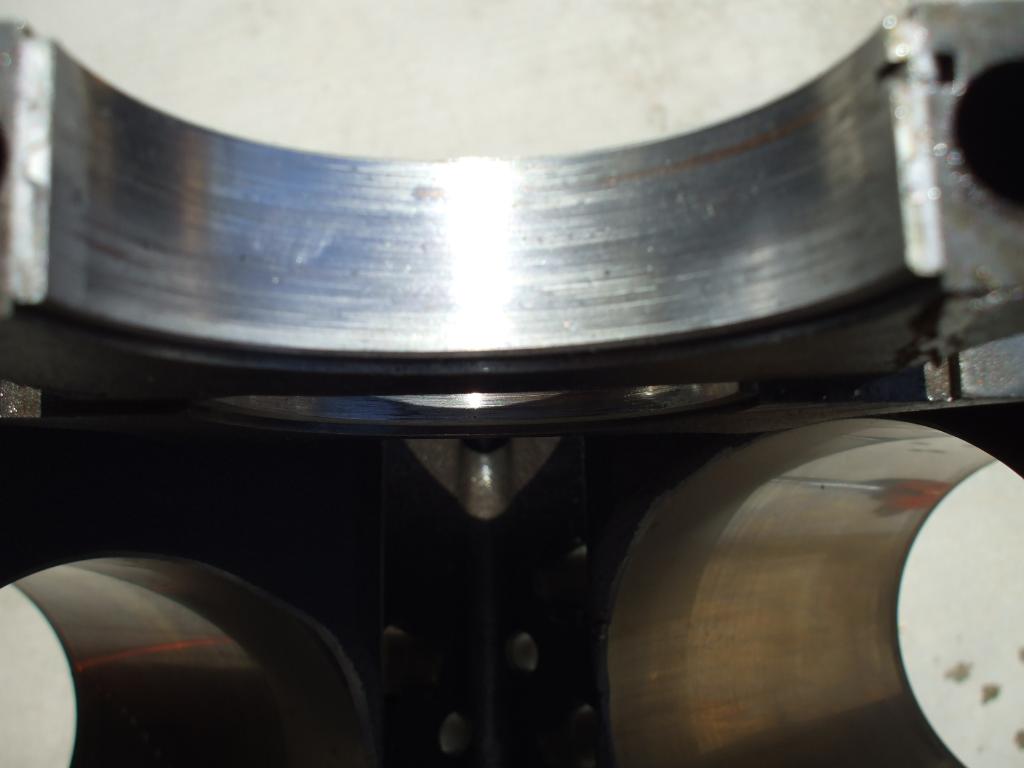
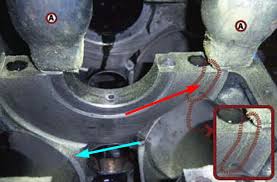
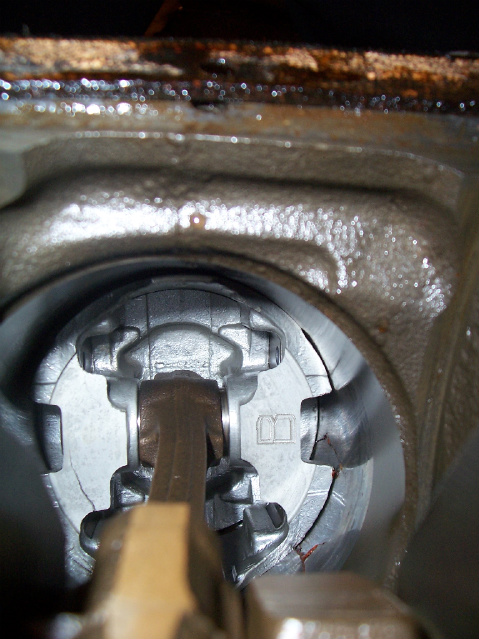
instructions in links below as to oil hole clocking
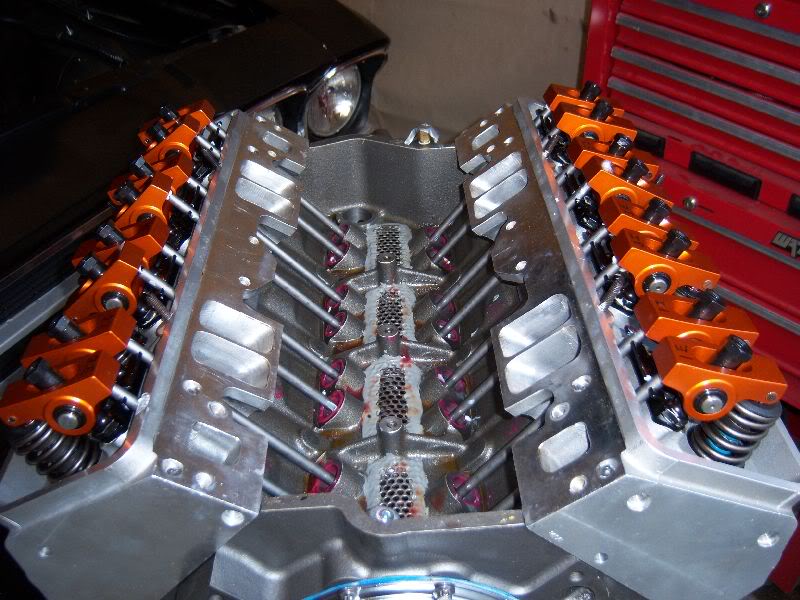
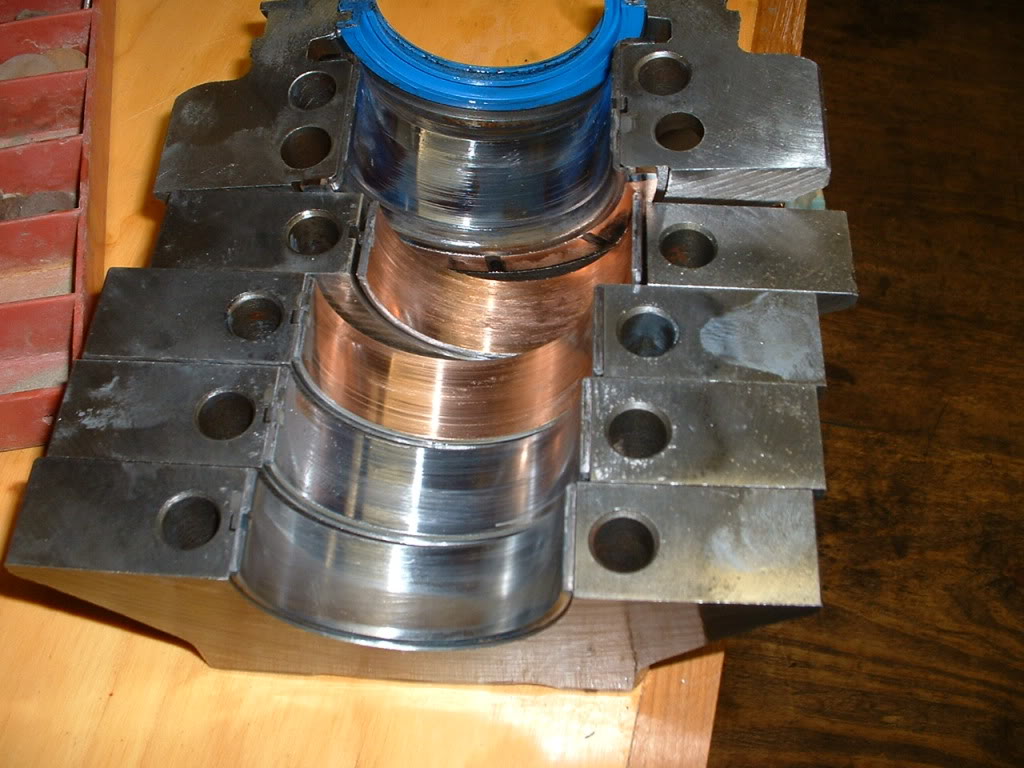
theres a GROOVE under the cam bearing so oil will enter at any location PROVIDED you get it installed correctly front to back so the oil feed holes line up with the groove under the bearing BUT look at this, you will want to support the cam with maximum oil wedge under the cam bearings, remember the bearings are NOT interchangeable in all locations
viewtopic.php?f=32&t=939&p=1582#p1582
If your installing your own cam bearings you want to clean the oil passages out first carefully,look for the blocks oil feed holes, read the instructions, and pay attention during the process and if if the cam bearing your using seams to be loose spend the $20 for a new set , of cam bearings rather than chance it coming loose.
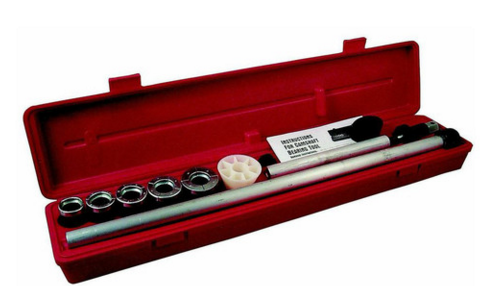
one more reason to buy a cam bearing install tool.
http://garage.grumpysperformance.com/index.php?threads/cam-bearing-install-tools-install-info.1479/
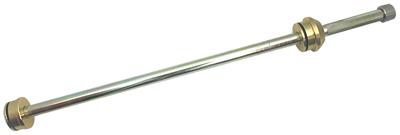 usual cost of about $32
http://www.summitracing.com/parts/AAF-A ... /?rtype=10
the cheaper tool pictured above works fine, but I never saw one for sale decades ago
http://www.summitracing.com/parts/AAF-ALL96470/?rtype=10
I bought a used tool,
( ONLY USED ONCE IF YOU BELIEVE THE SELLER) at a swap meet 40 years ago that looked similar to this for $70
http://www.cpooutlets.com/lisle-180...ap=lisn18000&gclid=CIum95iqhcsCFQUIaQodk3YDfw
http://www.lislecorp.com/uploads/instructions/18000_WebInstr_CC56DD9726DB5.pdf
Ive occasionally been asked what you can do too reduce the slack in the timing chain if your blocks been line honed,
to straiten the main bearings and that resulted in a slightly closer crank to cam center-line distance,
that results in a slightly increased slack in the stock timing chain sets.
a negligible amount of metal is generally removed from the main bearing saddles in the block, they usually try very hard to minimize that, metal removal so standard parts still fit,during a line hone , but they do sell slightly tighter timing chain sets to correct excess slack if that's required.
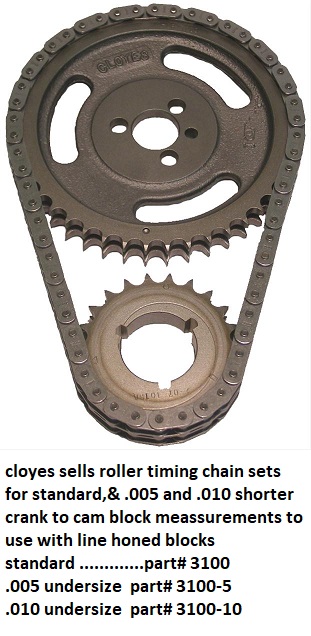
https://www.summitracing.com/parts/clo-9-3100-5
Timing Chain and Gear Set, Original True Roller, Double Roller, -0.005 in., Iron/Steel Sprockets, Chevy, Small Block, Set
for line honed blocks where the crank is .005 closer to the cam
https://www.summitracing.com/parts/clo-9-3100-10
for line honed blocks where the crank is .010 closer to the cam
Timing Chain and Gear Set, Original True Roller, Double Roller, -0.010 in., Iron/Steel Sprockets, Chevy, Small Block, Set
you might want to read thru these links
viewtopic.php?f=51&t=1479
viewtopic.php?f=50&t=10363
viewtopic.php?f=54&t=3834&p=10199&hilit=trash+passages#p10199
viewtopic.php?f=51&t=10464&p=43788#p43788
viewtopic.php?f=54&t=120&p=867&hilit=magnets#p867
viewtopic.php?f=52&t=282
read these threads
now obviously you won,t be the first guy that thinks of just installing a new cam, changing the oil and filter , maybe flushing the engine out a bit with a quart of diesel fuel added to the old oil, for about 2 minutes of idle time just before changing the oil etc., and while those practices do occasionally let you get by, thats not the correct route and it leaves a significant amount of metallic crud in the oil passages , the fact that people do occasionally get by with a semi clean engine is tribute to how well the factory lube system and oil filter functions,
but betting on those bearings and the new cam and lifters not being scored by the retained metallic debris, is at best a gamble, where your putting far more than the new cam and lifters at risk
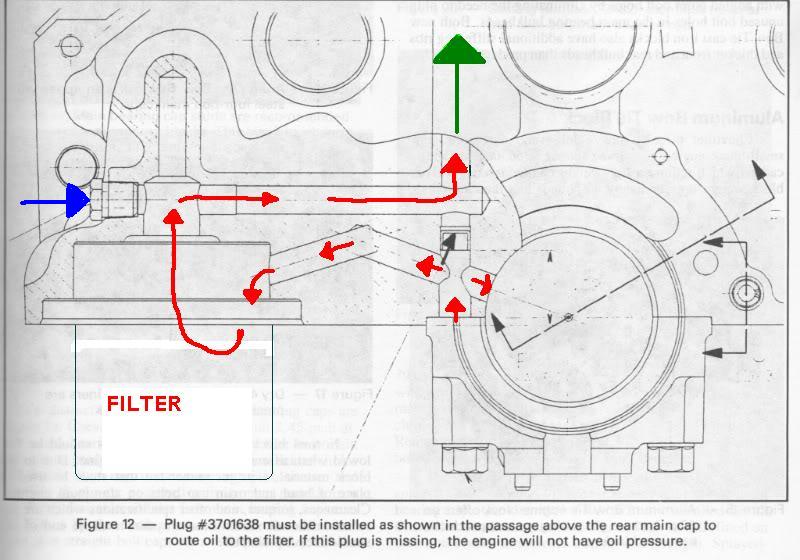
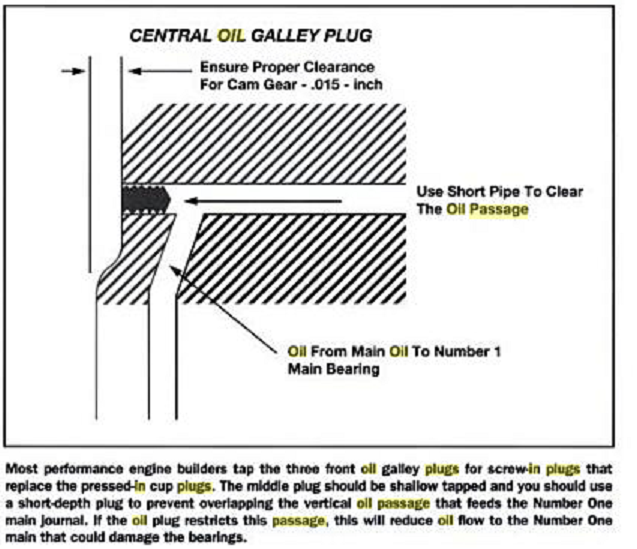
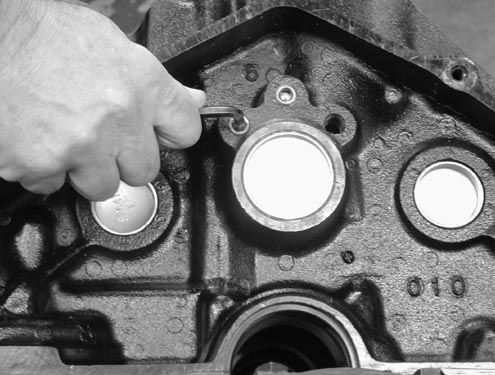
to do the job correctly Remove ALL oil passage plugs. Those are the 2-3 at each end of the cam, depending on if its a bbc or sbc ,don,t forget the one under the rear main cap, and the one in the left deck at the rear. Removing the, main ,bearings and rotating assembly and carefully inspect and clean those components,remove the cam bearings, as the oil passage that feeds oil to the main bearings is behind them, and if there is ANY metallic crud retained AT ALL in the oil passages and if you don,t remove the bearings and clean the oil passages with a brush and high pressure air theres bound to be some retained, you can be certain that metallic debris, which will get flushed RIGHT DIRECTLY INTO your brand-new main bearings, lifters and cam lobes, during the first 10 minutes the new engines running, when you crank the new motor up, resulting in scored bearings and a highly increased chance of the new cam failing
READ THIS
viewtopic.php?f=54&t=4580
IF youve got the time you could get a bit excessive and polish the block surfaces
VERIFY THE BLOCK DECKS NOT WARPED
ONCE your cam has failed and theres no way to do any repair other than replacing BOTH the cam and all new lifters, your current engine has a great deal of metallic dust from the worn cam lobes and lifters circulating in the oil and only about 70%-90% is likely to have been trapped in the oil filter before being embedded in the bearings, yes IM fully aware you don,t particularly want to do a rebuild, and yes Im fully aware that youve got a buddy that says just flushing out the block and installing a new cam and lifters is all thats required, and while that can be done,and its cheaper and has been done thousands of times, its very unlikely that the bearings in the current engine are not contaminated, with metallic debris, the correct route is a total dis assembly, cleaning and rebuild
READ THESE LINKS
viewtopic.php?f=52&t=282
viewtopic.php?f=51&t=2919&hilit=cleaning+passages+lifters
viewtopic.php?f=53&t=2727&p=7078&hilit=magnets+screens#p7078
http://garage.grumpysperformance.co...e-springs-and-setting-up-the-valve-train.181/
viewtopic.php?f=32&t=939&p=1582&hilit=filter+cutter#p1582
viewtopic.php?f=54&t=3834&p=10199&hilit=trash+passages#p10199
http://garage.grumpysperformance.com/index.php?threads/analyzing-piston-damage.16432/
viewtopic.php?f=54&t=4580
[/size] [/b]
LINK FOR OIL PASSAGE LOCATION INFO
viewtopic.php?f=38&t=11
http://www.se-r.net/engine/block_prep.html
viewtopic.php?f=50&t=614
http://www.hotrodpitstop.com/engine-block-prep.php
Cleaning Your Engine Block
Engine builders usually charge around $120 to clean a block, and most racers consider it money well spent to avoid the hassle. The engine builders usually use a mild acid or caustic wash, either in a hot tank or a jet sprayer. Whether you choose to do it yourself or have your engine shop handle the duties, make sure the freeze and gallery plugs are removed beforehand so that anything hidden behind them can get out. After all the machining processes are complete, the block needs to be cleaned again to get rid of any accumulated machining oils and metal slivers left over from cutting.
Cleaning is a necessary step even if you are using a brand-new block. New blocks can often have casting slag hanging around in the cracks and crevices, and it becomes a big, gritty problem if not removed before assembly. This is a step you can definitely do yourself. If the block is new, all you need is a water hose and a variety of brushes to make sure you scrub everything. If you are cleaning a rebuild, however, the work gets tougher. You need to use hot water and a cleaner capable of cutting through the grease and grime that builds up just about everywhere. When you are finished, make sure to hit all the surfaces with a light coat of WD-40 or some other type of light oil as soon as the surface has been dried to prevent rust.
Replace The Freeze Plugs
If you have your freeze plugs in place, it's also a good idea to pressure test the block before beginning the big projects. Pressure testing is done by filling the water jackets and then adding air pressure to see if there are any cracks or leaks. Both of these processes should be repeated after all the machine work is done to make sure you didn't cut too much away. Many machinists say they have seen situations in which a chunk of casting slag that was knocked away during one of the cutting procedures opens a pinhole through to a water jacket. The only way to catch this is with a final pressure check before engine assembly begins.
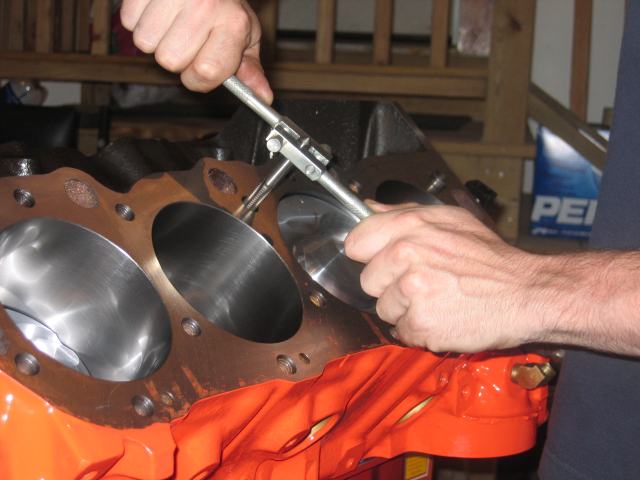
Sonic and Pressure Testing Your Race Engine Block
It doesn't make sense to do machine work on a block that may not even be usable. That's why it's wise to sonic test the block before much effort is put into it. Sonic testing can tell you the thickness of the cylinder walls quickly and easily. Even on a new block, this is important because core shift can cause one side of a cylinder wall to be too thin. Engine builder Peter Guild of PME Engines says he likes to see the cylinder wall thickness at least 0.275 inch. A sonic tester is also capable of catching a block that's just too far gone to be rebuilt again
Instructions
Things You'll Need: to hone a block in your home shop
* Drill
Cylinder hone
Goggles
Motor oil
Kerosene
File
Soap
Cloth
Anti-rust protective oil
1 Set the engine block on an engine stand if you have not done so already. You can use the top of a sturdy workbench instead; just make sure the engine block is set firmly on the surface.
2.Set the honing tool in a large drill with a slow speed setting. You may use a brush hone if the condition of the cylinder walls is fairly good and they just need deglazing. Use a flex (stone) hone if the cylinder is worn but not excessively; use a rigid (stone) hone if the cylinders are excessively worn but still within manufacturer specifications. Also, if you are installing cast-iron or chrome-faced rings, use a 280-grit stone; for moly rings, use a 400-grit stone.
3 :Mix equal amounts of 20-weight. motor oil and kerosene in a clean plastic container and use the mixture to lubricate the cylinder walls. Put on your safety goggles. Hand-squeeze the brush or stone hone and slip it into the cylinder.
4.Turn on the drill and keep the hone moving up and down the cylinder wall at all times, at a pace slow enough to produce a crosshatch pattern of about 50 to 60 degrees on the wall. Keep the cylinder wall well-lubricated. When you are finished, shut off the drill, but keep the hone moving until the drill stops. Compress the brush or stones and pull the hone out of the cylinder. Continue with the next cylinder until you are finished.
5.Chamfer the top edge of the cylinder walls with a small file so the pistons will not seize during installation. Thoroughly wash the engine block with soap and warm water, to get rid of the grit produced during honing. Dampen a white cloth with new motor oil and wipe the cylinder walls. If the cloth picks up gray residue from the wall, wash the engine block again.
6.Rinse the engine block and cylinders with clean water. Dry the engine and lubricate the cylinders with anti-rust protective oil. Cover the engine with a plastic bag to keep dust off.

don,t forget to blow out the crank oil passages , metallic crud can be trapped in there
http://www.ehow.com/how_4827132_hone-cy ... z1FeOOneJL
related threads you really should read thru
viewtopic.php?f=27&t=2886&p=7496&hilit=sprayer#p7496
viewtopic.php?f=27&t=1077&p=2078&hilit=+pressure+water#p2078
viewtopic.php?f=51&t=125
viewtopic.php?f=54&t=117
http://circletrack.automotive.com/10913 ... index.html
http://www.harborfreight.com/cpi/ctaf/d ... mber=95100
http://www.harborfreight.com/cpi/ctaf/d ... mber=97014
http://www.harborfreight.com/Air-Blow-G ... 68260.html
http://www.harborfreight.com/cpi/ctaf/d ... mber=95947

http://secure.armorholdings.com/kleen-b ... ct387.html
http://www.midsouthshooterssupply.com/i ... 0009796231
BTW
SUPERIOR FORMULA 23 HEAVY DUTY INDUSTRIAL CLEANER & DE-GREASER
"BLACK BOTTLE/JUG, & YELLOW LETTERING"
"PUBLIX super market sells it"
if you ever want to clean your cars engine while its in the car, a spray bottle filled with a 50%/50% mix of that cleaner/solvent sprayed onto the outer surfaces and left to soak for 5 minutes and a pressure washer does an amazing job if used several times in repeated succession
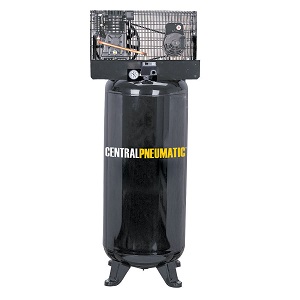
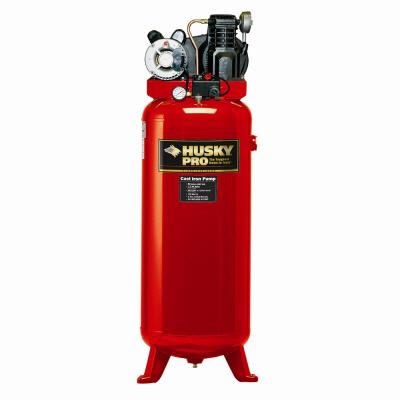
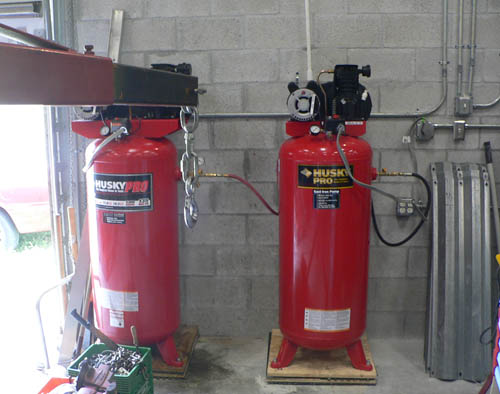
OBVIOUSLY USE OF A PRESSURE WASHER AND OR A DECENT AIR COMPRESSOR, and SOME good GREASE SOLVENT HAS ADVANTAGES, and use of QUALITY OIL FILTERS and INSTALLING HIGH TEMP, MAGNETS to trap any metallic crud you might miss helps
RELATED INFO YOULL WANT TO READ
http://garage.grumpysperformance.co...iepts-on-each-car-maintinance.1467/#post-3297
http://garage.grumpysperformance.co...-heads-up-on-buying-used-engine-blocks.14305/
viewtopic.php?f=54&t=2080&p=5568&hilit=magnets#p5568
viewtopic.php?f=52&t=282&p=5227&hilit=+magnets#p5227
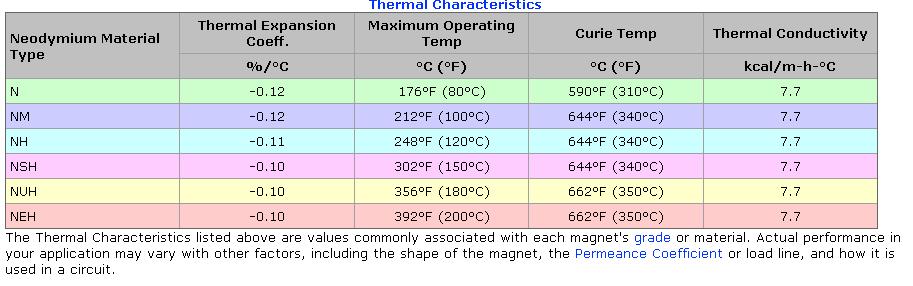
http://www.kjmagnetics.com/proddetail.asp?prod=D66SH
viewtopic.php?f=54&t=938&p=1581&hilit=+magnets#p1581
viewtopic.php?f=54&t=120&p=867&hilit=+magnets#p867
http://garage.grumpysperformance.com/index.php?threads/parts-washers-cleaners.2886/#post-12701
http://www.eastwood.com/paints/hi-temp- ... aints.html

http://www.homedepot.com/Outdoors-Outdo ... ogId=10053
a good spray down, with this spray and rub in with a synthetic bristle brush, as you heat the metal with a heat gun, immediately after cleaning helps
 the new wd40 rust preventative spray works far better than the older version
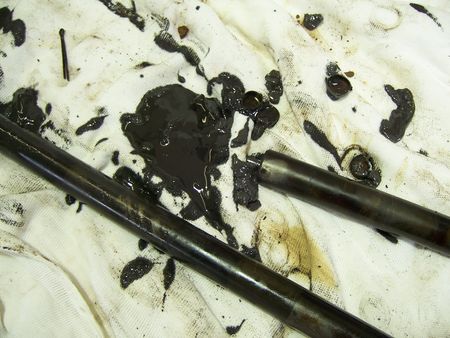
you would be amazed at the sludge build up in some engines
LEAKING GASKETS< BAD PVC VALVES FAILURE TO CHANGE OIL ALL RESULT IN ENGINE DAMAGE
heres a helpful diagnostic tool,
http://www.circletrack.com/enginetech/c ... ilter_fun/
http://www.summitracing.com/parts/SUM-9 ... toview=sku
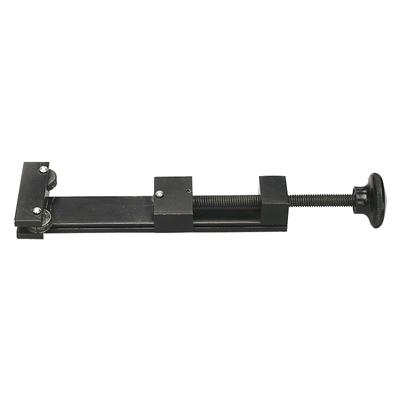
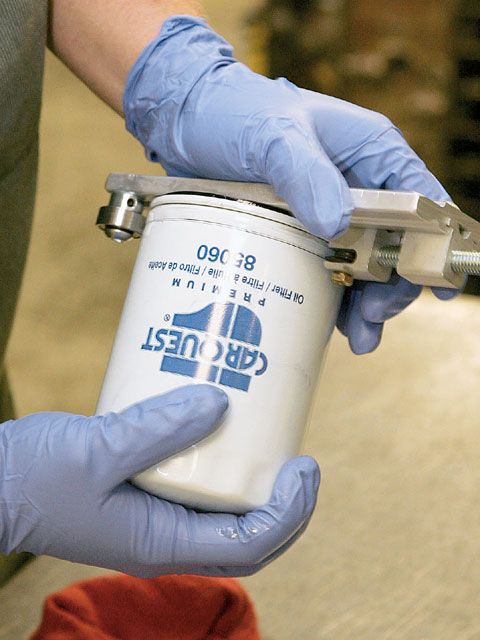
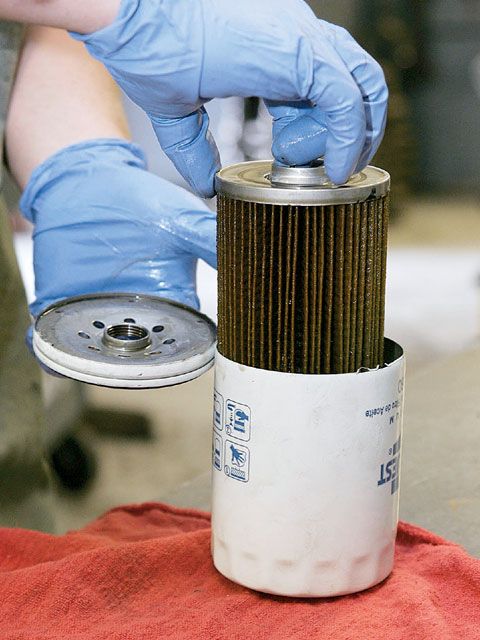
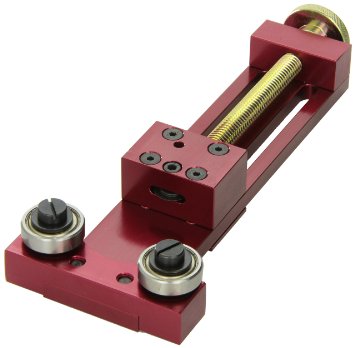
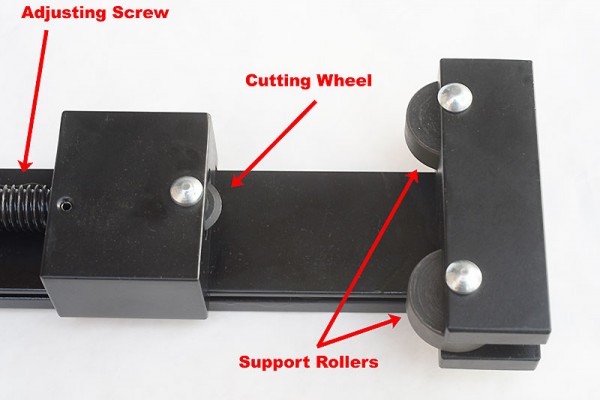
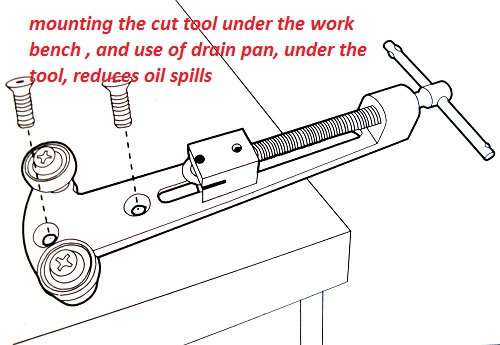
heres a helpful diagnostic tool,(the oil filter cutter pictured below) and yes I still cut open the oil filters and inspect the filter element on my cars oil filter
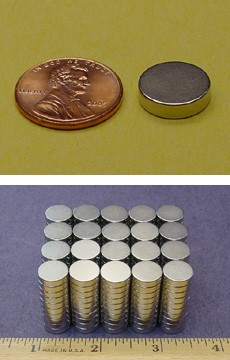
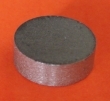
proper magnets trap metallic debris
SmCo Samarium Cobalt Disc Magnets
http://www.magnet4less.com/
Samarium Cobalt MAGNETS HELP
http://www.magnet4sale.com/smco-disk-magnet-dia-1x1-4-samarium-cobalt-magnets-608-f-temperature/
magnets are ceramic and glass hard, don,t try to drill or grind them, as they can shatter
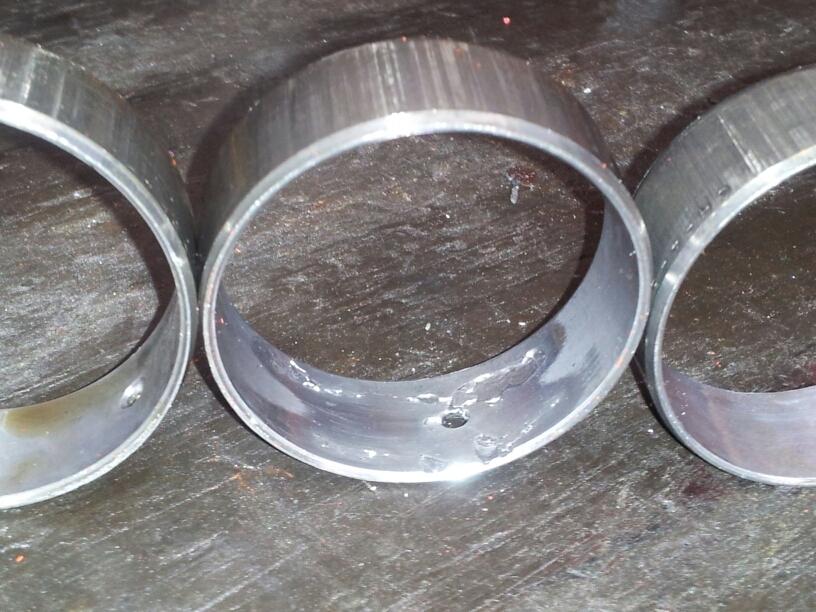
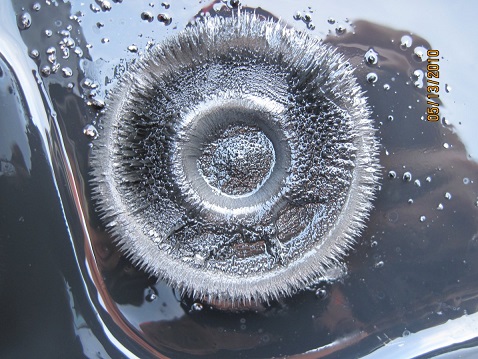
if you don,t think a proper magnet can trap/hold and prevent metalic debriss from getting into the oil pump and bearings , look at this picture of an oil pan magnet I found posted
Model# SMCO-D8
Samarium Cobalt Magnets 3/4 in x 1/4 in Disc
Suitable for high temperature applications
Wholesale Price Range:
$2.99
its basically a heavy duty can opener , or an oil filter cutter designed to make it easy to internally inspect oil filters, by allowing you to remove the filter element , from inside the surrounding (CAN) for close visual inspection. if you've got more than a tiny bit of metallic crud in the filter theres a good chance some is embedded in bearings or partly clogging oil passages
If you don,t have one, and have not used one, your unlikely to see, or appreciate the benefits,close inspection can and does frequently give you prior evidence of impending or at least gradually occurring wear and with practice you can make an excellent guess as to the parts and condition of those components.
IT also helps to trap crud if you install a couple high temp magnets on the filter and in the oil pan.
RELATED THREADS THAT SHOULD BE READ
http://garage.grumpysperformance.co...bearing-studs-torque-stretch.9409/#post-34238
http://garage.grumpysperformance.co...4-bolts-or-stds-good-enough.10632/#post-45801
http://garage.grumpysperformance.com/index.php?threads/installing-splayed-caps.7267/#post-24723
http://garage.grumpysperformance.com/index.php?threads/splayed-main-caps.1014/#post-16462
http://www.jegs.com/i/Dart/301/3277...7&cadevice=c&gclid=CMfnmqaG2tMCFUm1wAodg-4J8A
http://garage.grumpysperformance.co...eventing-leaky-head-bolts-studs.50/#post-1253
http://garage.grumpysperformance.co...block-cylinder-wall-thickness.976/#post-22976
http://garage.grumpysperformance.co...gine-block-main-cap-movement.6162/#post-19172
http://garage.grumpysperformance.com/index.php?threads/main-cap-fit-in-block.5945/#post-18302
http://garage.grumpysperformance.co...-help-with-main-bolt-question.2851/#post-7377
http://www.chevydiy.com/ultimate-chevy-ls1-ls4-engine-block-guide/
AND for yet another an unpleasant moment in your thought process, just ask yourself "where did all that material , metallic trash, etc. that wore off the cam lobes, lifters, cam gear go before MOST it ended up in the oil filter? What instantly comes into mind for me is the obvious question, "why did the cam or lifter wear excessively, what can I do to prevent a repeat failure" . That is the first thing to logically be determined.
A properly installed and maintained valve train and cam, even a flat tappet cam while using quality top shelf parts , and having the clearances checked and oil flow checked, should not have wear issues for many tens of thousands of miles..
in most cases youll want to remove all oil passage plugs and the cam bearings
before having a local trusted machine shop hot tank the block,
and use ultrasonic cleaning, use a rifle bore brush on all the oil passages
carefully inspect for cracks and damage
as soon as you get the block back pressure clean, dry and paint the non-machined surfaces and use WD40 on the machined
surfaces
I can,t begin to tell you the number of times I see guys have a cam lobe fail and they barely clean anything, they simply slide a new cam into the block, drop in new lifters and then get that stupid deer in the head lights look when the new cam lobes fail!
This is simply a matter of a good deal of residual metallic debris remaining in the block from the previous cam &lifter failure, being washed into moving parts by pressurized oil flow upon start up, theres almost certainly several tea spoons of metallic trash from the previous cam failure trapped in the oil passages and behind the cam bearings if you don,t carefully remove the old cam bearings and use a rifle bore brush, solvent and high pressure air to remove any debris, this Has nothing to do with the condition of the block. Oil galleys are always a great place for this kind of grit and metallic trash to accumulate during the previous lift and cam lobe failure , it get's trapped. ALL the oil passage plugs in a block need to be removed, brushes run through with solvent, then hot soapy water then high pressure air. Cam bearings should be removed and replaced , and yes we all know guys that simply slipped in a new cam and lifters and seemed to get away with it ,but in the vast majority of cases the residual debris will eventually cause durability issues if its not removed, ALL oil galleys and passages need to be flushed out before final Re-assembly and especially after machining. An hour in the parts washer, will frequently does not get the job done.Id highly recommend removing all the oil passage plugs and use of a pressure washer and rifle bore brushes and installing new cam bearings.
ID also strongly recommend use of several high temp rated magnets , as they are very effective at trapping metallic trash from reaching the bearings and valve train.
READ THESE THREADS
http://garage.grumpysperformance.com/index.php?threads/magnets.120/#post-49772
http://garage.grumpysperformance.com/index.php?threads/block-prep.125/page-2#post-48605
YES all that METALLIC TRASH from the cam lobes and lifters DID get into the OIL and MOST of it probably DID get sucked thru the oil pump and at least some of that fine metallic trash bye-passed the oil filter and got embedded in the bearings....ESPECIALLY if you failed to install magnets and shrapnel screens to limit the amount of metallic debris from reaching the oil pump
you first job should be to inspect the worn or defective components and correct the CAUSE of the parts failing so you don,t just replace the components and repeat the problem
Its a fact of life that if you start pushing the engine performance to its limits that youll eventually have components fail, and that can get expensive rapidly.
But parts rarely just "FAIL" theres usually a REASON that parts fail,that can be traced to the CAUSE, thru a careful inspection.
the cause is frequently, use of the wrong component for the application, miss matched components ,improper installation, improper clearances , or lack of proper lubrication , or cooling ,are high on the list, but there's an opportunity to learn what went wrong and what process or clearance issue, lack of cooling or lubrication,or improper tuning caused the part to fail!
post very clear pictures of all damaged components, and theres a good chance the CAUSE will be indicated, by the type of failure or damage
if you don,t understand why a part failed and just blindly replace it, your certainly going to have similar failures operation under similar conditions with similar parts
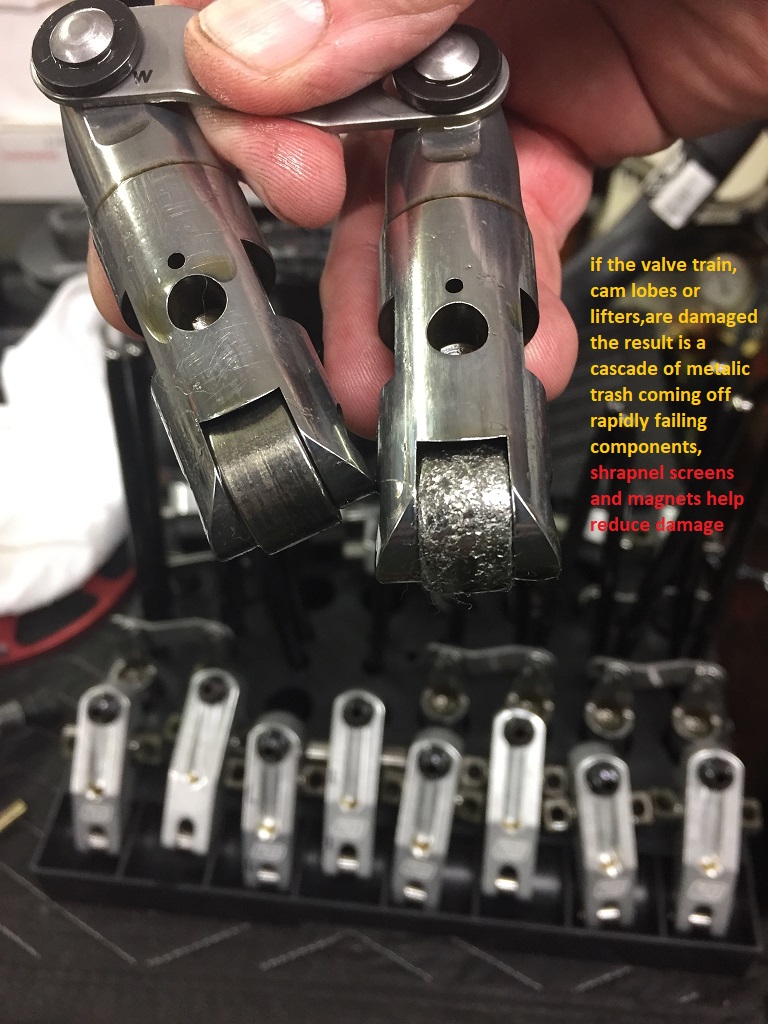
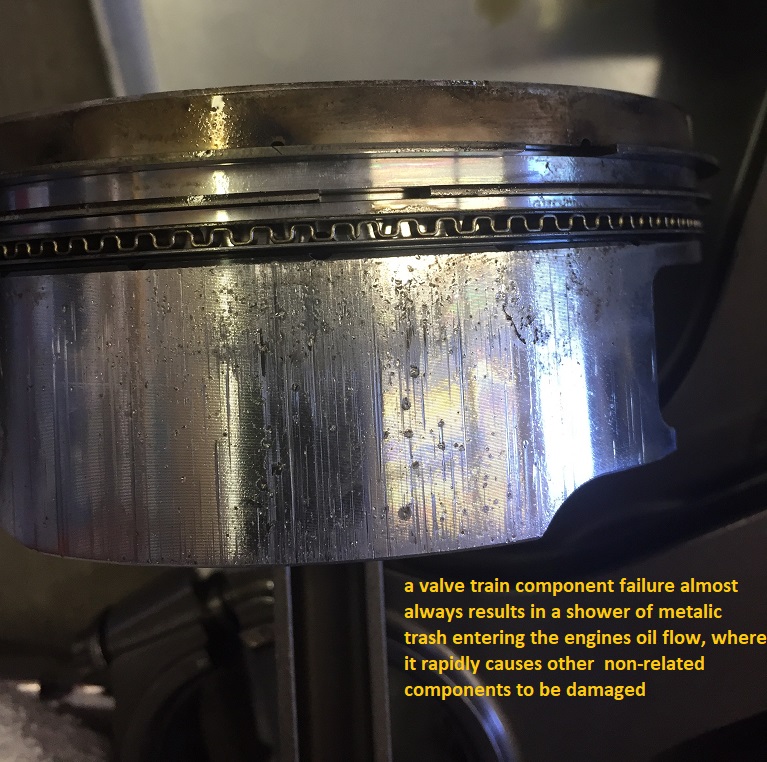
valve train failures seldom result is ONLY busted valve train components, its rather common for the shrapnel formed during a catastrophic valve train failure to spread metallic debris thru the engine , that causes extensive secondary damage especially if the engine run for long after the valve train failure, obviously the extent of damage will be effected by the component(S) that failed and if you've installed safety measures like shrapnel screens , quality filters and magnets and a well designed oil pan , but the whole oil system, its passages and anyplace the debris could flow to needs to be cleaned to prevent future damage, simply replacing a worn lifter and cam won,t generally provide a long term cure as the metallic debris will tend to migrate into areas where it caused further damage if its not cleaned out of the block and oil passages.
almost any trash suspended in the oil eventually gets sucked back thru the oil pump before its going to reach the oil filter and as soon as the oil filter becomes partly clogged most oil filters bye-pass at least some metallic crud to the oil passages in the block, if you've installed shrapnel screens and magnets you can significantly reduce the potential amount of crud reaching the bearings
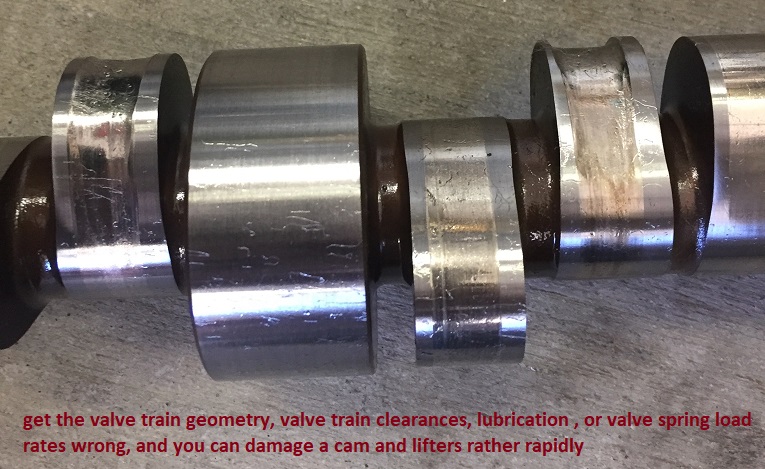
it only takes a few seconds running a new engine for an improperly installed cam , lifters and valve train, during the break-in process to generate teaspoons of metallic trash that ,once in the engine oil flow ,rapidly destroys bearings if the clearances ,spring load rates or valve train geometry is wrong
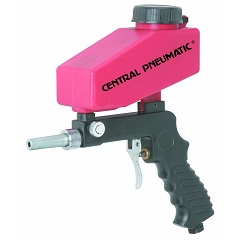
as I'm sure your aware, after careful dis-assembly,an older engine that looks rather well used and un-loved and homely ,can look much different after a careful cleaning those parts will come out of a cleaning,wither you do it or have a local machine shop do it in far better condition and once cleaned and painted look like a totally different engine. personally Ive found the price of a 3200psi pressure cleaner, and particle blast cabinet, pays for itself very rapidly in what you save in cleaning costs you would have other wise spent at the machine shop.
theres a strong tendency for newer guys to want to just install new parts, rather than research the reason the old part failed and that can lead to expensive mistakes and repeated failures, if your cam wiped a lobe and lifter, or you spun a bearing or busted a timing chain ETC.
all that metalic debris is potentially circulating through the engine and the oil filter RARELY collects all of it before a significant amount gets embeded in bearings , so its best to remove the block, dissasemble it, clean out the oil passages and replace ALL the bearings and freeze plugs and oil passage plugs after a careful cleaning.
will tend to free up stuck lifters, but it won,t cure all potential issues
if you find one or a couple rockers are not flowing oil at idle,
first step, Id suggest you back off the rocker nut on that push rod, pull that push rod and flush it out internally,
with carburetor cleaner or gasoline,just like is usually done before a new cams installed too limit the potential abrasive micro-crap in the engine,from any previous issues.
if any engine shows signs of having sludge build-up or a cam, or bearings, or lifters, have previously failed, you'll need to carefully clean all of the internal parts, before re-use.
In most cases you would soak the rockers and push rods in gas over night and use an air compressor too blow out the push rod internal passages, soak the push rods for several hours in gasoline, then, run some pipe cleaners through it, to be sure its totally clean and free of internal sludge and debris, like anyone should have done with all the push-rods, prior to assembly.
Id suggest you back off the rocker nut on that push rod adjustment slowly too the point it clicks softly, on that one push rod thats not spurting oil, ,this, indicating the clearance has reached the maximum allowable,
too safely run, and then stop the engine, squirt a bit (maybe 2-3 table spoons)of diesel down on that lifter and let that seep in for an hour then restart the engine and let it run with that lifter softly clicking for at least 15 minutes so it frees up internally.
rockers and rocker nuts and rocker pivot balls should ideally be kept together as individual matched sets , if you don,t have a valve train disassembly tray, tye-wrap the matched parts together
and reassembly with a good coat of moly assembly lube.
have you verified the oil pump pick-up to oil pan floor clearance?
this tends to be reduced when swapping to a high volume oil pump restricting oil flow rates
https://www.ebay.com/i/402584062207...1291&msclkid=d17e7155654a1a20769a115a09f43c68
IT durability thats KEY in building a good engine
when ever I get into a discussion with many of the guys I build engines for, the younger guys especially seem to be captivated or primarily focused on the concept of having " a RADICAL CAM, that rumbles at idle, or the new brand X heads that some magazine is pushing in the latest engine build...
garage.grumpysperformance.com
if the lifter base is well worn you can bet the farm the cam lobe is most likely also worn, and you'll need a lifter removal tool to pull the damage lifters up out through the blocks lifter bores
keep in mind all that metallic trash, cycles through the oil pump BEFORE it reaches the oil filter
http://garage.grumpysperformance.com/index.php?threads/testing-a-chevy-oil-pump.6479/
http://garage.grumpysperformance.com/index.php?threads/oil-system-mods-that-help.2187/
http://garage.grumpysperformance.co...m-sure-your-convinced-its-the-oil-pump.11085/
http://garage.grumpysperformance.com/index.php?threads/installing-an-oil-pump-pick-up-tube.1800/
http://garage.grumpysperformance.com/index.php?threads/not-getting-oil-to-rockers.4537/
http://garage.grumpysperformance.com/index.php?threads/basic-info-on-your-v8-lube-system.52/
http://garage.grumpysperformance.co...oil-passages-and-improved-oil-flow-mods.3834/
READ THIS LINK AND ITS SUB LINKED INFO
IT durability thats KEY in building a good engine
when ever I get into a discussion with many of the guys I build engines for, the younger guys especially seem to be captivated or primarily focused on the concept of having " a RADICAL CAM, that rumbles at idle, or the new brand X heads that some magazine is pushing in the latest engine build...
garage.grumpysperformance.com
READ THE LINKS
http://garage.grumpysperformance.com/index.php?threads/cam-bearing-install-tools-install-info.1479/
http://garage.grumpysperformance.co...oil-passages-and-improved-oil-flow-mods.3834/
http://garage.grumpysperformance.co...h-the-oil-when-a-cam-failed.11542/#post-53323
http://garage.grumpysperformance.co...d-what-goes-in-the-dumpster.13135/#post-68515
oven cleaner or a good commercial paint remover can usually remove old sludge and paint, from hart to reach crevices, if left for a few hours, to soften the surface mess,then use the pressure cleaner, but only use them on cast iron NOT ALUMINUM
Ive generally used and strongly suggest you consider using, one or both of these face and eye shields , and wearing a rain coat , while working outside in a well ventilated area , that's not near any building or car,when using chemicals and a high pressure washer due to learning from past experiences
make damn sure you number stamp ,the rods and rod caps and main journal main caps so they go back together correctly
http://www.harborfreight.com/36-piece-3 ... 60669.html
http://www.homedepot.com/p/DEWALT-Safet ... 220499-_-N
http://www.harborfreight.com/adjustable ... 46526.html
http://www.harborfreight.com/40-lb-capa ... 68893.html
http://www.homedepot.com/p/Simpson-Hond ... 177499-_-N
heres one area where harbor freight has a few real good items, the cheap long reach air gun nozzles and brushes come in very handy cleaning oil passages
http://www.harborfreight.com/cpi/ctaf/d ... mber=95100
http://www.harborfreight.com/cpi/ctaf/d ... mber=97014
http://www.harborfreight.com/Air-Blow-G ... 68260.html
http://www.harborfreight.com/cpi/ctaf/d ... mber=95947
if you don,t think the trouble and expense of installing a few shrapnel screens and a dozen magnets is worth the time and effort consider how much metallic crap will circulate through the oil pump if they are not in place when something unpleasant happens
lifter bores
and lifter gallery
,piston bore walls,
block main cap web support areas
heads between the valves in valve seat area
look for stripped head and manifold and oil pan mounting bolt threads,
in threaded holes and cracks in block radiating from the holes
http://garage.grumpysperformance.co...block-cylinder-wall-thickness.976/#post-21036
even high quality parts like this DART block can fail under high enough stress so think through your choices carefully
when you have a block magnetically or dye checked for cracks , and sonic tested for bore wall thickness, don,t forget to check lifter bores, and lifter gallery areas, and main cap webs etc. just because its not easy to access does not mean cracks can be ignored
BTW I have on several occasions seen guys who complain about various oil leaks on valve covers and rear seals ETC.
Used, engine parts will have oil embedded deeply into the micro surfaces.
almost all replacement parts will have a wax or grease preservative coating to prevent corrosion during shipping!
IF YOU simply wipe off oil soaked surfaces with a paper towel, who then smear on the sealant of there choice and proceed to install gaskets,
YOU WILL OCCASIONALLY HAVE LEAKS!
and then they wonder or maybe be in shock when you find the seeping oil leak has returned in a few weeks time!
metal surfaces may look smooth as glass but under a microscope they look like the surface of the moon , with lots of jagged surface cracks, so you really need to wash out the micro lubricants trapped in those cracks with a thin fast evaporating grease solvent and a lint free rag , followed by a second repeat of the process and in many cases a few minutes with a heat gun to dry and evaporate the solvent in the micro cracks ,
STOP AND READ THE SEALANT PACKAGE DIRECTIONS!
you'll generally find some rather amazing , bits of info such as temperature requirements, temperature limitations, what solvents work best to remove the cement or sealant, only after reading the directions, do you then smear the gasket sealant on both mating surfaces before bonding the two gasket & metal surfaces.(and in many cases you use a brush as dirt or oil on fingers prevents a good seal!)
splayed 4 bolt
threading the oil passage plugs increases durability and I generally suggest drilling an oil pray jet hole thats .031-.035 in the pass side oil pass plug, THE ONE AS YET UN THREADED IN THE PICTURE ABOVE
RELATED INFO
viewtopic.php?f=51&t=125
viewtopic.php?f=51&t=1479
viewtopic.php?f=54&t=117
viewtopic.php?f=51&t=3774&p=10002&hilit=taps+threads#p10002
viewtopic.php?f=51&t=281&p=344&hilit=brass#p344
http://www.homedepot.com/webapp/wcs/sto ... yID=502376
http://www.mcmaster.com/#standard-taps/=ke36u2
http://www.mcmaster.com/#thread-forming-taps/=ke38k5
I got darn tired of running old engine blocks to the local car wash to degrease and blow out the internal oil passages or wasting time and money ,dropping them off at the local machine shop to have them cleaned, and have new cam bearings installed, only to find they took 3 weeks and did a crappy job, so I bought a pressure washer and a heat gun, a bunch of thread cleaning taps and several cans of engine paint, several sets of freeze plugs and a rifle bore cleaning rod and a dozen bore brushes.
that way I could do my own block cleaning.
[/color] [/size]
anytime you loose a cam lobe or a few lifters and and cam lobes theres an excellent chance theres enough metallic micro crud circulating with the oil to trash the bearings with or without the new or used cam being reinstalled. that fine metallic debris was from the previous worn components and pumping all that hardened steel shaving stuff though the engine passages. the oil filter and oil pump are most likely loaded with shavings & debris the pump,bye-pass is probably open much of the time. You REALLY need to tear that engine down to the bare block and start fresh, after pulling all the oil passage plugs and roding out the passages and carefully cleaning the block.. These's very likely to be micro debris/ pieces of lobe and roller embedded in the piston skirts and cylinder walls. They'll eventually damage your new components too. get every plug out of the block, have it cleaned and carefully inspected, and most likely youll need to bore &hone it to the next oversize and get new bearings pistons and rings along with a new cam and lifters.
not all roller cams can use Melonited gears, check with the grinder to be sure. Some require bronze distributor gears.
on eny engine you don,t want to stress components till the oils up to art least 200F ,so stay out of it when it's cold. Anything over 10 lbs at idle is usually OK for hot idle oil pressure, 30 is more than needed. High volume oil pumps can add stress to the distributor gears and the front of the block behind the timing gear and really should not be used unless matched to a 7-8 quart baffled oil pan and windage tray, shrapnel screens and magnets are a huge help in limiting damage potential. BTW, that steel filings stuff is embedded in the oil pump gears too. replace the pump .. You'll get new cam bearings anyway,if your smart when the blocks cleaned. youll Need to disassemble and clean the valve train and the heads, take them down completely clean all the parts. It's in your roller rocker bearings too. I'd clean them carefully and if they show any were retire those roller lifters, you'll almost never get all the stuff out of the lifter wheels, and that could cause the next cam to fail.[/b]
Roller cam and lifter grindings are murder on engines. that's 8620 hardened steel. I've seen guys try to cut corners on this cleaning and rebuilding after that, it never works. Imagine breaking up a file into microscopic pieces and feeding it into the engine.
AFTERMARKET BLOCKS LIKE DART PRODUCES HAVE FAR THICKER CYLINDER WALL CASTINGS
the tools use is more a tweak or refinement than mandatory, but increasing cool lubricant flow to the lifter contact area can,t hurt a bit!I bought mine simply because I liked the idea, and its proved to be useful.
I usually groove my blocks lifter bores lower 1/3rd regardless of the lifter type used, but Id point out that the grooves are shallow and designed to flow extra cooling lubricant, so you'll want to also use a windage tray to control the extra coolant flow volume.
I don,t think they are as big a benefit to roller cam applications, as the flat tappet lifter applications but obviously your more or less stuck with the grooves in the lifter bores even if you change lifter types after the lifter bores grooved unless you sleeve them.
mag check for cracks in the block
http://www.circletrack.com/enginetech/c ... index.html
PARTS THAT FAIL TEND TO LEAVE SHRAPNEL/DEBRIS that can cause problems
for a GOOD job, at a minimum, you'll want to remove ALL the oil passage plugs , and clean the block out with solvent and high pressure air, and some rifle bore brushes, run thru the passages. IF you've had a cam or bearings fail, you need to clean out the oil passages and replace the cam bearings
first PULL ALL THE OLD CAM bearings and INSTALL new ones so you can remove crud trapped behind them
and rod out all the oil passages.
instructions in links below as to oil hole clocking
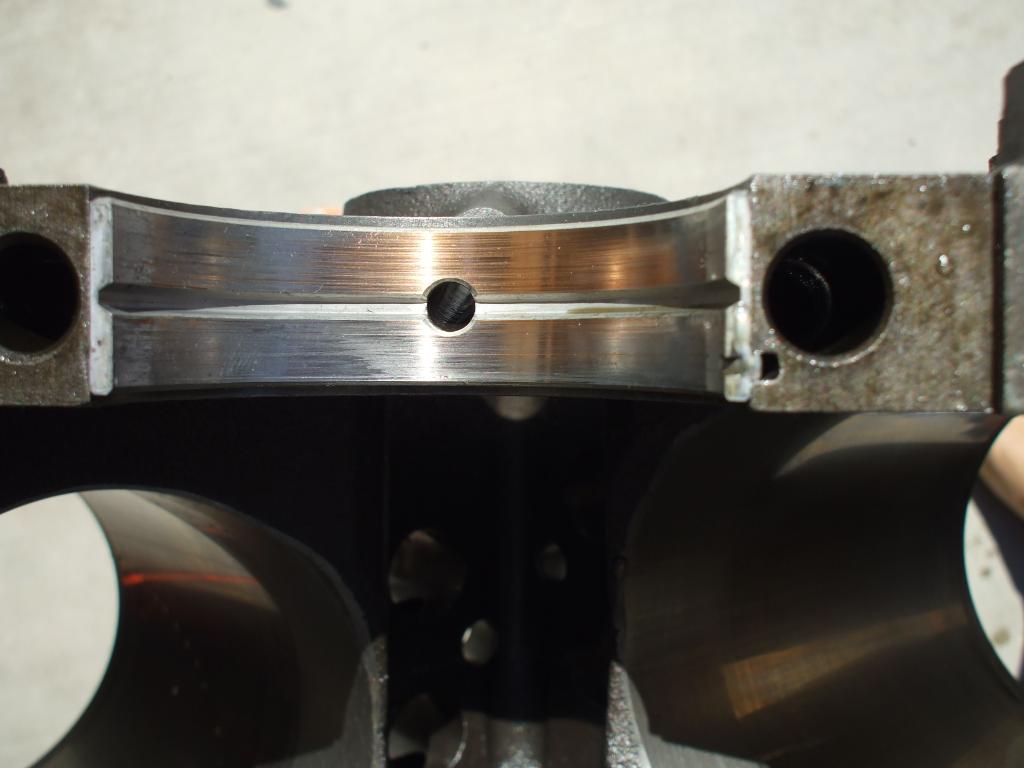
theres a GROOVE under the cam bearing so oil will enter at any location PROVIDED you get it installed correctly front to back so the oil feed holes line up with the groove under the bearing BUT look at this, you will want to support the cam with maximum oil wedge under the cam bearings, remember the bearings are NOT interchangeable in all locations
viewtopic.php?f=32&t=939&p=1582#p1582
If your installing your own cam bearings you want to clean the oil passages out first carefully,look for the blocks oil feed holes, read the instructions, and pay attention during the process and if if the cam bearing your using seams to be loose spend the $20 for a new set , of cam bearings rather than chance it coming loose.
one more reason to buy a cam bearing install tool.
http://garage.grumpysperformance.com/index.php?threads/cam-bearing-install-tools-install-info.1479/
http://www.summitracing.com/parts/AAF-A ... /?rtype=10
the cheaper tool pictured above works fine, but I never saw one for sale decades ago
http://www.summitracing.com/parts/AAF-ALL96470/?rtype=10
I bought a used tool,
( ONLY USED ONCE IF YOU BELIEVE THE SELLER) at a swap meet 40 years ago that looked similar to this for $70
http://www.cpooutlets.com/lisle-180...ap=lisn18000&gclid=CIum95iqhcsCFQUIaQodk3YDfw
http://www.lislecorp.com/uploads/instructions/18000_WebInstr_CC56DD9726DB5.pdf
Ive occasionally been asked what you can do too reduce the slack in the timing chain if your blocks been line honed,
to straiten the main bearings and that resulted in a slightly closer crank to cam center-line distance,
that results in a slightly increased slack in the stock timing chain sets.
a negligible amount of metal is generally removed from the main bearing saddles in the block, they usually try very hard to minimize that, metal removal so standard parts still fit,during a line hone , but they do sell slightly tighter timing chain sets to correct excess slack if that's required.
https://www.summitracing.com/parts/clo-9-3100-5
Timing Chain and Gear Set, Original True Roller, Double Roller, -0.005 in., Iron/Steel Sprockets, Chevy, Small Block, Set
for line honed blocks where the crank is .005 closer to the cam
https://www.summitracing.com/parts/clo-9-3100-10
for line honed blocks where the crank is .010 closer to the cam
Timing Chain and Gear Set, Original True Roller, Double Roller, -0.010 in., Iron/Steel Sprockets, Chevy, Small Block, Set
you might want to read thru these links
viewtopic.php?f=51&t=1479
viewtopic.php?f=50&t=10363
viewtopic.php?f=54&t=3834&p=10199&hilit=trash+passages#p10199
viewtopic.php?f=51&t=10464&p=43788#p43788
viewtopic.php?f=54&t=120&p=867&hilit=magnets#p867
viewtopic.php?f=52&t=282
read these threads
now obviously you won,t be the first guy that thinks of just installing a new cam, changing the oil and filter , maybe flushing the engine out a bit with a quart of diesel fuel added to the old oil, for about 2 minutes of idle time just before changing the oil etc., and while those practices do occasionally let you get by, thats not the correct route and it leaves a significant amount of metallic crud in the oil passages , the fact that people do occasionally get by with a semi clean engine is tribute to how well the factory lube system and oil filter functions,
but betting on those bearings and the new cam and lifters not being scored by the retained metallic debris, is at best a gamble, where your putting far more than the new cam and lifters at risk
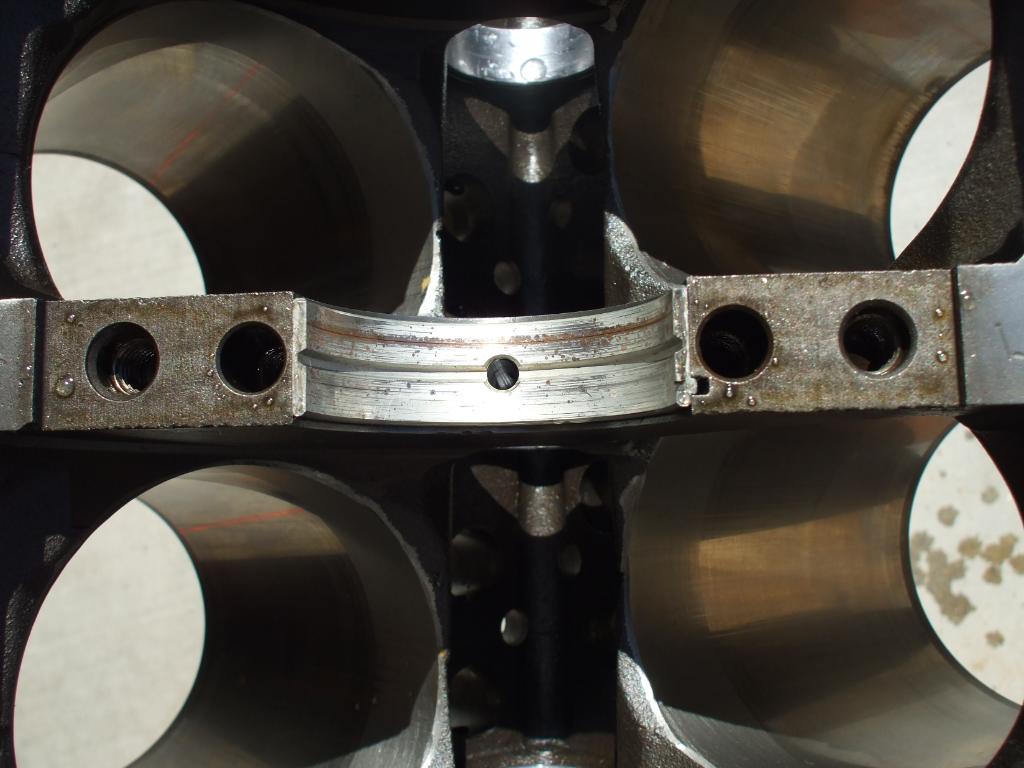
to do the job correctly Remove ALL oil passage plugs. Those are the 2-3 at each end of the cam, depending on if its a bbc or sbc ,don,t forget the one under the rear main cap, and the one in the left deck at the rear. Removing the, main ,bearings and rotating assembly and carefully inspect and clean those components,remove the cam bearings, as the oil passage that feeds oil to the main bearings is behind them, and if there is ANY metallic crud retained AT ALL in the oil passages and if you don,t remove the bearings and clean the oil passages with a brush and high pressure air theres bound to be some retained, you can be certain that metallic debris, which will get flushed RIGHT DIRECTLY INTO your brand-new main bearings, lifters and cam lobes, during the first 10 minutes the new engines running, when you crank the new motor up, resulting in scored bearings and a highly increased chance of the new cam failing
READ THIS
viewtopic.php?f=54&t=4580
IF youve got the time you could get a bit excessive and polish the block surfaces
VERIFY THE BLOCK DECKS NOT WARPED
ONCE your cam has failed and theres no way to do any repair other than replacing BOTH the cam and all new lifters, your current engine has a great deal of metallic dust from the worn cam lobes and lifters circulating in the oil and only about 70%-90% is likely to have been trapped in the oil filter before being embedded in the bearings, yes IM fully aware you don,t particularly want to do a rebuild, and yes Im fully aware that youve got a buddy that says just flushing out the block and installing a new cam and lifters is all thats required, and while that can be done,and its cheaper and has been done thousands of times, its very unlikely that the bearings in the current engine are not contaminated, with metallic debris, the correct route is a total dis assembly, cleaning and rebuild
READ THESE LINKS
viewtopic.php?f=52&t=282
viewtopic.php?f=51&t=2919&hilit=cleaning+passages+lifters
viewtopic.php?f=53&t=2727&p=7078&hilit=magnets+screens#p7078
http://garage.grumpysperformance.co...e-springs-and-setting-up-the-valve-train.181/
viewtopic.php?f=32&t=939&p=1582&hilit=filter+cutter#p1582
viewtopic.php?f=54&t=3834&p=10199&hilit=trash+passages#p10199
http://garage.grumpysperformance.com/index.php?threads/analyzing-piston-damage.16432/
viewtopic.php?f=54&t=4580
[/size] [/b]
LINK FOR OIL PASSAGE LOCATION INFO
viewtopic.php?f=38&t=11
http://www.se-r.net/engine/block_prep.html
viewtopic.php?f=50&t=614
http://www.hotrodpitstop.com/engine-block-prep.php
Cleaning Your Engine Block
Engine builders usually charge around $120 to clean a block, and most racers consider it money well spent to avoid the hassle. The engine builders usually use a mild acid or caustic wash, either in a hot tank or a jet sprayer. Whether you choose to do it yourself or have your engine shop handle the duties, make sure the freeze and gallery plugs are removed beforehand so that anything hidden behind them can get out. After all the machining processes are complete, the block needs to be cleaned again to get rid of any accumulated machining oils and metal slivers left over from cutting.
Cleaning is a necessary step even if you are using a brand-new block. New blocks can often have casting slag hanging around in the cracks and crevices, and it becomes a big, gritty problem if not removed before assembly. This is a step you can definitely do yourself. If the block is new, all you need is a water hose and a variety of brushes to make sure you scrub everything. If you are cleaning a rebuild, however, the work gets tougher. You need to use hot water and a cleaner capable of cutting through the grease and grime that builds up just about everywhere. When you are finished, make sure to hit all the surfaces with a light coat of WD-40 or some other type of light oil as soon as the surface has been dried to prevent rust.
Replace The Freeze Plugs
If you have your freeze plugs in place, it's also a good idea to pressure test the block before beginning the big projects. Pressure testing is done by filling the water jackets and then adding air pressure to see if there are any cracks or leaks. Both of these processes should be repeated after all the machine work is done to make sure you didn't cut too much away. Many machinists say they have seen situations in which a chunk of casting slag that was knocked away during one of the cutting procedures opens a pinhole through to a water jacket. The only way to catch this is with a final pressure check before engine assembly begins.
Sonic and Pressure Testing Your Race Engine Block
It doesn't make sense to do machine work on a block that may not even be usable. That's why it's wise to sonic test the block before much effort is put into it. Sonic testing can tell you the thickness of the cylinder walls quickly and easily. Even on a new block, this is important because core shift can cause one side of a cylinder wall to be too thin. Engine builder Peter Guild of PME Engines says he likes to see the cylinder wall thickness at least 0.275 inch. A sonic tester is also capable of catching a block that's just too far gone to be rebuilt again
Instructions
Things You'll Need: to hone a block in your home shop
* Drill
Cylinder hone
Goggles
Motor oil
Kerosene
File
Soap
Cloth
Anti-rust protective oil
1 Set the engine block on an engine stand if you have not done so already. You can use the top of a sturdy workbench instead; just make sure the engine block is set firmly on the surface.
2.Set the honing tool in a large drill with a slow speed setting. You may use a brush hone if the condition of the cylinder walls is fairly good and they just need deglazing. Use a flex (stone) hone if the cylinder is worn but not excessively; use a rigid (stone) hone if the cylinders are excessively worn but still within manufacturer specifications. Also, if you are installing cast-iron or chrome-faced rings, use a 280-grit stone; for moly rings, use a 400-grit stone.
3 :Mix equal amounts of 20-weight. motor oil and kerosene in a clean plastic container and use the mixture to lubricate the cylinder walls. Put on your safety goggles. Hand-squeeze the brush or stone hone and slip it into the cylinder.
4.Turn on the drill and keep the hone moving up and down the cylinder wall at all times, at a pace slow enough to produce a crosshatch pattern of about 50 to 60 degrees on the wall. Keep the cylinder wall well-lubricated. When you are finished, shut off the drill, but keep the hone moving until the drill stops. Compress the brush or stones and pull the hone out of the cylinder. Continue with the next cylinder until you are finished.
5.Chamfer the top edge of the cylinder walls with a small file so the pistons will not seize during installation. Thoroughly wash the engine block with soap and warm water, to get rid of the grit produced during honing. Dampen a white cloth with new motor oil and wipe the cylinder walls. If the cloth picks up gray residue from the wall, wash the engine block again.
6.Rinse the engine block and cylinders with clean water. Dry the engine and lubricate the cylinders with anti-rust protective oil. Cover the engine with a plastic bag to keep dust off.
don,t forget to blow out the crank oil passages , metallic crud can be trapped in there
http://www.ehow.com/how_4827132_hone-cy ... z1FeOOneJL
related threads you really should read thru
viewtopic.php?f=27&t=2886&p=7496&hilit=sprayer#p7496
viewtopic.php?f=27&t=1077&p=2078&hilit=+pressure+water#p2078
viewtopic.php?f=51&t=125
viewtopic.php?f=54&t=117
http://circletrack.automotive.com/10913 ... index.html
http://www.harborfreight.com/cpi/ctaf/d ... mber=95100
http://www.harborfreight.com/cpi/ctaf/d ... mber=97014
http://www.harborfreight.com/Air-Blow-G ... 68260.html
http://www.harborfreight.com/cpi/ctaf/d ... mber=95947
http://secure.armorholdings.com/kleen-b ... ct387.html
http://www.midsouthshooterssupply.com/i ... 0009796231
BTW
SUPERIOR FORMULA 23 HEAVY DUTY INDUSTRIAL CLEANER & DE-GREASER
"BLACK BOTTLE/JUG, & YELLOW LETTERING"
"PUBLIX super market sells it"
if you ever want to clean your cars engine while its in the car, a spray bottle filled with a 50%/50% mix of that cleaner/solvent sprayed onto the outer surfaces and left to soak for 5 minutes and a pressure washer does an amazing job if used several times in repeated succession
OBVIOUSLY USE OF A PRESSURE WASHER AND OR A DECENT AIR COMPRESSOR, and SOME good GREASE SOLVENT HAS ADVANTAGES, and use of QUALITY OIL FILTERS and INSTALLING HIGH TEMP, MAGNETS to trap any metallic crud you might miss helps
RELATED INFO YOULL WANT TO READ
http://garage.grumpysperformance.co...iepts-on-each-car-maintinance.1467/#post-3297
http://garage.grumpysperformance.co...-heads-up-on-buying-used-engine-blocks.14305/
viewtopic.php?f=54&t=2080&p=5568&hilit=magnets#p5568
viewtopic.php?f=52&t=282&p=5227&hilit=+magnets#p5227
http://www.kjmagnetics.com/proddetail.asp?prod=D66SH
viewtopic.php?f=54&t=938&p=1581&hilit=+magnets#p1581
viewtopic.php?f=54&t=120&p=867&hilit=+magnets#p867
http://garage.grumpysperformance.com/index.php?threads/parts-washers-cleaners.2886/#post-12701
http://www.eastwood.com/paints/hi-temp- ... aints.html
http://www.homedepot.com/Outdoors-Outdo ... ogId=10053
a good spray down, with this spray and rub in with a synthetic bristle brush, as you heat the metal with a heat gun, immediately after cleaning helps
you would be amazed at the sludge build up in some engines
LEAKING GASKETS< BAD PVC VALVES FAILURE TO CHANGE OIL ALL RESULT IN ENGINE DAMAGE
heres a helpful diagnostic tool,
http://www.circletrack.com/enginetech/c ... ilter_fun/
http://www.summitracing.com/parts/SUM-9 ... toview=sku
heres a helpful diagnostic tool,(the oil filter cutter pictured below) and yes I still cut open the oil filters and inspect the filter element on my cars oil filter
proper magnets trap metallic debris
SmCo Samarium Cobalt Disc Magnets
http://www.magnet4less.com/
Samarium Cobalt MAGNETS HELP
http://www.magnet4sale.com/smco-disk-magnet-dia-1x1-4-samarium-cobalt-magnets-608-f-temperature/
magnets are ceramic and glass hard, don,t try to drill or grind them, as they can shatter
if you don,t think a proper magnet can trap/hold and prevent metalic debriss from getting into the oil pump and bearings , look at this picture of an oil pan magnet I found posted
Model# SMCO-D8
Samarium Cobalt Magnets 3/4 in x 1/4 in Disc
Suitable for high temperature applications
Wholesale Price Range:
$2.99
its basically a heavy duty can opener , or an oil filter cutter designed to make it easy to internally inspect oil filters, by allowing you to remove the filter element , from inside the surrounding (CAN) for close visual inspection. if you've got more than a tiny bit of metallic crud in the filter theres a good chance some is embedded in bearings or partly clogging oil passages
If you don,t have one, and have not used one, your unlikely to see, or appreciate the benefits,close inspection can and does frequently give you prior evidence of impending or at least gradually occurring wear and with practice you can make an excellent guess as to the parts and condition of those components.
IT also helps to trap crud if you install a couple high temp magnets on the filter and in the oil pan.
RELATED THREADS THAT SHOULD BE READ
http://garage.grumpysperformance.co...bearing-studs-torque-stretch.9409/#post-34238
http://garage.grumpysperformance.co...4-bolts-or-stds-good-enough.10632/#post-45801
http://garage.grumpysperformance.com/index.php?threads/installing-splayed-caps.7267/#post-24723
http://garage.grumpysperformance.com/index.php?threads/splayed-main-caps.1014/#post-16462
http://www.jegs.com/i/Dart/301/3277...7&cadevice=c&gclid=CMfnmqaG2tMCFUm1wAodg-4J8A
http://garage.grumpysperformance.co...eventing-leaky-head-bolts-studs.50/#post-1253
http://garage.grumpysperformance.co...block-cylinder-wall-thickness.976/#post-22976
http://garage.grumpysperformance.co...gine-block-main-cap-movement.6162/#post-19172
http://garage.grumpysperformance.com/index.php?threads/main-cap-fit-in-block.5945/#post-18302
http://garage.grumpysperformance.co...-help-with-main-bolt-question.2851/#post-7377
http://www.chevydiy.com/ultimate-chevy-ls1-ls4-engine-block-guide/
Last edited by a moderator: