Compressor Installation and Piping

Indycars

Administrator
Staff member

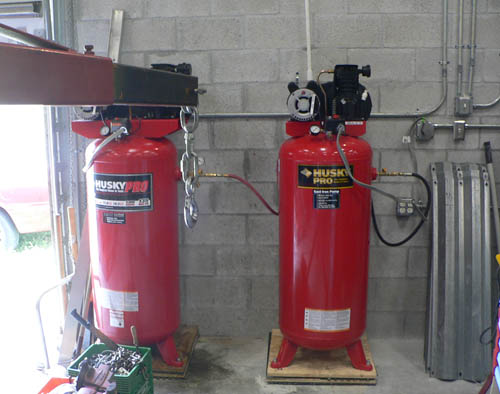
I finally pulled the trigger and bought a compressor because I need to paint
the transmission case before I assemble it. Now I wish I could have bought a
dual stage compressor, but that would have been another $700 or about twice
what I paid. I didn't want to give up quality, so another reason I went with a
smaller single stage compressor made in Illinois......or at least the company
is based there. The motor is made in the USA and the tank is made in
Italy(According to Northern Tool). The physical constraints in my 20' x 20'
garage, limited me to a 60 gallon receiving tank.

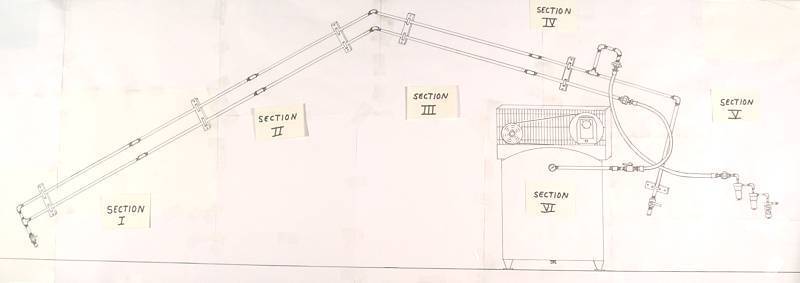
Note: Plan on spending another $200 - $400 in a small shop like my
garage for wiring and piping the air lines ....... but more on that later.

http://www.northerntool.com/shop/tools/ ... _200479713


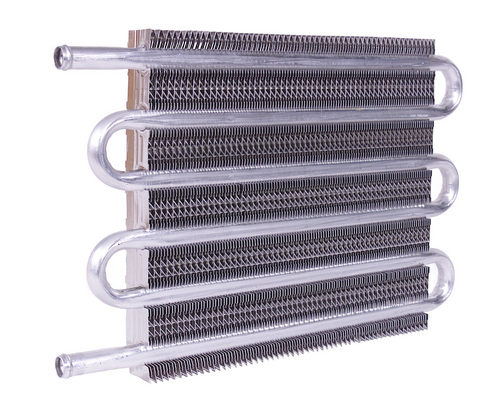
http://garage.grumpysperformance.com/index.php?threads/franzinator-air-dryer.6246/

P01_CompressorOnPallet01_3908.jpg

I used a couple of the dollys that I use for the TBucket to move the
compressor around.


P01_CompressorOnDolleys01_3911.jpg
P01_Pump&Motor01_3912.jpg
P01_Pump&Motor02_3931.jpg
P01_SpecificationsLablel_3918.jpg
P01_MotorSpecificationsLable_3927.jpg

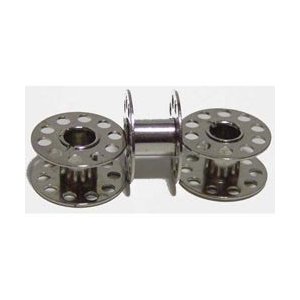
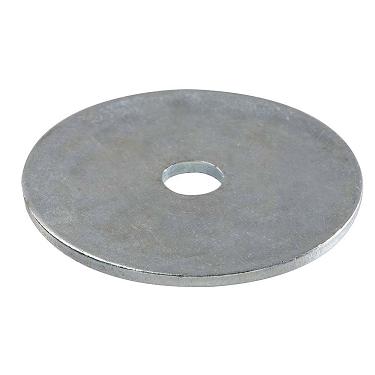
When I pulled the drain valve that Quincy supplied with the
compressor, this fell out. I removed the vale to replace it
with a much easier to use Ball Valve or 1/4 turn valve.

P01_WeldingSlagInsideTank_3928.jpg

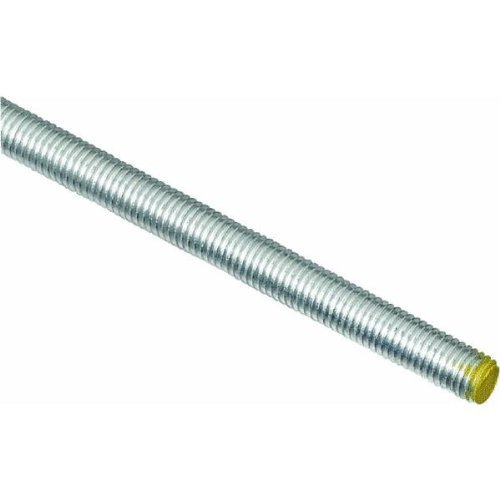
I went by our local "Industrial Rubber Product" company and bought some
3/8" x 4" ribbon of rubber for my vibration isolators and also raise the
compressor enough that I could drain it easily.

P01_RubberVibrationLayer01_3940.jpg

I also used the wood from the pallet that the compressor was shipped
on. I cut the block 4 inches long and glued the rubber to them using 3M
weather strip adhesive. #08008

P01_RubberVibrationLayer02_3953.jpg
P01_RubberVibrationLayer03_4005.jpg


Last edited by a moderator:
CONGRATS ON GETTING A GOOD COMPRESSOR!
and your effort in taking the time too install those vibration insulators does make a big difference. I use two layers of 3/4" plywood and two rubber waffle mats
rubbermat.jpg

P1000311.JPG


and adding the franzinator air cooler radiators a fan and piping to reduce compressor air temps and condense the moisture helps a great deal.
Ive got to post pictures as the final config works great.

removing moisture from compressor high pressure air requires TIME , for the moisture in that air to condense,
DISTANCE, a long cool surface , like dozens if not hundreds of feet of metal pipe,will improve the odds of moisture collecting ,condensing and draining as the air cools, for the moisture to form on and drain, into, AND a pronounce reduction in air temperature or COOLING,obviously a condenser or radiator with its increased effective surface area and a fan to allow fast heat absorption will have benefits, keep in mind water or condensed moisture tends to run down hill , so giving it several places to collect that you can easily drain and pulling air you want to remove the moisture from, only from higher points placed after the air flow has had a chance to cool and condense is far smarter, design features, in planing your shop.
draw01.jpg

viewtopic.php?f=27&t=24

viewtopic.php?f=59&t=6246&p=22837&hilit=franzinator#p22837

read thru these threads,it takes a good deal of planing to efficiently locate parts storage shelves, electrical outlets, air compressors, lifts, air lines, switches, breaker boxes, etc.
I used all 10 gauge wire, and HIGH QUALITY 20 amp dual outlets on my standard wall outlets and mounted them 5 feet off the floor to limit water related issues plus all 120 volt outlets are on gfis and in 3/4" steel electrical tube and outlet boxes with ground wires,and separate circuit breakers on each leg , carefully calculated to match the electrical loads,and have some extra capacity but still provide protection far below the point where the wires might over heat, or outlets burn
the shops 36ft x 80ft and theres no place in the shop your more than about 12-16 feet from a 120 volt outlet, and most of the side and back walls your with-in 6-8 feet of a 120 volt outlet. one reason, is that having spent decades doing electrical related work for AT&T as an engineer you quickly become aware of the dangers of shoddy low quality electrical work and the increased fire hazard that low capacity thin gauge wires impose on electrical circuitry
and theres properly placed 220 volt outlets with the proper amp rates for compressors, lifts, welders etc.
keep in mind your shelving heights ,and where youll place light switches and lighting, you certainly don,t want shelf's covering outlets, or switches, or lighting mounted so low shelving interferes with adequate lighting

viewtopic.php?f=28&t=5

viewtopic.php?f=28&t=1408

viewtopic.php?f=28&t=4865
 
Last edited by a moderator:

I would like to use a solder that melts at 1090°F, is there a chance in hell that a
propane torch will be able to solder/braze 3/4" copper tubing ???

I want to use the higher temp solder for safety reasons in case of a fire.

 
Indycars said:

I would like to use a solder that melts at 1090°F, is there a chance in hell that a
propane torch will be able to solder/braze 3/4" copper tubing ???

I want to use the higher temp solder for safety reasons in case of a fire.

Do a very good job of cleaning the tubing and get it hotter than the blazes of hell. Get the tubing hot and dip it in the flux just before the soldering. Not sure but you may need a gas torch to do it Rick. I don't think a propane torch will get that hot, not real sure though, its been a long time since I used a propane torch.
 
http://en.wikipedia.org/wiki/Propane_torch

http://en.wikipedia.org/wiki/Soldering

a GOOD QUALITY propane torch EASILY supplies over 1500 F temps

normal solder melts at between 360F-420f DEPENDING ON THE alloy
SILVER SOLDER MELTS AT BETWEEN 740f-800f DEPENDING ON ALLOY
brazing IS ALSO NORMALLY done IN THAT similar 800f-900f TEMP RANGE
but I see some braze rod, and some silver solder requires up to 1400F in some alloys
I can tell you careful surface prep cleaning (sand paper ,steel wool, alcohol,a rotary steel brush, etc.and use of a flux helps flow and adhesion

rotarywire1.jpg


dolly2.jpg

flux1.jpg


http://www.grainger.com/Grainger/FIREPO ... Pid=search


and I have used a propane torch in the past but my ox-acetolene torch works much better

HARRIS AND VICTOR are the torch brands I prefer
oxy1.jpg

oxy2.jpg

oxy3.jpg

oxy4.jpg
 
grumpyvette said:
a GOOD QUALITY propane torch EASILY supplies over 1500 F temps

But will also supply enough BTUs of heat to bring the copper up to a 1000°F ???


I'm thinking of using this, but it's quite expensive at $26 for 7 pieces - 19.5" x 1/8" x .050":

http://www.amazon.com/HARRIS-STAY-SILV- ... uctDetails

HARRIS STAY-SILV 5 PHOS-COPPER SILVER BRAZING ALLOY
These brazing filler metals are primarily used to join copper to copper, copper to brass, and brass to brass. The phosphorus content serves as a "self-fluxing" agent in joining copper to copper. When brazing brass to copper or brass to brass, use Stay-Silv White Brazing Flux. The phos/copper and silver/phos/copper filler metals are not recommended for brazing steel or nickel alloys. The amount of phosphorus in the phos/copper filler metals is critical in determining precise melting range and performance. Proprietary computer based technology is used to accurately control the phosphorus content to exacting standards. Each heat of metal is precisely checked before pouring to assure users a phosphorus content to within + or - 1/10 of a percent. Even more significant, a liquidus variation of no more than + or - 6 degrees F. The advantages of this precise control is apparent in automated brazing operations, where even modest variations in flow temperatures can significantly increase the incidence of rejects. Equally important, manual operators no longer need to make adjustments in heating practice from one batch of filler metal to the next to achieve uniform results. STAY-SILV 5 This medium-range alloy is well suited where close fit-up cannot be maintained. This filler metal is somewhat more ductile than Harris 0 or Stay-Silv 2. Silver-2%, Phosphorus-7%, Copper-91%. Solidus 1190 degrees F Liquidus 1450 degrees F Fluidity rating 4 .003" / .005" Joint Clearance AWS A5.8 Class BCuP-6

 
THAT LOOKS like it might be exactly what I buy at my local miller welding supply dealer for brazing/silver soldering, oil pump pick-up tubes to oil pumps, I doubt youll have any issues using it for that application,
but the last time I purchased it it was priced at $6 a stick, or just over $107 for a pack of 20 sticks
and IM fairly sure it said #15 on the package...luckily you seldom require more than about 1/2 a stick to braze an oil pump pick-up onto an oil pump


http://www.harrisproductsgroup.com/en/P ... lv-15.aspx

http://store.cyberweld.com/tubrrodsi15s ... productads

http://www.harrisproductsgroup.com/en/P ... azing.aspx

and I have used a propane torch in the past but my ox-acetolene torch works much better
 
what about the yellow bottle i thing its mapp gas it make for a hotter flame?
With mine i used sand paper and normal blue bottle and normal solder works fine, i dont care if there's a leak when there is a fire and thers a valve at the compressor outlet i keep it closed when not in use stop any pressure in the solder/line ;).. or maby i did not understand what your saying.
 
mathd said:
what about the yellow bottle i thing its mapp gas it make for a hotter flame?
With mine i used sand paper and normal blue bottle and normal solder works fine, i dont care if there's a leak when there is a fire and thers a valve at the compressor outlet i keep it closed when not in use stop any pressure in the solder/line ;).. or maby i did not understand what your saying.

No you understood correctly. I didn't really consider that I could shut the valve, but there is always the situation where the fire starts while you are there and you can't get to the valve or maybe you don't even think about. Foremost on your mind getting to the fire extinguisher.

On the other hand, closing the valve when you are not in the shop would certainly stop the tank from emptying it's contents if there was a fire.

I thought about MAPP gas, but wanted to use what I had if it works ok. I just brazed, one 1/2" joint, and it worked, but it took a couple of minutes to reach melting temp. Now don't get any ideas about trying that other kind of joint! :lol:

 
grumpyvette said:
THAT LOOKS like it might be exactly what I buy at my local miller welding supply dealer for brazing/silver soldering, oil pump pick-up tubes to oil pumps, I doubt youll have any issues using it for that application,
but the last time I purchased it it was priced at $6 a stick, or just over $107 for a pack of 20 sticks

I bought 3 sticks today (1/8" x .050" x 20") at $3 a stick for the Stay-Silv5 from the local Lincoln Dealer.

I'll sell you some at $4.50 stick plus shipping! :lol:

 
Stay-Silv® 15 is a different product,
it flows into small surface cracks easily and remains a bit more resistant to vibration
I doubt theres a great deal of difference but Ive never had issues with the #15 which is what the miller welding tech guy, I buy most of my welding related products from, suggested for the application (probably due to a higher profit )

http://www.harrisproductsgroup.com/en/P ... lv-15.aspx
Stay-Silv® 15
Cu - 80%
P - 5%
Ag - 15%

Description: PhosCopper Brazing Alloy

For many years the standard of the industry, the 15% silver alloy has proven its value. This filler metal is excellent for situations in which close fit-up does not exist, and where thermal expansion and service vibration are involved.


Stay-Silv® 5
Cu - 89%
P - 6%
Ag - 5%

Description: Medium-silver PhosCopper Brazing Alloy

These medium-range alloys are well suited where close fit-up cannot be maintained. These filler metals are somewhat more ductile than Harris 0 or Stay-Silv 2.
 
grumpyvette said:
http://en.wikipedia.org/wiki/Propane_torch

http://en.wikipedia.org/wiki/Soldering

a GOOD QUALITY propane torch EASILY supplies over 1500 F temps

normal solder melts at between 360F-420f DEPENDING ON THE alloy
SILVER SOLDER MELTS AT BETWEEN 740f-800f DEPENDING ON ALLOY
brazing IS ALSO NORMALLY done IN THAT similar 800f-900f TEMP RANGE
but I see some braze rod, and some silver solder requires up to 1400F in some alloys
I can tell you careful surface prep cleaning (sand paper ,steel wool, alcohol,a rotary steel brush, etc.and use of a flux helps flow and adhesion

rotarywire1.jpg


dolly2.jpg

flux1.jpg


http://www.grainger.com/Grainger/FIREPO ... Pid=search


and I have used a propane torch in the past but my ox-acetolene torch works much better

HARRIS AND VICTOR are the torch brands I prefer
oxy1.jpg

oxy2.jpg

oxy3.jpg

oxy4.jpg
Really, I didn't know a propane torch gets that hot, wow learn something new everyday! My preference is Victor, I have used Harris but prefer the Victor torches.
 

Bought this Mapp Gas Torch (BZ8250HT) and bottle this morning with
my $10 Off Lowes coupon.

It comes with zero instructions and how to use. The trigger lock is difficult to use
unless you know the trick. The natural pull on the trigger is at the back, but to
release the lock you have to push at the front of the trigger. See picture.

It became to hard to heat the 1/2" tubing when I had it clamped in the vise, it was
just to big of a heat sink and it took forever to get it hot enough and then it was
still marginal. Since I have 3/4" to solder also, the propane torch was not going
to make it.

bz8250HT_BenzOmatic.jpg

 
Last edited:

Used the new torch to finish one segment of the copper piping. I was
so close to the input to the intercooler, that I ran down and then back
up to the input connection. This helped spread the vibration stresses
out over a longer distance.

P02_CoolerPiping01_4032.jpg
P02_CoolerMounting01_4012.jpg
P02_CoolerPiping02_4030.jpg
P02_CoolerPiping03_4029.jpg


Still need to add bracing to the top of the intercooler to stabilize it more.

P02_CoolerPiping04_4034.jpg

 
Last edited:
is this a twin cylinder compressor? loks like a single piston/cylinder compressor but i know am wrong.
I always try and get twin cylinder and not parallel but V shaped for better cooling.
 
I wished I had known you were going to buy a torch, I would have let you use mine and get a bottle of oxygen and acetylene and you be in business.
 

I didn't know I was going to buy one either. When the propane didn't
measure up, I went and spent $50. No big deal

 
darn I can,t help but always be impressed with your ability to post excellent and clear pictures.

Im redoing my heat exchanger to add a fourth radiator/air conditioner condenser, and I was looking for a way to slightly separate each from the others so I purchased a couple 1/4 sections of thread rod and found sewing machine bobbins make great spacers.
So I have some sections of thread rod about 9" long, with a thread rod with a nyloc nut and fender washer on the end,so the stack from the side has a column like this

thread rod with a nyloc nut and fender washer on the end,a radiator then a fender washer/bobbin/fender washer/radiator a fender washer/bobbin/fender washer a fender washer/bobbin/fender washer/radiator fender washer/radiator fender washer/radiator fender washer nyloc nut

my brother -in-laws provided me with 4 very similar air conditioner condensers, so I fabricated a stack, to reduce the air flow restriction as now the out or high pressure side of each compressor feeds into a 1/2' COPPER PIPE THAT FEEDS THE FABRICATED MANIFOLD i BUILT TO FEED THE 5/16" air conditioner condenser TUBING.

iLL POST A PICTURE AS SOON AS MY KID CAN SHOW ME HOW
aOilCooler.jpg


bobbinss1.jpg


fenderwasherss.jpg

nylocnut.jpg

threadrods.jpg
 

Yes posting some pictures would be extremely helpful to understand how
you connected the 4 condensers.

What part of posting pictures do you need help with....getting them
from the camera to the computer maybe??? Now quit digging in with
your fingernails.....come along now, the 21st century is not that scary! :p

 
Back
Top