My Chevelle build and spot to Rant

Back on this project again!! Ordered scorpion shaft mount rockers today. Been in touch with Brian as will still stay in touch and talk frequently through text. Also ordered measuring pushrods a valvetrain checking springs to get the geometry correct. Goal is to run smith brothers push rods. Wish I ordered the rockers 2 years ago would have been half the price. But still need to get finished so I can enjoy this car.
 
New parts coming in scorpion shaft rocker system came in need special low profile head bolts for top 4 bolts in order to mount. Order some jesel ones. Also have a pushrod measuring tool so after I get these mounted I can get the proper pushrods for my engine. I also got an ultra bell as an ear on my transmission got broke when I last removed the engine. The friend that was helping me missed or there was a miscommunication. No big deal will get it sorted. Also got the rest of the body parts that were not in primer in primer. I had to scuff the doors down also as one ended up getting chipped and the other needed more pearl to match the rest of the car. I plan on basecoating the parts then mounting them on the car spray the pearl coat then take them back off to clear them. 20230519_164840.jpg20230527_144336.jpg20230526_191549.jpg20230526_191537.jpgIMG_20230526_191657_01.jpg20230526_192631.jpg20230526_191539.jpg20230526_200320.jpg20230526_200322.jpg20230526_200310.jpg20230526_200320.jpg
 
Last edited:
SS stripes first I added the black in the area the stripes will be located
20230602_113930.jpg
I then rough in the flames with my dakest color which in this case is a rain forest green
20230602_124318.jpg
I then go in and start adding more detail and depth with a yellow
20230602_154724.jpg
After that I intercoat clear the art work to protect it when I mask it off to add basecoat.20230602_202503.jpg
 
First I measured to find the center of the hood a marked with stibilio pencil which is paint safe. I looked up the proper measurements for chevelle SS stripes marked the front and rear. After I layed the two center pieces of tape. I measured a few spots up the hood to make sure I had consistency. But this far from my first rodeo but if this is your first time I suggest marking 5 different spots down the hood to help you measure. Next I layed a few different spots down the hood fine line to use as a gap measurement. If you are a beginner I would just run a full line of tape next to that line.
20230603_120729.jpg

So using the guide we made we run our next 2 pieces of fine line tape.

20230603_121323.jpg


We do the same process for the outside tape. The curve I did by eye as I have allot of experience. You can use a compass or a set of French curves and the stibilio to mark the curve if you are not confident or happy with your results. You will need to pull back the inside tape so it goes over the top of the new tape. Cut the center tape using a razor blade and using the tape you just layed as a guide. Remember you do not want to press too hard you want to cut the tape not the paint. The other tape cane be cut over the other tape like in the picture below.
20230603_122745.jpg
We will repeat the process to do the inside tape line like we did on the center using fine line tape to measure the distance. And again the same cutting technique.
20230603_124025.jpg
We then roll a piece of tape out the length we need on a frat surface sticky side up.
20230603_141440.jpg
Take our paper mask don't use plastic paint chips off of plastic into your new paint. Start with about 8 to 12 inches so you can center the paper to the tape so when you roll it out you stay centered on the tape. They do make racks that do this but most will not do enough paint work to justify this cost.
20230603_141551.jpg
As you see I roll the paper down the tape to create my masking sheet.
20230603_141623.jpg
We then use our tape to completely mask off the inside stripes.
20230603_140851.jpg
The bottom of my hood is black and mask so no overspray hits any of the areas I don't want to see paint. After that I spray the basecoat. Stay tuned as I need to add a pearl coat and then unwrap this Christmas present for clear coat. Notice my car is covered along with chainsaws to keep them safe from overspray. I also use a respirator and have a garage door partially open to provide ventilation.
20230603_154606.jpg
Amazon has this which would provide allot more movement of air in a painting environment. Harbor freight also carries one but is more expensive. Alway read reviews and do homework before purchasing tools.
Comfort Zone CZBU80 8” Industrial Utility Blower Fan, All-Metal Construction, Auto-Reset Thermal Protection, Durable Carry Handle, Rubber Feet, Helps Exhaust Fumes/Odors, Dry Wet Areas, Yellow https://a.co/d/j0jWjf4
 
Last edited:
And last week my special Jesel head bolts came to use with the shaft rocker setup. They are low profile torx head. Jesel also sent some contingency stickers and all their catalogs to tease me.20230602_142805.jpg20230602_142803.jpg20230602_142634.jpg
 
so far the parts selection appears to very well thought out
 
New jegs Hitachi style starter good to 14:1 compression. So nice it came with the starter bolts. Also a set of Taylor ls coil boots to convert my Moroso race wires over to my ls1 coils.
20230608_191706.jpg
 
so far the parts selection appears to very well thought out
Yes have put allot thought into this for sure. Question for you Grumpy you may know the answer off the top of your head. So the only headers I can find that may fit with my oil pan and angle plugs are Sanderson C12 long tube headers. (Will still need sacrifice factory air for a vintage air system.) My concern is the collector length, I will be running a full exhaust on the car 3" to 3" reducer with O2 bungs into a 3" x pipe into a 3" to 2.5" venturi reducer cone into my 2.5" bola turbo XS mufflers reasonably quiet while keeping performance and flow master tail pipes. As hopefully that gives the exhaust some distance to cool and use the 2.5" exhaust. The Borla Turbo xs mufflers and flow master 2.5 pipes are already mounted under the car. The Sanderson Headers are 1 3/4 diameter runner with a 3" collector but in what I have read the collector length is one of the most important parts of the design as Header collector length should be established so that its volume is at least twice the displacement of one cylinder of the engine in question. This provides an isolation between the header pipes and the atmosphere, ensuring that the collector does not appear as simply more pipe to the exhaust gas slug. - as per MOTORTREND article along with the below diagram. I recall them doing testing on this with Engine Masters series but they have locked those videos away in the subscription only section season 5 episode 16.

1686323170879.png

1686318205460.png1686322032158.png1686322118188.png1686321851398.png1686322292617.png
 
Im not 100% sure what your question is, simply because once you connect the header collector of any ;length to the full 2.5"exhaust the collector length becomes rather un-important, as its back pressure to exhaust gas mass or flow that changes with the displacement and rpms,
generally you'll want a full 3" exhaust from the engine's header collector /exhaust ports to the X pipe at a minimum, only then reduce the dual 2.5" exhaust
index.php


Thank you Grumpy you verified what I thought. I may update the rest of the exhaust down the road but right now the budget is being put fully to getting it a driving project. You know projects like this never end.
 
So got the Jesel head bolts installed and test fit the shaft rocker mounts you can see the difference between the height of the APR studs in the picture below.
20230609_165949.jpg
They all went in nice did one at a time used 30 weight oil as bolt lube as I had no moly lube except the stuff that came with the new cam sync. Torqued to AFR specs of 65 ftlbs
20230609_181045.jpg
The base plates fit nice now I need to remove 2 springs and put in checker springs to calculate proper rocker height and proper push rod length. I found this video more helpful then the scorpion video.
20230609_181037.jpg
20230609_182550.jpg
I soaked my isky lifters in mineral spirits and used an acid brush to clean them off after I blew them off with air and used a healthy amount of permatex red assembly lube to coat them and rotated the wheels to make sure they are covered properly.
20230609_183039.jpg
20230609_183046.jpg
I had clearance issues with the tie bars and valley vents so they got removed. I know vent tubes are one of those subjects that some people like and some don't with no evidence one way or another. Personally I like the idea and the BMP or Comp cams style will work as they are a different design. Allot thinner as they were just touching if these one have issues I will just screen the holes off.
IMG_20230609_205833.jpg
products-IMG_3187__15343.1555380712.1280.1280.jpg
But here is where we are right now with engine assembly
IMG_20230609_211130.jpg
 
thank you for the posted pictures and update, its nice to see things advancing
 
It feels good to be moving forward after buying the house the car being stalled as a forgotten project for a while. But I know how bad letting something sit out side and just rot is. Now it is here and can conveniently go work on it here and there which wasn't an option when the car was at my Mother's house. Plus looked at the reg 2015 last inspection 2016. Too long to let sit prefer a driving project to tinker with. This has been a huge undertaking with the body work involved.
 
if the valve stems do not extend high enough for the rockers to contact with out retainer contact, they do make valve keepers with extended valve caps to extend valve stem height in several different designs/types


man-42104-16_w.jpg


in-depth-review-nextek-valve-spring-400x316.jpg


reading the links and sub links will save you a great deal of problems
http://garage.grumpysperformance.com/index.php?threads/cam-wear-articles-you-need-to-read.282/
http://garage.grumpysperformance.co...k-after-a-cam-lobe-rod-or-bearings-fail.2919/
http://garage.grumpysperformance.com/index.php?threads/oil-system-mods-that-help.2187/
http://garage.grumpysperformance.co...s-and-improved-oil-flow-mods.3834/#post-10199
http://garage.grumpysperformance.co...-in-vs-threaded-rocker-studs.2746/#post-90509
http://garage.grumpysperformance.co...train-clearances-and-problems.528/#post-79273
http://garage.grumpysperformance.com/index.php?threads/using-rare-earth-magnets.15981/
http://garage.grumpysperformance.com/index.php?threads/rocker-push-rod-wear-issues.9815/
http://garage.grumpysperformance.co...-pushrods-and-check-info-you-might-need.5931/
 
Last edited:
No lash caps are needed I am doing everything I can to keep it light these fit real well I set the height on the stands over the weekend.

Started on the driver side brought the #1 piston to TDC 0° then put some rope in the sparkplug hole. Allot easier to remove on a head that has not been ran. I only have one of the cheaper tools that are a stamped thick sheet metal. Let's just say they are not engineered for solid roller springs. But with some creative welding it got the job done.
20230610_194936.jpg
I started with no shims to get a baseline Scorpion wants the patch to center of the valve. Using a sharpie I colored the top of the valve stem. I set a small metal ruler next to the valve and moved the valve approximately .65 inches/16.5mm (metric is easier to keep track of) by pressing down on rocker arm. As you can see it is a little closer to the intake side and the patch is pretty wide. I did expect to have to shim it. As if it was on the other side you have to have the head machined.
20230610_200137.jpg
I added .050 shims next and repeated the process.
20230610_201348.jpg
After that it a much smaller contact patch and dead center of the valve. I was happy with this. So I reinstalled the two springs and torqued the mounting plate back down 65ftlbs using apr moly lusi.dI then moved onto the other side.

I removed the #2 cylinder springs after bringing that cylinder to TDC at 120° and installed the checker springs.
20230611_110301.jpg
After that I installed the the same shims I used on the driver side. And did the same process as before.
20230611_111036.jpg
Is hard to see in the picture but is dead center in the valve stem and a nice small contact patch. So reinstalled the springs and torqued that side down 65ftlbs using apr moly lube.
I installed all the lifters and checked for any contact with the retainers they all fit well as I really did not want to add any more weight to the valvetrain by adding lash caps. If I ran any of the stainless stud mounted roller rockers I would have had to run lash caps from what I have read on the internet. This was another reason why I went shaft over stainless with girdles. So as far as scorpion products go the stands would more then likely fit with a standard headbolt. All the roller tips fit perfectly center over the valves. I think Scorpion makes a really nice product. I am going to measure for pushrod length this week not sure which day as I have to go out of town for work for a couple days this week.
20230610_211859.jpg
 
looking good so far :like: 
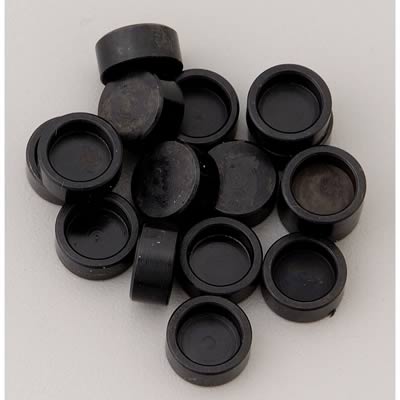
but keep inspecting the retainers & rocker lower surfaces, for rocker contact/wear marks
BTW LOVE THE CLEAR PICTURES
index.php
 
Last edited:
Back
Top