New TBucket Front Suspension and Brakes

Indycars

Administrator
Staff member
I'm converting from a 2-bend axle with drum brakes to a 4-bend axle with disc brakes. It makes sense to order everything from one place so if something does not fit, it will be easy to remedy the problem, everything will be coming from Speedway. It presently has 1962 Econoline spindles and brakes that will need a new home in the near future.

The components ordered are .....

Spring Over Front Tube Axle, Chevy Spindle, 4 Inch Drop, Plain
Plain Chevy Wilwood Front Brake & Tradit. Steering Kits, 48 Inch Axle
Wilwood 150-8850K 7112 BP-10 Brake Pad Set, DLIII/BDL/FDL, .49 Inch
Super Glide® T-Bucket Front Spring, Standard Eye, Plain
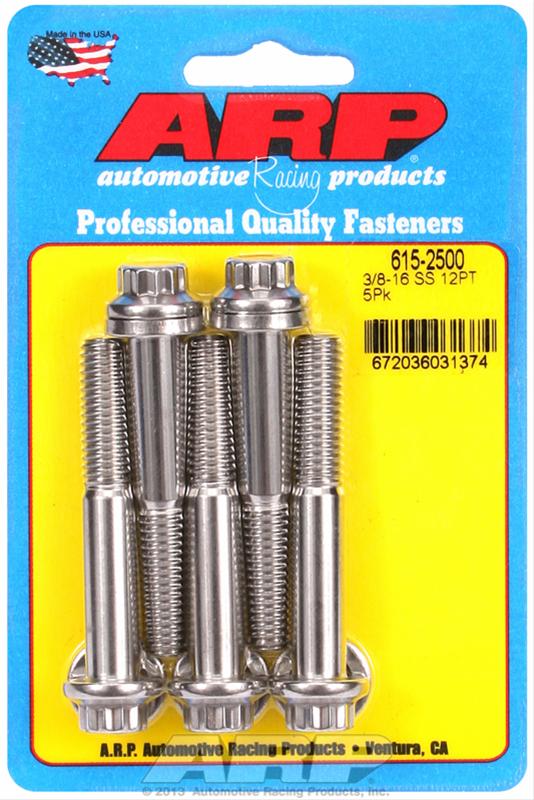
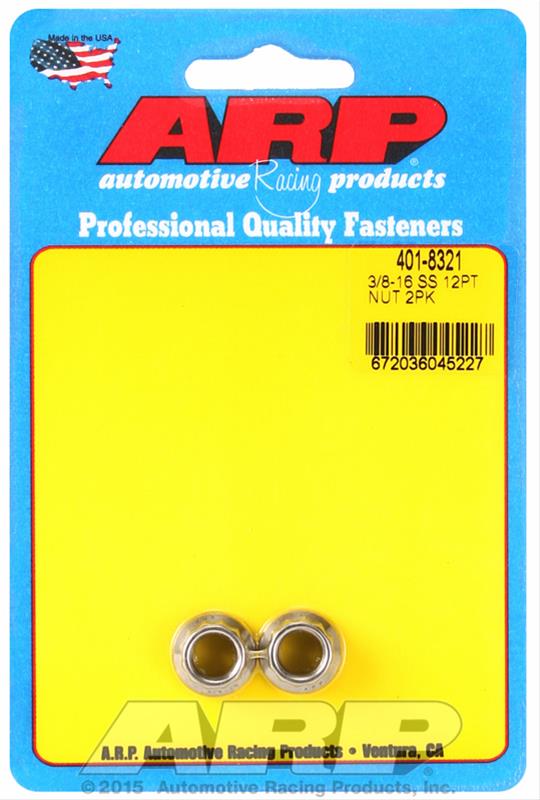
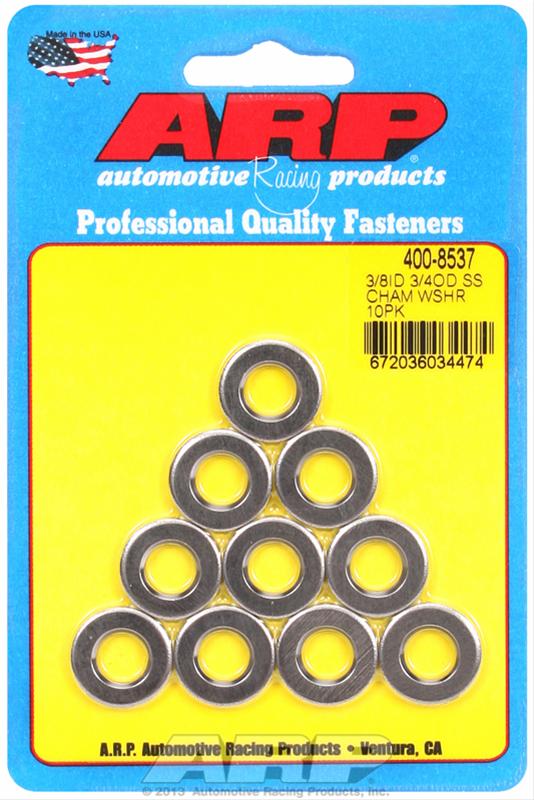
Speedway Stainless 1-3/4 Inch Leaf Spring Front Suspension Pivot
Transverse Leaf Spring Shackles w/ Nylon Bushings, Stainless

FP01_FrontAxleProjectParts_03733.jpg
FP01_FrontAxleProjectParts_03734.jpg
FP01_WiwoodParts_03743.jpg

I'm trying to stay with my manual 1" MC, so that's why I went with the 4 piston Wilwood caliper. My thinking was they will have more stopping power over the 2 piston or even the single piston, making up for the required higher pressures of a disc brake system. If this doesn’t work like I need, then there is a proportioning valve.

This Single Piston GM caliper 4.4 SqIn [ I think is also an option ]
1978-88 GM Metric G-Body Brake Calipers, IMCA Approved, 7/16-20
Wilwood Disc Brakes - Caliper Part No: 120-8925

2 – Piston Caliper Piston Area = 2.4 SqIn [ This was an Option ]
Wilwood Disc Brake Kit 1949-54 Chevy Spindles, 2-Piston, Steel Rotor
Wilwood Disc Brakes - Caliper Part No: 120-10188

4 – Piston Caliper Piston Area = 4.8 SqIn [ My Calipers ]
Forged Dynalite-1.75/.380
Wilwood Disc Brakes - Caliper Part No: 120-6818

1677279102930.png
 
The image below is my original spring capture plate from 1979 when I originally built the car and next to it the new one. It’s twice as thick at a ½”. It’s was tapped for 3/8-16 thread and will be attached with ARP SS 12 pt bolts, nuts and flat washers, the nuts are to lock it and keep it from coming loose. Nickle anti-seize will be used on the threads since it’s stainless.

The original ¼” plate was not strong enough as you can see how it was bending around the spring from being tightened.

FP02_LeafSpringCapturePlateComparison_03748.jpg
FP02_LeafSpringCapturePlateOrientation_3572.jpg
FP02_LeafSpringCapturePlate_3757.jpg

I cut a relief for the spring curvature with a file, although once the spring is loaded it will be almost straight for those 3-1/2” above the capture block. I used my digital angle finder to set the block at ~ 7° and then tried to hold the file parallel with the vise jaws for my reference.

FP02_LeafSpringCapturePlate_3751.jpg

I started with some flap wheels 60 grit, then some 120 grit to get the spring surface somewhat smooth and ready for paint.

FP02_LeafSpringPrepForPaint_03762.jpg
FP02_LeafSpringPrepForPaint_03763.jpg

The flap wheel left some low spots, so I came back and block sanded with some 220/320 grit and WD-40. I only had to block sand the last 4-1/2" on the end of each leaf, it's the only part that will be showing or the Nylon Button will slide on.

FP02_LeafSpringPrepForPaint_03766.jpg
FP02_LeafSpringPrepForPaint_03773.jpg

I’m going to paint the spring with Cerakote “Black Velvet C-7300” and then “High Gloss Ceramic Clear MC-160”.
To make sure the spring works as freely as possible where the Nylon Button rides on the leaf below it, I will spray “Micro Slick C-110” by Cerakote to reduce the friction even further.

FP02_LeafSpringNylonButton_03770.jpg
FP02_LeafSpringNylonButton_03772.jpg


Later ..... time to let my fingers recuperate ! :cool:
 
once again, amazing details , and pictures,
thanks for the informative and visually informative post RICK
YOU CONSTANTLY IMPRESS ME WITH YOUR ATTENTION TO DETAIL AND SKILLS!
 
Last edited:
BTW IS THE T-BUCKET BACK TOGETHER AND DRIVEABLE NOW?
 
Do you send your chrome out or buy it already done and if you send it out where do you send it
 
Do you send your chrome out or buy it already done and if you send it out where do you send it
Sorry, I thought surely I had answered your question. Guess I forgot to click Post Reply.

I haven't done any chrome in decades. I polish SS or aluminum. If it's aluminum, then I coat it with Cerakote MC-5100 immediately after polishing.
 
Now that I have my SS tubing I need to know how long to cut each tube. So I setup the car loaded on the springs with a 5° rake and 5° caster angle. Then I measured the distance, center-to-center to each mounting hole. Now I measure each component and what it added to the length of the radius rod or what will be subtracted from the tubing actual length.

FP04_RadiuRodCalculations.jpg
FP04_RadiusRodsCutToLength_03811.jpg

When considering how much to leave on the rod end threads for adjustment I wondered how much it took to change the caster by 3°-4°. So that’s when I decided to measure the change over a significant distance to get an average. Below is what I found.

FP04_RodEndEffectOnCaster_03809.jpg
FP04_RodEndEffectOnCaster_03808.jpg

The average change per turn of a single lower rod end was 0.6°. Now this was adjusting just one rod end, so adjusting the radius rod with both RH and LH threads would theoretically change the caster by 1.2° for each full turn of the radius rod.

[(8.7-3.2) / 9)]*2 = 1.2°

FP04_RodEndEffectOnCasterPerTurn.jpg

Wixey WR365 Digital Angle Gauge
www.amazon.com/gp/product/B0054RJ7VC/ref=ppx_yo_dt_b_search_asin_title?ie=UTF8&psc=1
QA-1 1/2" Rod Ends, LH & RH
https://www.summitracing.com/parts/qa1-xml8
https://www.summitracing.com/parts/qa1-xmr8
.
 
WOW THE DETAILED INFO AND ATTENTION TO SMALL DETAIL'S ,
IS FRANKLY BOTH IMPRESSIVE AND AMAZING
THANKS RICK!
I deal with so many people that are either marginally skilled or want to find the fastest and cheapest fix to every problem,
its a true pleasure to watch your posted research and attention to detail
 
Last edited:
I need to polish the Wilwood brake components for the front dics brakes before I spray them with a clear Cerakote. This piece adapts the hub to the disc.

FP05_HubDiscAssembly_03822.jpg

Cerakote - CERAKOTE CLEAR - ALUMINUM
Wilwood Disc Brakes - Rotor Adapter-Drag - 300-3307

I need a fixture to hold the adapter so I can spin it in the drill press while I sand it ….. time to break out the 3D printer. Drew something up in FreeCAD and sent it to the printer. After a few test prints for size, I had the final print done. The final print took 11 hours, test prints took roughly 1.5 hours.

FreeCAD: Your own 3D parametric modeler

I made sure the printed fixture was slightly smaller than the Wilwood adapter OD so I could polish the OD of the adapter. I had to turn down the button head screws so they would not stick out past the OD of the adapter. I really hate broken fingers …..LOL!!!

FP05_FreeCAD_Fixture.jpg
FP05_WilwoodDiscAdapter_03813.jpg
FP05_PolishingWilwoodAdapterPN300-3307_03816.jpg
FP05_3DPrintedAdapter_03815.jpg

Emery Cloth [240, 400, 800, 1000]
https://www.amazon.com/dp/B091B5YQBV?psc=1&ref=ppx_yo2ov_dt_b_product_details

Working on the 2nd adapter I found I only needed to use 800 grit emery cloth to remove the machining marks, then I went straight to the Wet-r-Dry 1000, 1500, 2500 grit paper with WD-40. The 2nd adapter should only take about 2/3 the time of the 1st one. I had to work on the bottom side of the Wilwood adapter while it was in the drill press, so I used a small 6”x3” loaf pan with some WD-40 and dipped a 3/4" strip of Wet-r-Dry paper in it and then pressed it up against the adapter. This way I didn’t make a big mess, although it did sling some WD-40, but I was able to control it.

FP05_AdapterJustBEforeBuffing_03826.jpg
FP05_WilwoodDiscAdapter_03818.jpg

And finally the finished polished adapter !!!

FP05_BeforeAfterPolishedAdapter300-3307_03827.jpg
FP05_BeforeAfterPolishedAdapterCloseup300-3307_03827.jpg
 
I love the posted info, but you do realize the disc surface you smoothed was intentionally lined/rough to much more rapidly seat the discs to the pads as most pads ship with a protective film coating the disc is designed to remove rapidly (no big deal, just expect the brakes to take a couple had stops to seat properly) no big deal results will be nearly identical after about 7-9 miles of average drive time.. and yeah it looks spectacular
index.php
 
Last edited:
I am very impressed with Indycars polishing skills and skills in general I've shown many people his block prep post
 
but you do realize the disc surface you smoothed was intentionally lined/rough to much more rapidly seat the discs to the pads
That is not the disc that the pads ride against. Go back to the very first pic in my post and you will see that what I polished is the adapter that bridges the gap between the hub and disc. I would never polish the brake disc, at least not where the pads ride! LOL!

I am very impressed with Indycars polishing skills and skills in general I've shown many people his block prep post
Wow, thanks rlphvac !
.
 
thanks for the clarification RICK,
and yes most of us are very impressed with ricks work,
I know I sure am,( one reason, of many why I asked him to be co-admin)
 
Last edited:
I have polished some things in my time and currently doing a Harley sign my son made me on a CNC but I'm way out of your league
 
It's not so much about technique, but the will to spend hours doing something a million times, change grit and do it a million times again, repeat, again and again until you get to where you want to go. Then buff it.

It helps that I kinda enjoy the process, especially the anticipation of what I will see when I finally get to buff the part!

Do you have a die grinder/high speed grinder? What kind of abrasive?
.
 
Last edited:
I do have all kinds of stuff from 50 grit paper to 2000 grit paper a bench buffer and hand buffers for electric and air I'm working on getting everything together I really haven't used a lot of this stuff since I finished the Vette around 2010 I used to polish a lot of aluminum on my Harleys until I got lazy and had everything chromed there was a really good aluminum polish called Semichrome that worked miracles on bike covers with 0000 steel wool and lots of elbow grease I guess the main thing is to just start working on it and a lot of old memories will come back I know I already made big improvements but I want this to be as good as I can get it as it is the 1st thing he ever made on the CNC he has its not his but he is the superintendent of the company
 
Back
Top