- Home
- Forums
- Technical Articles/muscle cars
- American Muscle Cars
- Engine: Repairs , Modifications , Trouble Shooting
You are using an out of date browser. It may not display this or other websites correctly.
You should upgrade or use an alternative browser.
You should upgrade or use an alternative browser.
Porting the Edelbrock Pro Flow XT 7137
- Thread starter ASE Doc
- Start date
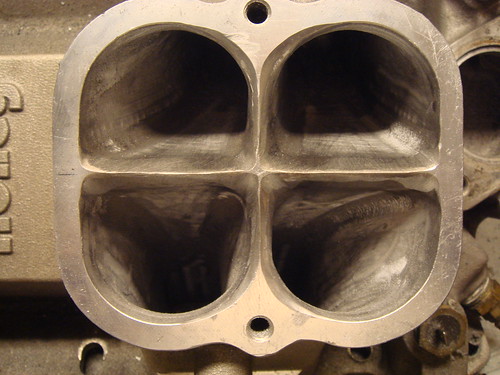
What do you think about the exit of the second runner? Its the one on the right in the photo. Im really thinking maybe I should take the exits out to the full 1205. Forget leaving a margin. I actually think i left too much margin on the outside vertical wall of the first runner anyway. Didn't mean to leave that much.
When I look at the photo, they both do look pretty good don't they. I just can't make up my mind. The taper is great as is. Guess I'll finish up the second and go on with the rest. I can always change things later. I'll never get them perfect anyway.
When I look at the photo, they both do look pretty good don't they. I just can't make up my mind. The taper is great as is. Guess I'll finish up the second and go on with the rest. I can always change things later. I'll never get them perfect anyway.
Loves302Chevy
"One test is worth a thousand expert opinions."
It's too bad that you don't have access to a Bridgeport milling machine.
Your ports are slightly tapered rectangles. You can buy tapered end mills.
Maybe 85% of the metal removal could have been done this way.
Then, all that would be left is the blending.
Similar to the picture below.

I used this method on some SBC aluminum cylinder heads in the past.
Do you have a technical school near you that has a machine shop and a weld shop?
Your ports are slightly tapered rectangles. You can buy tapered end mills.
Maybe 85% of the metal removal could have been done this way.
Then, all that would be left is the blending.
Similar to the picture below.
I used this method on some SBC aluminum cylinder heads in the past.
Do you have a technical school near you that has a machine shop and a weld shop?
Last edited:
I do have a friend who is a mechanical engineer and has put together his own machine shop at home. I don't know just what type of milling machine he has or of he TIG welds aluminum. I was thinking of getting in touch with him. I actually was able to rough out the second runner pretty quickly using a carbide. I'm not in a hurry anyway.
Thank you Grumpy. That's the clarification I was looking for.
Thank you Grumpy. That's the clarification I was looking for.
I worked more on the first runner today and pretty well finished up the second runner, aside from some finer surfacing with 120 grit sandpaper. I matched up the runner floors and took the overall runner exits out closer to the gasket dimension. I think they look pretty good.
I'll post photos tomorrow. Then start on the next pair.
I'll post photos tomorrow. Then start on the next pair.
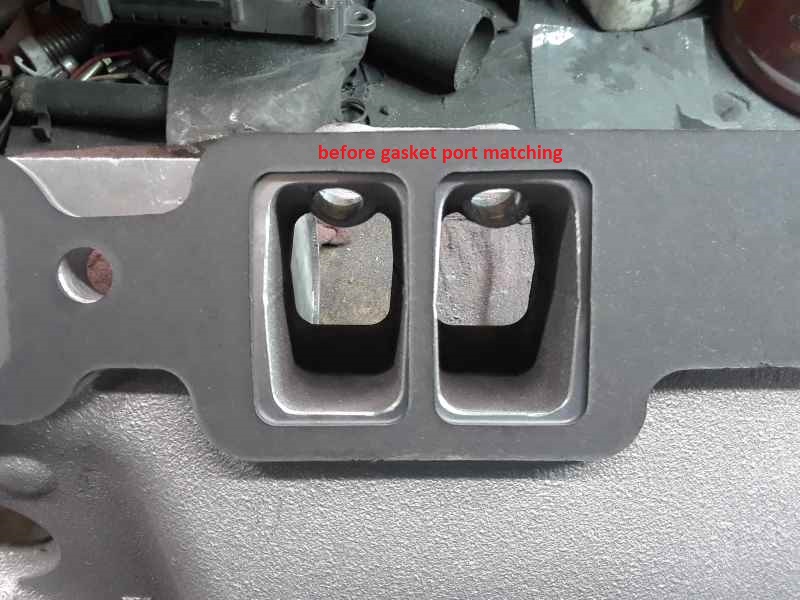
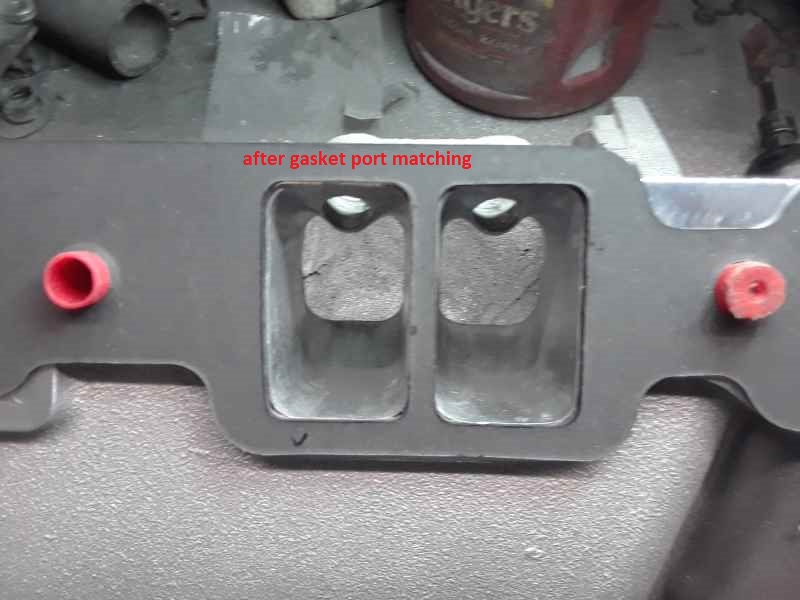
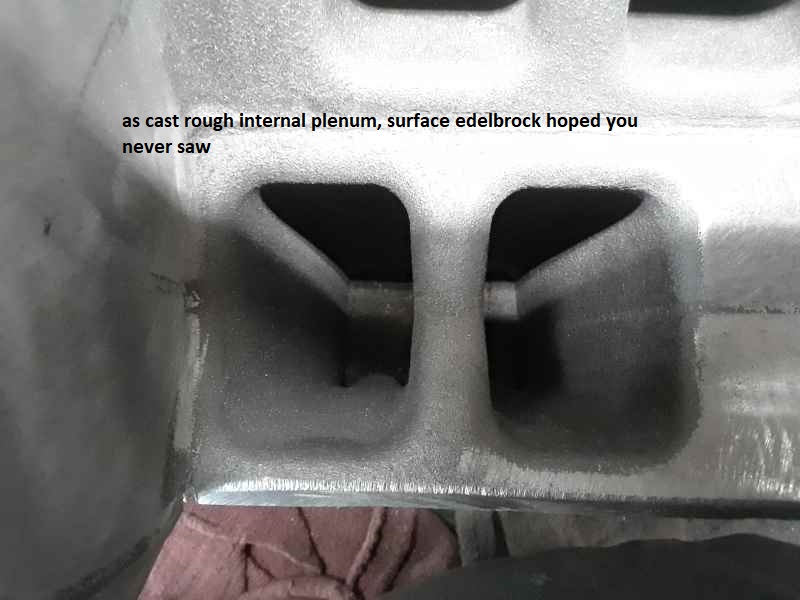
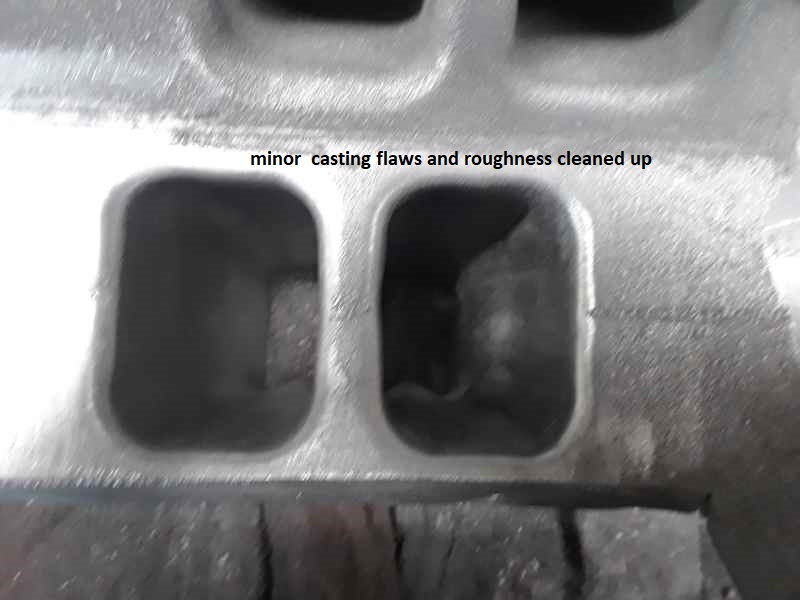
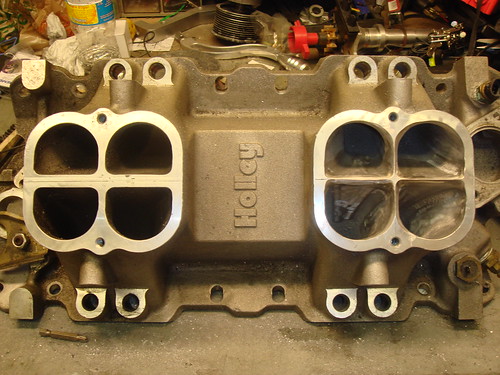
Here are some photos comparing the finished pair of runners to an as cast pair. Pretty dramatic difference. I took the floor of the first runner down to match the second runner. I opened up the overall exit a little closer to the gasket but I'm keeping the exits a little small. This intake is initially going on a 355. While the ported G2 heads and ZZX cam can certainly support the full potential of this intake, I don't want to create a torque curve so high in the revs that I don't even use it on the street. I have a 3,500 stall TC and decent gearing so sacrificing some of the TPI's low end grunt is a fair trade for alot more midrange and top end power. I just don't want to push it too far initially. When I get ready to install this intake on a larger motor, I can take the exits out to the full dimension. There is plenty of taper to support it. There will be no need to open up the top again at that point.


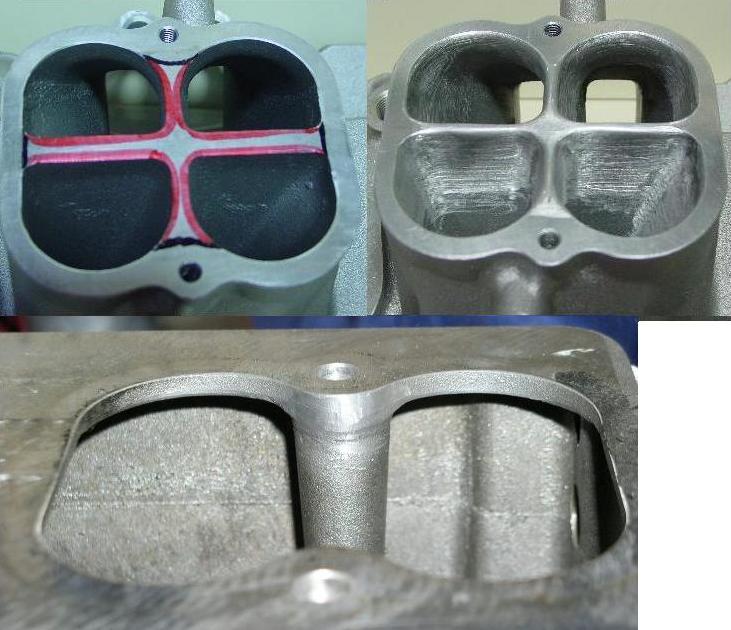
Im excited to get it finished and installed. As a freind once told me when I asked about his 68 Camaro's upgrade to a 1000hp 540, "I hope it scares the s**t out of me."
I started work on the 3rd runner tonight after work. Should be on to the 4th by day after tomorrow. I'll post more photos when the second pair is done.
I put a call into my friend with the machine shop. While I don't need him for the port work, I might use his help in re-assembling the plenum. The lower corners that were ruined when the plenum top was cut off, I've been planning to rebuild using JB Weld. I would much rather have the seams welded and the corners restored on a mill. Ill see what he thinks of it.
Loves302Chevy
"One test is worth a thousand expert opinions."
Very nice work. And you stayed within the lines.
It shows that you have developed the "feel" for your tool.
It shows that you have developed the "feel" for your tool.
Loves302Chevy
"One test is worth a thousand expert opinions."
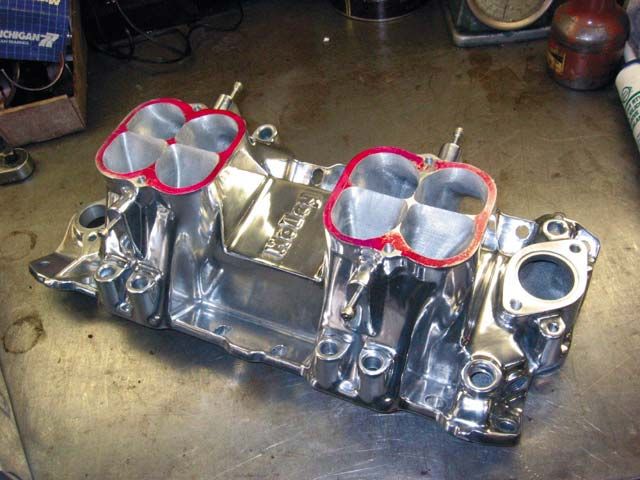
Sorry Rick, but this is the easy way. Spray this on the back (head side) of the intake gaskets.

Permatex High Tack. I have a warning on the use of this product. It does a great job of sticking a gasket to a surface. Unfortunately, it doesn't do so well at preventing a gasket slipping or shifting. In fact, since it doesn't harden for some time after application, it can even lead to a gasket being sucked in or pushed out. I've had issues using it on oil pan gaskets. It's okay, just be sure to only apply it to one side of the gasket and leave the other side dry. High Tack on one side and RTV on the other is a pan gasket that is sure to squeeze out of place after tightening. It will really ruin your day when it happens after the motor's back in the vehicle. One product that will actually retain a gasket against slipping is Edelbrock Gasgasinch. My machinist turned me on to it for retaining oil pan hoop seals. K&W Copper Coat gasket sealant is another product that I've had success with on intake gaskets.
https://www.summitracing.com/parts/...Hci_rngCjPIi0Hzl27DmoGKgPl5jkEzRoCXYoQAvD_BwE
https://www.ebay.com/i/202118289436?chn=ps
EDIT: corrected name of K&W Copper Coat and added a link to the product
https://www.summitracing.com/parts/...Hci_rngCjPIi0Hzl27DmoGKgPl5jkEzRoCXYoQAvD_BwE
https://www.ebay.com/i/202118289436?chn=ps
EDIT: corrected name of K&W Copper Coat and added a link to the product
Last edited:
As far as aligning the intake runners with the intake ports goes, I'm thinking about making the plenum top removable. For that matter, using my bore scope, I can look down into a runner pretty easily to verify alignment as I tighten the manifold bolts. One of the really cool tools I bought in the past two years is the Autel bore scope. It sells for around $200 and is so far superior to the old one I had before. It produces a pretty good image and has a small diameter(5.5mm) posable wand that gets you into tight spots. It also takes snap shots.
This would be the second product plug I've posted this morning. Believe me, I'm not trying to sell anyone anything, just sharing my experience.
This would be the second product plug I've posted this morning. Believe me, I'm not trying to sell anyone anything, just sharing my experience.
Here's a link to the bore scope I have. It's less from this supplier. I bought it off a tool truck, which is generally higher priced.
https://www.walmart.com/ip/Autel-Ma...6307&wl11=online&wl12=183265067&wl13=&veh=sem
https://www.walmart.com/ip/Autel-Ma...6307&wl11=online&wl12=183265067&wl13=&veh=sem
Just ordered my fuel rails and injectors. That's it for the major parts of this intake swap. From here, there are a few AN fittings that I'll need and a T-stat housing. I'm taking another tip from the XT throttle body adapter thread and using the TPIS Miniram F-body water neck. It will fit my application the best, among the available options. Once I have the intake finished, I'll assemble it on the bench and measure, prefit all of the fuel plumbing. That way when I do the install, all the fuel plumbing will be ready to go together.
I am pretty much finished with the fourth runner. It's runner #8, the farthest to rear and closest to the rear wall of the plenum. That is making getting the radius finished up a bit more of a challenge. I think a scotchbrite type surface prep pad will help. I still need to go back over all of the radiuses to bring them out to 3/8" and clean them up. I'm also looking at the runner roofs, around the injector bungs. I think I can do more in those areas. Of course, these ported runners as they are now will certainly already meet my goals of raising the XT's torque peak and peak power ceiling by 500 rpm. I may wait til it's going on the 383 or 406 before I do anymore to it. No new photos yet. Not until runner #8 is done.
I am pretty much finished with the fourth runner. It's runner #8, the farthest to rear and closest to the rear wall of the plenum. That is making getting the radius finished up a bit more of a challenge. I think a scotchbrite type surface prep pad will help. I still need to go back over all of the radiuses to bring them out to 3/8" and clean them up. I'm also looking at the runner roofs, around the injector bungs. I think I can do more in those areas. Of course, these ported runners as they are now will certainly already meet my goals of raising the XT's torque peak and peak power ceiling by 500 rpm. I may wait til it's going on the 383 or 406 before I do anymore to it. No new photos yet. Not until runner #8 is done.
the very minor issue here is simply that you won,t have a valid before & after dyno result to compare between the two, intake manifold prep levels,
thus you won,t have the ability to truly feel , or see on a dyno the DIFFERENCE,
your effort to increased efficiency had, on those improvements to the air flow rates, or the real measurable effect that had , had on the engine.
but I can assure you there is a measurable improvement , simply from similar pass intake port work.
Ive regularly seen power increases in the 15-20 hp range with similar work you've displayed,
but I know that gains in power from similar port & runner clean-up work, of over 25-30 hp are rather common.