Random stuff I'm working on

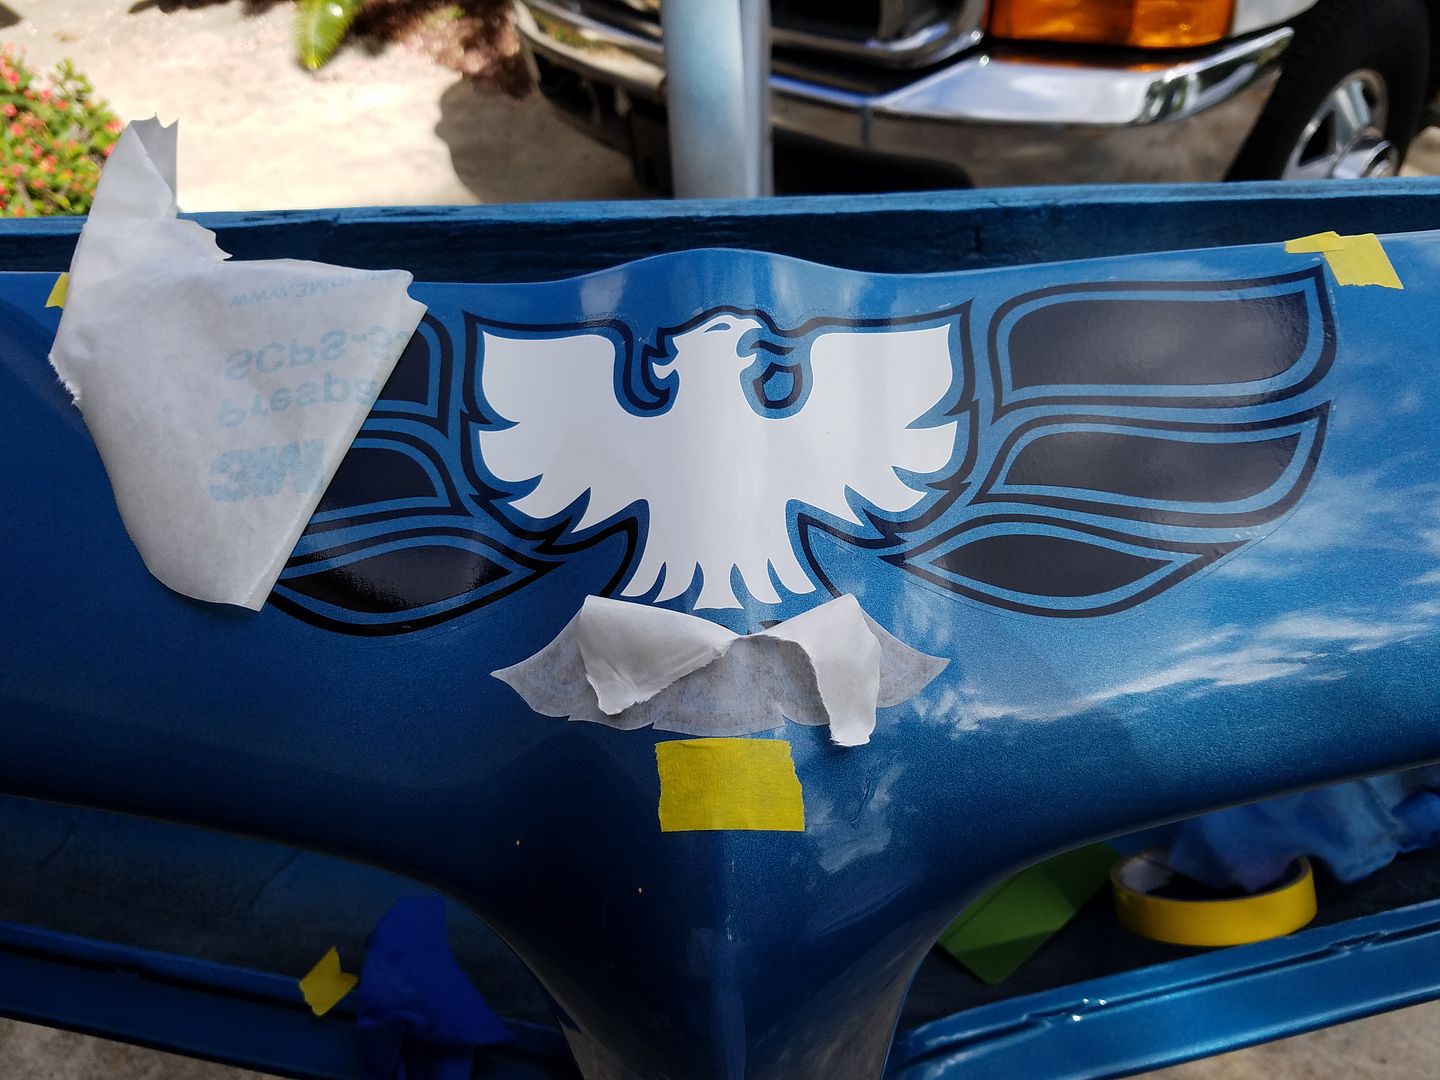
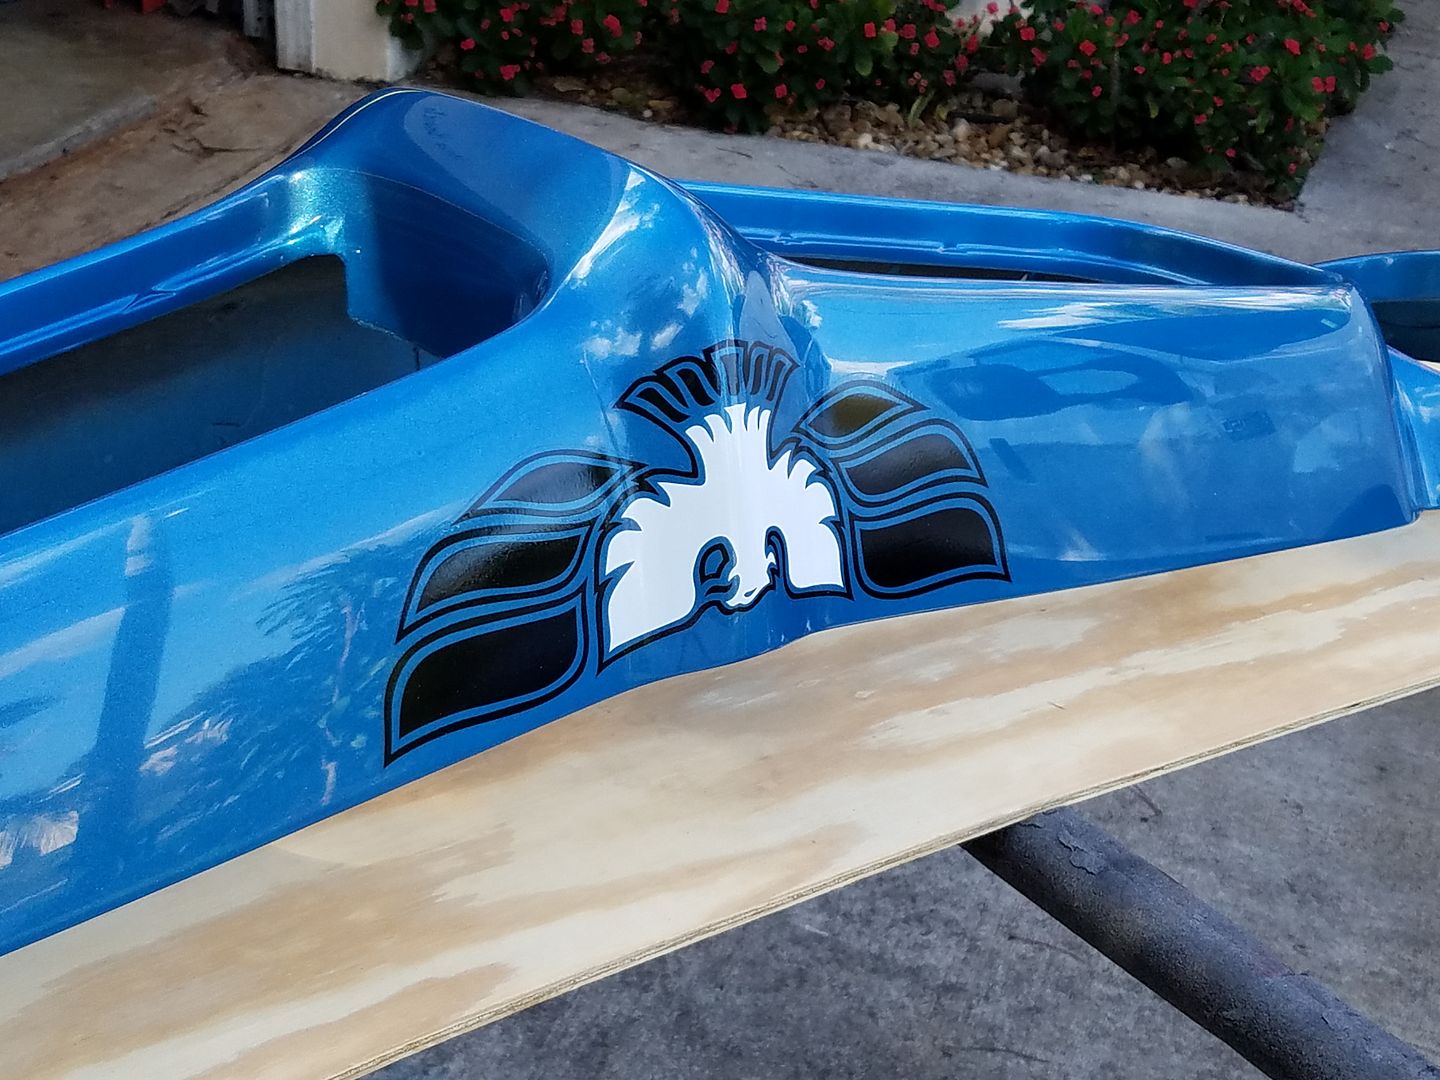
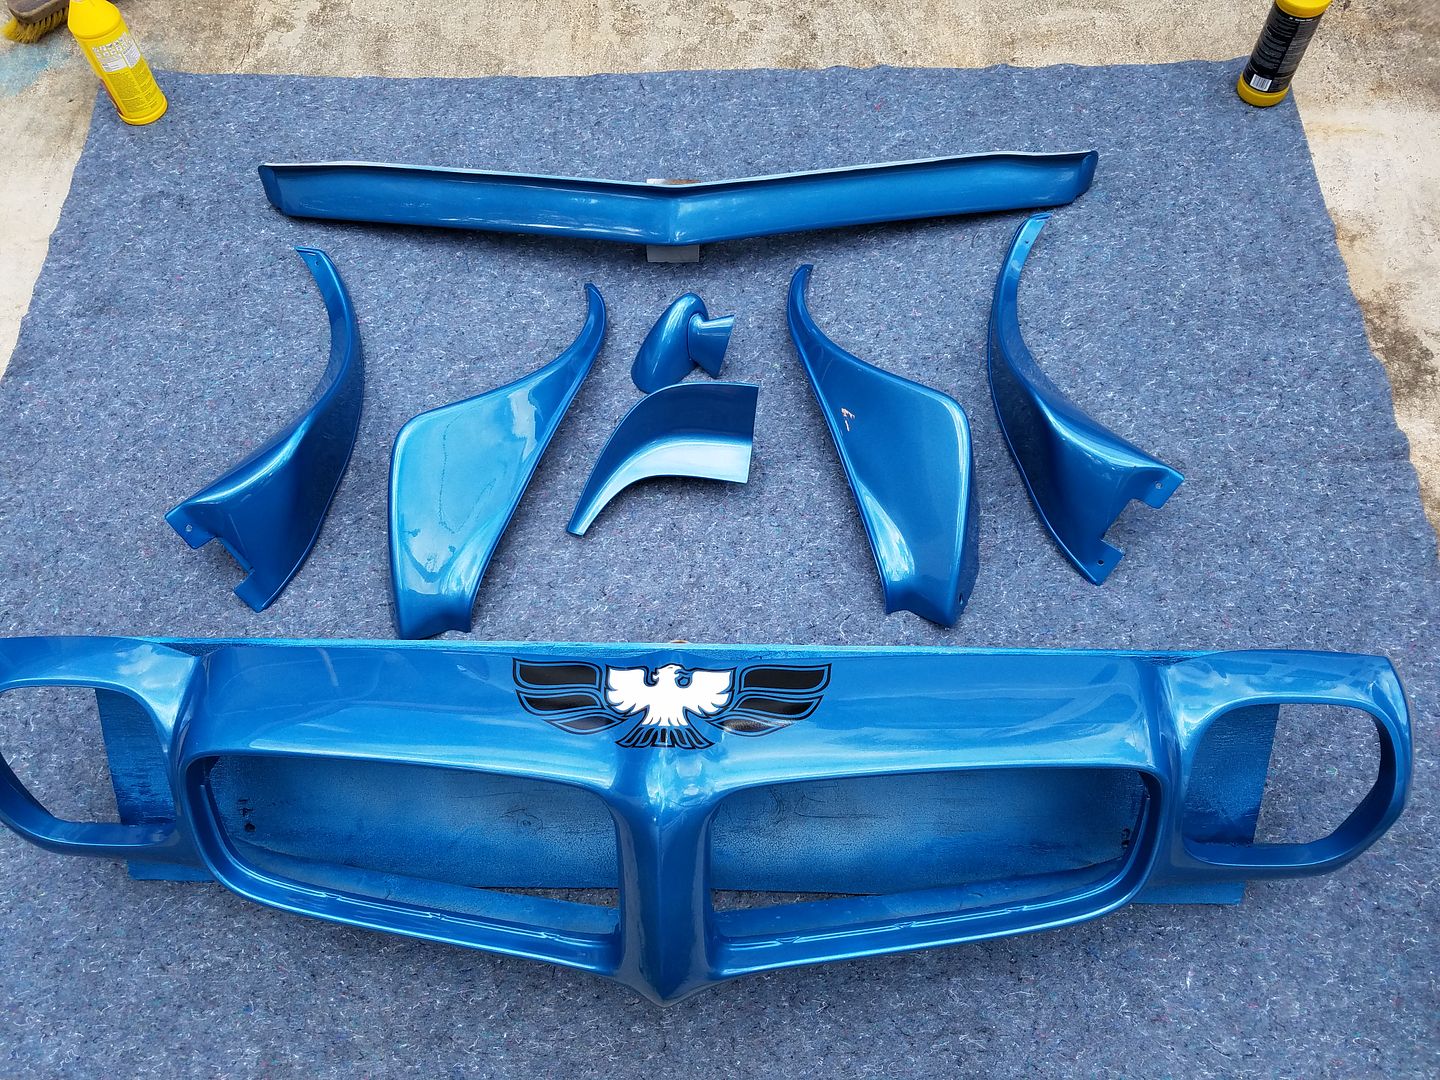
Since the Trans Am parts weren't getting picked up for a couple weeks I left them to fully cure before applying the nose bird sticker. I put the sticker on this past weekend to allow time to get another sticker before the pieces get picked up, just in case there was a problem with the sticker, or installer! ahaha Used some tape as register marks to make sure it was straight and used "Slide-On" application gel for large stickers. It came out nice and all the parts look good. I mounted the bumper to a piece of plywood in the hopes it helps keep the bumper from getting damaged before it gets installed. The board is a couple inches bigger than the bumper in all directions.


ALWAYS IMPRESSIVE..
I wish I had your paint & body skills and experience,
now I can and have done a good many projects but having done so I also recognize,
a good deal of what went on thats not shown,
and that takes a good deal of time and effort to get correctly done,
that those who have never been involved just won,t recognize
 
You're quite right Grumpy! There's a lot of things involved that don't get mentioned. Just doing an Endura bumper alone from start to finish at this quality level is 50+ hours of labor.
 
Looking good if it was my bird there might be 50+ hours into just painting that bird on there would not look the same though ;). Awesome work man I am looking forward and not looking forward to redoing the chevelle this year or next.
 
It took a couple weeks to get the Jeep engine back from being rebuilt because it needed two rods that had to be ordered. Installed it and got everything hooked back up. Fired up instantly and everything sounded good so I started my break in routine checking things with a heat gun and looking for leaks etc. After a couple minutes I noticed an oil drip....... OH NO!!!! Rear main seal was leaking. So now because engine R&R is very time consuming the trans and transfer case will have to be dropped and a new rear main seal installed with the engine remaining in the vehicle. That's a job better done on a lift so the truck will be moved to a shop with a lift. I suspect they'll call me to remove the intake system and remove the upper bell housing bolts because that requires climbing into the engine compartment and reaching down in a very tight area to get at the bolts. The guys who'll be doing the trans drop and seal replacement aren't agile and small enough to do it. Sure was glad I didn't have anything to do with the actual rebuild. Everything I'd touched was fine.

This reminds me to mention safety. I do these jobs fairly regularly and get called when people screw things up. I've seen some bad (preventable) accidents when people don't take proper precautions.

If there's any way possible fire the car up outside, reduces risk of burning the place down if things go bad.

Never put your body parts between solid objects that could crush them.

Always have a good large fire extinguisher handy. Not that 2 lb. joke you keep on the kitchen counter to make the women feel secure.


Wear a face mask! I know it sounds silly but I know several guys who are badly scarred and one who spent a lot of painful time in the hospital getting skin grafts etc. from engines blowing off a radiator hose right after engine rebuilds. I saved a good friend a couple years ago with a loud yell to the person in the car to shut it down while I shoved my friend away from the car. This occurred at a first start after installation when I noticed temp was climbing too high with my temp gun. My bud (who owned machine shop) had built the engine and wanted me there for start up because customer had the installed engine in the vehicle after I broke it in on a run stand and he knows I'm careful and cautious during my routine. When the upper hose blew I'd just shoved him and it missed his face but scalding water hit his T shirt and luckily he only got a large but minor burn. Customer had wired aftermarket electric fan backwards so it took a while before the lack of proper cooling let the temp go too high. Everyone could hear the fan running when the temp sensor turned it on and I'd signaled when the thermostat opened so they thought all was good. It was a built BBC with aluminum radiator and 16 or 18 lb cap. Hose wasn't tight enough for that high pressure of apparently. Imagine taking a pot of boiling water off the stove and having it thrown at your face, that's what it's like when a hose blows. I continue checking things with the temp gun for 15-20 minutes whenever a new engine gets fired.

I tell folks at every start up I do. Don't stand next to the car in line with the fan, fan belts, radiator hoses, etc. and don't stick your face in there. People never listen and I end up scolding people repeatedly. I tap them and just look at them with the "Are you stupid?" expression on my face while waving them to back up. I have no idea why everyone always wants to stick their face in there. My bud in the story above is a perfect example, he'd been around many times when I fired up newly installed engines and told repeatedly not to stand there but was right there in the worst place anyway. Hasn't done since though............Lesson learned the hard way?

Buddy Dave I was working for rebuilt the Jeep engine and is seen in 1st pic. Other pics are just random pics. Forgot to take pic after complete installation but it looks stock like engine was never removed except it's clean..


Been making Lab-14 parts the past couple days but you guys don't want to see more pics of that and although this thread is usually about stuff I'm working on we all need a little distraction from the routine. This evening Snap On had a display set up here in town at a school. They had race car driving simulators, tool displays, race car and motorcycle displays, and as an added bonus lots of give away swag and prize drawings. I ended up with a half dozen T shirts, some seat covers to protect customer cars, a hat, and a couple bobble head tool guys.They have three 18 wheelers to haul the show displays from place to place.


cool deal how where the simulators were they actuated to give g-force how much view did they give. They are great tools for learning tracks.
 
Yes, they moved the seat to create the feeling of banking, bumping the wall etc. Having no gaming experience I wasn't accustomed to how to really take advantage of it and never used paddle shifters before but I did OK only scraping the wall a couple times and had fun. They had 8 of them IIRC.

 
nice major race teams have ones where you feel like you are right in the car there are companies that just do that. Even allow you to change setup think how far tech has come.
 
Trans Am guys wife sent me a pic over the weekend when he finally had time to get the painted parts on the car. I think the color match looks pretty good considering I was using a modern urethane without being able to blend into the 30 YO faded Lacquer.

 
Finally getting back to work on the 67 Camaro trunk pan project. The rust under the rear seat area where the torque box and frame rails are welded in was worse than I'd hoped it would be. I'm already more than $1500.00 over what I'd originally intended to spend so I could drive the car this winter (which is quickly passing) and I won't have the extra money to register and insure it now anyway. So, rather than buy replacement floor pan sections I'm fabricating some to keep my cost down. Certainly not "worth it" financially as there's a lot of fabrication time involved but I just don't have extra cash to spend. Once this project is done I'll most likely sell the car to pay off the parts bill and put some money toward other things. I'm getting older and have a bunch of cars so I've been slowly selling down anyway. I still have the wide body 86 Carrera if I feel the urge for a red convertible.


One of the members on a Trans Am forum I'm on has been working with a supplier to recreate the welting used on the 70's Trans Am's and other cars where the plastic wheel flares etc meet the metal body panels. It's higher quality than has been available as reproductions and he's having it produced in a few of the popular original colors. However for those who don't have cars in those colors it will need to be painted. I offered to do some testing of various types of paint and related materials using several different prep techniques and then testing them long term for durability, adhesion, fading and so on through different temps etc. I got started yesterday using a PPG BC/CC on some, just a clear on some, and other pieces to use as part of a control group that won't see temp and light extremes.


I went back to work today. It's been killin me to sit around and "take it easy". Meanwhile, I've been keeping quiet about something that's been in the works for a few months until I was positive it was really going to happen. A a couple buds of mine are opening a new automotive machine shop I'll be working at part time (because I don't want to do it full time) named of all things "The Head Shop". Yes, I told them it wasn't a good name and they used it for the legal stuff anyway. One guy is financing it and the other will run it day to day. Anyway, while I was in the hospital trying not to get dead and then being a slacker the past couple weeks my buddy Dave (guy in Jeep engine swap pic above) has been working on getting all the equipment delivered and getting electrical wiring done. I got out the big 8 HP Snap On compressor you may have seen in pics in the back of my garage about a week ago (sort of against doctors orders), and it's now moved into it's new home for the machine shop. Since I got away with shuffling around a 500+ lb compressor last week I figured I should be OK to install a 3600 lb milling machine today right? Yes, I was careful not to exert myself too much.

Now a little history, Dave owned a machine shop years ago with a partner. He sold out his half and got out of the machine shop biz for a few years. Meanwhile when I first moved to FL I started working at the same machine shop with his old partner before I ever met Dave and became friends. Those of you who saw my Malibu build thread here saw pics building the engine taken in that old shop which is still operated by Dave's old partner. So Dave has many years experience in a machine shop and I have several years, but on old style equipment. The new machines are sooooo much nicer. I used to drool over them at the PRI trade show but now I get to use them! My phone died so no pics of the actual machine I installed today but it's brand new and looks like the one below. As the next week or two go by I'll show the other machines.

Here's the milling machine. http://www.rottlermfg.com/surfacing.php?model=S7M

 
can you post more pictures of the mill and give some idea as to its capabilities and cost?
 
I believe the machine was over $30,000.00 but I wasn't involved in equipment purchase negotiations. Here's some of the features below. I'll take pics of our machine and show what it's capable of. The machines I used in the past were the old wet style machines converted to use dry bits. This machine has a double bit head we can keep different bits for steel or aluminum in to quickly switch materials or we can run two bits for the same material and cut twice as fast. Once we get some experience with it we should be able to shave a pair of small block heads in 8 minutes. Mounting heads to be cut is much faster than the old machines I learned on.

  • Extra Heavy Duty Spindle - designed for CBN and PCD tooling. Large diameter, hard chromed tool steel spindle utilizes high precision triple angular contact bearings resulting in many years of super fine surface finishes.
  • Reduced Floor Space - Compact, one piece castings and multi layer slideway guards give the most compact surfacing machines available today.
  • Super Fine Surface Finish - Belt driven precision ball screw and infinitely variable speeds and feeds allows surface finished as low as 2Ra to 6Ra for today's MLS (Multi Layer Steel) head gaskets.
  • Dry Cutting System - Eliminates coolant disposal and makes clean up a breeze! Cutterhead shroud directs dust and chips into optional vacuum system.
  • Return to Vertical Zero - The cutterhead always stays at vertical zero - ready for the next pass.
  • Latest Control Technology - State of the art closed loop electronic controls make the most advanced surfacing machines available today.
  • Protection and Long Life - Multi Layer Steel Guards cover and protect the slideways for extra long service life.
  • Fast Floor to Floor Time - Heads can be surfaced in less than 2 minutes and a pair of V8 heads in less than 8 minutes.
  • Versatile - Capable of surfacing large diesel heads such as CAT3406 and 3412, and diesel blocks such as Detroit V71 and Mercedes OM440.
  • T Slot Base - Large, flat T Slot One Piece Mehanite Cast Iron Base allows mounting of any fixture and any job - jacks and clamps can be placed anywhere!
  • Flat Panel Control with Lexan Layover for Durability
  • On completion of Surfacing, Cutterhead Indexes, Press Button & Returns to Home.
  • Infinitely Variable Spindle Speeds from 350 - 1250 RPM for machining different metals
  • Infinitely Variable Travel Feeds 2 - 40" (50 - 1000mm) per minute for desired Surface Finish Roughness
  • Maximum Work Head Travel 40" (1000mm)
  • Belt Driven Precision Ground Ball Screw for Work head Traverse
  • Rapid Feed Rate 80" (2000mm) per minute
  • Large Diameter Triple Angular Contact Bearings in Heavy Duty Hard Chromed Spindle
  • Slideways Coated with Low Friction Turcite for Durability
  • 14" (360mm) Cutterhead. Optional 16" (420mm) Cutterhead
  • Tool holders (2) for 3/8" (9.52mm) IC round or square inserts. Optional 1/2" (12.70mm) IC Toolholders available
  • Cutterhead Guard with Chip Collection and Vacuum Attachment Outlet
  • Depth Dial Indicator Assembly for Rapid Touch Off on Surface to be Machined
  • Large One Piece Base Casting with three T Slots for Universal Fixture Mounting
  • Multi Piece Metal Slideway Covers protect Ball Screw and Slideways from Dust and Chips
  • Instruction and Spare Parts Manual
S7M Machine Specifications
American Metric
Control Manual
Machine Weight 3600 lbs 1637 kg
Table - Size 50" x 21" 1270 x 530mm
Spindle - Rotation Speed 350 to 1200 RPM
Cutter Diameter 14" 360mm
Cutter Travel (Horizontal) 40" 1000mm
Cutter Travel (Vertical) 6" 150mm
Max Distance - Cutting Inserts to Machine Base 25" 635mm
Spindle Feeds Variable .004"-.04" .100-1mm
Rapid Travers Rate (per min) 120" 3048mm
Dimensions - Machine 45D x 55W x 75" H 1143D x 1397W x 1905mm H
Dimensions - Floor Space Requirements 46D x 75W" 1170D x 1900Wmm
Dimensions - Shipping 67D x 77W x 82" H 1702D x 1956W x 2083mm H
Electrical Requirements 210-240V, 15A, 50/60Hz, 1Ph
Air Requirements .5 cfm @ 90 psi 14 l/min @ 6 bar
Paint Color Code RAL9002 (Grey White)
 
thats impressive!
I hope it will do the intended jobs to your satisfaction, so its well worth the investment
 
Last edited:
Back
Top