Cracking Down on Block Fillers
by Jim “Animal” Feurer - Jul 24, 2014
In earlier articles, I mentioned filling dedicated, drag racing iron blocks to keep cylinders round and keep them from cracking. Many drag racers still practice that modification.
Today, racers have the luxury of a low-cost block filler called Hard Blok, provided by Joel Bayless.
Back in my early Pro Stock days, when I was racing Cleveland small blocks, we had to use a very expensive Devcon aluminum epoxy.
It was easy to use and it poured like cake batter.
It bonded to anything, had nil shrinkage or expansion when hardened and weighed slightly less than the water it displaced. But, it was very expensive.
Today, the cost of that epoxy needed to do a small block would be about $500. On the other hand, a tub of Hard Blok is about $85 for a short fill and $92 for the larger tub.
Hard Blok is not quite as easy to use as the aluminum liquid epoxy, but the $400 saved to safely do the same thing is well worth the slight extra effort, in my opinion.
I did have a couple 427 aluminum Cleveland blocks that had 4.125 ID Ramsco steel sleeves. The sleeves might bend a bit, but never break. So I did not fill those blocks.
A big thing to consider before filling blocks to the deck or even 1.5″ below, as I did, is that block is then dedicated to short term cooling. There is no release for block fillers that I know of.
Plus, I am not sure about cooling even for some bracket racing.
At RT 66 Drag Strip in Joliet, they go “round robin” by the semis. For Pro Stock, it was OK. We towed back and had at least an hour between rounds.
Before Hard Blok, many racers and engine builders experimented filling blocks with various substances. Many had some very shocking and ill effects.
Way back about 1982, I had a customer’s block someone filled with some sort of industrial equipment, concrete type grout. Like concrete, the substance had been mixed with water.
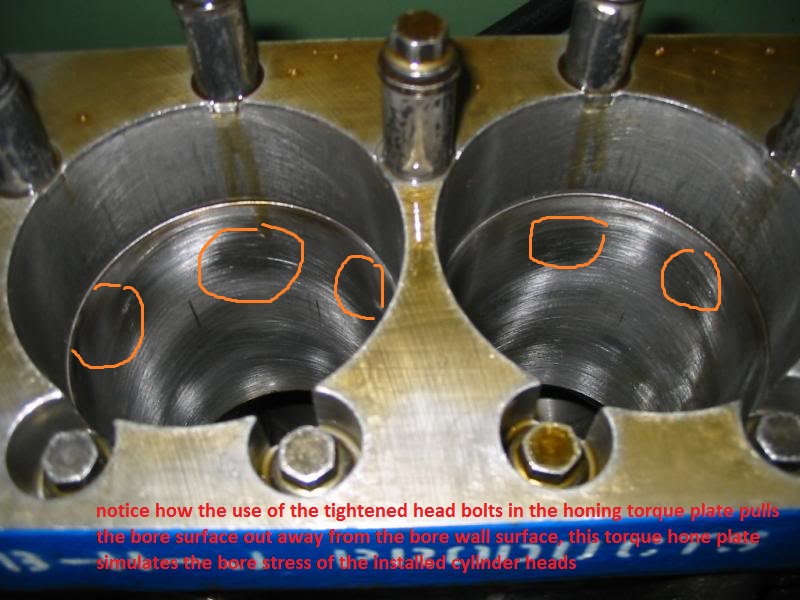
I chased little dots of rust, not only on the outside of the block, but also on the nice cylinder bores I had torque honed. I had to wait weeks to assemble that engine before that block quit bleeding those tiny rust spots.
In the early ‘80s, another negative block filling result I experienced was when my good 427 aluminum block was hurt. In desperation I acquired a Cleveland block from some joker in Indy that had talked me into trying it in my own racecar.
He had sleeved every cylinder and filled it 3/4 of the way under the deck with fiberglass resin and hardener. The block was then bored and honed to 4.125. I put it together using new special order BRC 4.125 pistons and Brooks windage rods. For a crank I borrowed my 3.625 stroke crank from my 370″ engine. With 4.125 bore and 3.625 crank I created 388 CI. It had great rod ratio.
This was the AHRA Nitrous Small Block Pro Stock era. My next race was the AHRA Summer Nationals at Kansas City.
First run with the 388 – wow!! That combo felt as strong as my aluminum 427. Suddenly, half into the run, my Zephyr nosed over and my car filled with oil smoke. No burnt aluminum smell? Just oil. Oil was everywhere.
We switched engines to my back up, the 409″ iron, Devcon filled Cleveland, and got through the weekend with a semi-final finish.
When I got back to my shop in Lacon, IL., I pulled that hurt 388” engine apart. The sleeved bores were wacked out of round so bad the pistons were scored above the ring package from rubbing the extremely distorted cylinder walls.
Apparently that sleeved, bored to .125 over, and resin filler method was a failure. Hard Blok was not on the market till 1986, so it was back to the high dollar Devcon liquid aluminum epoxy.
When I switched to Mammoth motors in ‘84, those 4.625 bore cylinders in the A/R aluminum blocks maintained integrity pretty well, until we started using nitrous in those engines.
By ‘87, I started running as an Outlaw Pro Stock, using nitrous with my 672″ A/R Ford Boss Hemi we named the “Monolith.” The block, like my next four mammoth engines, was an aluminum Allen Root design with 11.2 deck. When using nitrous, the inboard cylinders 2 & 3 and 6 & 7 would go out of round .003” to even .005”. The problem was the thin aluminum between those center cylinders would crack. In some cases the cracks would eventually travel the radius to the main saddle bosses. Then a welding repair was in order, including reinforcement between the cylinder sleeves.
When only “freshening up” the still useable engine with out of round cylinders, I would hone with a deck plate using a course stone with light pressure so the stones would trim the high spots.
Too much pressure and too fine stone, the hone would just follow the irregularity and make matters worse. It was tricky. With patience I could get the distortion to just under .001 and still keep useable piston clearance. Once that was reached then a light as possible plateau hone.
When ordering pistons for nitrous or power adder engines, I always ordered several extra pistons in progressive sizes to counter future excessive piston to wall clearance.
Another too loose clearance fix was to knurl the pistons on my trusty Perfect Circle piston knurling machine. Knurling does work. Even on race engines.
Those sleeves used in the A/R blocks were not prone to cracking. Like the Ramsco sleeves in my earlier aluminum Cleveland blocks, they would bend, but not break.
However, somehow I managed to crack one of those sleeves. I had five A/R Boss Hemi’s since 1984. So one cracked liner in all that time is not too bad.
While starting on a routine freshen, intending to install new aluminum rods, I discovered #2 cylinder with a small crack. The cylinder with the crack, when leaked down, tested the same as the rest for cranking compression. All were 190/195. The engine had been running fine. Plugs looked perfect.
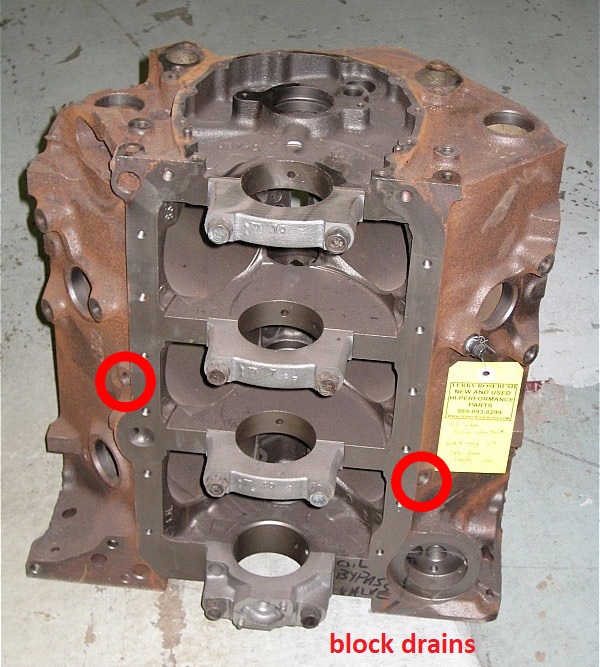
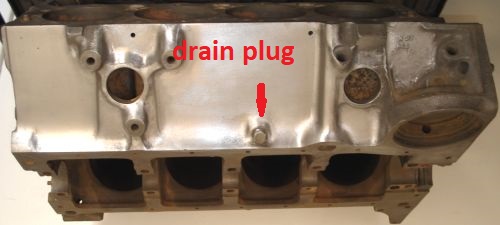
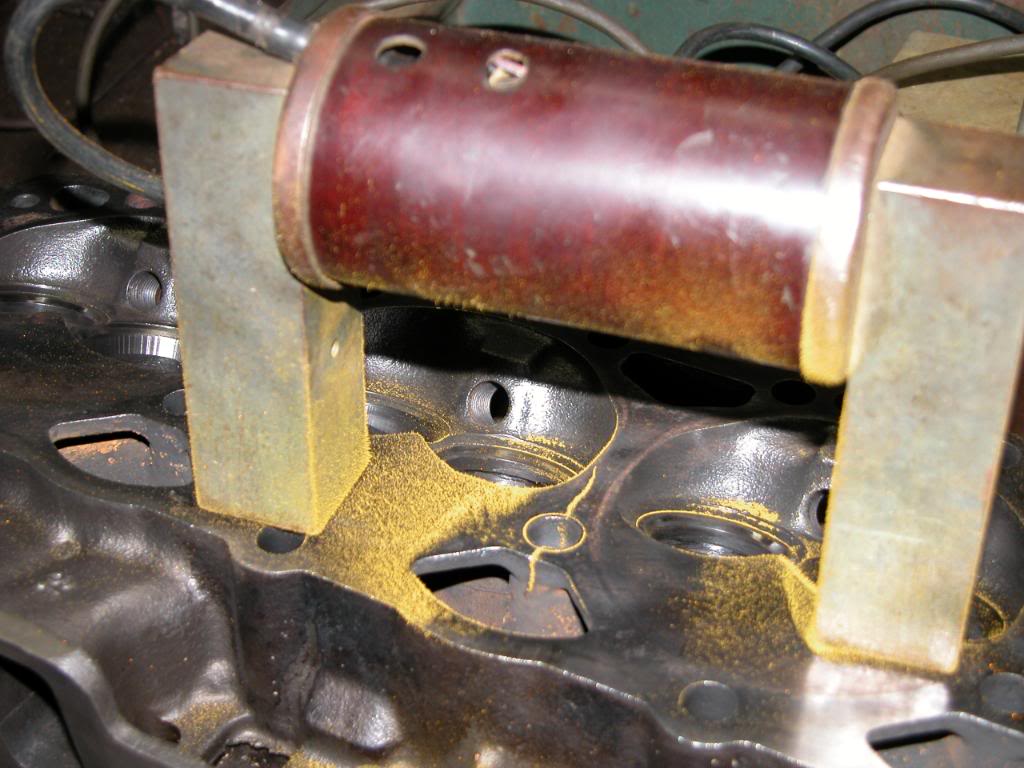
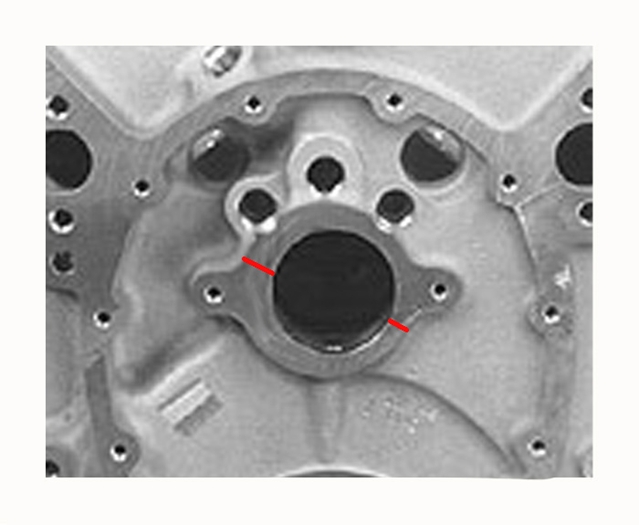
This is the Cleveland block that a customer from Indianapolis had filled with a fiberglass resin. The engine never got through the quarter-mile. The cylinders were wacked out of round so bad that the pistons grabbed the cylinder walls above the ring package. Note the tapped hole for a drain cock, two inches below deck. Unfortunately, this poor old block just sits around and rusts. I fear to resize the cylinder or replace sleeves for fear that the resin may react again.
This is the Cleveland block that a customer from Indianapolis had filled with a fiberglass resin. The engine never got through the quarter-mile. The cylinders were wacked out of round so bad that the pistons grabbed the cylinder walls above the ring package. Note the tapped hole for a drain cock, two inches below deck.
Unfortunately, this poor old block just sits around and rusts. I fear to resize the cylinder or replace sleeves for fear that the resin may react again.
The perpendicular crack started just below the top lip and went about .500 down.
I had put my recently freshened 666″ engine “Damien” in the Zephyr for two USSC contracted bookings.
I wanted to take the Monolith for backup. We were running out of time.
I reasoned that engine was running ok with that crack. No telling how long it had been that way. It had not been apart for 30 runs. If we need it for a few runs it should be OK.
No time to fix it, the rods have only 30 runs, so I put the heads and intake back on and got it ready to load in the travel crate.
Another problem arose. Zeke, my racecar, was still on the stands. I had started Damien earlier. I still needed to tweak the NOS/Animal nitrous fogger system.
In doing so I warmed the engine up again, cranked the throttle enough to burst the nitrous. Whooom! After I did, smoke started pouring out the driver side header big time. Oh man! I had hurt a piston.
Later, I found when I burst the nitrous # 6 had cracked the ring land above # 2 ring groove. I found several like that with nitrous engines during my many years. The land cracks behind and away from the piston. You cannot see it. To check, use a small screw driver in the upper and lower ring grooves, and carefully apply pressure up and down. If that land is cracked behind there, it will move.
We needed to get wrapped up and on the road to Englishtown, NJ, nearly 1,000 miles away. No time to fix Damien. My regular crew help that was to go East with me, and a friend, were already here at my shop. We changed engines, putting the Monolith with the cracked sleeve liner back in, started the engine and it ran fine. (I refrained from bursting the nitrous!)
We got to Englishtown in the nick of time for the Wednesday “Night of Fire” and ran the best times and MPH ever with that old Zephyr and the Monolith with a cracked cylinder. We looked at plugs every run. They were storybook examples. All exactly perfect readings.
On Saturday night, our USSC Circuit was booked at Atco, NJ. We had time when we got there and pulled the passenger side head off.
I measured the crack with a machinist 6-inch ruler. The crack had moved about .060” further down. We had made four full hard runs. I determined the crack must have moved .015” a run. We put the Monolith back together. We ran our USSC Chicago style program and got in the finals. We ran well, but not as well as Walter Henry.
We went back home and checked the crack. It had moved down .060” more. We had made four more runs at Atco.
Cranking compression was still even at 190+.
We had a UDRA finals at Great Lakes that coming weekend and I capped the UDRA championship for the second year in a row, winning Outlaw Pro Stock with the Monolith and the cracked cylinder.
When I later removed the passenger side head at my shop, I measured the crack. You guessed it. The crack had moved down another .060”.
We had made four more great runs at Great Lakes.


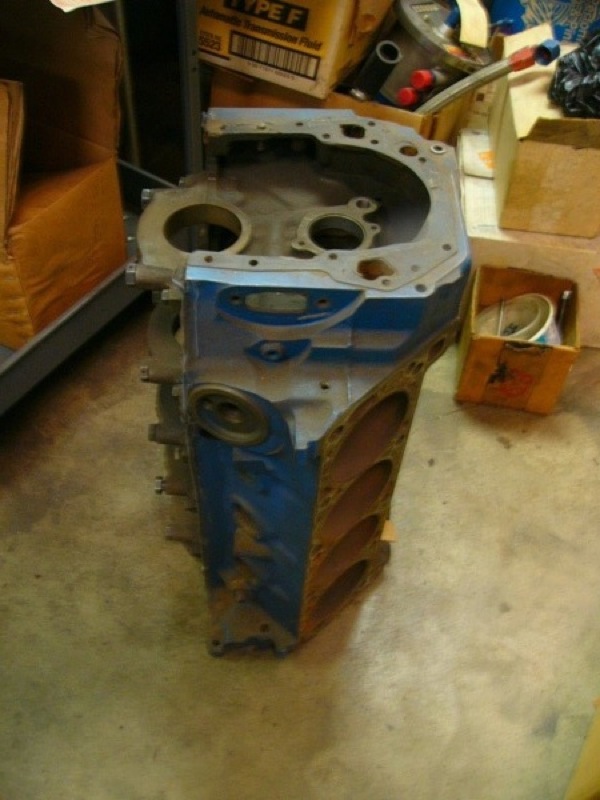
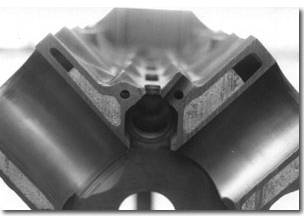

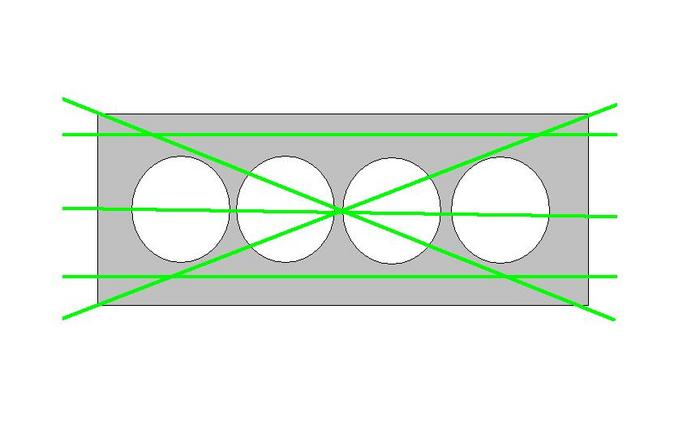
 Core shift example