Engine cranes
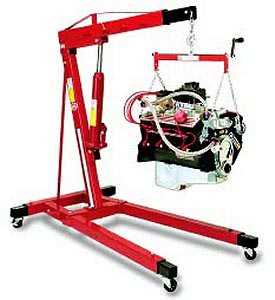
there’s a HUGE difference in QUALITY between different engine cranes, ID VERY STRONGLY suggest you look over ALL the choices and NOT LET PRICE be your main factor in your decision, DON,T JUMP at the CHEAP PRICE OPTION, think about it carefully, at some point you’ll be UNDER that engine and its potentially possible that if it falls you’ll be seriously hurt.
here is two different engine hoists, the cost difference is major BUT SO IS THE STRENGTH, REACH and WEIGHT of STEEL IN THEM
http://www.northerntool.com/webapp/wcs/ ... _200305213

Ship Wt. 278.0 lbs
http://www.northerntool.com/webapp/wcs/ ... 9703_19703

Ship Wt. 500.0 lbs
now IM NOT suggesting you spend 4 times the money, but I AM suggesting you take your time and shop very carefully as you may get crippled for life if you use CRAP, and it fails while your under it!....how much is your #%^%& BUTT WORTH
http://www.asedeals.com/aff_engine_cranes.html
http://www.extremetools.net/miva/mercha ... gineCranes
http://www.americanautomotiveequipment. ... ranes.html
http://www.harborfreight.com/cpi/ctaf/d ... umber=7620

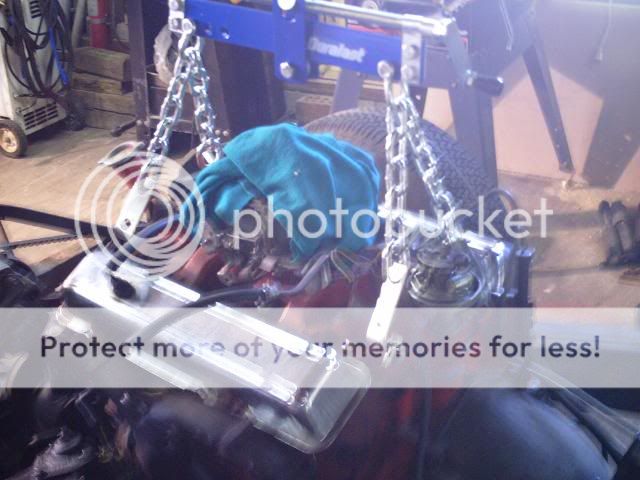
I’ve used PLATES in swaps done at some of my friends shops, in my opinion they flat out are dangerous and very difficult to use compared to a good engine tilter like this one below, while the plate seems attractive at $8 compared to $25-$30 or more for a tilter/leveler I have seen the plates destroy manifolds on two occasions by cracking carb mount pads and bending carb studs, especially if the intake is old with corrosion on the stud threads, (4)1/4" or 5/16" studs into aluminum intakes of questionable depth are no comparison to (4) 3/8" bolts into the cylinder heads, and the (4)head mounted 3/8" bolts are under shear and tension while the studs in the intake rely on the thread strength only

I now bring my own tilter/leveler when going to a friends to do an engine swap and have YET to find anyone who after useing one that did not go out and by one!
http://www.harborfreight.com/cpi/ctaf/Disp...itemnumber=5402

LOOK THEY ARE ON SALE FOR $25, they are rated at 4000lbs vs 1250 lbs for the plate and they make life far easier durring an engine install at $25 they are a GREAT DEAL[/b]
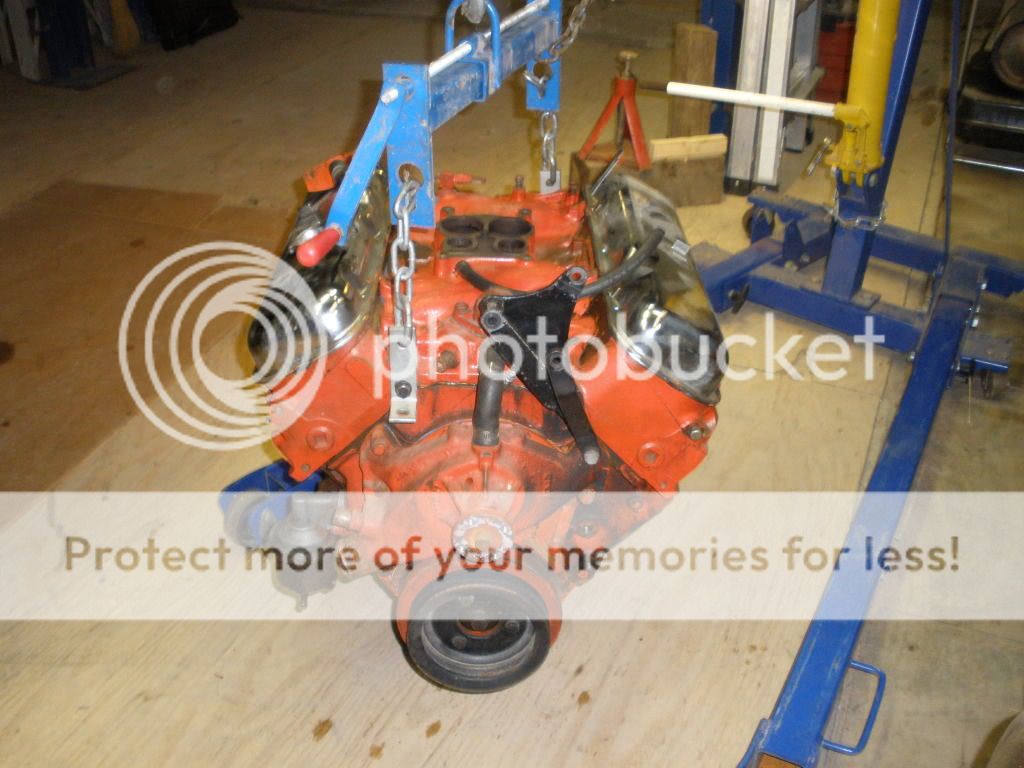
adding a swivel like this between the leveler and crane GREATLY AIDS THE ENGINES REMOVAL, DON,T GET STUPID or CHEAP, GET THE 3400lb rated one not the 1200lb size (REMEMBER YOULL BE UNDER THAT ENGINE SOMETIMES)

youll need two of these rated at similar load strength

there’s a HUGE difference in QUALITY between different engine cranes, ID VERY STRONGLY suggest you look over ALL the choices and NOT LET PRICE be your main factor in your decision, DON,T JUMP at the CHEAP PRICE OPTION, think about it carefully, at some point you’ll be UNDER that engine and its potentially possible that if it falls you’ll be seriously hurt.
here is two different engine hoists, the cost difference is major BUT SO IS THE STRENGTH, REACH and WEIGHT of STEEL IN THEM
http://www.northerntool.com/webapp/wcs/ ... _200305213
Ship Wt. 278.0 lbs
http://www.northerntool.com/webapp/wcs/ ... 9703_19703
Ship Wt. 500.0 lbs
now IM NOT suggesting you spend 4 times the money, but I AM suggesting you take your time and shop very carefully as you may get crippled for life if you use CRAP, and it fails while your under it!....how much is your #%^%& BUTT WORTH
http://www.asedeals.com/aff_engine_cranes.html
http://www.extremetools.net/miva/mercha ... gineCranes
http://www.americanautomotiveequipment. ... ranes.html
http://www.harborfreight.com/cpi/ctaf/d ... umber=7620
I’ve used PLATES in swaps done at some of my friends shops, in my opinion they flat out are dangerous and very difficult to use compared to a good engine tilter like this one below, while the plate seems attractive at $8 compared to $25-$30 or more for a tilter/leveler I have seen the plates destroy manifolds on two occasions by cracking carb mount pads and bending carb studs, especially if the intake is old with corrosion on the stud threads, (4)1/4" or 5/16" studs into aluminum intakes of questionable depth are no comparison to (4) 3/8" bolts into the cylinder heads, and the (4)head mounted 3/8" bolts are under shear and tension while the studs in the intake rely on the thread strength only
I now bring my own tilter/leveler when going to a friends to do an engine swap and have YET to find anyone who after useing one that did not go out and by one!
http://www.harborfreight.com/cpi/ctaf/Disp...itemnumber=5402
LOOK THEY ARE ON SALE FOR $25, they are rated at 4000lbs vs 1250 lbs for the plate and they make life far easier durring an engine install at $25 they are a GREAT DEAL[/b]
adding a swivel like this between the leveler and crane GREATLY AIDS THE ENGINES REMOVAL, DON,T GET STUPID or CHEAP, GET THE 3400lb rated one not the 1200lb size (REMEMBER YOULL BE UNDER THAT ENGINE SOMETIMES)
youll need two of these rated at similar load strength