read thru
I hope this helps the newer guys, you older guys know this by now or your hopeless!
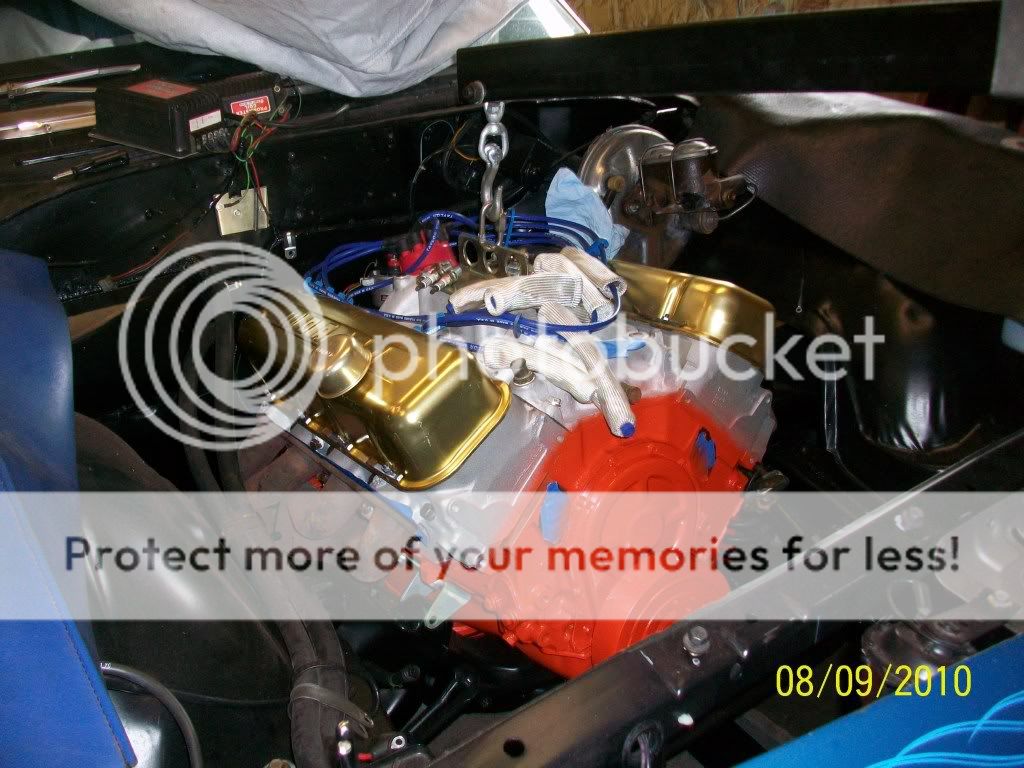
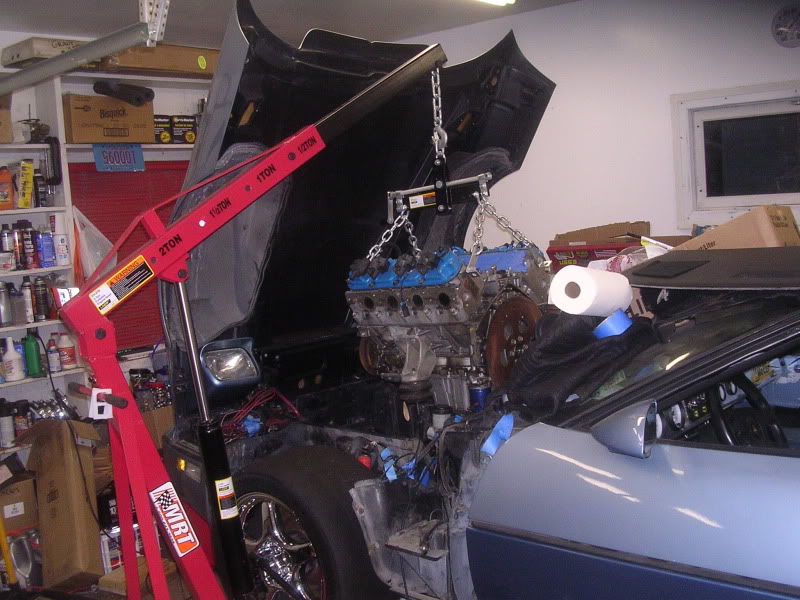
Yes, you can pull the engine without removing the hood...
step (1) buy a manual, the chevy shop manual is PREFERED
http://www.helminc.com/helm/search_...2=CHV&mscsid=5PPE6D798JEA9JTTG118F918ULHR0V8C
(step (2) THINK THINGS THRU.....work on a dry level concrete surface if you can, use floresent not incandesent lights under the corvette,thier far less likely to start fires

http://www.wiringproducts.com/?target=dept_166.html
disconnect both battery terminals, drain all oil and coolent, use quality jack stands and wheel chocks, put the parking break on, keep a fire extinguisher handy , make very sure the car can,t be knocked off the jack stands, which should be placed on the frame at all four corners,THINK THU EVERY MOVE,DON,T ALLOW YOUR HANDS INTO PLACES THAT WILL GET CRUSHED IF SOMETHING SLIPS OR BREAKS,
DON,T FORGET TO BRING DOZENS OF THOSE TIE ON LINEN TAGS TO LABEL EVERY CONNECTOR AS YOU REMOVE IT AS TO WHERE IT CONNECTS, USE a marker that gas and oil won,t make the ink run, AND USE A DIGITAL CAMERA TO TAKE DOZENS OF PICTURES AS YOU DO THE WIRE REMOVAL TO USE LATER AS A REFERANCE TO MAKE THE RE-INSTALL EASIER
BTW theres no way to write all the necessary info on the tag so just write a large number on the tag and then write all your info on a large pad with that number on the top of the page and the same number on the back of any photo if you can later when the pictures are developed or down loaded to your computer and printed out
remember to support the transmission, BEFORE you pull the engine , just letting it drop could cost you big$$$
keep a 5 gallon bucket around to throw ALL the bolts in with some deisel fuel (not gas) in it to clean the bolts BEFORE putting them in each labled plastic bag,AND YEAH! take the time to lable zip lock bags for each group of bolts also ,(bags like )(intake bolts)(header bolts)(accesories)(water pump)(motor mount)(bellhouseing) (head bolts)CAN HELP A GREAT DEAL IN GETTING THE CORRECT BOLTS BACK IN THE CORRECT SPOTS
clean all bolts before reuse with a mix of diesel/carb cleaner and a wire brush and look for worn or corroaded parts needing replavement
YOU DON,T NEED to pull the hood to pull the engine,(MOST CARS) but if you do,lightly dust the hood mount locations with white paint,this allows you to exactly replace the hood alighnment correctly by showing exactly how they were previously installed (RECOVER(REPAINT) AFTER THE HOODS REPLACED WITH BLACK paint AGAIN)
take lots of notes and pictures, lable every connection
its far easier with two people!
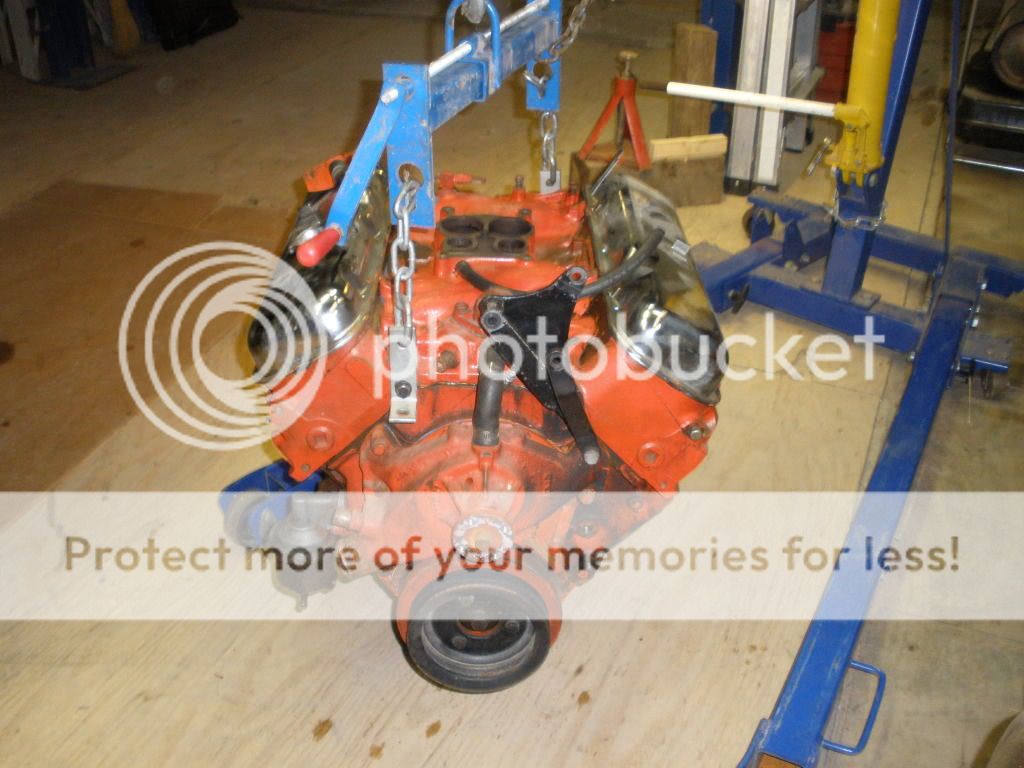
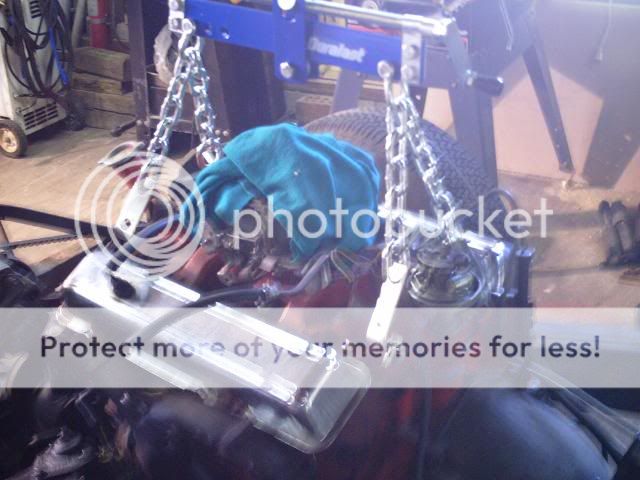
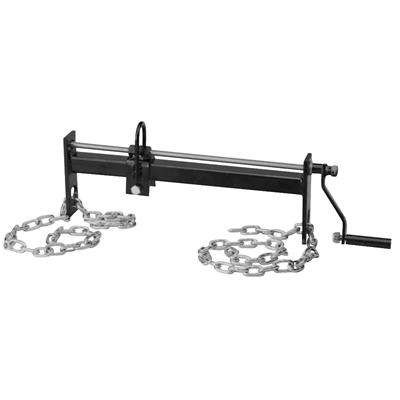
adding an engine leveler and swivel to your engine crane makes things far easier


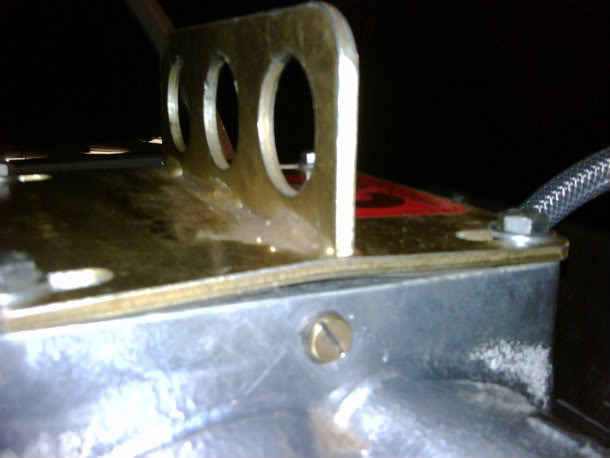
adding a swivel like this between the leveler and crane GREATLY AIDS THE ENGINES REMOVAL, DON,T GET STUPID or CHEAP, GET THE 3400lb rated one not the 1200lb size (REMEMBER YOULL BE UNDER THAT ENGINE SOMETIMES)

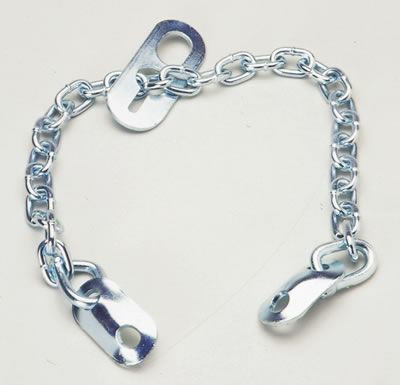
youll need two of these rated at similar load strength[/b]


the question almost always goes like this
"whats the proper way to safely work under the corvette? the ramps I have skid away from the tires as I try to roll up on them, and the jack scratches or dents my cross member, I can,t get the floor jack under the corvette, where do I place the jack stands, how high should the vette be?ETC."
lets talk
jack stands first, need to have a wide base and allow significant under car clearance to work, I can and do HIGHLY RECOMMEND getting 4 of these JACK STANDS as they are significantly larger and stronger and far harder to tip over than the average auto parts store JUNK most guys use
http://www.harborfreight.com/cpi/ctaf/Displayitem.taf?itemnumber=34924
yeah I KNOW your first idea is , the 6 ton stands are cheaper and the corvette only weights 3500lbs so why the 12 ton stands???? trust me here!!! the 12 ton stands allow both a significantly larger under car clearance and they have a much wider base making them MUCH safer, spend the extra few bucks!!! its well worth it!! and the jack stands need to be placed solidly on the frame in four widely spaced locations, I normally use the locations chevy suggests in the user manual , but two widely spaced on the front (K) member and TWO on the rearv frame seems ok also
if your going to get under the car SAFELY you need QUALITY jack stands, a QUALITY FLOOR JACK and RAMPS to allow you to roll the jack under the vette!
if your like me , and own a C-4 corvette (I OWN 3 C-4 corvettes) youve more than likely found that a typical floor jack won,t roll under the corvette unless its up on ramps first and that RAMPS tend to skid away from the tires as you try to drive up on them
heres the solution
first buy the (4 )12 ton jack stands, so you can work under the vette safely
buy these or similar ramps
http://www.autobarn.net/rodi/usm11905.html
they are light weight plastic but rated at 8000 lbs (you only use them to get the jack under the corvette NOT YOU! and no you don,t work under the corvette with them, and to keep them from sliding away from the tires the solution is simple, you buy 0ne 36" long rubber mat, cut it into two 36" long and 10" wide sections and CONTACT CEMENT/GLUE them to the rhino ramps so that about 18" is on the concrete in front of the ramp and 18" is glued to the upper surface of the ramp, so the vettes tires are on the mat before the car starts to go up the ramp thus TRAPPING the ramp in place as the tire starts up the ramp useing the vettes weight it self
next the floor jack, youve got lots of choices but get a good one!
sears has a reasonably good quality 3 ton floor jack that comes with two jack stands( these you can use to support the trans or rear end while the good 12 ton stands support the vettes frame) it costs about $99 I have two in the shop. and that frame dent problem is easily avoided if you GLUE a 6" x 6" X 1" thick section of old truck tire thats FREELY available on most interstates as BLOW OUT SCRAP to the jack pad with contact cement!
http://www.bizrate.com/buy/products...loor jack,lp--1,mkt_id--16867906,rf--fwa.html
remember its your BUTT/life thats under that vette and if it falls your the guy getting squashed like a bug! think ! do it correctly
I think youll find these very handy if you work on cars and don,t have a lift
BTW the 12 ton stands are VASTLY PREFERED as they have a WIDER BASE and EXTRA STRENGTH,(if IM GOING UNDER A CAR I DON,T WANT TO BENCH PRESS THE DAMN THING TO GET OUT FROM UNDER IT)
how much is you LIFE WORTH,BUY THE !12 ton RATED STANDS they are MUCH safer than the 3-6 ton stands IF ONLY BECAUSE THEY ARE FAR HARDER TO TIP OVER IF SOMEONE ROCKS THE CAR!
2 Piece Set
These super heavy duty jack stands will hold most cars and trucks safely over 2 feet off the ground. Perfect for repair work or storage.
Height: 19-1/2'' to 30-1/8''
Base: 12'' x 12-1/2''
Weight: 68 lbs.
THIS ABOVE IS RIGHT OFF THE HF WEB SITE
http://www.harborfreight.com/cpi/ctaf/Disp...temnumber=34924
second, thing is IVE used a set of four very similar 12 ton jack stands from NORTHERN TOOL for years, with no problems what so ever , and when they are in their low setting they are at about the right height to allow you to work under the corvette

http://www.northerntool.com/webapp/wcs/sto...19&categoryId=0
Torin Pair of 12–Ton Jack Stands
2 heavy–duty steel jack stands at one low price! Double locking pawl and tooth design for extra protection. Minimum height is 18 1/8in. Maximum height is 28in.
In Stock
Ship Wt. 63.0 lbs
Item# 144872
Discount Price... $64.99
Sale Price... $54.99
110% Guaranteed Lowest Price!
youll be getting them at a significant discount if they price match, which they should
ENGINE ASSEMBLY
Removal (from chevy manual) step by step
http://members.shaw.ca/corvette86/Compo ... w%2086.pdf
Disconnect battery ground cable.
Drain cooling system.
Remove air cleaner.
Remove serpentine belt.
Remove braces at the back of A/C compressor.
Disconnect wires at A/C compressor.
Disconnect fuel feed and return lines at TBI units.
Remove A/C compressor mounting bracket nuts and bolts.
Disconnect heater hoses at the block.
Disconnect fuel line clip at fuel pump cover plate.
Disconnect upper radiator hose at thermostat outlet.
Remove A/C compressor to mounting bracket bolt and ove compressor aside.
Remove mounting bracket.
Disconnect CFI harness at engine.
Disconnect cruise, detent and accelerator cables.
Remove distributor shield.
Remove distributor cap.
Remove 4 wire connector at distributor.
Disconnect detent cable bracket at intake.
Remove distributor.
Disconnect wires at oil pressure sending unit.
Remove oil pressure sending unit.
Disconnect necessary vacuum hoses.
Disconnect power steering hoses at rack and pinion.
Remove crankshaft pulley.
Disconnect bulkhead connector and necessary harness connectors.
Disconnect AIR hoses at converter check valve.
Move fuel lines aside.
Disconnect radiator hose at water pump.
Disconnect upper radiator hose at power steering reservoir bracket.
Raise vehicle.
Disconnect AIR pipe at exhaust manifold.
Remove AIR pipe at converter.
Disconnect "Y" pipe hanger.
Disconnect heat shields at "Y" pipe and converter.
Disconnect oxygen sensor wire.
Remove exhaust bolts at manifold.
Remove "Y" pipe at converter bolts.
Remove "Y" pipe.
Remove flywheel cover.
Remove torque converter bolts.
Loosen motor mount through bolts.
Remove motor mount to engine block bolts.
Remove bell housing bolts.
Disconnect knock sensor wire.
Disconnect ground cable at block.
Disconnect positive battery cable at battery and harness.
Remove right rear intake manifold bolt and install lift hook.
Support transmission with jack.
Install lifting device and lift engine enough to remove CFI ground at rear of left cylinder head.
Remove engine from vehicle.
Installation
For installation, reverse Removal procedures.
I hope this helps the newer guys, you older guys know this by now or your hopeless!
Yes, you can pull the engine without removing the hood...
step (1) buy a manual, the chevy shop manual is PREFERED
http://www.helminc.com/helm/search_...2=CHV&mscsid=5PPE6D798JEA9JTTG118F918ULHR0V8C
(step (2) THINK THINGS THRU.....work on a dry level concrete surface if you can, use floresent not incandesent lights under the corvette,thier far less likely to start fires
http://www.wiringproducts.com/?target=dept_166.html
disconnect both battery terminals, drain all oil and coolent, use quality jack stands and wheel chocks, put the parking break on, keep a fire extinguisher handy , make very sure the car can,t be knocked off the jack stands, which should be placed on the frame at all four corners,THINK THU EVERY MOVE,DON,T ALLOW YOUR HANDS INTO PLACES THAT WILL GET CRUSHED IF SOMETHING SLIPS OR BREAKS,
DON,T FORGET TO BRING DOZENS OF THOSE TIE ON LINEN TAGS TO LABEL EVERY CONNECTOR AS YOU REMOVE IT AS TO WHERE IT CONNECTS, USE a marker that gas and oil won,t make the ink run, AND USE A DIGITAL CAMERA TO TAKE DOZENS OF PICTURES AS YOU DO THE WIRE REMOVAL TO USE LATER AS A REFERANCE TO MAKE THE RE-INSTALL EASIER
BTW theres no way to write all the necessary info on the tag so just write a large number on the tag and then write all your info on a large pad with that number on the top of the page and the same number on the back of any photo if you can later when the pictures are developed or down loaded to your computer and printed out
remember to support the transmission, BEFORE you pull the engine , just letting it drop could cost you big$$$
keep a 5 gallon bucket around to throw ALL the bolts in with some deisel fuel (not gas) in it to clean the bolts BEFORE putting them in each labled plastic bag,AND YEAH! take the time to lable zip lock bags for each group of bolts also ,(bags like )(intake bolts)(header bolts)(accesories)(water pump)(motor mount)(bellhouseing) (head bolts)CAN HELP A GREAT DEAL IN GETTING THE CORRECT BOLTS BACK IN THE CORRECT SPOTS
clean all bolts before reuse with a mix of diesel/carb cleaner and a wire brush and look for worn or corroaded parts needing replavement
YOU DON,T NEED to pull the hood to pull the engine,(MOST CARS) but if you do,lightly dust the hood mount locations with white paint,this allows you to exactly replace the hood alighnment correctly by showing exactly how they were previously installed (RECOVER(REPAINT) AFTER THE HOODS REPLACED WITH BLACK paint AGAIN)
take lots of notes and pictures, lable every connection
its far easier with two people!
adding an engine leveler and swivel to your engine crane makes things far easier
adding a swivel like this between the leveler and crane GREATLY AIDS THE ENGINES REMOVAL, DON,T GET STUPID or CHEAP, GET THE 3400lb rated one not the 1200lb size (REMEMBER YOULL BE UNDER THAT ENGINE SOMETIMES)
youll need two of these rated at similar load strength[/b]
the question almost always goes like this
"whats the proper way to safely work under the corvette? the ramps I have skid away from the tires as I try to roll up on them, and the jack scratches or dents my cross member, I can,t get the floor jack under the corvette, where do I place the jack stands, how high should the vette be?ETC."
lets talk
jack stands first, need to have a wide base and allow significant under car clearance to work, I can and do HIGHLY RECOMMEND getting 4 of these JACK STANDS as they are significantly larger and stronger and far harder to tip over than the average auto parts store JUNK most guys use
http://www.harborfreight.com/cpi/ctaf/Displayitem.taf?itemnumber=34924
yeah I KNOW your first idea is , the 6 ton stands are cheaper and the corvette only weights 3500lbs so why the 12 ton stands???? trust me here!!! the 12 ton stands allow both a significantly larger under car clearance and they have a much wider base making them MUCH safer, spend the extra few bucks!!! its well worth it!! and the jack stands need to be placed solidly on the frame in four widely spaced locations, I normally use the locations chevy suggests in the user manual , but two widely spaced on the front (K) member and TWO on the rearv frame seems ok also
if your going to get under the car SAFELY you need QUALITY jack stands, a QUALITY FLOOR JACK and RAMPS to allow you to roll the jack under the vette!
if your like me , and own a C-4 corvette (I OWN 3 C-4 corvettes) youve more than likely found that a typical floor jack won,t roll under the corvette unless its up on ramps first and that RAMPS tend to skid away from the tires as you try to drive up on them
heres the solution
first buy the (4 )12 ton jack stands, so you can work under the vette safely
buy these or similar ramps
http://www.autobarn.net/rodi/usm11905.html
they are light weight plastic but rated at 8000 lbs (you only use them to get the jack under the corvette NOT YOU! and no you don,t work under the corvette with them, and to keep them from sliding away from the tires the solution is simple, you buy 0ne 36" long rubber mat, cut it into two 36" long and 10" wide sections and CONTACT CEMENT/GLUE them to the rhino ramps so that about 18" is on the concrete in front of the ramp and 18" is glued to the upper surface of the ramp, so the vettes tires are on the mat before the car starts to go up the ramp thus TRAPPING the ramp in place as the tire starts up the ramp useing the vettes weight it self
next the floor jack, youve got lots of choices but get a good one!
sears has a reasonably good quality 3 ton floor jack that comes with two jack stands( these you can use to support the trans or rear end while the good 12 ton stands support the vettes frame) it costs about $99 I have two in the shop. and that frame dent problem is easily avoided if you GLUE a 6" x 6" X 1" thick section of old truck tire thats FREELY available on most interstates as BLOW OUT SCRAP to the jack pad with contact cement!
http://www.bizrate.com/buy/products...loor jack,lp--1,mkt_id--16867906,rf--fwa.html
remember its your BUTT/life thats under that vette and if it falls your the guy getting squashed like a bug! think ! do it correctly
I think youll find these very handy if you work on cars and don,t have a lift
BTW the 12 ton stands are VASTLY PREFERED as they have a WIDER BASE and EXTRA STRENGTH,(if IM GOING UNDER A CAR I DON,T WANT TO BENCH PRESS THE DAMN THING TO GET OUT FROM UNDER IT)
how much is you LIFE WORTH,BUY THE !12 ton RATED STANDS they are MUCH safer than the 3-6 ton stands IF ONLY BECAUSE THEY ARE FAR HARDER TO TIP OVER IF SOMEONE ROCKS THE CAR!
2 Piece Set
These super heavy duty jack stands will hold most cars and trucks safely over 2 feet off the ground. Perfect for repair work or storage.
Height: 19-1/2'' to 30-1/8''
Base: 12'' x 12-1/2''
Weight: 68 lbs.
THIS ABOVE IS RIGHT OFF THE HF WEB SITE
http://www.harborfreight.com/cpi/ctaf/Disp...temnumber=34924
second, thing is IVE used a set of four very similar 12 ton jack stands from NORTHERN TOOL for years, with no problems what so ever , and when they are in their low setting they are at about the right height to allow you to work under the corvette
http://www.northerntool.com/webapp/wcs/sto...19&categoryId=0
Torin Pair of 12–Ton Jack Stands
2 heavy–duty steel jack stands at one low price! Double locking pawl and tooth design for extra protection. Minimum height is 18 1/8in. Maximum height is 28in.
In Stock
Ship Wt. 63.0 lbs
Item# 144872
Discount Price... $64.99
Sale Price... $54.99
110% Guaranteed Lowest Price!
youll be getting them at a significant discount if they price match, which they should
ENGINE ASSEMBLY
Removal (from chevy manual) step by step
http://members.shaw.ca/corvette86/Compo ... w%2086.pdf
Disconnect battery ground cable.
Drain cooling system.
Remove air cleaner.
Remove serpentine belt.
Remove braces at the back of A/C compressor.
Disconnect wires at A/C compressor.
Disconnect fuel feed and return lines at TBI units.
Remove A/C compressor mounting bracket nuts and bolts.
Disconnect heater hoses at the block.
Disconnect fuel line clip at fuel pump cover plate.
Disconnect upper radiator hose at thermostat outlet.
Remove A/C compressor to mounting bracket bolt and ove compressor aside.
Remove mounting bracket.
Disconnect CFI harness at engine.
Disconnect cruise, detent and accelerator cables.
Remove distributor shield.
Remove distributor cap.
Remove 4 wire connector at distributor.
Disconnect detent cable bracket at intake.
Remove distributor.
Disconnect wires at oil pressure sending unit.
Remove oil pressure sending unit.
Disconnect necessary vacuum hoses.
Disconnect power steering hoses at rack and pinion.
Remove crankshaft pulley.
Disconnect bulkhead connector and necessary harness connectors.
Disconnect AIR hoses at converter check valve.
Move fuel lines aside.
Disconnect radiator hose at water pump.
Disconnect upper radiator hose at power steering reservoir bracket.
Raise vehicle.
Disconnect AIR pipe at exhaust manifold.
Remove AIR pipe at converter.
Disconnect "Y" pipe hanger.
Disconnect heat shields at "Y" pipe and converter.
Disconnect oxygen sensor wire.
Remove exhaust bolts at manifold.
Remove "Y" pipe at converter bolts.
Remove "Y" pipe.
Remove flywheel cover.
Remove torque converter bolts.
Loosen motor mount through bolts.
Remove motor mount to engine block bolts.
Remove bell housing bolts.
Disconnect knock sensor wire.
Disconnect ground cable at block.
Disconnect positive battery cable at battery and harness.
Remove right rear intake manifold bolt and install lift hook.
Support transmission with jack.
Install lifting device and lift engine enough to remove CFI ground at rear of left cylinder head.
Remove engine from vehicle.
Installation
For installation, reverse Removal procedures.