Ok I know a lot of you have followed my threads on diff's over the years and a question I get a lot is " Why are your's different then any of the others out there"
That is a very good question, so here I present something for those of you who want to play along. Let me know if you see anything odd here. I'll go over what I was told before I opened it up. I won't mention the owner or the well known rebuilder. I will say the shop is South of the Mason/Dixon.
Some may know and Mike Dyer can't play! He's got an unfair advantage over most of you and this is not his work but he does know who it is. There is a fellow in Europe who probably would know too.
Ok this was "rebuilt" recently and has only 800 miles on it. The gears were whining from day one and the pinion seal leaking like an open tap.
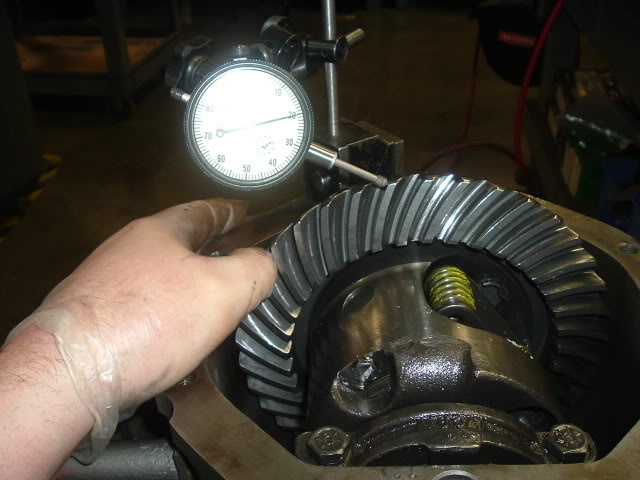
What you can't see, 020" backlash, 030 pinion endplay.
So anyone want to take a shot? Win a no-prize!
The main purpose is to use this as a tool to inform and educate the average vette owner. Anyone in the rebuilding business would or should know this.
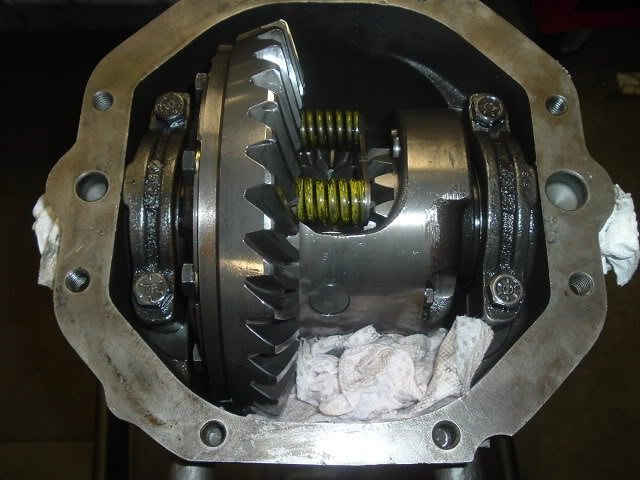
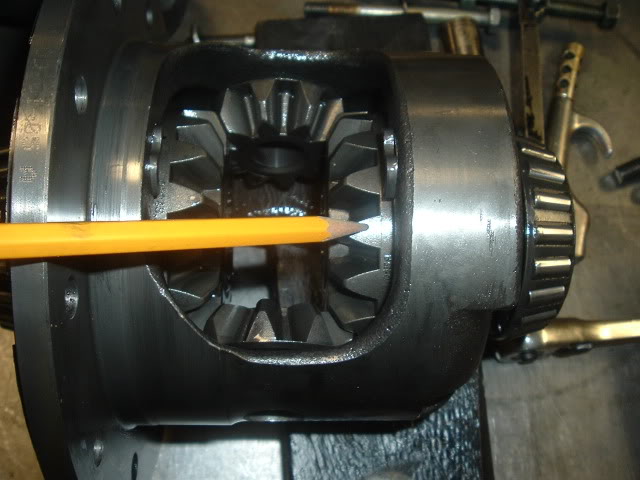
You guys are sharp but no cracks seen yet. The posi is a loaded Eaton. I want to mention I like and use Eaton posi's. They are my first choice, I just mod them somewhat for my own taste.
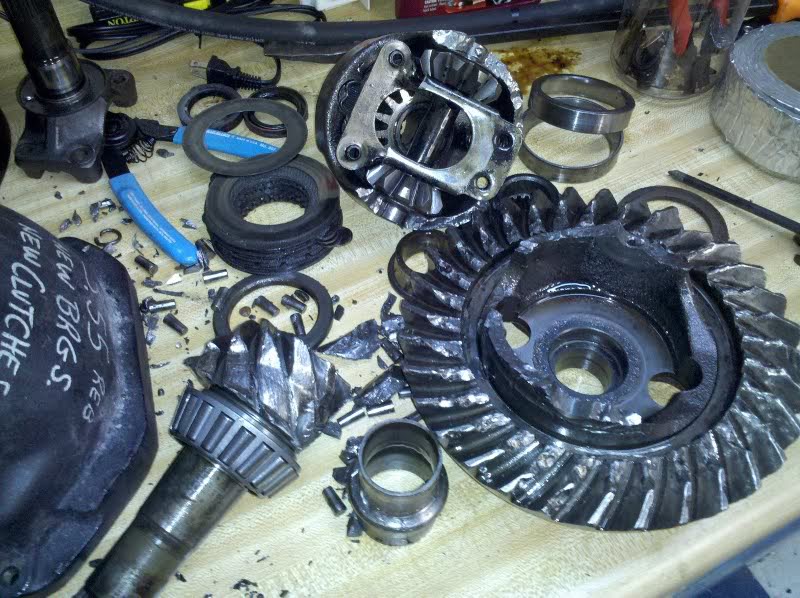
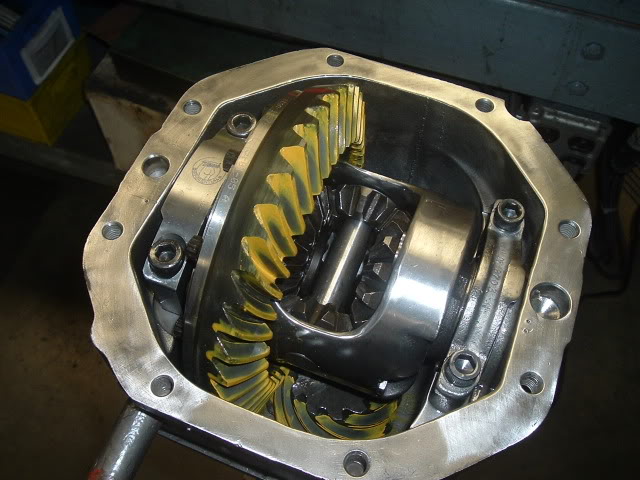
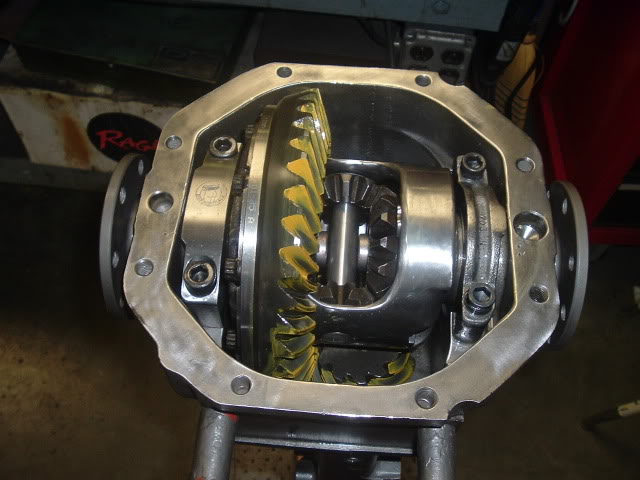
Ok here's what I found.
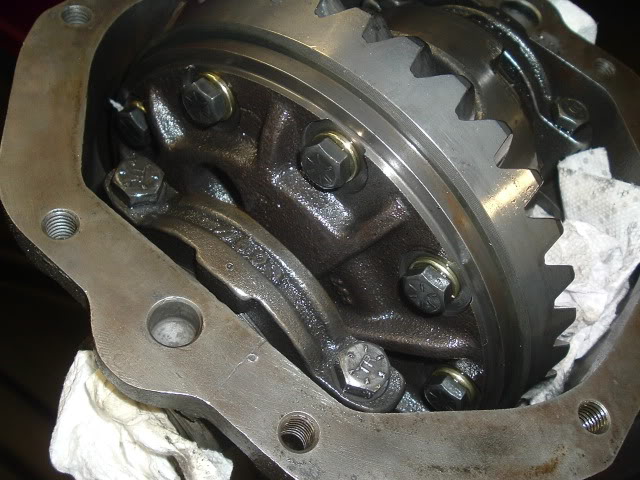
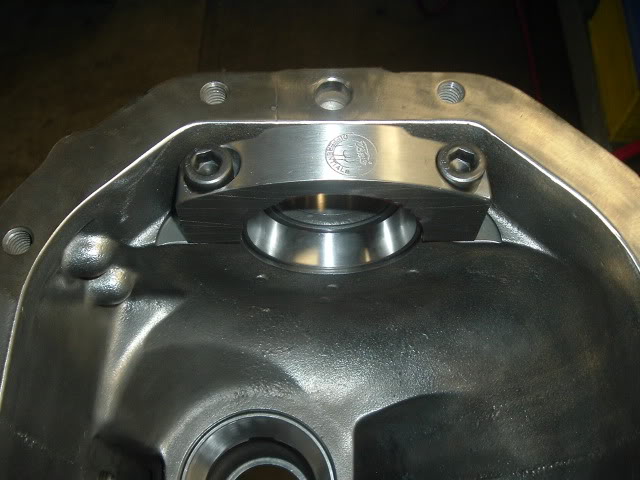
First look at the carrier( housing) and you see it's a 1965, stamped for a 65 396 in fact. NCRS guys might want it,but I already ground off the ears. Then look at the bearing caps, not correct for this year,they're 71-79 with cast in tab. What's that mean? They were not fit to the carrier, the caps originally were line bored so the caps are matched to each carrier. I was able to loosen them by hand with a 3/8 ratchet. The case came out without any resistance and NO preload- Not good.
The Ring gear bolts are std grade 8's,they're ok but I only use them in very mild applications. They are part of the common master kits sold many of which include the cheap side yoke bearings which I also don't use.
I use ARP RG bolts.

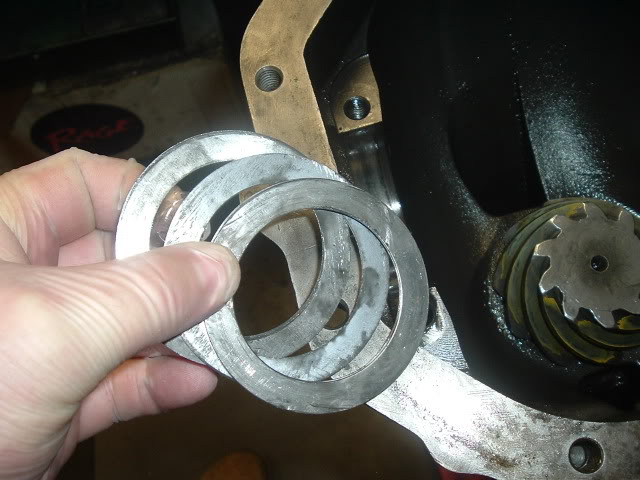
The back lash was way off and the wrong shims used. The 63-68 housings are narrow and no one sells a master kit with the correct shims in it. The kits use shims for the wider 69-79 housing- vendors please note. I grind shims to size when rebuilding these.
I've made my feelings known about using certain posi parts. This is just my opinion, only the way I do them, others think otherwise - generally motivated by money.
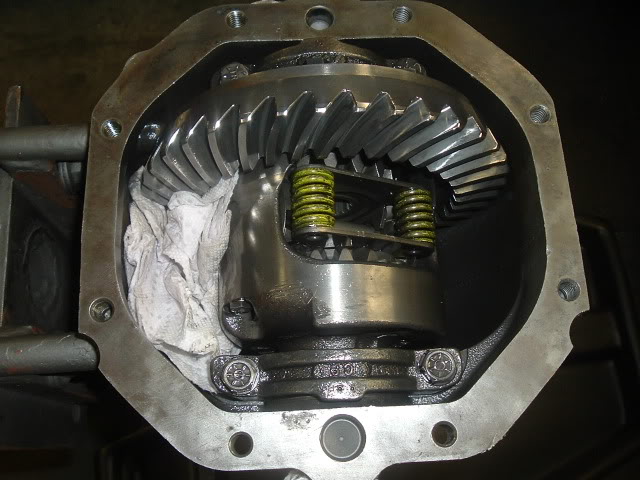
Here are the fiber coated clutches.
HD springs with less clutches per side and once the springs were removed there was 030" endplay in the side gears- also not good.
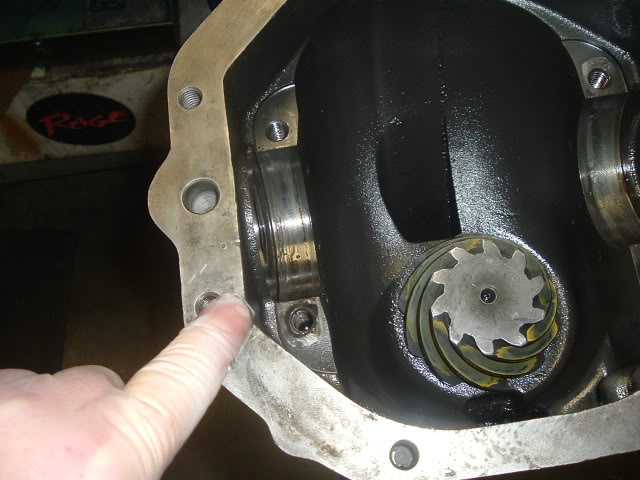
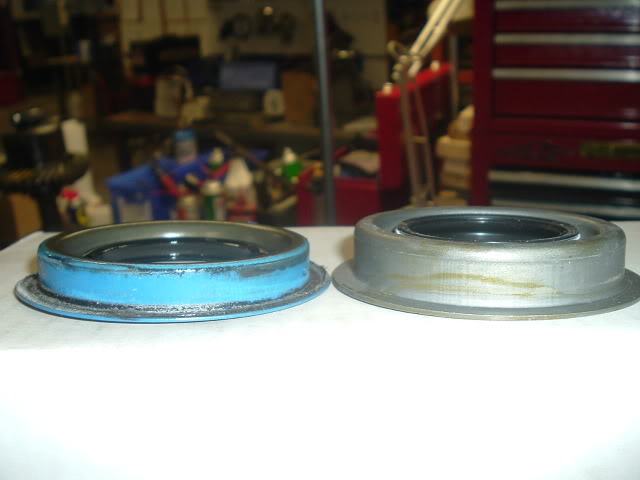
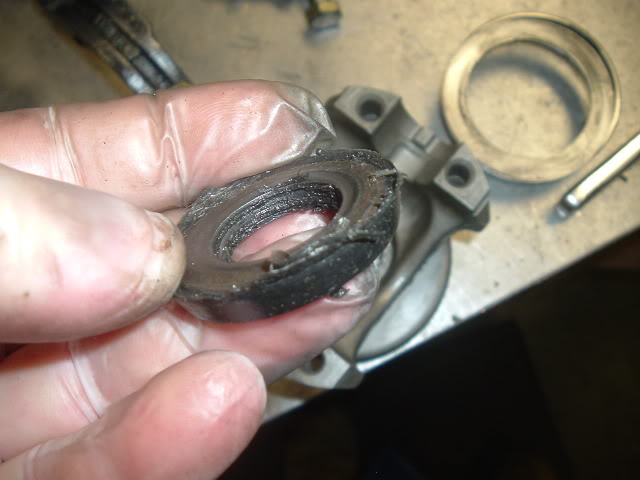
The diff leaked from lousy setup - 030 endplay in the pinion yoke and CHEAP parts, in this case the pinion seal used. Also no sealant on the splines - only under the washer completely useless and shows complete lack of experience with this work.
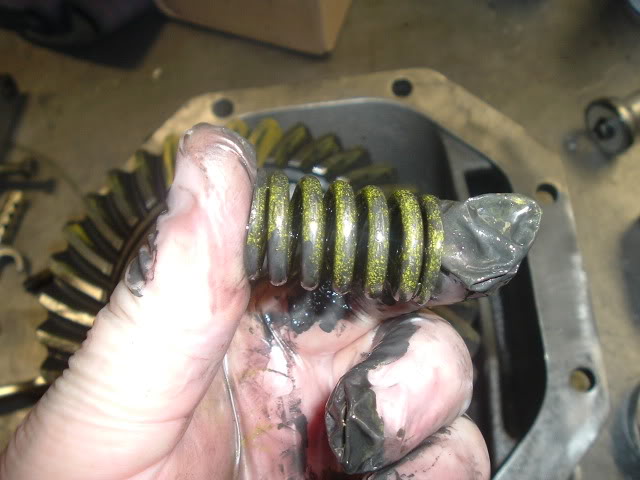
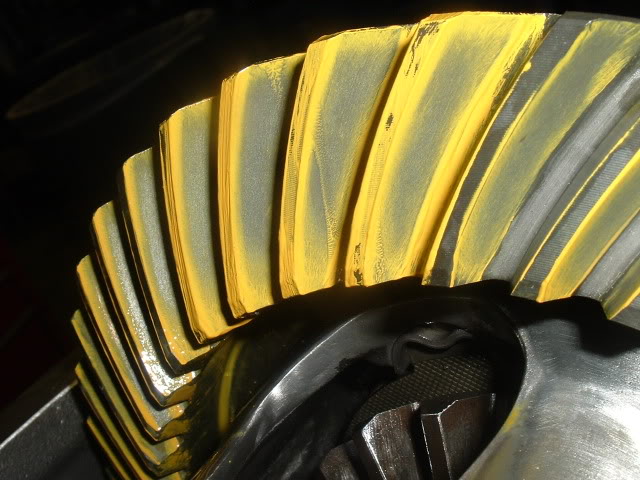
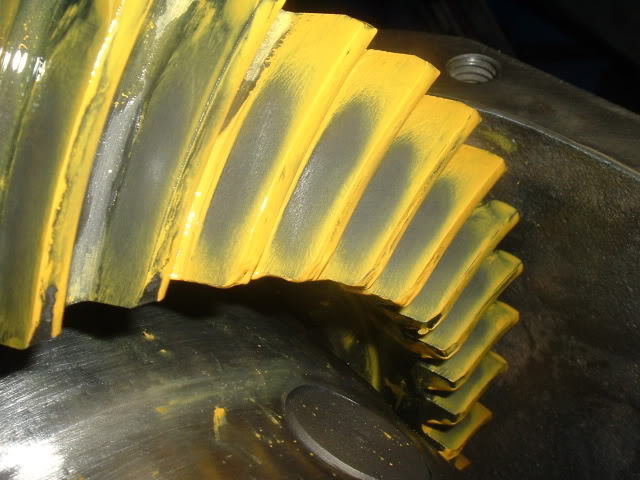
Other things, the crush sleeve was over crushed,the cross shaft had wear on it already- I use HD shafts, I didn't care for the R&P set, the pattern was all over the place.
So I hope this helps answer some questions, if you need a diff make up your own mind and ask questions before you decide.
You all passed!!
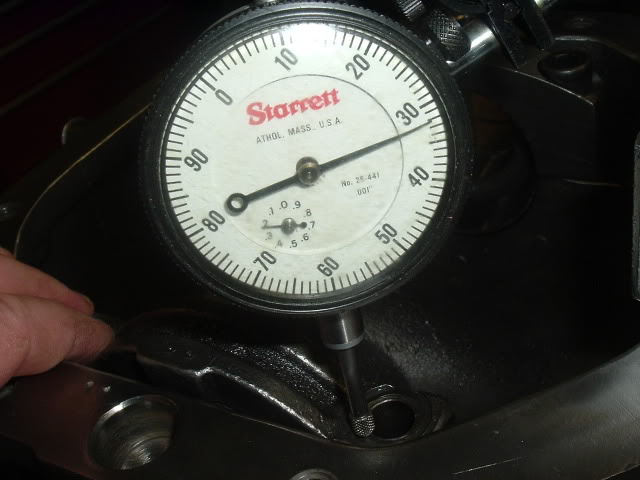
I'm still working on this diff and everything I check is bad. This one caught me by surprise at just how bad this was. Many times I'm asked about fitting the bearing caps or a steel cap. This job is getting a fit steel cap on the LH side. I set them to 001-0015 rock,meaning the cap acts like a seasaw. Press on one end the other goes up and you measure the gap between the cap and housing pad. Then you divide it in 1/2 to get your parallel gap for correct cap fit and torque. The stock caps are bored and most times are in this range, +001" and work fine.
The steel cap here is set to 001 and done. When I installed the supplied cast RH cap it had 032" gap or 016 parallel !!! This is why I found the cap bolt hand tight, they must have just grabbed a set of caps from a late C3 and bolted them in and shipped it. I really thought I wouldn't be surprised with this job, I was wrong. I have to fit a RH stock cap. If the cap was torqued down at 016 parallel it would have distorted the race and caused bearing failure. I hope the guys that asked me this week about building cost read this, they went with a similar builder due to lower cost, good luck!
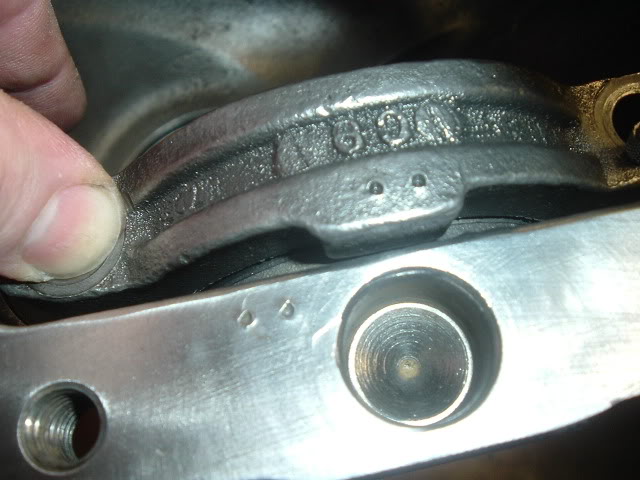
Here is the cap, you can see the "builder" marked them. Too bad he didn't know what he was doing.
Rock in the stock cap
Fit steel cap
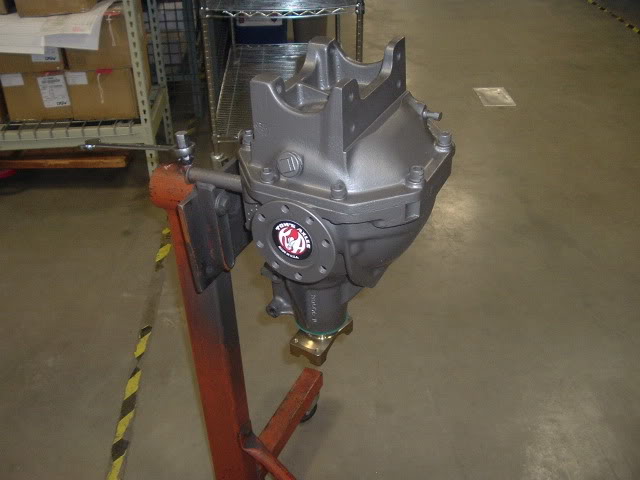
Ok for those following along with this build, it's done and on the way back to be installed and broken in.
Here are some more pictures, kind of redundant from my Diff post but these are from this build.
Correct side shims used and ground to size by me. This one isn't ground yet.
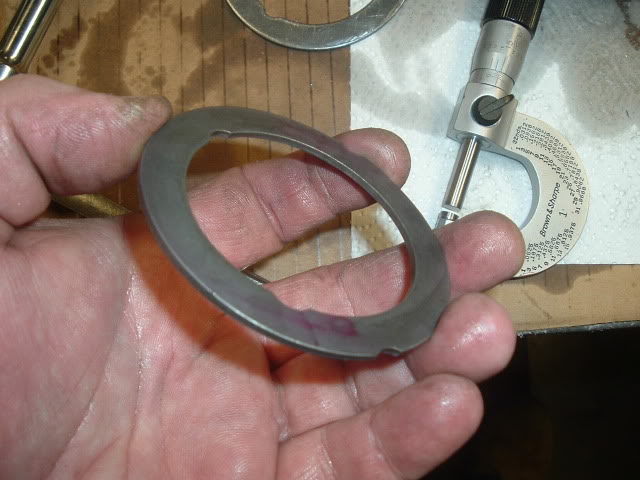
This is what they used
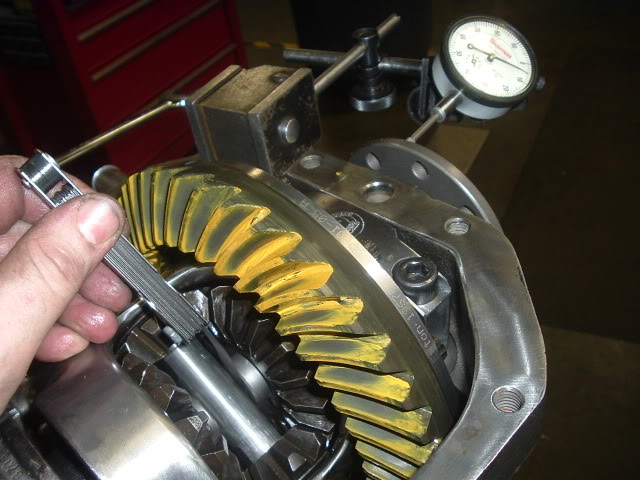
My Pattern
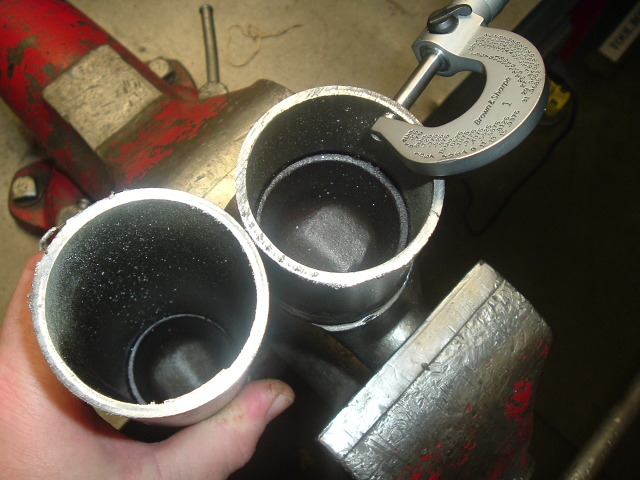
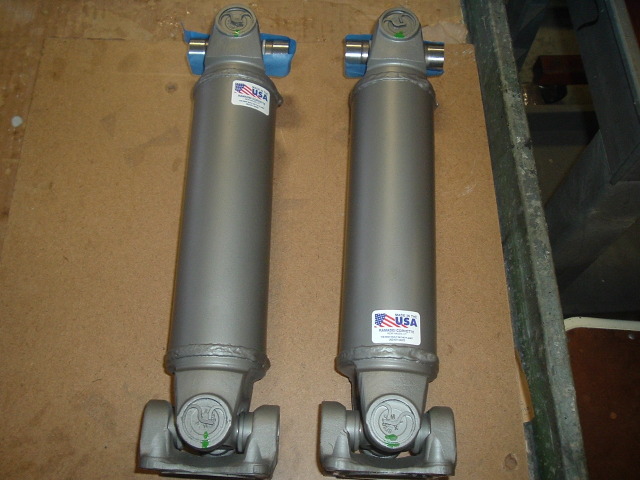
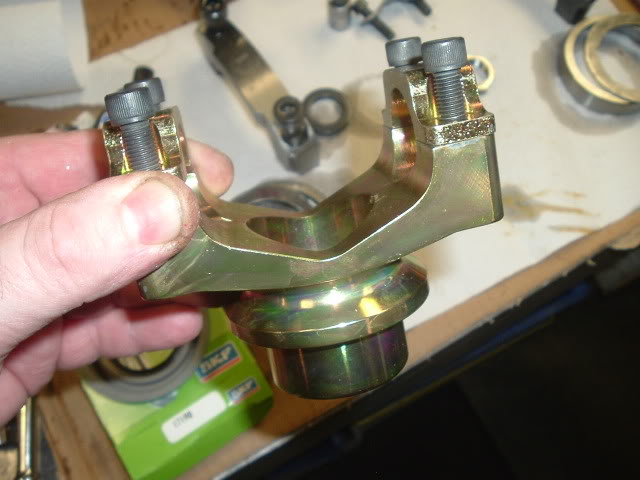
Billet 1330 pinion yoke
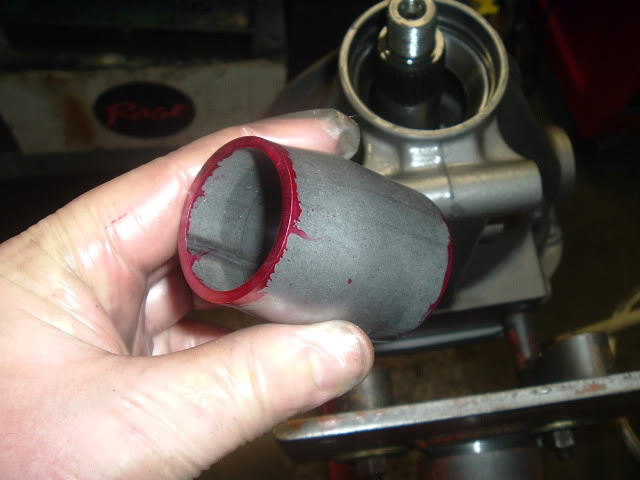
Solid Sleeve ready to be ground to size.
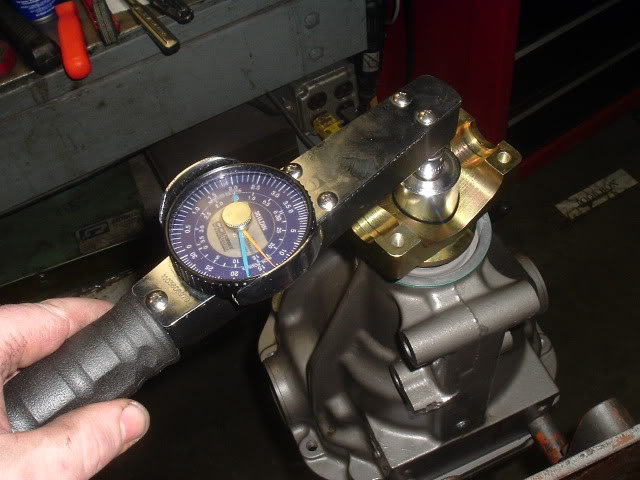
correctly setting the preload on the bearings with the solid sleeve
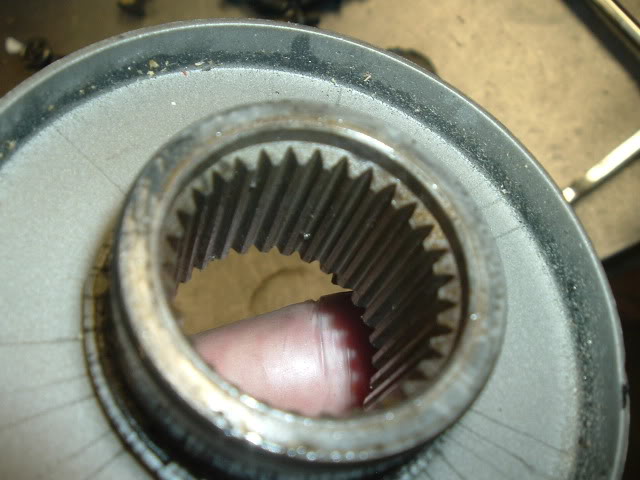
Setting up the endplay in the 30 spline axles.
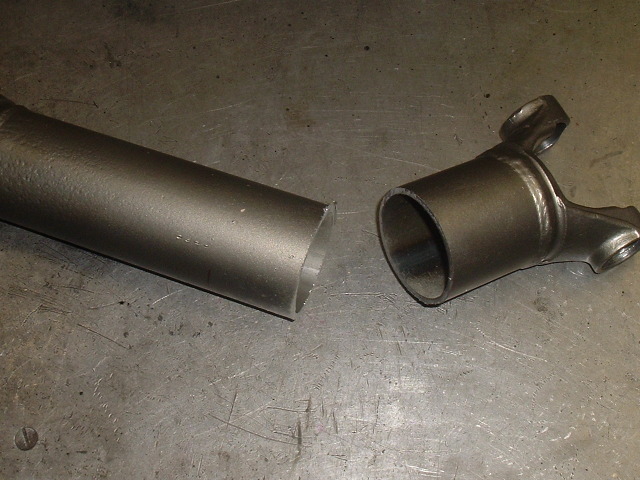
So I took this
And turned it into this, just a bit different.
Ok Mark, I'm waiting to hear from you on your build!
http://dazed.home.bresnan.net/narrowinga9.html
http://www.crankshaftcoalition.com/wiki ... _a_rearend
http://www.bhjproducts.com/bhj_content/ ... ng/dnk.php
That is a very good question, so here I present something for those of you who want to play along. Let me know if you see anything odd here. I'll go over what I was told before I opened it up. I won't mention the owner or the well known rebuilder. I will say the shop is South of the Mason/Dixon.
Some may know and Mike Dyer can't play! He's got an unfair advantage over most of you and this is not his work but he does know who it is. There is a fellow in Europe who probably would know too.
Ok this was "rebuilt" recently and has only 800 miles on it. The gears were whining from day one and the pinion seal leaking like an open tap.
What you can't see, 020" backlash, 030 pinion endplay.
So anyone want to take a shot? Win a no-prize!
The main purpose is to use this as a tool to inform and educate the average vette owner. Anyone in the rebuilding business would or should know this.
You guys are sharp but no cracks seen yet. The posi is a loaded Eaton. I want to mention I like and use Eaton posi's. They are my first choice, I just mod them somewhat for my own taste.
Ok here's what I found.
First look at the carrier( housing) and you see it's a 1965, stamped for a 65 396 in fact. NCRS guys might want it,but I already ground off the ears. Then look at the bearing caps, not correct for this year,they're 71-79 with cast in tab. What's that mean? They were not fit to the carrier, the caps originally were line bored so the caps are matched to each carrier. I was able to loosen them by hand with a 3/8 ratchet. The case came out without any resistance and NO preload- Not good.
The Ring gear bolts are std grade 8's,they're ok but I only use them in very mild applications. They are part of the common master kits sold many of which include the cheap side yoke bearings which I also don't use.
I use ARP RG bolts.
The back lash was way off and the wrong shims used. The 63-68 housings are narrow and no one sells a master kit with the correct shims in it. The kits use shims for the wider 69-79 housing- vendors please note. I grind shims to size when rebuilding these.
I've made my feelings known about using certain posi parts. This is just my opinion, only the way I do them, others think otherwise - generally motivated by money.
Here are the fiber coated clutches.
HD springs with less clutches per side and once the springs were removed there was 030" endplay in the side gears- also not good.
The diff leaked from lousy setup - 030 endplay in the pinion yoke and CHEAP parts, in this case the pinion seal used. Also no sealant on the splines - only under the washer completely useless and shows complete lack of experience with this work.
Other things, the crush sleeve was over crushed,the cross shaft had wear on it already- I use HD shafts, I didn't care for the R&P set, the pattern was all over the place.
So I hope this helps answer some questions, if you need a diff make up your own mind and ask questions before you decide.
You all passed!!
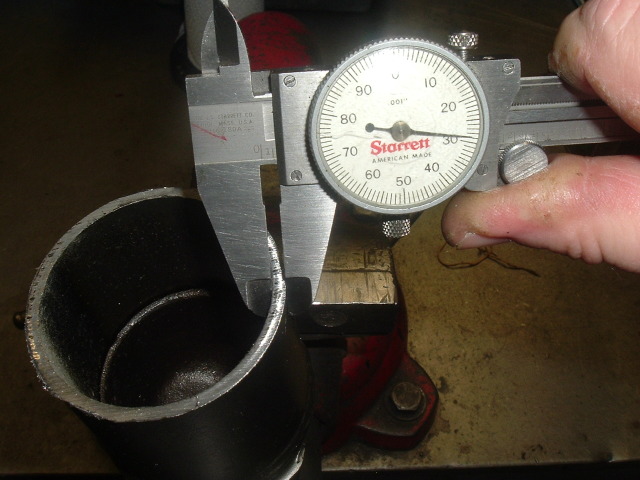
I'm still working on this diff and everything I check is bad. This one caught me by surprise at just how bad this was. Many times I'm asked about fitting the bearing caps or a steel cap. This job is getting a fit steel cap on the LH side. I set them to 001-0015 rock,meaning the cap acts like a seasaw. Press on one end the other goes up and you measure the gap between the cap and housing pad. Then you divide it in 1/2 to get your parallel gap for correct cap fit and torque. The stock caps are bored and most times are in this range, +001" and work fine.
The steel cap here is set to 001 and done. When I installed the supplied cast RH cap it had 032" gap or 016 parallel !!! This is why I found the cap bolt hand tight, they must have just grabbed a set of caps from a late C3 and bolted them in and shipped it. I really thought I wouldn't be surprised with this job, I was wrong. I have to fit a RH stock cap. If the cap was torqued down at 016 parallel it would have distorted the race and caused bearing failure. I hope the guys that asked me this week about building cost read this, they went with a similar builder due to lower cost, good luck!
Here is the cap, you can see the "builder" marked them. Too bad he didn't know what he was doing.
Rock in the stock cap
Fit steel cap
Ok for those following along with this build, it's done and on the way back to be installed and broken in.
Here are some more pictures, kind of redundant from my Diff post but these are from this build.
Correct side shims used and ground to size by me. This one isn't ground yet.
This is what they used
My Pattern
Billet 1330 pinion yoke
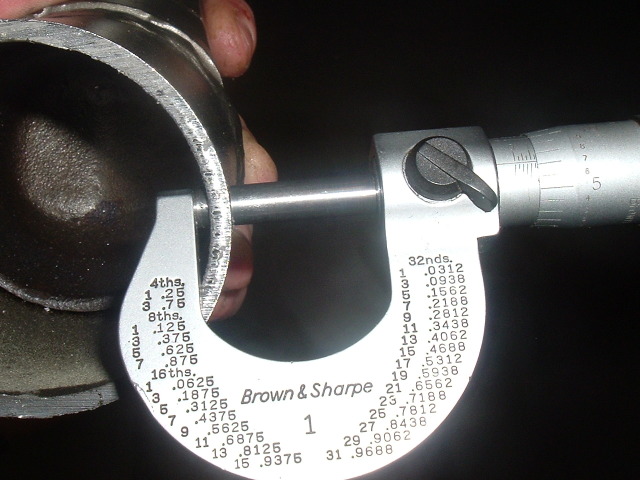
Solid Sleeve ready to be ground to size.
correctly setting the preload on the bearings with the solid sleeve
Setting up the endplay in the 30 spline axles.
So I took this
And turned it into this, just a bit different.
Ok Mark, I'm waiting to hear from you on your build!
http://dazed.home.bresnan.net/narrowinga9.html
http://www.crankshaftcoalition.com/wiki ... _a_rearend
http://www.bhjproducts.com/bhj_content/ ... ng/dnk.php